Building The KINETIC F-84F

By Jack Mugan
Sometime last year at a model show I managed to pick up a new 48th scale kit from a model company called KINETIC. The vendor had a nice build up of the model on display and he assured me it was built right out of the box. I thought it looked really good, even if I know very little about this aircraft, so I bought it. When I got home it was put on the pile and forgotten.
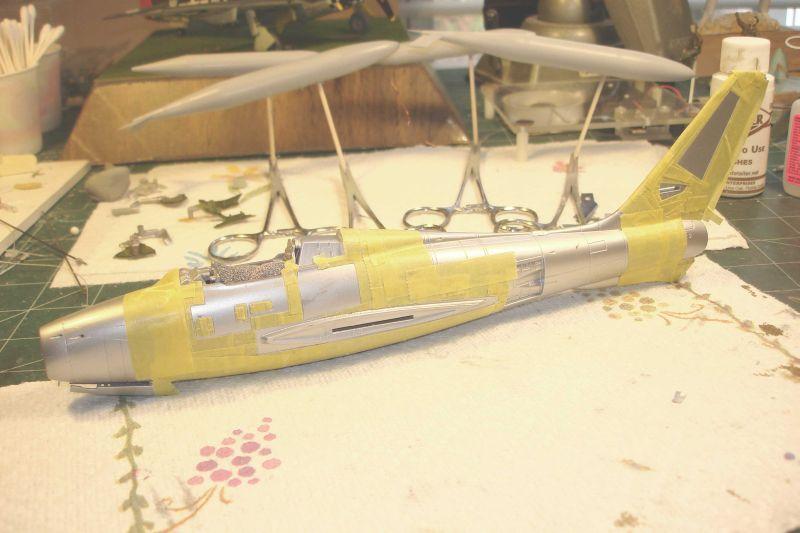
A couple of weeks ago I took it out and started to look it over and next thing I knew I was well into the construction. The fit looked so good I decided to do this model in sub-assemblies again, which allowed me to assemble, paint and decal with greater ease than handling a completed model. I also decided to try a real OOB project right down to the decals.
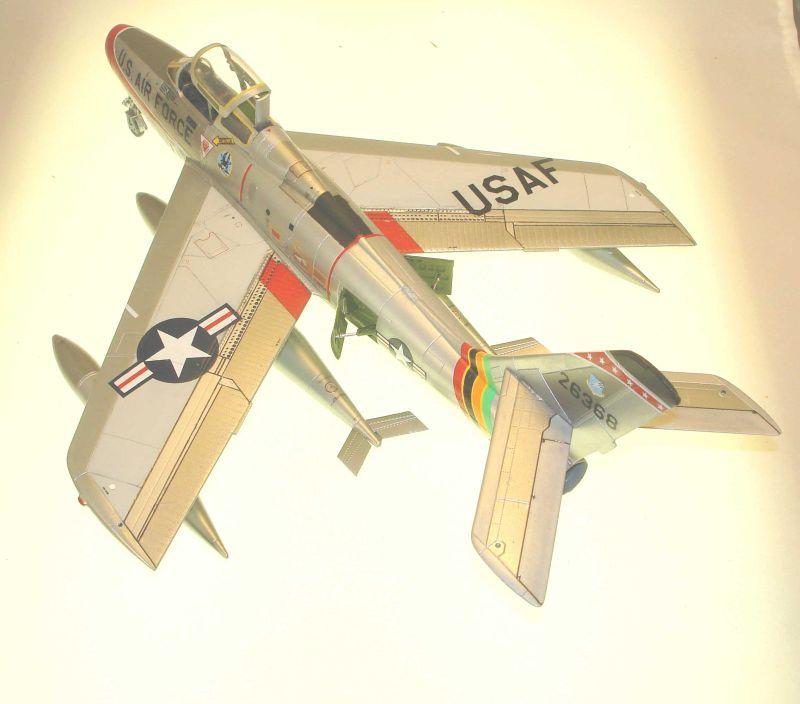
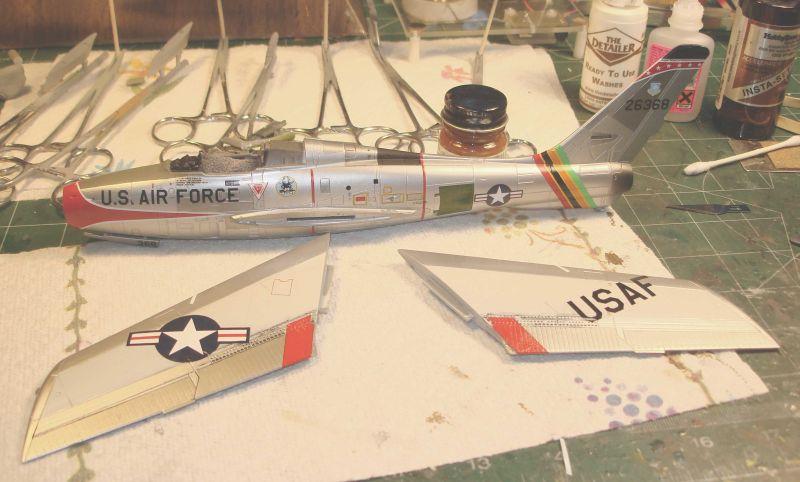
Actual construction went quickly without any problems with fit or alignments. The panel lines along the seams even matched up, which was a pleasant surprise. The model comes with it's own weights to keep it on it's tricycle gear in the form of two large ball bearings. The kit is designed to accommodate these weights so it's a no-brainer. The panel lines seemed to be a bit heavy handed, but when it is finished, they seemed to blend in, so I think I can live with it. I think the busy and colorful markings help with this issue.
As I mentioned earlier, I have no reference material on this aircraft, so I went along with the painting directions provided in the instructions. I did stray a bit and took a little artistic license when painting the wings, I chose to paint the center section a light gray as I have done with the Sabre Jet and the F-84G in the past. These aircraft are from the same era, and I like the way it looks, so why not? I'm not that much of a purist. For all I know it may be correct.
So when the construction was completed I moved on to my favorite part of the hobby, the paint job. As this was going to be another natural metal finish, I was going to be using a lot of Tamiya tape and Alclad paint once again. Working with sub-assemblies made this part of the project very easy and very fast. I probably used about five shades of silver. In no time at all I was laying down the decals. The decals are really quite good. The red on the markings is a perfect match to the Testors 1103 Red, so no paint matching was necessary. There are a lot of tiny data stencils to contend with, but I live for all that visual detail.
If you are a rivet counter or a model purist you may find some faults with this kit. On the other hand, if you want a sharp looking model of an F-84F, and a quick and fun build, pick one up and enjoy.
very, very beauty!
Beautiful job...
Thanks guys...
Jack, what an eye catcher!
I fully agree with you, a sharp looking model. I guess this is the same kit as the Italeri and I got the impression the surface was a little on the frosty side. Looking at your model I don’t see a sign of that, have you sanded the surface smooth or is it that good out of the box?
I like the way you build your model in sub-assemblies, I wouldn’t dare given the risk of ruin the nice bare metal surface but you seem to master that with elegance.
Nice job!
Regards
Rickard
Rick... no, I just primed it with Tamyia Fine White before spraying on Alclad. I can't use that building method with every kit, only those that have a good fit to begin with. I do find it a lot easier to decal, especially using rivets and small data decals.
Jack,
Another beauty. HooRah
Frank