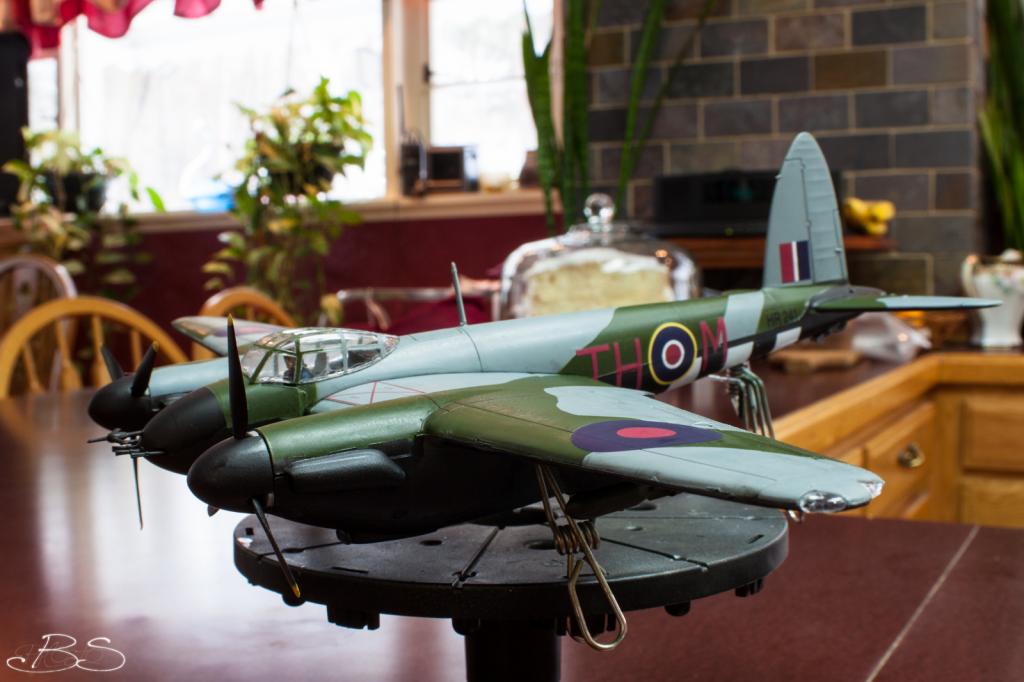
1/48 Mosquito Mk IV Nightfighter
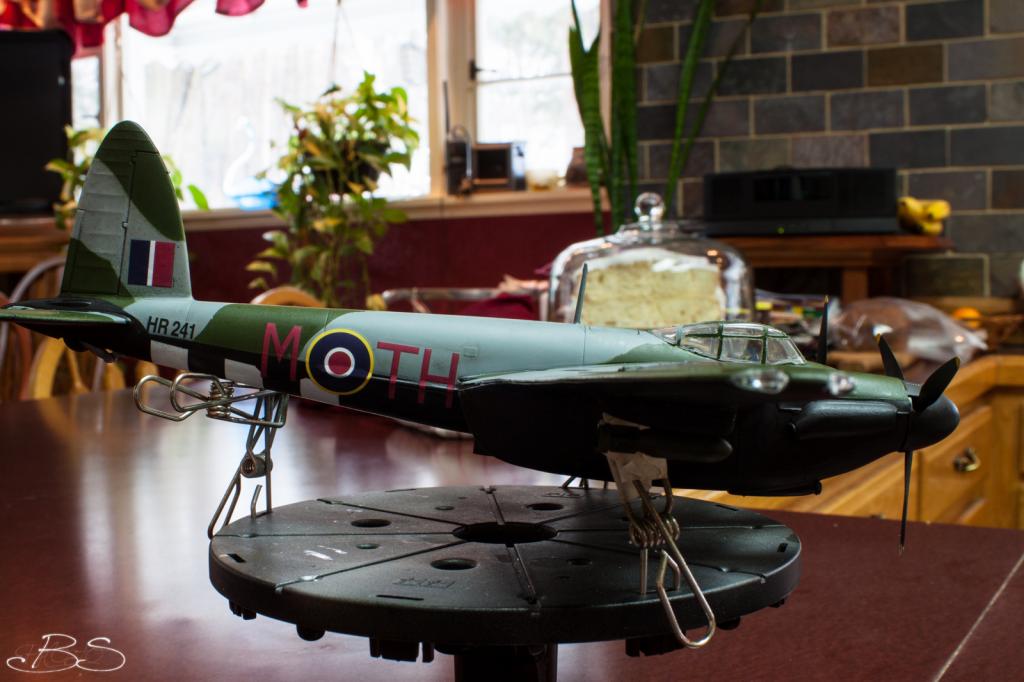
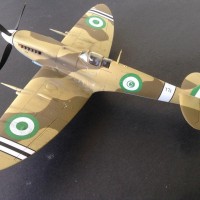
This is my first, fully airbrushed plane where I airbrushed the interior and the exterior of the plane. The only thing I did not airbrush was the figures inside (which one fell down somehow :/ ). I made a few mistakes which are very clear but I think the plane looks decent. 😀


Looks better than MY first airbrushing attempt...but I didn't use 'hard' demarcation lines in the camo pattern - looks like you taped 'em off or sumthin'. Anyhow, nice work. And the other crew member must've dropped his clipboard - that's why ya can't see him.
I used a technique I read about in a book called "Puddying" where you take silly puddy and use it like a mask. I'll say one thing with this kit though, the decals where utterly terrible.
Look like a good airbrushing job, even finish and clear demarcation lines.
Wonder what kit is it, Monogram? Airfix?
It's a monogram
Demarcation lines with soft edges or hard edges ...that is always a conundrum with many modelers. Folks have commented that Spitfires were painted with large mats that were used to paint the A or B schemes on the A/C and some camps say that they were sprayed on with a hard edge while others folks insist that the mats were lay ed down sprayed and then a fine line of spray was applied to the outer edges to soften things. Further more A/C in field may have gotten some attention from the fitters with some paint after some wear and tear. So consulting a photo maybe the best thing to do for modeling a individual A/C. On the whole using the silly puddy method is a good start and the model looks pretty good.
Actually, it's now been pretty well demonstrated that the A and B schemes were done with chalked outlines and then sprayed with a tight nozzle along the demarcation line. We used to have one of the Spitfires restored in England out at Planes of Fame that was painted this way. You really had to get to within a couple feet to realize it wasn't a "hard" edge. In 1/48, you really do want to use some sort of soft-edged mask as Billy did here
with his model, unless you have a Badger SOTAR or a brand new #1 tip in a Paashe H and a steady hand.
I shake too much for that haha, I think I did pretty decent for my first camoflauge, I still have a lot to learn especially with airbrushes . I hardly know the tip sizes etc. but it takes time. 😀
"I think I did pretty decent for my first camouflage" My point exactly. Modeling is about the process of making a kit and having fun with it while doing some experimenting and learning along the way. I cut my teeth on Monogram kits and still enjoy making them and can appreciate the efforts put into them. Keep on building and show us your work. Don't let this poor old Sod or some of the old hands slow you down.
Some folks have used masking tape cut into the appropriate pattern for the A or B scheme and then have used a thread placed just behind the outer edge of the mask to leave a little room for getting a feathered look for the demarcation line. If your airbrush nozzle doesn't spray a fine enough line or you've had too much coffee or one too many energy drinks that is...
Looking forward to your next build.