Alley Cat 1/48 deHavilland Vampire F.3 all-resin kit
Unlike the Gloster Meteor ‑ which was always intended to be an operational fighter ‑ the deHavilland Vampire began as an experimental aircraft, originally developed to specification E6/41, to test the deHavilland Halford H.1 jet engine. Design of what the company named the DH‑100 began at the deHavilland factory at Hatfield in mid‑1942, some two years after the Meteor began development. Known in the company as the “Spidercrab,” the aircraft utilized deHavilland's extensive experience in using molded plywood for aircraft construction, and was the last composite wood/metal construction high performance military aircraft. To reduce thrust loss for the single engine ‑ later known as the Goblin ‑ the design centered around an egg‑shaped aluminum‑ surfaced fuselage (which had a wooden basic structure) with the rear control surfaces on twin booms to either side of the fuselage; this allowed for a short exhaust pipe which reduced thrust loss. While the design looks strange today, at least two contemporary German jet fighter projects used a similar layout.
The first prototype, LZ548/G, was flown by Geoffrey deHavilland on September 20, 1943, only six months later than the Meteor. Performance was good enough that the RAF supported further development as a fighter to supplement the Meteor. The production Mk I, by this time known as the “Vampire,” did not fly until April, 1945. Almost all Vampire F Mk. Is were built by English Electric, due to the commitment of deHavilland for production of the Mosquito series.
The first of 268 Vampire F Mk.1 fighters was taken on charge by 247 Squadron in March 1946. Improvements were introduced on the line as production progressed, with the Goblin 2 of 3,100 lb thrust introduced along with auxiliary under wing fuel tanks with the 40th airplane and a pressurized cockpit and bubble canopy from the 51st. The centrifugal engine was thirsty, and the early Vampires suffered from having a range of only 730 miles.
The range problem was addressed in the Vampire F Mk.3, built to specification F.3/47, which carried additional fuel in large underwing drop tanks that extended the range to 1,145 miles. The tanks caused stability problems, which were solved by lowering the horizontal stabilizer, widening its chord, and changing the shape of the fin and rudder. The prototype, TG275, first flew on November 4, 1945 and the F Mk.3 entered service with 54 Squadron in April 1948. With the introduction of the F.B.5 fighter-bomber, which became the most numerous of the series with 485 produced, the F.3 was progressively transferred to second-line units and became the first jet issued to the reserve squadrons of the Royal Auxiliary Air Force.
The Vampire was the first British jet to fly faster than 500 mph, and an F.3 set an altitude record of 59,055 feet. An F.3 also became the first jet to fly the Atlantic. The Vampire was the most maneuverable of the first generation jets, with light, responsive controls, though tight banking at low speed and low altitude could be dangerous, while sudden throttle movement could cause a flame-out.
The Vampire was the first jet flown by the Royal Canadian Air Force as well as the Royal Australian Air Force and the Royal New Zealand Air Force. In all its 20 basic versions and over 50 variants, the Vampire served with 30 Air Forces and was produced in France under license. It only left Swiss service at the end of the 1980s. Several privately-owned Vampires have been flown in the United States since the 1960s, with its most famous private owner being actor John Travolta, who has owned and flown his F.3 for the past 30 years.
The Vampire was first produced as a 1/48 injection kit some 20-od years ago; the less said about these plastic abominations the better. Things were saved for those willing to turn to the dark side of the "dread vacuform" with a really nice set of 1/48 Vampires from Aeroclub in the 1980s that covered all marks. Back in about 2006, Classic Airframes did some Vampires, with the first release being sadly inaccurate, though later releases were corrected in shape and outline details. There is also the Trumpeter kit released in the past year, which upholds that comapny's tradition of driving modelers nuts from release to release, depending on whether the A team or the B team did it; this one was done by the C team. In 2012, Alley Cat Multi-Media Kits, a brand of A2Zee Models, did a series of all-resin Vampires, of which this F.3 is one of three different Vampire kits originally produced. These kits are pricier than any others in 1/48, (approximately US$70.00) and are as accurate as the Aeroclub kits with the additional value of being designed to be easily assembled, which to my mind makes them competitive with the Aeroclub vacuforms for "overall cost" assuming one can find one of the Aeroclub kits without paying "kit collector's prices."
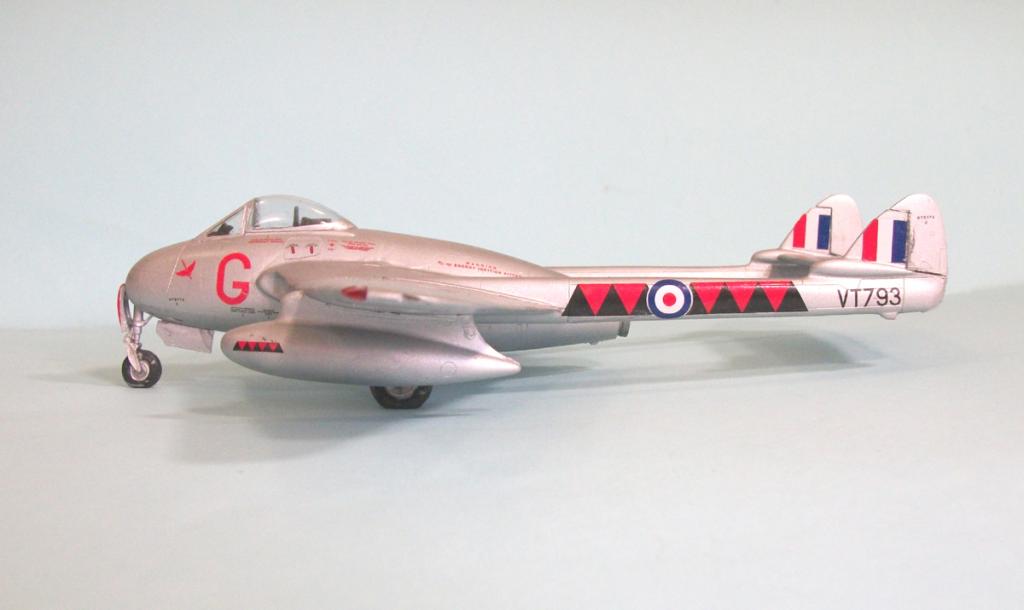
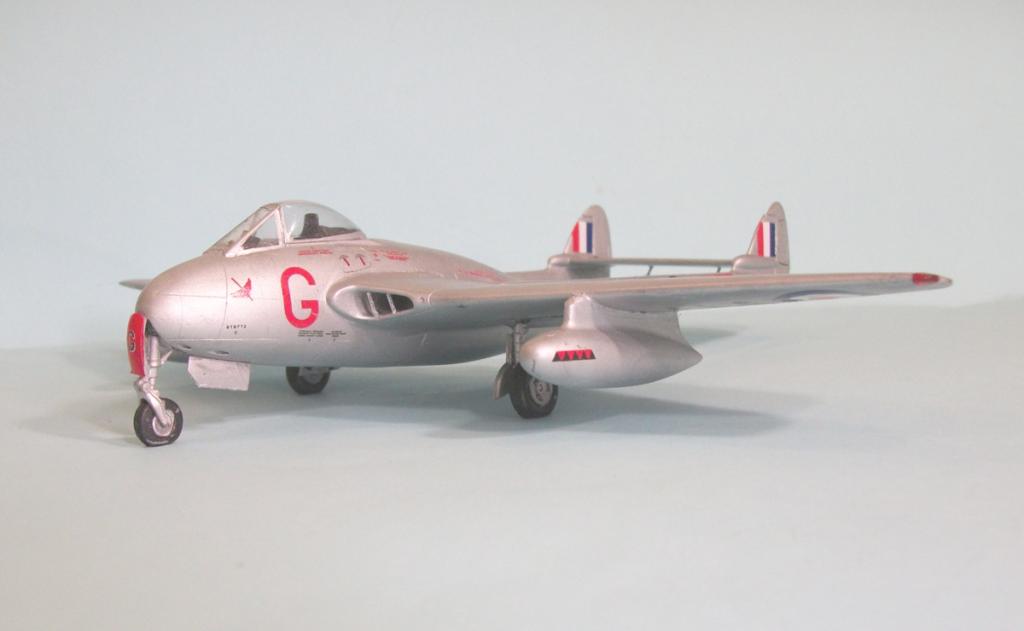
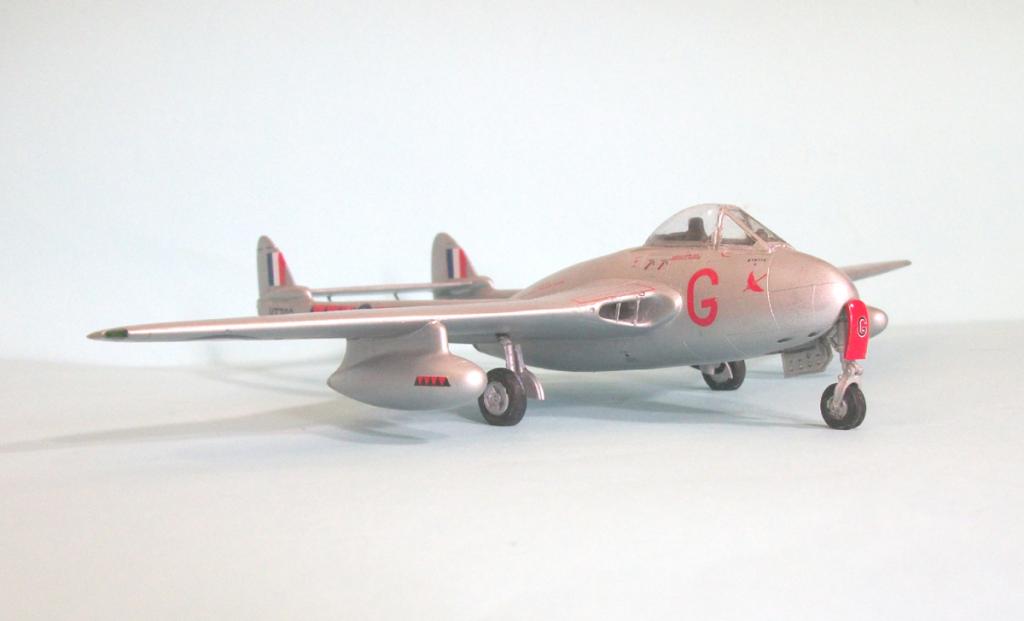
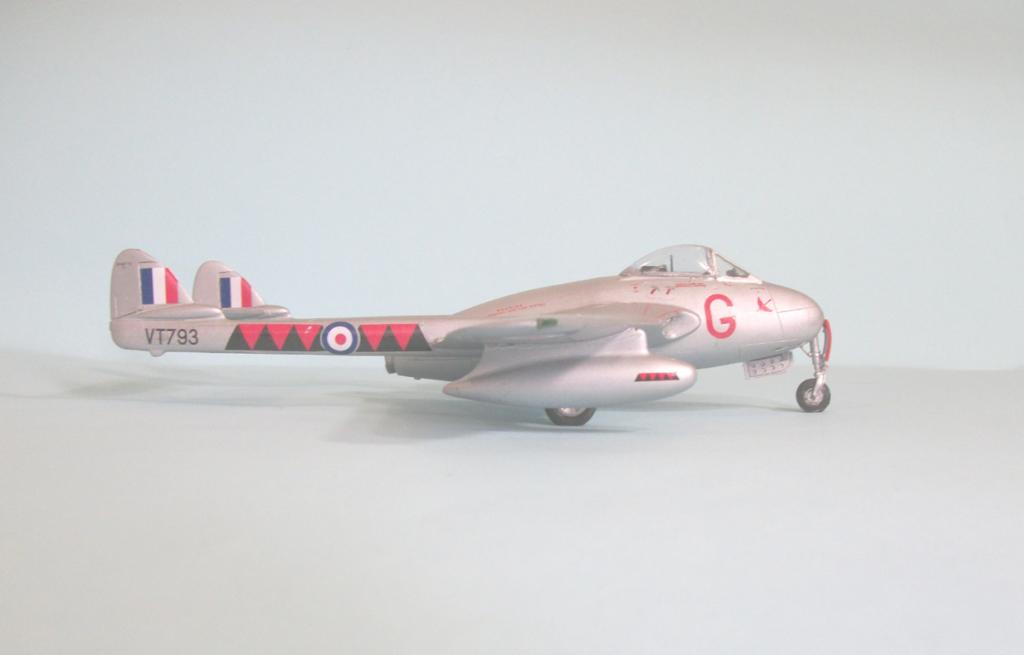
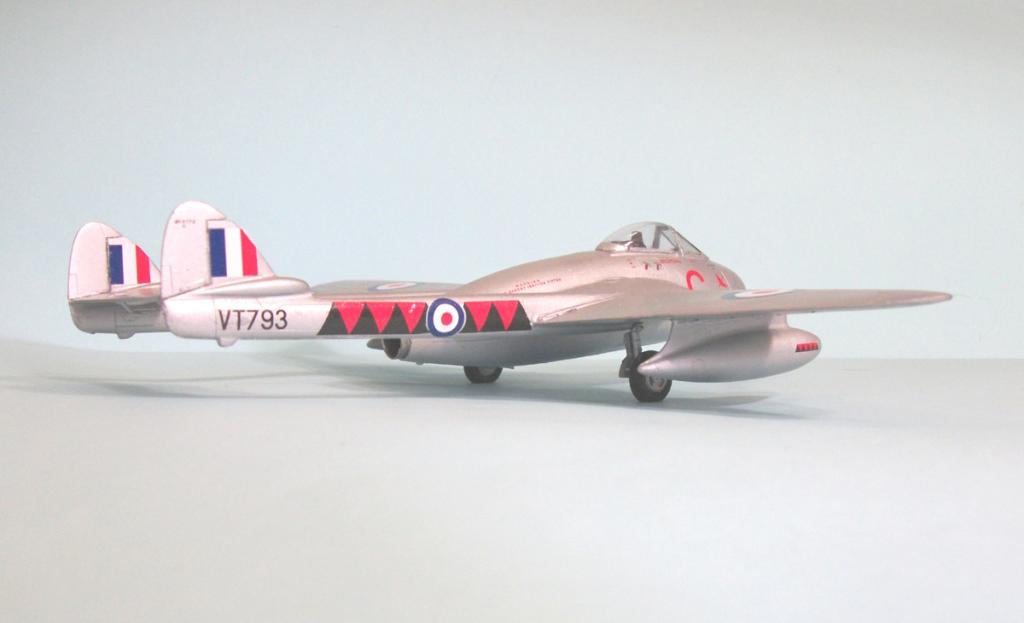
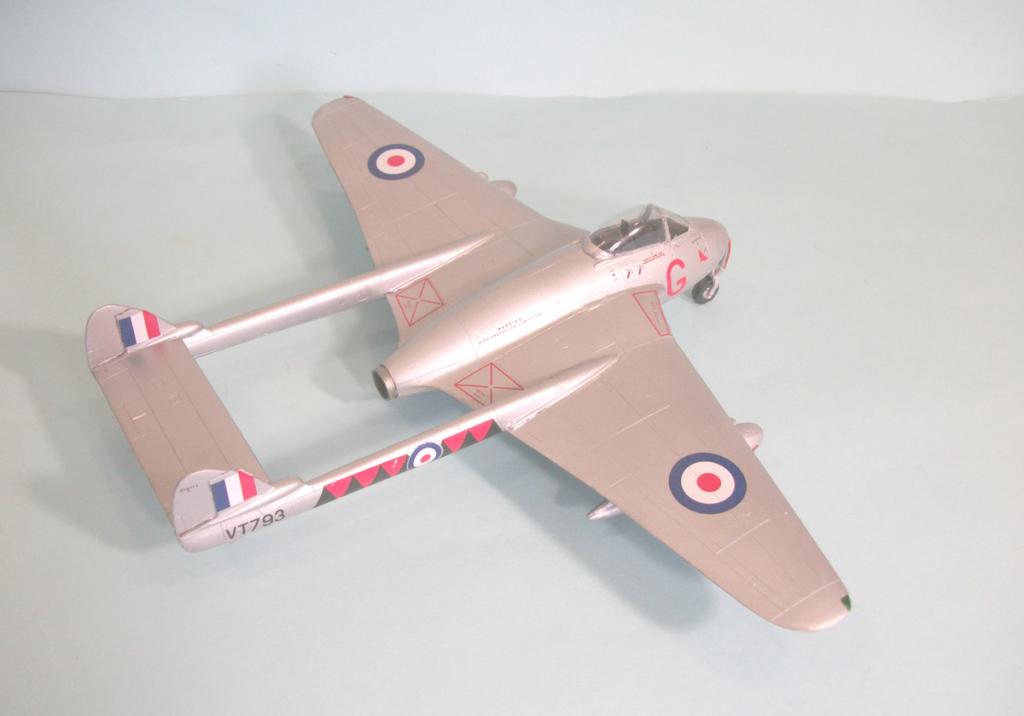
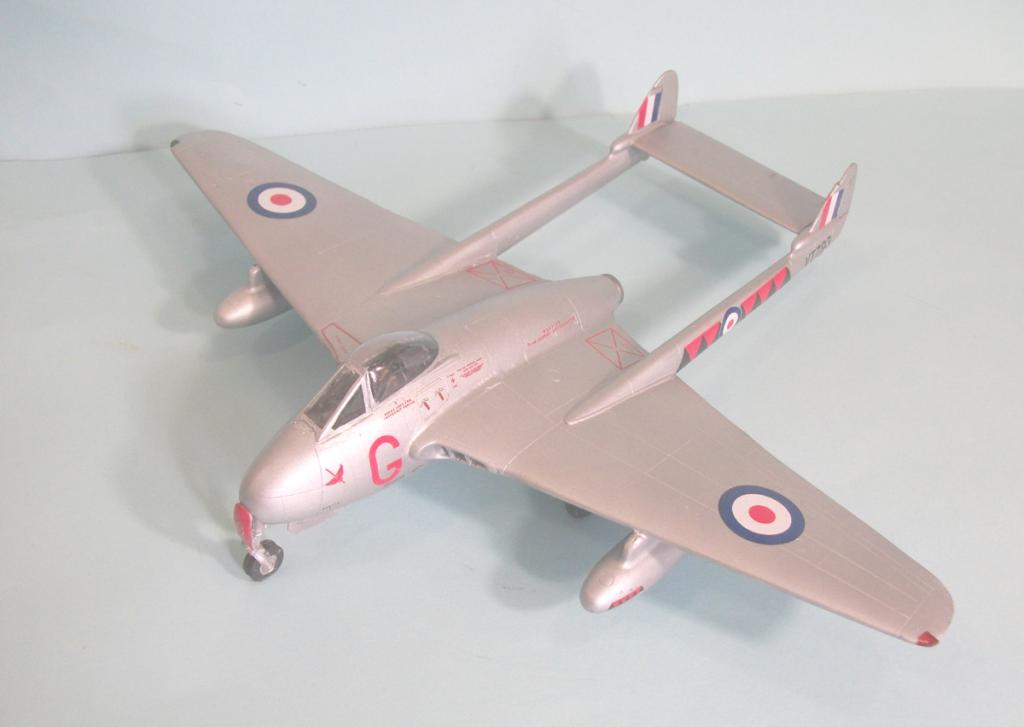
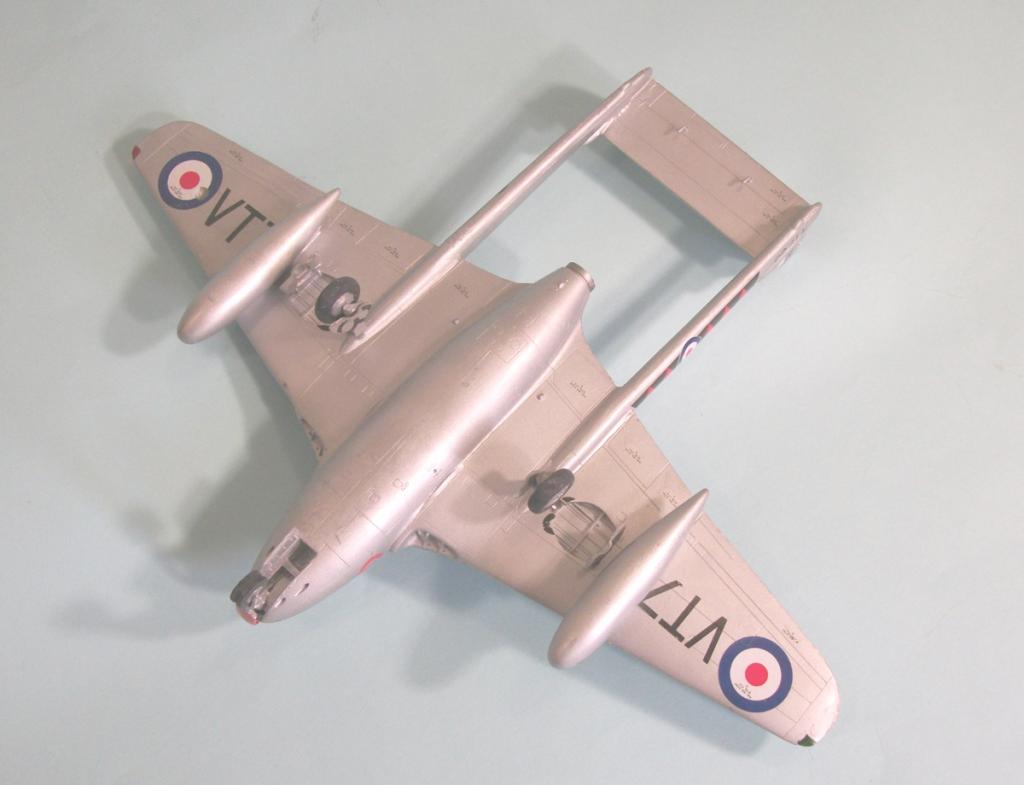
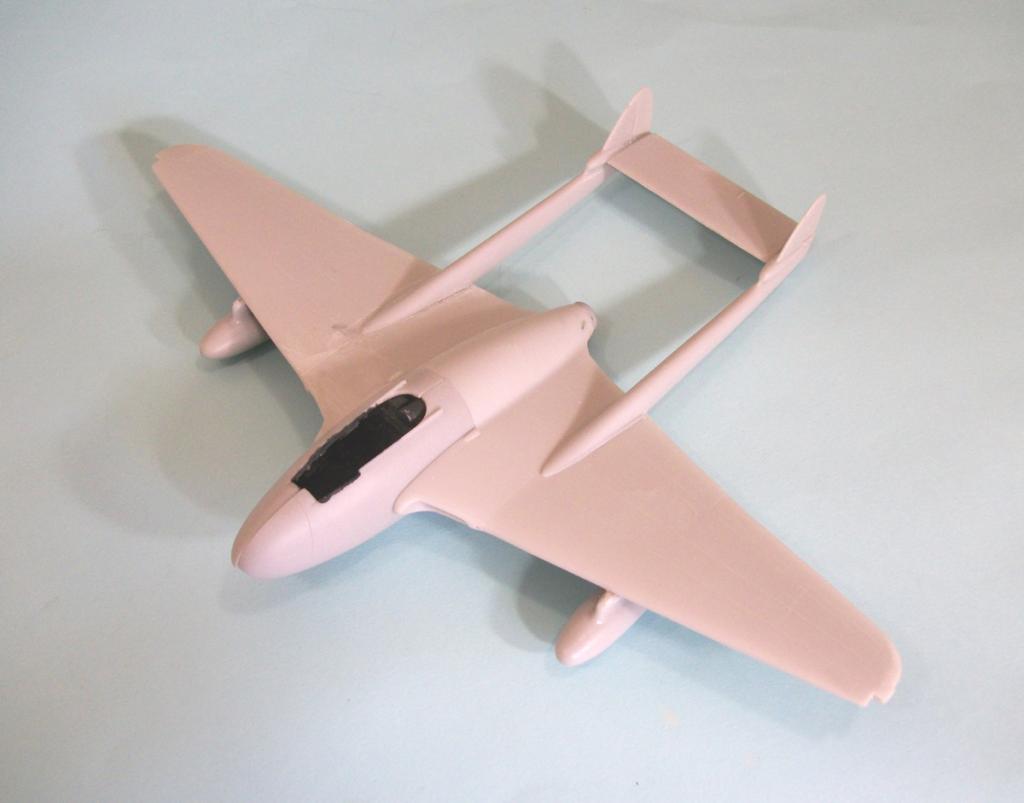
As with many resin kits, there is a low parts count and an excellent casting with beautiful surface detail. All flying surfaces are thin with sharp trailing edges. First rate decals are provided for four different aircraft flown by 73 Squadron RAF and 601, 604 and 614 Squadrons, RauxAF in the early 1950s. All are in the “high speed silver” finish, with traditional RAF and RauxAF squadron markings. The two piece canopy is a beautiful bit of clear resin casting, as are the wingtip navigation lights. The landing gear legs are cleanly cast in white metal.
There is a bit of flash to clean up and parts need to be taken off their casting blocks, but this should present no problem for anyone who has ever built a resin kit before. The kit design is very “modeler friendly” and assembly is so easy that a test-fitting session turned into the construction session as the kit whispered “build me...”
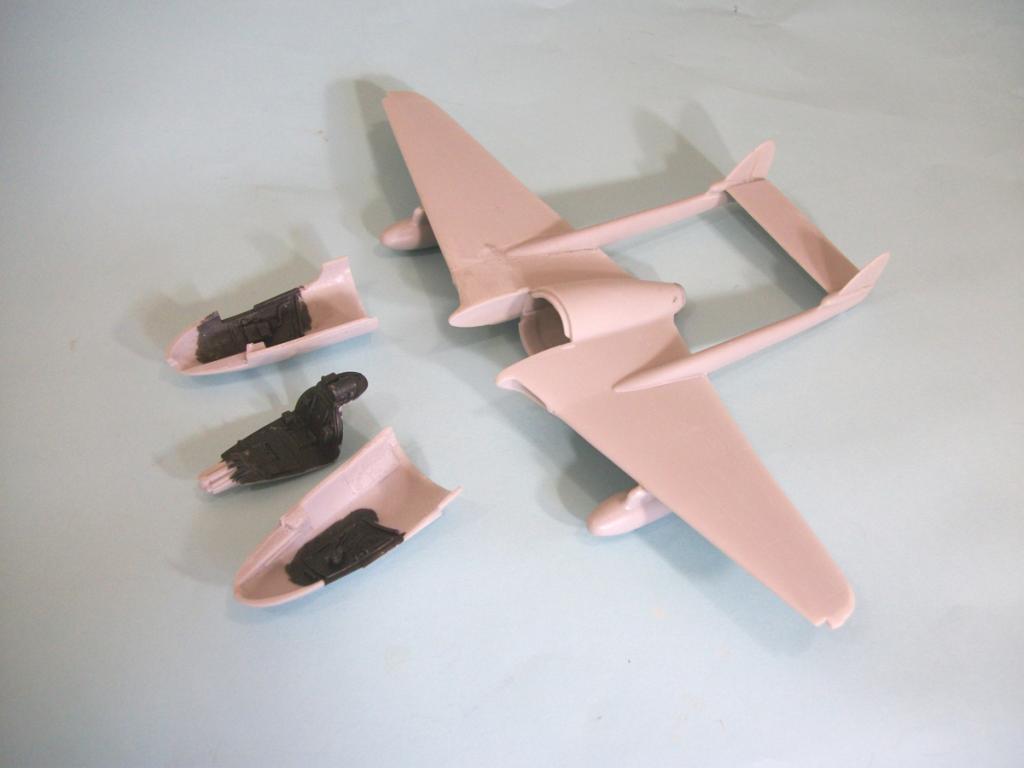
The cockpit parts were painted black and I used Airscale Decals for the instrument panel. The Bakelite resin seat was painted with Tamiya Hull Red to simulate Bakelite, with Red Brown for the leather seat back. After the photoetch Sutton harness was fitted, the seat was installed and the cockpit glued into one forward fuselage half. The metal weight provided for the nose had to be cut down and filed to fit the nose compartment. The forward fuselage was then glued together and the other two weights were slid into position under the cockpit floor.
The tail booms, rudders and horizontal stablizer were glued to the main fuselage-wing casting, with the tail cone cleaned out and thinned to allow the resin exhaust pipe to slide into position.
The forward fuselage was then glued in position. I used C-A glue to fill the centerline seam of this part, and the joint of the forward fuselage to the main casting.
Test-fitting the canopy revealed that the canopy does not mate perfectly to the windscreen. If you are going to pose the canopy open, this does not present a problem since the poor fit won't be obvious. I ended up sanding down the forward edge of the canopy to get the “blown” appearance; this was sanded out with micro-mesh and then polished, and the canopy was then dipped in Future, but it still didn't look just right - I ended up discovering where I had put the Aeroclub Vampire vacuformed canopy issued with their correction set for the Classic Airframes kits, and used that, since it is perfectly shaped. The canopy fit perfectly to the windscreen, thus preserving the lines of the airframe. I would note here that a close up photo I ran across shows that there is no metal frame for the leading edge of the canopy, which is molded plexiglass and slides into a recess in the bow of the windscreen.
I then glued the drop tanks in position and attached the white metal elevator mass balances and glued the gear legs in position so the model could sit up for painting.
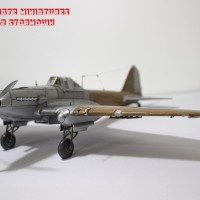
I applied a nice thin coat of Tamiya “Flat Aluminum,” thinned 50-50 and misted on, then gave the model a coat of Xtracrylix Satin varnish, which gave a final finish that closely approximates the finish of the “high speed silver” lacquer with which the original aircraft were painted.
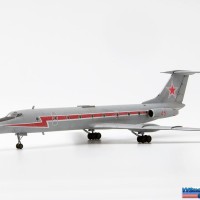
I did VT793 of 601 Squadron, the box art illustration. The very nice Alley Cat decals went down under a coat of Micro-Sol without a problem. I glued the wheels to the landing gear, attached the gear doors, and unmasked the canopy.
This kit from Alley Cat solves all the problems of the Classic Airframes release. Overall quality is excellent, and the simple design assures a “weekend project.” For those who like the Vampire, this is a sweet kit, and an excellent first resin kit for those looking to expand their projects.


Very nice Tom. Thanks for the history.
Nice clean build of an unusual kit.
Tom,
Very nice build.
Nice build, Tom.
Alleycat are one of those niche companies that for some time now have provided unusual types for modellers in 1/72, 1/48, and 1/32.
If the Vampire seems an odd modelling subject for those modellers unfamiiar with the company, consider, too, their Boulton Paul Sea Balliol T21, the Henschel He123A, the Gloster Gamecock, or, if you're really 'out there', the Vickers Vimy.
All kits are accurate, challenging, and beautiful to behold.
The Vimy is a kit developed about 18 years ago by another company and needs a lot of work. Go over to Modeling Madness and see the review Candace Uhlir did about 12 years ago. She definitely went "the extra 12 kilometers" but the kit needs at least half of what she did. And realize while looking at it that it was her 10th model. (she really is a "rocket scientist", or was before she retired to soar the mountain wave)
The Gamecock, Fury and the Hs-123 are the kits previously released by Montex, designed by the guy who now does Silver Wings. You can see my Fury and Hs-123 here.
Cool! I like the early jet age stuff. Looks good.
Looks Good Tom, i have the F5 hope it comes out as well as yours
Tom,
You keep on giving away the store with these great articles. Some great lead ins to books too. The little history lessons on the some of models produced in the past are interest too.
that's of interest too.
Two thumbs up on the modeling...which is a given.
Wooden structure. Gad.
Hard to believe that lot invented the Industrial Revolution, isn't it? 🙂
Another beautiful build of a beautiful plane, Tom, your pictures always make me want to buy one!
another great job