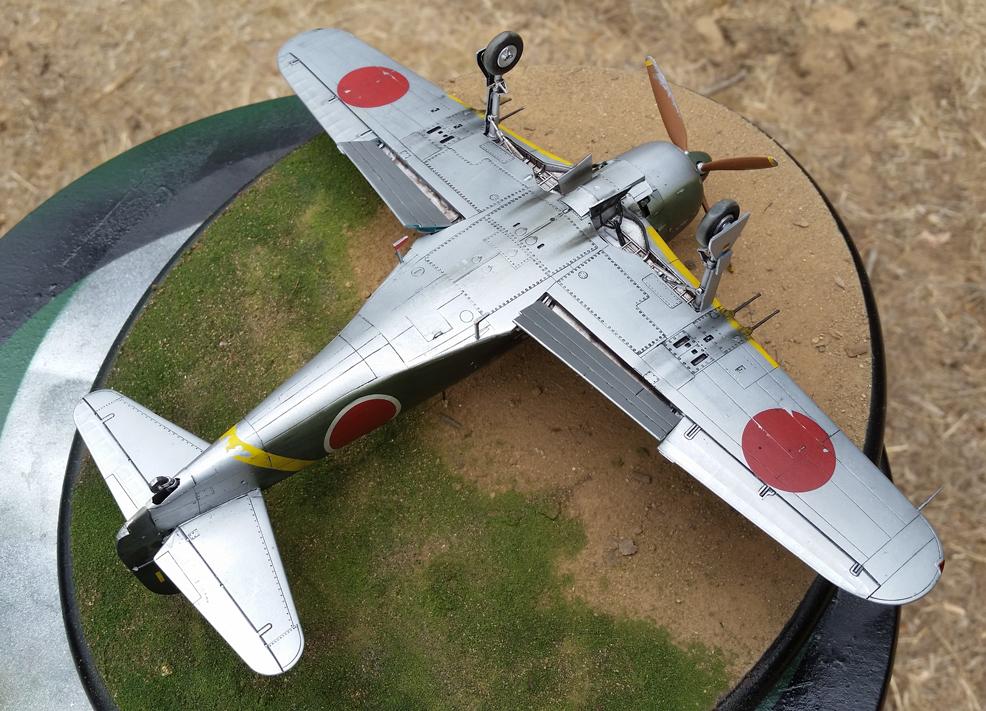
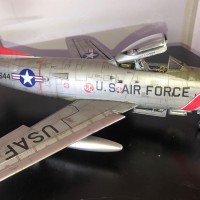
Hasegawa 1/48 scale N1K2-J George
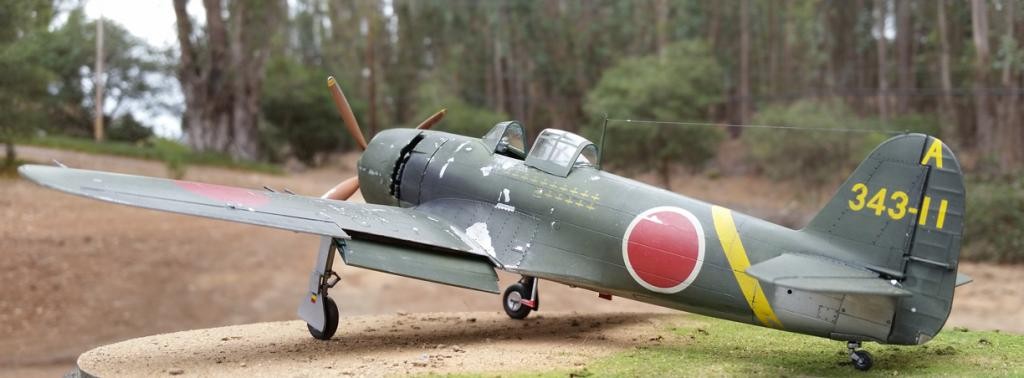
Hello all! Here is my Hasegawa Shiden-Kai, built straight from the box. The only add on was the EZ Line antenna wire.
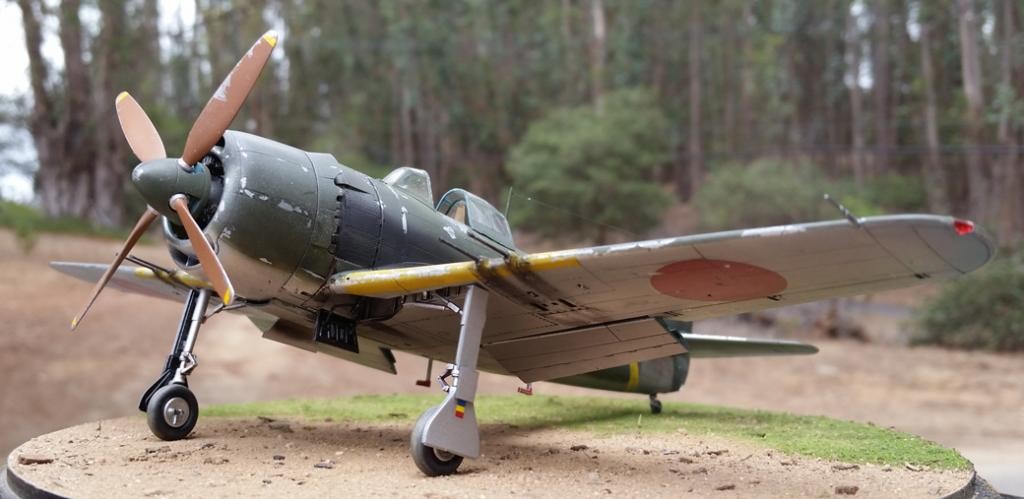
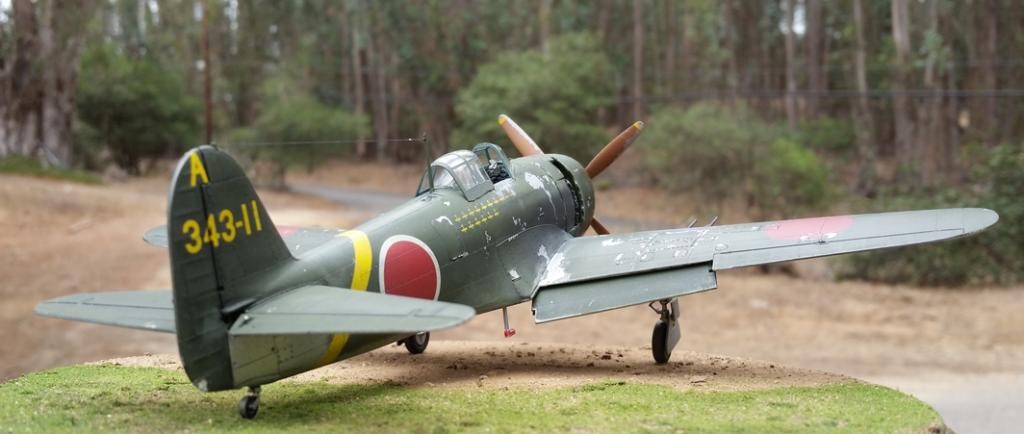
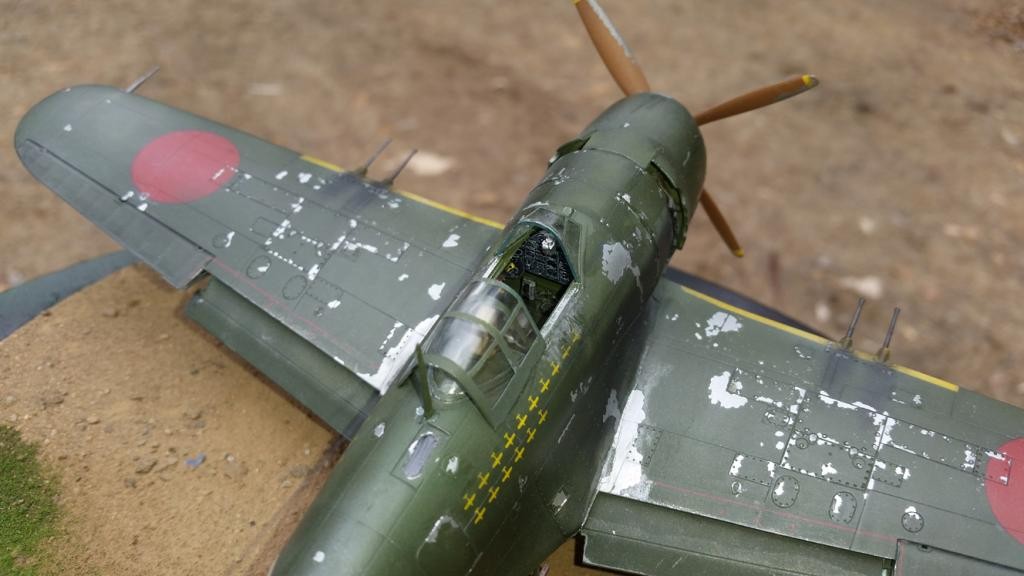
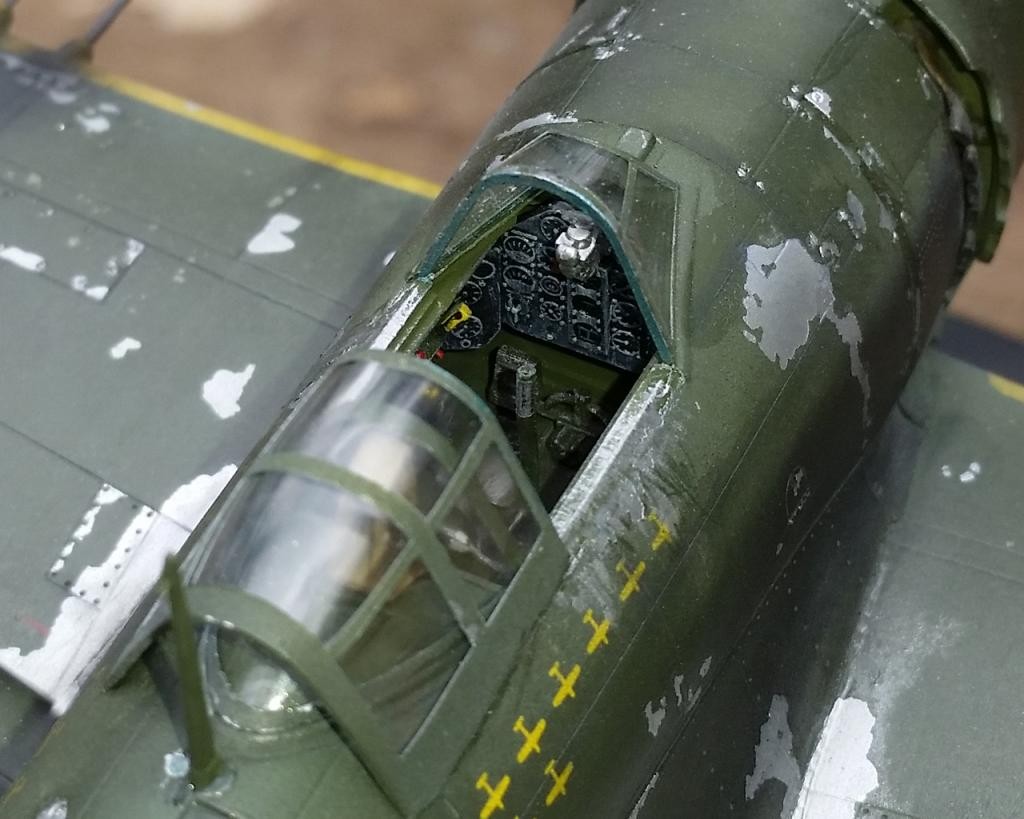
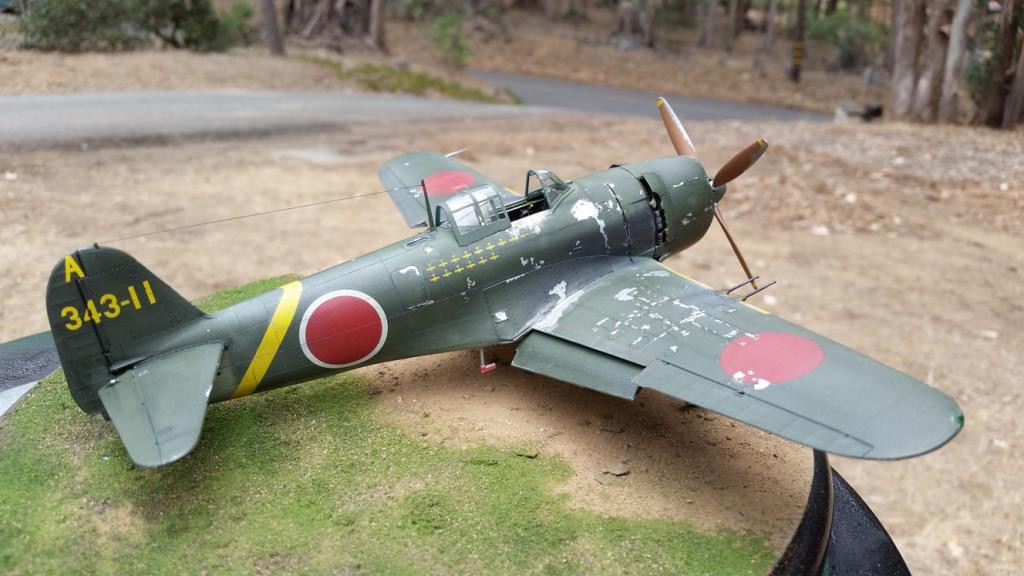
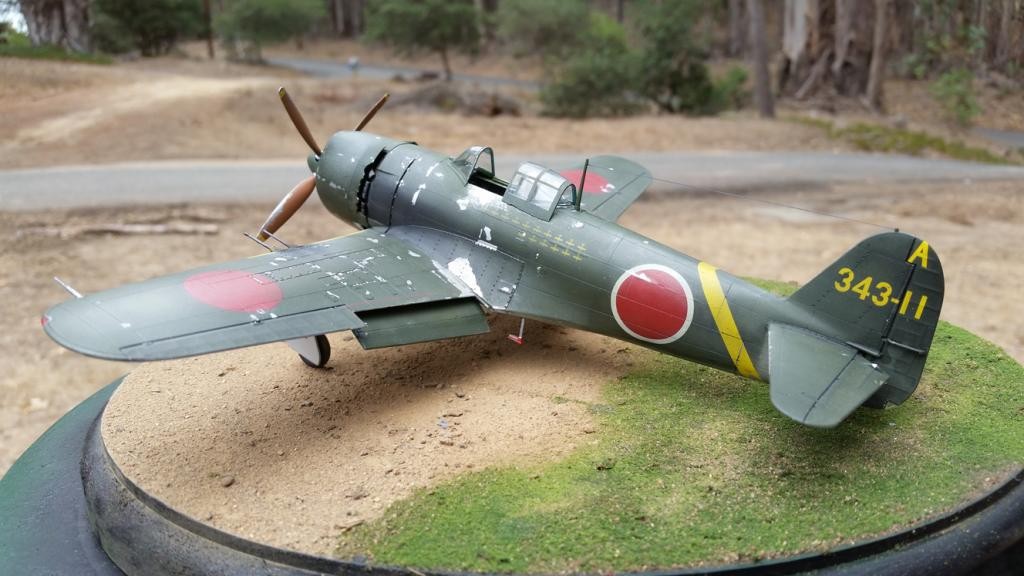
Once assembled, I sprayed Testors Metalizer Aluminum from a can as a primer coat, then I used Tamiya IJN Green acrylic shot through my airbrush. The chipping was simulated by pressing tape against certain areas to peel off paint, as well as scraping with a sharpened piece of sprue, scratching with my fingernail, dry brushing with silver enamel, and using a silver colored pencil. The base was a simple pine plaque, with white glue holding the dirt from my front yard and some simple grass from Woodland Scenics.
This was my first Hasegawa kit ever, and I was really impressed with the level of detail and how well everything fit together. I have a few more Hasegawas in my stash and I am looking forward to building them as well!
Cheers!
-Ramon


You did a great job on this one. Weathering looks very authentic. You should experiment with salt in order to simulate paint chipping. Well done!
Thanks Morne! the salt technique is something i almost tried with this one. i might have to try it on the next one!
Nice work Ramon.
Great weathering and some great pics to.
Especially the opening shot.
thanks Simon! i had a lot of fun with the weathering, and its always fun to finally get to the photoshoot, because that means i have reduced my stash by one model! 🙂
Very nice work! You did a great job all the way around. As Morne suggested, using salt would make your chipping a bit more subtle and "to scale," but still a great looking model and finish.
Thannks Greg! i have seen a lot of cool results with salt weathering. i definitely must give that a try!
Very nice!
I really like the chipping job you've made.
Great photography too.
thank you Ulf! 😀
well done and great subject
thanks Bob!
Nicely finished and photographed...I like it. From what I've seen over the years, the chipping of paint was prevalent and in various degrees of "yuck". But then again, I've never tried the 'salt method', either (not real sure how it's done).
thanks Craig! my understanding of the time period was that by the end of the war, the IJN skipped applying primer and just painted on bare metal. This lead to a lot of gnarley chipping and flaking. admittedly, reference was hard to come by, so i just did it using practical guesswork and an aim for a high cool factor! 🙂
Pour a tablespoon of salt into a saucer. Add a bit of water to the salt until it forms a paste. Take an old brush and carefully apply to the area you wish to weather. Apply topcoat over the salt once it has dried. Take an old brush and remove the salt. It is very easy and the result looks authentic.
Ramon, Great job all around on a cool subject. Your chipping looks really good and really sets off your model. Do you, or anyone else out there, know what that small window behind the canopy is for?
My guess (if it IS a 'window'), is most likely some sort of inspection access. For what, I haven't a clue...radio?
Thanks Erich! i have no idea what the window is for and am also a bit curious... Craig's suggestion seems pretty plausible though!
Very nice model. That's a good kit.
FYI for future Japanese projects: where the airframe is unpainted aluminum, the fabric surfaces (ailerons, elevators) will be the underside grey (IJN or IJAAF). If the airplane is overall unpainted aluminum (numerous IJAAF aircraft) then both upper and lower fabric surfaces are in the "underside grey" color. Just a tip, not a criticism.
thanks Tom, and thanks for the knowledge!
🙂
Ramon, this is outstanding!
thanks Bryan! 🙂
Ramon, really fine build, Gendas group?
Thanks Bernard! the instructions say 301st, but now that you mention it, the tail number says 343... (i had to look up Gendas because i didnt know what that meant)
🙂
Ramon, it's the 343 Air Group, and the letters tell which squadron. "B" is the 407th, and "A" is the 301st. "C" is the 701st. Nonconsecutive, apparently. From Ospreys Aircraft of the Aces series, #22, Imperial Japanese Navy Aces 1937-45, by Henry Sakaida. The single color band is a flight leader, double a squadron leader.
ok, that all makes sense - thanks for the info Bernard! 🙂
🙂 ... Greetings ... 🙂 :
I sense "HISTORY" as I sit here observing it. It has a authentic look to it, kind of a feel of the time. Nice work.
thanks dude, that means a lot!
🙂
Look good nice build and wetering!
thanks P.k! 🙂
Great work, Ramon, and the outdoor photographs set it off a treat!
thanks George! no better way to make natural light effects than with natural light! 🙂
I agree, great job! Nice weathering, base and I note the prop. My experience is in general Hasegawa makes nice kits. Thanks for sharing your fine work-
Thanks for looking Ralph! I am definitely looking forward to my next hasegawa kit after this one!
🙂
Am I too late to throw into the praise fest? That's a really well done model, all phases. Forget the salt it looks fine as is.
GOT to finish my 1/32.
its never too late to stroke my ego Bill! thanks for the kind words!
🙂
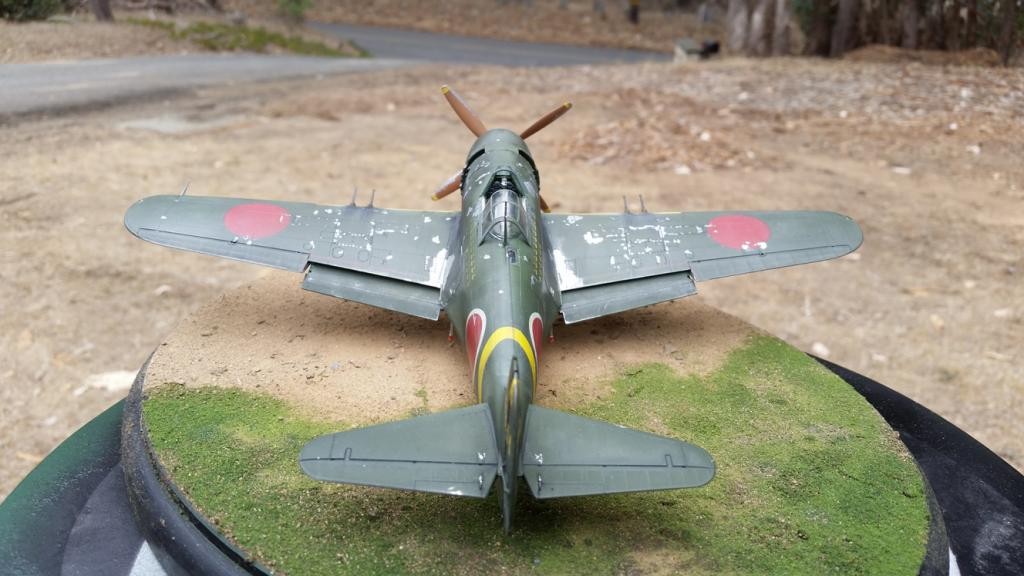
I think the blades are backward ?
i am not savvy on this airplane, so if they are backwards, i will pass the buck over to the house of Hasegawa! 🙂
Impressive build, Ramon, love the well executed chipping.
Thanks Bernd!
Beautiful job. Great detail and weathering. Looks like a classic.