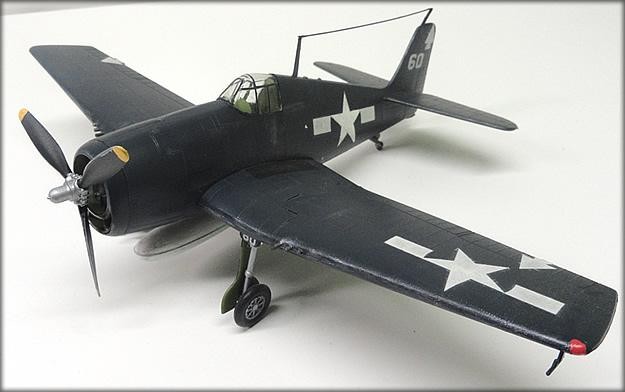
1/48 Scale Monogram F6F-5 Hellcat
The Monogram F6F-5 Hellcat is one of those 1960's aircraft models that had working parts (in fact, this model was made the year I was born, 1963). The wings fold back, the wheels move and can be retracted, and the arresting hook can come out of the tail section. Cool stuff.
I had never built this model as a kid, so I was not too familiar with this kit. In fact, I had actually started another Hellcat kit, but I ran out of paint, and while waiting for the new paint to show up, I dropped the original model I was working on and destroyed it. Luckily, I have two other Hellcat kits in the stash, so after I received the new paint, the rebuilding began.
In the Beginning
Upon opening the box of this kit, one will not find a whole lot of parts. This is a reissue from the late 1980's, with parts to make either a pure fighter, or you can add rockets and bombs to make a ground attack version. In addtion to the bombs and rockets, there is also a belly tank. The main parts of the kit were shot in a very dark blue plastic, that look like an indigo color, with the propeller, bombs, rockets, all the landing gear, and the arresting hook molded in black. Most of the parts have raised panel lines, which was in vogue at the time. There is a one piece, non working canopy for the cockpit (with minimal canopy lines, hoo-rah). After inspection and cleaning, the fun began.
Construction
Aircraft construction usually begins with the cockpit. But like the A6M5 Zero and the Spitfire Mk IX, there is really no cockpit detail at all, only molded in side walls, with no instrument panel, but there is a pilot figure, which has the seat attached to him. I glued into the cockpit area the back plate that the pilot figure is supposed to attach to, and then I painted the interior cockpit area Pollyscale Interior Green. I also painted the main wheel wells and the rear wheel well interior green as well. After the interior green dried, I put the rear wheel assembly together, which works with the arresting hook, which can slide out. This assembly was installed into the right side fuselage. After this step was done, I glued the main fuselage together.
While the fuselage was drying, I began work on the wing assemblies. The landing gear has to be assembled at this stage, because the top sections of the wings actually help hold the landing gear in place. Normally, the landing gear is movable, since the main struts on the real aircraft would fold back, and then pivot to lie flat inside the wheel wells while in flight. But the struts felt somewhat weak during assembly, so I glued them in the down postion so they could not pivot.
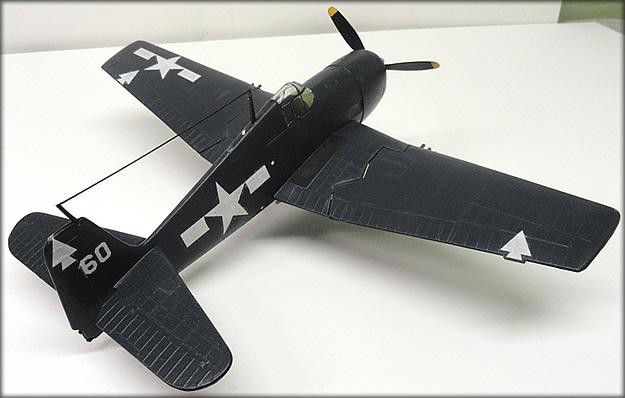
The wing assemblies were designed to fold back, and this posed a question. Should I construct the wings to fold, or just glue the wings on as if they were fixed? Even though I knew that I was going to display the model with the wings out, I wanted the option to do the folding wing, so I built it that way. The wing folding mechanism is just a straight plastic rod, that is sandwiched between the upper and lower main wing cord piece that will be part of the fuselage, and the outer wing panels. On the outer wing panels, this piece is again sandwiched in between the upper and lower panels, so you have to make sure that you have a good solid glue join between the wing pieces, because that is what holds the folding part of the wings onto the aircraft.
Before putting all the wing assemblies together, I painted the inside interior green. After all the paint had dried, I slid the wing assembly into the fuesalage, and glued it in place. Then the stabilizers were added. Everything went pretty slick, with no real problems. After some seam work, and clean up, it was off to the paint shop.
Painting
Now most US Navy aircraft at this time period (early 1944 and on) were painted one color, AN 607 Sea Blue, which was not only made painting aircraft easier, but it also has anti-corrosive properties in the paint, so a lot of Navy aircraft were quite blue, even the landing gear, and in most cases, the wheel wells. The paint I bought was made by Pactra, AN 607 Sea Blue, since my usual brand, Pollyscale, does not carry this color anymore. At this time, I did not even know that Pactra still existed; in fact I had not used any Pactra paint in over 25 years, so I was curious as to how this paint was going to work. The paint was designed for radio controlled aircraft, even though the paint is an acrylic, and it was gloss vs. a flat that I usually employ.
I began by trying to do my Qtip painting method, but this did not work at all. The paint made the fuzzy part of the Qtip come off, and onto the model, so I went to the old tried and true paint brush. Now, as I said above, this paint was designed for RC models, so I did not know what it would do to the plastic of my regular old static model. As it turns out, it did nothing at all, but dry on the surface of the model, like it should. But because it was glossy, I did have some brush strokes showing, so I laid the coats on a little thick, and the brush strokes disappeared for the most part. The paint dried fairly quickly, and it dried shiny, and I mean really shiny. In fact, I had to put three coats of flat finish on the upper surfaces during the weathering phase, and it still had a fairly good shine to it. More about this later.
After I got the technique down, the rest of the painting went very quickly, since everything on the model was pretty much one color, although I did paint all the wheel struts aluminum. The tires I painted my usual grimy black. The belly tank I painted white, as I did see quite a few photos of Hellcats with white belly tanks. I also did this to break up the Blue color scheme a little bit. After the paint had dried, the main wheels were installed, as well as other small bits such as pitot tubes and radio masts.
When everything was attached and looking good, it was off to give this bird a personality.
Decaling and Weathering
The decals I used were the kit decals that came with the model. The decals were in very good shape, and there were not that many of them. Because of the color, the star and bar insignia were almost just white stencils. In fact, all the decals were white. The only other decals were the aircraft number, and 4 small “Christmas Tree” symbols that were on put on the upper wing surfaces and the tail. The christmas trees were symbols that were supposed to help air wings form up with other aircraft from the same aircraft carrier or group. In this case, the christmas tree symbol was associated with the carrier USS Bennington.
The decals went down very nice, and in fact, I did not have to lay down any gloss coat, since the paint was extremely glossy as it was. The decals were treated with Micro set and Micro Sol, and they reacted well. It was after the decaling phase, that I now had to try and fade the top surfaces of the aircraft, and keep the lower surfaces somewhat glossy. I decided to lay down a semi-gloss on the lower surfaces, and then, from the top, I laid down the flat coat. As mentioned above, it took 3 coats of flat to get the upper surfaces to look weathered. Then it took three coats of a white wash for fading.
After the flat coat was laid down, I did the usual weathering, with aluminum chipping along the all leading edges and the engine cowling. I also did exhaust and gun powder staining, as well as fuel spills. To tone things down, I did my usual overall grimy black wash, as well as dry brushing the decals to tone them down. After this was complete, I thought I was done.
Final Assembly
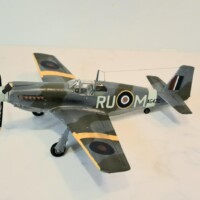
After some small touch up, and the attaching of the canopy, I was ready to let the model set for a bit, when to my horror, I saw that the star and bar decal on the left hand fuselage side had somehow got a healthy smear of grey paint on it. After looking at the model with a very puzzled look on my face, I glanced down, and saw that I had grey paint on my left hand ring finger. I had been doing some touch up on my Spitfire MK IX at the same time, and I had got some of the grey paint from that model on to my finger, and thus on my Hellcat.
After talking with the model making posse in my place of employment the next day about what they thought I should do to remedy this issue, I decided that I would try and use rubbing alcohol to thin the paint so I could wipe it off of the decal. The alcohol took a little paint off, but not much. The alcohol had also started to get through the finish coat as well. So, after controlling the impulse to see if the model could survive flying into a wall at 50 MPH (remember, this was my second attempt at building this bird), it was decided that I would try and repaint over the entire decal with Flat White, RLM 22. Surprisingly, this method worked quite well. Any mistakes I made I covered with weathering, and it actually does not look half bad. After all the touch up paint dried, a final coat of flat was done on the upper surfaces, and the Hellcat took her place on the display shelf.
Conclusions
This bird was a learning experience in many ways. One was the fact that I had not built this kit before, and I was surprised at how weak both the landing gear and the folding wing assembly were. The biggest lesson was using the Pactra paint. I do like that this paint is the correct color for this era, but I am not too sure about using this brand in the future. The jury is still out on the mega glossiness that the paint finish becomes when it dries, even though that would save me on gloss coating for decals.
Overall, I do like the finish product much more than I thought I would, and, like the Thunderbolt I did years ago, it is a much bigger model than it originally looked to be.
Until next time
Copyright Kipling Mitchell © All Rights Reserved.


A fine job. The brush finish intrigues me, what size brush did you use?
Hey Bob,
I just the standard old Testors white plastic handle brush which has been around forever. You can buy them in a 3 pack, which has wide, medium, and small brush widths on the bristles. I almost exclusively use the medium width brush.
After they get worn out, I cut the bristles down to a "stubble brush" which is what I use to weather my aircraft with (dry brush wear spots, exhaust stains, etc).
Kip
Fine looking specimen. Always nice to bump into someone else who brush paints!
I'd have never guessed this was painted with a brush...nice job, sir.
Hello Kipling...Nice to see an older kit like that built so well. From what I can tell from your photos, it appears to be one of the best builds I have seen of that fine ole Monogram Hellcat kit. One question however, just curious as to why you apply a copyright line on the photos as well as your text?
Good Afternnon Jim,
Just a habit I guess. I used to post on other websites in the past in the past, and I discovered that someone was passing off my text as theirs for their builds, which they were also selling. I have always copyrighted my photos right from day one.
Kip
Thanks Kip, that certainly makes sense and I thank you for your response.
Kipling, great build of an old classic. I always though this was the best of thier earlier kits. The wheels are anemic, which nobody pointed out until fairly recently. The working features always were a draw, in those days. My favorite was thier Dauntless, with the working dive brakes, and bomb! And the landing gear retracted, as on this one. Gool-lee! Just like on the real one! Well, sorta.
I love the Wild Cat Your's is very well done. I' working on the same model I only hope mine comes out that well
Tom
I was born in 1964, and and those old Monogram, where my first models. Great to see somebody give new life to this kit.