Dragon Pz. Kpfw. III Ausf. E in 1:35
Some history:
I bought this particular kit (# 9040 dated 1997) out of the stash from another modeller in Belgium, together with an Early Tiger I Academy kit, which I posted on here too. The Panzer III formed the backbone of the German Panzerwaffe in the first years of WWII but its relatively light armour (orginally 30 mm but later upgraded to 50 mm through bolt-on plating on the J-version) soon proved inadequate, especially in Russia.
The kit features the E-version that was used in abundance during the campaign in the Balkans. The 37mm Kwk. 36 was the vehicle-borne version of the standard light antitank gun and proved adequate in the early war years. Both the armour and armament of this tank was rendered obsolete quickly in later war years, especially after some nasty encounters with KV-series and T-34 red army armour on the Eastern front.
The research effort:
The Pz. Kpfw. III is a well documented vehicle and there are numerous b/w pictures of it on the web. I decided to model it as part of Sepp Dietrich's 1 SS Panzer Corps (Leibstandarte, LAH) during the invasion of the Balkans in April 1941. I envisaged to build a little diorama around it featuring the tank rolling through the narrow streets of an Athens suburb on April 27th, 1941. The build was out of the box but I added some scratchbuilt items and Tamiya figures from another Pz. Kpfw. IV kit to increase realism.
The build:
Building was a typical Dragon experience, with little more than half of the styrene actually used and instructions sometimes forcing the modeller to turn to other references in order to obtain a more-or-less historically accurate result. Otherwise, the build was fun but for professional reasons stretched over many months. As usual with Dragon, there were no figures included in the kit, but I cannibalized a Tamiya Pz. Kpfw. IV kit for a commander and a gunner in early war tank uniform in order to increase realism.
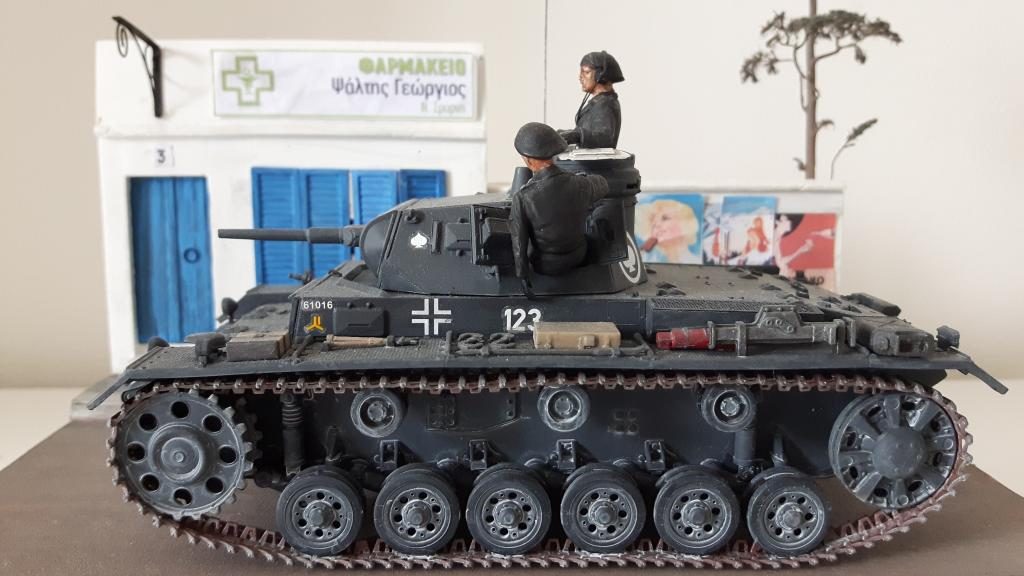
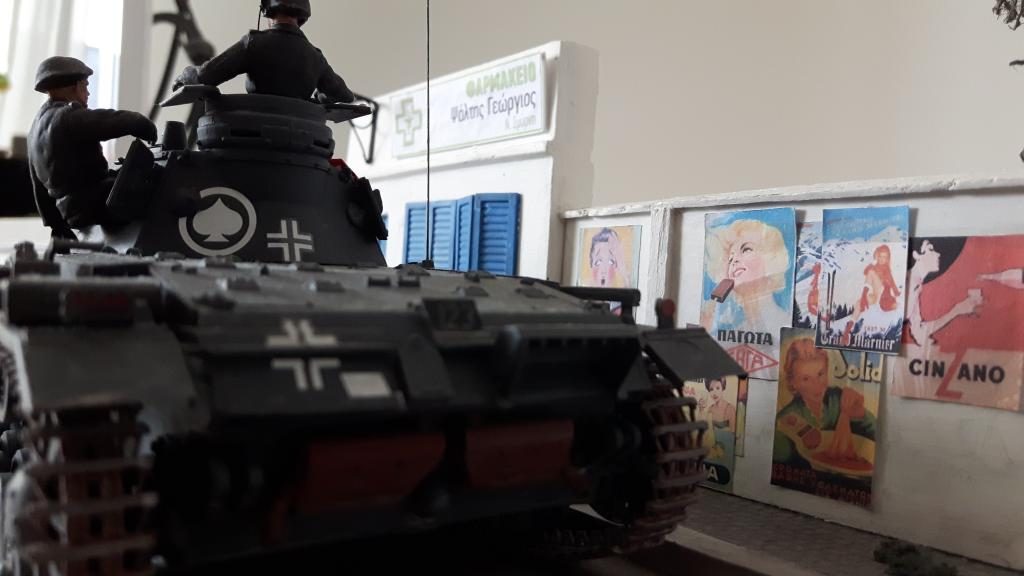
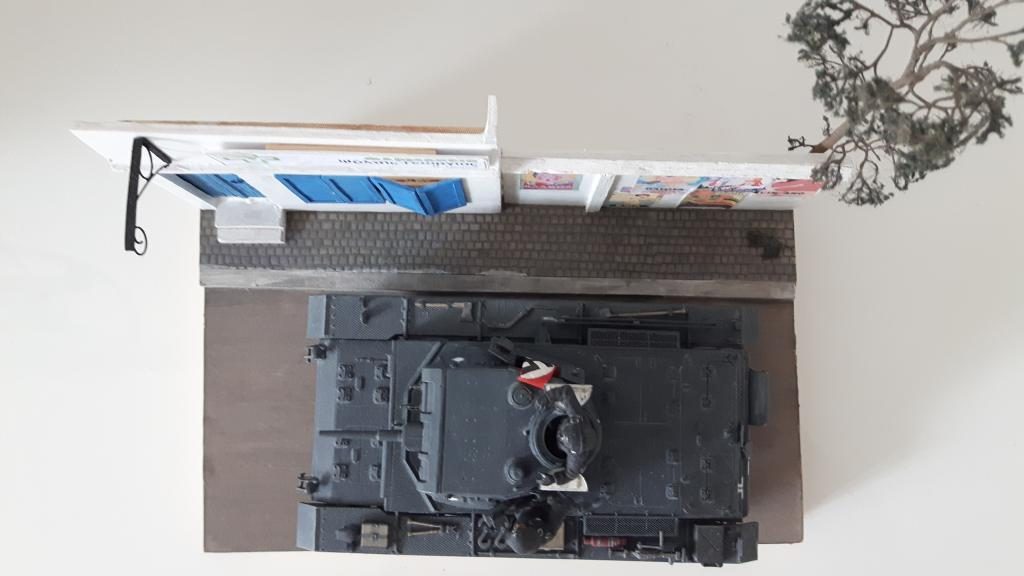
I decided to leave the turret hatches open on the vehicle. However, as the breech-end of the 37 mm main gun is not modelled in this kit, I had to "hide" the interior from the curious eye... I did this by fitting the gunner through the portside hatch and adding a folded ensign on the starboard hatch. It was usual practice for German motorized units to display a swastika on top of their vehicles in order to avoid friendly fire from the Stuka's roaring overhead on CAP duty. I took a lot of care ensuring that the swastika was not completely visible on the end-result!
The tank commander was featured of headphones and associated cabling made of 0,3 mm copper wire. I also added some fittings coming out of the spare-parts box to make the fenders of this vehicle look even more busy. Other than that, there were no aftermarket items, the kit was built pretty much out of the box..
Painting:
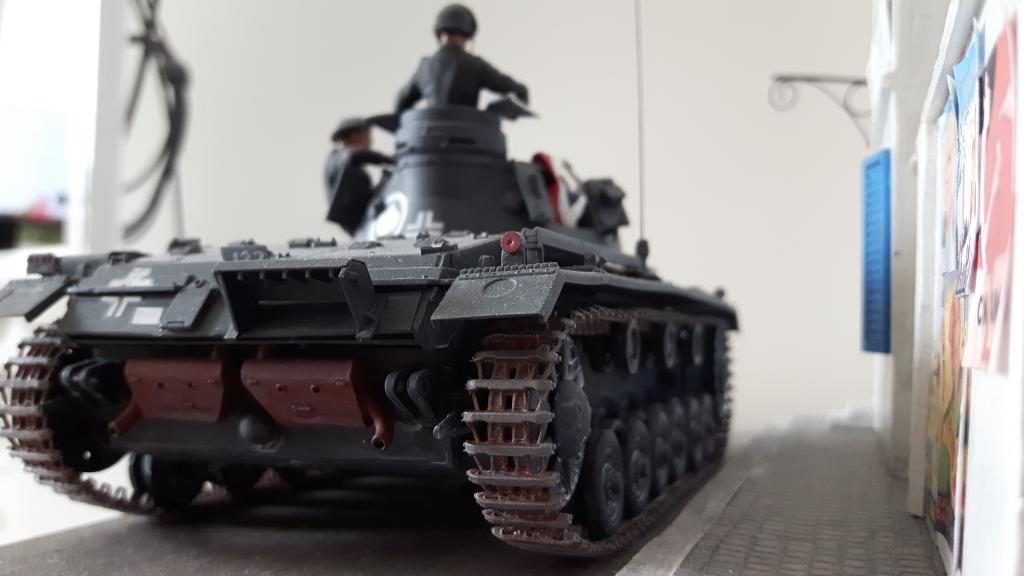
I airbrushed the vehicle first with a black base primer and then sprayed thinned Revell “German Grey” on top. I left the road wheels apart until the last moment, after I had fitted the individual link type tracks. After a black base primer, I sprayed the fitted tracks with a mixture of steel and red-brown thinned Revell paint. After that, I weathered the vehicle with a dusty wash of thinned white acrylics. For those of us who have not been to Greece: The climate is very hot and unhardened roads throw-up a lot of fine white dust when hiking, leave what happens when a 23 tonne Panzer is rolling by...
Figures:
I added two figures, one being the commander and the other one intended to be the gunner/loader. These figures were taken out of an older Tamiya kit (Pz. Kpfw. IV Ausf B) and were OK quality but not more than that. These Tamiya figures were assembled, corrected using some putty and then primed using a light grey color. I then hand painted them using self-mixed acrylics from a standard purpose art store. I made sure that the crew was featured of a nice acrylic sun-tan! This brings up the question with me about why do we want to pay a fortune for stashes full of acrylic model paints when the alternative is so much cheaper and more versatile? After it was all done, I was quite pleased with the result and all that was left to do was mounting the diorama.
The diorama:
For this model, I made a small diorama out of a wooden base of about 20 to 15 cm size.
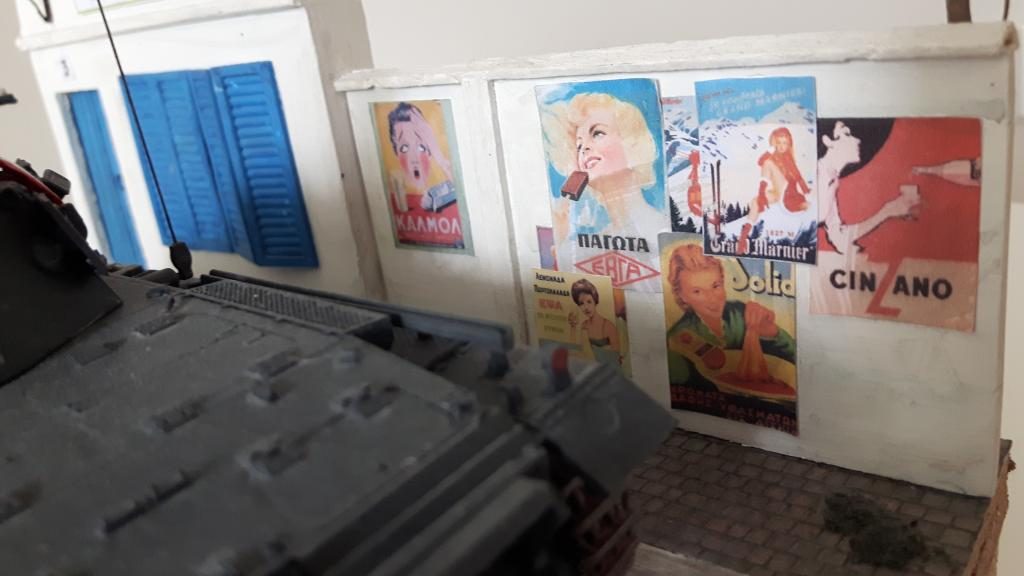
I wanted to model a street in an Athens suburb on April 27th, 1941. So I researched the web for old postcards and considered how to give the surroundings of the 23 ton armoured vehicle a "Greek touch". I concluded that the best thing to do was to build a shop (Actually a pharmacy) in white, with doors and window shutters in the well-known Greek mediterranean blue. I also looked-up some vintage posters to graffiti the walls, if possible with Greek wording. I found everything on the internet and printed them in the right size using a standard purpose color inkjet printer. After adding a photo-etched tree and careful painting, all was ready!
Conclusion:
I enjoyed this 1:35 build of the Dragon Pz. Kpfw. III Ausf. E, the resulting diorama is nice to watch and quite realistic I find, especially the Greek wording on the Pharmacy shop and posters do the job, taking you back to that early 1941 springtime Sunday in Athens! I'm happy about the end result and hope you like it too!
I think I spent about 40 hours totals on this one.
Happy modelling!


Another fine example of your armor talents, Michael...nice work.
Great build , and clever street scene.
A nice simple scene to show off your tank. I quite fancy a Cinzano now...
Looks nice - and the dio is a nice touch - not the usual crumbling walls and rubble!