Review: Thunder Model 1/35 Case VAI Tractor – Build Review
What now?
Between all the new kit announcements over the last couple of months, one in particular struck my interest. A new company by the name of Thunder Model was about to release their first kit, a Case VAI tractor in 1/35th scale.
I had never heared of that vehicle before, but a quick look around the Interwebs convinced me that this little tractor was somethng I wanted. Having built US military vehicles for the last 25 years, I am always happy to see something different, a bit esoteric even. So I jumped on the opportunity and pre-ordered the kit from LZ Models, an European distributor for Thunder Model.
The subject
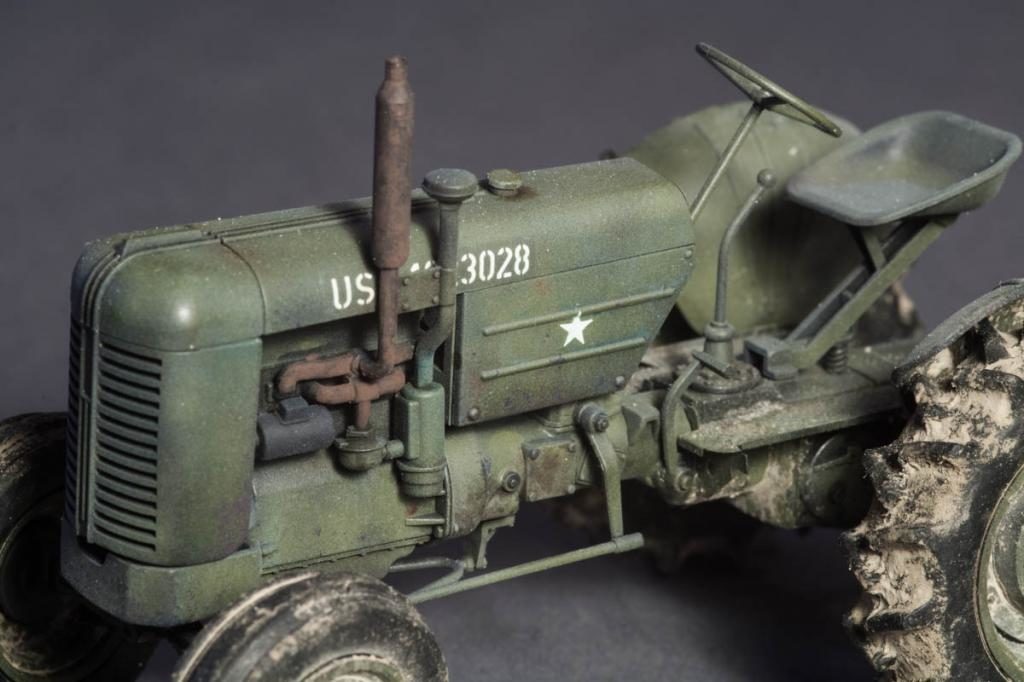
The Case VA was a tracor produced from 1942 to 1956, with almost 150,000 units being built. There were a bunch of different models, like VAC, VAO - and the VAI variant depicted here. This was used by the US armed forces in a bunch of different roles, including engineering work and aircraft towing.
The kit
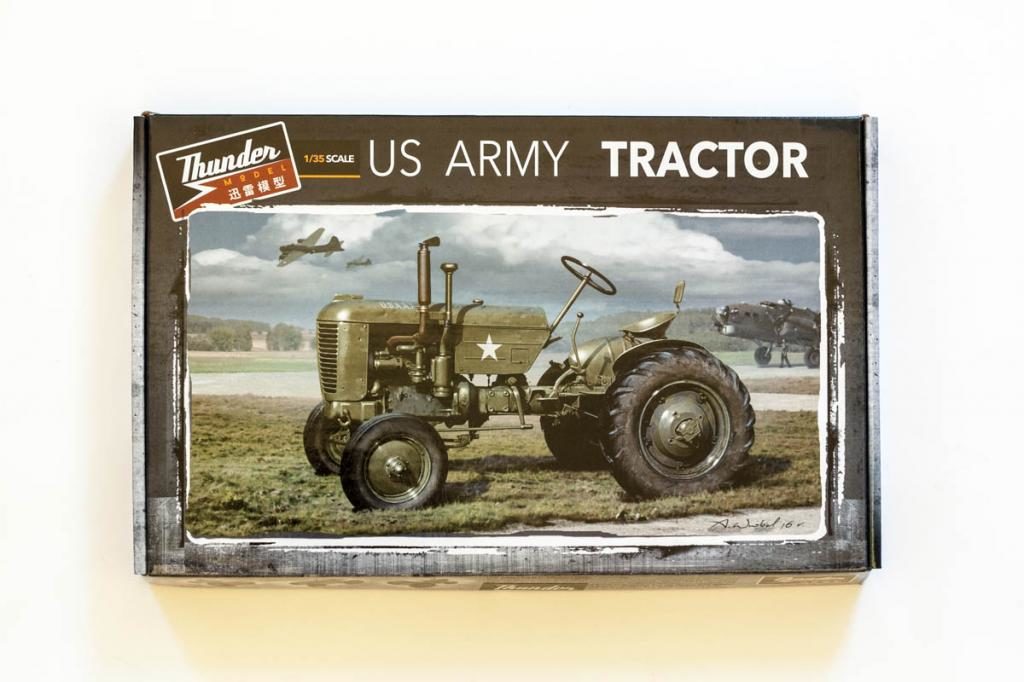
The kit comes in a very nice small box with a top opening lid, the artwork being very well done. Inside the box you will find two light grey sprues (seperately bagged), a bag with the vinyl tires, a small decal an PE sheet, the instructions and a sperate full color painting guide.
Instructions

The kit instructions are of the standard b/w drawing variety, are clear and easy to follow. There are, however, a couple of small errors, with parts being shown without their respective part numbers. That is something I would call a beginner's mistake, and nothing to really worry about. As the parts count is fairly low it is easy to locate the parts on their sprues and just keep on building.

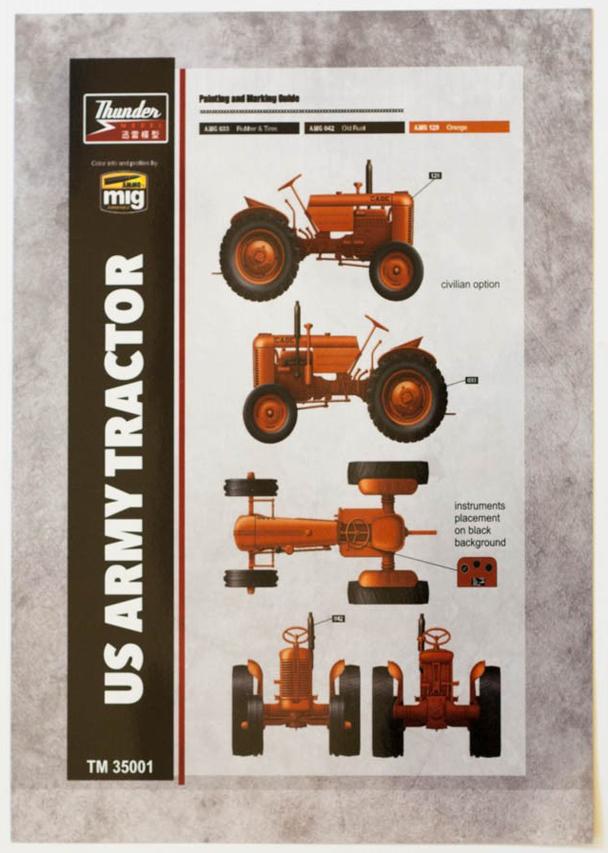
The color callouts are in Ammo by Mig colors only. This follows the trend of new(ish) kit manufacturers cooperating with certain brands, thereby helping each others business. Not a bad thing per se, and if you don't want to use a particular brand, you can always use a color conversion chart, right? Still, I am not convinced that this is the best approach for novices to the hobby, making it unnecessarily difficult for them to find the right colors.
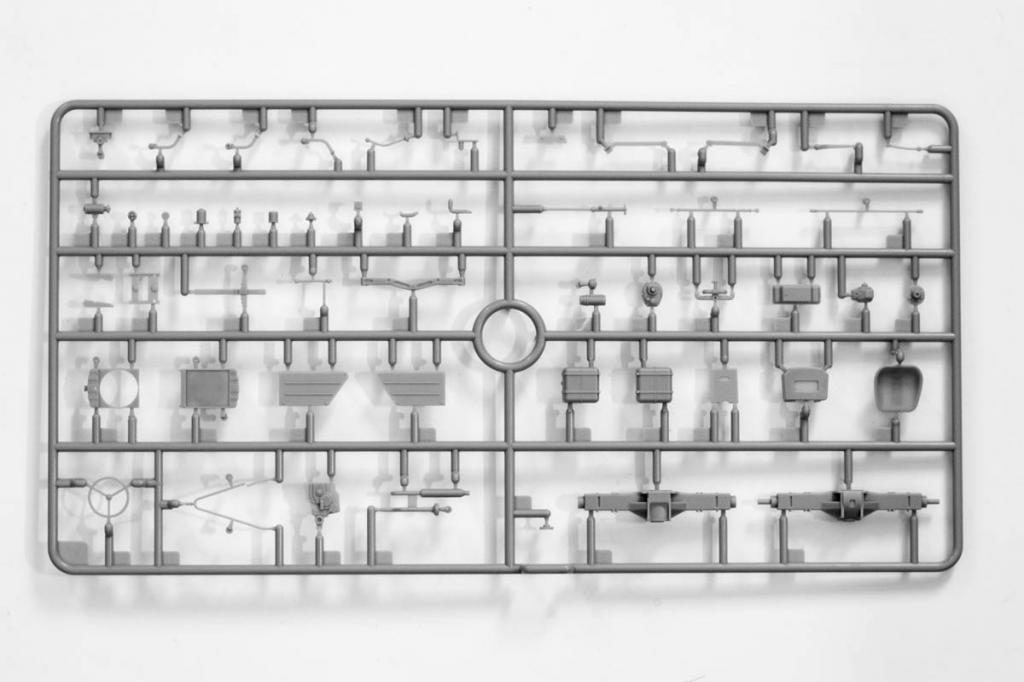
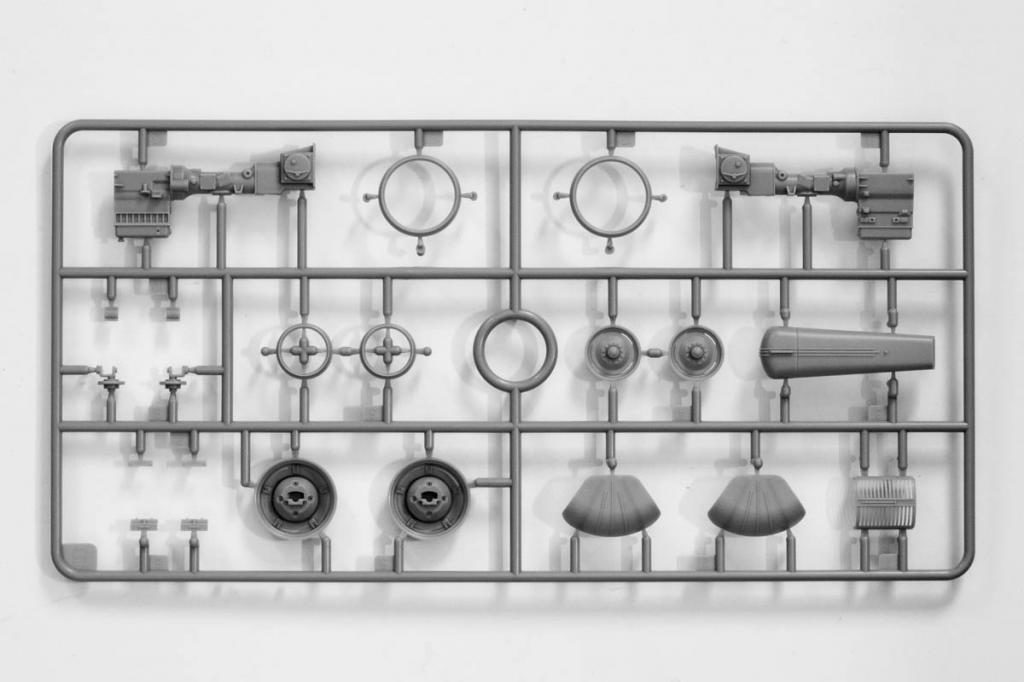
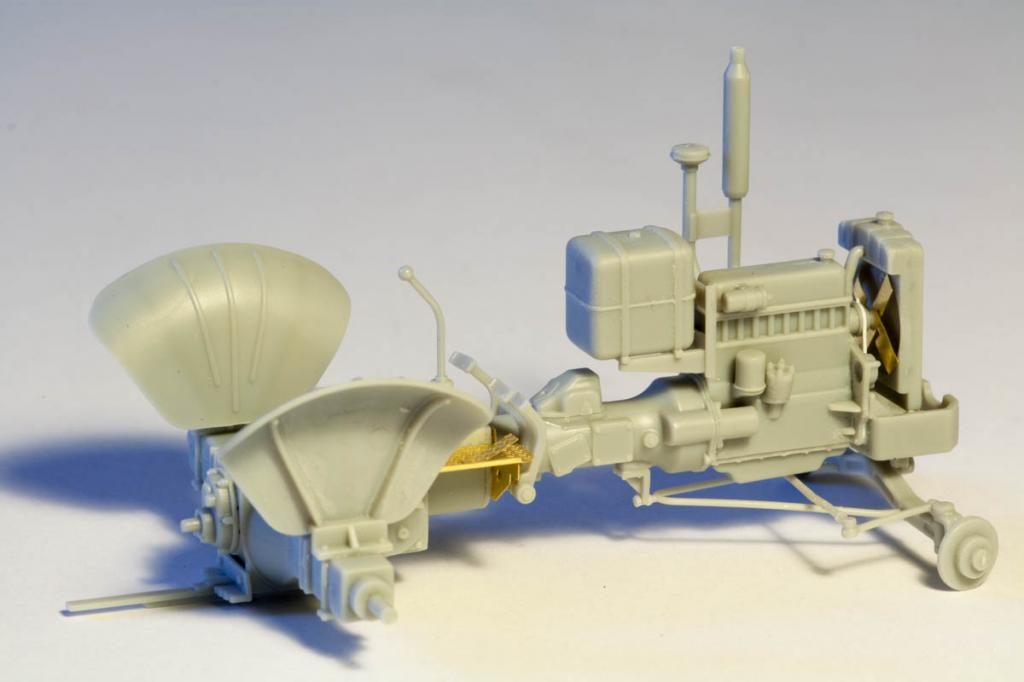
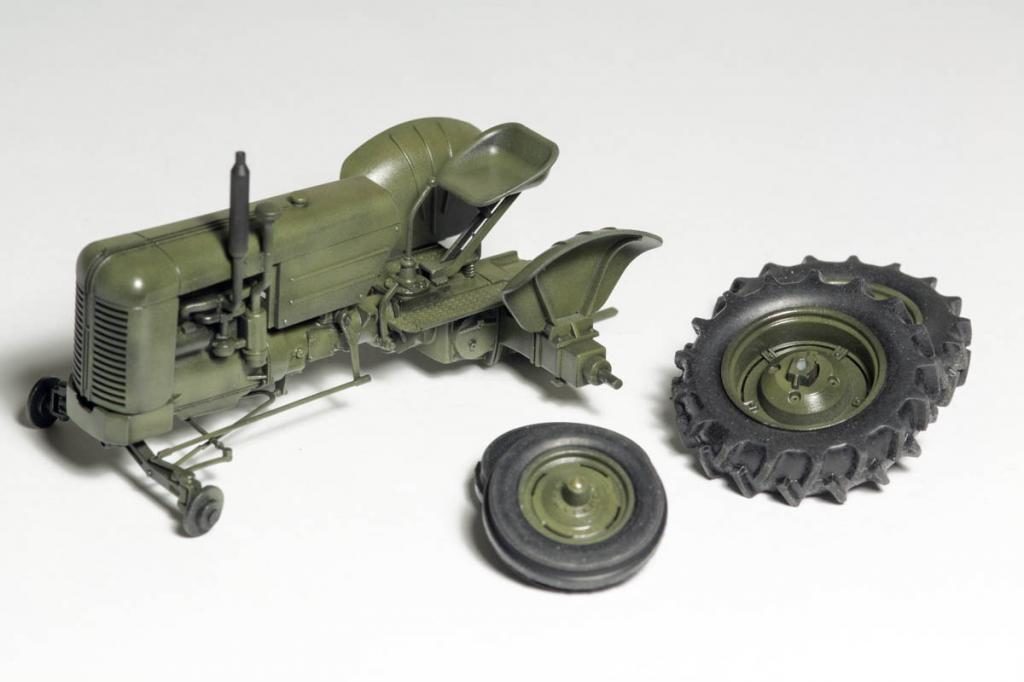
The parts
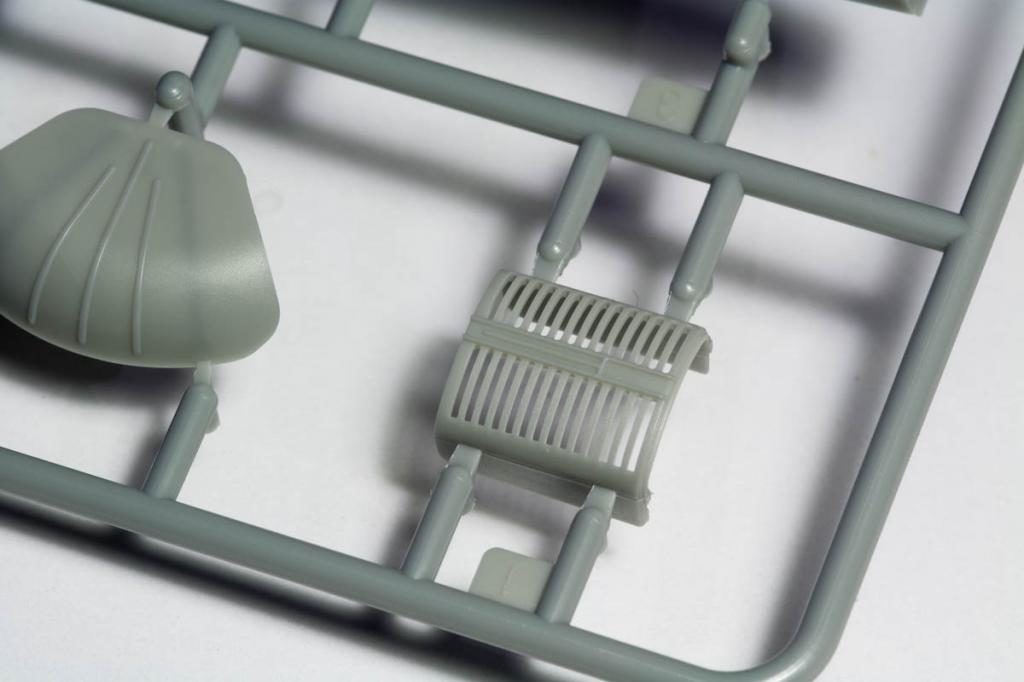
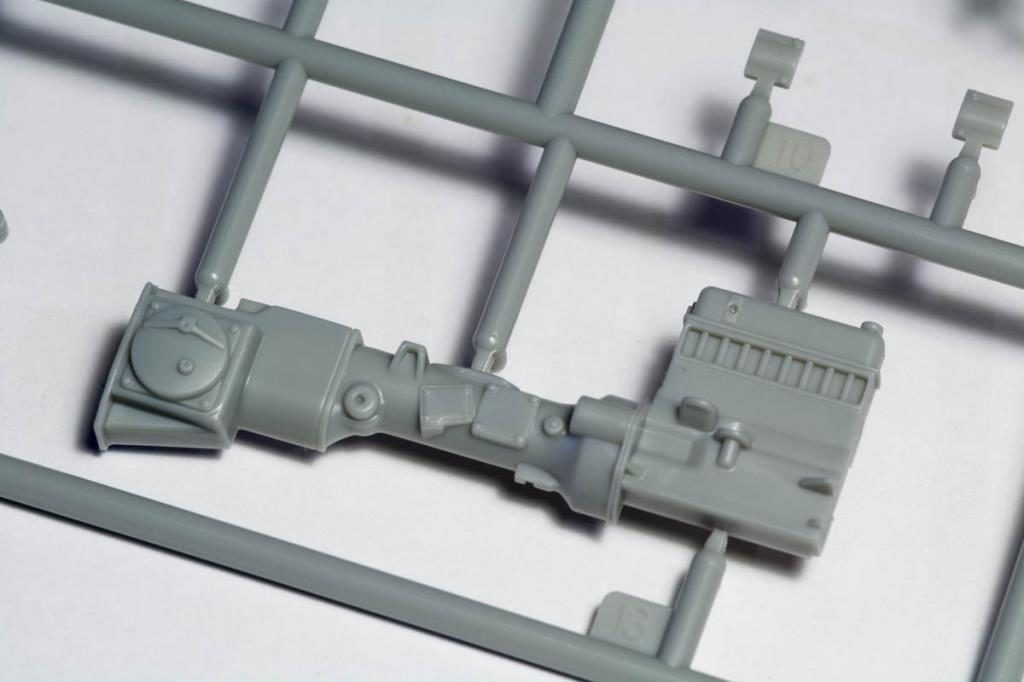

They are beautiful. Period. Sharply molded, no flash, sprue attachment points are small and made in a way you can get to them eith your favourite plastic cutter. Care has to be taken when removing the small parts, as they are naturally quite prone to breakage.
Detail is delicate, and the parts break-up is sensible - no silly multi-part assembly just for the sake of parts count.
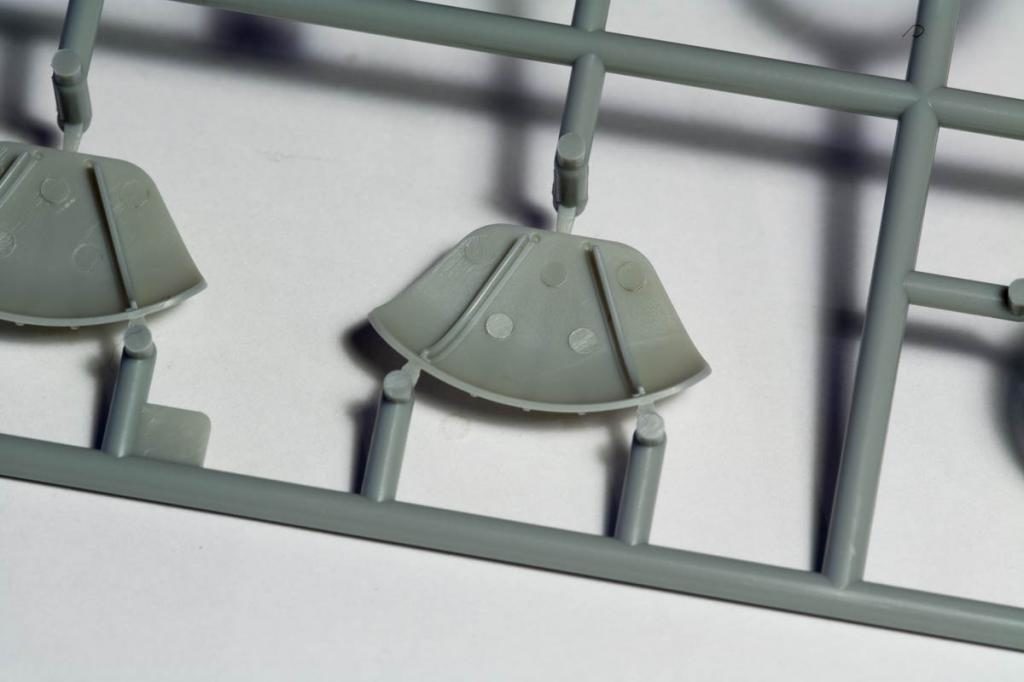
There are a couple of ejector pin marks on the inside of the mud guards, removing them will need some careful sanding around the strenghtening ribs.

The vinyl tires are a bit tricky to judge. If you don't like vinyl, you will have to get some resin replacements from LZ Models. If you are ok with it, you will be happy with them. There is a rather pronounced center seam on the rear tires - which is perfectly fine when compared to the original. The real tires had a seam that is easily spotted in pictures you can find on the Web (just don't forget to bring such a picture when entering into a contest!). However, I would suggest sanding away the seam on the raised portions of the thread, a task best accomplished by putting the tires in the freezer for 15 minutes before sanding them.
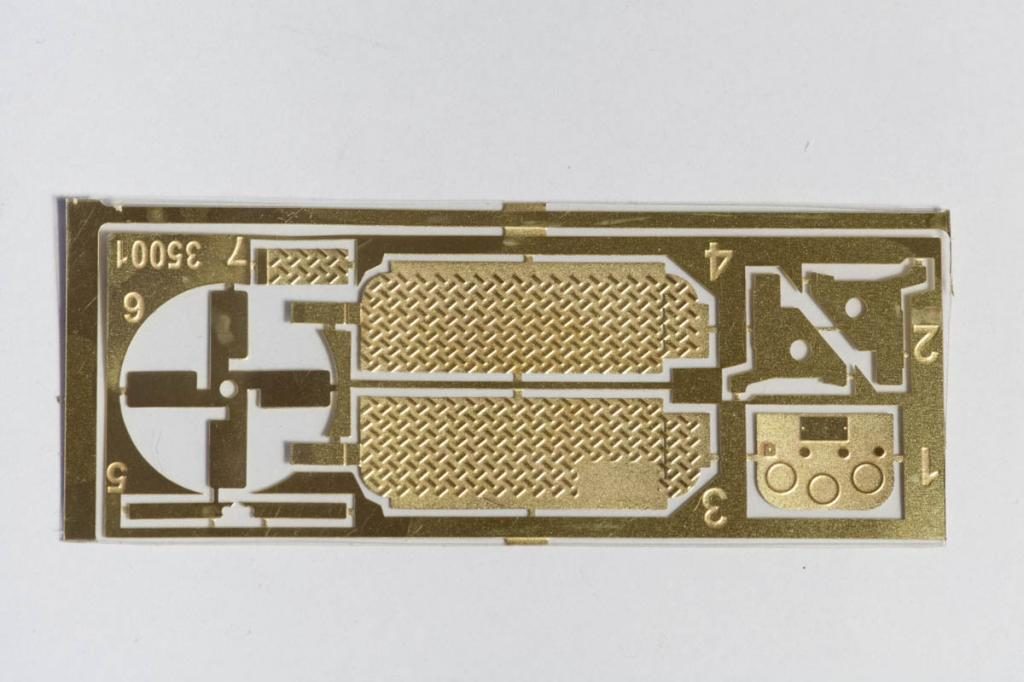
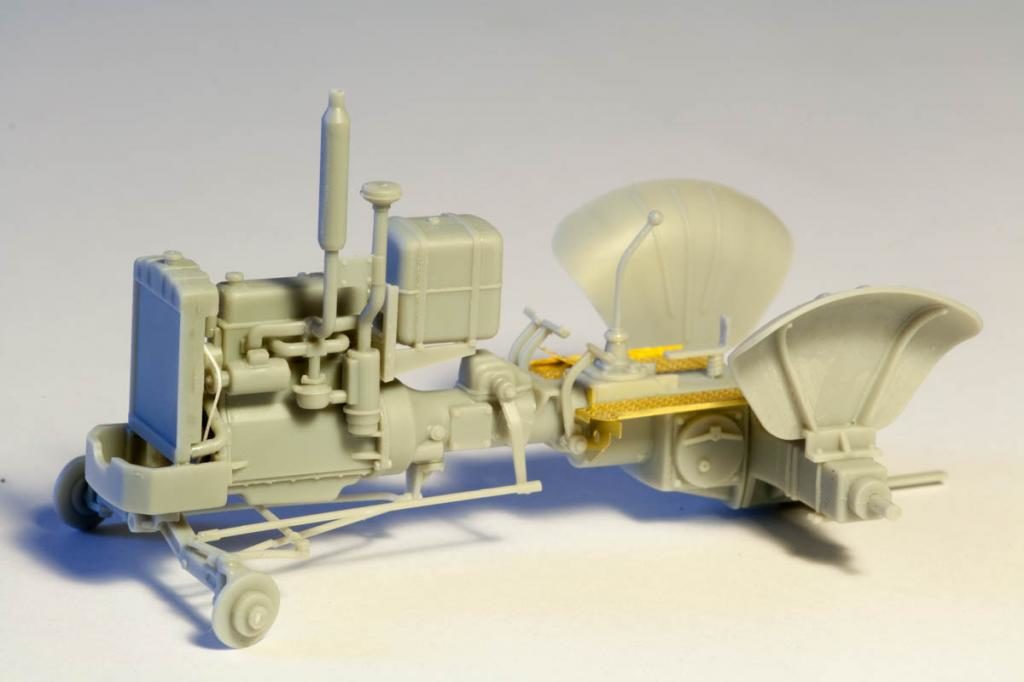
The PE parts provide you with the cooling fan blades, two nicely textured thread plates, the instrument panel and a couple of strengtheners. the thread plates need to be bent to shape, take care to understand the instructions before you start bending away.

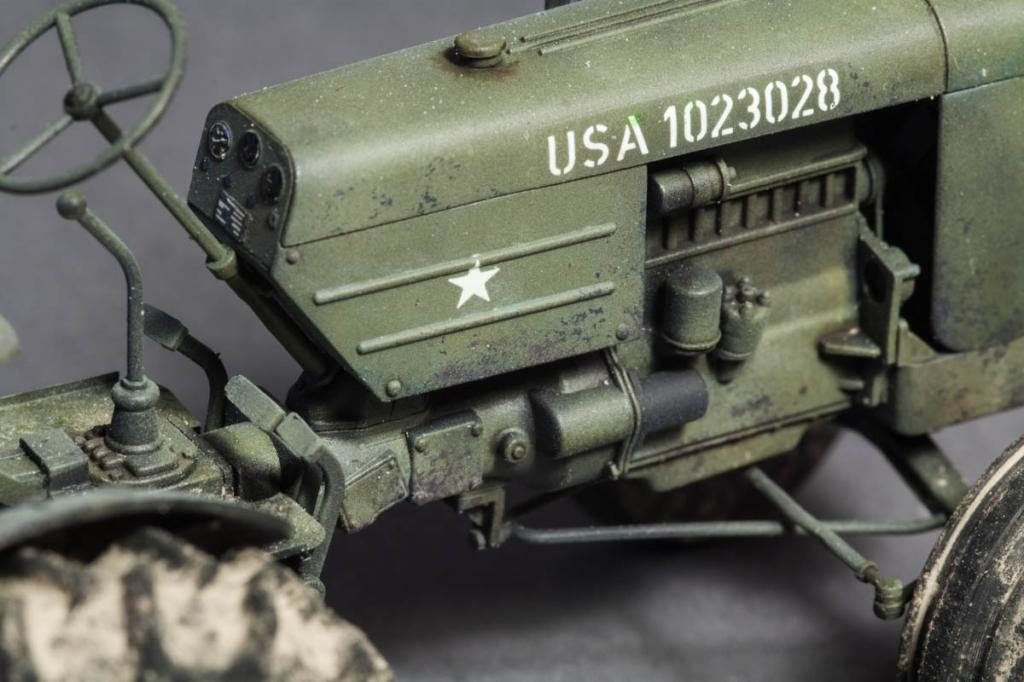
The decals give you three marking options, which are US Army, USAAF, and a civilian tractor. I am not sure if the USAAF variant is complete, maybe missing the serial number. Some pictures show the s/n in blue drab, something easily overlooked in b/w images - so check your references!
Building it
There is not much that can be said about the construction. I followed the instrcutions step by step, something I don't usually do, but I wanted to see if they make sense. I did, however, leve the cowling, the seat and the tires off until after painting and weathering, making it easier to reach all the areas.

Care has to be taken when aligning some of the engine parts, as the locating points are not always completey clear. The drive belt was made with a thin strip of paper, this was the only thing I had to add. If you wish, you can also add some wiring to the engine, something I chose not to do and keep the built very much OOB.

The front wheels are not movable, so if you want to mount the them at an angle you need to decide up front and glue the brake discs into position.
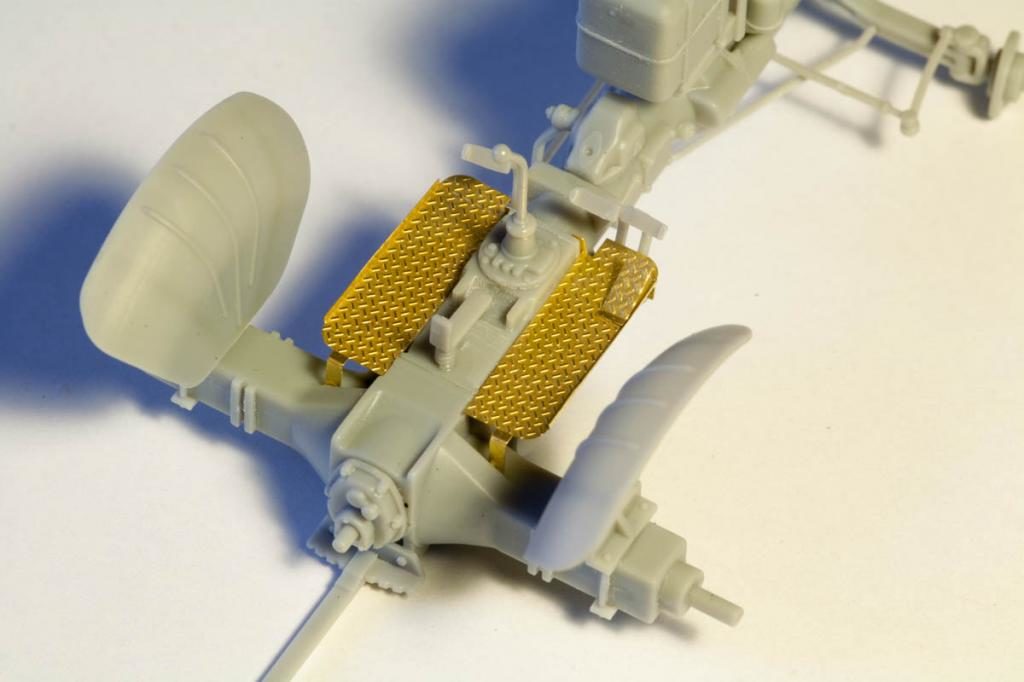
Attaching the PE thread plates requires careful alignment to keep the straight and level, as there are no positive locating points. I used slow setting CA gel glue, which gave me enough time to align everthing.
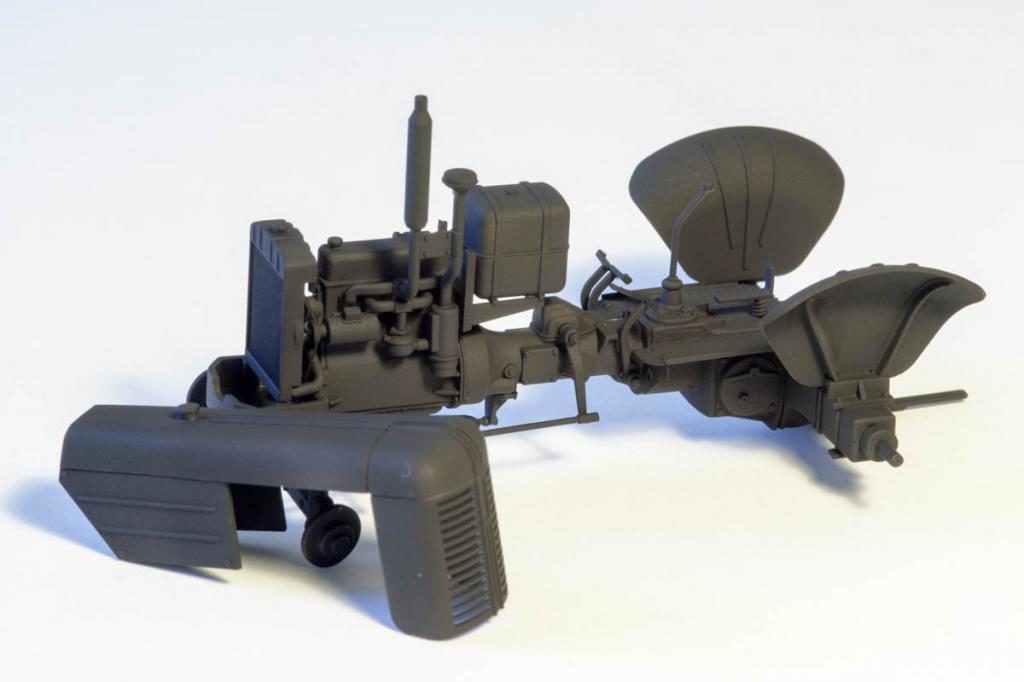
Painting
I decided to go with the US Army version, using Life Color Olive Drab 319. The whole kit was primed with Tamiya XF-1 Flat Black. After checking for issues (there were none), the OD color was airbrushed in a somewhat patchy fashion, using low air pressure and trying to go easy on shadow areas.
After the paint had dried, I gave everything a coat of Tamiya X-22 Gloss, thinned with Gunze Levelling Thinner. This combination makes for a very glossy and hard wearing finish, perfect for decalling and weathering.
Weathering
This is were the fun starts! First, the whole vehicle was given some fading and color variation, using the oil dot technique with blue, green, black and buff oil paint. Then, a pin wash was applied, using Mig's Panel Line Washes, black and brown. After that, I reproduced scratches and chipping with a mix of Vallejo Dark Grey and brown, using a sponge and a fine brush.
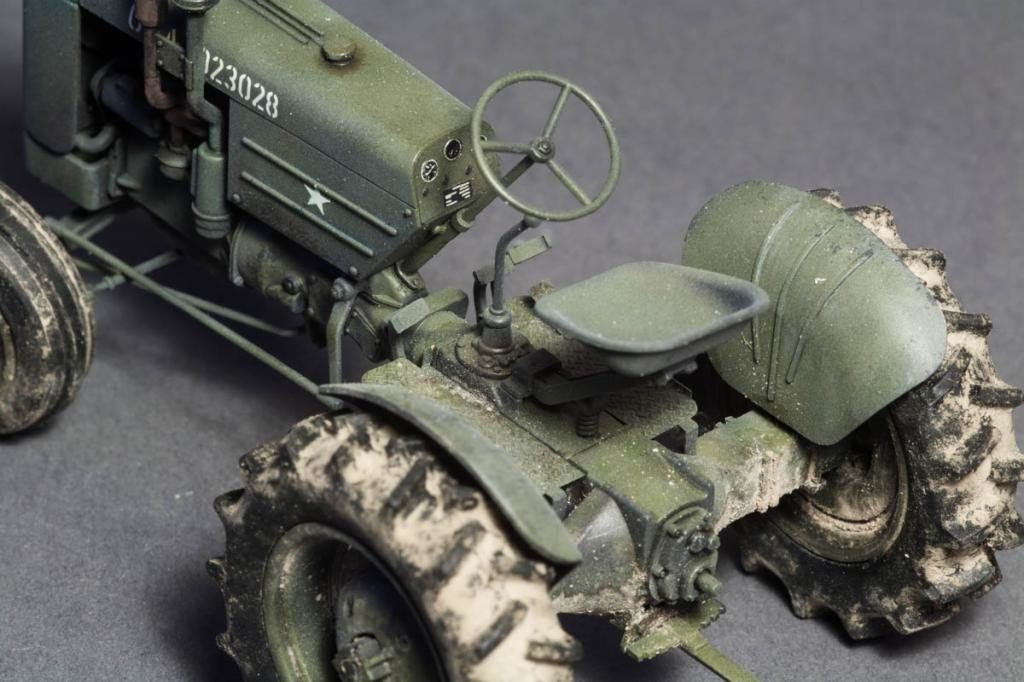
After a light coat of Vallejo Matt Varnish, I started applying Mig pigments to the wheels, the underside of the tractor, and the mud guards. A liberal amount of European Earth and Rubble pigments were sprinkled on, Mig Pigment Fixer was then carefully dropped on with a fine brush.
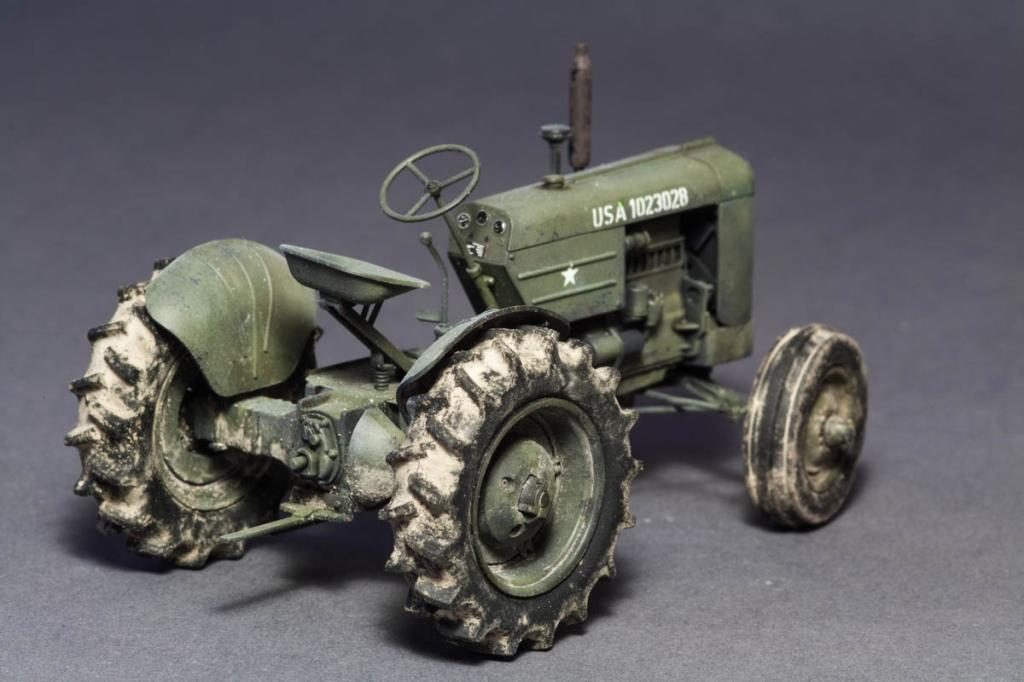
Conclusion
If I had to give points, this one would be an 11 out of 10 for me. The subject choice is brilliant, the execution almost flawless. The kit goes together very quickly and exceptionally well, with no fit issues and hold-ups. What I like the most is the possibilities this little gem holds for painting, weathering and dioramas.
I made it a habit to keep a "sanity stash", consisting of kits that I know and can turn to whenever I feel the need for something fast and easy (grinding through the Hobby Boss USS Arizona can provoke that feeling, belive me...).
Thunder Model's Case VAI tractor has definitely made it into that stash.

Excellent article Boris especially on a subject you rarely see. Nice job.
Great review! Can't wait for the version with the loader as I find that one even more interesting.
Cool! Very cool Boris! What a neat little kit. It looks great!
Interesting kit.
For the "airplane-family" it should be available in 1/32 ans 1/72 scale.
I forgot 1/48 - cause that's not my scale.
Great article a perfect build review. And nicely done model. I second the need for this in 1/48th scale.
Welcome onboard at iModeler, Boris. What an wonderful review, really having it all from sprue layout to the completed model. Very informative, and what a cool subject. Thanks for sharing
Exactly what I was gonna say, Martin...to the letter.
Excellent model, and great, informative article! I only build aircraft, but grew up on my grandad's farm driving all sorts of tractors, so there is a place for them in my heart.
I like that. Perfect weathering.
A huge source of fun reading and watching the pictures. Many thanks for sharing this. Now the Hobby Boss Arizona please ...
Gorgeous!
I think I posted something about this company here a few months ago, at the time they had just brought out this kit and one other, but yours is the first build I've seen of the tractor - very nice.
Someone in our club bought this at Telford but I don't think he's made a start. Always good to try something different.
That is a good looking tractor! Would be nice f they did it in 48th, as well.
Vauu i Like!
Absolutely stunning! Great article as well.
Thanks for sharing the article and pictures.
It looks great. Like Hans Wilhelm mentioned, something for the scale 1/32-1/48-1/72
Thanks Boris,
Just opened this kit and your review is a big help. My dad had a Case VAC (row-crop version) so i’m Going to build the farm version of the VAI. Two year later than your review, but still valuable info.
I am currently building it and can only agree to all you said.