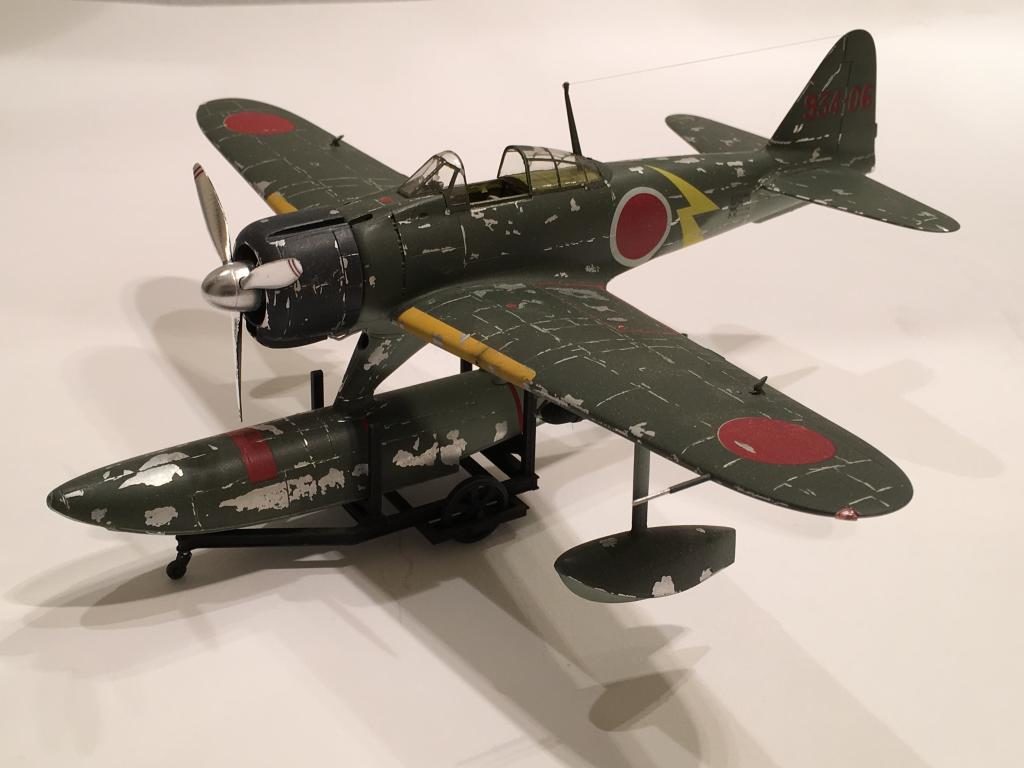
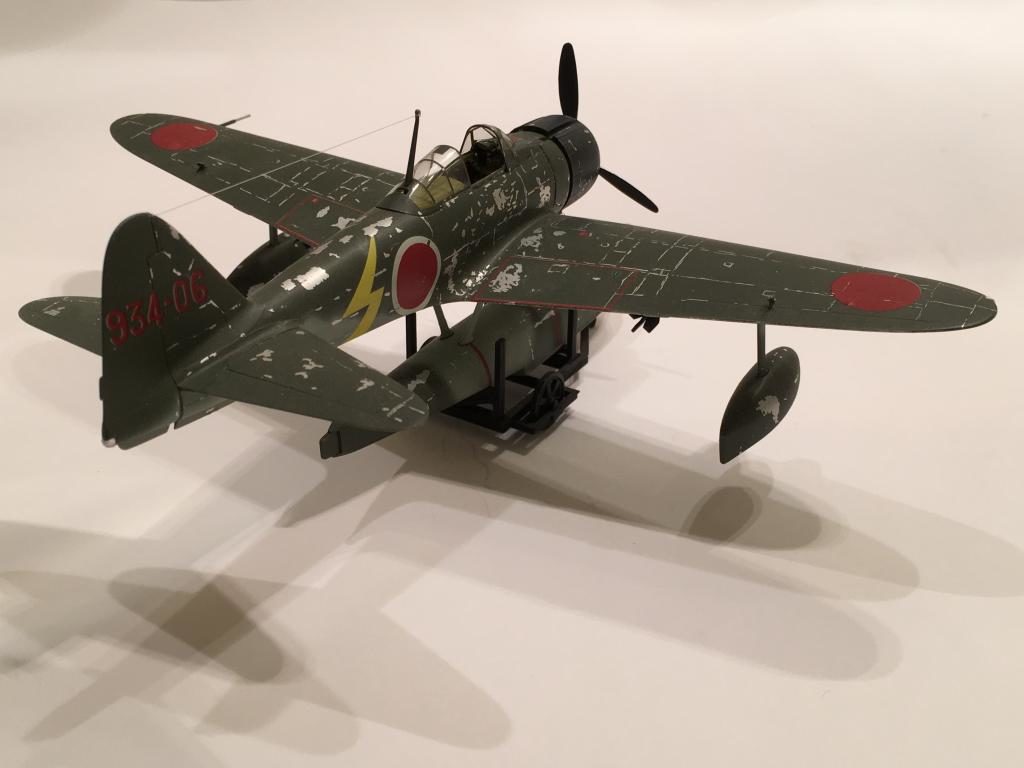
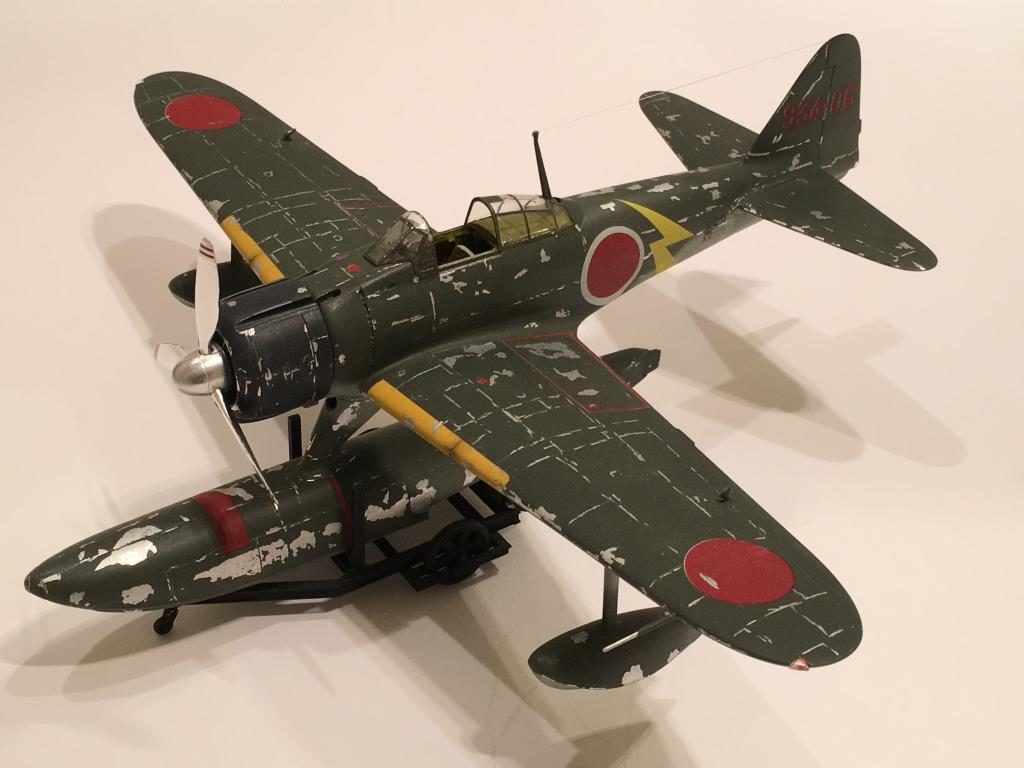
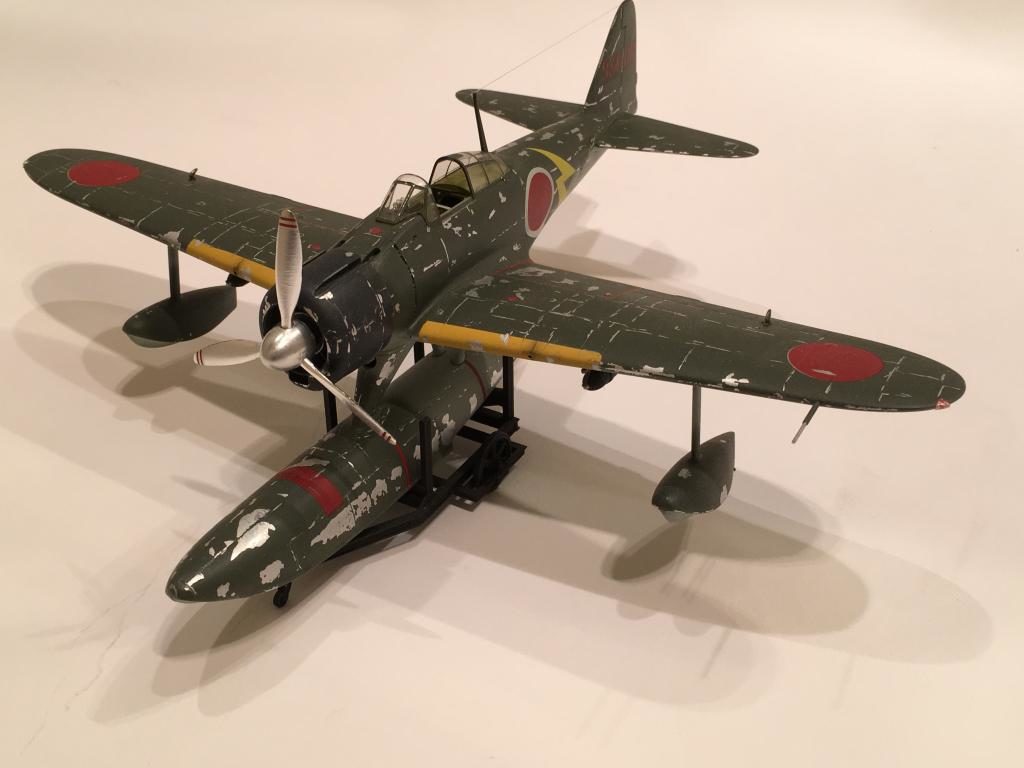
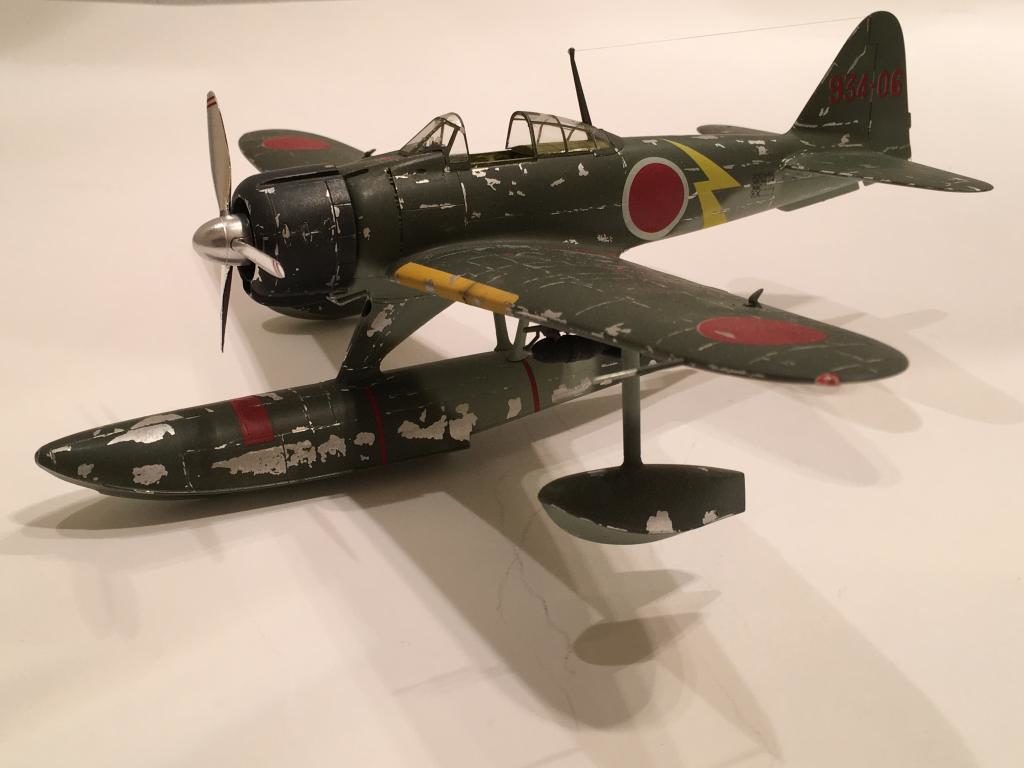
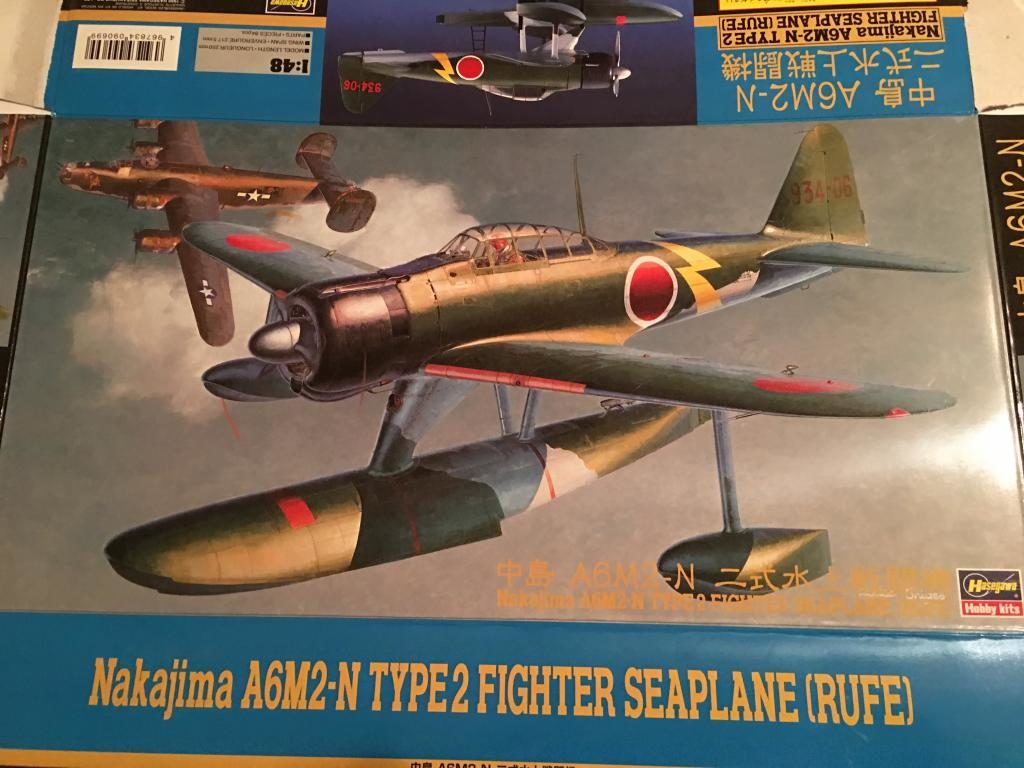
1/48 Hasegawa Nakajima built A6M2-N “Rufe” Type 2 float plane
It's been a little while since I have posted any of my builds here. I've been really busy with moderating the Midway Group build, while trying to get a few more planes built before the 75th Anniversary of Midway in June.
Here's a little article about this float plane that I built right around the year 2000. It was definitely not a new build so it didn't quite qualify for the recent "Water Wings" group builds. (which I watched an awful lot... some great work went on over there by the way).
I wanted to wait a few days before I posted this "Rufe" to allow time for other Imodeler members to post their work from the recent Water Wings group build.
This is the Hasegawa rendering of the "Zero with floats". If I'm not mistaken, all of the "Rufe" float planes were built by Nakajima, hence the "dash N" suffix.
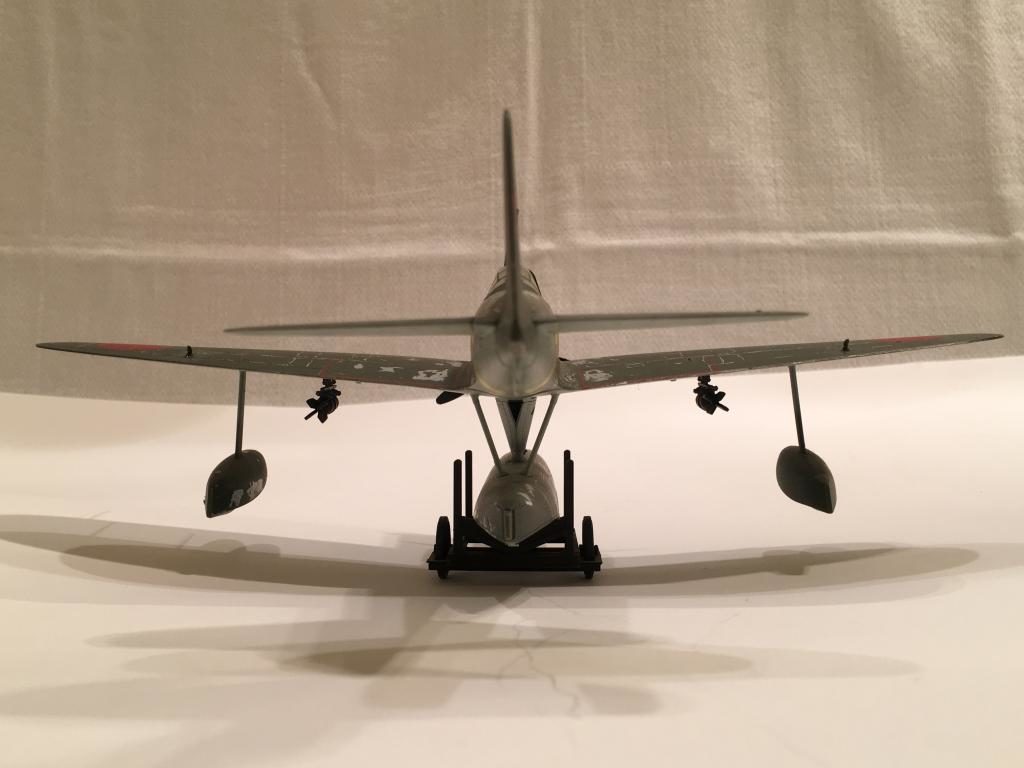
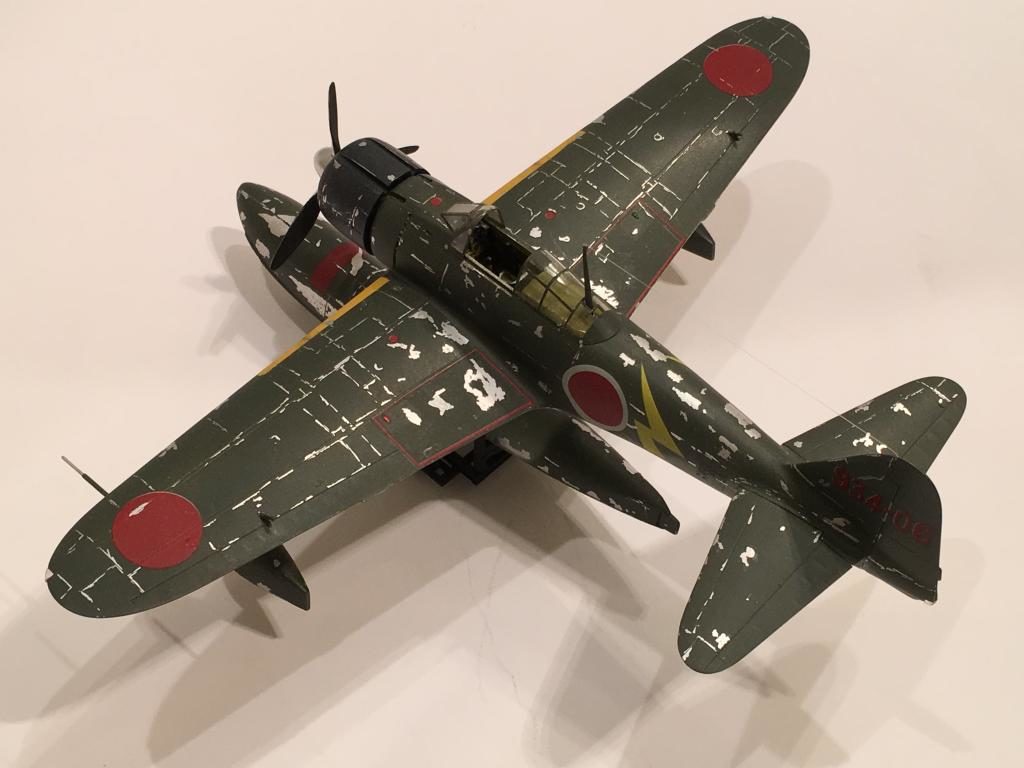
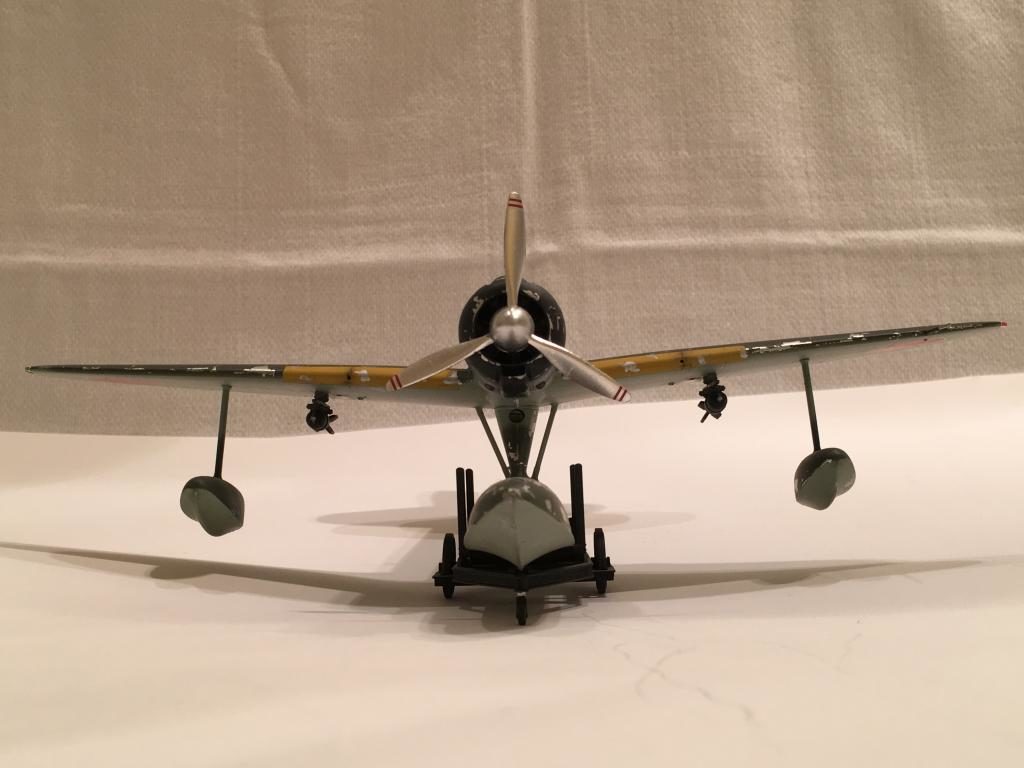
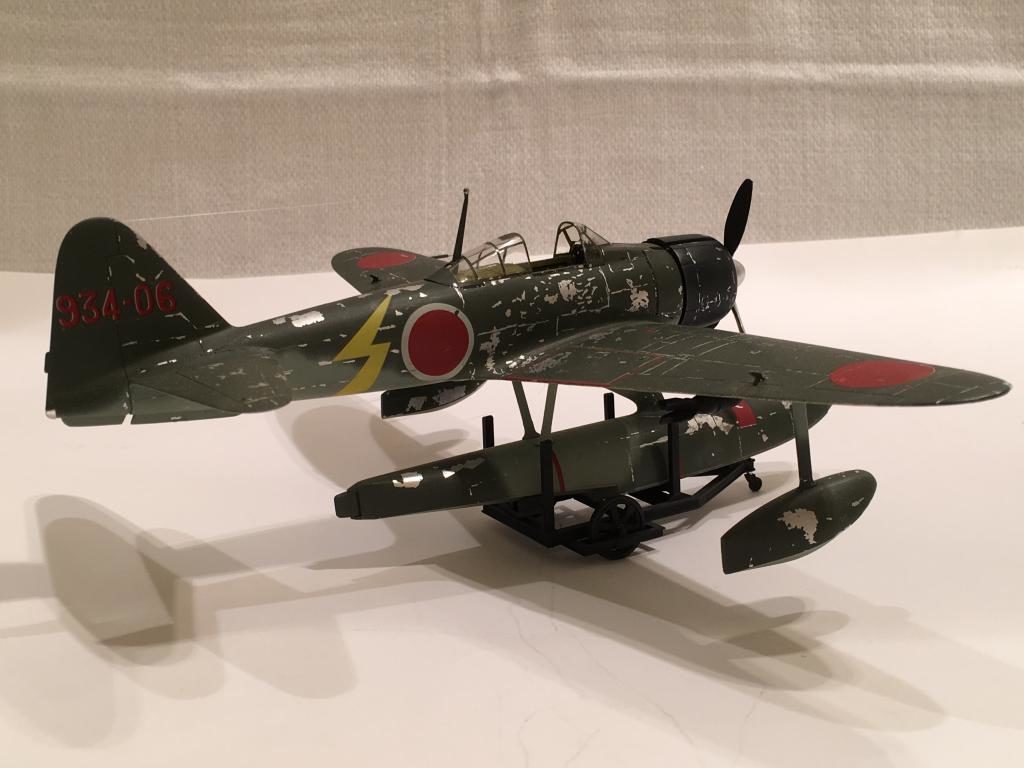
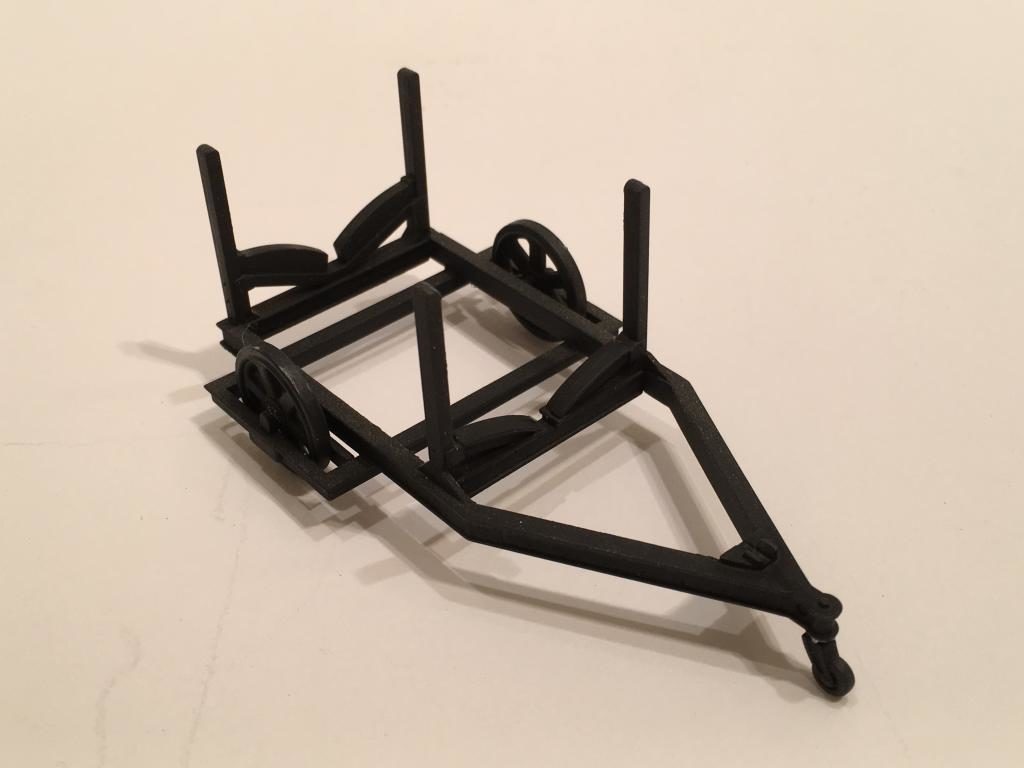
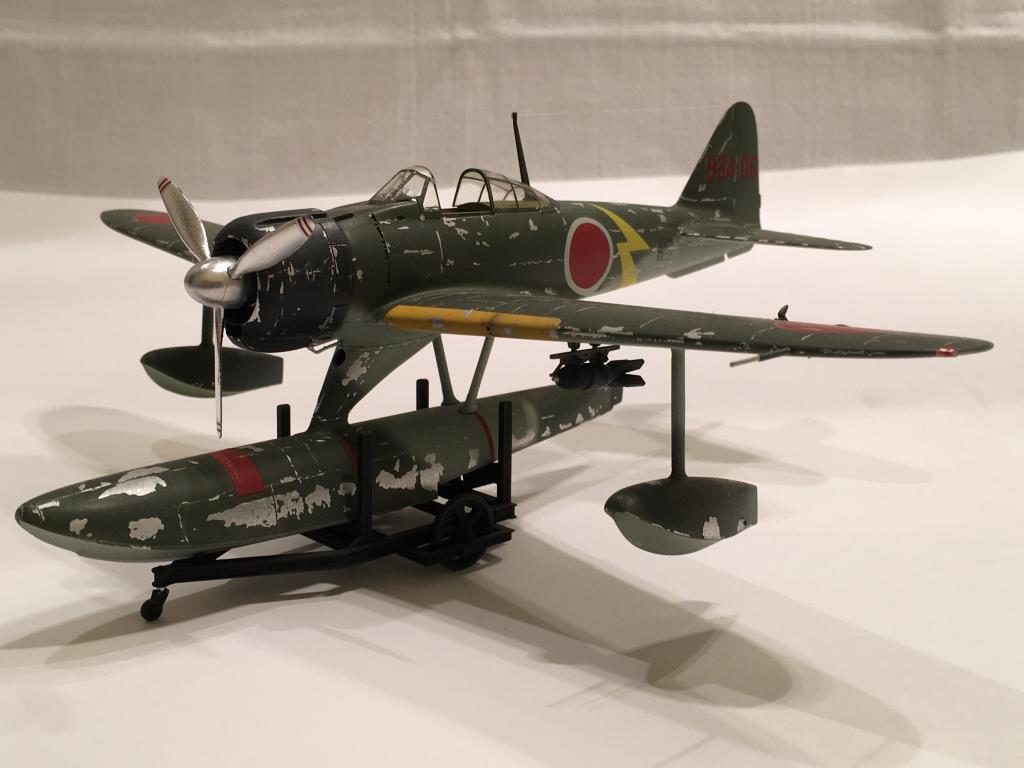
This kit was built right out of the box, and I even used the kit decals. I did however add some serious modelling clay as weight to the front end of the float to keep this one from being a tail dragger. This kit came with a really neat little trolley car that holds the plane nicely. I think it was modelled after the real version. I'm not 100 percent sure about that though... but it looks the part after seeing several photos of the original ones with a "Rufe" perched on top of it...
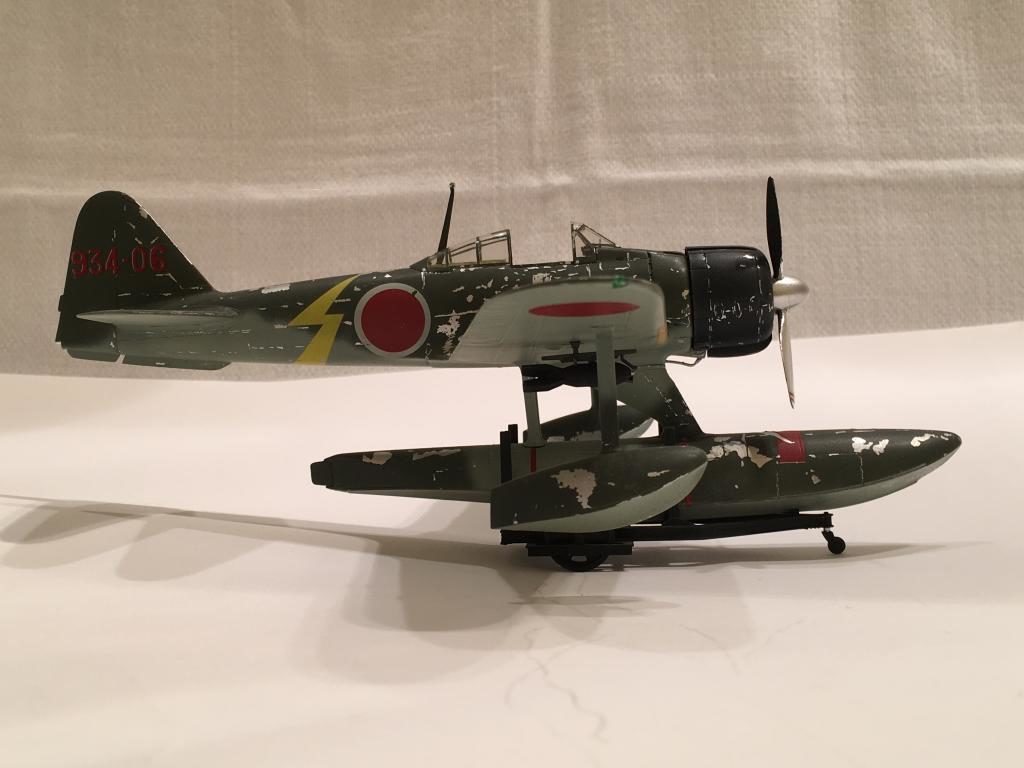
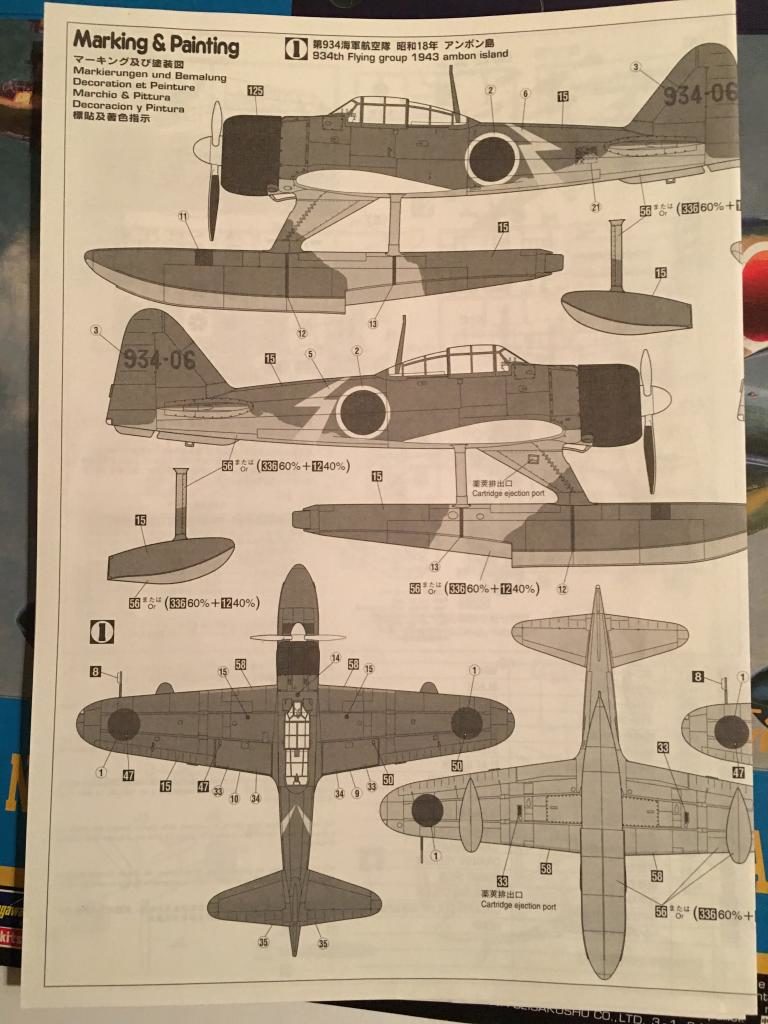
One neat little bit of information I learned when building this kit: The two smaller red vertical lines that you see on the main center float, were used as locating points for the beaching trolley. The ground crew simply lined up the red lines with the vertical posts of the trolley. Then the plane was balanced properly to remove it from water. These thin red lines also just happen to be directly under the larger main float support that is faired in from the fuselage, and the smaller twin rear float support struts. Clever indeed.
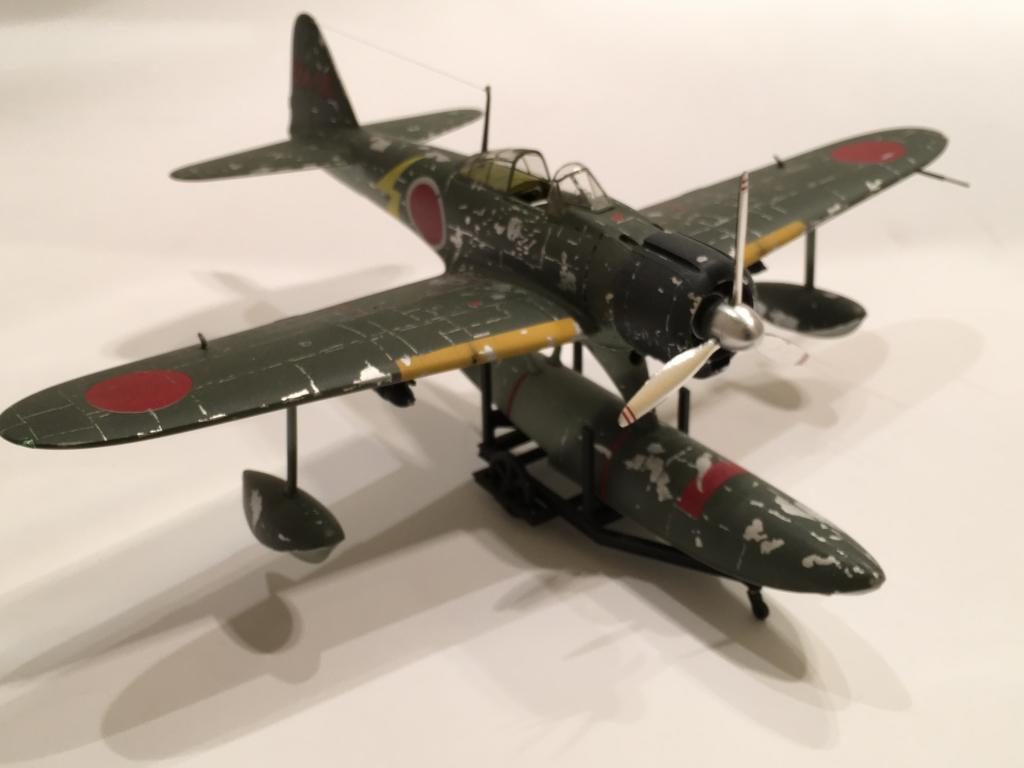
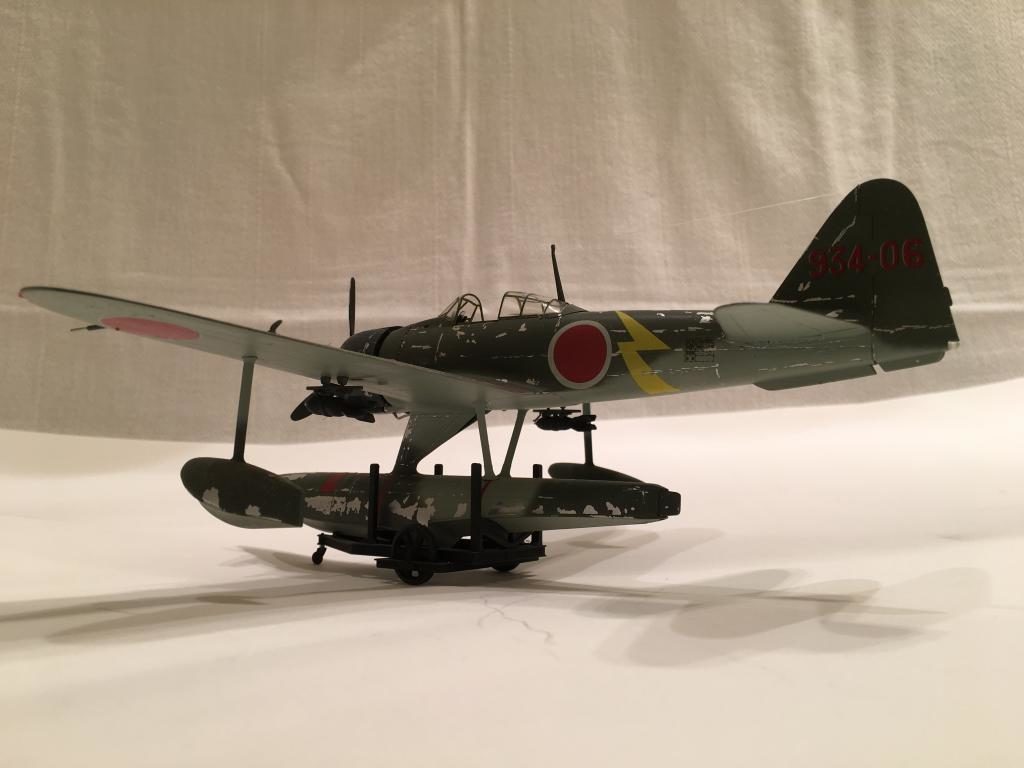
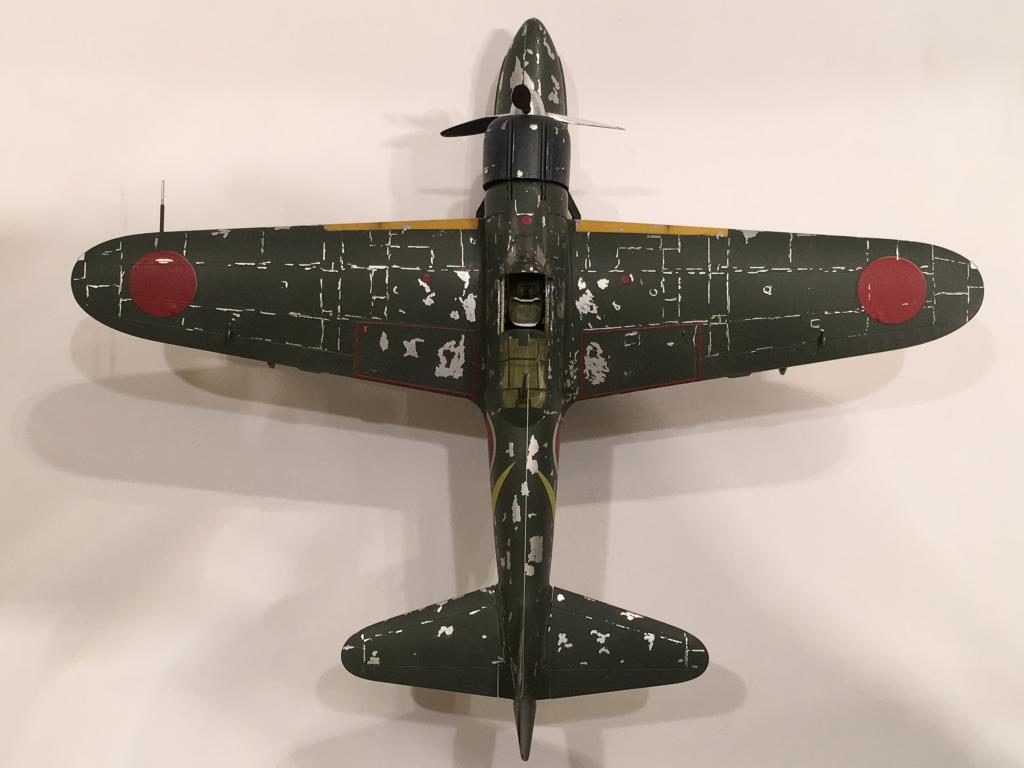
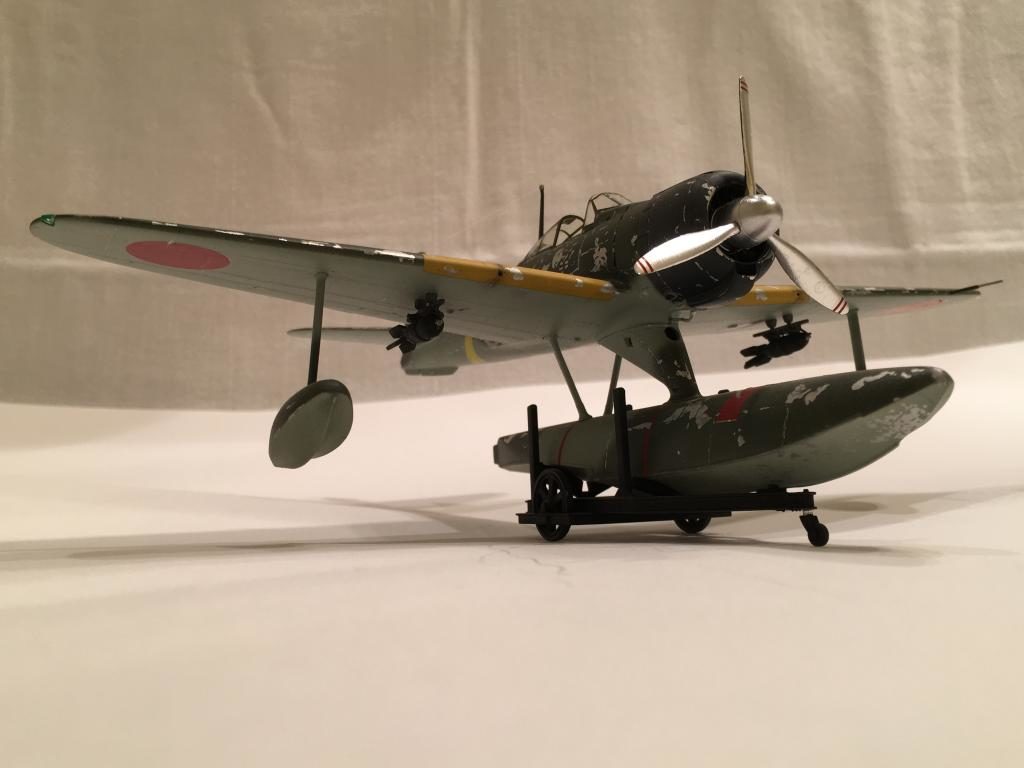
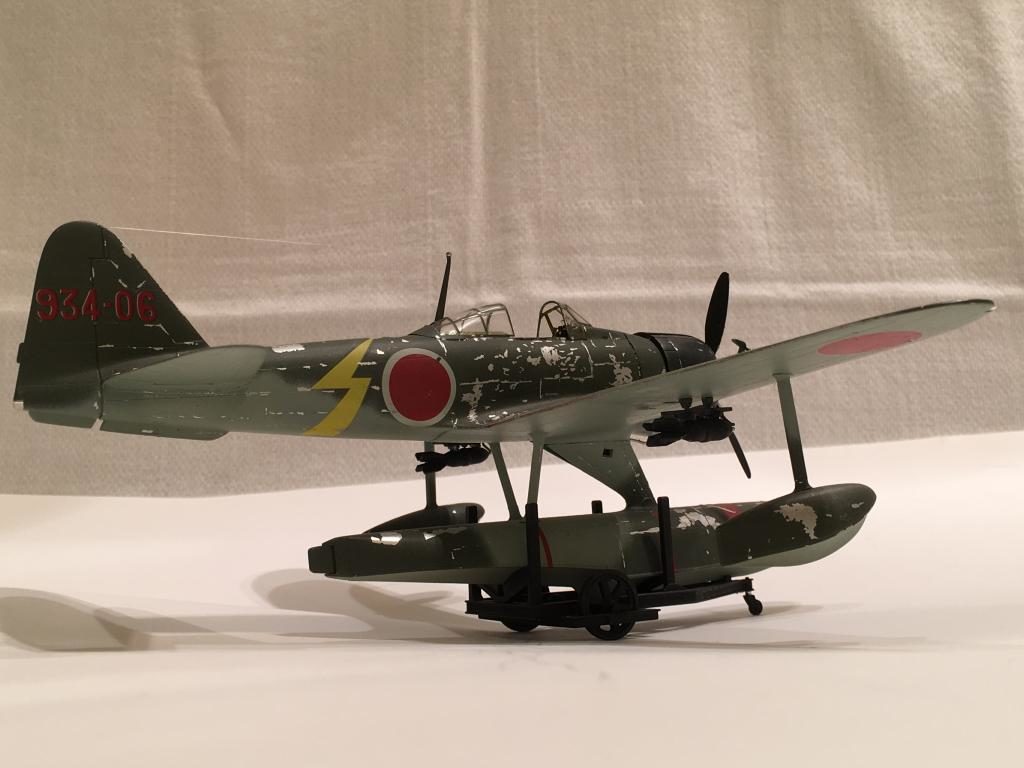
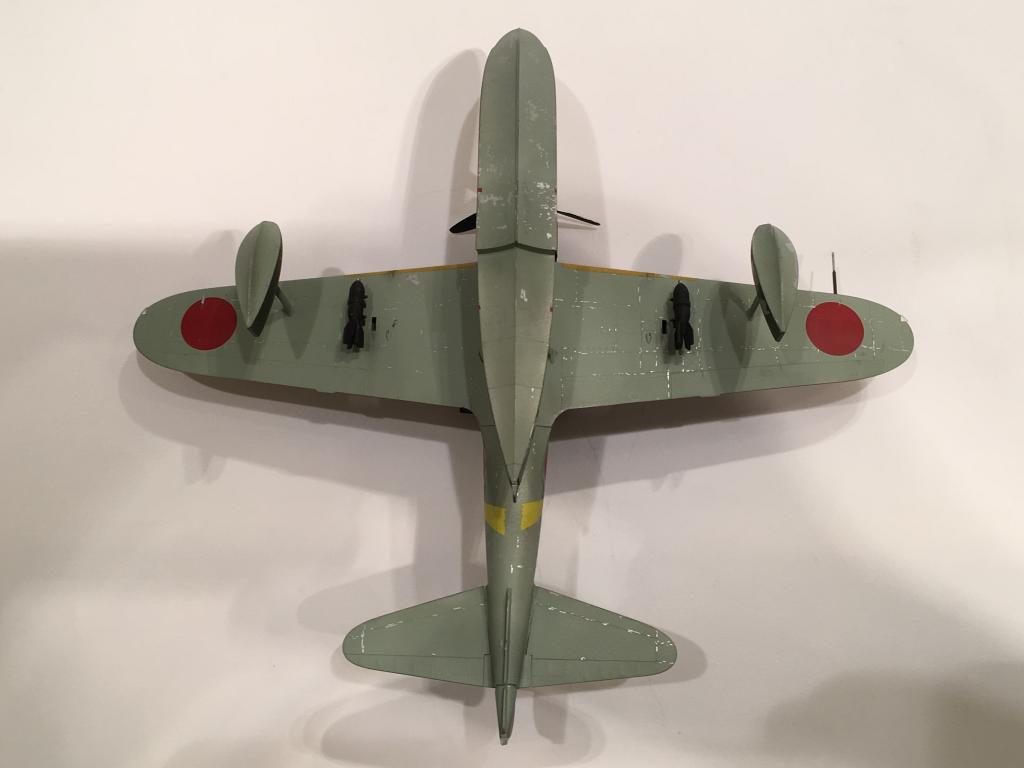
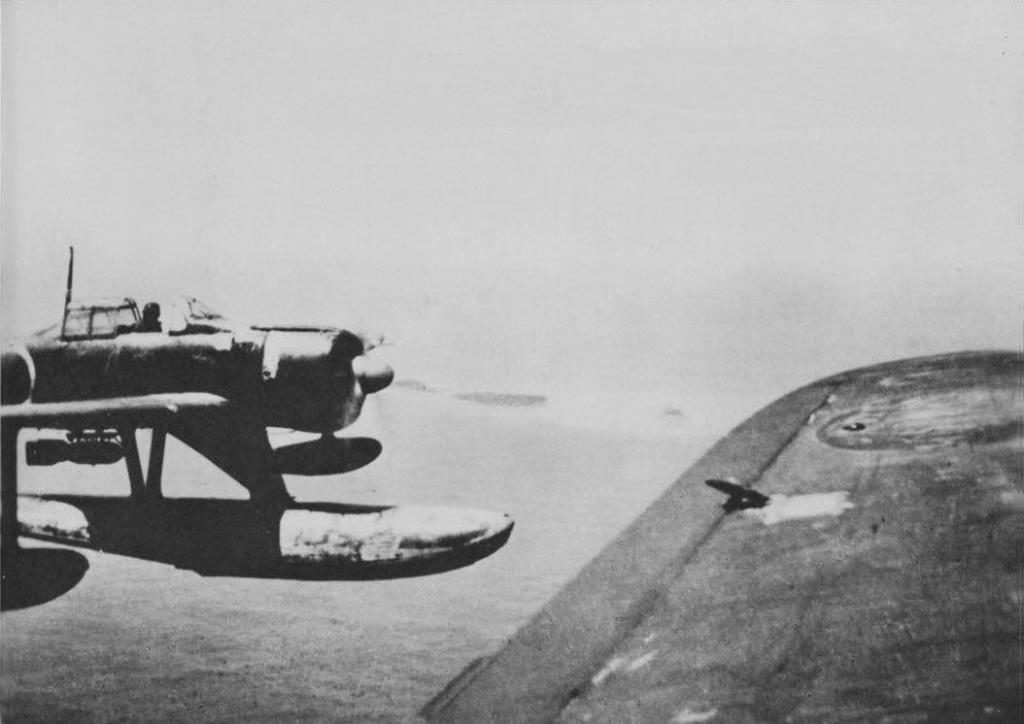
This one was from the time in my modelling adventures where I was experimenting with various ways to chip paint. I honestly think now that I over did it in some places... But possibly not. Check out the last photo that I found online. It looks pretty beat up and is also carrying underwing bombs...
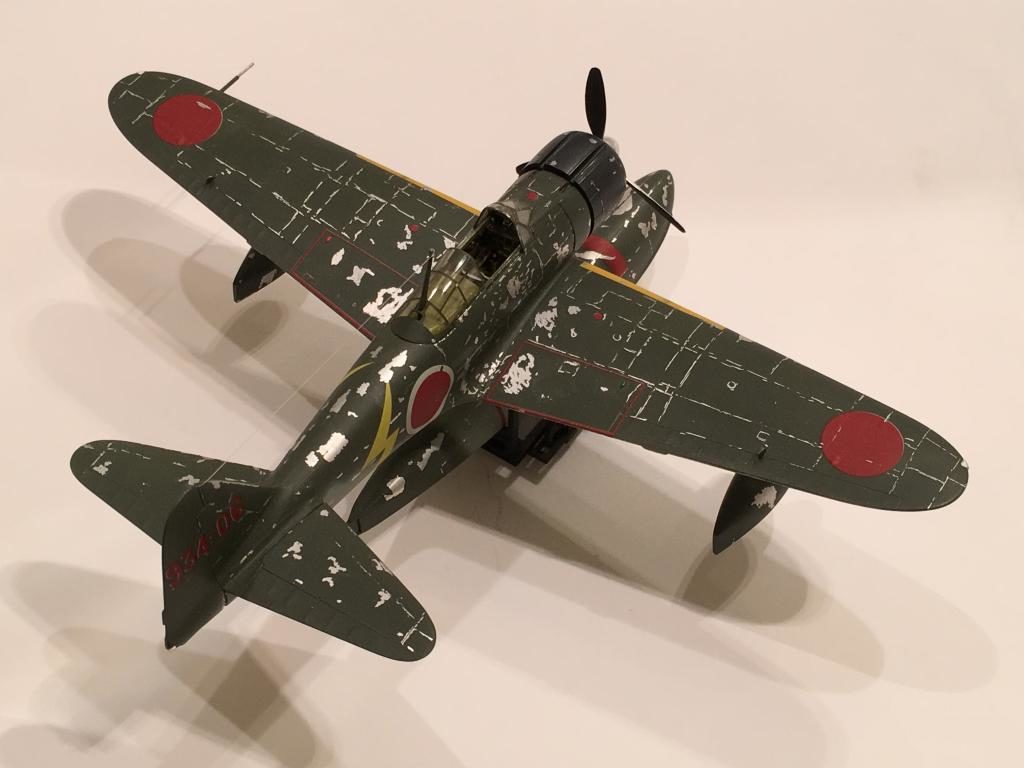
This plane was built then sprayed with Model Master "Metalizer" paint. It was buffed to a nice shine, and then I used tape to peel the top layer of "Nakajima Green" off the top. In areas along the panel lines, I simply used a tooth pick to pick away the top coat.
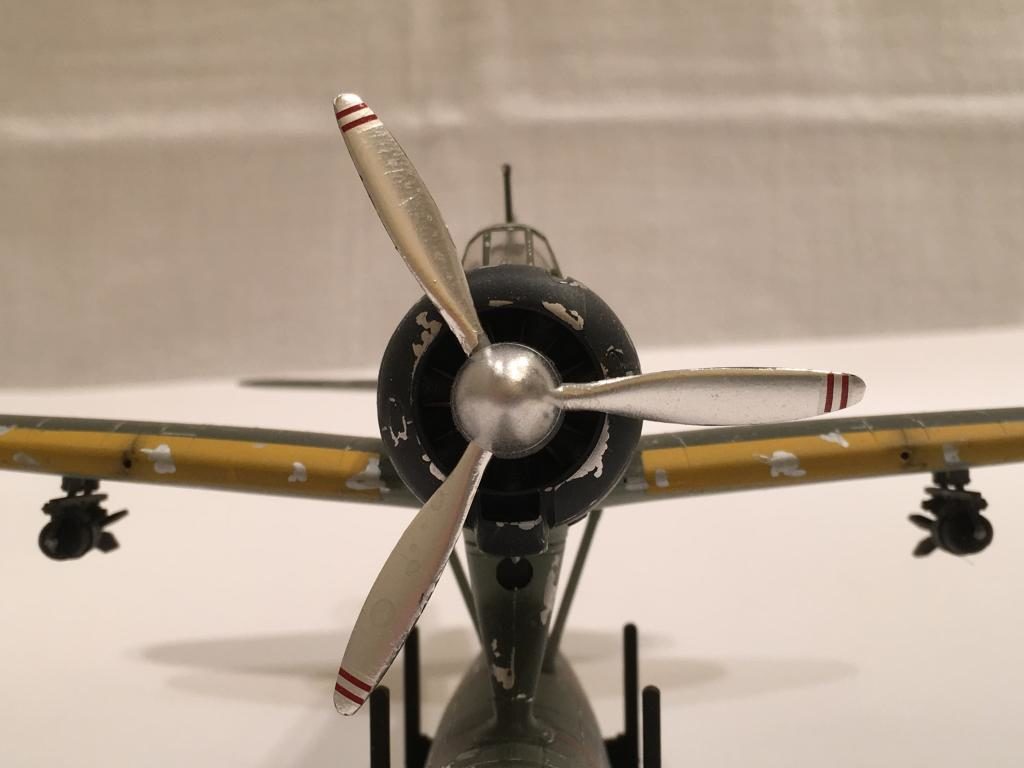
Bare metal foil was used on the front of the propeller blades.
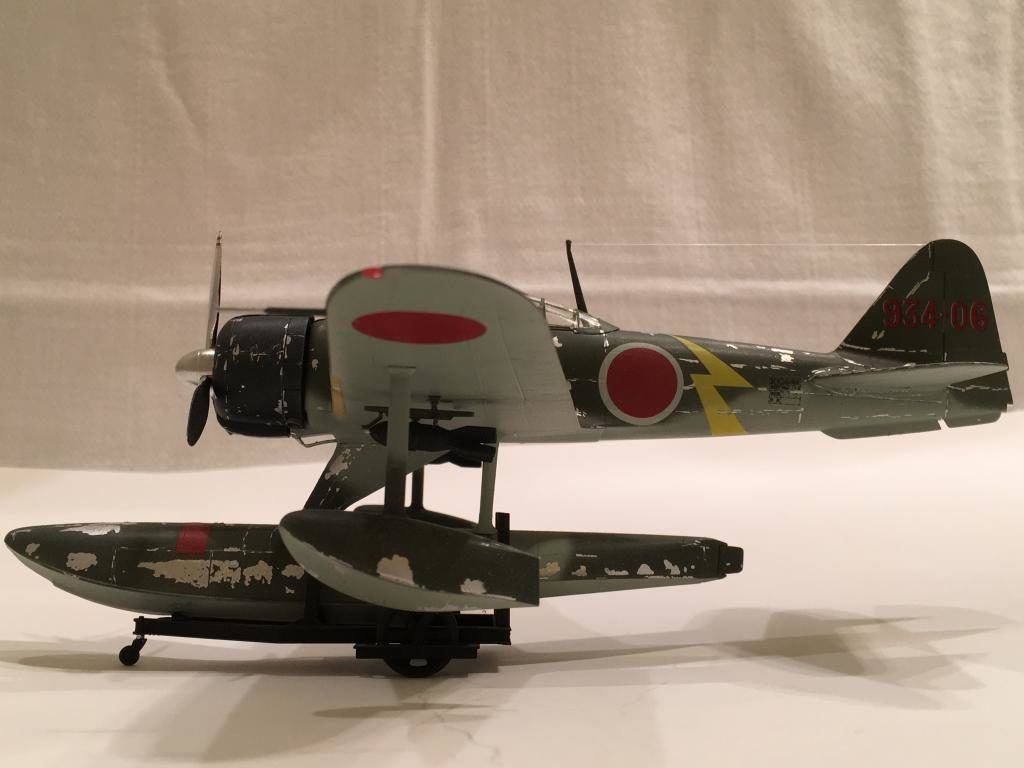
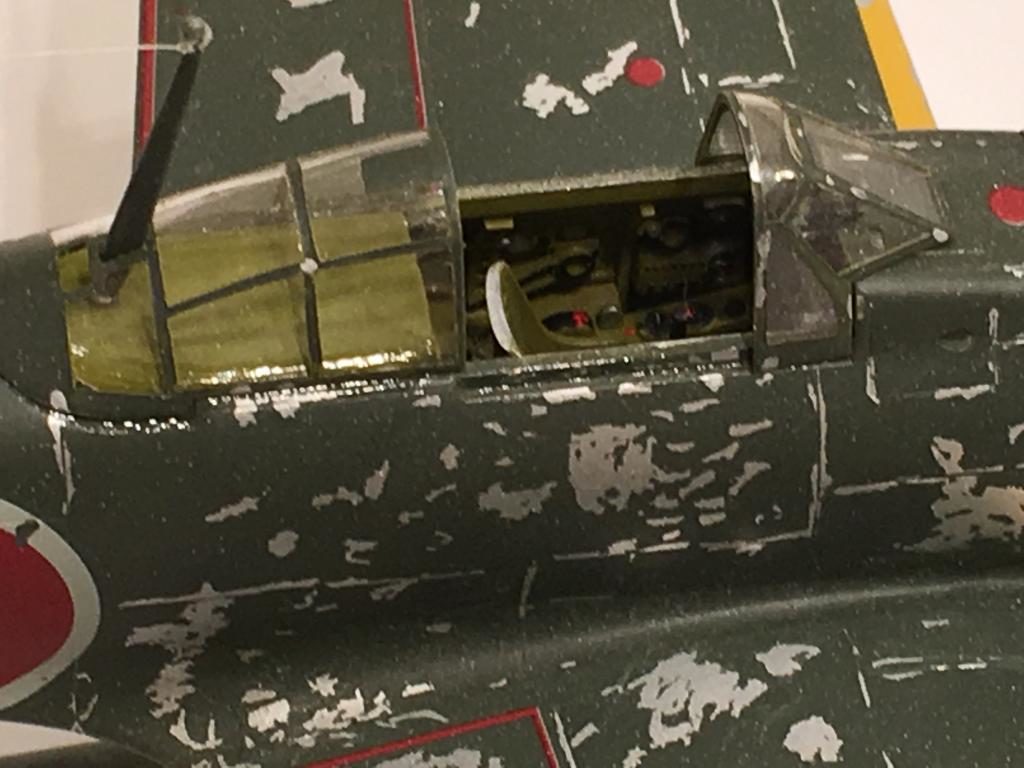
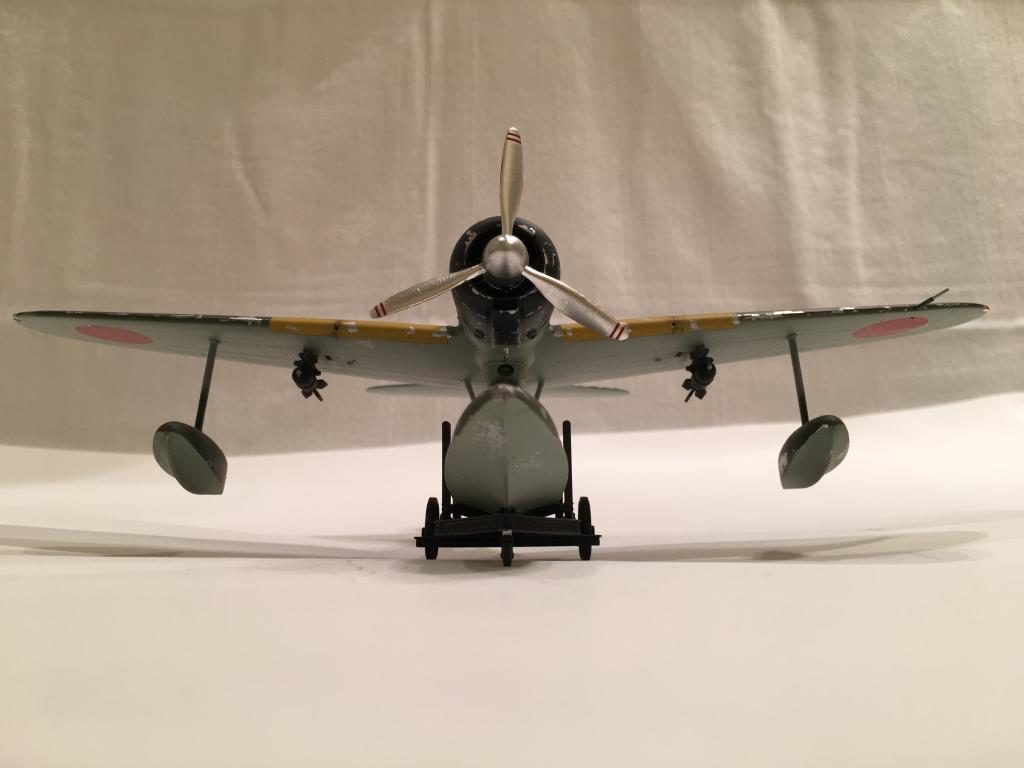
If you're wondering where the canopy is, I had a small mishap removing this one from my display case. I broke off the antenna lead wire which was made from clear stretched plastic. As I was attempting a quick repair, a drop of glue fell onto the center canopy... which in turn instantly fogged up !
So I simply removed the canopy. Luckily I have a spare vacu-formed one from Squadron on hand. I'll probably replace the center section prior to putting this one away in the display case. Meanwhile the original has been dipped in "Future" floor wax to see if it will fix it.
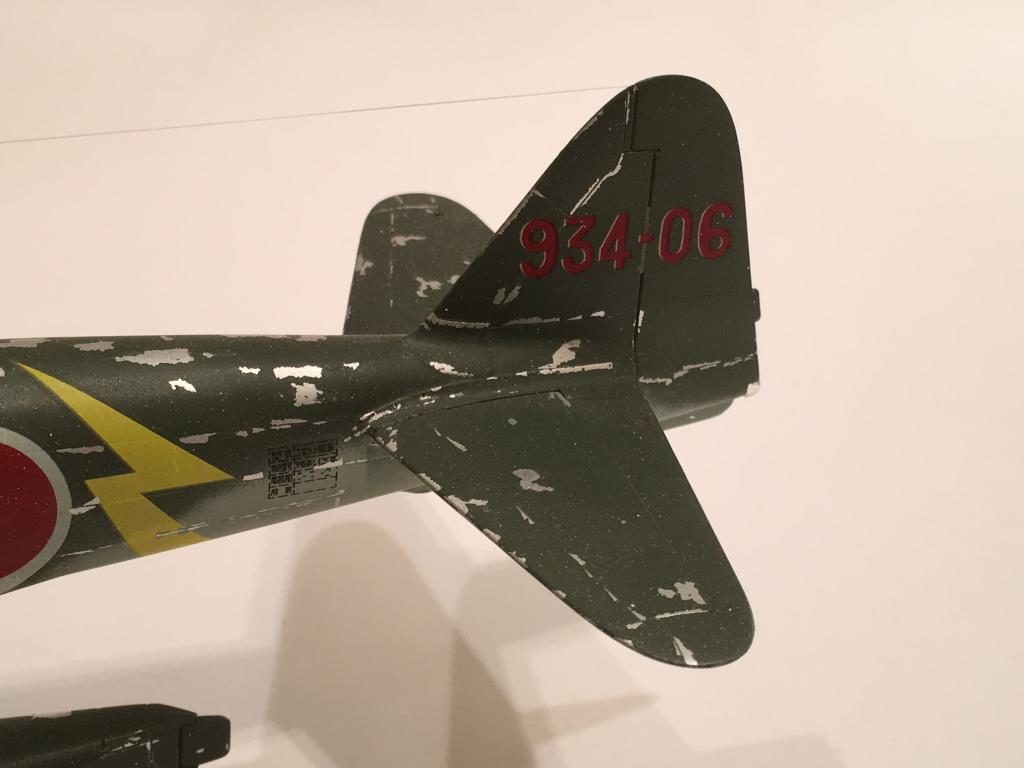
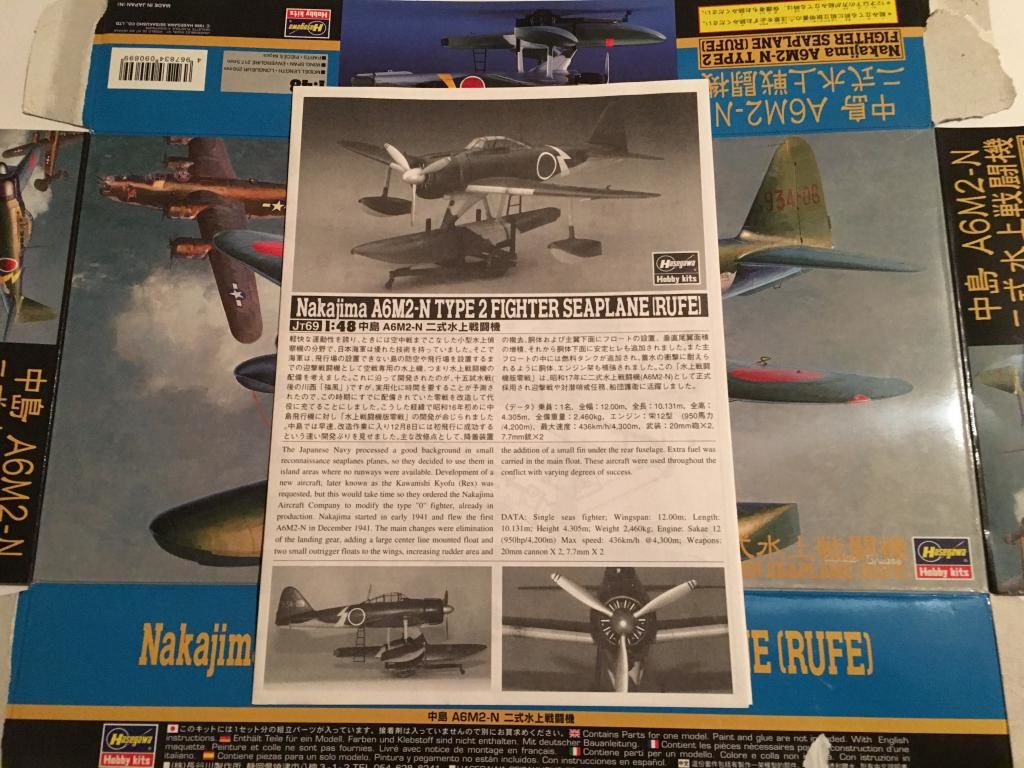
The plane that mine was modelled after was flown by the 934th Flying Group at Ambon Island per the instructions. I try to keep the instructions and box lids from all of my builds, especially if they have cool box art... That way I can go back and reference them if needed, (which I have done on occasion).
As usual, comments are encouraged.


Exquisite workmanship, my friend...that build looks fantastic ! Top-notch photos, too. 🙂
Thanks Craig... It's been a while hasn't it ?
Not as long as it's been for ME...but you've still got the 'touch".
Louis,
Great job. You did a beautiful job on the distressed paint. I can relate to not posting in quite a while. Hope to get back soon.
They say that good things come to those who wait. I have been pretty busy lately with an big block Chrysler 440 engine build for my 1973 Challenger. I've been spending a lot of time out back in the shop, and not so much on my model building. Hang in there my friend. I'll be looking forward to more of your postings. You have some very nice models on here.
Thanks for the compliments Sir !
Nice build! I think I have one still in the box, waiting for the right time. 🙂
Thanks for inspiration!
When you decide to start yours, please start a build thread for us. If it turns out anything like your SBD-5 has, it will be a head turner for sure. Thanks my friend for posting pictures of your SBD on my current Midway build thread. You have inspired me too...
Louis, Nice looking Rufe (I wonder where they came up with that name ?). As for paint chipping, that's an art all onto itself. The best explanation I heard was to be "consistently inconsistent". I have done exactly what you've done here and also used silver pencil, and the jury is still out on what's the best. Keep up the good work, and I'll continue to follow you for some pointers.
Terry, nice turn of phrase! Consistently inconsistent" ! Make a nice tee shirt or wall hanging, and my wife would agree with the diagnosis.
Made my day!
Terry, there was an air intelligence officer named Frank McCoy. (seriously! yeah, seems a stretch) and he was given the task of coming up with code names for the japanese aircraft. Either he or his staff must have been from the South, and the names they came up with had a distinct down home flavor if'n y'all look at them. Luckily, there was no Cletus or Cooter.
Thanks Terry. On this one I didn't use a silver pencil, but the thought did enter my mind. I like the phrase too... Bernard is right on the money with how they came up with Allied code names for Japanese aircraft during WW2. The fighters all had male names. For example the A6M was a "Zeke" or a "Hamp" although the original name for the "Hamp" was "Hap" named after "Hap" Arnold. He apparently didn't like having an enemy plane named after him, so the name was changed the "Hamp".
There is also a story about how the G4M "Betty" got it's name. It has something to do with the side blister windows and a nurse named "Betty". You can connect the dots...
The bombers and torpedo planes all had female names too...
Very nice. I have several techniques to get my chipping. It's great to use all of them in the one subject. Keeps it random looking.
Thanks Paul.
Louis, great job! I built this model when they were new. It was a fun build but I never finished it. (painting) It's a great model.
This one was built maybe a year after it was originally released by Hasegawa. Too bad you never finished yours. It really builds into a nice model. I have two more Tamiya versions. I'm interested to see how they look next to each other...
Thanks for the compliments my friend.
It reminds me of my favourite restaurant menu "chips with everything" (for you people who don't speak the Queen's English, chips are maybe what you call fries). Seriously, Louis, some great techniques on show here, and the Rufe seems to be lasting well despite the canopy mishap.
George, here in the former colonies, lately it's cheese or bacon on everything, seems to me. Being Oirish, chips (or anything potato) are obligatory, or they drum you out of the outfit.
Thanks George. Tonight I looked at the canopy after the Future has dried. There is still a spot that didn't turn out as nicely as I had hoped for... So it looks like I'll be using the vacuum formed canopy to replace the middle section. Chips with everything... I like it. Thanks again my friend.
Very nice! Looks like a well-used bird! A nice add (which you could do anytime) is to layer a little salt spray build up on the back of the floats with some Flory wash or other equivalent (you can even do with a brush - so no need to fire up the airbrush!). It looks great as is, but just thought I'd suggest another way to add some dimension to a great build.
That's a great idea. I have never tried to reproduce the "salt spray effect" on anything. I did notice that it becomes very prominent after watching a few shows on TV that had battleships and carriers in them. The spray looks almost like a white color. Where do you get "Flory" wash and what is it ?
Thanks again for the compliments and the suggestion Greg.
Nice ! great weathering tips. got an old 1/72 Revell/Frog Rufe in my stash. I too save my instructions, just recently put them in binders.
Putting them in binders is another great idea. I currently have them stored in a large box. It would make things easier to access and organize.
Thanks again my friend...
Louis, nice looking Rufe ya got there. I figure the further from the Home Islands they got, the more weathered the aircraft got. That's provided they didn't run afoul of the law of averages. The "In Action" Zero book has some photos, Rufe never got the attention it's deck and land based brother did. I like the theory behind it, but our technology and manufacturing expertise negated that, after we got up to speed.
I was watching another episode of "Dogfights" the other evening. They had Hellcat night fighters going up against the Rufe's. It was very cool to see... Thanks Bernard.
Hello Louis...Thanks for sharing that fine looking Rufe and the details of your weathering technique which is very effective. The model looks great and I enjoyed seeing it.
I'm glad you liked it Jim. Thanks for the compliments too. I haven't forgotten about the Goodyear "birdcage" F4U we were talking about. It's on the back burner for a little while, but not for too long. I'll keep you posted. Take care my friend.
Louis, I think they were also used as "Washing Machine Charlie" nocturnally, dropping bombs here and there, messing up the sleep of the guys on the ground. One of several aircraft used for this.
WOW WOW Louis sweet looking Rufe my friend. Excellent detail and excellent job on the weathering !
Thanks Brian !
Louis, Very cool looking build! I've got the same kit in about 90% finished shape-thanks for pasting it.
You're welcome. Maybe this will encourage you to finish yours ? I'd like to see it. Thanks for the compliments my friend.
What inspires me most is that you can really imagine this has seen action - it is one of those builds that looks so convincing. I appreciate the 'clean' builds, and I guess everyone's vision of a plane involves some element of style or taste, but heavily weathered builds that pull of a sense of realism are really to be admired! Excellent stuff.
Thanks Paul. Looking back, and knowing what I do now, I would have used the "Ame-Iro" as a base then proceeded with the chipping only in a few small places. I appreciate the compliments.
Nice work. The "N" denotes a landplane modified to a seaplane.
This is very nice work, but if you look at photos of operational Rufes, you will see very little paint chipping. That's because salt water and salt air do not play nice with aluminum - they corrode it right down to aluminum powder very quickly. what you would see is a lot of "touch up" painting, like a modern USN TPS. Same is true for carrier-based aircraft, flying boats, anything operating in salt air.
Thanks Tom. This build was done about 17 years ago when I had very little knowledge of Japanese aircraft colors and finishes. If I were to build this one again today, I would have used Ame-Iro as the base (instead of polished aluminum), and then proceeded with chipping on the dark green top coat.
In some operational photos I have found of the Rufe, you can see considerable paint that has flaked off revealing the base coat color which I would believe to be Ame-Iro.
You're correct about metals and salt air. I never realized just how quickly it happens until I held a few parts in my hands from the Collings Foundation F4U-5NL after it's first but short lived restoration. The plane was ditched offshore shortly after it was restored and sat underwater in the Atlantic for about a week. During this time, the magnesium rocket launch braces practically disintegrated into nothingness.
Once it was raised form the ocean, they whole restoration process started all over again... Now it's a beautiful plane... again.
nice
Thanks PK. I'm glad to see that you liked this one.
Great finish Louis. I always thought the red markings served as a warning to the prop location
The wide one that is directly under the prop and spinner is a warning stripe for the propeller. The other two smaller thin red lines that line up with the trolley cart are the ones used to align the vertical bars on the cart with.
Thanks for the compliments George.