What’s with that “quick build” thing?
Too long; didn't read summary: I no longer think I can find satisfaction in quick builds. They can be either quick or satisfying. Never both. Your mileage may vary.
Quick build (noun • /kwik bild/)
A box of sprues you grab, glue and paint over the course of a short amount of time whenever you can no longer bear all the long-term projects staring at you from the shelves.
Apart from trying to sell this definition to the Oxford Dictionaries (answer still pending), I have been working on a couple of rather involved projects lately. There is that 1/350 Arizona started over a year ago, a 1/350 Spruance which gives me fit issues to no end, a Monogram B-26 Marauder which needs to be rescribed and riveted… couple that with a 1/48 T-2C Buckeye that needs its cockpit rebuilt and a A-20 Havoc with lots of details missing, and you get me in a state of “I'd like to get something done. And quick.”
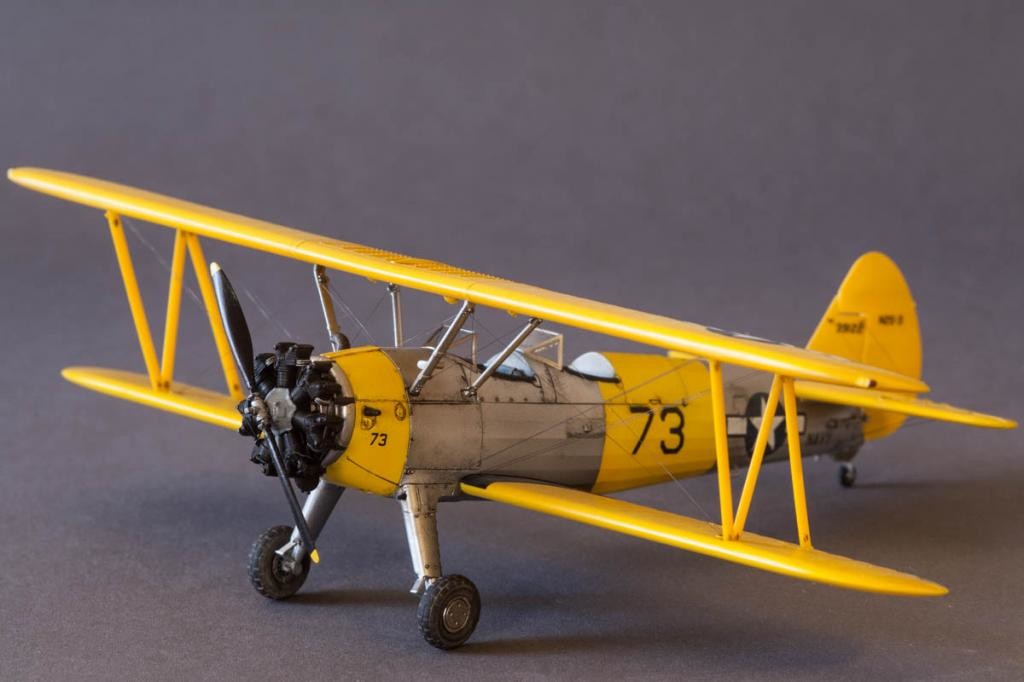
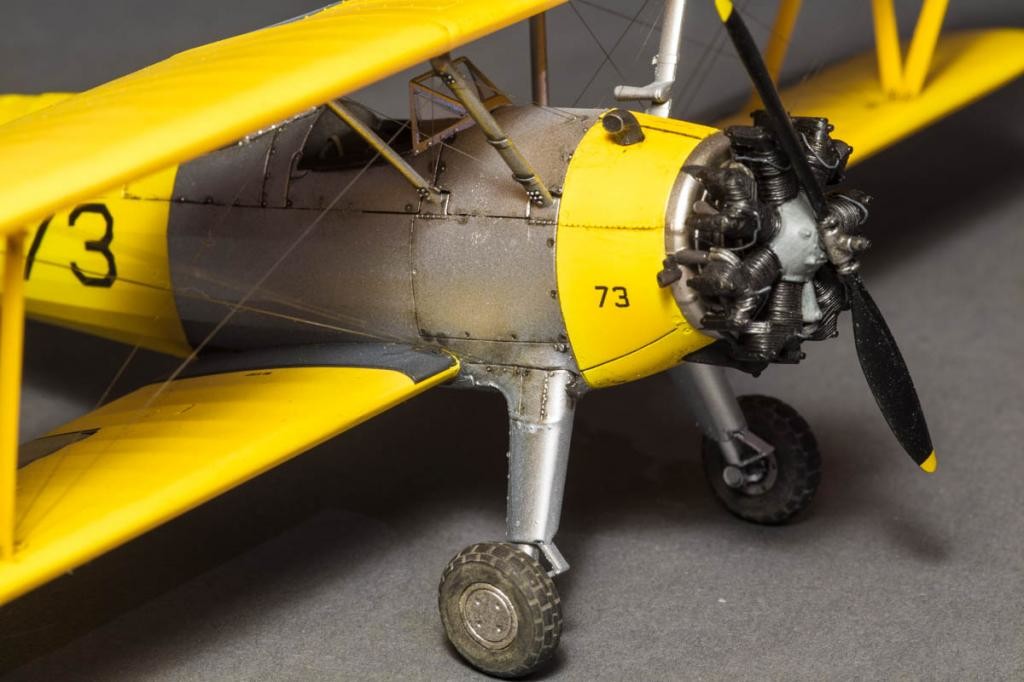
A year or so ago Revell released a new 1/48 scale kit of the Stearman PT-17 Kaydet, a US training biplane from WWII. I got that kit for 10 Euros (in the souvenir shop of a military museum, of all places) and put it in my stash for a rainy weekend. The kit itself is very well detailed and gives you two colourful options for a USAAF and a US Navy aircraft, respectively. Speaking of colourful, Revell somehow saw fit to mould the parts in yellow, which might help with painting, but gives the whole kit a rather toy-ish appearance.
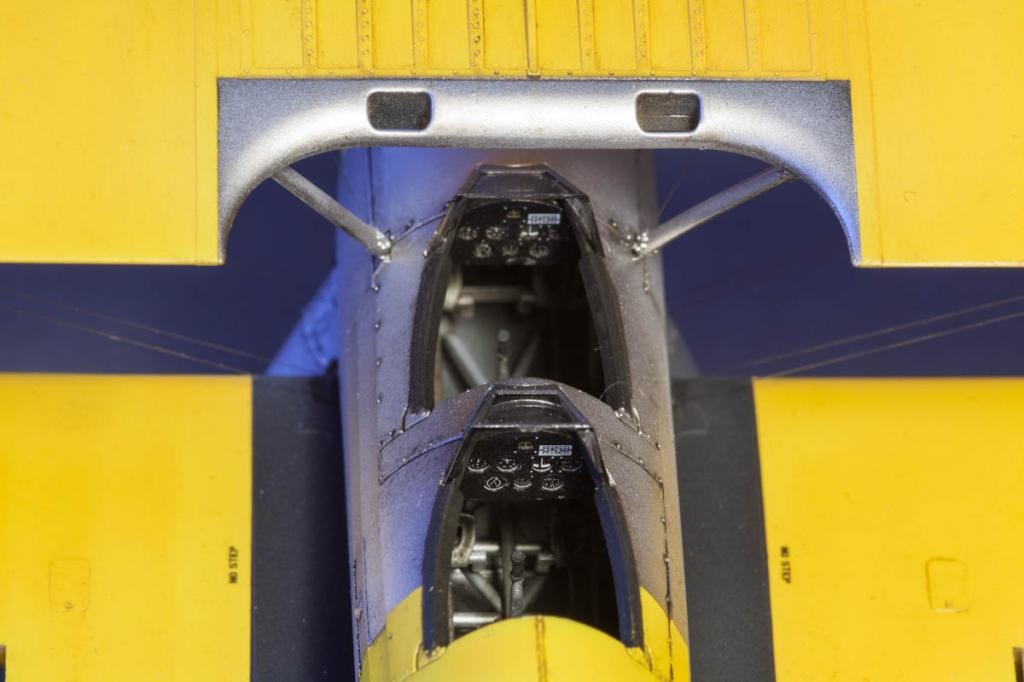
At the Moson Show I stumbled upon a new manufacturer called Yahu Models, who specializes in pre-painted PE instrument panels – and they produce a set for the PT-17! I guess the universe wanted to tell me something…

Lesson One: Research. Quick it is not.
Back from Hungary, I immediately started taking a closer look at the Revell kit, doing some research on the versions and markings. That is something I do with every build, basically checking what I am in for, and if there are any alterations needed. Sure, this takes some time, but it is all well within the scope of a quick build, right?
Well, it turned out the markings provided where both for warbirds – beautifully restored planes that fly today, complete with sometimes fictional markings and civil registration numbers. No, I didn't want that. So off I went to do a quick Google image search. I found a nice colour photograph of a line of Navy N2S (the Navy designation for the PT-17) sitting on the tarmac, with what looked like a mix-and-match of yellow and aluminium lacquer fuselage parts. Yeah, let's do one of those. Can't be too hard to find the appropriate markings in the spares box.
Lesson Two: If you want quick, get good.
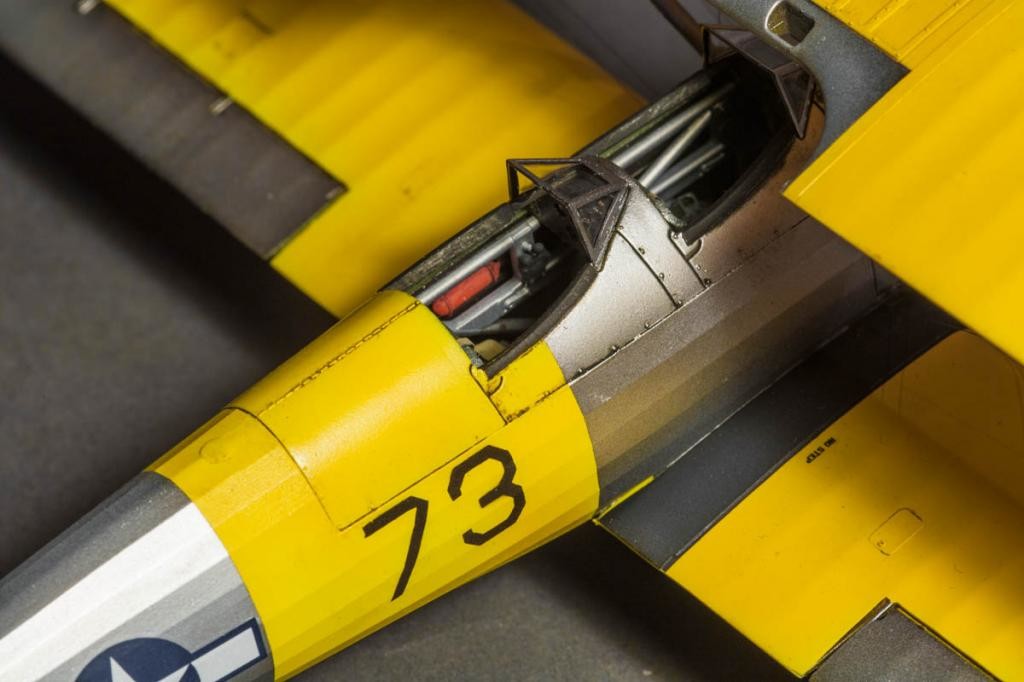
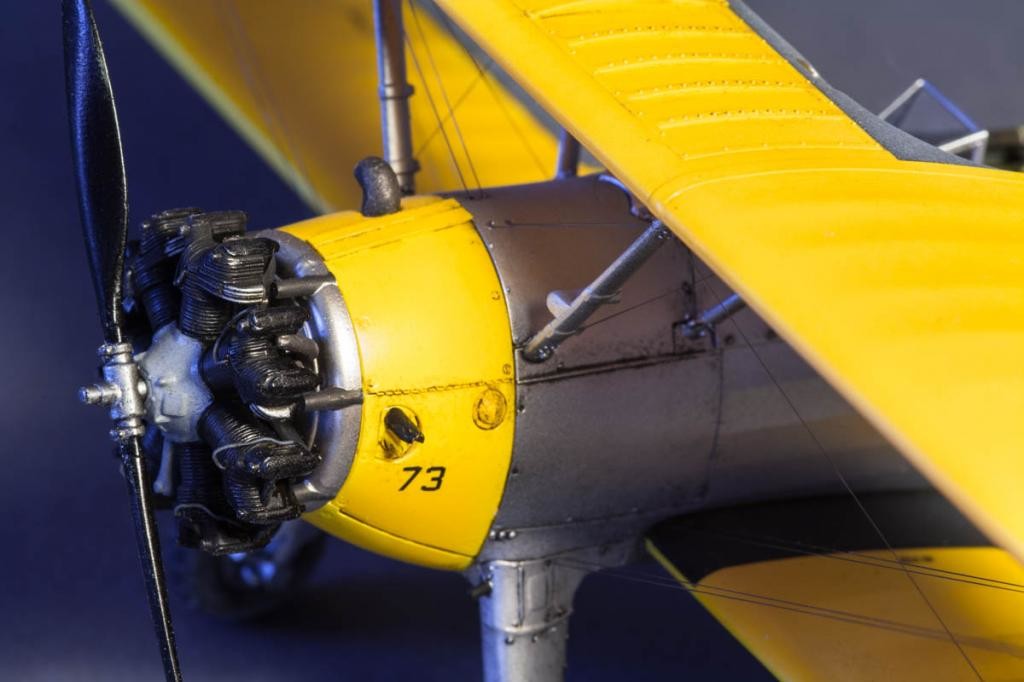
Building the kit itself was the most trouble-free and pleasurable experience. Revell incorporated a couple of very good engineering choices, there are not fit issues whatsoever, and even the after-market PE fit beautifully. I did, however, detail the engine with lead wire, filed the seats to a more correct shape, and used some PE harnesses. Maybe not exactly a quick-build approach, but I tend to see these modifications as part of even the most basic build. The whole building process took a couple of days, mainly because I had other stuff to do.
Lesson Three: Fast is slow.
For painting I chose the following approach: First, I primed all the yellow areas with Gunze SEA Grey FS36622. This is an almost white colour, but without the issues “real” whites tend to have when spraying them. Reason for that primer coat is that yellow colours tend to be translucent, no matter how heavy a coat you apply. I test painted the upper wings yellow without the primer coat, and was still able to see through the wing when holding it against the light!
Next, I sprayed the yellow areas with Gunze FS13538 Yellow. No problem here. After letting this dry overnight, I masked the yellow areas, and then primed the rest of the airframe with Tamiya X-1 Gloss Black, as a base for the Aluminium colour.
AK Xtreme Metal Aluminium went on like a dream. I really do like this stuff, as it gives a beautiful finish, dries instantly, and is not as delicate as Alclad. That is, if you let the primer coat dry thoroughly. I didn't.
Getting fingerprints out of a metal finish is not an enjoyable task. When I applied the aluminium coat, the underlying black base was dry to the touch, but only on its surface. Handling the model afterwards, the heat of my fingers basically softened the black paint up to a point where I got a nice 3D impression of my index finger onto the fuselage. So, snad it off, prime and paint again. Took me longer than if I had waited a bit longer in the first place.
Lesson four: Stick to the stickers.
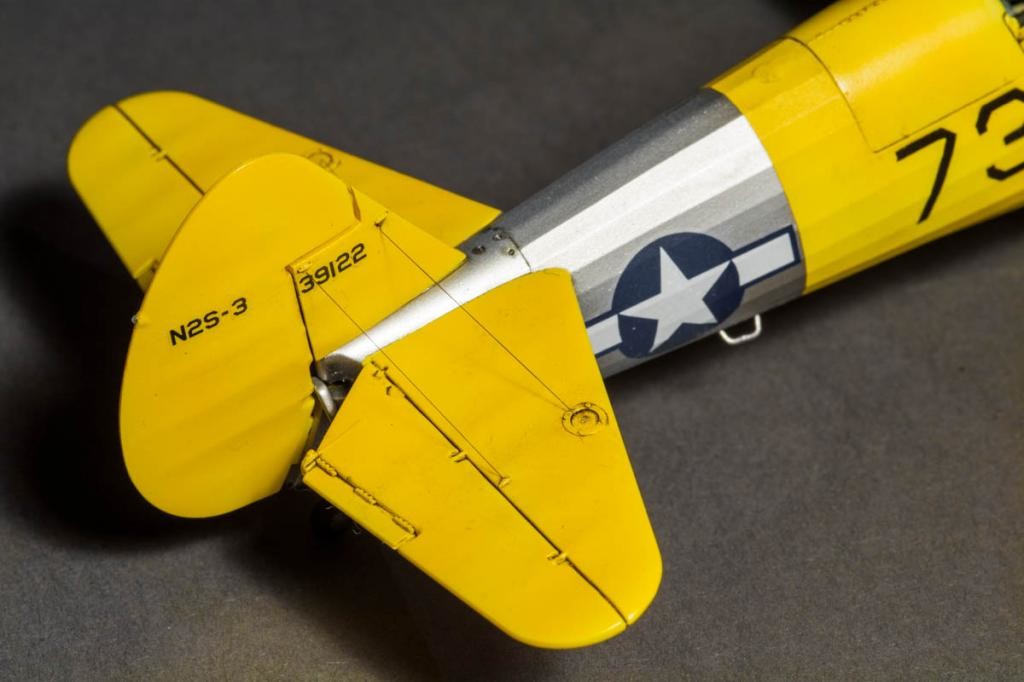
Remember those decals? Spare box and stuff? Yeah, wasn't going to happen. I was lucky to find the right sizes of Stars'n'Bars, and was able to cobble together a/c registration numbers from the kit's decal sheet, but the large number “17” on the fuselage sides and bottom had to be painted. Some time ago I had created a set of masks for modern US Navy lettering, but these have 30° angles to the corners, whereas for a WWII plane I would need 45° angles. Apart from that, the numbers seen in the picture seemed to be thinner than specifications called for.
Back to the PC, drawing the appropriate numbers, feeding the file into the cutting plotter, and after a couple of hours I had all the masks I needed. Spaying them on with Tamiya XF-1 Flat Black took only a couple of minutes.
Lesson Five: Quickly take your time
Weathering. Some of us do not like that part of a project at all. I happen to enjoy it more and more, easily spending days on washes, streaking, chipping and that sort of thing. This, however, was still supposed to be a quick build, right?
Well, by that time I had already decided that it would be of no use rushing things close to the finish line. Two things helped in getting a nice result in a short amount of time. First, subject choice. As a stateside training aircraft, it would not be too dirty and grimy (from my own time in the military I remember one of the basic rules during training: If it moves, you salute it. If it doesn't move, you clean it).
Second, using pre-made washes, like Mig's Panel Line Washes, noticeably reduces drying time over traditional oils.
Bonus Lesson: If you pick a biplane for a quick build, you might want to reconsider your life choices.
This one is kind of self explanatory. Admittedly, I did not bother with eyelets and fasteners, but instead stuck to simply using Uschi vdR flexible rigging line. Still, this process took about two evenings.
A definitive conclusion. Until next time.
This one took longer than expected – and I did enjoy every bit of it. Even more important, I enjoy the final result way more than the “real” quick builds I did in the past.
In the end, I think the real idea of a quick build is not to get something done in a short amount of time. It is rather to work on something that does not force you to interrupt your flow, that lets you quickly get to stages you enjoy the most (like painting or weathering) – and maybe most importantly, something that does not make you notice the amount of time you spend on it.
Loved it! The article is fantastic, Boris, and the model is excellent too! Spot on, Sir!
WOW! That's all I can say about this beautiful aircraft you've built, Boris! This model is so good, I'd be tempted to get another kit to make an Air Corps version! Beautifully done, Boris.
Bravo!
Boris, nice choice of the used and semi-painted markings. There were problems with the yellow paint, which failed in both it's Army and Navy applications, and also with the Army Blue paint, leading to the piebald look. Trainers got a lot of use, and the time to repaint them was at a premium, so optempo took precedence. The mixed up colors give interest to the otherwise vanilla overall yellow for the Navy.
Great kit, I've got a couple. Great job on her!
Outstanding work, Boris! The finish and weathering are just superb, as well as your photographs. Really enjoyed reading your article, too.
Hi Boris.
I love this post. The build is just an amazing piece of work and the writing is entertaining, informative, and brilliantly presented. Bravo all round!
Boris, very nice, I think about everybody likes a nice Stearman, especially when they are built well like this !
I wholeheartedly agree with the general consensus of the masses as stated above. There.
Not sure about your entry to the Oxford Dictionary, Boris, but this is a great posting. Terrific attention to detail from your research and skilled workmanship have resulted in an excellent model.
Boris,
This is fantastic. I am without words to express how much I like it. I have this kit and will build it and I hope it is 1/10 th as good as this one is. I have gone back and looked over your posts and your work is excellent
Hilarious! One way of keeping the speed up is to keep the reference digging to a minimum. When actual building time is less than the time you spend with your nose in books and checking things up on the web you should have a think about what you are doing. Flow is much about planning before you start the actual build and then sticking to the plan.
Enjoyable reading... somehow comfortable for those of us who aren't able to finish a model quickly! 🙂
You explained very well why fast is slow and I liked the wise concluding remark on the modeling time relativity.
Such a pleasure to read!
Apart from that, there's one word that attracts me like magic: cutting plotter. Tell us more please ...
Great question! Excellent article and yes, the cutting plotter the thing I really curious about 🙂 I'm long time considering to buy one, but at the end I always chickened out as I don't know what they are really good for and these machines are quite expensive just for a try... even from China.
Excellent work Boris. I enjoyed reading your comments as well.
Yes, a beautiful Stearman Boris! That's a very nice bi-plane sir! 🙂
Beautiful model and an excellently written description! Bravo! I know exactly what you mean - I just finished two pretty detailed builds, and wanted something quick, so pulled an old MPC P-39 out of the stash planning to build straight OOB. Woe is me! First thing I have to do is recreate the gear doors which will not fit closed in the least. Now, if I can just avoid putting any details in the space that is supposed to be the cockpit...
Thanks guys for your comments! Jeffry, getting another PT-17 is definitely the way to go - I will certainly add one to the stash.
Greg, this happend to me more often than I care to remember. I guess there are certain manufacturers from which you just can't expect a quick build:)
I dont know if you are better as a writter or as a modeller! Excellent job in both field!
Superb post. Entertaining and informative, and the result is excellent.
As someone who was lucky to get about 200 hours in a Stearman 40 years ago (when one could afford that sort of fun), you brought back the look of a very fun airplane to fly (not so much fun to land though, with that high stalky gear just asking for a ground-loop at the first excuse).
Great build, and enjoyable read.