1/32 Tamiya A6M2 Zero: Current WIP
I recently started a consignment build for a friend of mine who wants 1/32 models of Pacific Campaign fighter planes. He has already taken delivery of the 1/32 Trumpeter P-40B in AVG colors, and the 1/32 Tamiya F4U-1A Corsair in VMF-214 colors. All of these planes have also been featured on this site. He now wants the 1/32 nemesis to these planes; the 1/32 Tamiya A6M2 with a Peal Harbor Sq. color scheme. We still have not decided on the exact markings to use. The kit offers 6 choices of markings, as well as, we purchased an aftermarket set.
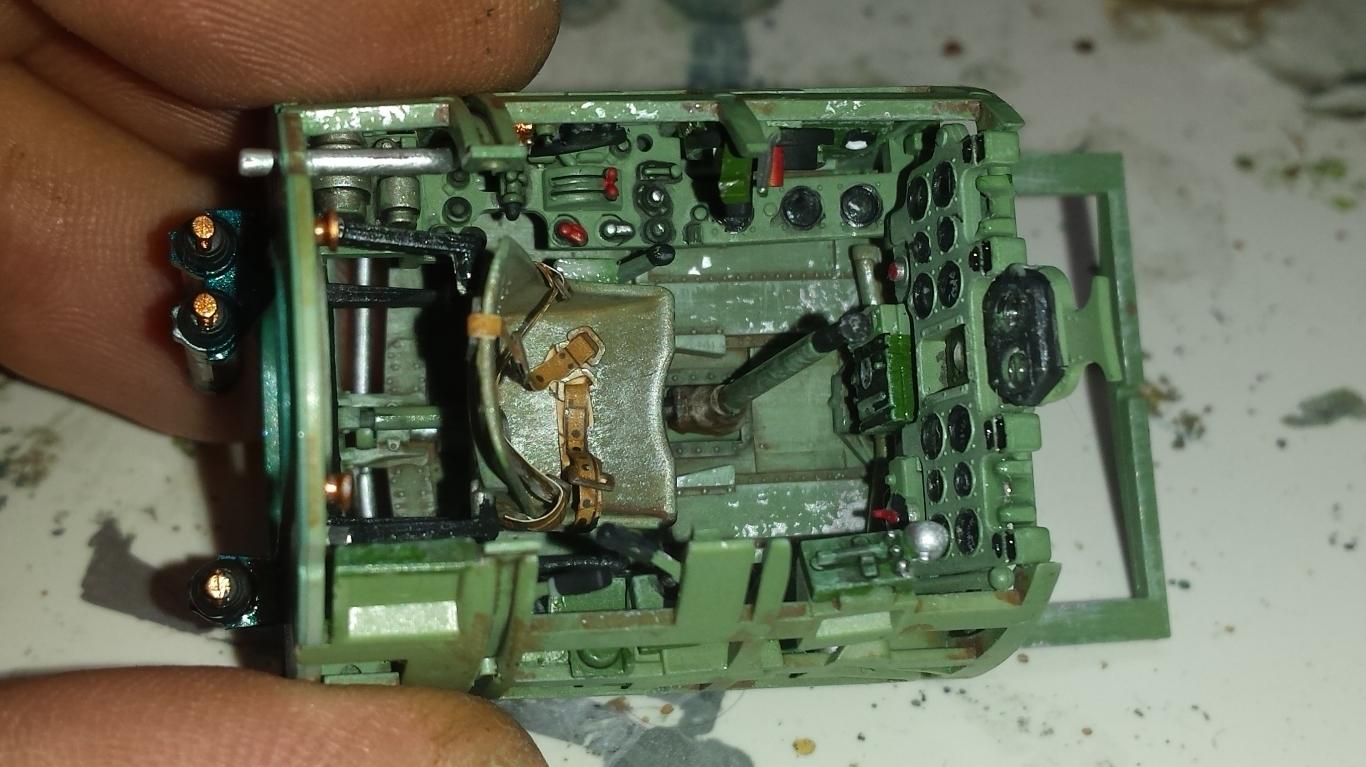
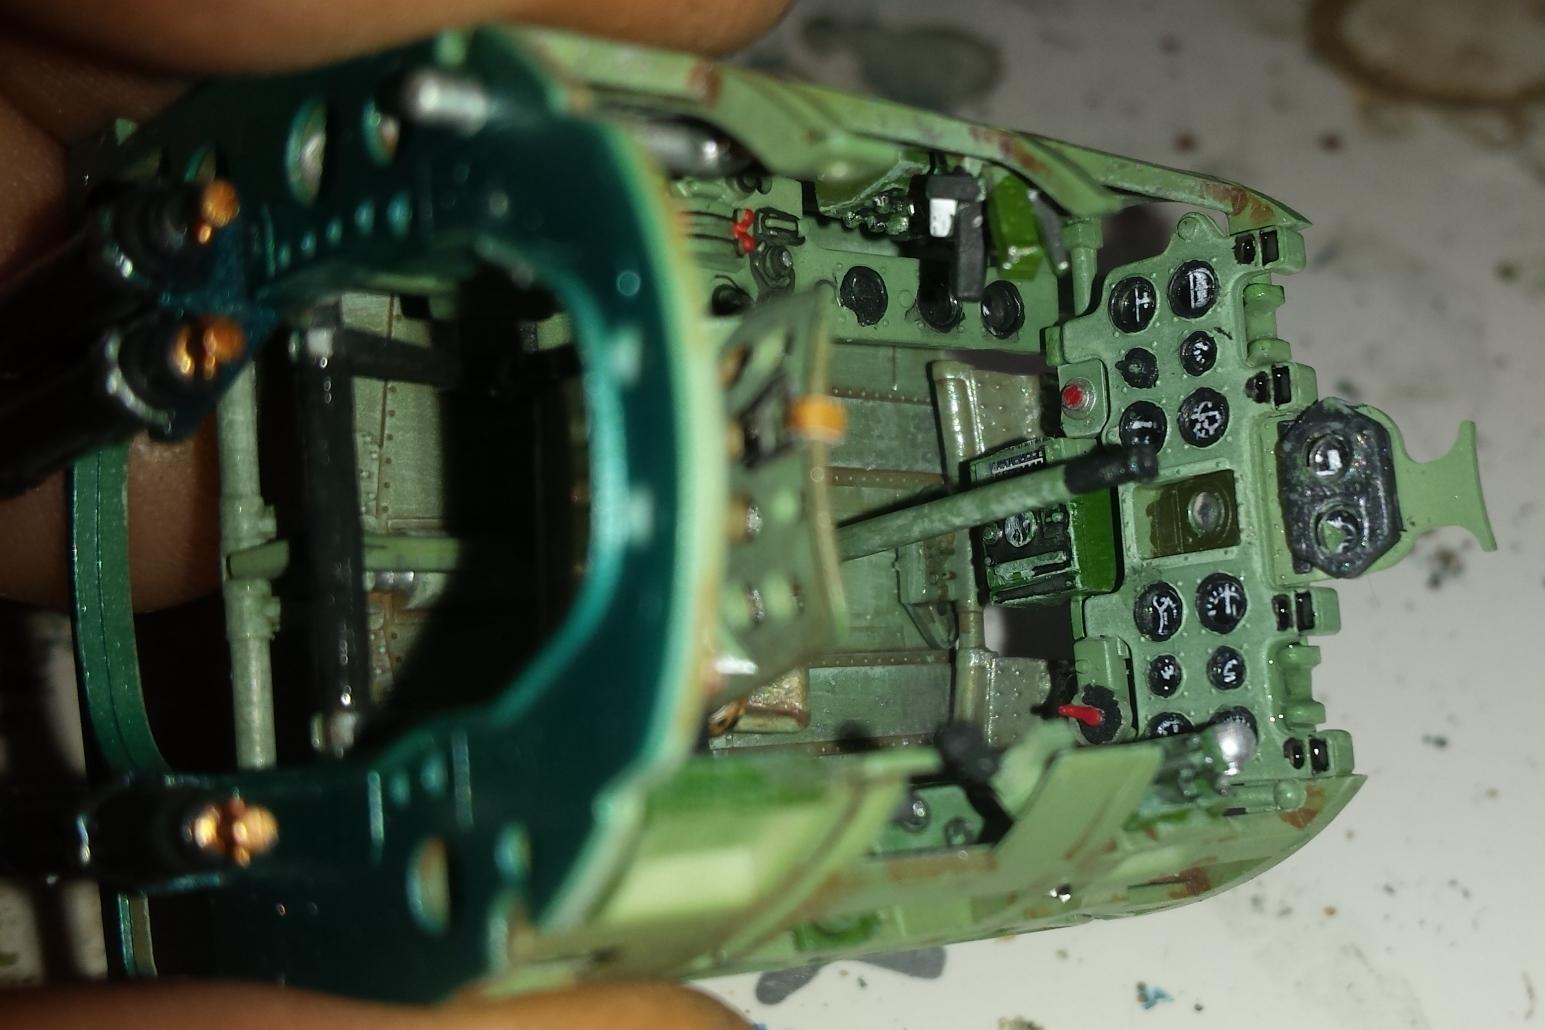
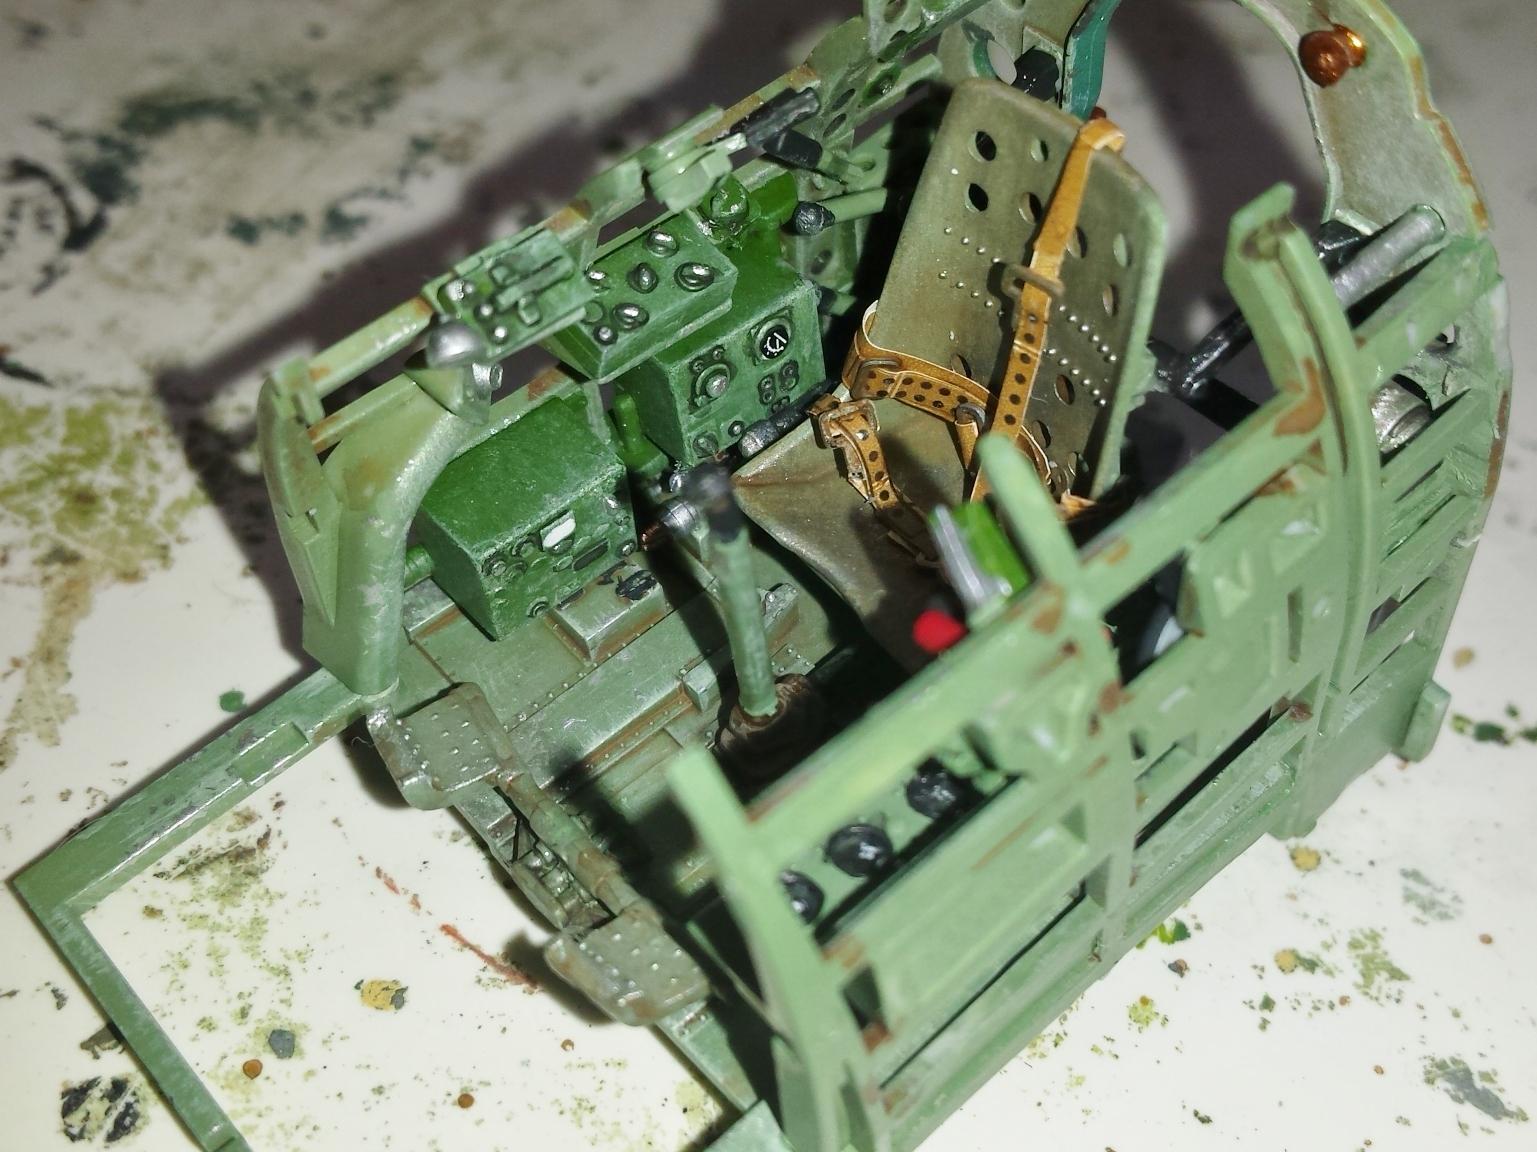
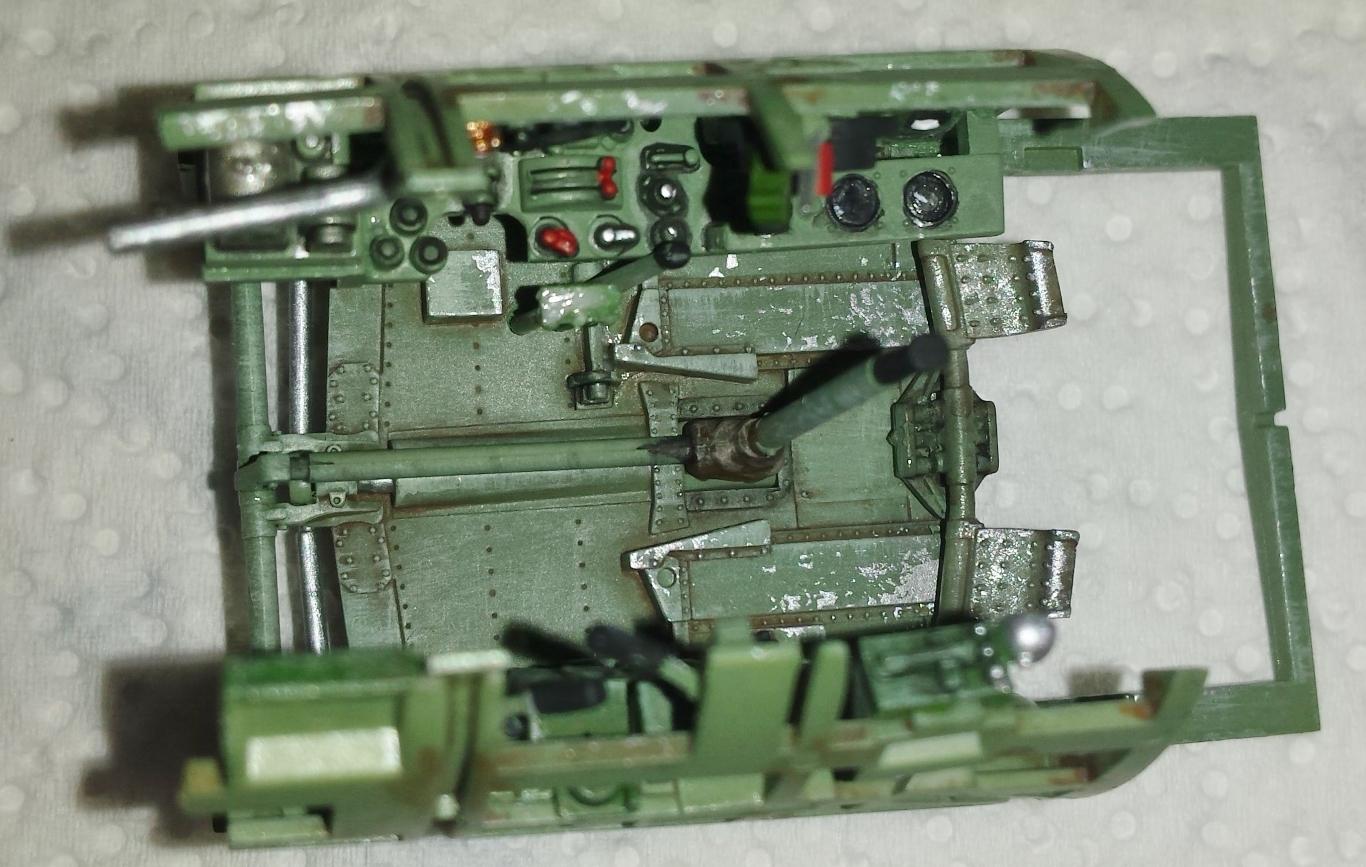
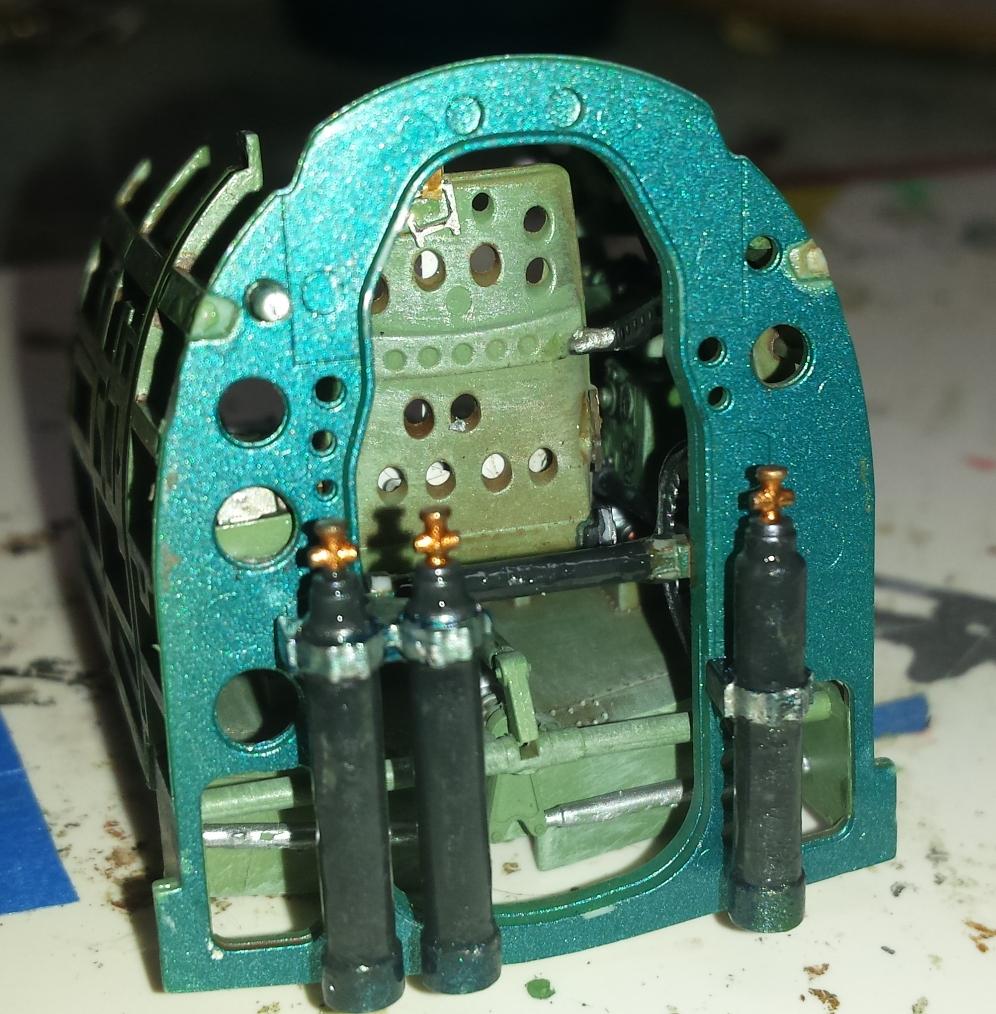
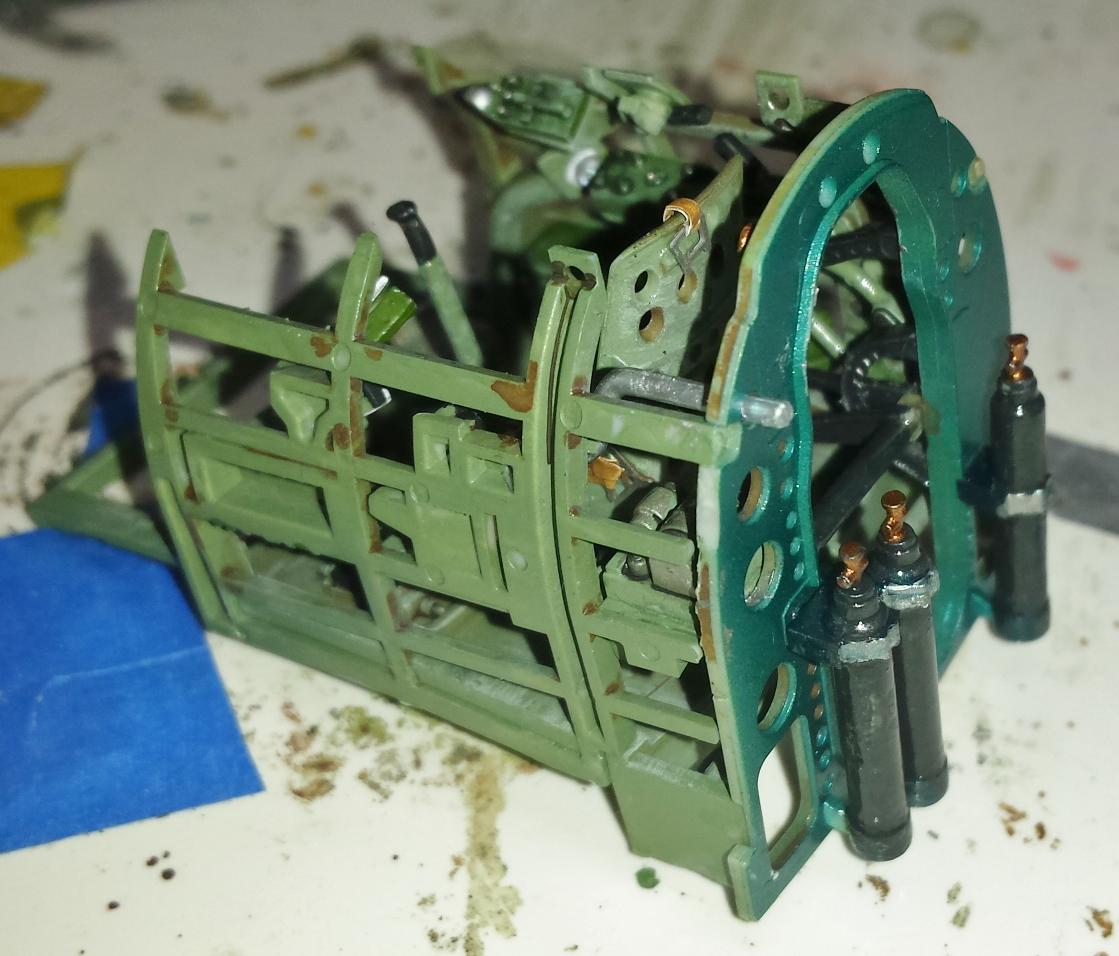
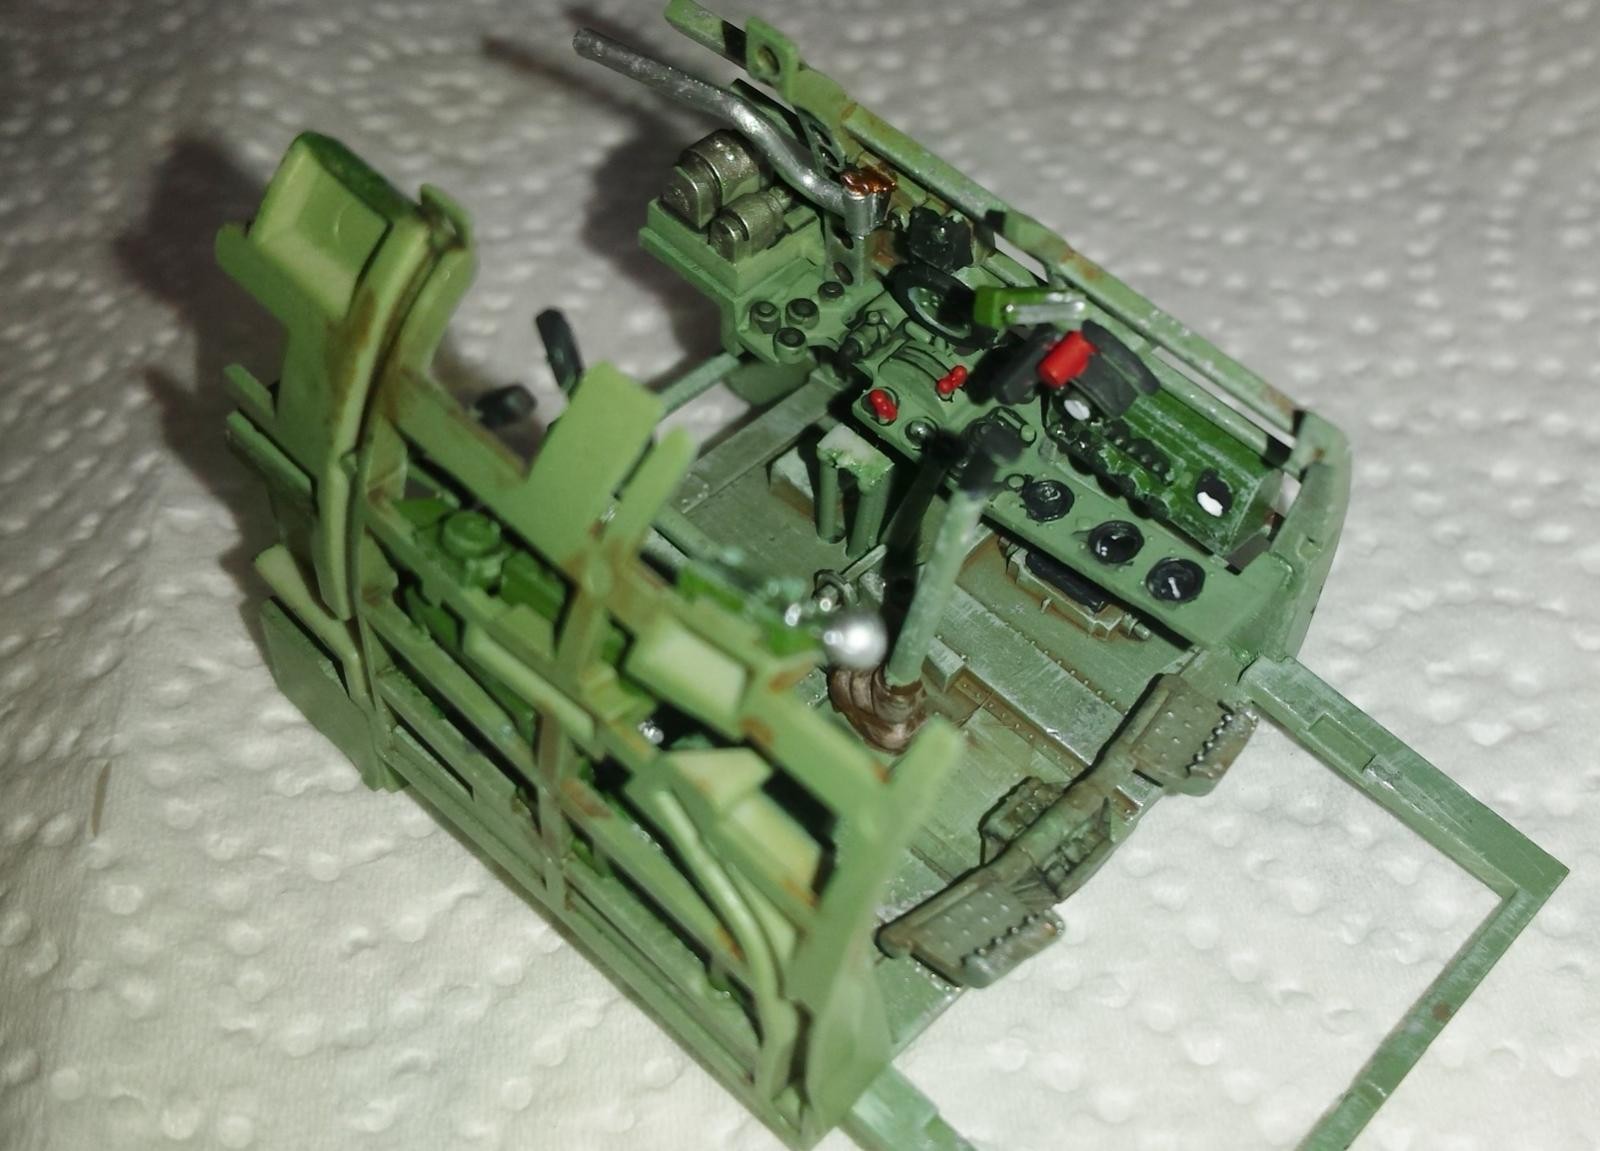
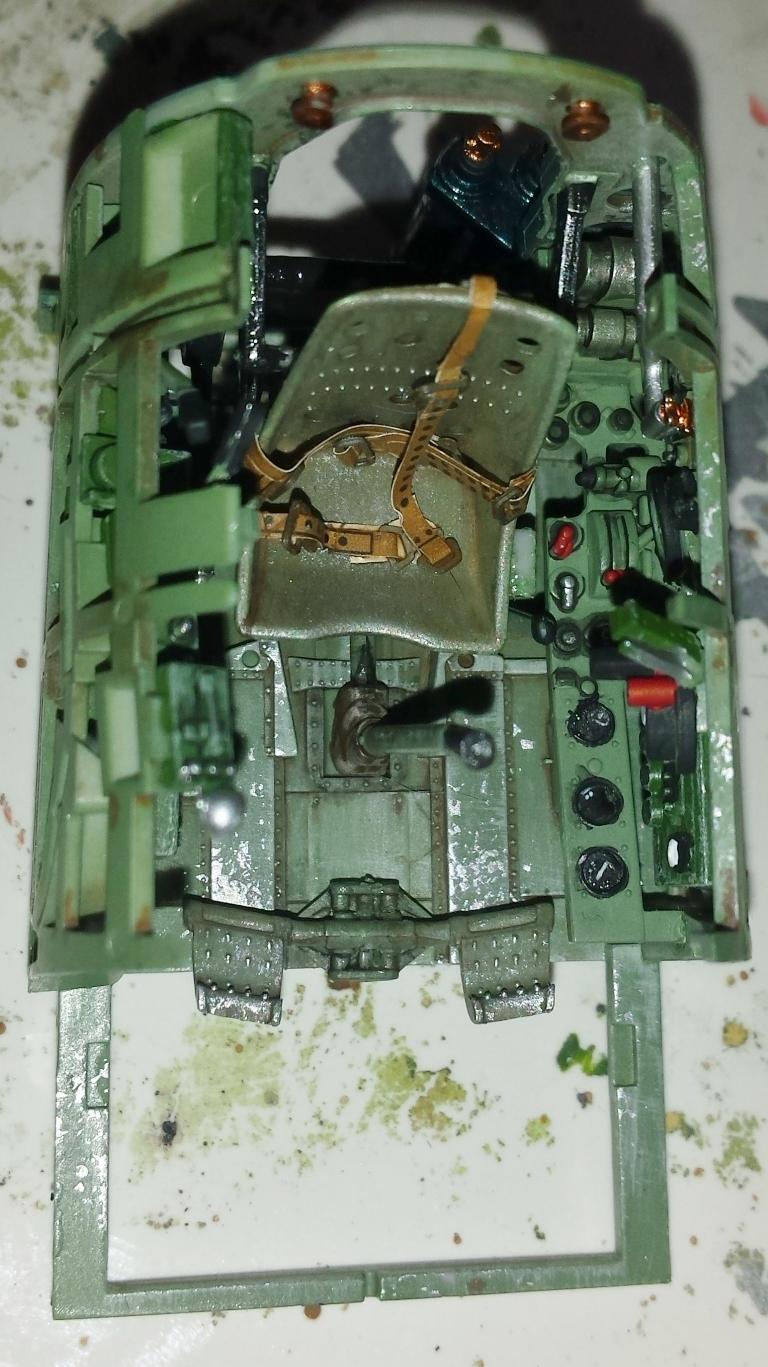
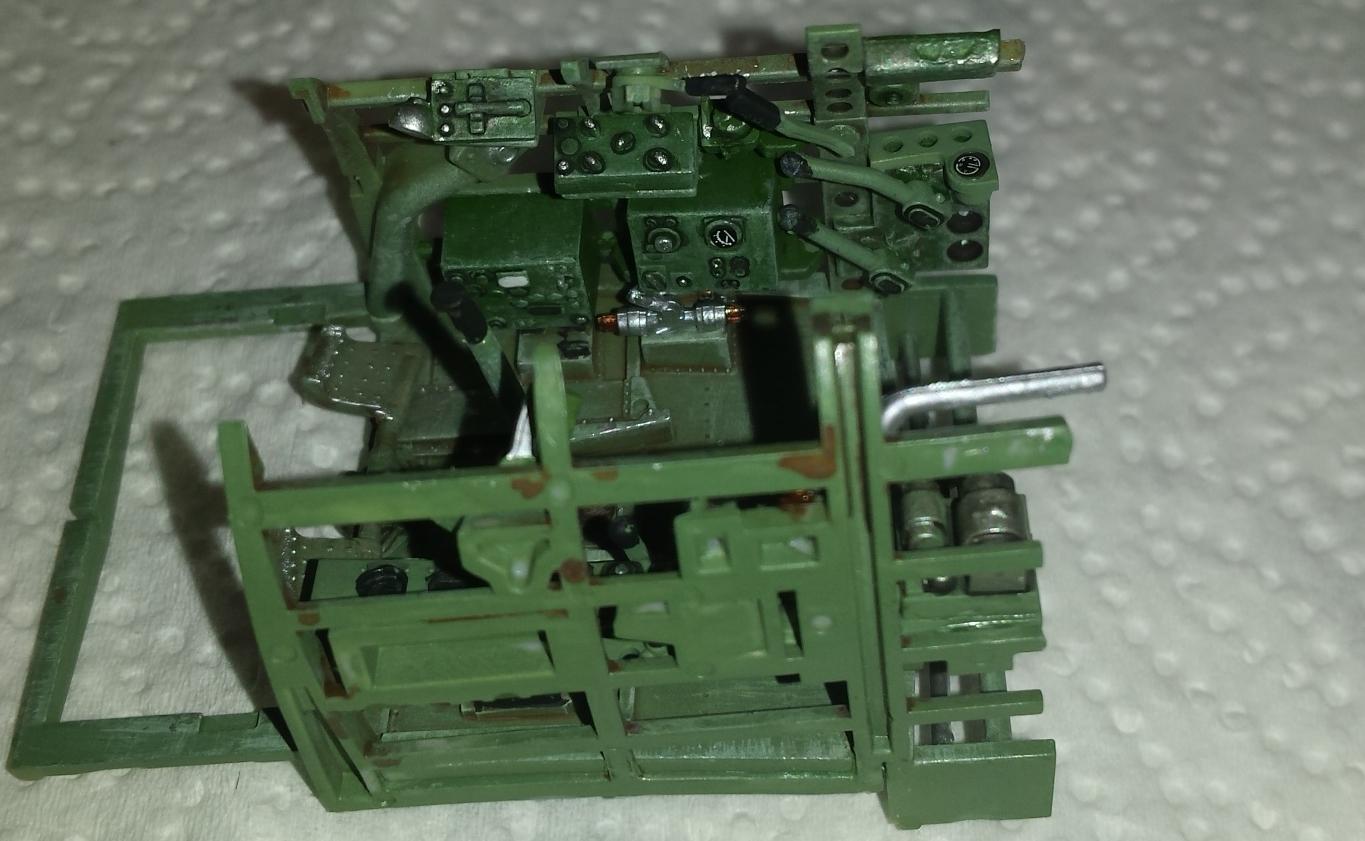
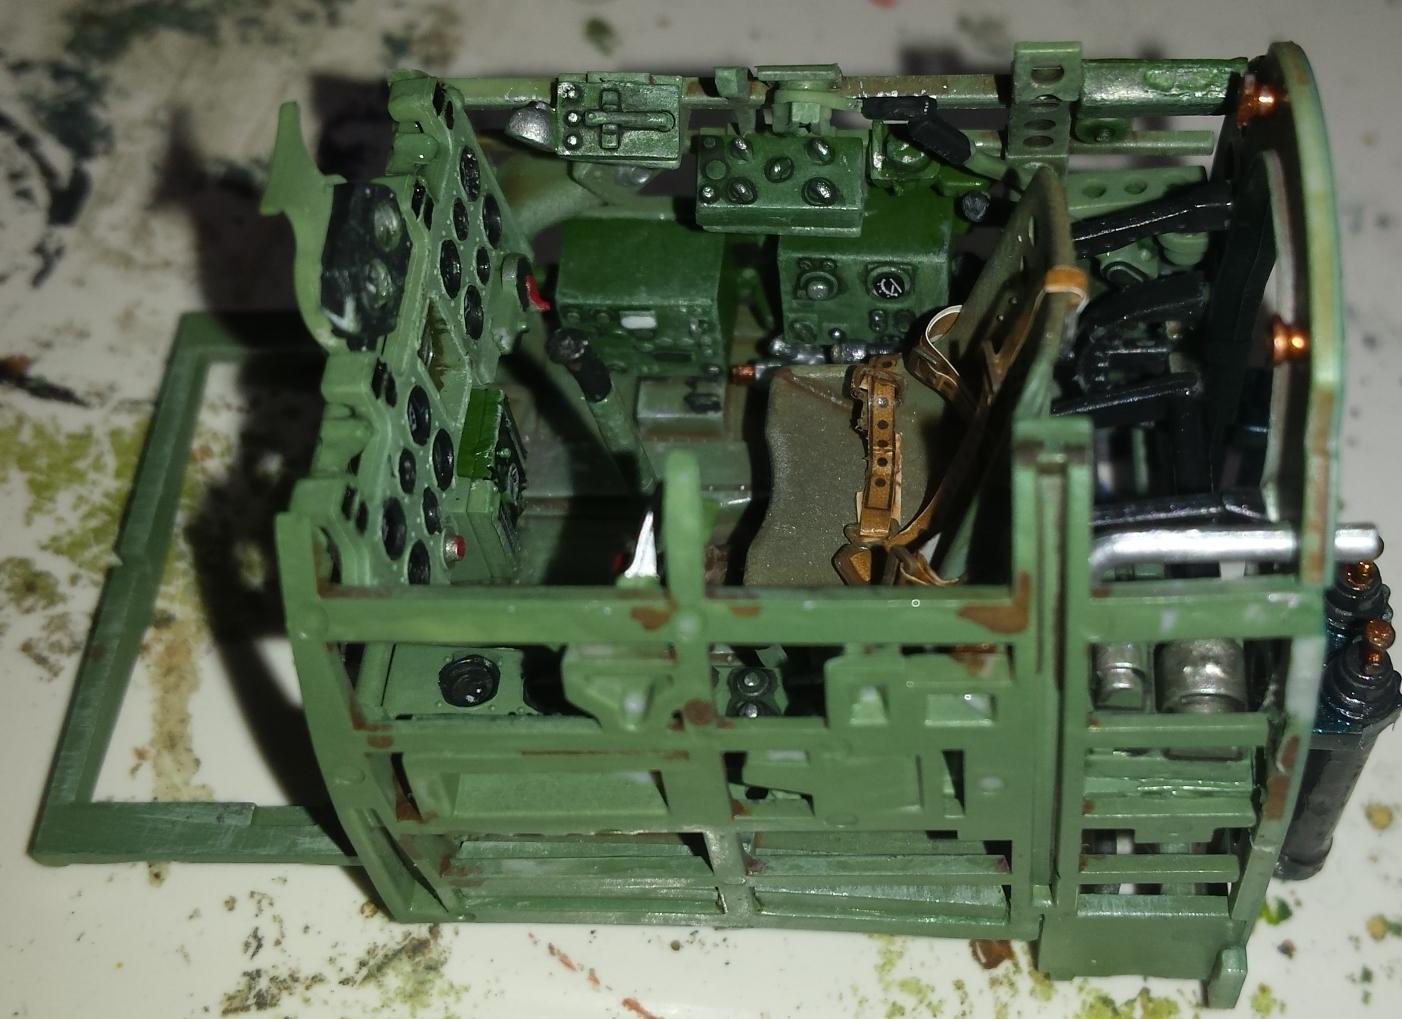
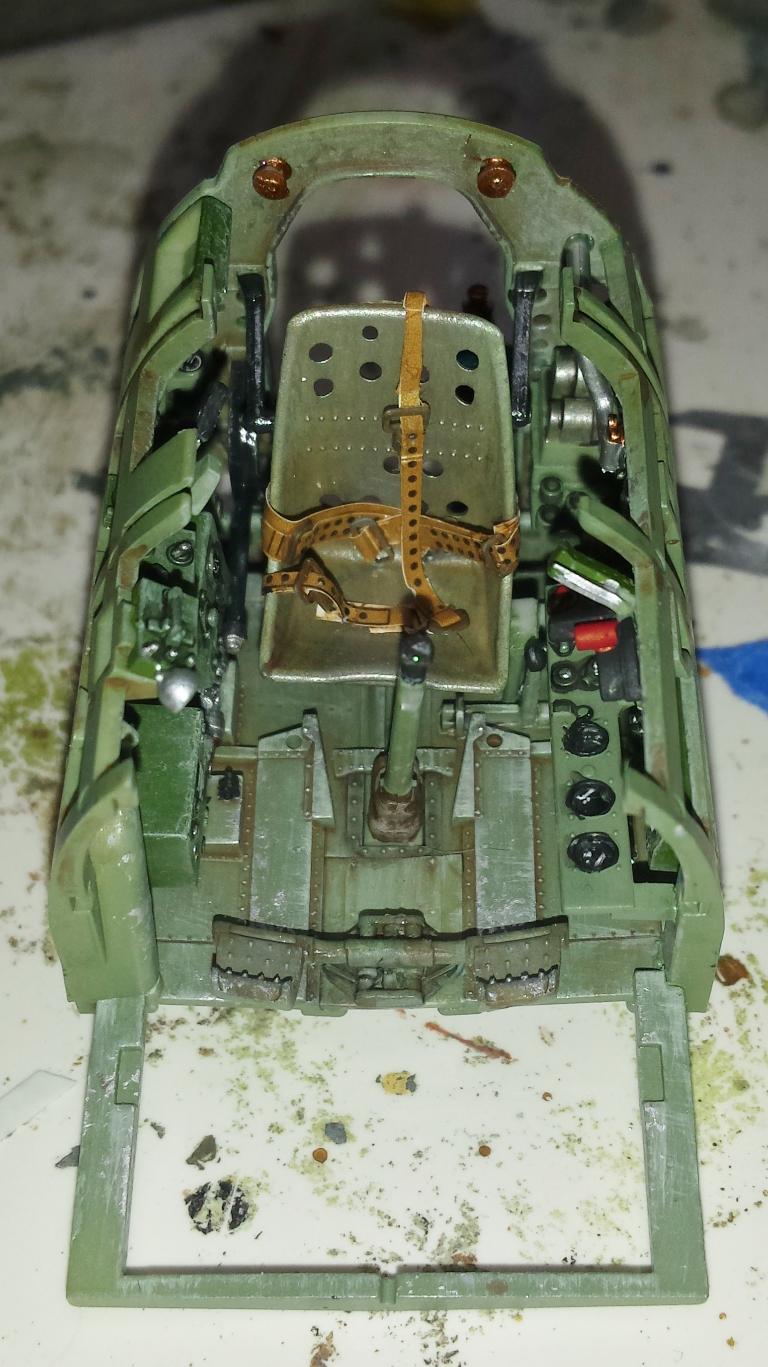
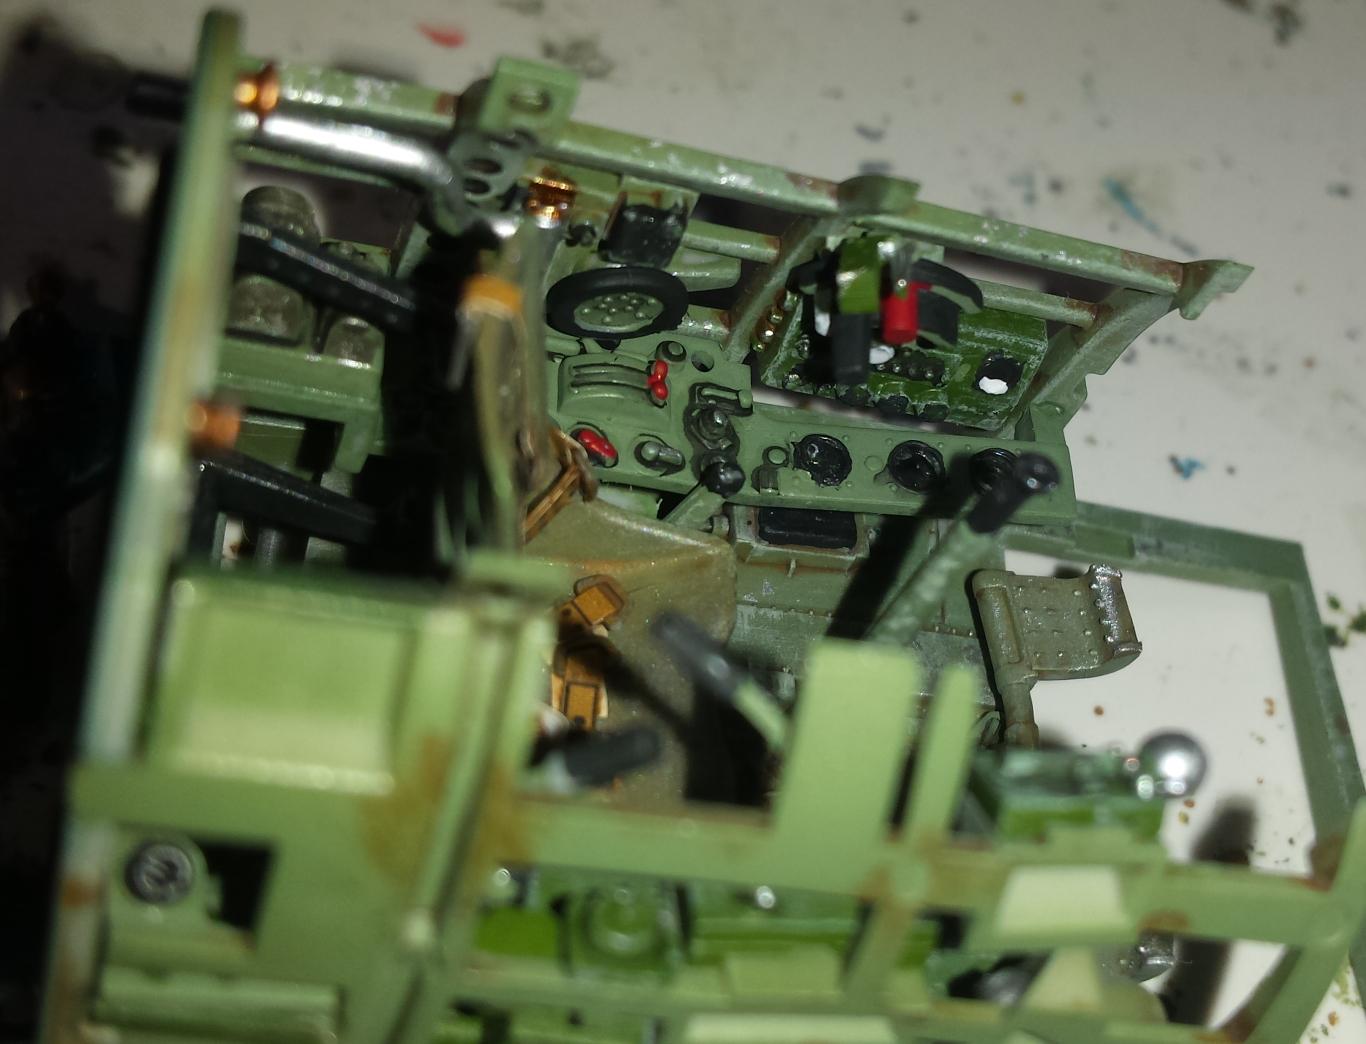
As you can see in the included pictures I have completed most of the cockpit assemblies. What is not included is pictures of the completed fuselage halves which is awaiting the insertion of this cockpit assembly. I am very impressed with the details that are included in these 1/32 Tamiya birds of war with the Zero being no exception. Unless you are a real fan for super-detailing I do not feel much more needs to be added to this OOB cockpit assembly. Overall, the build has been typical Tamiya featuring well molded plastic, zero flash, precise parts-fit, and tight tolerances. The build is complex with high parts count but if you follow the instructions exactly you should have no problem. Every-time I have tried to pave my own path I have stumbled and needed to back-track to fix an assembly. Despite my praise for the kit, and it's high Tamiya standards, it is not as perfect as it could be. I say this only because I have completed the Tamiya 1/32 Corsair which is a much later, and perfected molding. The Corsair, despite its complexity, just falls together with snap-fit precision. In contrast this kit does have some "fiddly" parts which do require some trial and error, and dry-fitting to insure precise, and correct assembly. I have test fitted the current cockpit assembly into the fuselage and it appears to fit very well, as advertised. One such area I was not pleased with is the included "sticker-type" seat belts. The texture just is all wrong with it's paper-like, sticky tape feel and shiny appearance. Also they could of at least pre-cut the stickers to peel off the backing paper. In order to improve it's look I have used a flat-varnish to remove the sheen, as well as, some brown wash to weather and darken a bit. I think after this preparation they will do. If you needed to add something to this kit I would recommend you look into some after-market products for seat belts. Also, all the buckles are included on the steel PE sheet so you could fabricate and make your own belt strap using the included buckles. This could be very time consuming though.
Regarding paints, I have used mostly Tamiya to color the cockpit assembly pictured. The cockpit green is not modified except for some lightened dry-brushed paint, and a light wash of Tamiya Brown Wash product. The Metallic green/blue color is a mix of Tamiya metallic blue with Tamiya Clear Green, in a 3 to 1 ration. Most chipping is applied using a fine brush, and/or sponge. Although Tamiya recommends flat and semi-gloss black for many of the electrical and control boxes I went a different route. Many decent online photos I found of accurately restored and preserved cockpits show these boxes to be a semi-gloss dark green. So I used tamiya dark-green to recreate this look along with a coating of semi-gloss varnish. Details picked out with a pointy tooth-pick and very fine brushes using various colors called out by instructions, and/or found in pictures.
I will try to post more WIP photos as I progress in this build, as well as, a photo selection of the completed project. I hope you find my description helpful and enjoy the photos. Comments are always welcomed.


Excellent start on an equally excellently engineered kit (of course it is...it's a Tamiya, right?) - looks terrific so far - you're gonna love it!
Since you are obviously doing a Mitsubishi-built airplane from the cockpit color, beware that the wheel wells and inside of the gear doors are painted the exterior color, not the Ameiro (that was used by Nakajima-built airplanes). This is information available since the kit was released, so the color callouts in the instructions may be incorrect.
Paul, this is a wonderful start! It looks like a stellar kit, even with the issues you mentioned. I look forward to more progress (WIP) reports.
Paul, just a marvelous cockpit, a kit in itself. I was wondering how you did the seat harness. I think it looks good, myself. The various "boxes" in all kinds of cockpits-not just the Zero- are made by subcontractors. What they paint their finished subassemblies might not exactly match the other cockpit components. A monotone anything just doesn't look right. I suspect that as the war progressed, some components didn't get painted, or were just left primered. No time, and lack of materiels. A look at the painting instructions for the Tamiya Gekko cockpit is my example.
Paul,
This is an excellent article on the A6M. Tom C recently posted some photos he took of the real thing, and it looks like you simply shrank yours down...to a 1/32 scale.
Well done, and I'll be looking forward to seeing your next installment. 🙂
Congratulations.
Very nice and well done job. It will serve to inspire me, so I have this kit in the box on my shelf, for long time. I will keep watching your bird.
I had the kit in my stash when it 1st came out and it sat for years b/c I was overwhelmed with it. So I finally sold it. Then years later a customer sent me this one to build for him. Dive in and build it!
Looks fantastic!
Building a zero myself Paul - so great to come across this post!