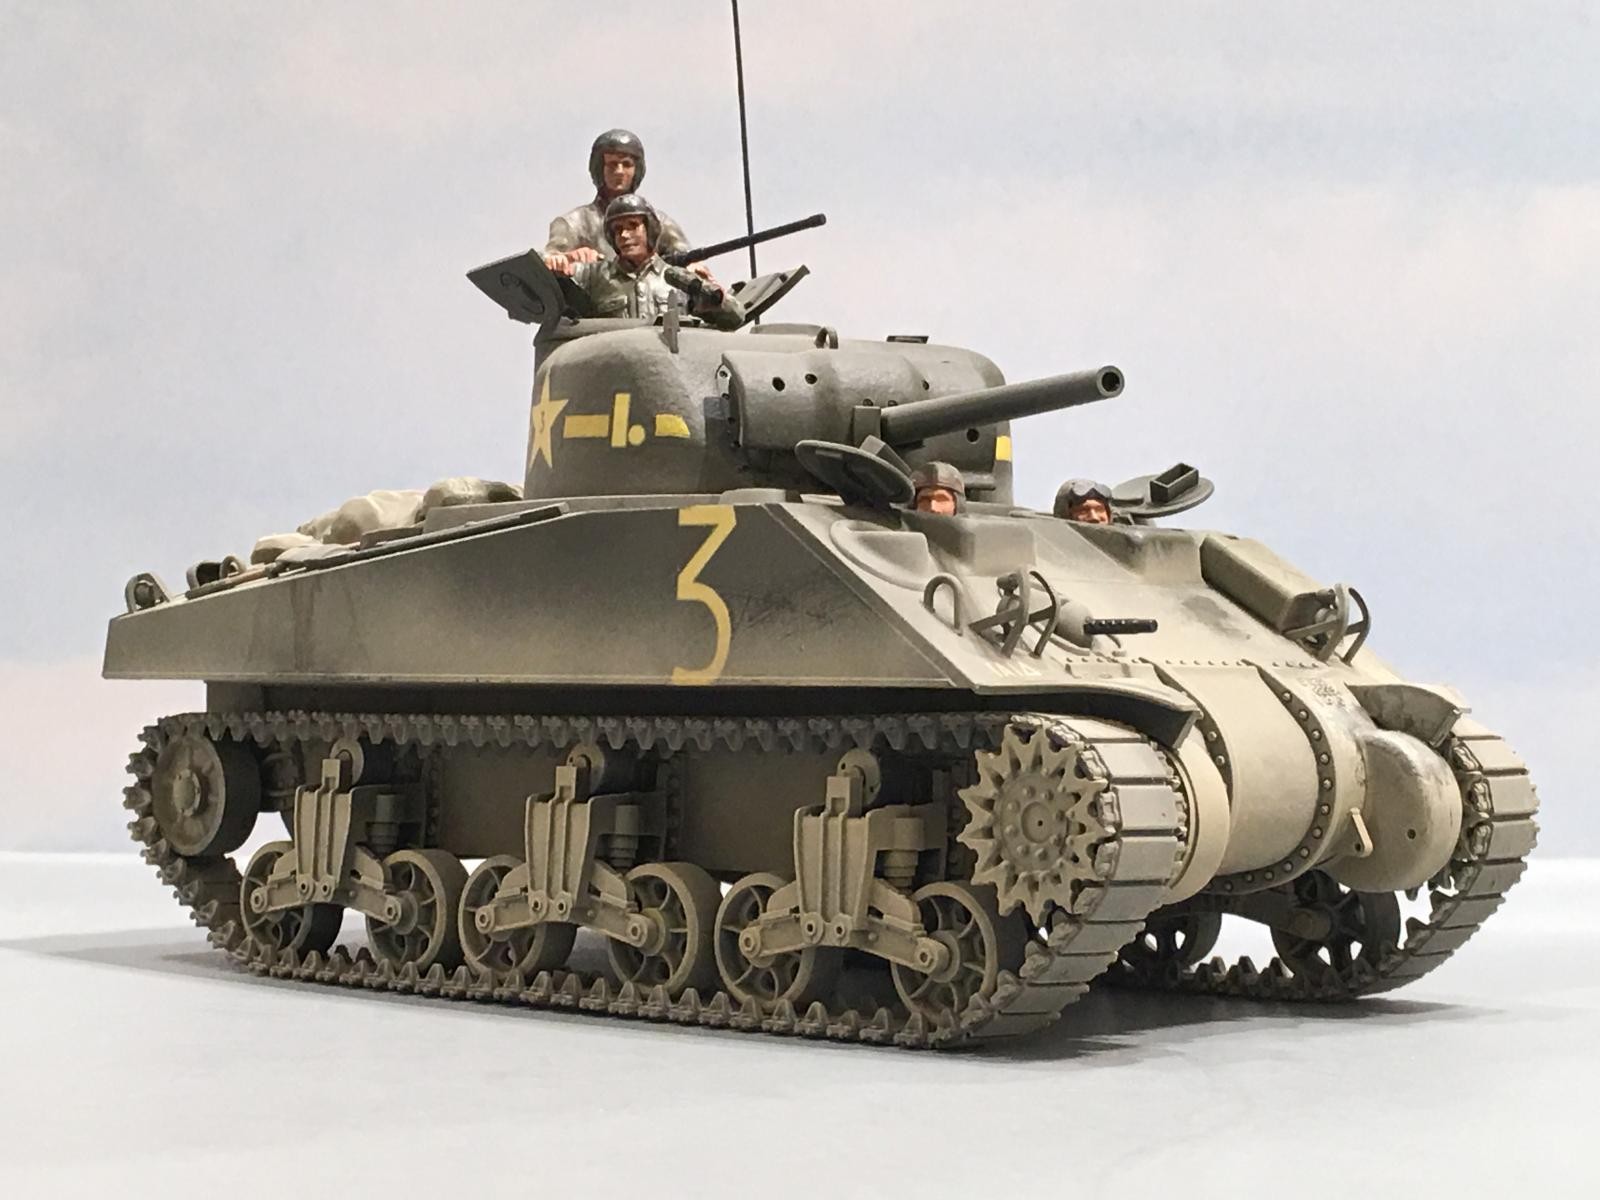
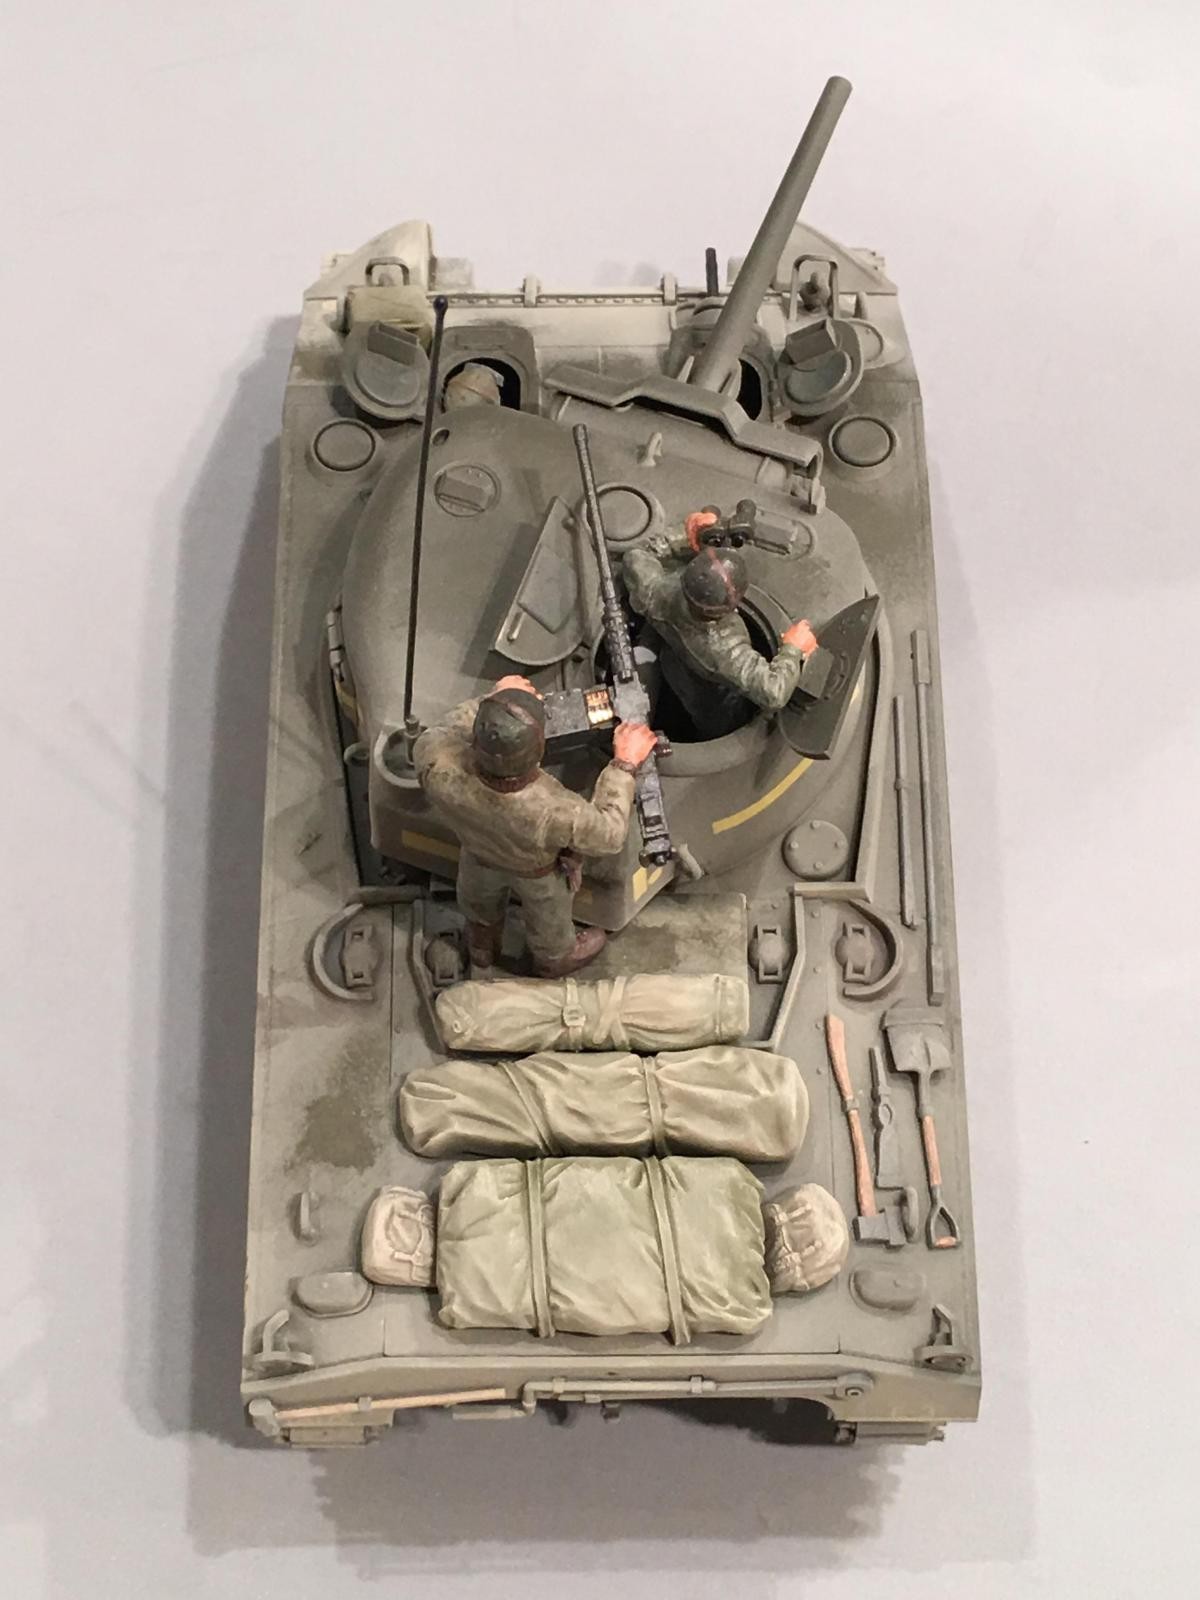
Battle of Kasserine Pass, M-4 Sherman “early” of the 1st Armored Division, Tunisia 1943
Finally, this one is done. I completed it last night.
I want to start off by saying "Thank You" to David Thomas, for coming up with the idea, organizing it, and leading this Kasserine Pass Group Build from the Front...
which was a lesson learned during the Battle by American leaders the hard way. Many American Commanders never were within miles of the front, and literally didn't have a clue as to what was actually happening on the ground.
Many don't realize this, but the Battle of Kasserine Pass was one of the most important battles that was fought by the US Army early on during WW2. It showed the Army what they were up against as far as the enemy they now faced. The battle also showed the leaders just how bad some of the equipment currently fielded by the Army was, and how good the German equipment was.
The Kasserine Pass was another turning point as far as it changed the style of tactics used and shook up the upper echelon levels of leadership. Shortly after the battle was over, many of the "top Brass" were relieved of command due to poor performance.
Unfortunately this was a necessary step made by Eisenhower, if he wanted to win the War against Germany and Italy.
During this time of late 1942 and early 1943, the 1st Armored Division was operating tanks that were no longer suited for battle against a better equipped and better trained Army. The most common types deployed were the light weight, M-3 Stuart, which was great for scouting missions, but not intended to fight one on one against another heavily armed and armored tank.

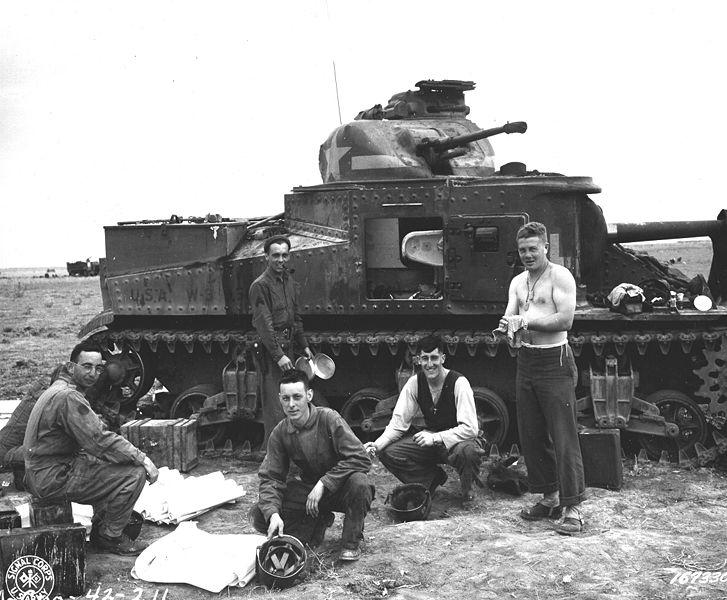
The other main type fielded was the predecessor to the M-4 Sherman, called the M-3 Lee. This was a medium weight tank, and it had a 75 MM main gun mounted in a side sponson.
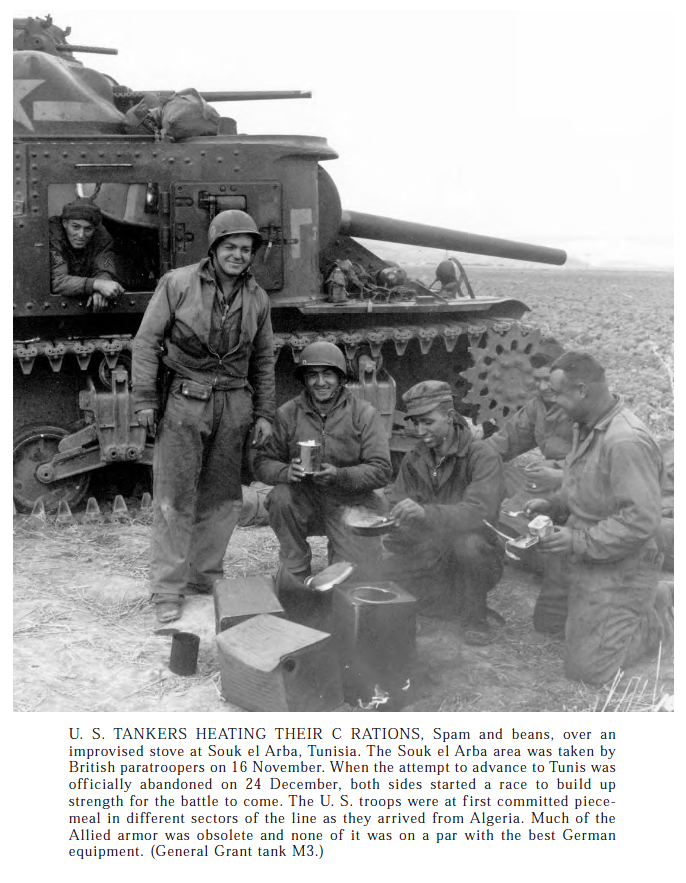
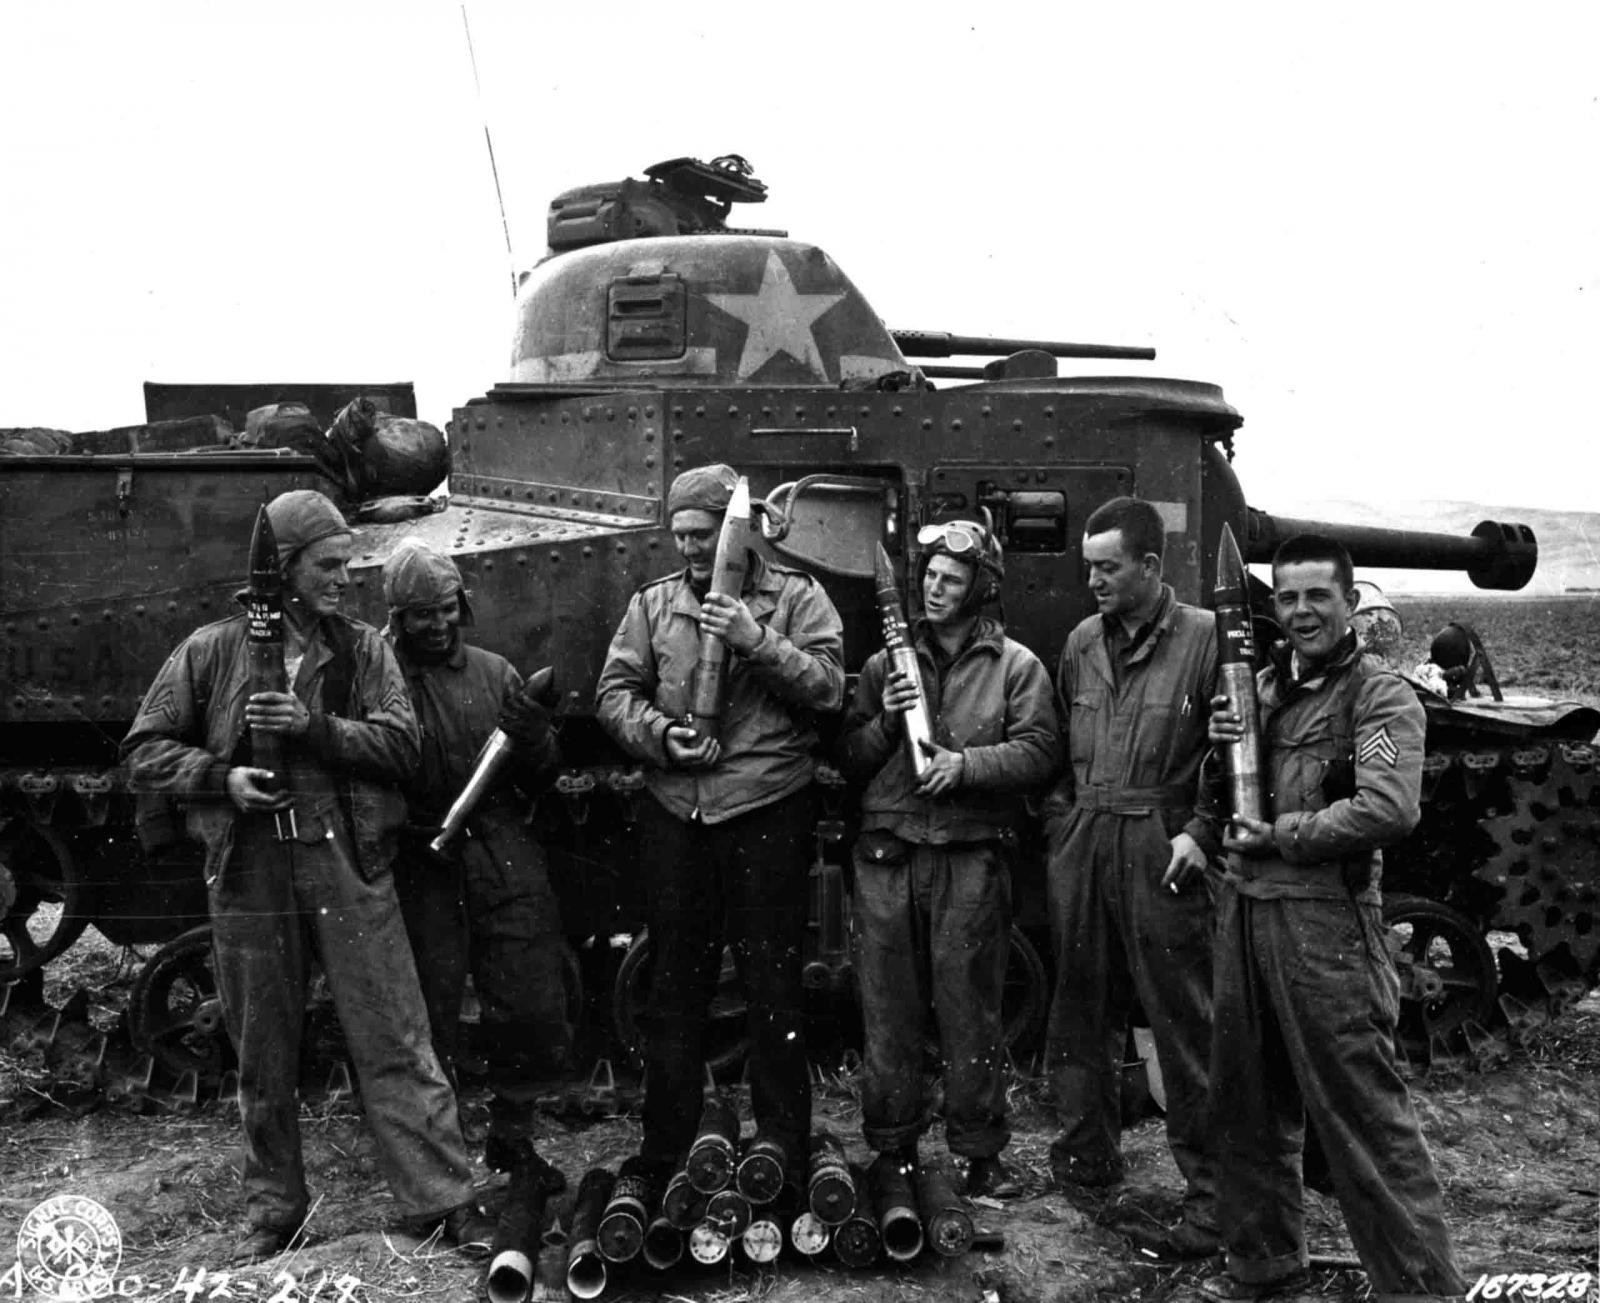
This tank was good against lightly armored vehicles, but it lacked a turret that housed the main gun as we know it today. Instead the M-3 Lee had a much smaller 37 MM cannon mounted in a smaller turret that was mounted on top of the hull. You can see both weapons in this picture shown below.
I found this photo that shows the size of the 75 MM main gun rounds carried by the M-3 Lee. They have a much shorter casing than a typical German round of similar caliber. What this means is this: The American 75 MM round was a low velocity round. It lacked the penetration power of a similar higher velocity German round, that had more gun powder behind the projectile that acted as a propellant. When you combined this along with the longer main gun barrels found in most German Tanks, you can see the reasons why the M-3 Lee was destined for failure against the Afrika Korps.
However, when used against the Japanese in the Pacific and CBI theaters, the M-3 Lee and Stuarts did fairly well...
Another bad thing about the Lee and the Stuart is this: If you look close at the construction, you will see the tanks hull was riveted together. This was World War 1 technology at it's finest. The Titanic also relied on a riveted hull... Once hit by incoming rounds, if the round did not penetrate, often it would break off the inside head of the rivet, causing it to bounce around inside the tank, either injuring or killing the crew.
Plus the riveted armor did not fare well against the daunted German 88... seen in action here in Tunisia in this photo below.

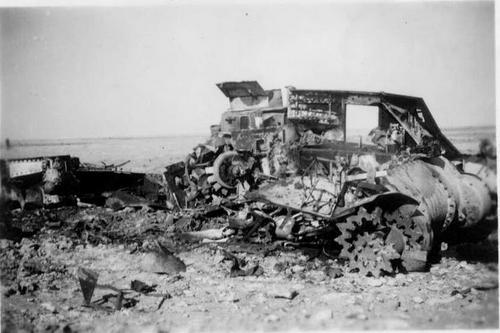
This is often how these American tanks would look like after a single hit from the 88. Normally a fire would start inside the tank, and within mere seconds the whole interior of the tank would be on fire. This would cause the ammunition stored inside the tank to "cook off", which often resulted in a massive explosion resulting in this;
The M-4 Sherman was a definite improvement over the M-3 Lee. it had the same 75 MM main gun, but now it was mounted in a turret that could rotate 360 degrees, like current battle tanks we see today. It also got away from riveted armor. There were various versions of the Sherman produced. Some had welded hulls with flat sides, (like my model depicts) and others had a one piece cast hull like the one from the 1st Armored Division in this picture below:

The American Forces during the Battle were sent into battle in small forces. They did not have a single massed attack. This was a huge mistake that cost many American lives. I read that during one day of battle, the 1st Armored Division lost 48 M-4 tanks ! Over half of their tanks...
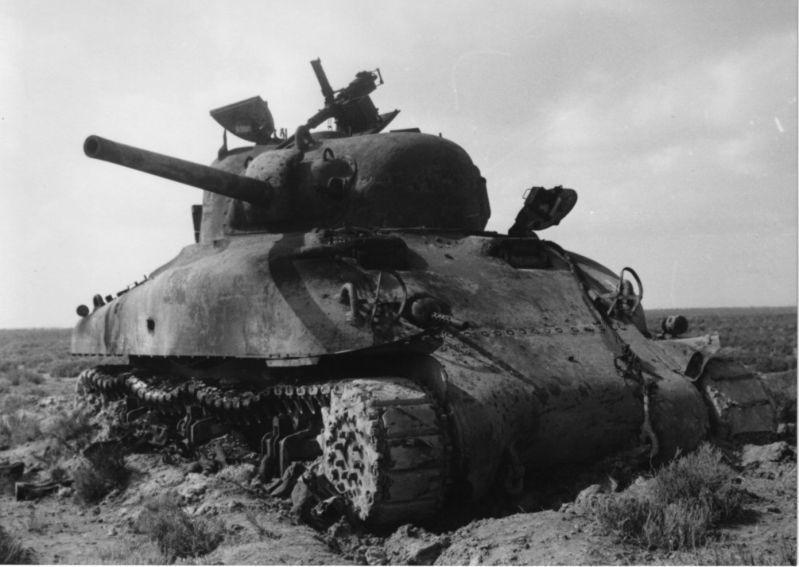
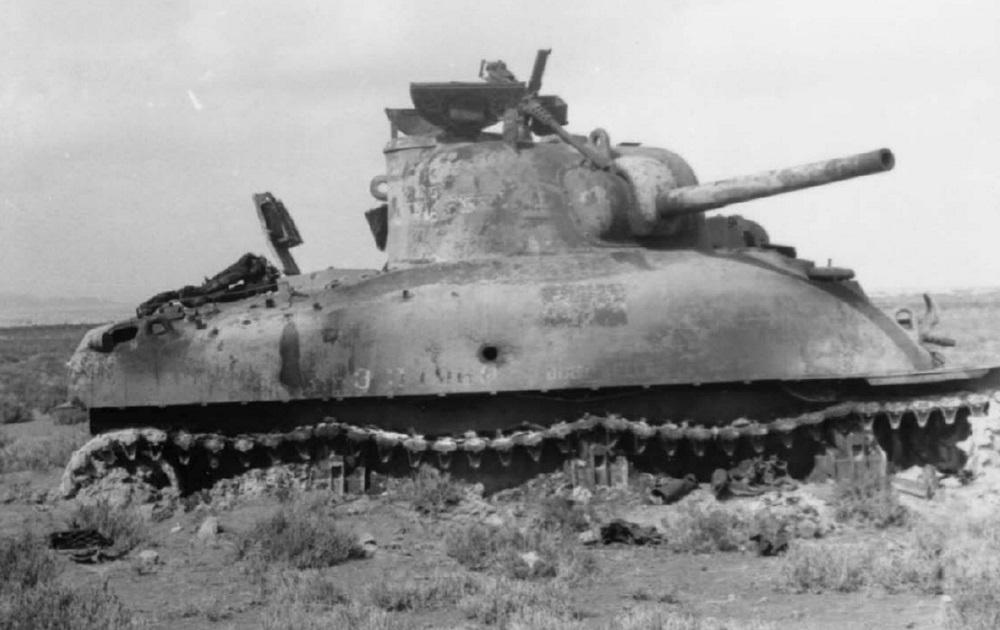
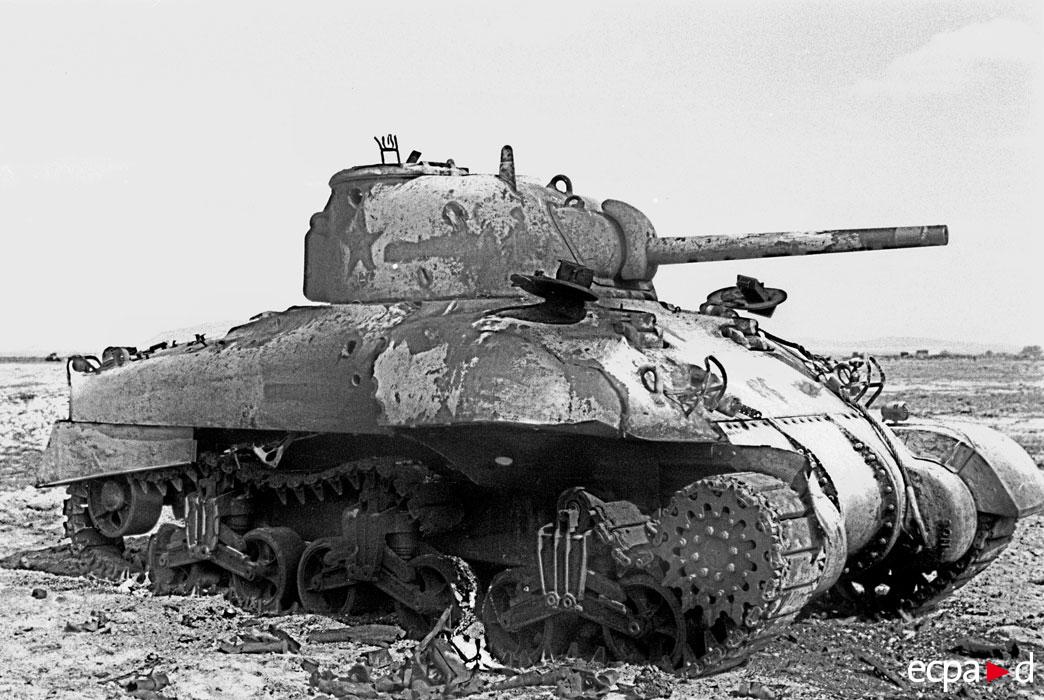
I found these two pictures that show the same Sherman from different angles after it was knocked out by the Germans at the Kasserine Pass.
The M-3 Stuart light tanks didn't fare any better... Here's a photo showing one of the many lost during the battle...

Besides the vaunted German 88, the new "Tiger" tank was put into operation here in Tunisia for the first time. This is an actual photo of a Tiger in Tunisia... several were captured later on.
David, you and Michel will probably like this picture...

The Germans also had Mark IV Panzers; some of which were operated in the standard European color scheme of overall Dark Gray like this one here... It didn't take long for them to get covered with dust !

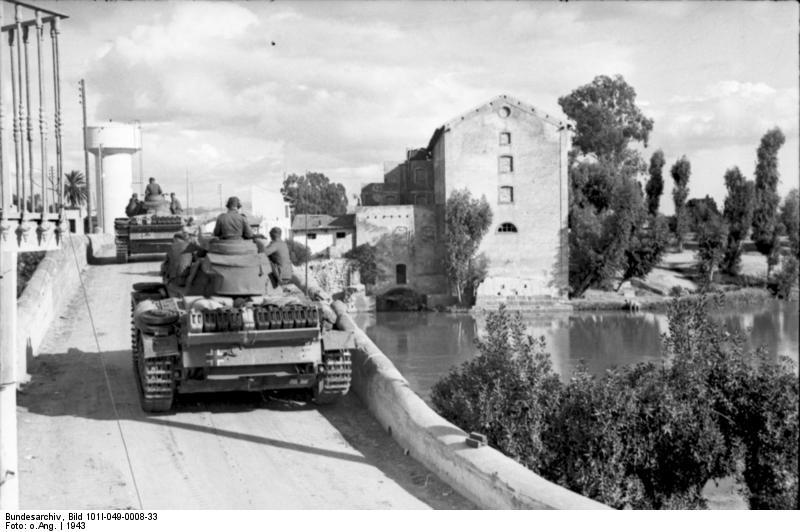
and Panzer Mark III's. These shown below were reinforcements being sent to the front...
The US Forces failed to use the terrain to their advantage. Instead they were led into a trap by Rommel. This trap was the "Kasserine Pass". Typical Americans would go to the high ground thinking it was best. But they did not think about being 'silhouetted" against the sky, and became easy targets. Another thing the US Infantry failed to do adequately was dig in once they stopped. They often dug what was known as a slit trench. This was not nearly as deep as a typical fox hole.
The German tankers would run over these slit trenches with their tanks and turn, grinding the tracks into the sand. You can guess what happened to the poor foot soldier then.
Due to obvious training and doctrine faults, many of the new Sherman M-4's were lost here too.
Most deployed here ended up like this one... after an internal explosion tore the turret off. However, the hull and turret remained mostly intact. Compare this picture to the one above where the tank was obliterated. This is how much better the armor was on the Sherman when compared to the Lee. They still didn't stand a chance against the 88 ( or the 75 MM high velocity like the Panther carried)...
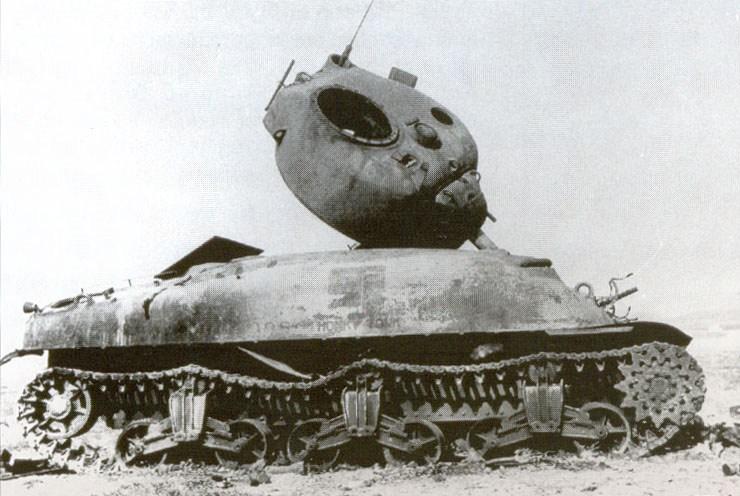
The Germans gave the tank a gruesome name. They called them "Tommy Cookers", for obvious reasons. It was also called the "Ronson" since it was like the well known cigarette lighter made by the Ronson company. Their sales slogan was "Lights the first time, every time !"... You get the idea behind that one.
My Dad served in the much improved Sherman's during the Korean War, as well as the M-26 and M-46 tanks. He told me that a lot of the "old timers" told him that once your Sherman was hit, you had mere seconds to get out alive".
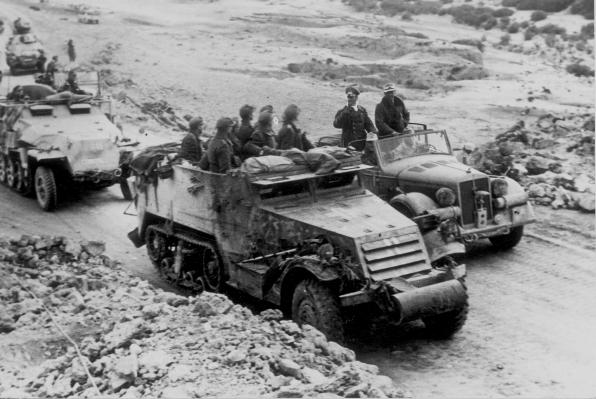
After the battle of Kasserine Pass, the Germans captured a lot of Allied vehicles and put them to use. This gave Rommel a much needed boost since most of his equipment had been damaged or destroyed. Plus the Germans were not receiving adequate supplies, so they were not hesitant to put Allied equipment into German service.
Here's a picture of Rommel talking to a group of German soldiers just after the battle. You will notice that some are riding in a captured American M-3 half track vehicle...
The US Army took a good hard look at itself after the battle was over. It had to if it was going to win against the battle hardened Afrika Korps. Changes needed to be made, and they were. These changes effectively made the Allies a much better fighting force.
I built my Sherman as part of the "Kasserine Pass" Group Build. Here is a link to the construction log:
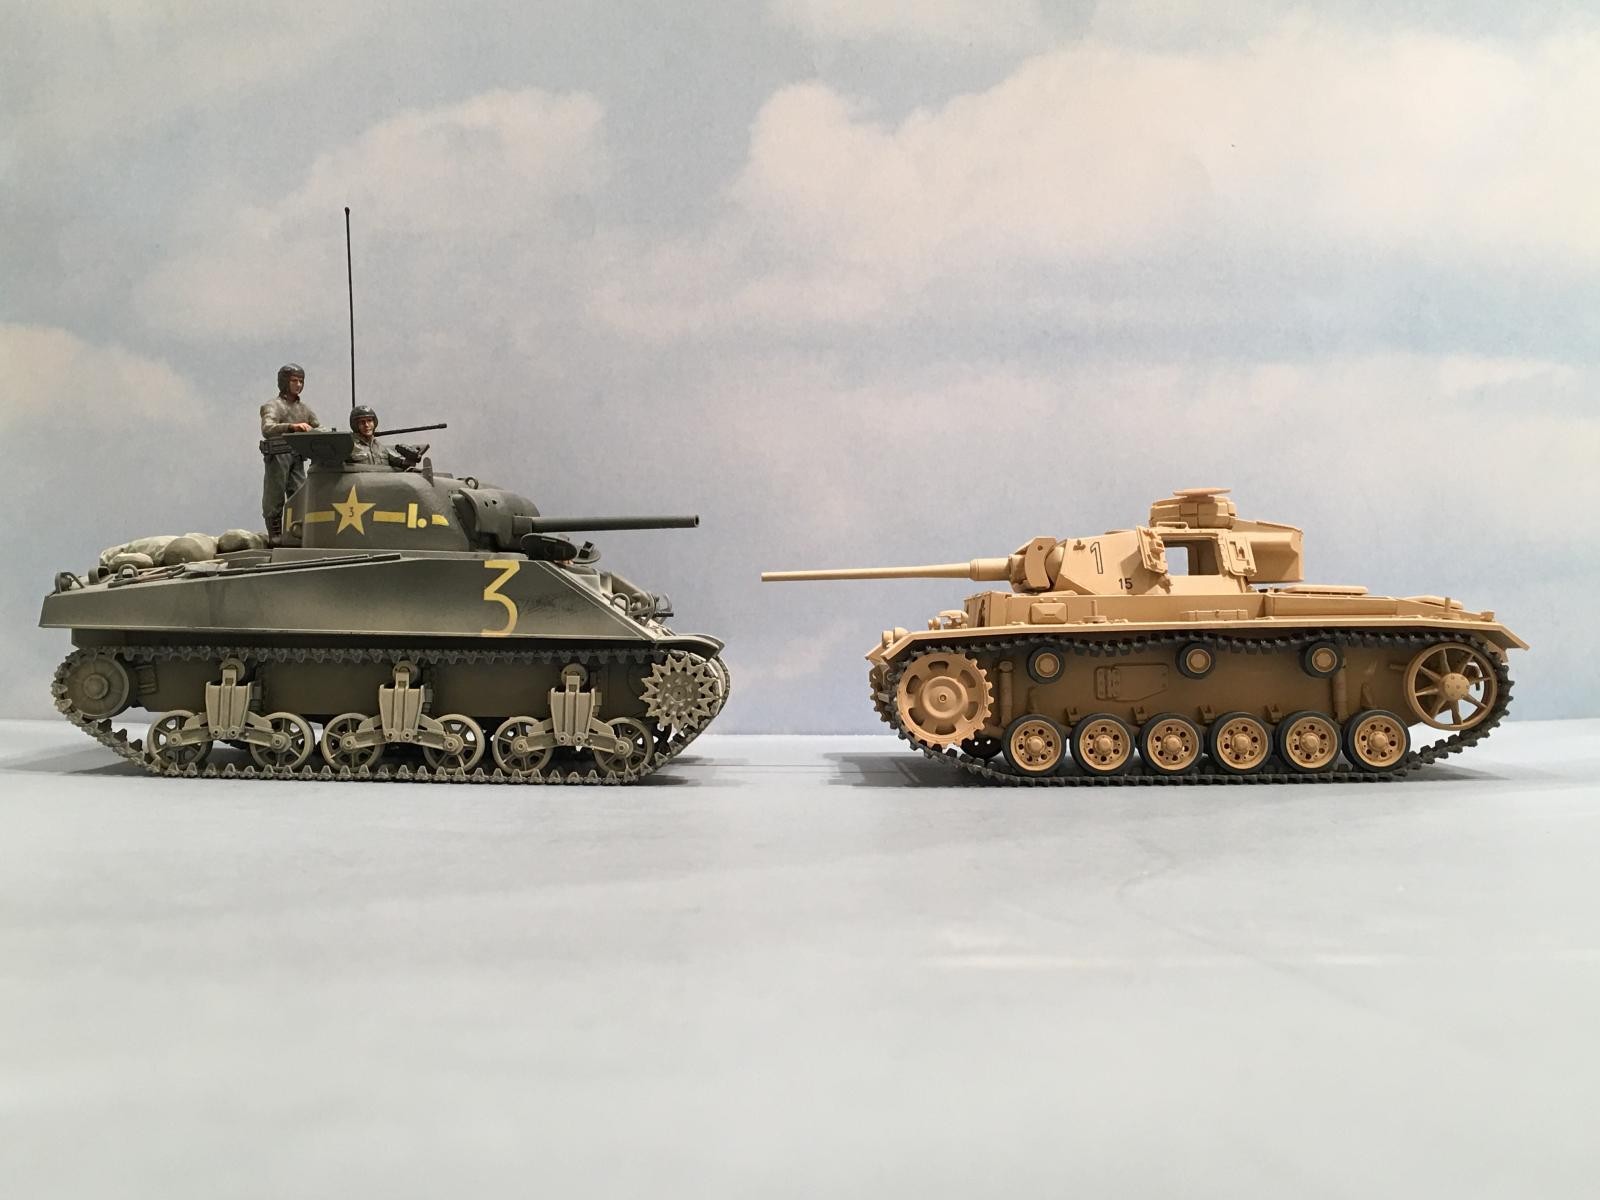
I am currently finishing up a German Panzer Mark III, that is also part of the Kasserine Pass GB. I took a photo showing the differences between the two tanks for a comparison. These are both 1/35 scale kits.
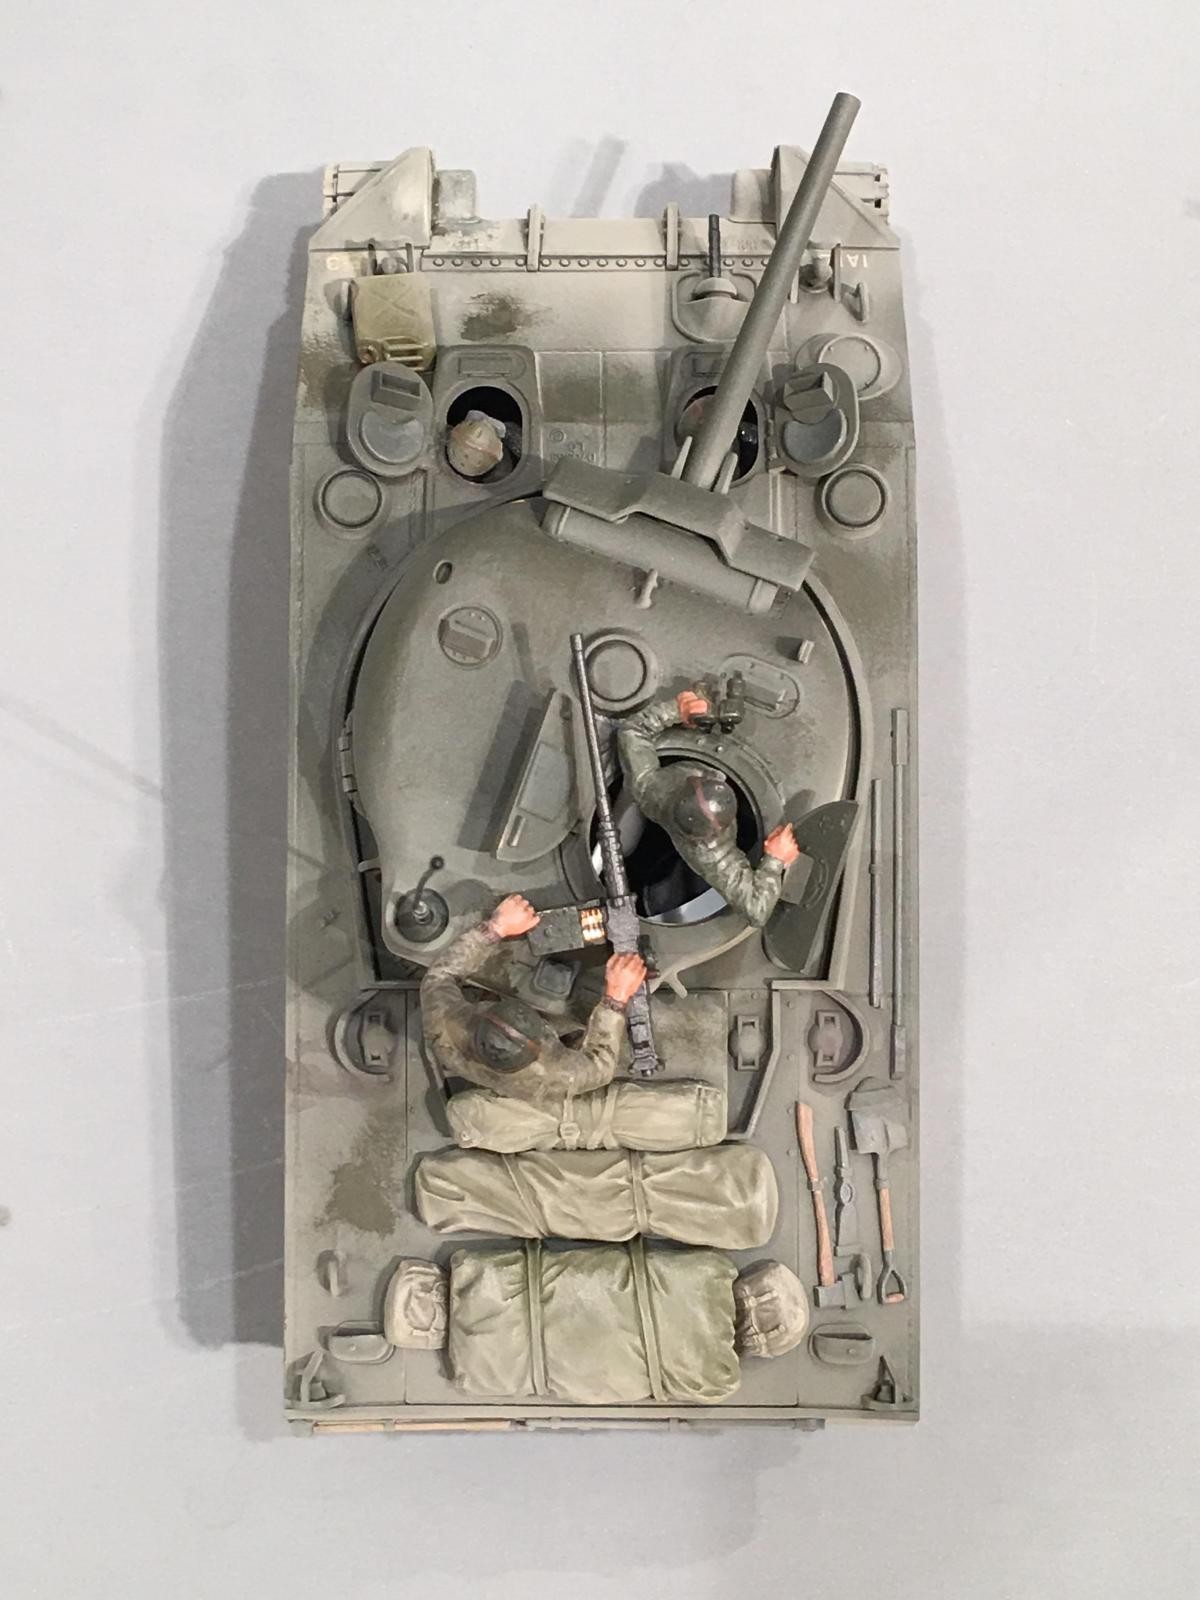
I am not very good at painting figures. I wanted to give it a try however to see if I could get better with practice... The whole crew.
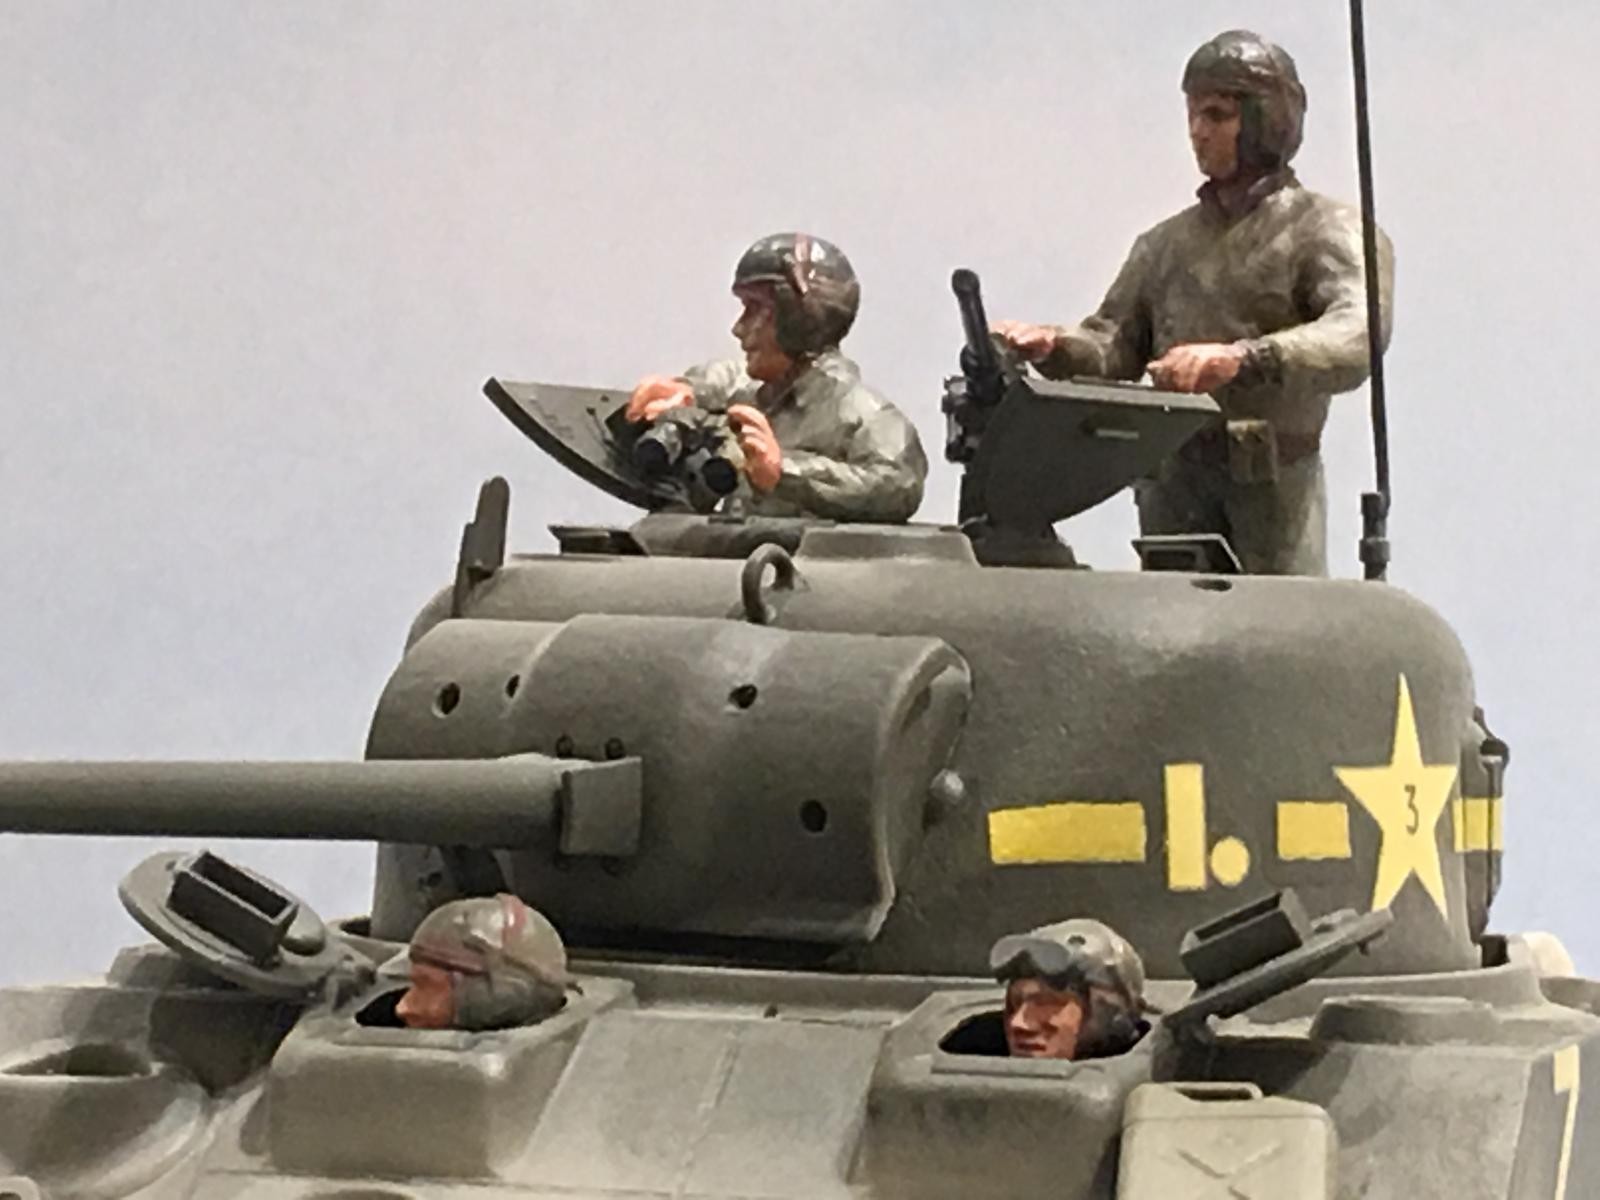
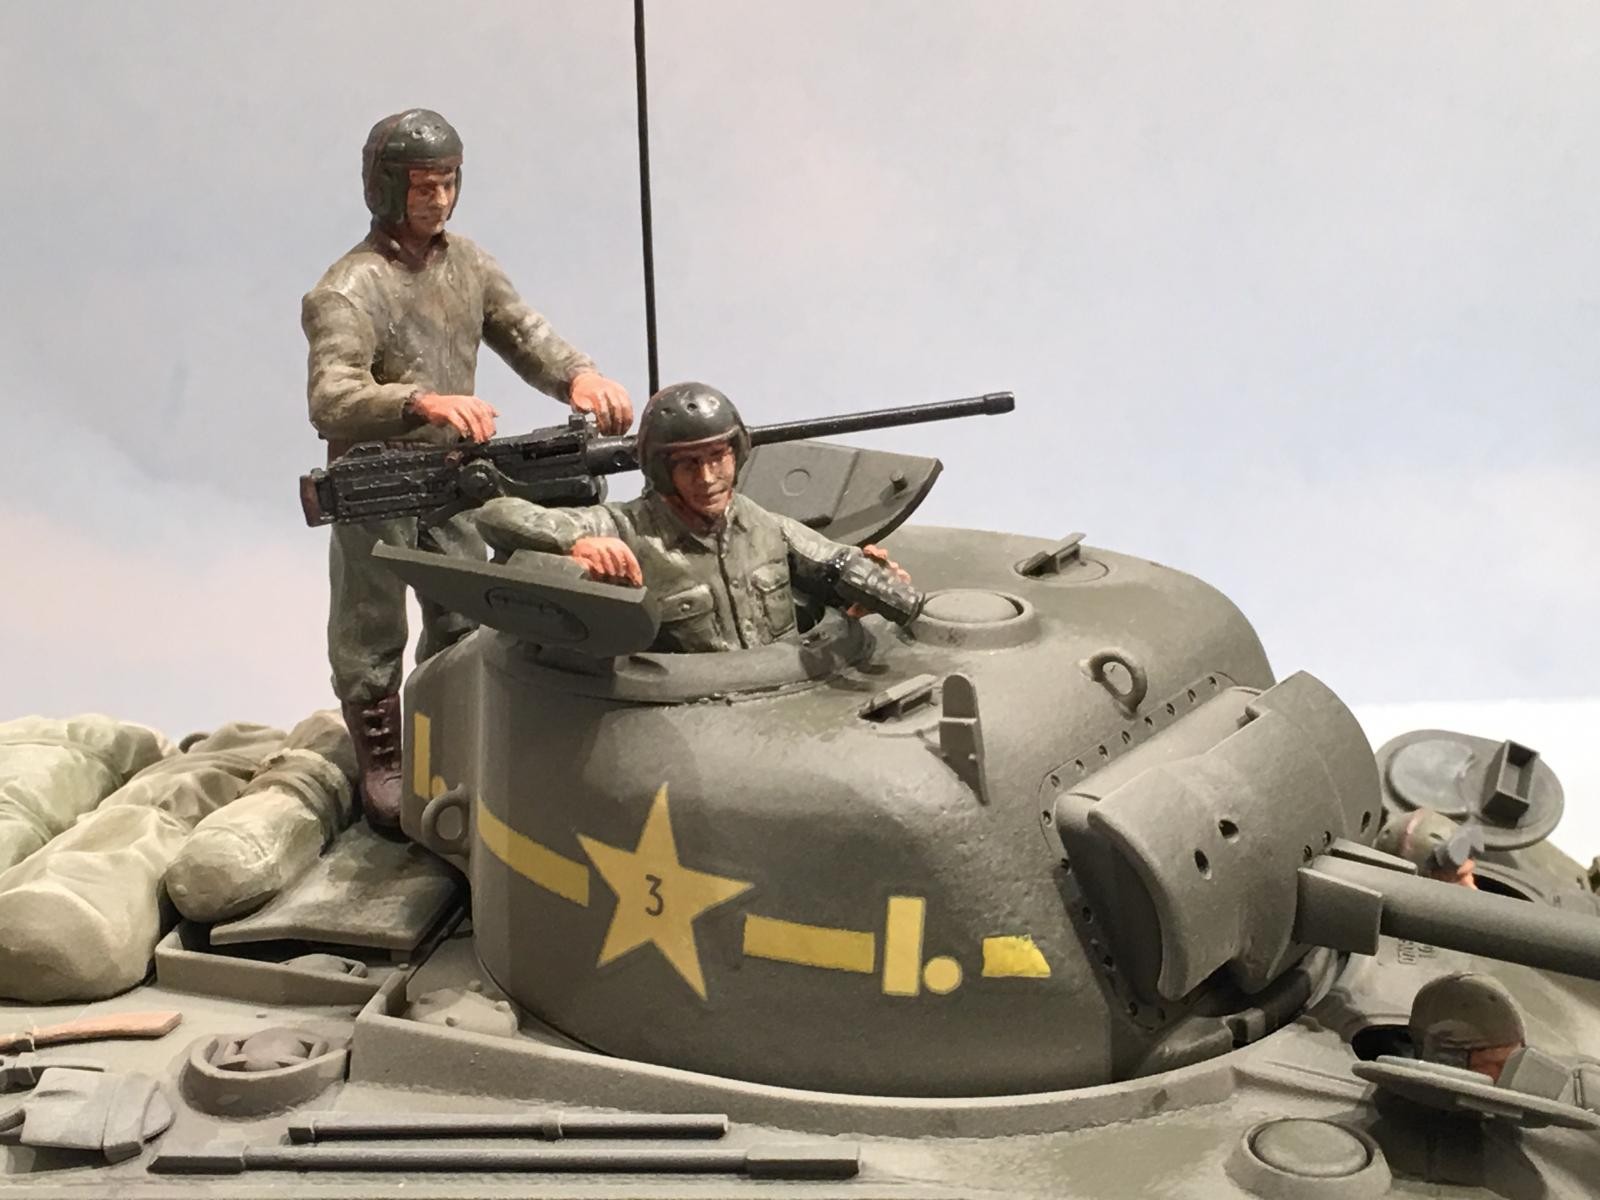
The Gunner and Tank Commander.
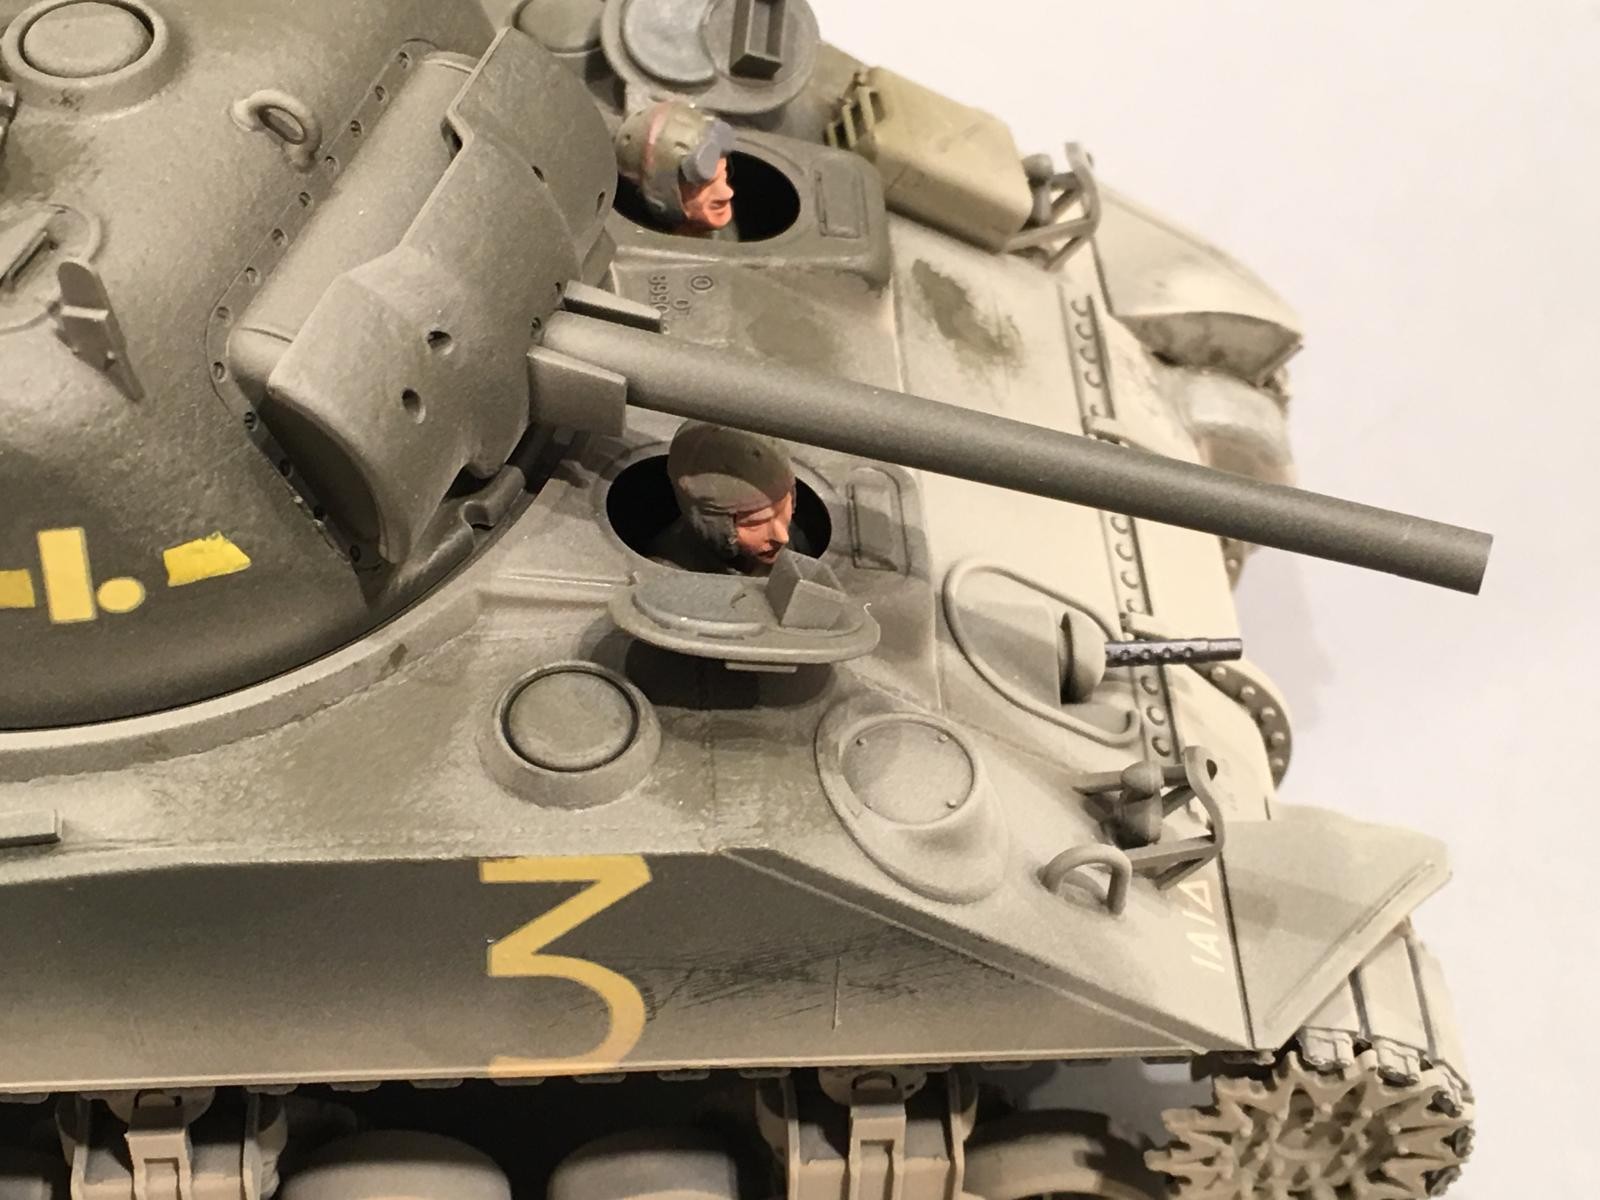
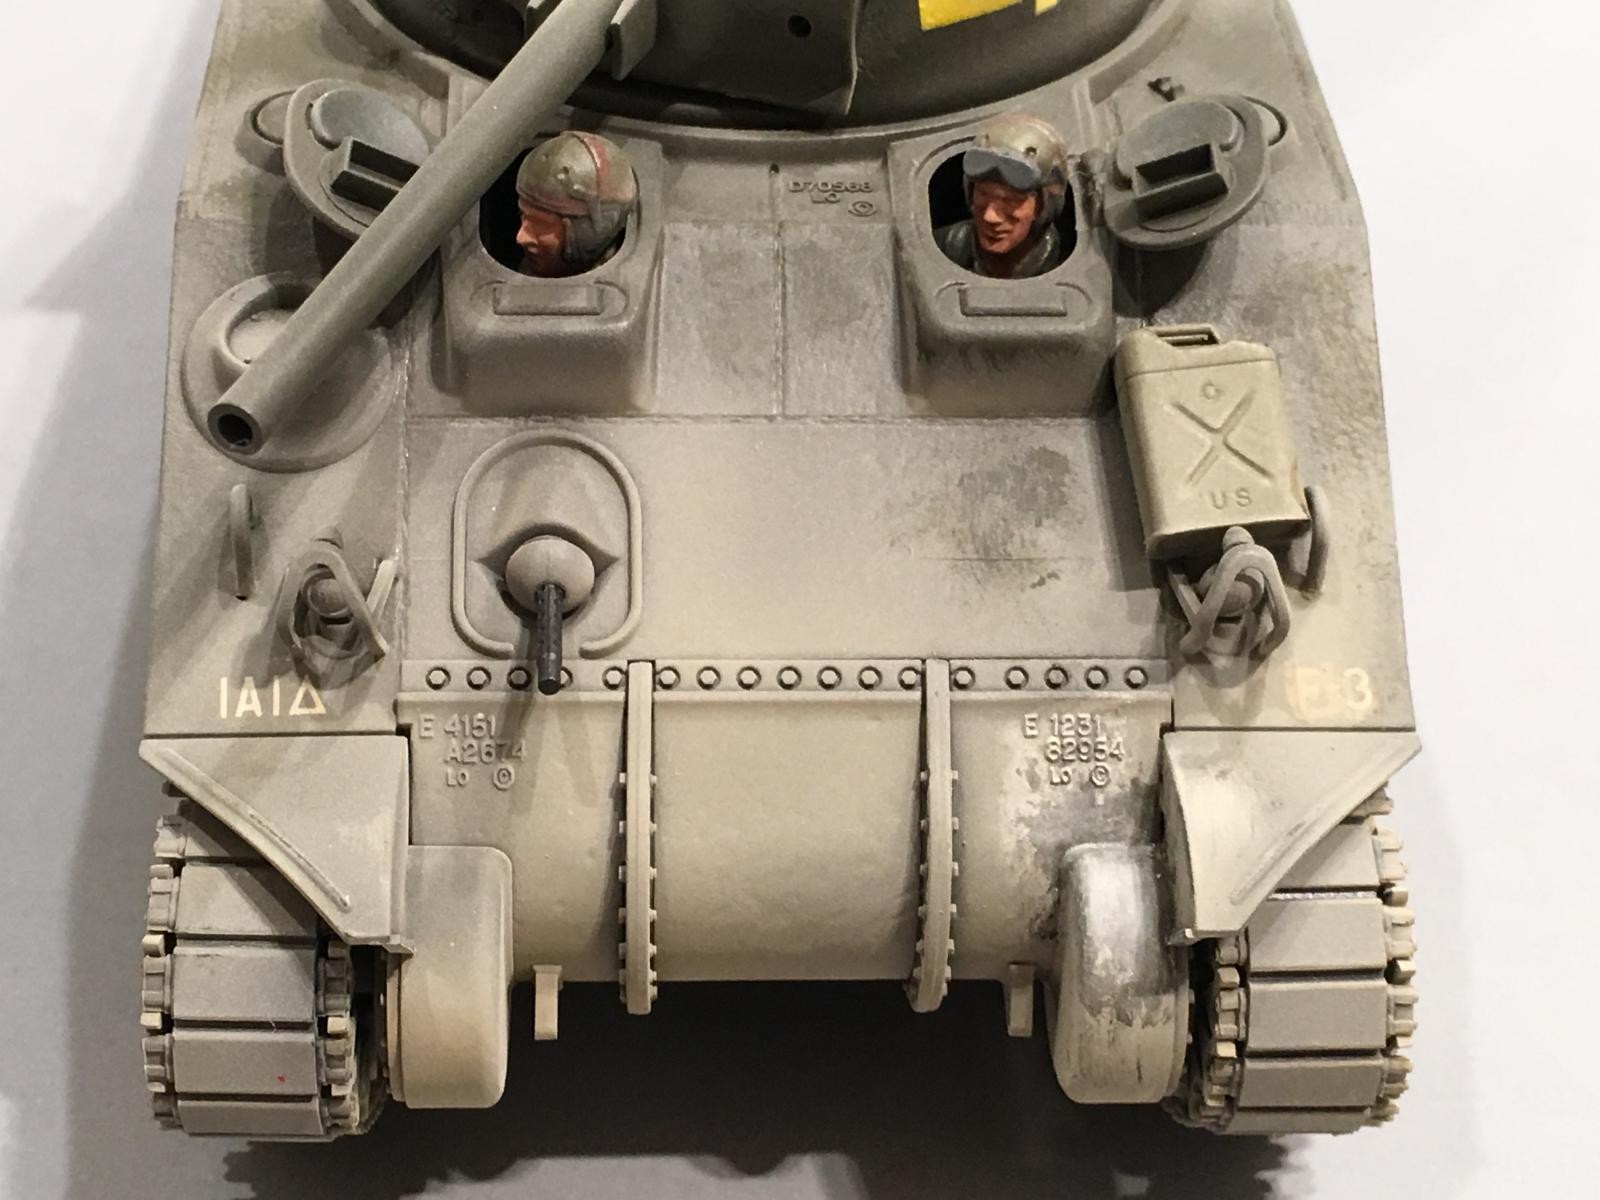
The driver and Bow Gunner / Radio Operator. (sometimes called the "Assistant Driver").
I zoomed in on the .050 caliber "Ma Deuce" for these next two pictures. I tried something new here too. I used "Gold" colored Bare Metal Foil to represent the brass casings of the .050 caliber ammunition. I tried using the "Copper" color on the projectile portion, but the piece was too small to work with. So I ended up painting the bullets instead...just as I painted on the connecting links.
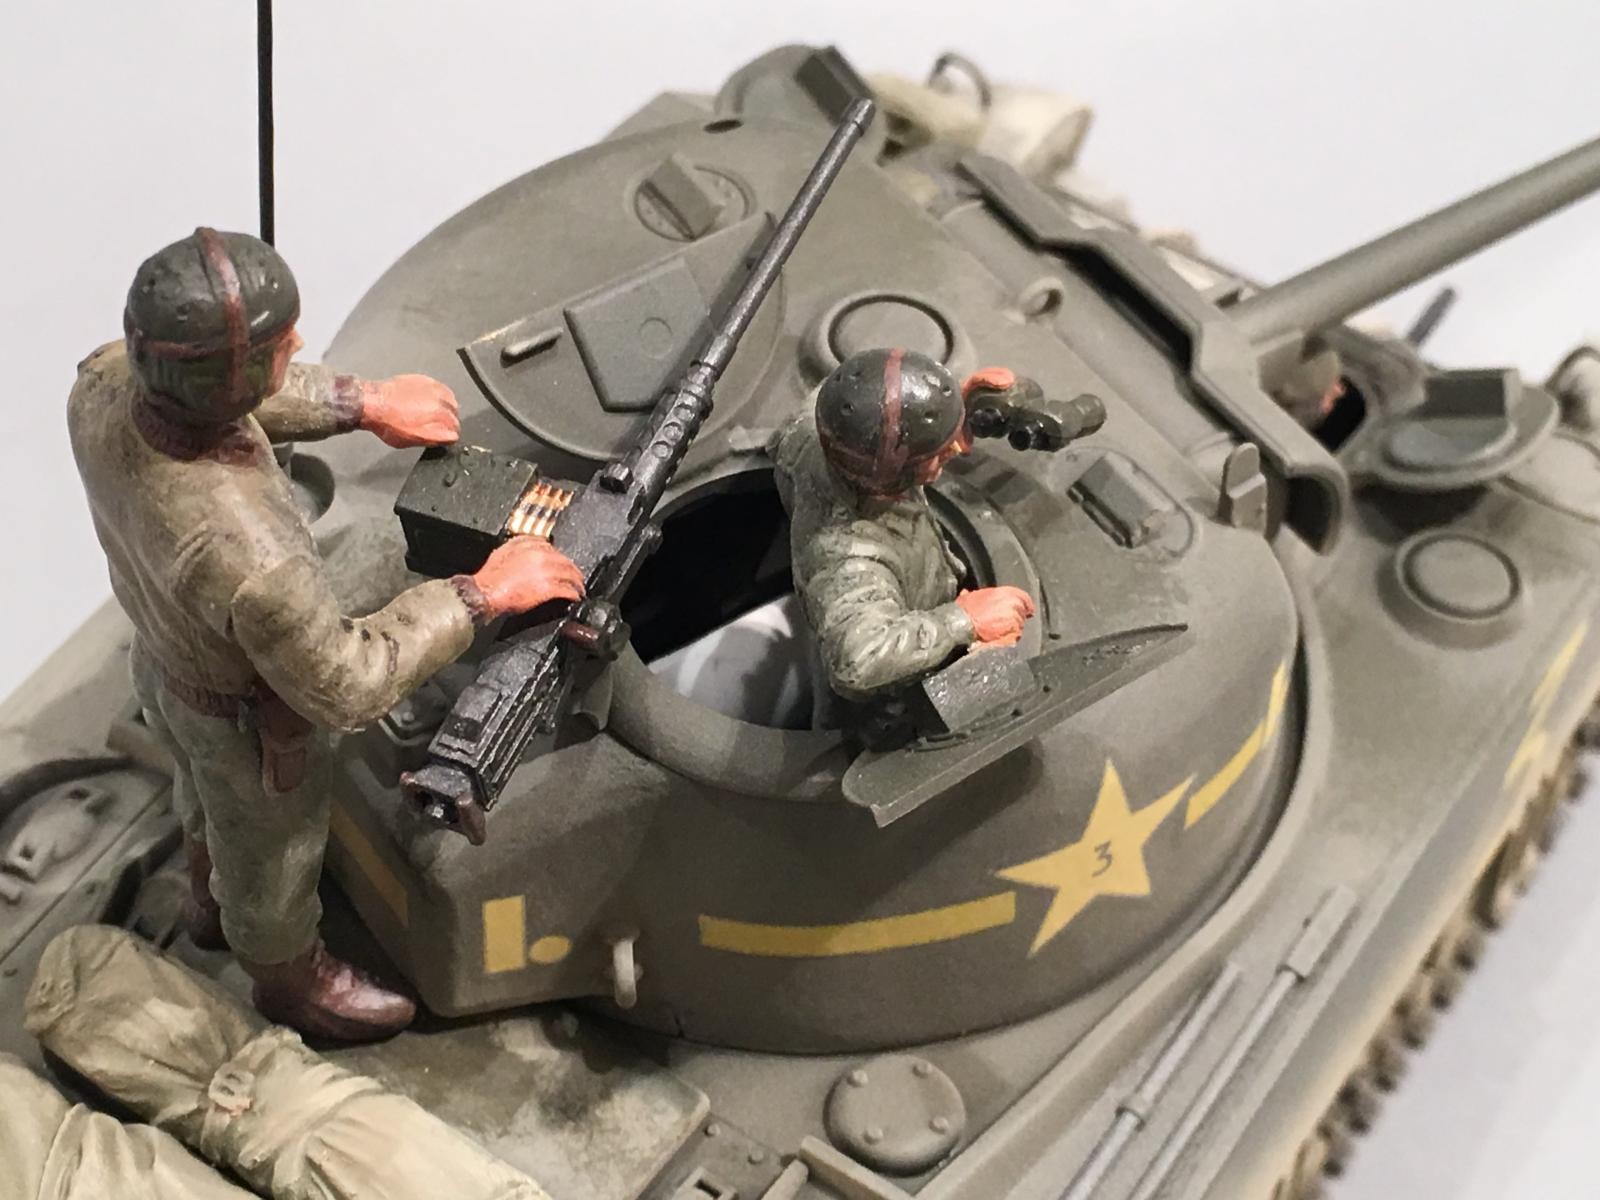
and added a decal for the ammo box that represent the lot number and type of ammunition.

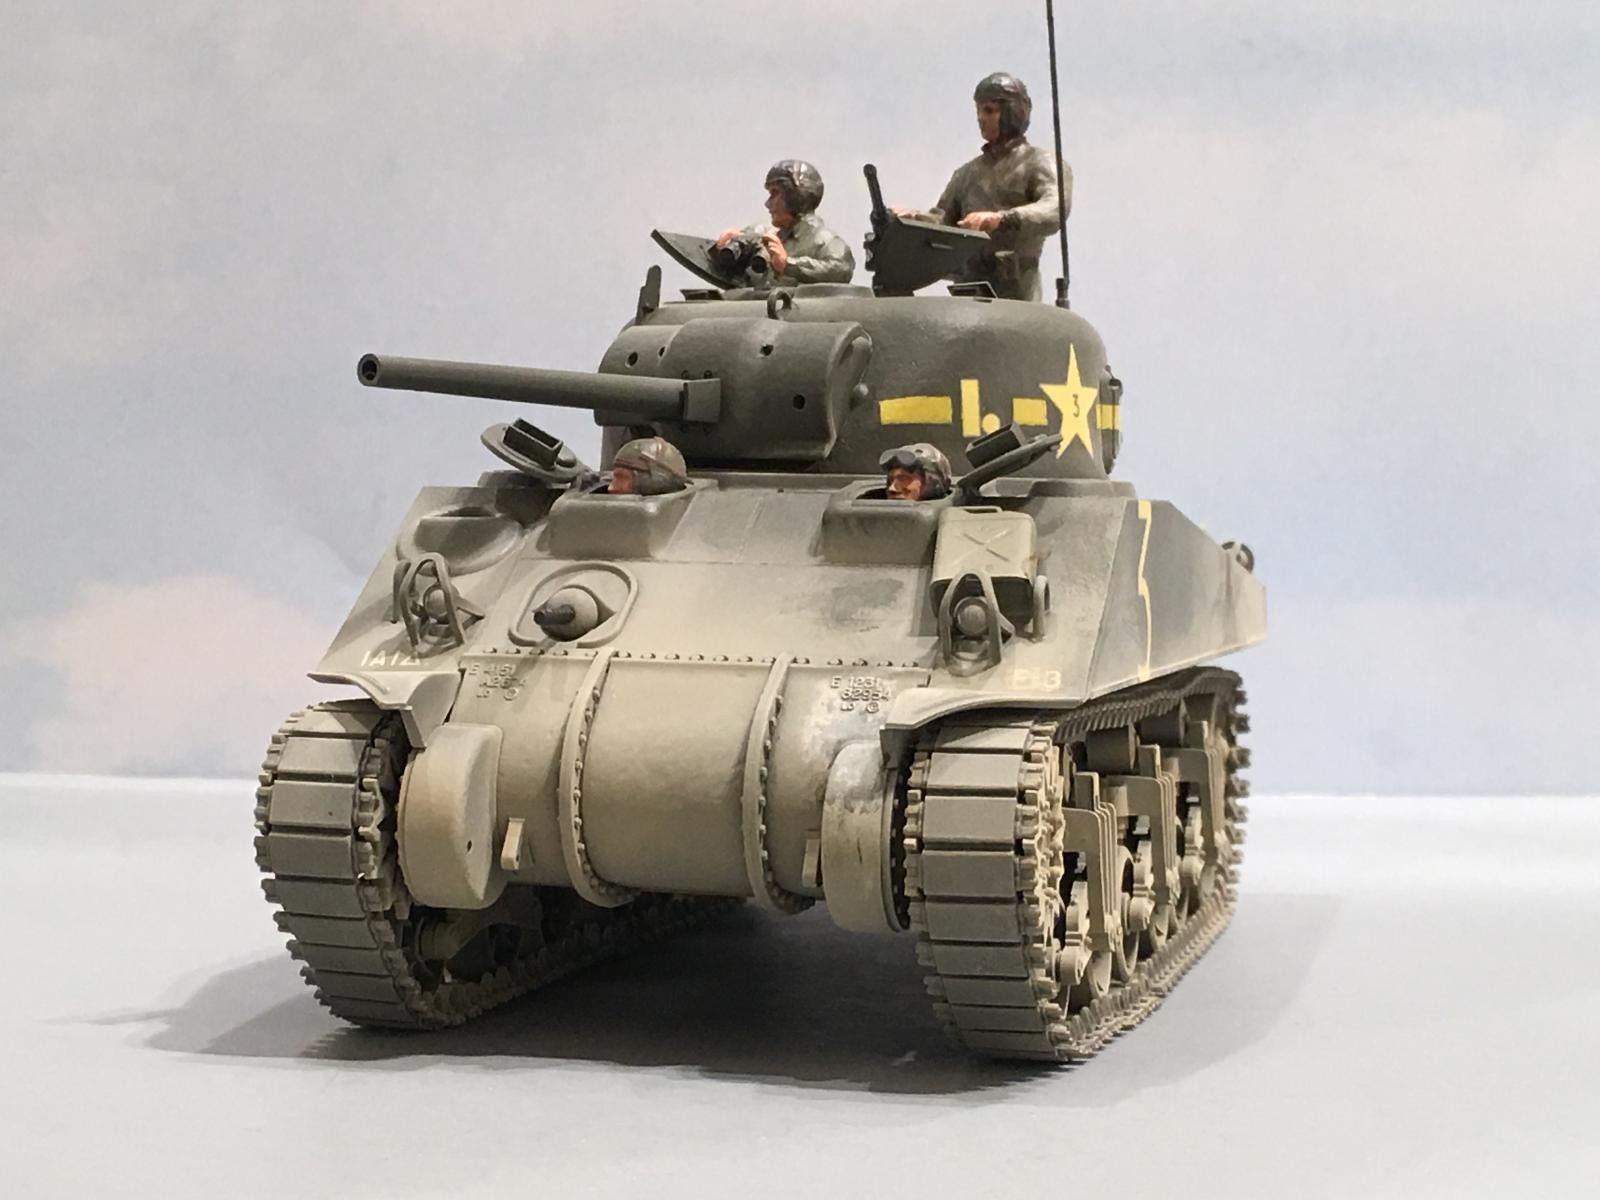
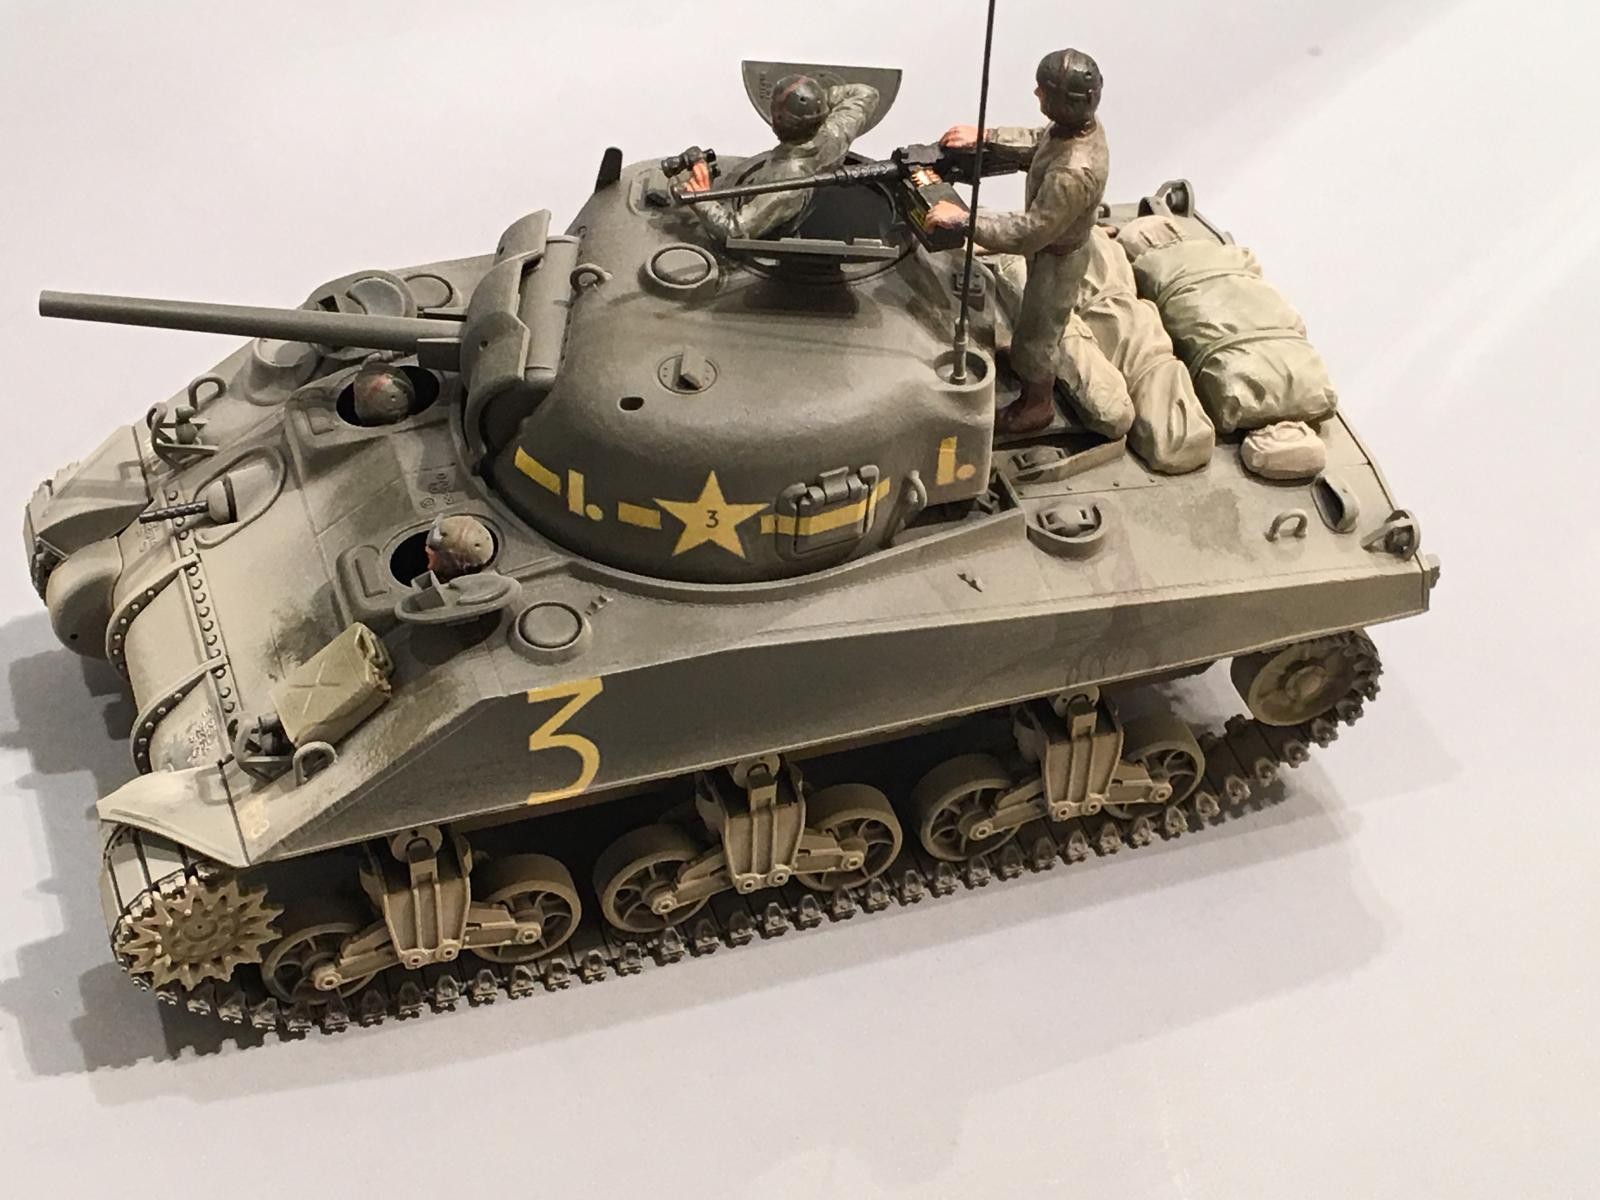
I painted the tank in overall Olive Drab. Then I added the decals, which worked great. Once the various bits like crew storage was added,
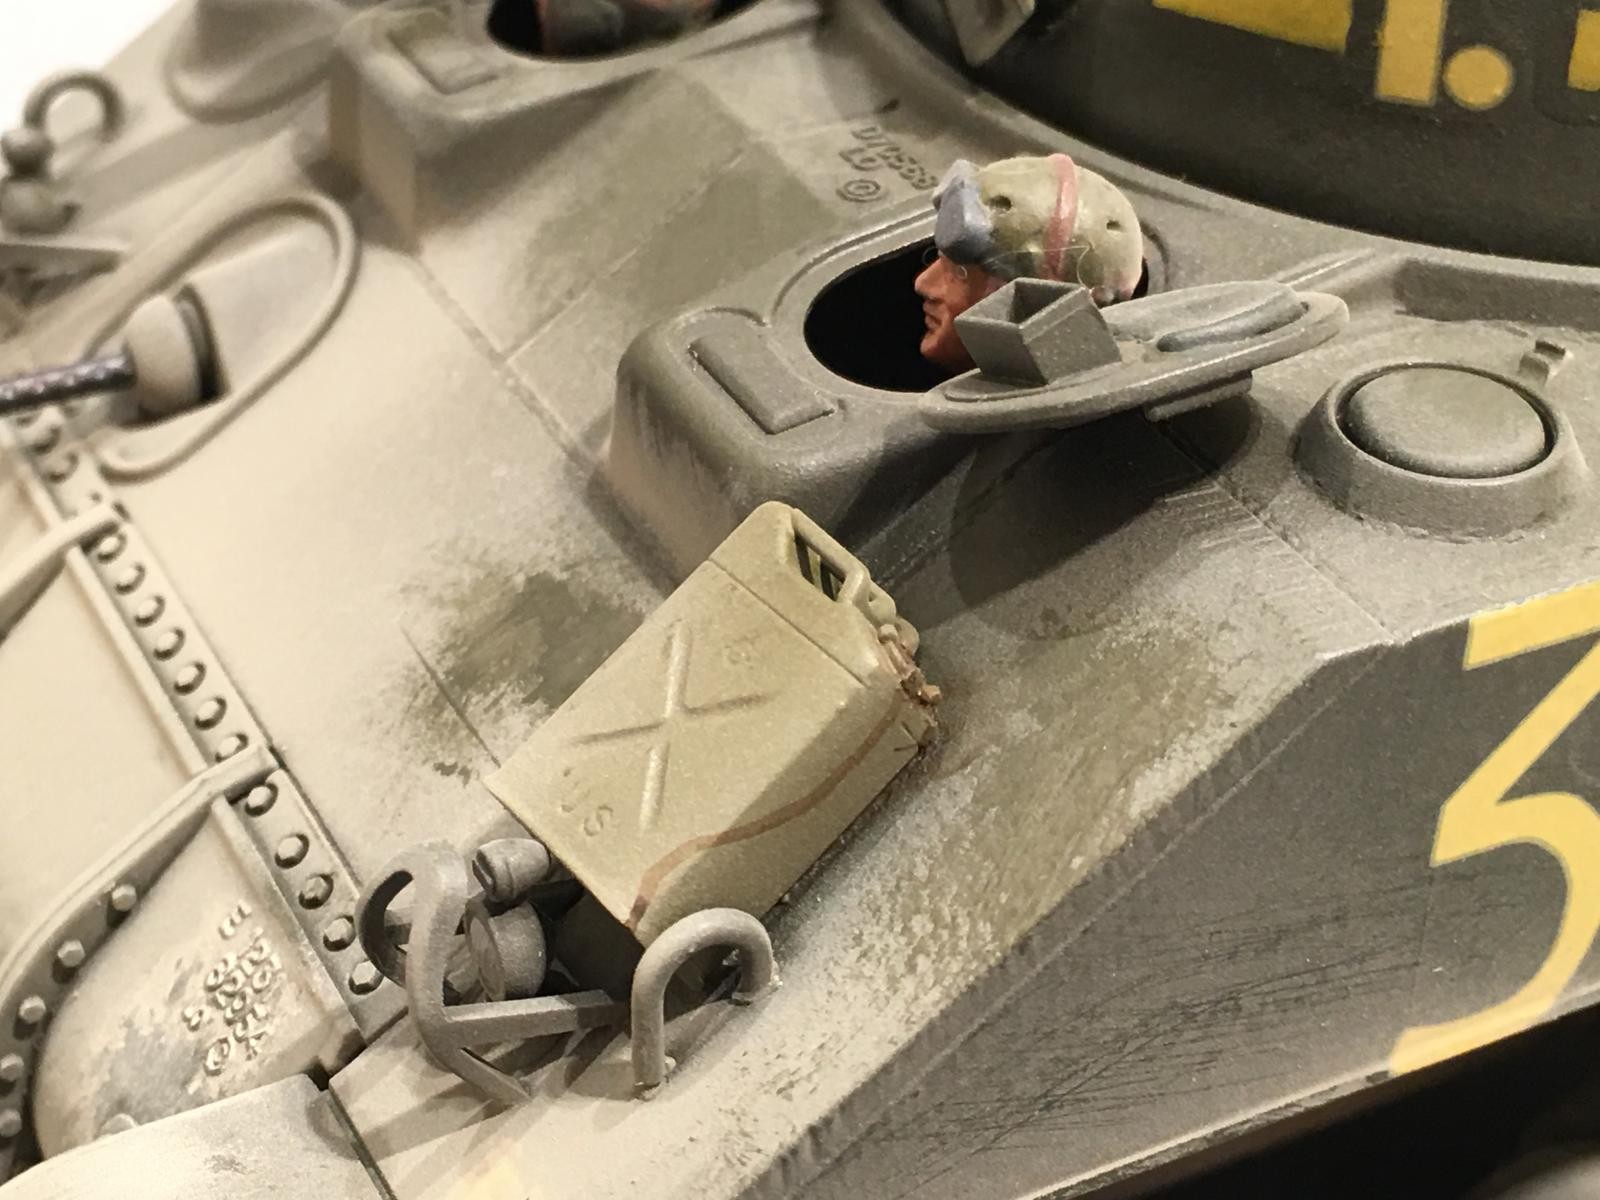
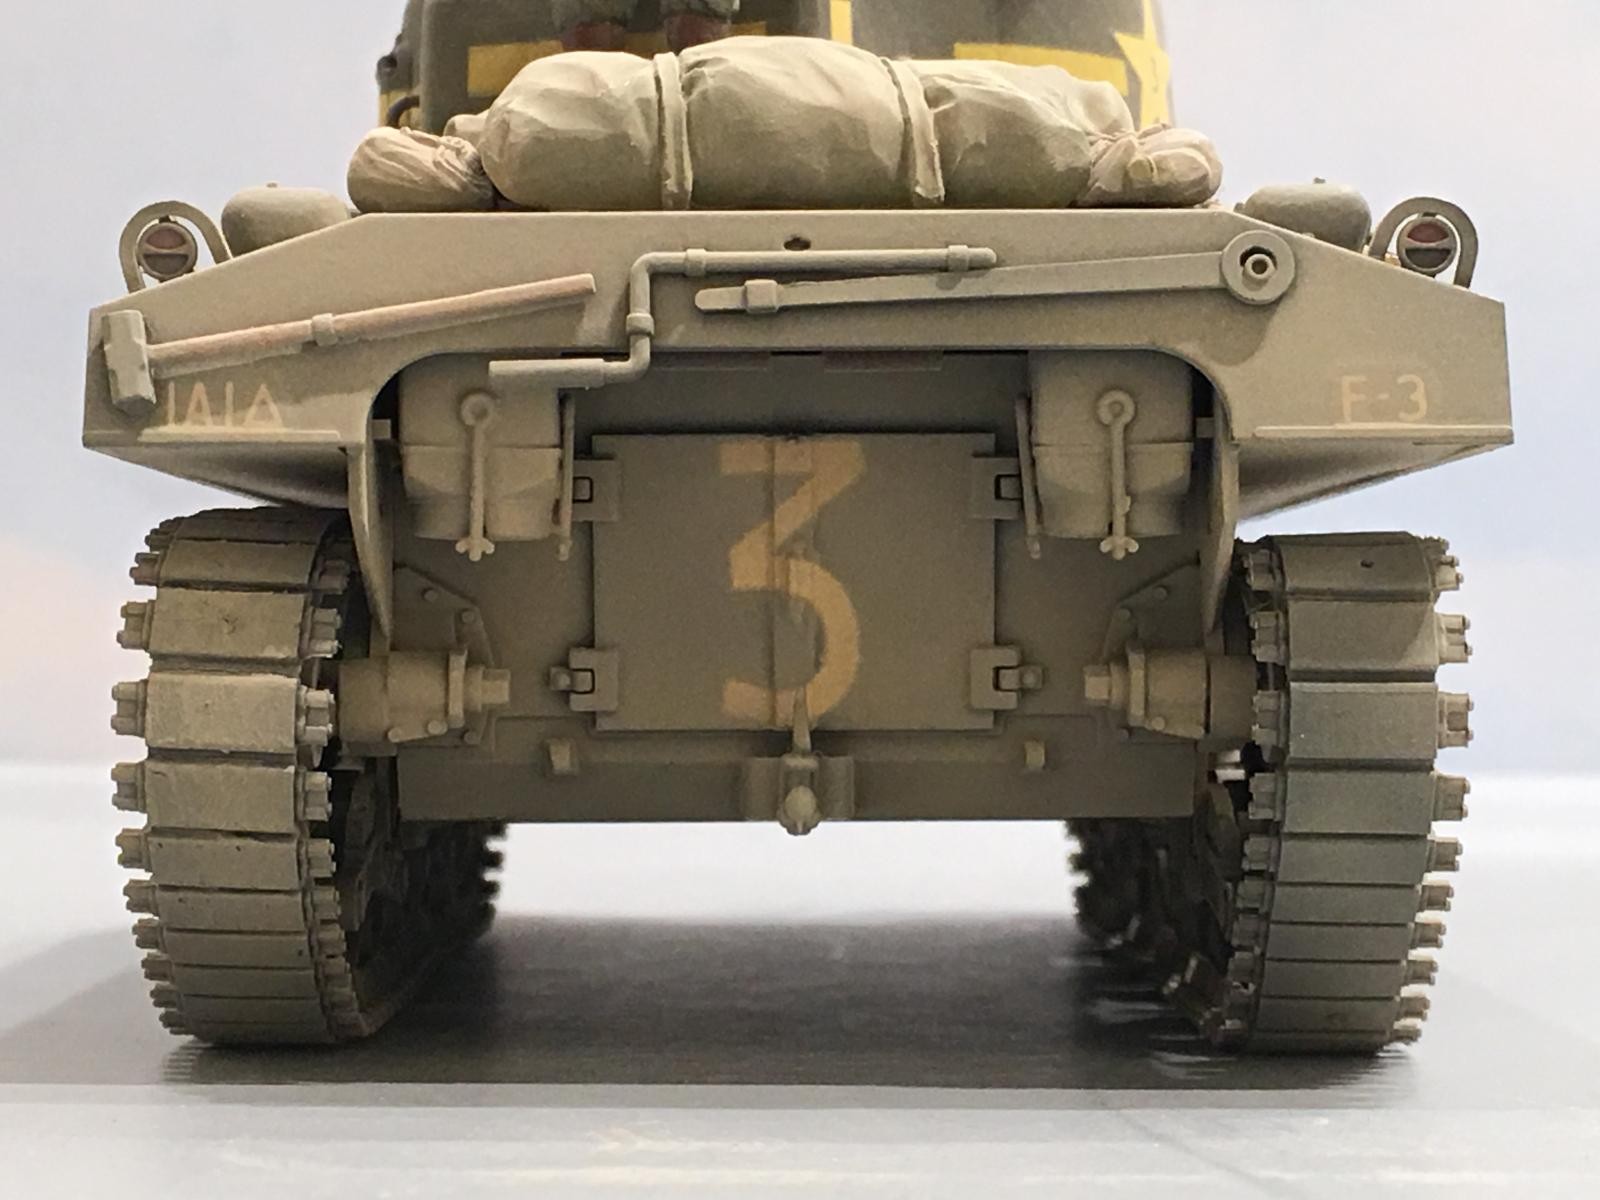
and a spare oil can... complete with "leaking oil" from the pour cap. There are also some places on the tank where I came back after the dusting, and painted on straight OD green with a brush. This makes it look like the crew has knocked off the dust as they moved about on the tank. If you look closer, just ahead of the large yellow "3" on the side of the hull, you will see some small scratches where the dust has been scraped away as if the tank brushed up against some small branches or other desert shrubbery.
I gave the tank a light coat of tan that was highly thinned.
I "dirtied" up the front slope,
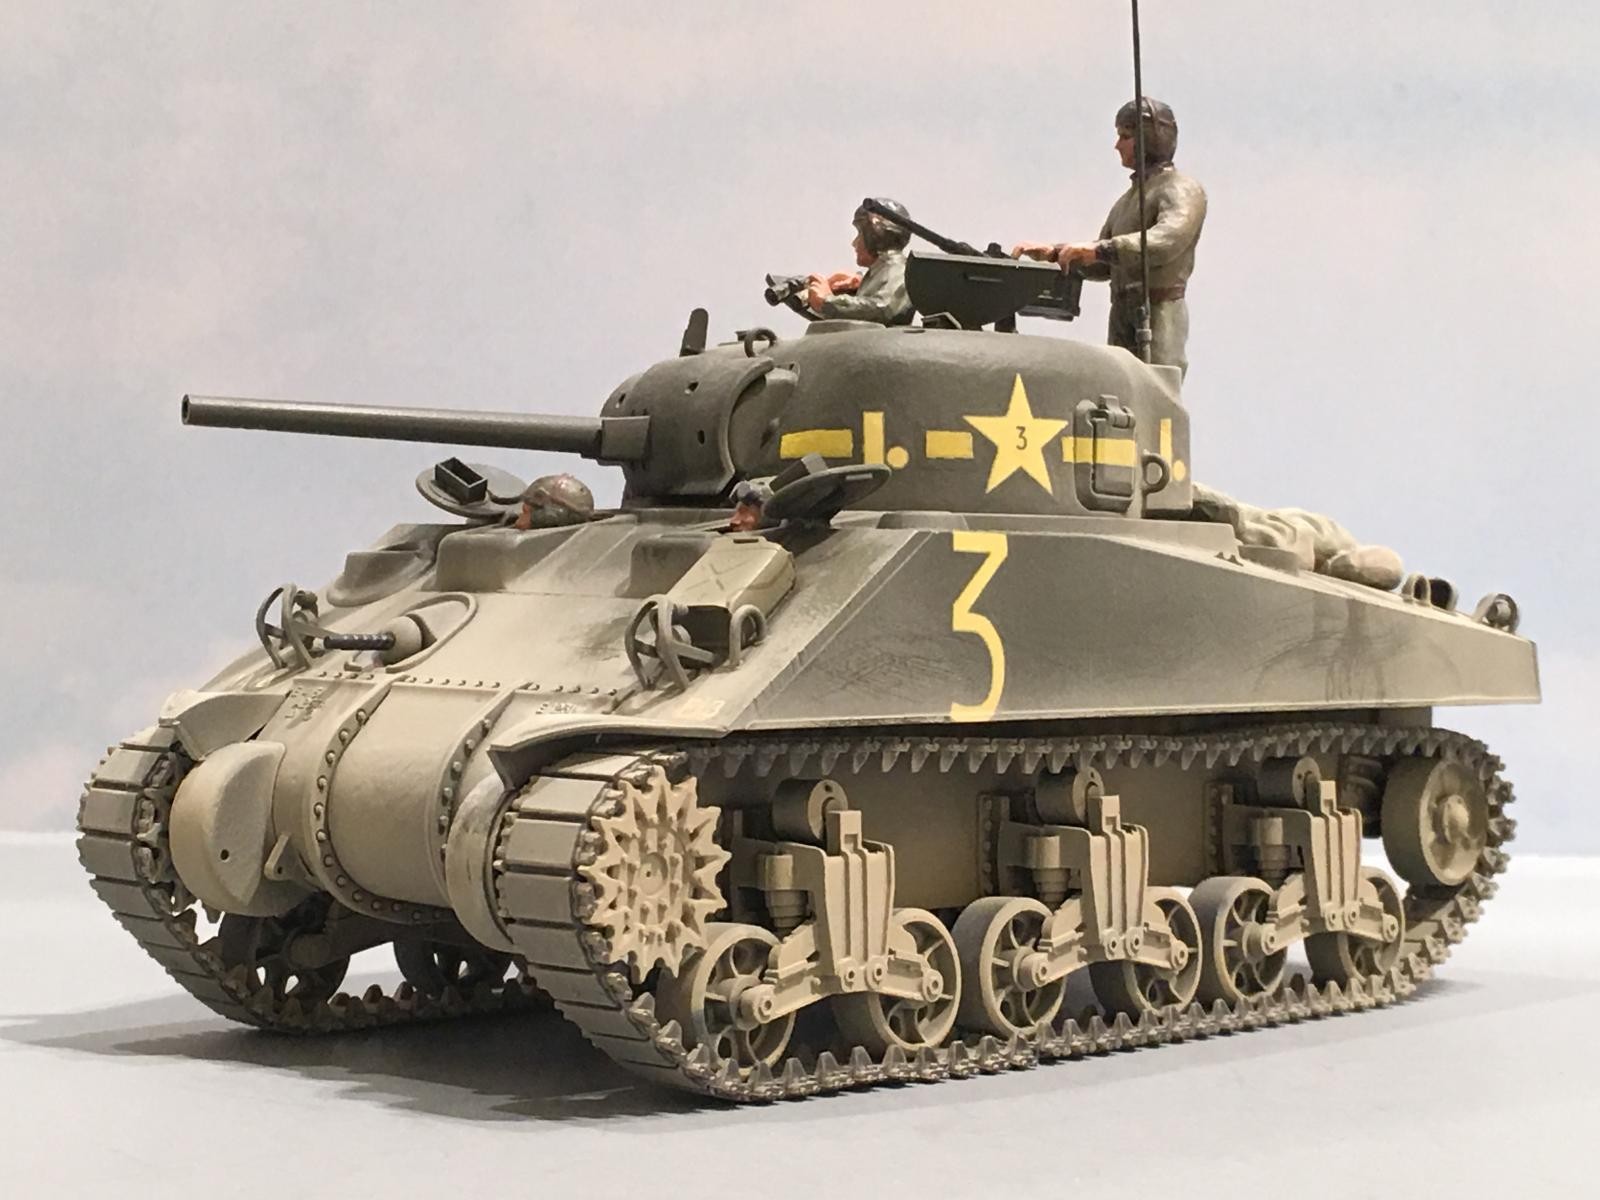
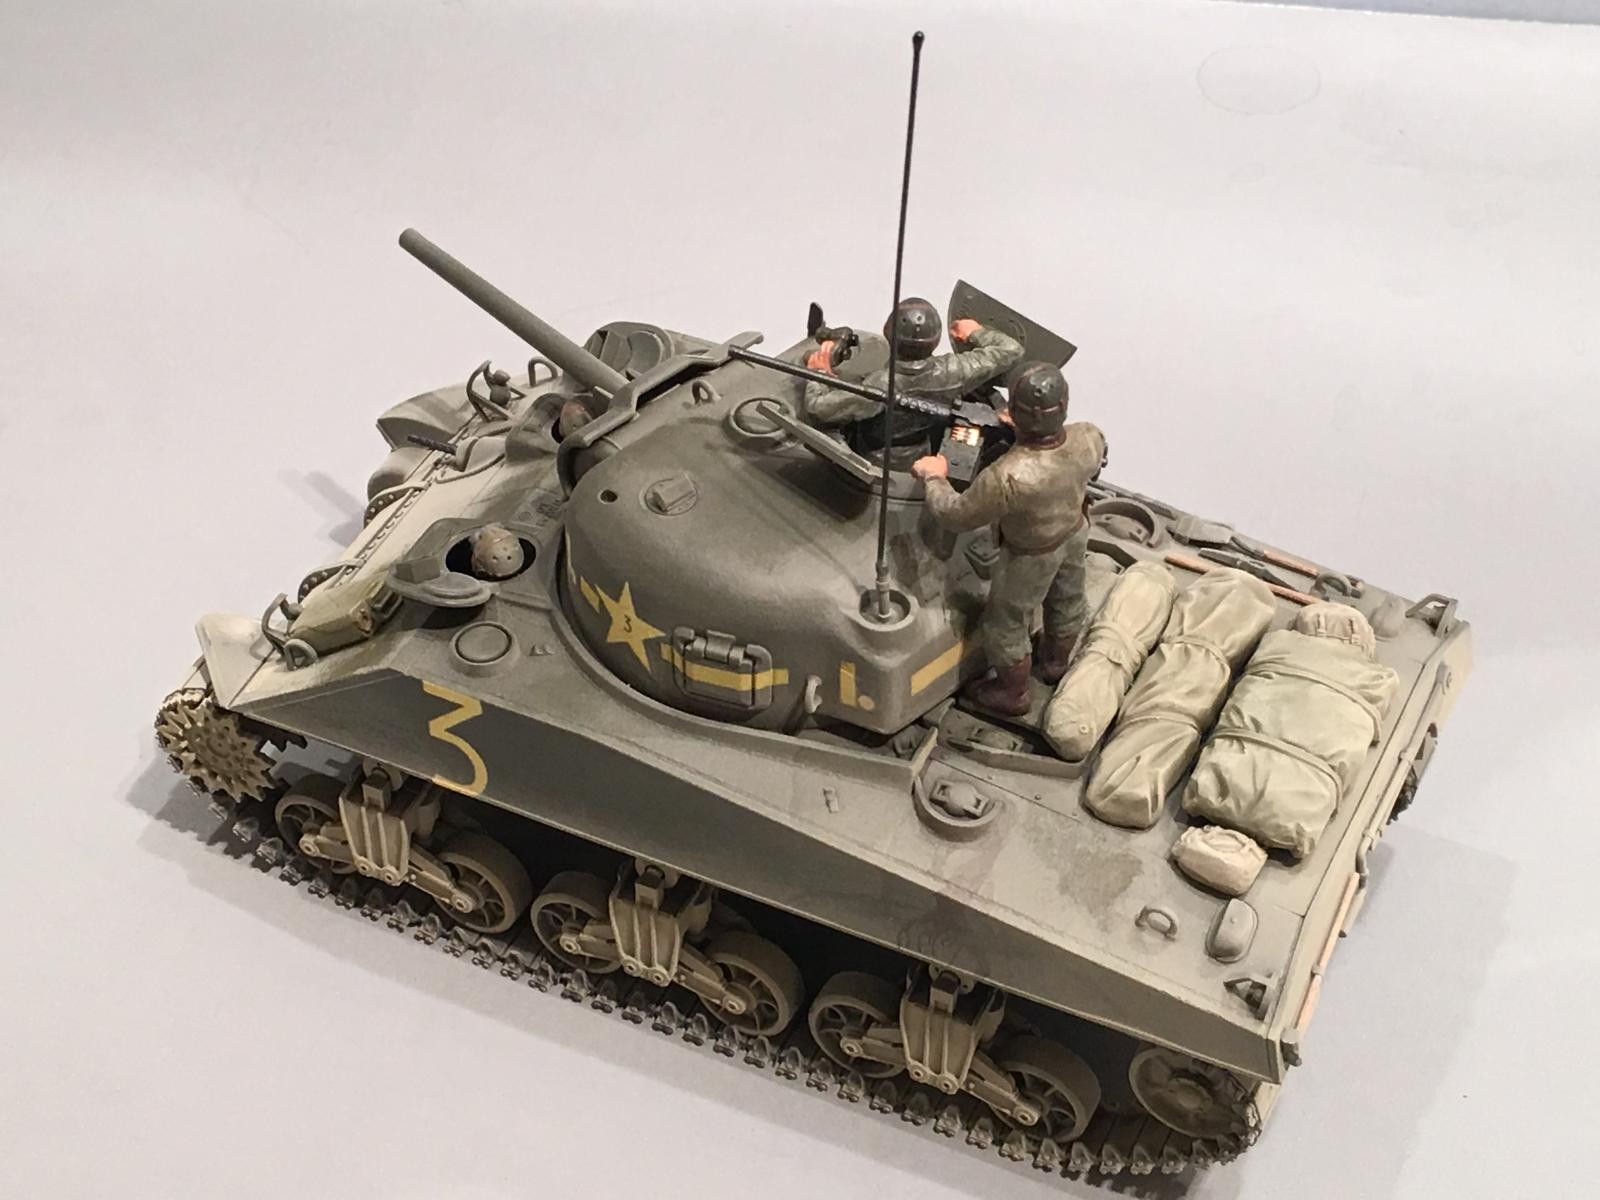
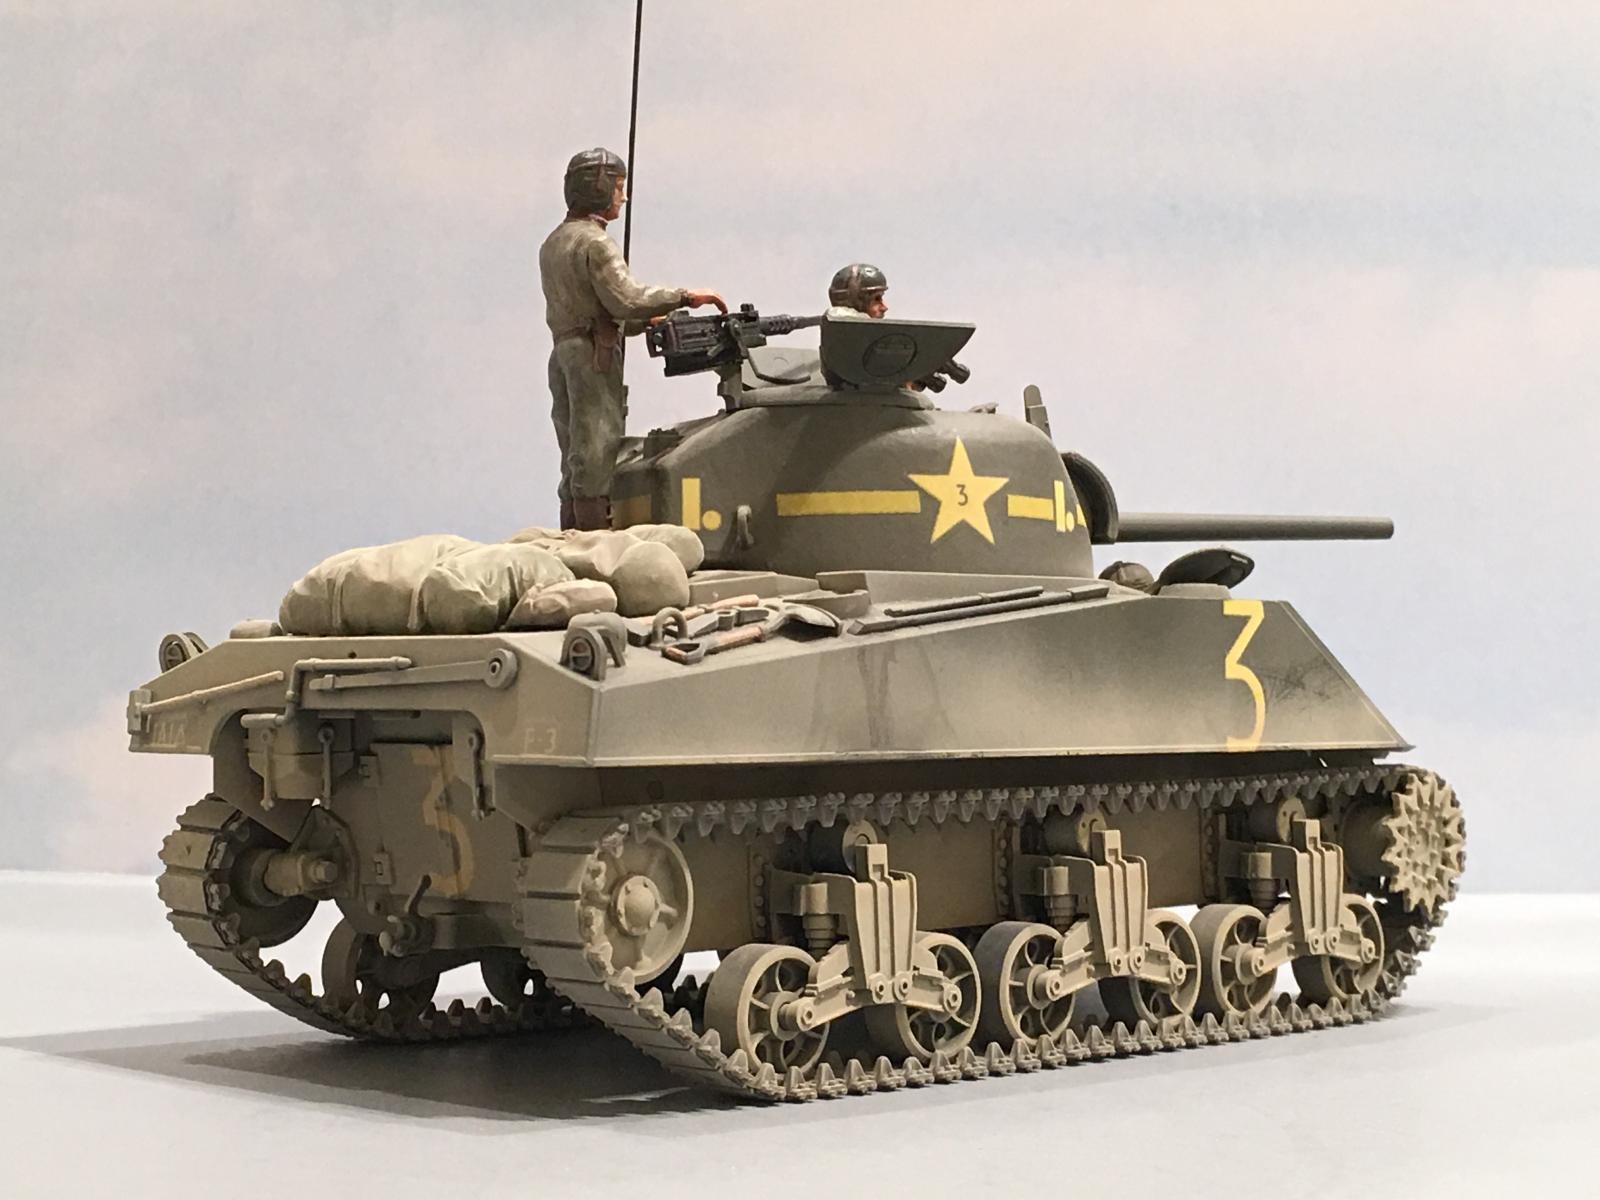
As I progressed to the rear of the tank, I sprayed on more paint to make it look like the dust had accumulated much thicker.
The OVM tools were coated with dust too... Here you can see where fuel has been spilled on the tank if you look really close...
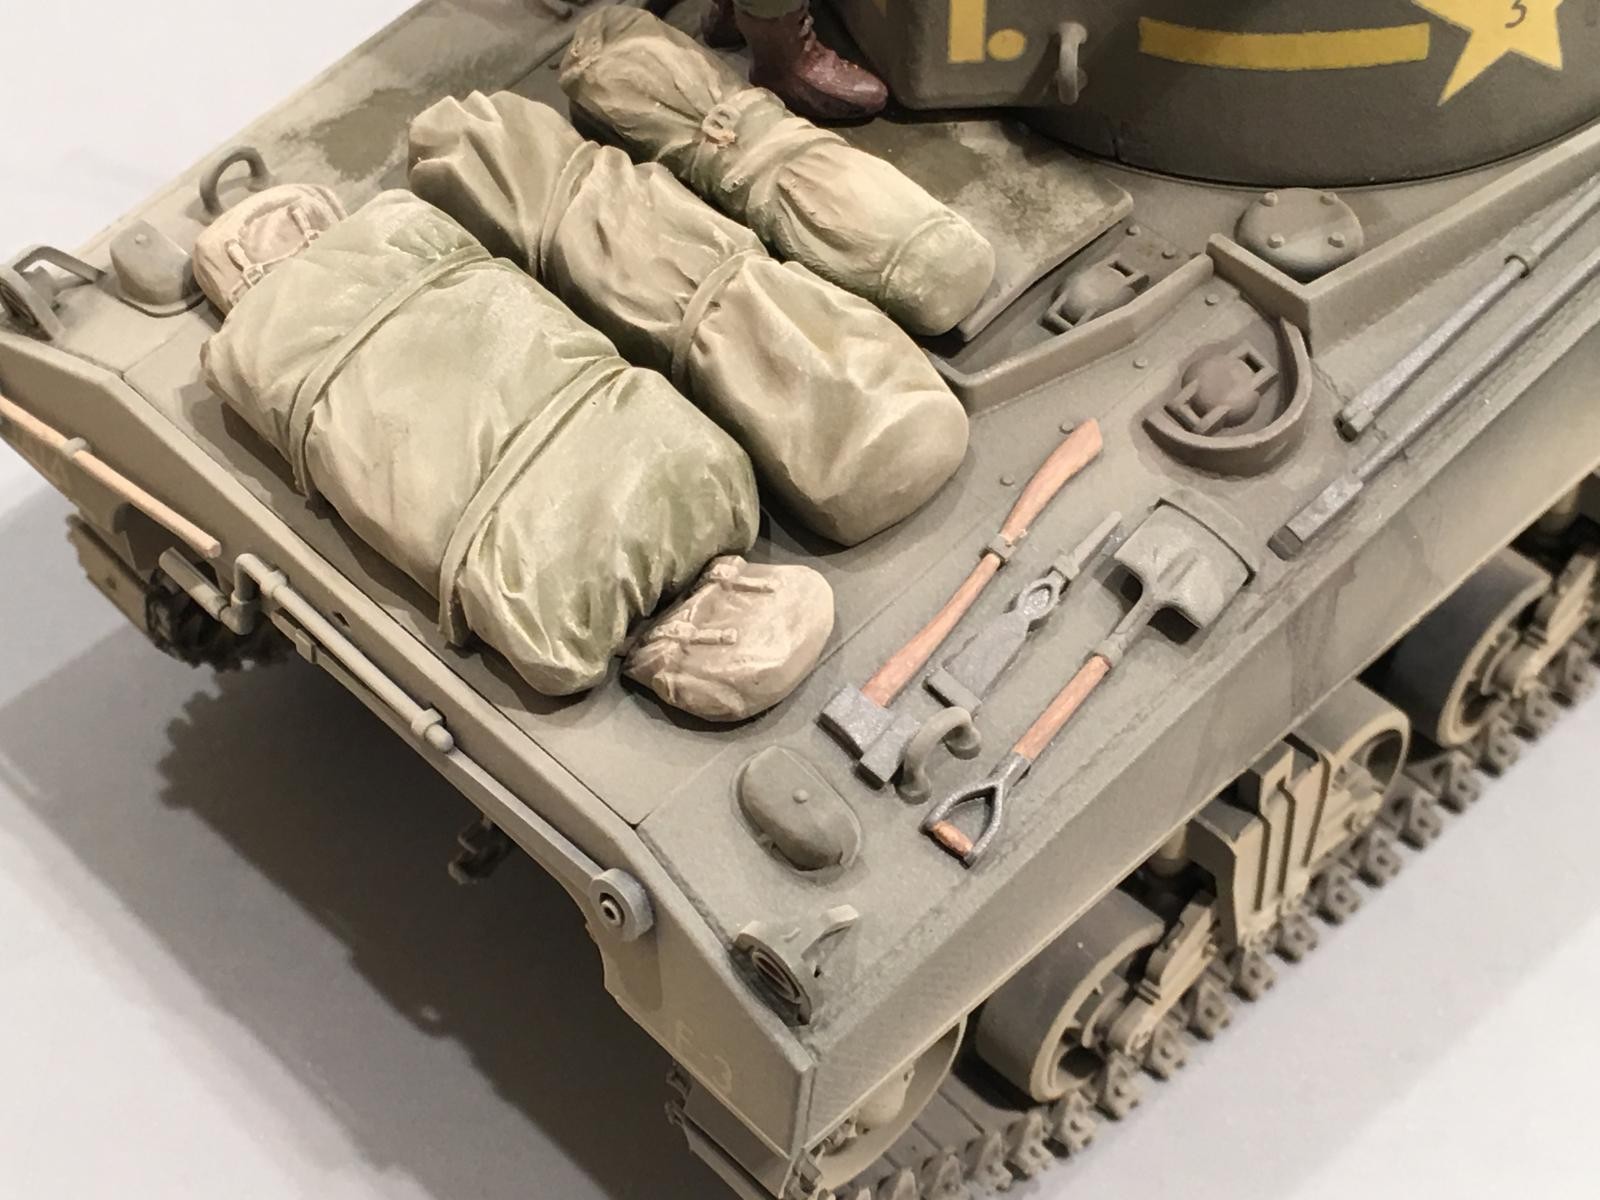
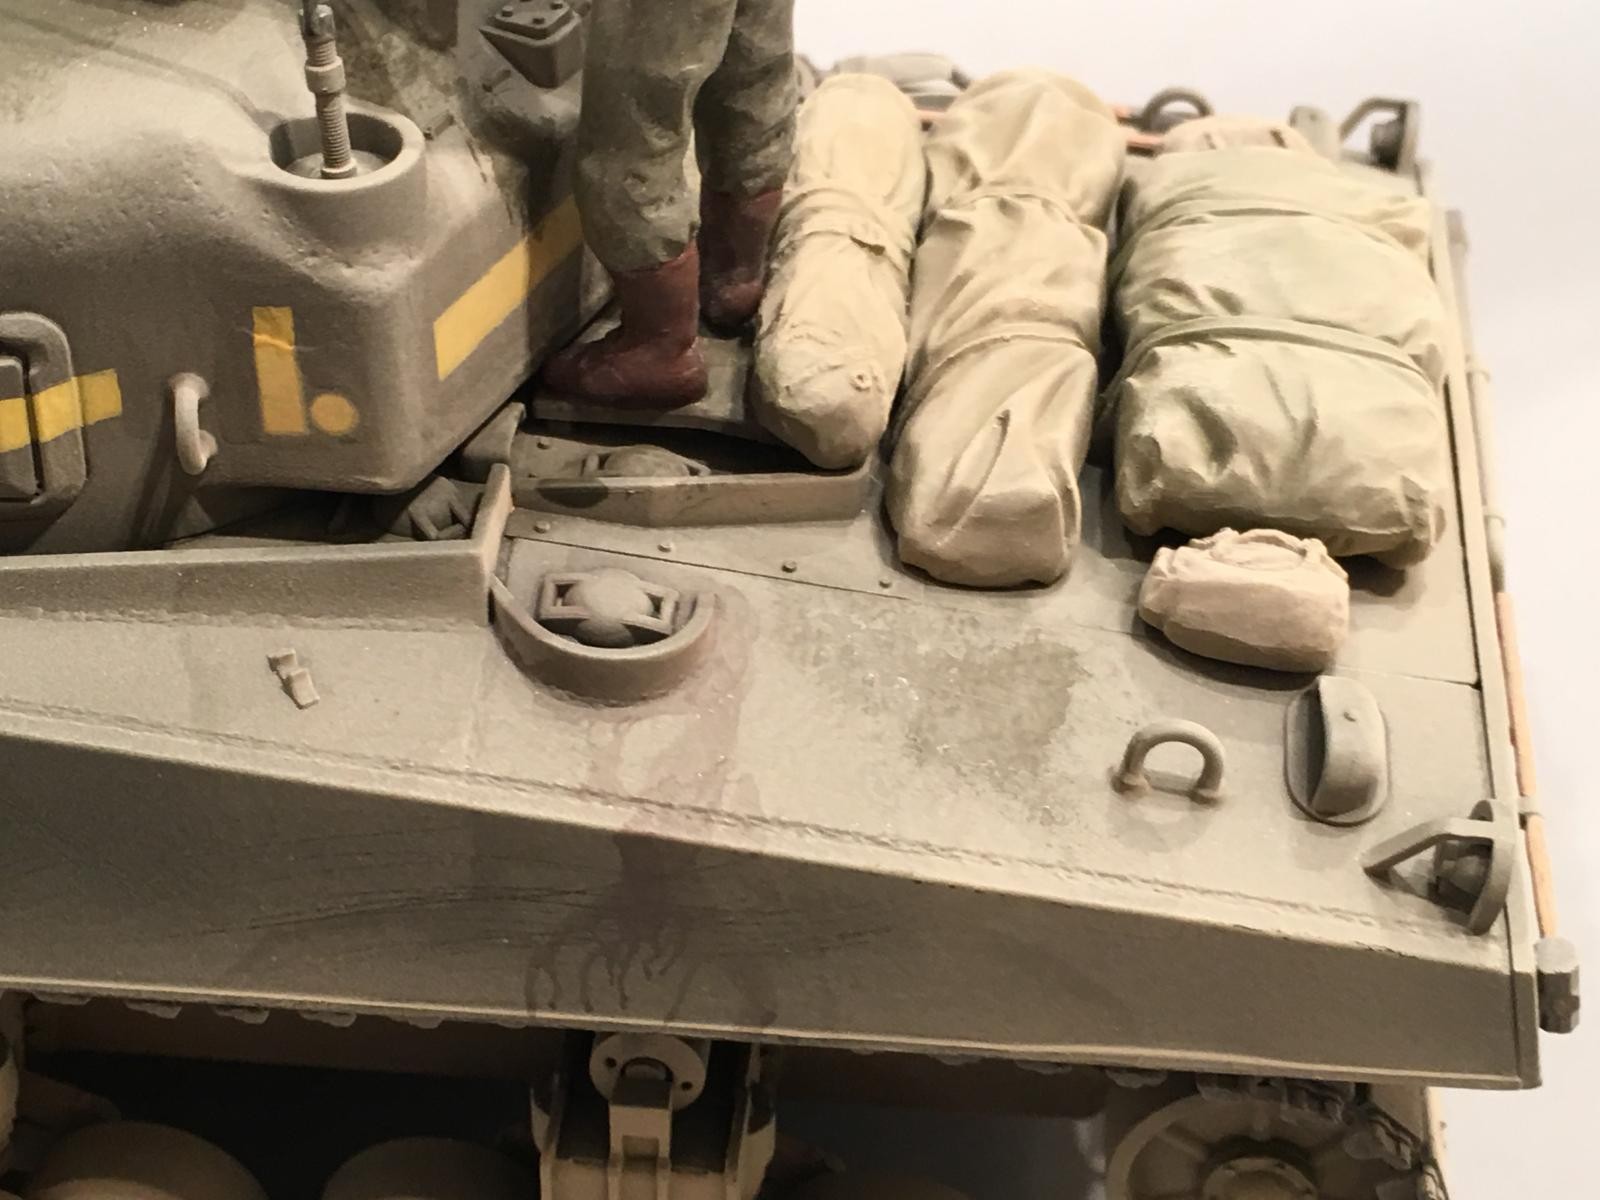
Here's another picture showing how I added crew items to the rear deck. Most often these things were covered in tarps to protect them from the elements and dirt.
If you look really close, you can see how I made it look like fuel was spilled on the tank during the refueling process.
Here's the same thing, but from the other side... spilled fuel, and dusty tools.

This next photo is a close up of the front slope after the dusting process was completed. It kind of gives you a feel for just how nasty the desert can be.
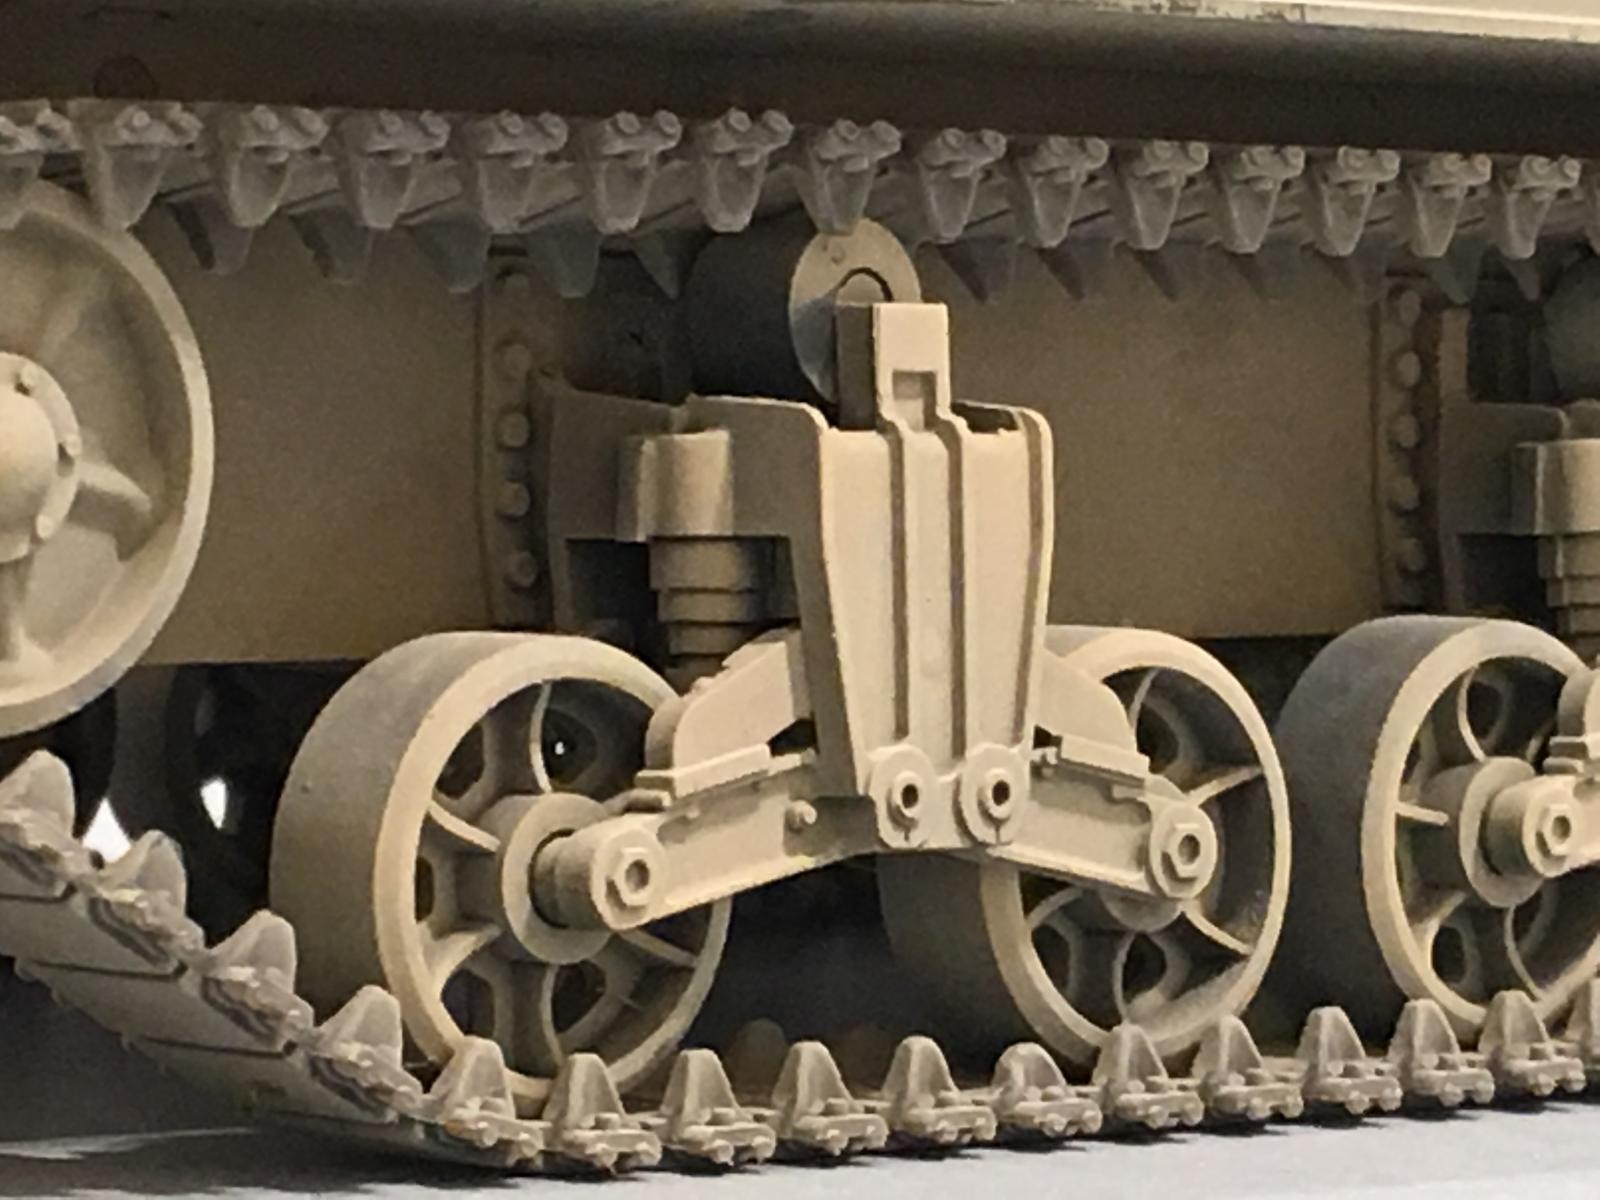
In hindsight, I probably could have saved some time by not painting the suspension or sprockets. I gave the whole suspension (which was modified form the kit parts by swapping out the truck assemblies from a Tamiya M-3 Lee), the tracks and the sprockets a heavy coat of "dust". It almost covers everything...as seen here in this close up.
These next photos give you a walk around of the tank in general.


I hope you enjoy this one as much as I have building it.
If you haven't checked out the Kasserine Pass Group Build, I strongly recommend that you do. You don't know what you are missing if you don't ! I highly recommend it.
As usual, comments are encouraged.
Thar she blows!
Louis, after all you've done, that you then submit this masterpiece of American armor...well, I'm speechless. I can almost hear the thing rumbling along. Fantastic weathering and soiling of the vehicle, great figurines, crucial and indispensable addition to the GB.
Bravo, my friend. She represents significant work over an extended period even as you produced other museum worthy works. Enjoy to glow of achievement, because you've earned it!
Thank you very much David. I sincerely appreciate the compliments my friend...
Every once in a while I break away from my typical aircraft builds when a piece of armor catches my eye. It's a nice change of pace.
I am pleased the way this one turned out, and for being able to contribute to the Kasserine Pass group build. I had a wonderful time with this GB, and have a few more builds in store... but first I must finish the DAK Panzer III.
Well done Louis, kinda makes you want to motivate to build one. I do have a Sherman kit in the stash. Tamiya M4-E3 I believe. One that I wanted to build as a PTO USMC machine. The detail on yours really pops. Seldom seen yellow markings really catch the eye. Thanks for an outstanding Sherman
Hello Chuck ! Good to hear from you my friend. Thank you for the kind words.
I say go for it and build your Sherman ! You typically don't see them built up as a tank used in the Pacific, much less the USMC variants. Most are built as ETO tanks from the US Army. This is what attracted me to this build, as it was something different.
The yellow does pop... at first I was suspect of the color, but research proved otherwise. The Army also used a light blue color for the side lettering which was the serial number of the vehicle during this time frame. Later they switched to using white for everything from US Insignia Stars to bumper numbers.
I'd like to watch the progress on your tank if you decide to build it. I have another Sherman in store for the next tank project.
Really well done, Amigo! Great write-up as well. Really, the only advantage the Shermans had over some German armor was their speed and maneuverability. That ceases to be an advantage if you silouette your tank on top of a hill! As you said, they became easy targets, especially since back then, tanks generally had to stop to fire. Like we said in training, a stationary tank is a dead tank. But these poor guys had a hard lesson to learn back then. I admire them all very much. The lessons they learned so painfully then are the reasons we are so successful today!
Your dusty M-4 is a real thing of beauty, Louis. Like Chuck stated, the yellow markings are really eye catching.
Bravo!
Thanks my fellow DAT brother...
Like you, I have spent a lot of time in the desert as a tanker...on the full sized 1 to 1 scale beasts. (so we have a first hand knowledge of how these things look in real life). I think these experiences helped me to make this one look as if it has been out in the desert sands.
You're absolutely correct... Shoot, move, communicate ! Never stay stationary ... We owe a lot to these guys, who paved the way for us with their blood.
Besides speed and maneuverability, one more advantage the Sherman had was it's reliability. These tanks were fairly easy to maintain when compared to the German counterparts. Plus they mass produced Thousands of them. I think next to the Russian T-34, the Sherman series of tanks was the second most produced tank of the War.
Thanks again buddy.
Right you are, Bud! I had forgotten just how many M4s were produced, but I'm sure you are right, as usual. The only tank that was produced more than the Sherman was the T-34 - also a great tank, if a simple one. It's very typical of the pretty much ENTIRE Soviet fleet of vehicles, aircraft, choppers, small arms, and probably ships though I have nearly zero knowledge about Soviet watercraft. They made their equipment simple; easy to use, rugged, and easy to maintain. Which also goes for the M4 Sherman, I believe.
Great model, Pard! I had never seen or heard of the light blue markings being used. I have seen a few of the yellow, but not many. Of course, since most photos back then were Black & White, it's pretty hard to tell the exact colors used. Ha! Keep up the great work and interesting write-ups, Louis!
Louis, besides the small strategy and tactics lesson that summarises the weaknesses and strengths of the opposing forces in Tunisia, may I add that the Sherman looks convincingly real. The touch that separates your Sherman from others I’ve seen is the dust effect. It really is well done. In fact I will try it when the possible, not on tanks but on wingy stuff. As for the figures, well let’s just say you got them much better than I ever would ?
Thank you Pedro ! These same "dust" techniques work on aircraft too. I still am not very good at painting figures... this is going to take some practice and many others here have it down to a science.
I sincerely appreciate the compliments my friend. I have to finish up the Panzer III, and I will resume work on the four FW-190's I have started, so please stay tuned.
Take care.
Heck, Pedro - at MY house I don't have to spray on dust - just leave something sitting out through 1 growing season and whatever I have out has a VERY realistic coating of dust! My house joins at the back to a small corn or soybean field. (The farmer grows corn for 2 years, then the next year he plants soybeans. The SBs replenish valuable nutrients in the soil, which then allows him to plant corn again. Many (or most) farmers do this, actually; it's called crop rotation. Anyway, because this rather often dusty corn / bean field is less than 25 yards / meters from the back of my house we get a lot of dust during the non-winter months and a lot MORE dust at harvest time. Plus we get thousands of little beetles that look like ladybugs, but are actually a corn beetle of some sort, I or what they call Asian Ladybugs. We get a fair amount of field-mice too, but our 3 cats usually handle that chore. (I'm a city boy and an ex-Tank Master Gunner & Platoon Sergeant / Mail-Man / Radio Shack Manager, so my knowledge of most crops and associated bugs and other vermin is somewhat limited LoL!)
Anyway, well done! Kudos to ya!
A ladybug: (pic #1) The type we get mostly: (pic #2) For our British & other friends; they are Ladybirds
2 attached images. Click to enlarge.
Very, very nice post, Louis...the added photos, the figure painting, the weathering, the build itself, your photography...top-notch work all around, my friend. Great Job!
Thanks Craig for the compliments. I appreciate this.
Now that's a tank! An excellent build sir. great info on build techniques.
Thanks Robert !
I sincerely appreciate this.
Very nicely done sir. Kasserine was an interesting battle to study. From the Germans exploiting American mistakes, to the resulting changes in the US command, and tactics in Africa.
Unfortunately the Sherman was seriously out gunned for most of the war, but the tactics learned after Kasserine served the tankers well later on in the war.
I couldn't have said it any better !
The things the Sherman had going for it was it's speed and maneuverability, when compared to it's German opponents. Another thing they had is numbers produced.
Between the Sherman and the T-34, there was over 100,000 tanks produced. That alone is an amazing achievement. The M-4 could also traverse the turret faster than the German gunners could do.
I found a map online of the area where the knocked out American tanks were found as positioned and the map had a description of what type of German munitions destroyed the tank. Surprisingly the anti tank 50 MM gun was responsible for many of these.
Nice work, Louis. Sherman’s are like Spitfires. You can build dozens and each will be noticeably different.
Thanks John !
I agree the Sherman has a lot of different paint schemes. Plus the tank itself changed numerous times over the years it was produced. It's almost like having a blank canvas and you can paint whatever color on it you want. That's the Sherman...
Louis, Wonderful work on this American work horse. Your overall finish has a very realistic look, especially the surface texture and the type of dirt/dust with a little touch of fluid leaks, makes for a very attractive and interesting model. I also enjoyed your write up, very informative and interesting. Well done !
Hello Terry,
I am pleased that you read the build log and the article I posted with the reveal. I wanted to make this M-4 stand out from the rest by doing little thing on it like the oil and fuel stains, scratches etc. .
Thank again my friend !
Well done Louis! That dust affect really shows off your Sherman and the history lesson was very informative as well. If you really want to get into what went right and what was a disaster in North Africa, check our Rick Atkinson's book, "An Army at Dawn." Goes into great detail about operations, leadership, and individual battles, told by those that were there. Fine work buddy, now lets get that bad boy on a desert base of some sort to really show her off. Hand salute.
Thanks Tom ! I'll try to locate a copy of the book you mentioned. It sounds very informative.
Now it would look better on a sand base. I also appreciate the information you sent me on how to build these bases. It's something that would really make this Sherman stand out from the crowd.
Thanks again my friend.
Hey Louis , great build, I love the dust effect, well done, great article and pictures.
Having a compliment like this coming from a seasoned scratch builder such as yourself, this is wonderful.
Take care Marc,
It's good to hear from you.
Very nice, Louis.
Thanks Rob. I like the new photo mini series you are posting called "No Comment" !
Fabulous stuff across the board, Louis. Great story telling skills with terrific photos and a beauty of a build. A privilege to read.
Thanks David. I'm glad to hear that you enjoyed the article as well as the photos.
I know this guy who is building a middle series Tiger Tank. He looks like he is doing a great job with it too.
Really nice article, well written, great history and very nice Sherman!
Thank you Paul,
I have been watching and reading your postings. You have build some amazing tanks ! The last one you posted, (the T-34) is outstanding (but all of your builds are). I am pleased that you enjoyed the history part of the build too.
Louis, I'm not close to qualified to write about this! It is sensational! The most comprehensive historical background and build description (here and elsewhere in the group pages) and then the build. If one of the themes was 'dust' you have absolutely nailed it. It looks real. The texture of the armour looks real. And the scratches and scrapes to remove the dust are perfect. Hugely impressive, again!
Hello Paul !
Thanks for the compliments my friend !
I tried to build this one going from memory and how the dust and dirt would accumulate on our tanks when I was in the Army. I was worried that I may go just a little too far with the dust, but then I found these picture online tonight.
--- pic1 not found ---
--- pic2 not found ---
--- pic3 not found ---
I always manage to do this after I complete the build. Judging by these photos I don't think I was too far off...
I like to try new things during my builds. I documented this one from start to finish and it was a very easy building kit.
I sincerely appreciate your compliments.
Now I need to get cracking on that BP Defiant in your Group Build. Plus after seeing the FAA Hellcat, that makes me want to build another F6F or a F4U... and paint them in FAA colors.
Really nice work, Louis. The weathering and wear is particularly realistic.
Thanks Tom !
I am not bragging, but I am particularly pleased with how this one turned out. Sometimes it's easy to get carried away during the process, (and over do it) but since it's an armor build, this one was more forgiving.
"Besides speed and maneuverability, one more advantage the Sherman had was it’s reliability. These tanks were fairly easy to maintain when compared to the German counterparts. "
Louis,I believe that the Sherman's turret could traverse faster than the Tiger tank adding some advantage for the type. But, really to bring things up to par with the Tiger and the Panther(German tanks in general) it wasn't until the British modified the tank into the Firefly with its 17 pounder. You read the accounts of Sherman Tank crews who went out into the field and it took gutts, a lot of faith, lots of cigarettes and Lady Luck. The ratio of Sherman losses to Tiger or Panther tanks was nothing to ignore and even in these earlier battles the same holds true. You took your tank out with a song and prayer. A lot of young men payed the ultimate price while being in the Sherman. The bean counters who look at the numbers and marvel at the automotive soundness and reliability of type never had to have their a*s hanging in the wind while using...these tankers/vets deserve a lot of respect. Which I am sure your well aware of.
Like the model and dust. The figures ...I am never impressed with Tamyia figures. When assembled properly and painted they still look like mannequins. The figures are stiff and the hands are too thick and fingers are too round. They remind me of those surgical gloves that you inflate ...or you put them on your head when doing the chicken dance. The driver and the front gunner (torso and heads) you can get by with.
Appreciate, the thought and effort that goes into your builds. I see so many models that look like painted toys and they look like exercises in just that. Your attention to details along with the photos and comments help flesh out the story of our true flesh and blood hero's. Who where/are the common man and woman who went beyond the norm.
Stephen,
You're absolutely correct about the turret traversing speed. I mentioned this to Robert Paschall in my reply to his comment about the model. I probably should have mentioned it in the main article too. Thanks for bringing this to my attention.
If I'm not mistaken, there were 5 Sherman's lost for each Tiger or Panther knocked out. The typical plan was to zip around behind the Tiger and fire off a few rounds into the back side or flanks of the German Tanks. Occasionally though, a well trained Tiger crew in a good fighting position could hold off an enemy (this time Allied Crews used as the enemy) for quite some time. Look at Michael Whitman and what he did just before Villers Bocage. I think he took out 26 British Sherman tanks and several other types of vehicles in the same battle.
I have read about an encounter where Americans were firing shell after shell against a Tiger tank. They all kept bouncing off the Tiger's armor. At one point in this encounter, a shell ricocheted near the Tiger Commander's cupola. It was then that the Tiger Commander opened his hatch and wiped off the spot using his handkerchief where the incoming round just bounced away ! Then he shook his finger at the Americans and closed his hatch. What a crazy gesture !
If you want to read a great book about the American tanks in the ETO, I highly recommend the book called "Death Traps", by Belton Cooper. He was a tank maintenance / recovery officer with the 3rd Armored Division. He goes into details about what it was like bringing back a shot up or burned out Sherman. (and what they had to do for repairs, sometimes making a tank out of two or three damaged ones).
Occasionally he went into details about finding what was left of the crew inside some of these tanks...burned out or otherwise. Horrible stuff.
Well, despite the fact that there are no wings, that is a really nice build! A great bit of history to go along with it. Great post Louis!
Thanks Greg ! I appreciate the compliments buddy... I'm happy to hear that you liked the history lesson too... 🙂
I try to include this with my builds if I can.
Another great model, another great posting, really enjoyable reading and I just love the dust effect. While a desert base would be nice I like how the weathered tank stands out against the clean background.
Thanks George for the compliments. I'm happy to hear how you enjoyed the article as well as the little history lesson that came with the model.
The dust is something that I experimented with and luckily for me it turned out pretty good.
I'm planning on building up a desert base like the ones Tom Bebout has been using lately. To me they look very good. Tom sent me a "how to" article and a list of the necessary bits needed in order to build one.
I hope that I can use the base along with the cloud poster for the background of the photos I take with the models.
Eventually I plan on building up a grass base to go along with this desert one so that I can place models that need a grass type base such as planes from the RAF and the Luftwaffe.
Thanks again my friend.
Sorry for the late reply but I just noticed this comment.