When Easy is Fun: Tamiya 1/48 Bf-109-3 WIP Update
The past year has been a very productive and challenging year regarding model builds. During this challenging year I have pushed myself outside of my comfort level regarding the use of advanced modeling techniques. I have spent many hours researching subject matter to insure accuracy, as well as, watched and read hundreds of tutorials in order to advance my techniques. I have taken basic models and applied scratch-build details, and after-market accessories. Each model I made I challenged myself to out-do the preceding project never just settling for my usual average results. I can look back at this year and confidently report that I have accomplished all my model making goals for that time period. Despite this I still have higher standards I want to achieve and this next year will be no exception regarding trying to out-do myself. But at the same time I have felt pressure on myself and have given myself a headache. I have spent my down time still thinking about how to produce a certain result or look that I found in someone else's build. I asked myself "Is this really fun"? When is enough a enough. My answer is yes, I still had fun, but a different kind of fun. The sort of fun and feeling of accomplishment you get when you attempt and then succeed at some great personal challenge. But at the same time what happened to those days that you just relax, don't push your-self, don't need to achieve and produce museum quality models every-time you sit down to build. Well, I needed a relaxing, non-threatening, oh-what-the-heck kind of build were you revisit how fun model making use to be for me. So I went to my local hobby shop with a $20 limit. This $20 needed to include all supplies, and paints/ My goal was to buy a basic, inexpensive model that was high-quality, but simple and minimal assembly challenge. Yes, I still wanted to try something a little different, but allow it to be more of a fun experiment. will little invested in time and money. So i found this great 1/48 Tamiya model kit of a Bf-109 E-3 for $16.00 bucks including tax. Yes, I knew this was one of Tamiya's older 1/48 kits but it was still a Tamiya. This fact insured simplicity, lower parts-count, and great fit. It would guarantee a fun, short-term successful build that is truly fun with minimal pressure to create a one-of-a-kind masterpiece. If I screwed it up, so what! It was just an under $20.00 kit. I would still be trying something a little new, and actually get to experiment with some painting techniques that I have not tried. This is because I don't recall building a Bf-109 of any kind since I was a young child, and with this being said, I don't ever recall attempting an early war German aircraft camo job with mottled camo effect. So there was my small challenge. I could not wait to start but before I did I had little knowledge about color choices used by the Luftwaffe so I still had to do a little research, but I stopped myself when I found some colors that appeared just "good enough" to accomplish the build. The instructions only mention Tamiya brand paints with primary paints referencing their spray-can colors. This would not do for me because A: wanted to use my airbrush, and B: Wanted to use paints I already had.
So I finally got started and opened the box. Great, only 2 parts-trees, and 1-clear sprue. Yea-Haaa! The molding looked simple but all the basics were present including some nice surface detail, basic cockpit details, crystal clear canopies, and really nice decals. Upon dry-fitting I knew this kit would fit perfectly and just fall together. So this is what $16.00 bucks can still get you. Not bad, I was a happy camper. Being easy was good because it meant I could get to my favorite part of the build which is painting and finishing. This would be fun to finish because I could finally try one of these crazy Luftwaffe mottled camo jobs. I also like to beat my airplanes up like they belong to some rag-tag broken down air-force, which for the early Luftwaffe, was not the case for their pristine aircraft. So I would be taking some artistic license.
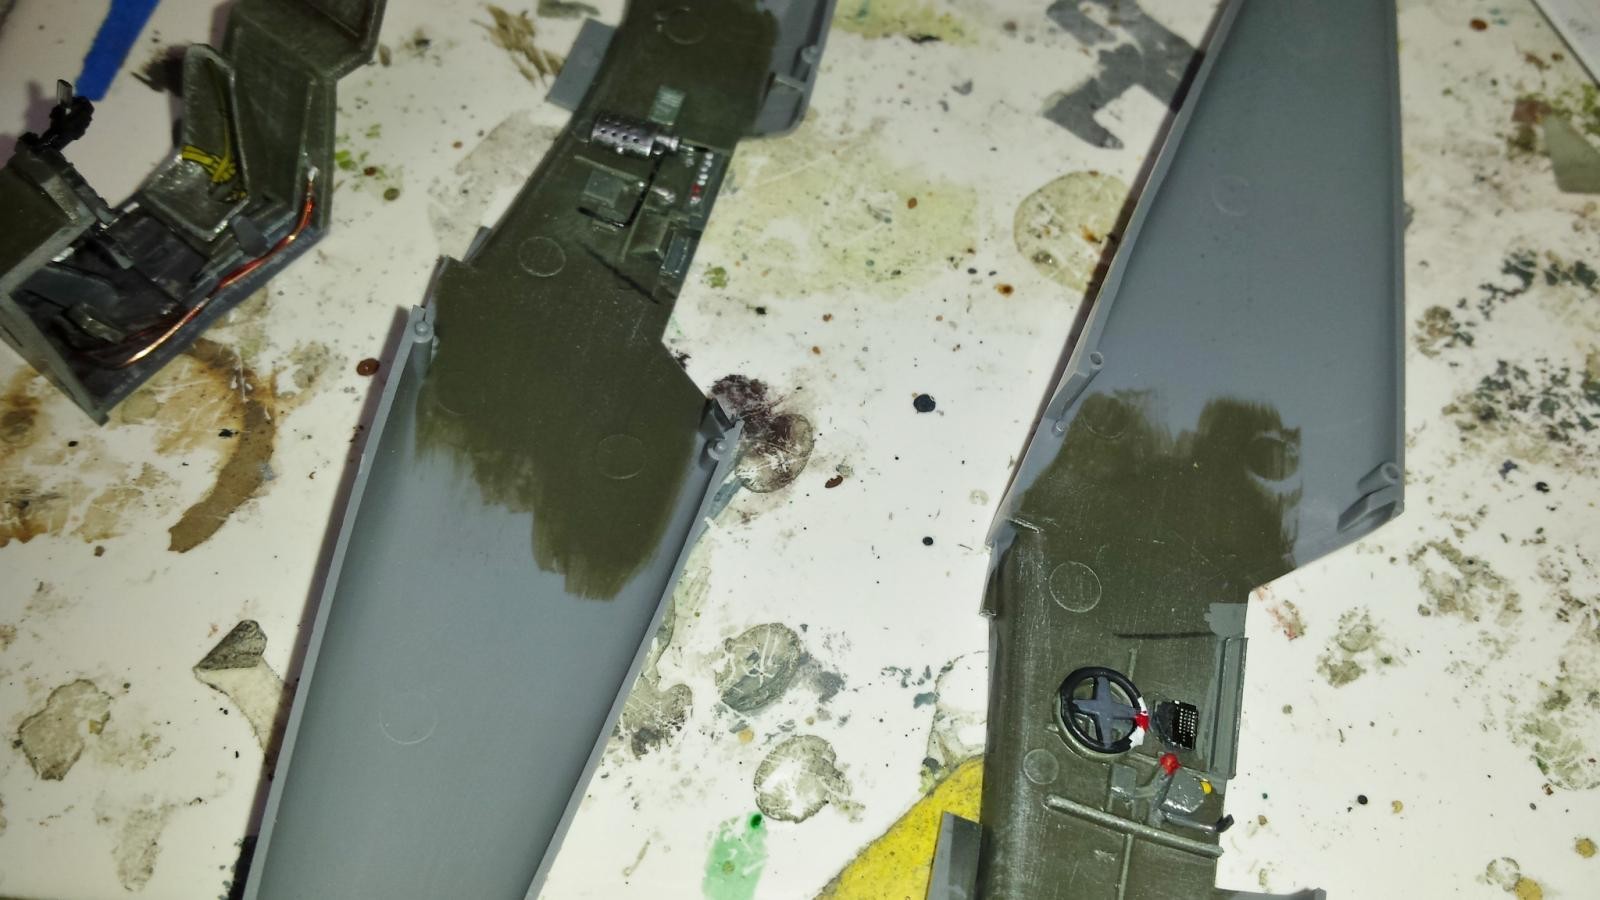
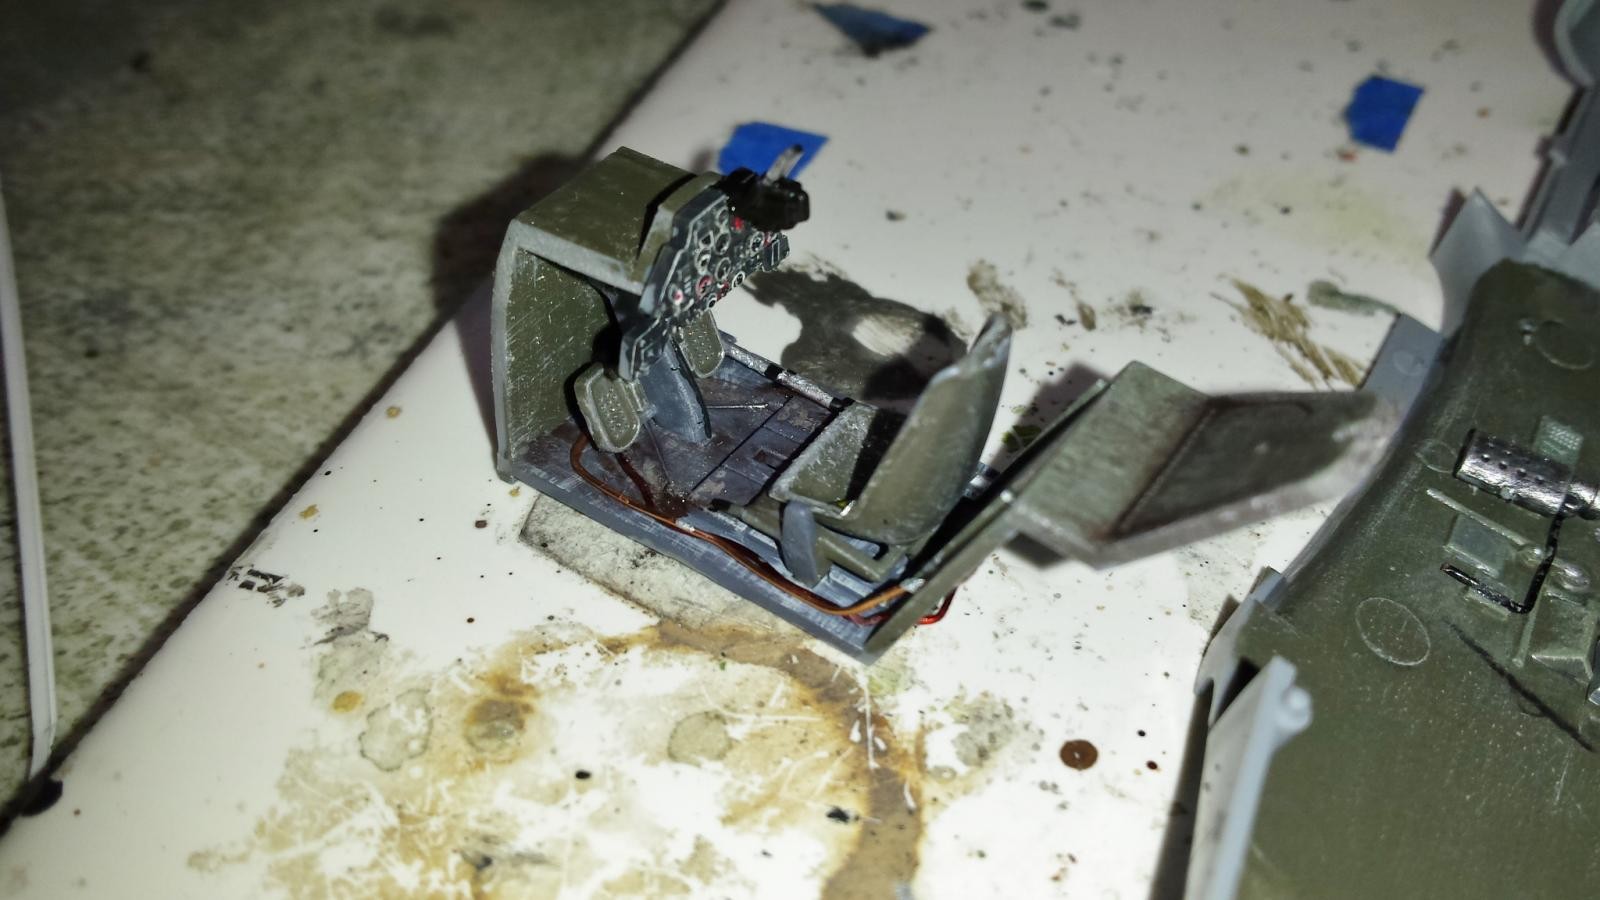
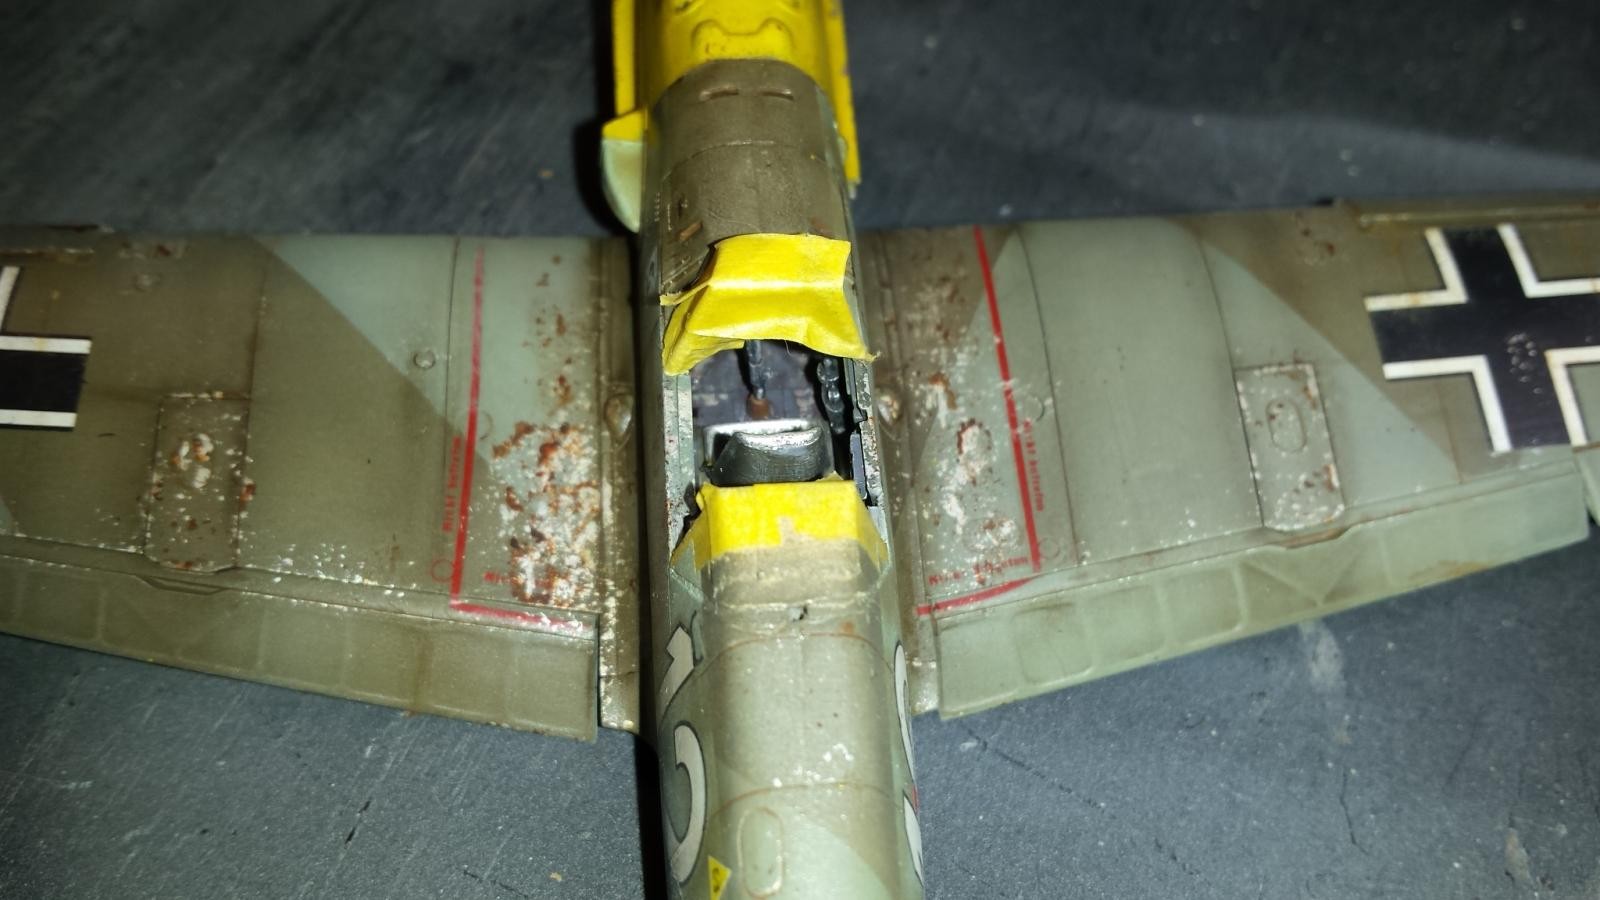
Upon starting I wanted to keep it simple but the cockpit was just a little to bare. That just would not do. I did not want to do tons of research on the cockpit so I went for just making it look busy adding what i learned to add to accomplish this goal following years of model making. I cut up a few pieces and bits of plastic to add to the side walls, installed some decal seat-belts (easy!), and threw in a few tubes and wires. It got the job done. I painted all the details, weathered the cockpit a bit and closed the fuselage halves around the cockpit assembly. It fit like a glove, no seams, no filler, way to go! The rest of the build went along very smooth and had the whole plane assembled, except for parts left off to ease painting, within a few hours. There was no other internal details or engine to assemble. She was ready to paint.
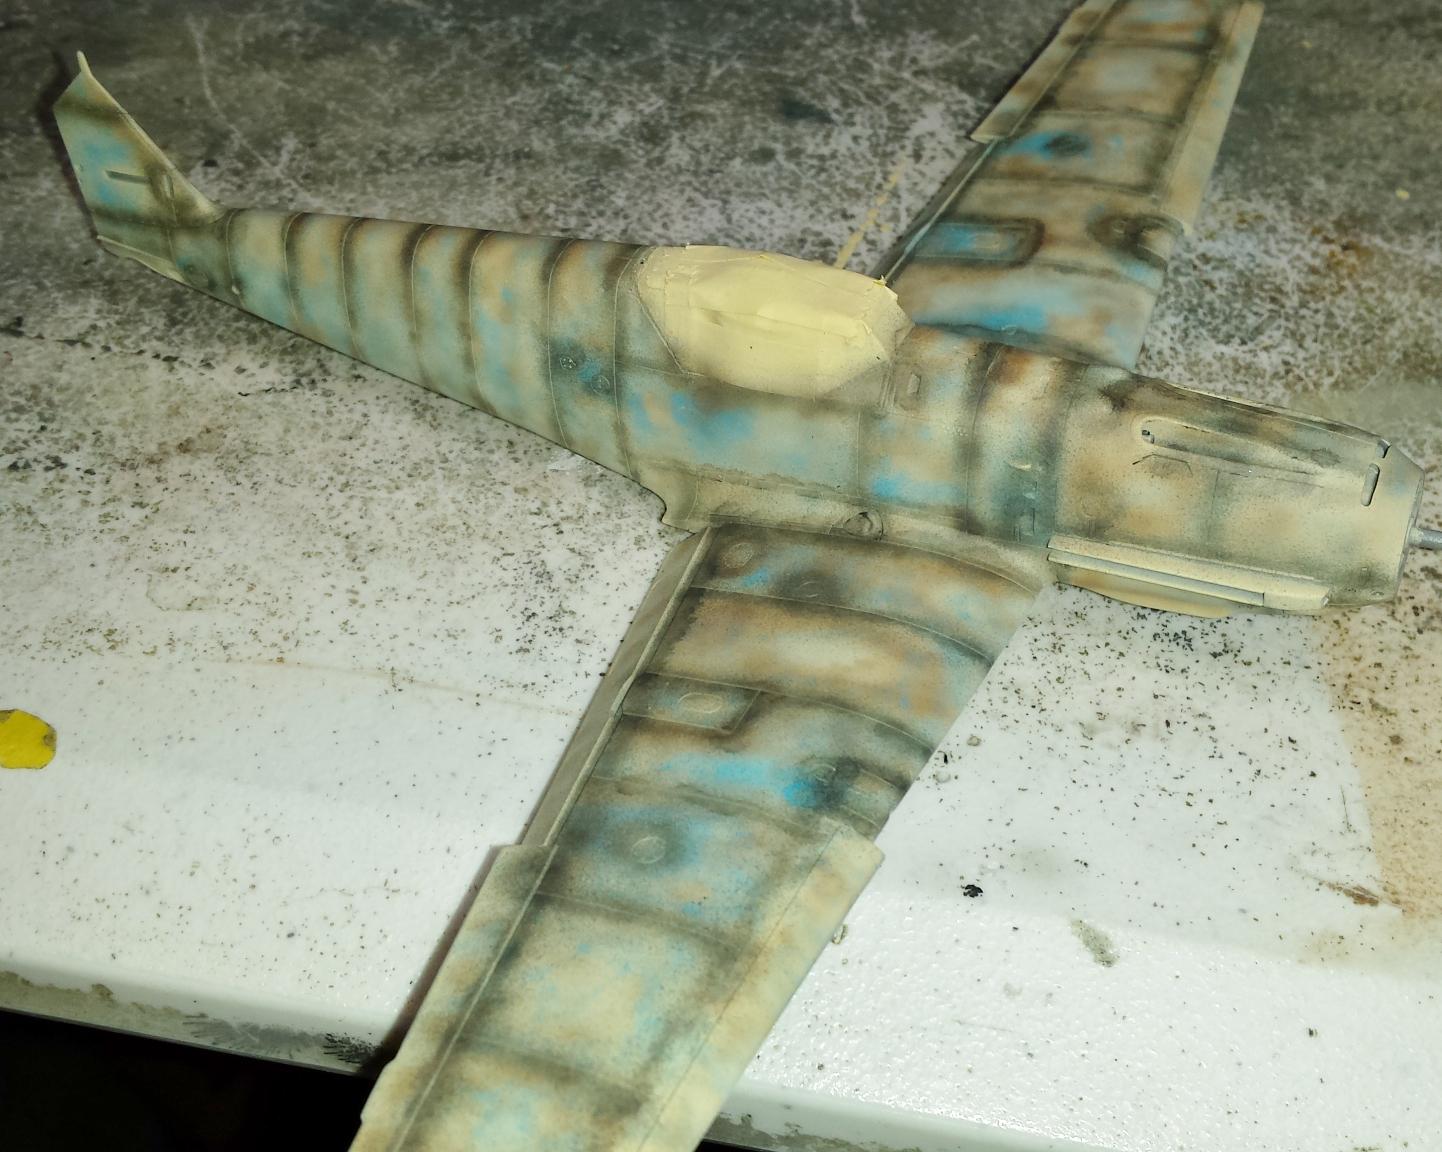
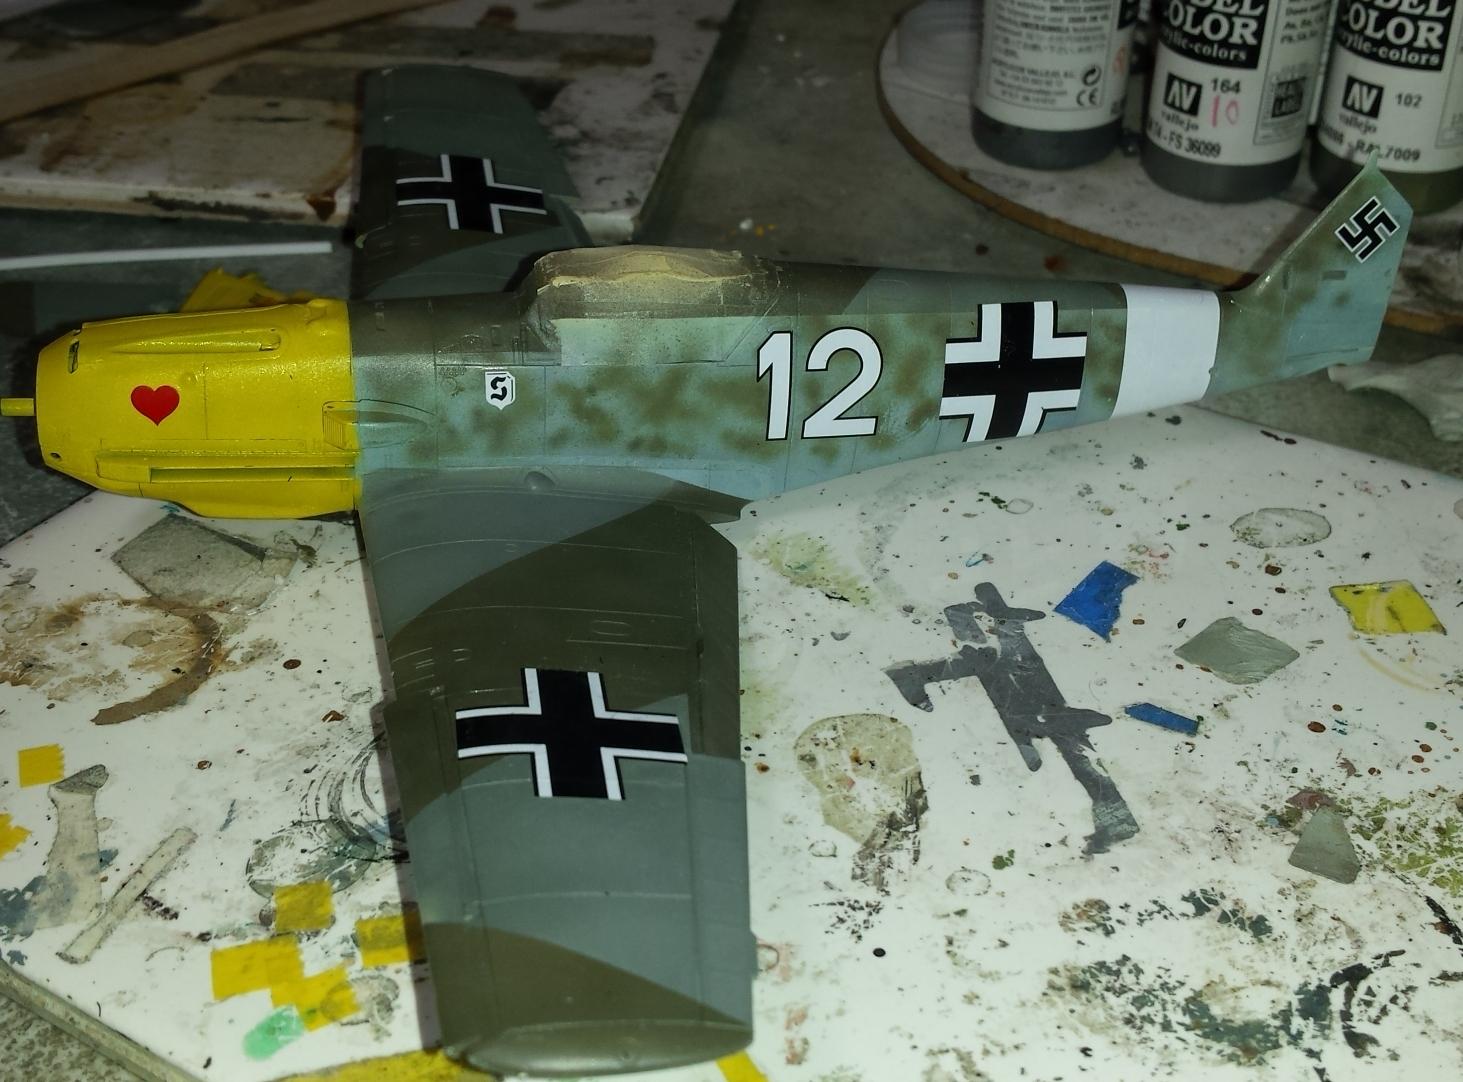
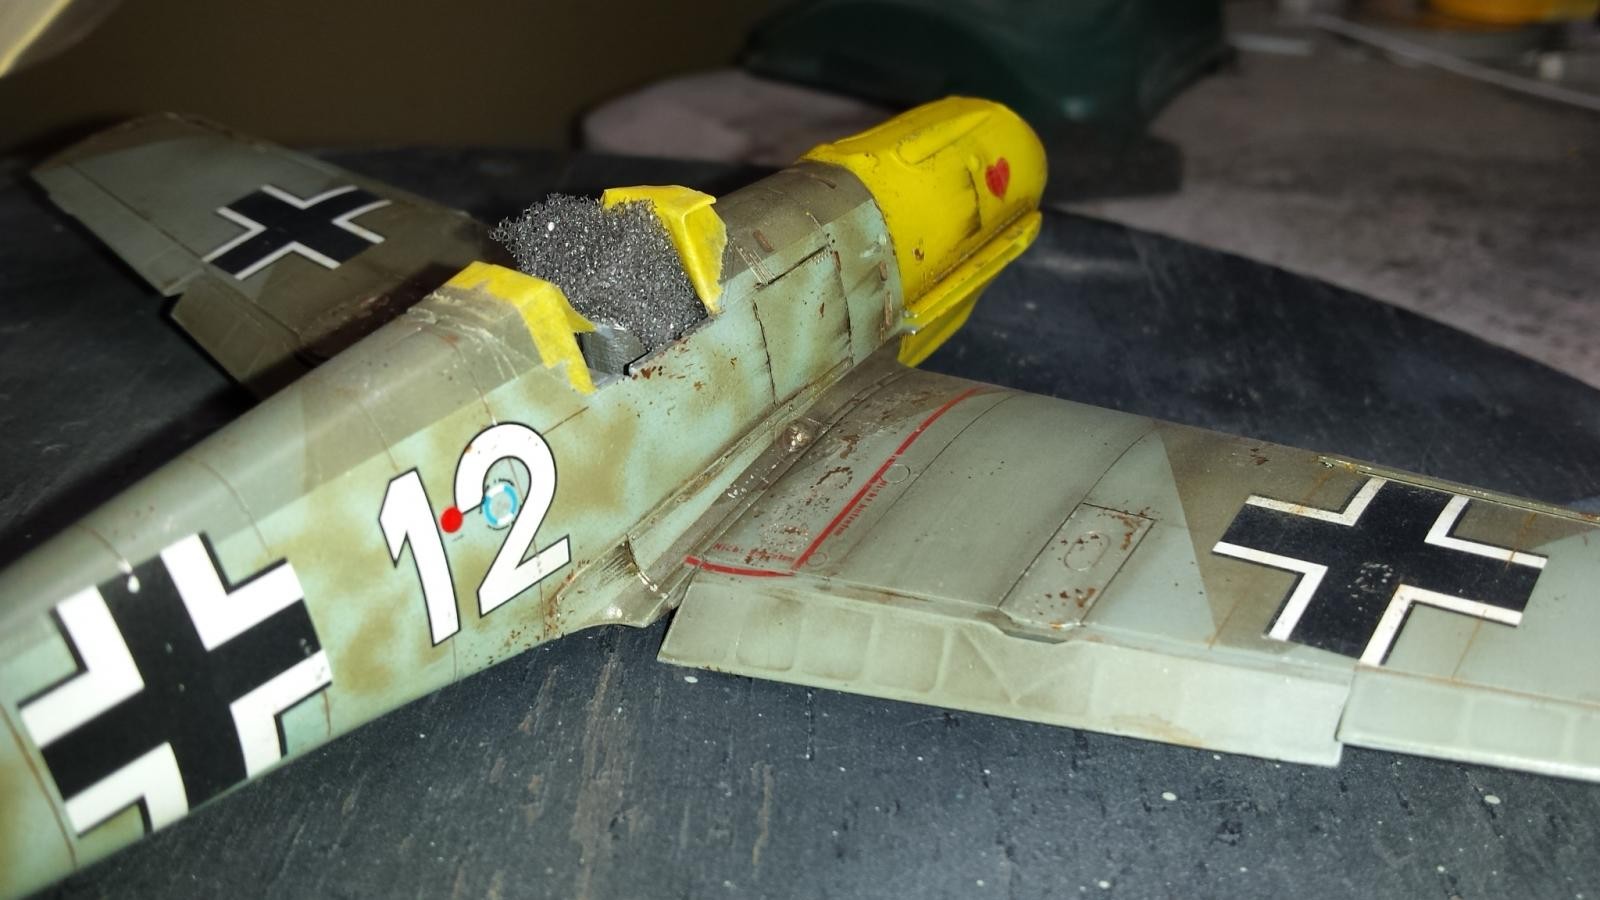
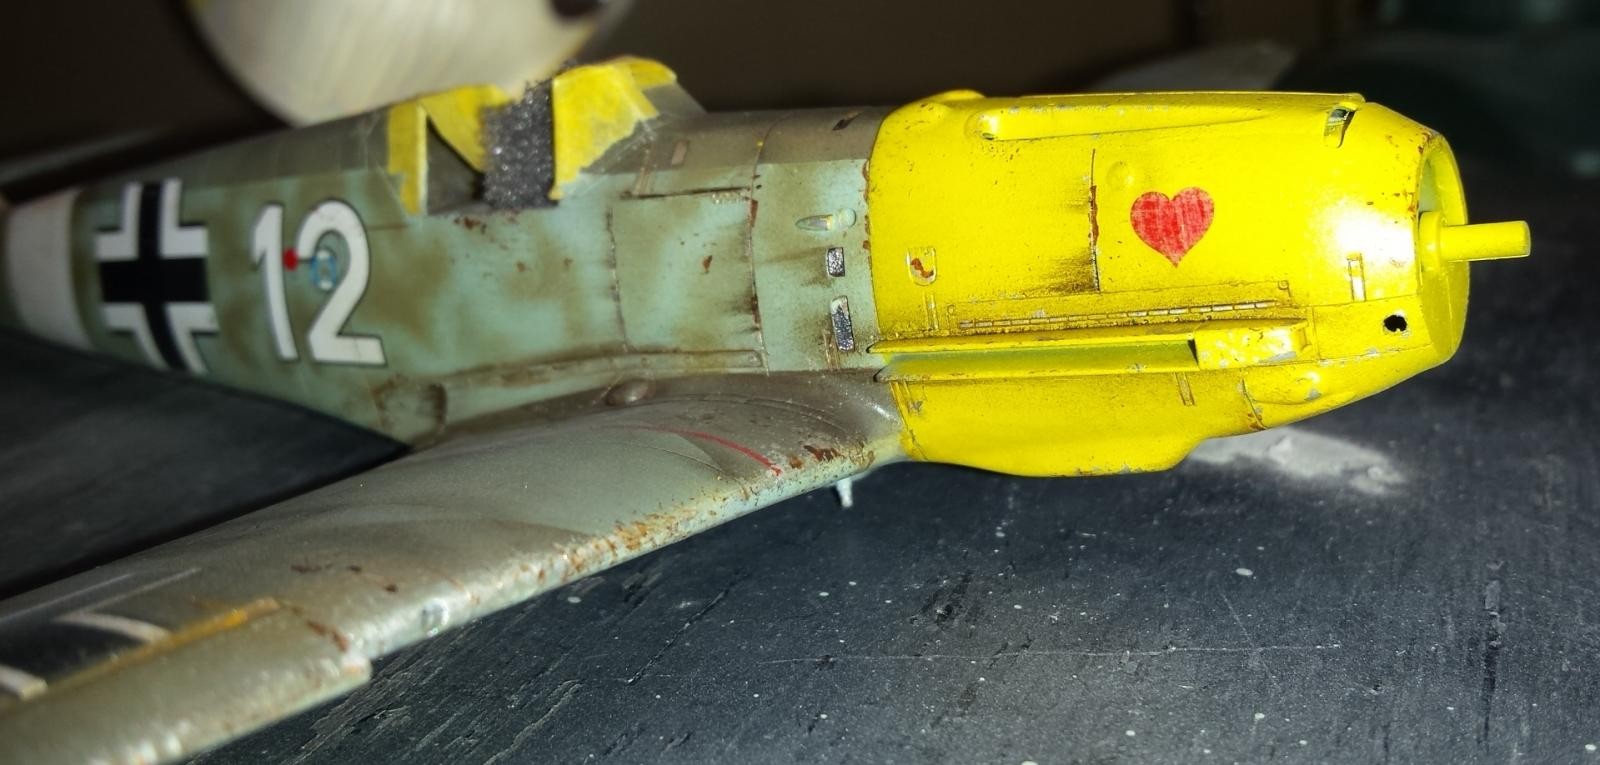
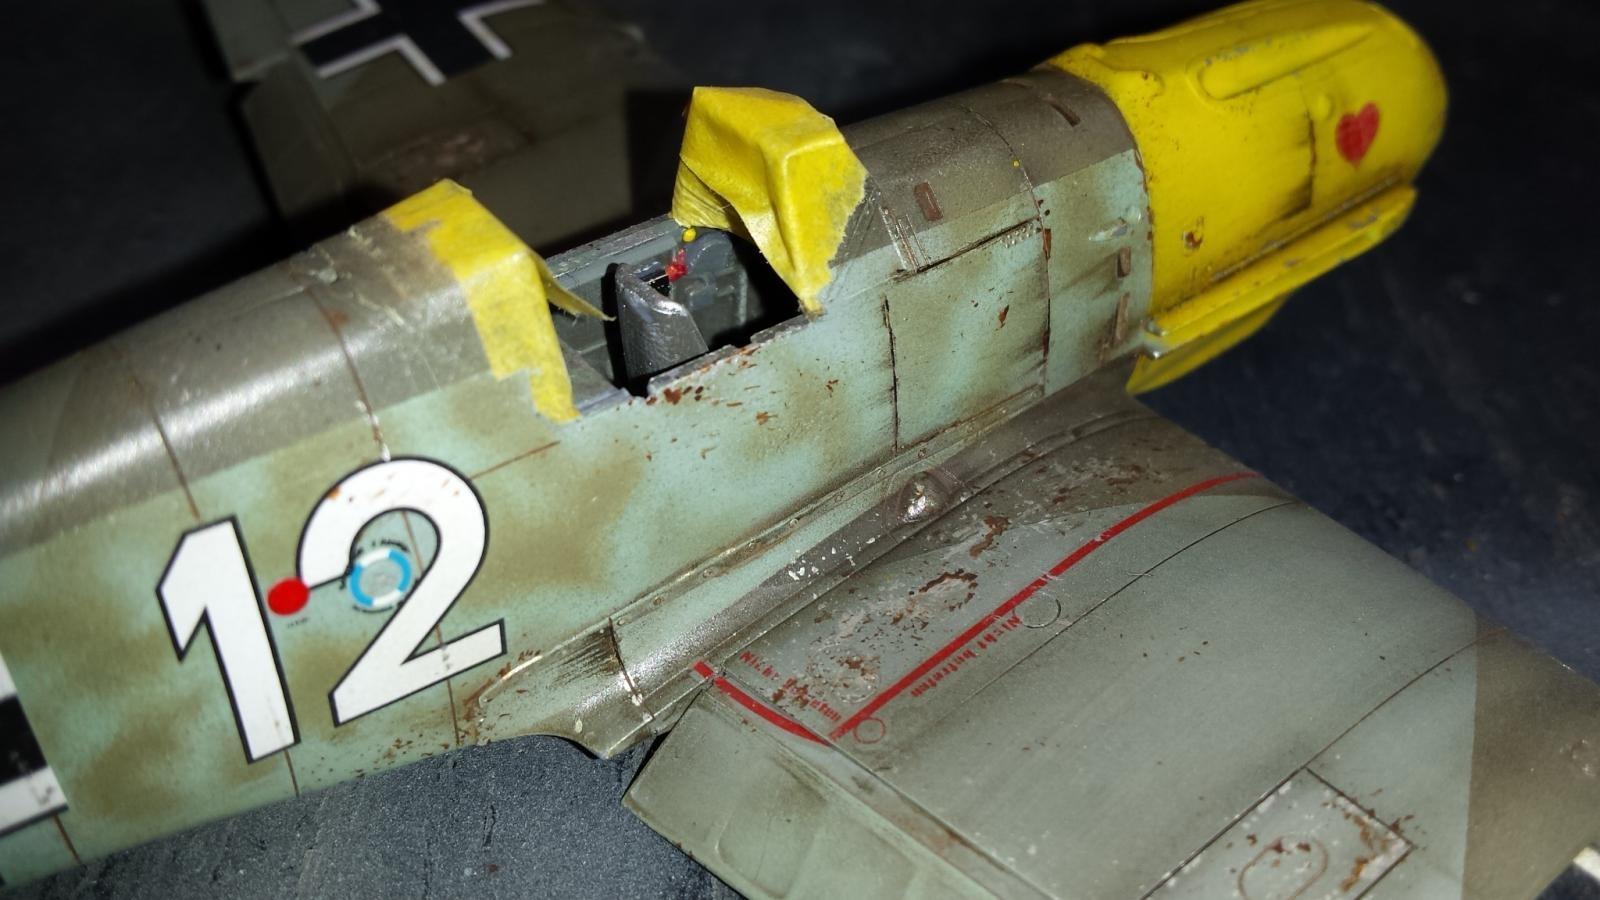
It was time for painting. I got a little bit carried away with the preliminary paint work such as pre-shading, and color layering, but it was not difficult for me because this is my standard practice these days, and I do love to paint. But the most difficult part of the painting at this stage was the masking. I would love to figure out a way to never mask again because I hate masking, always have, always will...LOL! This paint scheme needed some masking but not to bad b/c I strategically left certain parts separate to make this dreaded process easy. In no time I had complete 90% of the painting and I thought the colors looked good (I really fudged in this area), but I still needed to mottle the sides of the fuselage. It looked so good that I pondered on the idea of leaving it as is. After all, my research indicated that many of the early, Pre-Battle-of-Britain German Bf-109s did not have the mottling effect applied to the then basic Luftwaffe camo scheme. But then I re-called my purpose for selecting this subject. I wanted to try a mottled camo effect with my airbrush. So I set up my pressures, and limited my paint flow, and went to work. As I was doing it I found it fun, but it didn't look right. I reminded myself to just keep it simple and have fun. So I made some minor adjustments and finished up. I was not happy with the results of the mottling and actually got bummed out a bit so I took the night off. I looked at some Bf-109 paint jobs and examined all the different mottling patterns. The next day I looked at my Bf-109 again and thought ,"Oh, it actually does not look as bad as I thought". If I was to do it again the only change I would make is to mottle a little on the lighter side. Sort of a more transparent look using a thinner mixture of paint. But it looked OK for my 1st try.
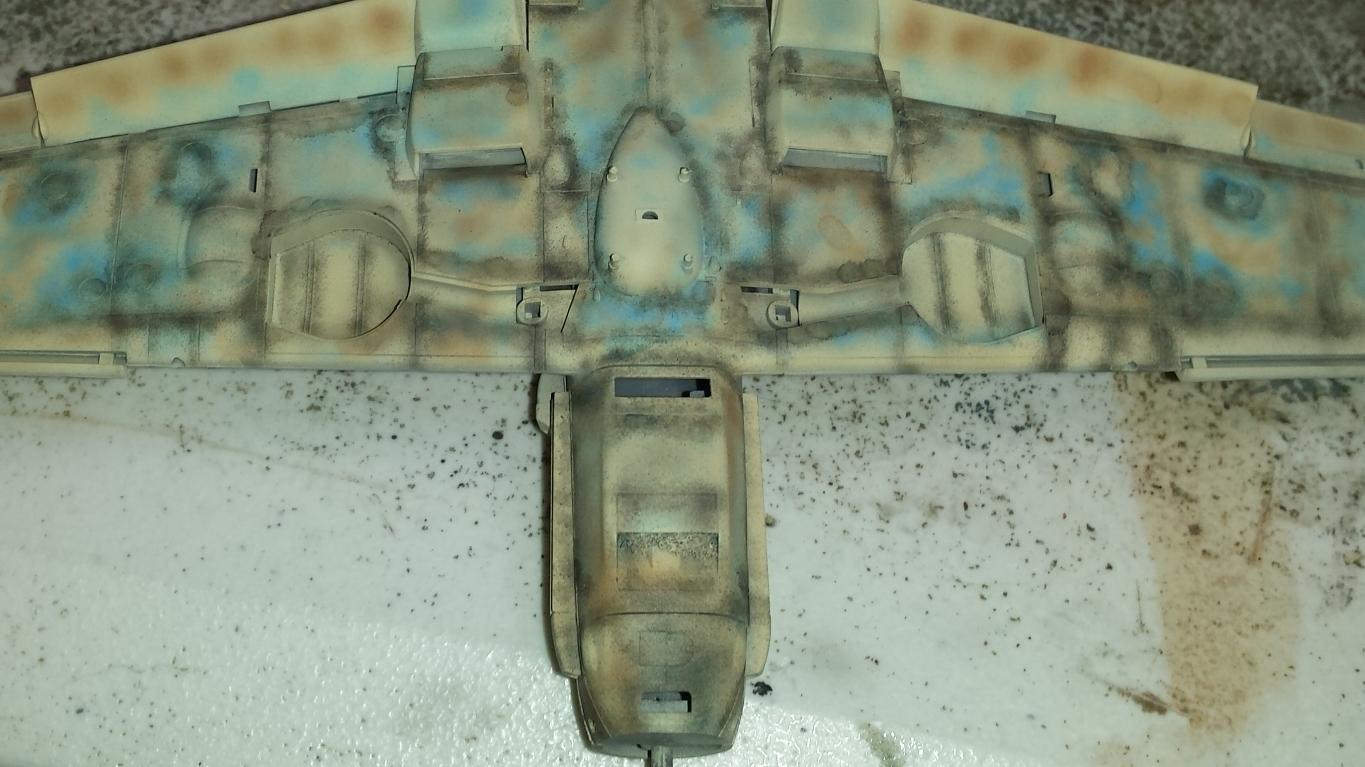
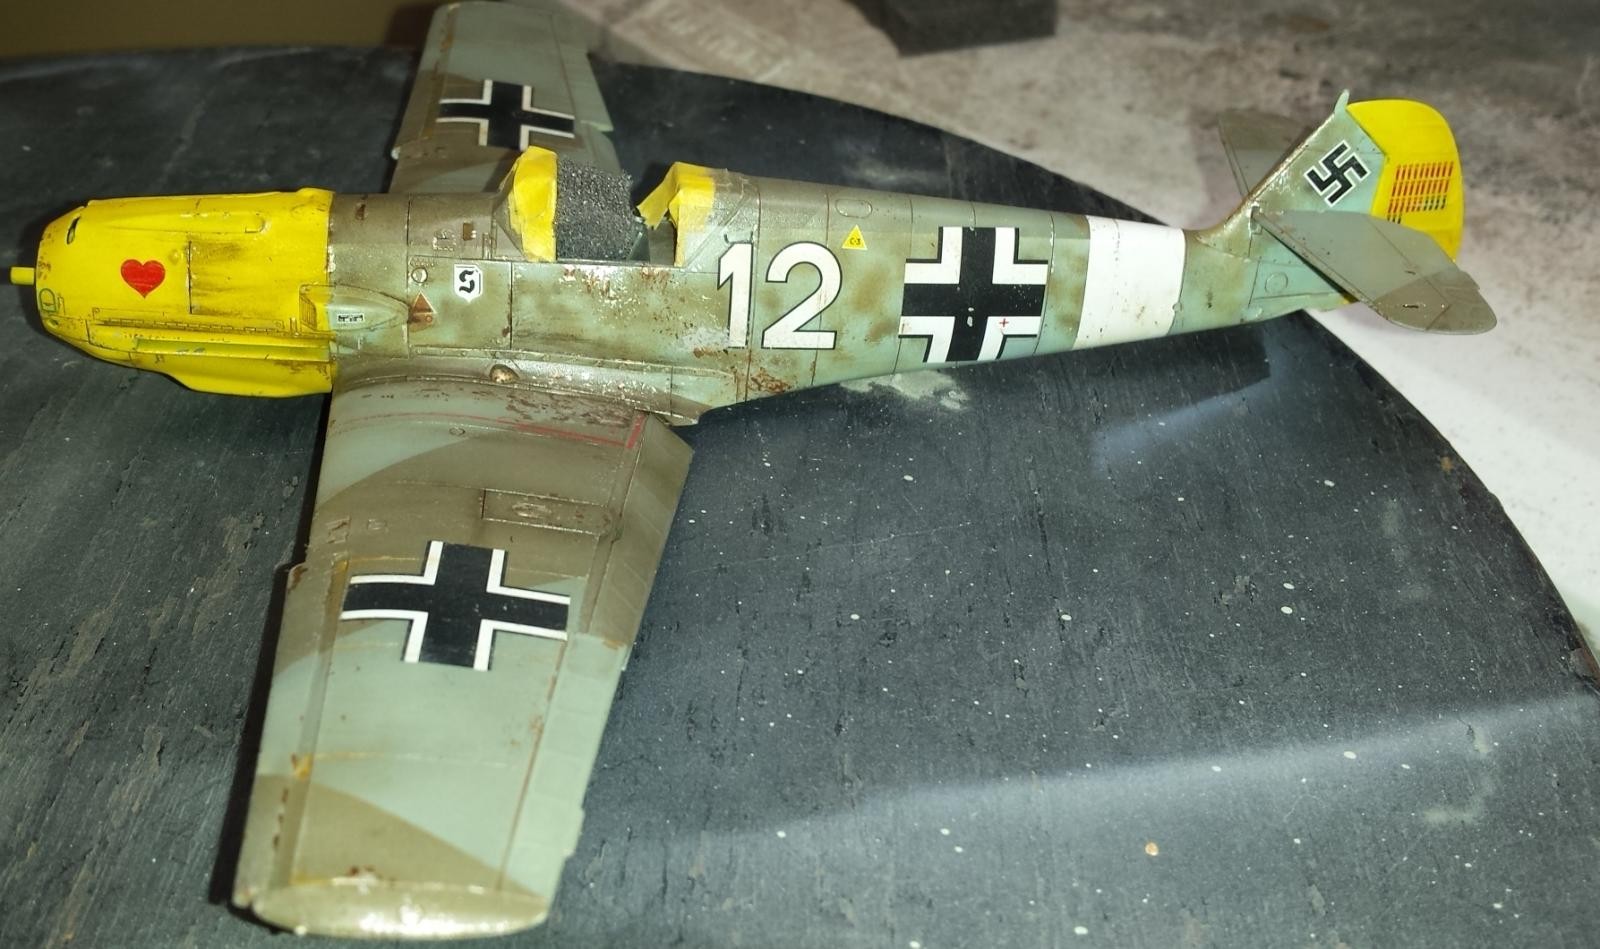
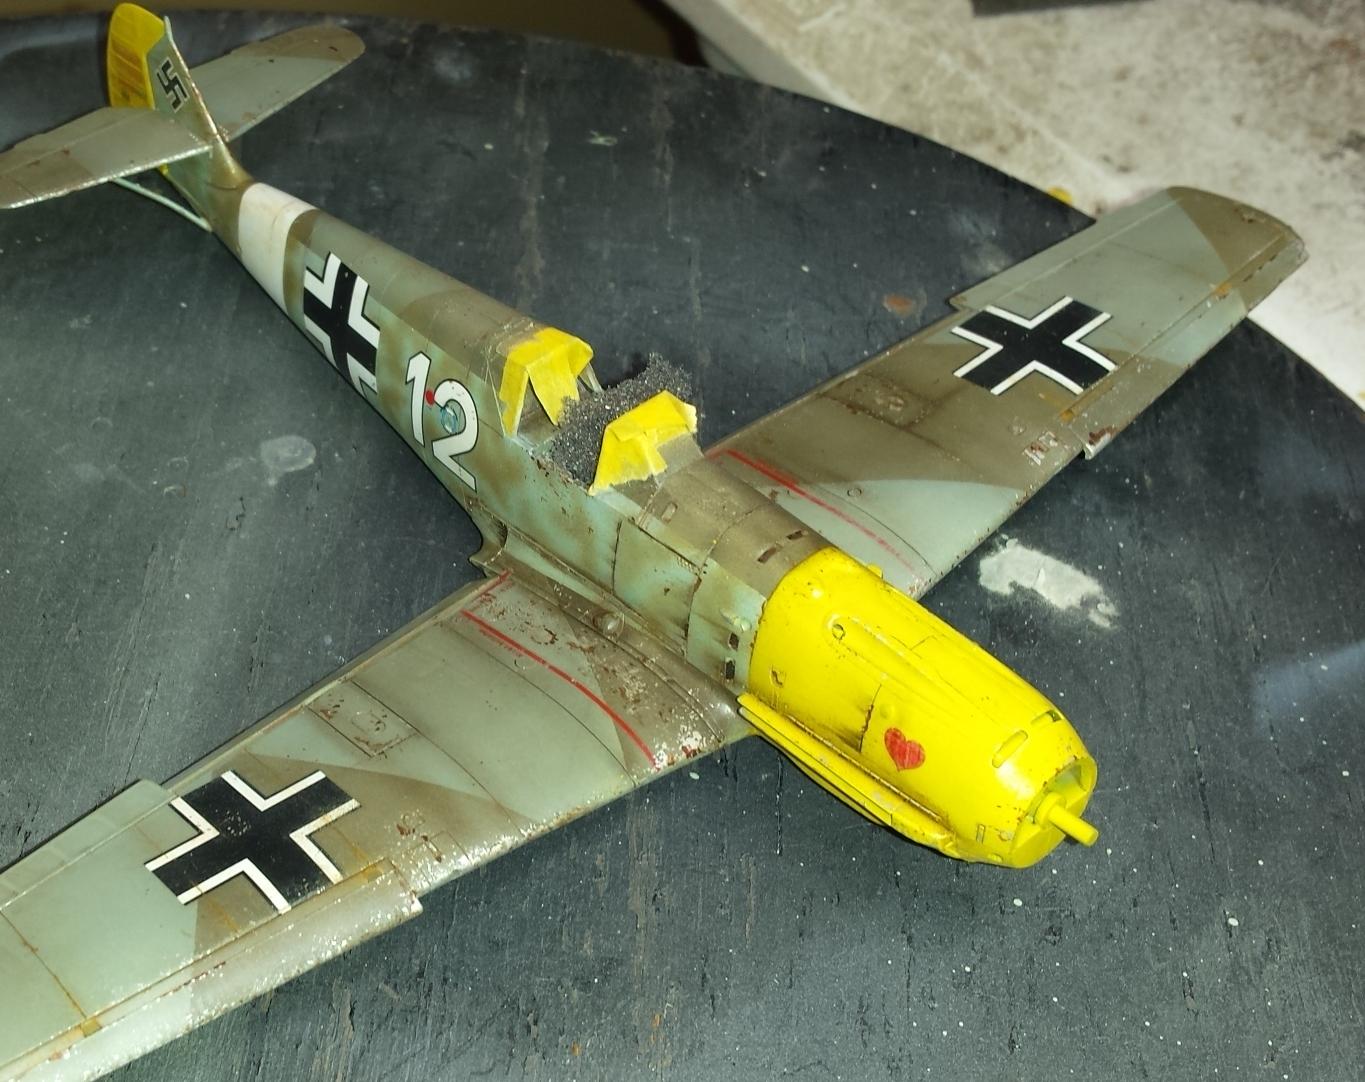
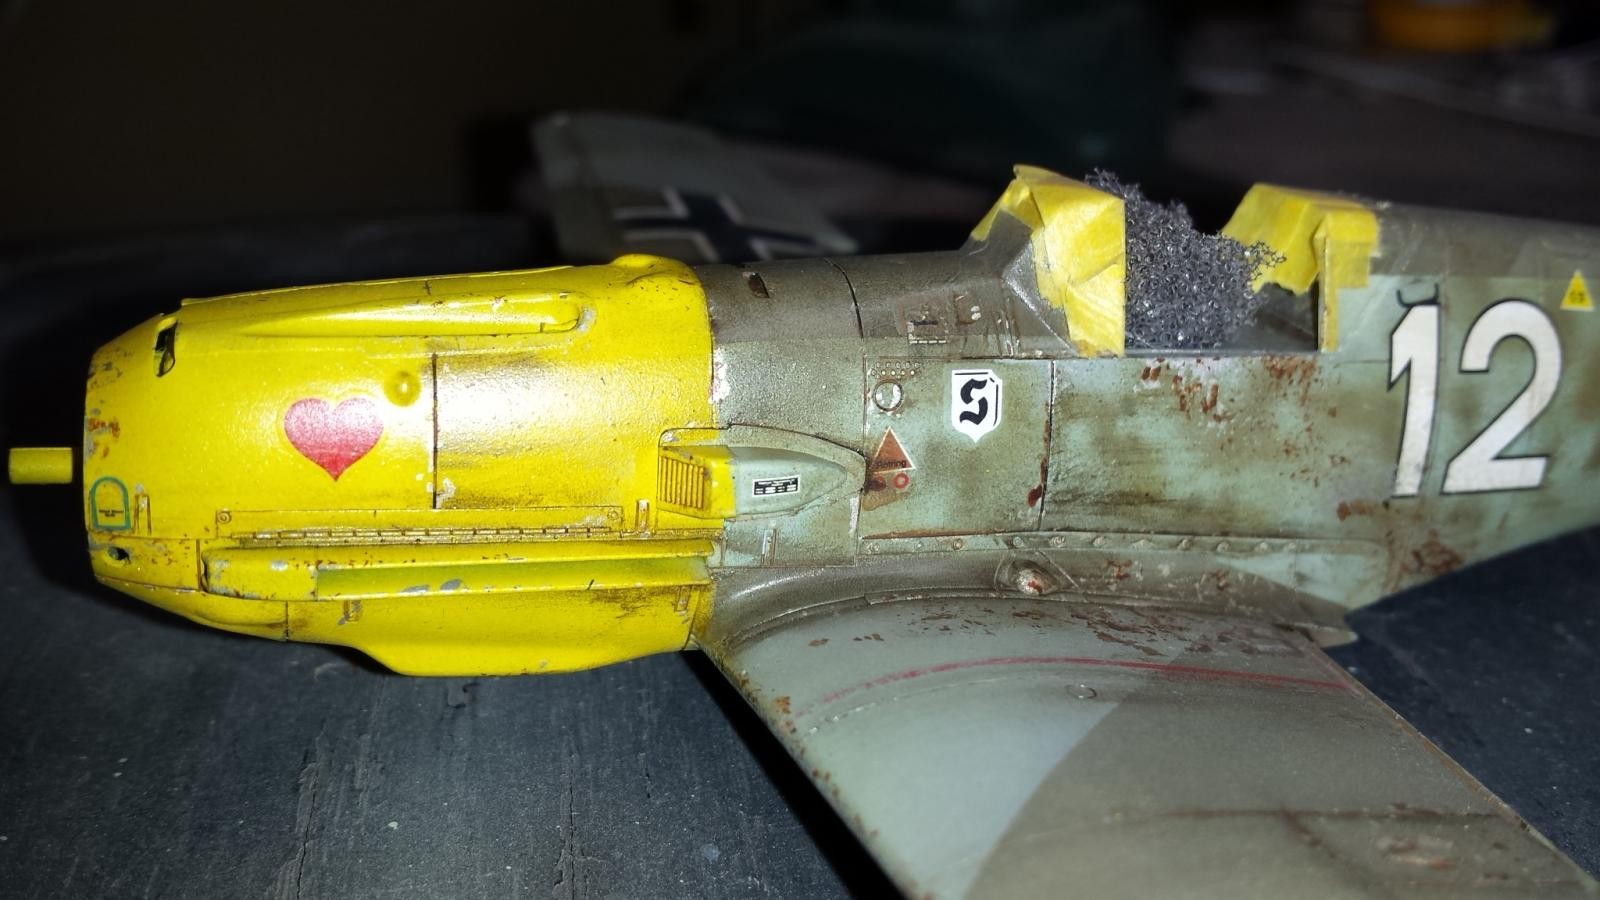
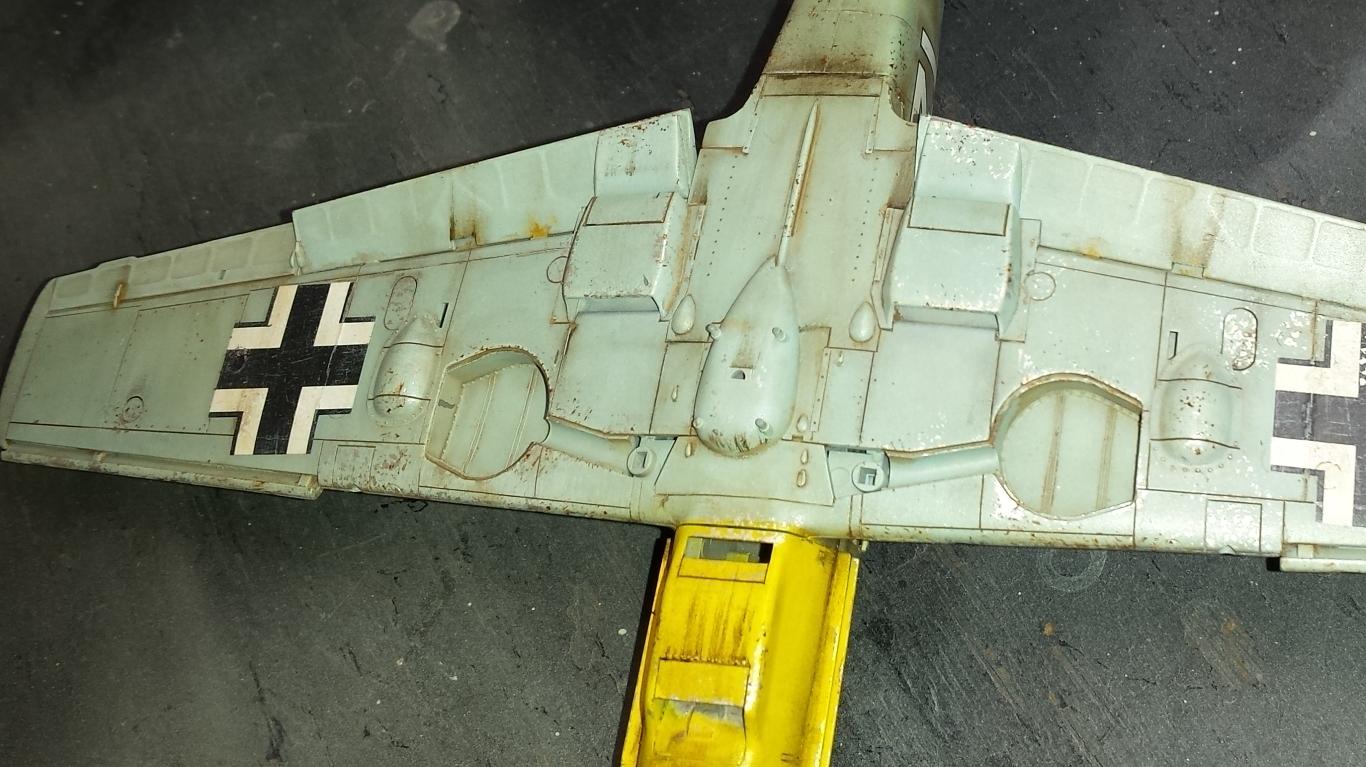
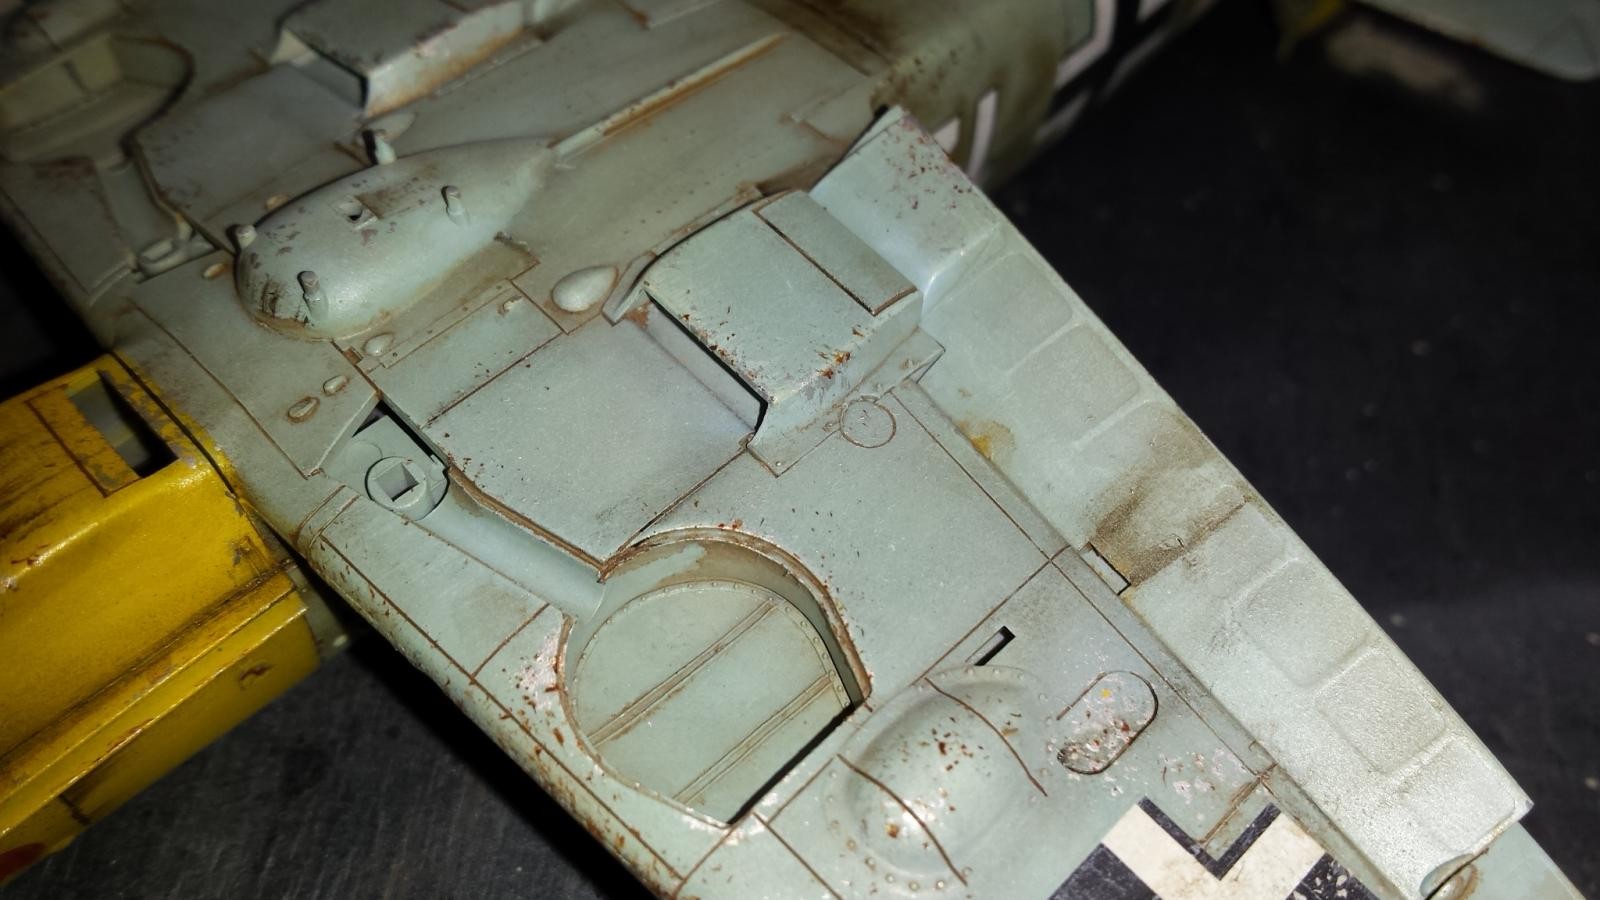
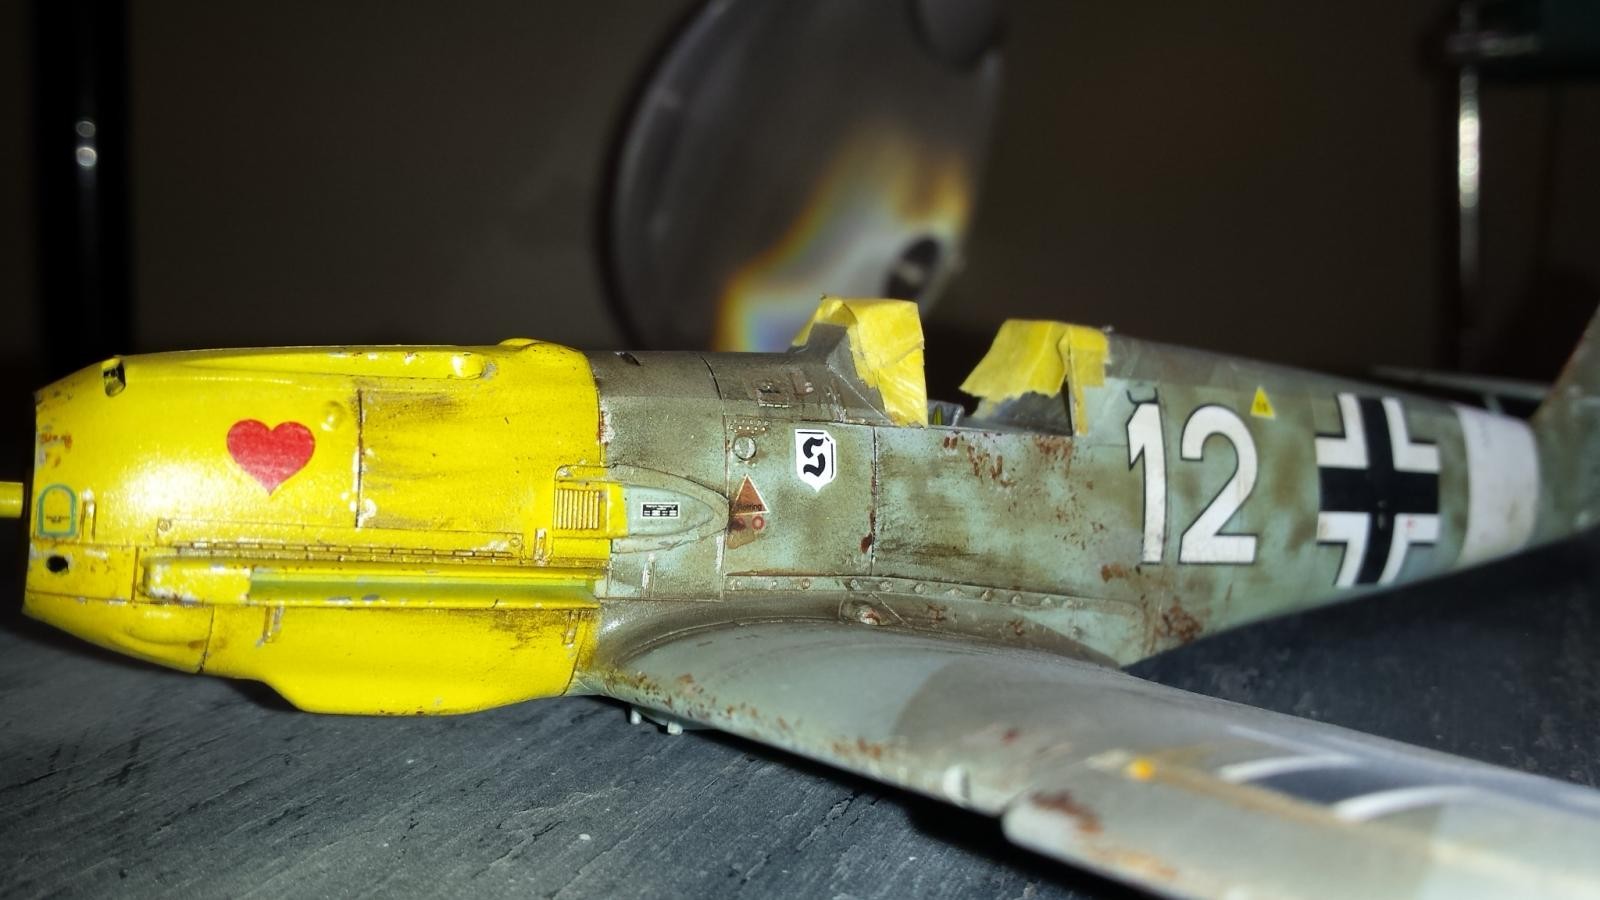
So it was time to have some real fun and beat her up with some dirt, scratches, chips, dis-coloration and fading. As always I had some fun doing this. One thing I like to replicated in a chipped paint job is the effect of primer showing through on less severe chips, and scratches. After some more research I found some examples were it appeared that a brownish-red primer was used. So I added some primer color using hull-red to the usual aluminium chip marks. Most of the chipping was applied using a pointy brush and a sponge to vary the effect. I then used my trusty Tamiya brown panel liner wash to add a pin wash to all the recessed lines. I applied some dry-brushing using a lighter version of the primary colors and hit the raised areas of the wings and body. The last thing I did up to this point was get out my oil paints and create various shading effects, spills, and stains.
I really had some fun up to this point with minimal stress, frustration, and worry. I was again engaged in a project that was pure fun, with a model only made for me, in the way I wanted to do it. I need to take another break for dinner, but can't wait to finish it. I took a few pictures throughout the WIP and have posted them here for your enjoyment. As soon as I complete this simple project I will post the finalized pictures. Hope you enjoy and comments are always welcomed.


VERY nice, Paul! Easy CAN be fun and you have proved it. After it all, it doesn't look very easy - it looks like you spent a lot of time on this build. Well done!
I'm with Jeff...it don't look THAT easy (at least to ME) - lol...but it sure looks good!
I guess it can be all relative to what you are use to. I should of said easy as compared to all the work and effort I had put into the last few builds in which I burnt myself out! I think it was also easy b/c I put no pressure on myself and 90% of the builds completed this past 12 months have been commissioned builds for customers with very very high standards and expectations that pushed my limits. I am glad they pushed my limits b/c it forced me to enhance my skill levels so that projects like this are now easy..LOL.
Paul, the weathering on this is phenominal! Is that salt I see on the wing next to the cockpit?
No, no salt at all used in the build. Just lots of Aluminium paint, hull red scratches, and some oil paint residue. Need to check out the pictures again to see what you see? Thanx for the comments.
"The terror of Malta." Very nice!
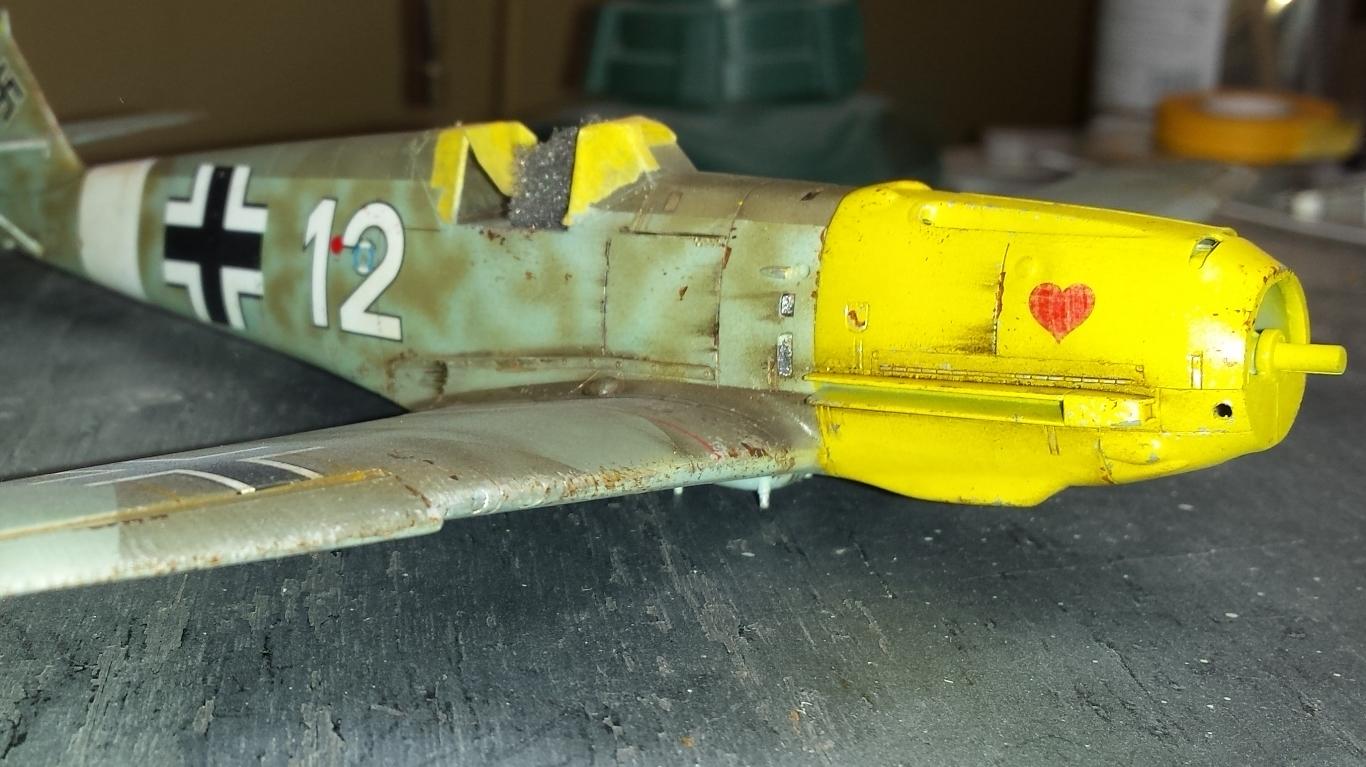
(On small minor niggle for the next one: counter-intuitively, the handle on the throttle is yellow)
One thing I did look at when researching was color of the throttle b/c this was one thing I needed to add to this model. After looking at dozens of photo's, and just reviewing them again, I could not comfortably go with yellow. Most of the pictures I gathered were a worn out black with a darker metal showing through, maybe yellow at one point but not after all the wearing. The Newer throttles, freshly painted did have a large handle with 3/4 the width painted black, and maybe 1/4 toward the inside end being yellow. Several had the 3/4 black with 1/4 width white. But in summary most of the photo's showed a very very worn black with no yellow left showing. Not done with the model yet so easy enough to go in and touch the inside of the wide handle with a tad of yellow. I know many of the aircraft I looked at were old, restored, and painted over many times so I really could not draw a conclusion from the photos I used. Thanx for the info and i will change this one if I remember to.
Paul - That looks really effective and I'm glad you're having fun 'cos lots of us get too fixated on the "actual" detail, sometimes losing sight of what is meant to be an enjoyable enterprise. I've lost count of the early 109s I've mutilated over the years as a BoB freak. Like you however, I like them a bit beat up, used and often abused. But that's probably not far from the truth since fighter production for the Luftwaffe was a bit overlooked during the early part of WW2 (scheduled to end by end 1940) and the fighter units were often having to make do with what they had before the pristine new/repaired a/c came through from the a/c parks. I think yours looks great and can think of only 2 details that you might consider if you build another. The a/c data plate should be on the lower fuselage behind the supercharger intake fairing (which was often swapped when damaged). Also the rear fuselage of the real a/c was put together just like the model with each fuselage section joined along the centre line (actually slightly offset since there was an overlap which in 1/48 would test most eyes) so a panel line top and bottom wouldn't be out of place. Great job anyway! Paul
Thanx for advice on data plate b/c Tamiya did include a very small decal which looked like a data-plate but could not find its location on the instructions and decal guide. It was not listed anywhere on my color scheme example, but maybe I am a little blind...LOL!
You have a great touch for weathering - I'm especially curious about the dry brushing you mentioned. I'd love it if you posted some YouTube videos of your weathering techniques!
I really suck at Video Making...sorry. My 11 year old daughter loves video and I am trying to talk her into making a video with me someday. Anyhow the dry-brushing is really the easiest method I use and is very easy to learn. I have been dry-brushing way before I ever used washes, sponges, oils, powders, etc. I think it the 1st technique I ever used on a model other then painting, so would love to help you on this. Just not sure how to. But keeping it simple I just take a base color paint like dark green and add a little white to it, or any color that will lighten the dark green. I use a flat brush and dip it in paint, not to much. I then rub it hard on paper-towel to get most of the wet paint off both sides of the brush. I may do this a few times before I hit the model with it. I then very lightly drag the flat side of brush across any surface you want to enhance, most effective on any slight raised surface. On this model it worked great to enhance the ribs on the fabric covered control surfaces. You start really light and a very dry brush b/c dont want to over-do. You can always repeat this procedure over and over until you get the wanted effect and impact on your model. practice varying the paint mixture, pressure on the paint stroke, and different kinds of surface it works on. But master this b/c it is the most basic and universal technique to use to start your weathering process. BTW this is also the 1st step for me after the base paint is applied. I then weather, then if needed dry paint again to hit very high marks in the surface. You can use various tones to the paint to vary the look. Always try to use the same color as surface you are dry brushing with just a touch of white to it. You can experiment with different colors that compliment this base color once you get a feel for how it works. Give it a go ASAP its really easy. Its really fun to try it as a basic technique on your figure painting. Hope this helped?
Thanks Paul! I've used dry-brushing to pick out small raised detail - like on an instrument panel - but not on large surface areas like wings and such. At first I thought you were talking about using as a way to lighten the centers of panels, so wasn't sure how you were pulling that off, but now that you've described how you used it (on the ribbing areas) I see how that would work (and can see the effect on your 109). I may try that on the Privateer I'm working on now...
BTW you just got my attention when u said "Privateer". Always wanted to build a PB4Y-2 b/c this is the plane my dad was assigned to flying out of HI during end of WW2. He was stationed at Kanoe Bay NAS. HI in 1945. Flew long range patrols into the deep Pacific. He was a crewman, flight engineer, and bubble gunner. I could tell you more stories from my Dad, who is the reason I love aviation, and model making. Died about 12 years ago. I missed out building one for him but purchased tons of books on the PB4Y-2. I want to know all about your build, and need pictures please. What brand is it? I only know of the Matchbox which is why I have not tried but need to do someday.
Greg Also, I do use the dry brushing technique over flat surfaces such as a wing and or fuselage side. I think it is a bit more difficult b/c you dont really want to streak the paint to much, and its easy to over-do. But some pigment does rub off and creates a nice subtle effect which adds to the paint tone, shadow, and breaks up the mono-tone qualities. I think that technique was one of the 1st used on flat surfaces to add some visual interest and break up the color. I dont lighten paint as much when I use that. I lightly did this on the 109.
For Pedro:
Regarding questions about primer showing. Here is one picture I just found showing what looks to be primer showing through on side of fuselage and on wing. I think wing may be spilled fluids and/or dirt. But side under fuselage looks like paint fading showing what could be a light greenish color as a primer like you suggested.
1 attached image. Click to enlarge.
Paul I had never seen this photo if memory serves me well, or at least in colour. Thank you for sharing it in the first place!
This a/c is basically a dream to anyone who wants to do a hard weathered model.
To me those big brownish stains are not dirt, though the area is scrubby and dirty alright (after all it’s the wing walk area for the mechanics), it looks something else, a primer being the best assumption, so we are the same level here.
What I still don’t think is that this sort of primer was applied from the factory as such. Here’s what I think I see in the photo:
This 109, giving the small yellow a tripe on the wing edge trail was likely photographed either during the Balkan campaign or just after that, and looking at the camouflage we can see 2 groups of colours, the fresher applied greys (74/75 ?) with heavy mottling on the fuselage sides, but underneath the wear starts showing what looks like 02 over the original 65. So this means that this plane has either been overhauled, possibly for the Balkans campaign, or it could also be an older E airframe (E-1/3) refurbished to the more modern E-4/7 standard. So during that phase that primer could have been applied over that area, perhaps to reshape battle damage. Who knows?
Of course, I can be (and possibly am) complete off mark, dead wrong with my assumption, and am happy to think differently if other photos with this brown stains appear.
About the greenish hue primer I’ll send you a p.m. Paul
Thanx for the info, very interesting!
Nice job with your first mottles, Paul. I just did my first as well, a ways to go doing finer ones though