Okay, it has been a while since I last posted on my Typhoon. As previously stated, I started this kit as a little side project to keep myself busy while I waited to finish my Hawker Hurricane project. As said project neared the finish line, I shelved the Typhoon and it remained shelved long after the Hurricane was complete. That is because after finishing the Hurricane project I was burnt out and lost my modeling mojo. This happens all the time, so I indulged in other things (flight simulation, bicycling, cat-napping, whiskey sipping, etc) until my mojo returned. Well, I am back in the game and am about to embark on another in depth project, but before I do, I figured I would finish this Typhoon off to dust off my modeling joints. First thing I did was to attach the KMC resin Tempest tail planes. Big mistake as the fit was absolutely atrocious! I have used many KMC products in the past (cockpits, wings, wheels, and other detail parts) and they were always an effortless drop in fit. I don't know what happened this time, but KMC really screwed the pooch with these tail planes. If I ever build this kit again, I am going to stick with the kit supplied tail planes. Next came the wheel bays and the usual debate, should I knock myself out over something that won't be seen once it is finished and glued to a base or should I just let it go. Well, as is grossly apparent, detailed wheel bays won out. What the hell, I am always looking to sharpen my scratch-building skills anyhow. Lastly came the radiator. Typhoons have that gigantic chin scoop which gives the aircraft a really aggressive look. I wanted to capture that look so, more scratch-building, filling, sanding, contouring, and shaping. I really love the end result. Far better than going with the kit item. A few more little tid-bits and my typhoon will be ready for paint. Have not decided on a paint scheme yet but something with full invasion stripes is a definite.
20 attached images. Click to enlarge.
-
1. Wings dry fitted. Fit is pretty darn good with just a minor gap here and there. Nothing I can't fix.
2. Fit of the windscreen was kind of poor and required careful filling, sanding, and contouring. Overall, everything turned out alright.
-
1. KMC Tempest tailplanes added. Totally horrible fit on both sides requiring a ton of filling, sanding, and contouring. All I can say is never again, brother.
-
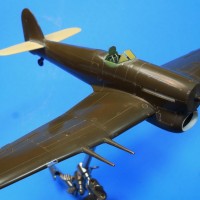
1. Starting to look like a Hawker Typhoon.
-
1. Scratch-built wheel bays
-
1. Lattice created with a small triangular template and a sewing needle in a pinvise.
2. Stainless steel wire with a piece of photo-etch fret bracket.
3. Loads of small plastic strips cut to size to form the ribs. Lots of time, liquid cement, and swearing.
-

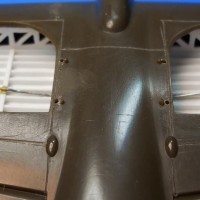
1. Forming the back corners was a real bitch but totally worth the effort.
2. Oval hole cut for the radiator flap actuator.
3. Filled in the holes for the kit rocket rails which are sub-par. I might have to scratch-build new rails. Thankfully, I have the Paragon rockets so that is at least half the battle.
-
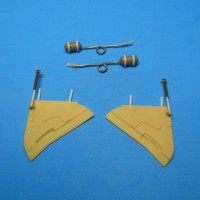
1. Scratch-built oxygen bottles
2. KMC landing gear doors. I prefer these over the kit doors as they have the proper internal detail
3. Scratch-built gear door actuators and brackets
-
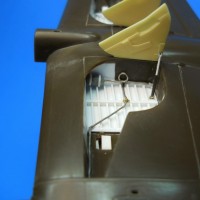
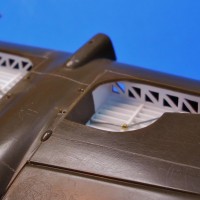
1. Everything fits pretty well in the starboard wheel bay.
-
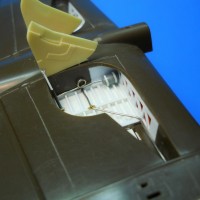
1. Port gear bay looks pretty damned good also.
-
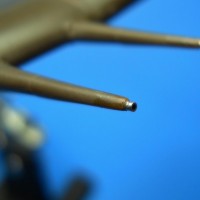
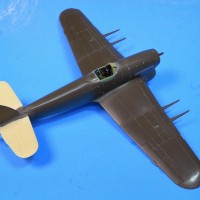
1. Rather than try to drill out the cannon barrel tips, I cut them off, drilled holes in the barrels and super glued in small pieces of metal tubing.
-
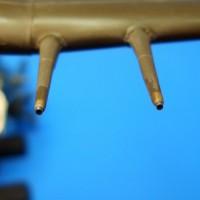
1. Oh yeeaah! Looks good. Thump Thump Thump Thump!!!!!!!
-
-
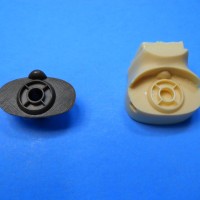
1. Kit radiator housing
2. KMC radiator housing
3. I figure I can combine the two of these into something more reasonable
-
1. Lots of cutting, gluing, sanding, shaping, and fitting, but I have myself a radiator.
-
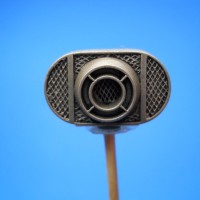
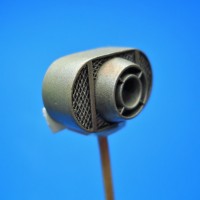
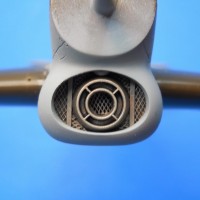
1. Plastic strip all around.
2. Plastic strip braces.
3. Plastic strip fins.
4. Hollowed out center.
5. Photo-etch mesh.
-
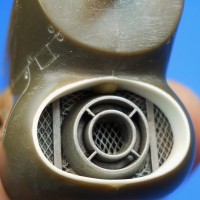
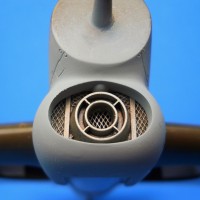
1. Front end of a bomb half forms this cover
-
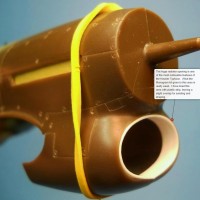
1. Radiator protrudes a little farther forward than it should in reality, but I'm going with it anyway.
-
-
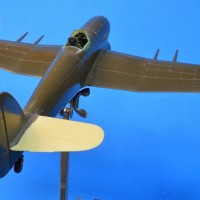
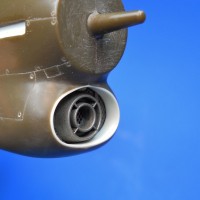
1. After a bit of priming the results speak for themselves.
-
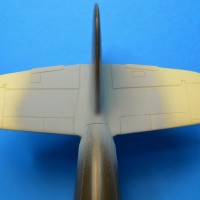
1. After hitting the tail planes with some primer, I'm happy to report all the filling, sanding, shaping , and contouring paid off.