Tamiya 1/48th Mitsubishi Ki-46 Recon Dinah #61045

Started by Chuck A. Villanueva · 46 · 5 years ago
  • Profile Photo
    Chuck A. Villanueva said 6 years, 1 month ago:

    Next up is to first apply the interior green over the canopy and rear compartment windows. And also the lower view windows as well. Then next up is the long process of pre shading. First to airbrush Aeromaster IJN Light Aircraft Grey for the under surfaces. Also painting the gear doors and other components in this color as well. Before painting the Brown upper surface, I took the time to mask off the white panels on the wings and rear fuselage. As the white will lay down better over the grey. Next the task of masking off the areas around the engine cowls. These will be painted Blue Black. With that done, next time apply the Brown and black. More to follow.

    21 attached images. Click to enlarge.

  • Profile Photo
    Chuck A. Villanueva said 6 years, 1 month ago:

    I had stated earlier that i would mask off the cowlings to prepare to paint them the blue black. Well this scheme does not have that option. The scheme is an overall Brown which includes the cowlings being the same color not black. So using Aeromaster IJN Brown to airbrush the color over the airframe .

    With tissue stuffed to cover the engines. I also applied the Brown around the engine cowls and extends below up the landing gear bay forward opening.

    Next once the paint has set. Being acrylic dries quickly on a warm day. I mask off the leading edges of the wings to paint the yellow ID markings.

    Being careful in the area between the engines and fuselage area is tight.

    Using Aeromaster RLM04 Yellow for the leading edge ID markings. Once dry I then remove the Tamiya tape masking.

    Next up to apply the Future glossy clear coat to apply the decals. More to follow.

  • Profile Photo
    Pedro L. Rocha said 6 years, 1 month ago:

    Chuck, that Dinah is looking good, can’t wait to see the end result

  • Profile Photo
    Louis Gardner said 6 years, 1 month ago:

    Chuck,
    You know I have been watching from the sidelines with this build and your F4U Birdcage. I am really looking forward to seeing how the rest of this one turns out. You have definitely turned the corner and are headed down the home stretch.

    I have been seriously thinking about building up a few Japanese twin engine planes later on during this year. This Ki-46 and the Mitsubishi "Betty" are both on the short list...

    Well done my friend. It really looks great with the pre shading work showing through the brown color. I have never pre shaded anything. I may have to give it a try to see how it works for me.

    Watching this one come to life has been inspirational.

  • Profile Photo
    Chuck A. Villanueva said 6 years, 1 month ago:

    Thanks Pedro, while building this, along the way, I started to admire the beauty of this aircraft. Sleek, even looks fast with the wheels down, as most airplanes really don't look as it should when parked. One of the things I love about this hobby you hold a bit of history in your hand regardless who or what it's for. And at times I will catch myself just holding her up for awhile at different angles maybe even a fly by. Regardless the Japanese had a winner with the Dinah.

    Thanks Louis, I'm getting into the part of Tamiya's line up where they have a few of their multi engine kits. With the Betty and Beaufighter next in the pipeline. The Betty is quite large and I will need to really finish the Lancaster to make room on the workbench. And these are not the typical easy and a little quick builds that the D.520 and the Fw's were. These are little bit more involved. These will take a little longer to build for me. The Dinah is a taste of what is yet to come.

  • Profile Photo
    Chuck A. Villanueva said 6 years ago:

    This session we will first apply the Future clear glossy coat. Will let it sit for a few hours before starting the decal process.


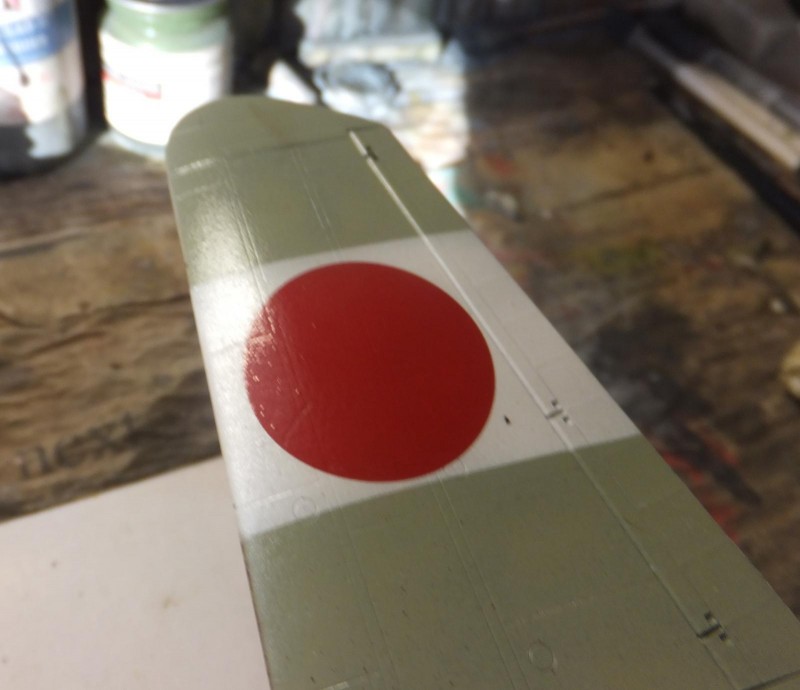
    Once the clear coat has harden. I start at the bottom and work my way up. And I typically start with the national markings. The Techmod decals are very good and nice and thin. Just take care that you have plenty of moisture on the area you apply the decal. They are quite sticky and tend to stay in place if your not careful. So carefully apply the decal and adjust the placement before it sets in place. What is typical of most Japanese war planes there won't be that many decals to apply. Not much in stencils, just some serials and unit markings for the most part. As I apply the Hinomarus on the lower wings, I realize that the white background should be a bit wider. It wouldn't take much really to mask off and add more white along each side. But I'm going to let it go.

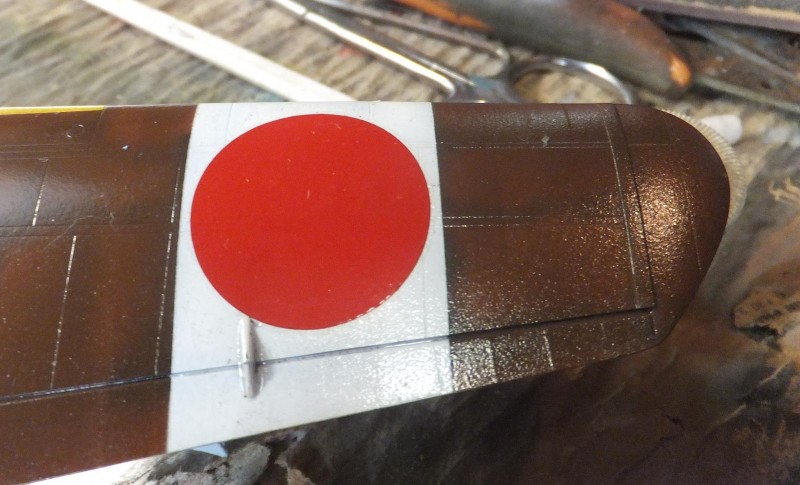
    Once the roundels are applied, next is to add the unit markings on the tail. I picked this scheme for a bit more color. And it's overall Brown finish will be a bit different than what I have on display already, Japanese aircraft can be rather bland, so I try to find a scheme that is a bit different. The kit decal options are not bad really, however the Techmod decal set offers a few different options and a couple of paint options as well. The decals went down ok on the tail, even though the red angle decal did tear and I was able to save it.

    The whole session took only a couple of hours. Now to let them set overnight. Then apply a dirty wash under the air frame, some other weathering before apply the dull coat.
    .

    More to follow as I apply the Flat coat and add the final bits.

  • Profile Photo
    Jeff Bailey said 6 years ago:

    Chuck, that red angle looks as if it had no problem. Nice save, Buddy! Dinah is looking like she's almost ready to start blowing her horn.

    Great build!

  • Profile Photo
    paul teixeira said 6 years ago:

    Great job, nicely done. Going to be a real masterpiece!

  • Profile Photo
    Chuck A. Villanueva said 6 years ago:

    Thanks Jeff, not much left on this one. one more wip session before it's time to show it off.
    Thanks Paul, masterpiece appreciate that, I'm glad it looks that good. I hope that the final finish will live up to that.

  • Profile Photo
    Chuck A. Villanueva said 5 years, 11 months ago:

    Been awhile, this will be that last post for the WIP portion of the Dinah. With the decal session done, flat finish applied. Time to remove the masks, and add the final bits. Starting with landing gear. The tires were painted tire black.

    Next to install the tail wheel. A little fiddly which is not the norm for a Tam kit. Just a bit of patience and in it goes.

    Next to add the retractors to the strut which had been installed quite for most of the build.

    Then the main gear doors. Tamiya approached this step quite well as the doors had great contact points to attach these items. Unlike the Academy P-38 which you had to kind of wing it with those bad boys. Also attached the main wheels.

    Next up the step under LH lower fuselage and thats it. Next time will be a full write up on the Dinah soon. Thanks for viewing.

  • Profile Photo
    david leigh-smith said 5 years, 11 months ago:

    Masterful, Chuck, a real pleasure to watch and learn from. Thanks for sharing.

  • Profile Photo
    Paul Barber said 5 years, 11 months ago:

    That pre-shading worked perfectly for this plane Chuck - it looks brilliant. You are nailing the heavier birds and bombers currently! Loving your work and the techniques you share, as ever!

  • Profile Photo
    Greg Kittinger said 5 years, 11 months ago:

    Looking great!

  • Profile Photo
    Chuck A. Villanueva said 5 years, 11 months ago:

    Thanks David, always a pleasure to share.
    Thanks Paul, not 100 percent all the time, but it works and enhances an otherwise clean air frame.
    lately getting into the multi engine type aircraft right now with a Betty and Beaufighter coming up soon.

  • Profile Photo
    Chuck A. Villanueva said 5 years, 11 months ago:

    Thanks Greg, appreciate that.