Well, the time has come for me to participate in the "Year of the Cat" group build. I move at a glacial pace, but i've had something underway for a while. It looks a little something like this...
This is the much-loved Tamiya 1/48th scale F-14A Tomcat, graciously gifted to me (by accident) by Darren Tamanaha. I'm building my Tomcat in the markings of VF-32 (callsign: "Gypsy"), with the modex number of 203 for my former instructor John Lawler. "Big John" was an F-4 and F-14 instructor with VF-101, in addition to serving with VF-74 and VF-32.
So, on to some highlights. As most of you know, the assembly and fit of this model is typical Tamiya- logical and drama free, leaving you somewhat amazed by how well everything fits together.
Or in other words, everything the Hasegawa kit should have been, that wasn't.
Much like Tamiya's P-47s, and their 32nd scale Corsair, the fit of the windscreen is outstanding. I generally suck at clear parts so appreciate this attribute a lot. I installed it with Elmers glue before i painted the framing, a feature that i would come to appreciate later...
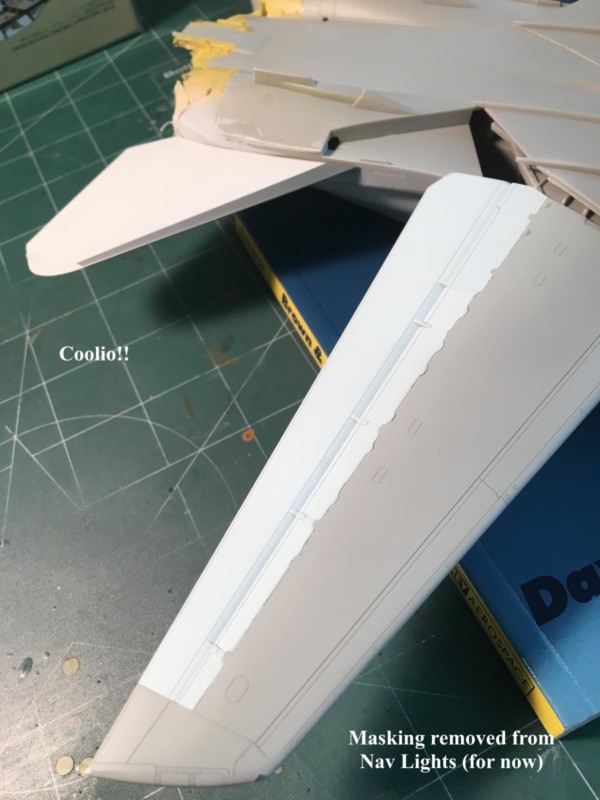
One thing that i found puzzling was omission of clear lenses for the navigation lights on the wingtips and vertical fins. Being a slightly OCD type, i had a tough time letting this get by, so i fashioned some...
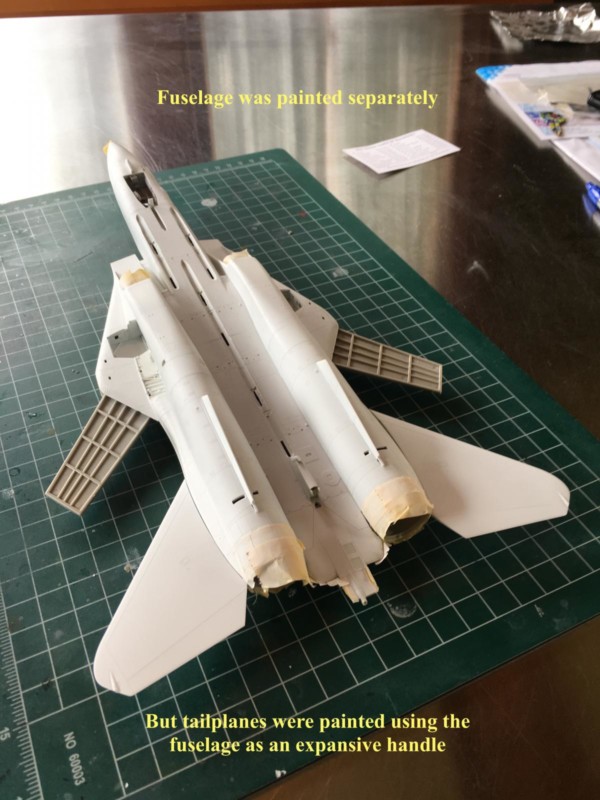
Painting is underway, and its been something of a two steps forward, one step back process. Early Tomcats were painted in glossy Imron white and light gull gray, and i wanted to depict the model in something almost-but-not-quite pristine condition. Gloss white doesn't cover very well over much of anything, so the first step was to paint the model with Tamiya white liquid surface primer, thinned with Mr Color Leveling Thinner. Its pretty good stuff, though i do want to try out Mr. Base White for a comparison one of these days. Tamiya White seems to shrink as it dries, so repeated applications are required to get an opaque, uniform gloss finish.
-

-
-
-
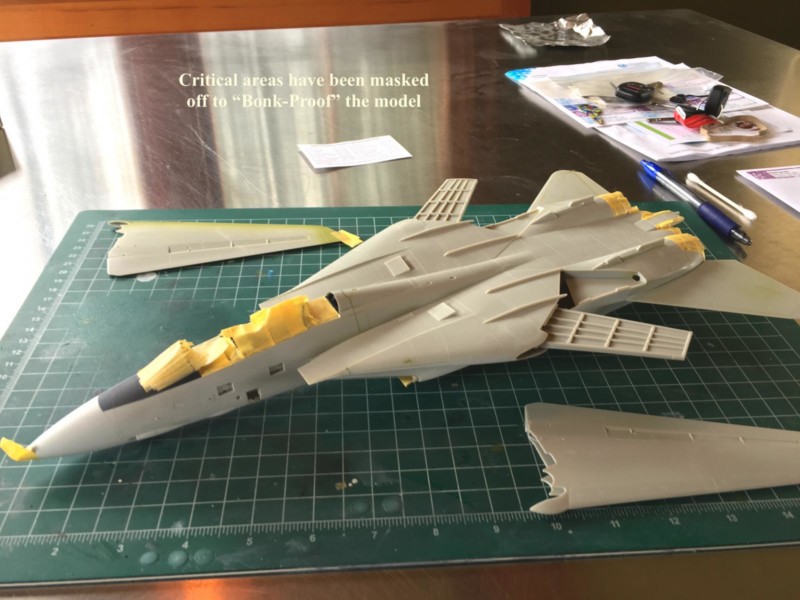
One of the miscues i had was when i sprayed the flat and gloss white undersides, overspray managed to get into the cockpit via the gun muzzle leading to a white haze on the inside of the windscreen. Fortunately because the windscreen was mounted with white glue i was able to remove the windscreen and clean it up with no ill effects. At this point i also noticed that the black framing i'd applied on the outside really wasn't very opaque. Given that i needed to paint the inside of the center panel with clear blue anyway, i masked off and painted the inside of the windscreen framing. Unfortunately i deleted my photos of this step. So sue me.
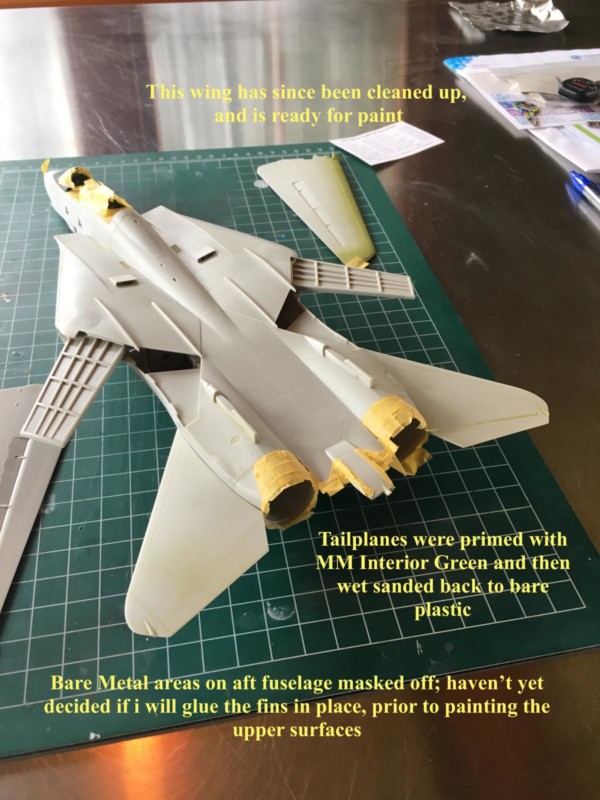
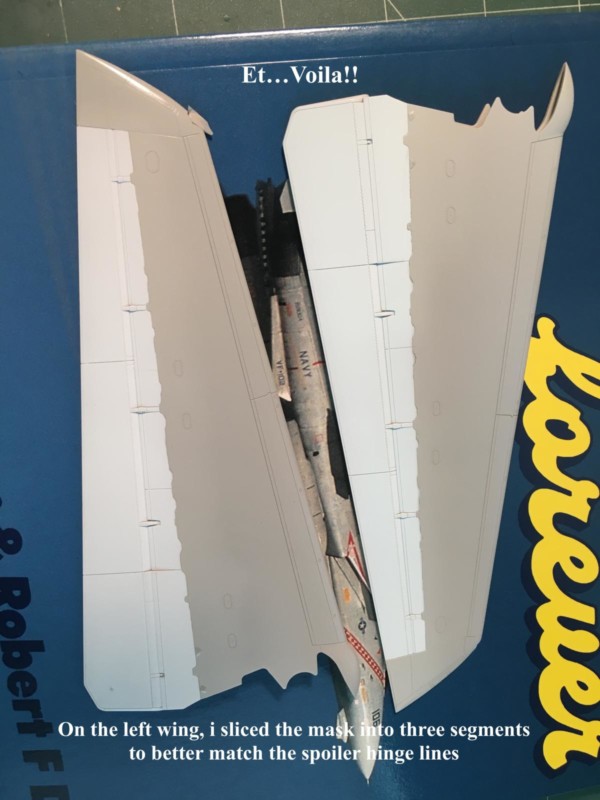
I started painting the wings by spraying the undersides and the upper flap/ spoiler areas with 2 coats of Tamiya White Surface Primer, with a rubdown with dry 4000 micromesh between coats. This was followed by 2 coats of Tamiya White, again rubbing down the first coat to eliminate FOD before applying the second coat. I then masked off the wing flaps and spoilers with the Furball Decals F-14 Spoiler and Flap Mask Set. I was pleasantly surprised by how accurately these were cut and how they conformed to the "serrations" of the spoiler hinge lines.
If you are obsessive with an absolutely perfect fit, you can cut this mask into shorter segments. These masks stick rather tenaciously, so i consider them a one-shot-deal.
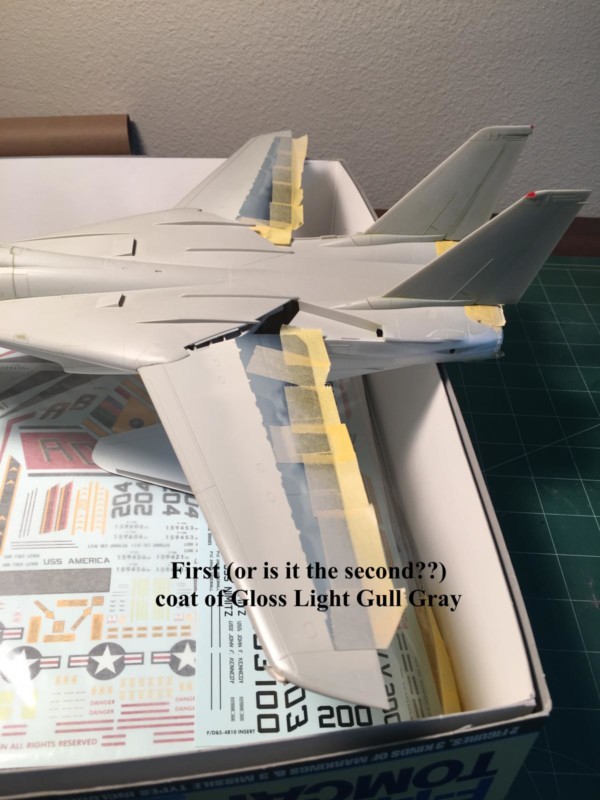
Steve Bakke gave me an old bottle of Mr Color Gloss Light Gull Gray. For those of you that are new to Mr. Color, one of its annoying characteristics is the solvent will evaporate over time, leading to a remaining paint that is very thick and gloppy. Mr Color makes a product called "Mr Replenisher" that allows you to bring these paints back from the dead; its sort of a combination of retarder, thinner...and probably some other stuff that's guaranteed to shorten my lifespan. But it works pretty well. After adding this stuff, I used this paint straight from the bottle with no alteration for scale effect (which for me is unusual). I applied 2 coats, again rubbing the first coat down with micromesh to eliminate FOD. I also used a tack cloth frequently to eliminate any contaminants prior to painting.
-
A couple other things i should mention about using lacquers, compared to enamels: On one hand, the drying time for gloss colours is amazingly fast (though still not instantaneous). On the other hand, the buildup of coverage is very slow; you're spraying something on the order of 70-80% volatile solvent and leaving 20-30% pigment on the model. As a result, you will create clouds of paint fog while spraying so ventilation if anything is MORE important when compared to enamels. Secondly, these thinner finishes are much more sensitive to sanding scratches showing though, so you need to be more fastidious in your surface cleanup, and/or lay down a coat of flat primer before applying your finish colour. I applied the gray directly over the partly painted plastic/ partly sanded paint, and if you look closely you can see the difference in smoothness. However, i think that will all be mitigated once the clear gloss coats and panel line washes and streaks, etc. go on the model.
-
-
Wing leading edges, and painting of the vertical fins comes next. Watch this space.
Well, after having a more or less successful painting session to get the leading edges done... i dropped one of the wings.
I did NOT needs this, but while irritating, it is fixable. What follows is a Public Service Announcement that describes my Tomcat wingtip repair..
With the prep work done, the first attempt was made...
Then there was more swearing...
Then we try again...
And finally...SUCCESS!
What follows next is restoration of the obliterated surface detail...
Finished now but not depicted in photos, i've re primed the repaired area with flat white, to get ready for re-application of the gloss white and light gull gray.
To be continued...
1 additional image. Click to enlarge.