Worst of the Best? Or: How i rescued a discarded model from certain destruction (Tamiya F4U-1D, 1/72nd Scale)
When was the last time you saw someone build a Brewster Corsair?
The story of this model begins in failure. I had gotten this model almost ready for the "Fiddly Bits" in 2004 when it suffered a catastrophic structural failure at the wing-fuselage joint. I don't know exactly why it happened, but the over wing-fuselage interface is the structural weak link in the 72nd scale Tamiya kit.
So the model languished for about 2 years or so while i turned to other projects. I couldn't quite bring myself to ditching this model, but what to do?
I remembered seeing a left-hand profile shot of a Brewster F3A-1 in the Detail and Scale book, assigned to MCAS El Toro in overall Gloss Sea Blue. I figured if i could get the paint sanded off it might stand a chance of getting finished with a simple, conservative paint scheme. So, i went to work sanding the model back down to bare plastic and prepping it for a re-paint.
I also figured it would be a good opportunity to try working with metals for antenna posts as well as incorporate some new details i had blown off when i originally assembled the model (2001). My very first (pathetic) attempt at a antenna post on the rudder is seen here.
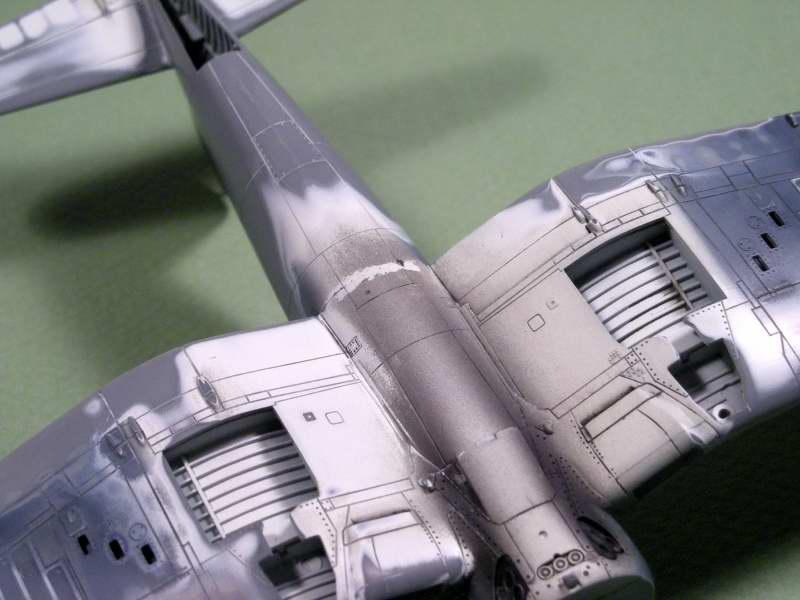
Here is a shot where you can see the socket i made for the forward antenna post. This was a piece of K&S Aluminium tubing i bored out and then crushed into an oval shape. Glued it in with super glue and then took some rather aggressive sanding sticks to it in order to make it flush.
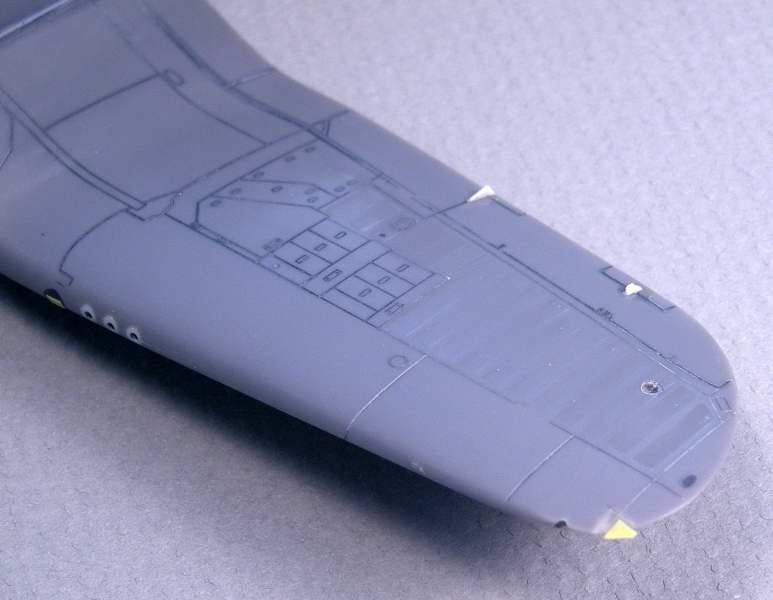
Visible in the next two shots you can see the additional mods i made to the kit; Booster tab actuators, clear wingtip lights, and little windows in the leading edges for the Gun Camera and LSO line up/ angle of attack light.
And with that done it was ready for paint. I started off by priming the model overall with Testors Yellow Zinc Chromate. i was curious to see if the underlying green colour affected the chroma of the overlying Sea Blue Paint (it didn't). Up to that point i felt that a Sea Blue model looked too dark in 72nd scale and this was the first of many iterations trying to find a GSB i'm happy with.

i built up the gloss sea blue coverage very gradually, allowing the model to dry several days between coats. What i don't remember is if i used Model Master Gloss Sea Blue, or Non Spec Sea Blue. At any rate you can see how the first coat went on flat.
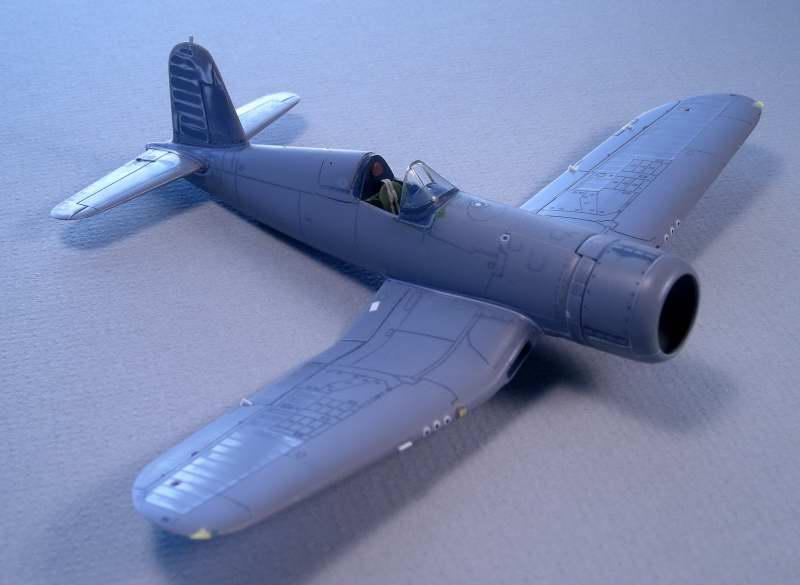
i stuck the prop, cowling, and landing gear struts on for this pic, because it looked cool.
One of the common problems with decal sheets is the use of an ivory-coloured off white for US National insignias. I was less than impressed with the Tamiya decals, so after the insignias had been applied , bombed with setting solution, glossed over, etc, i carefully masked off the stars and over painted the decals with MM Flat White. Definitely an improvement as you can see here.
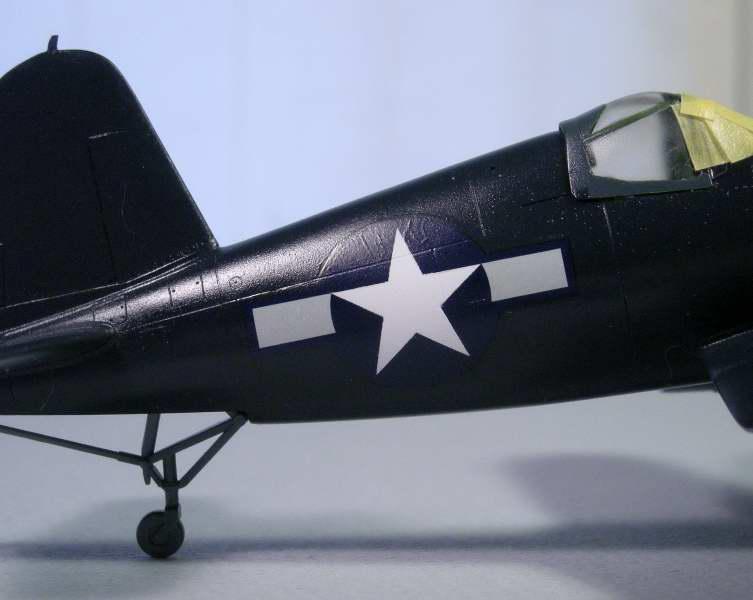
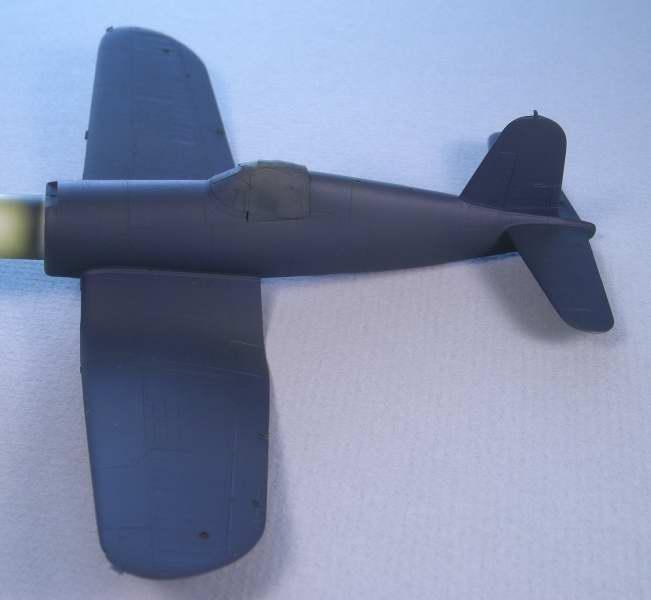
in this shot, the decals are on, stars over painted, and a wash has been applied over the model. One advantage of wet sanding the model down is it reduced the prominence of the Tamiya recessed panel lines. They can look overly deep on a gloss blue model.
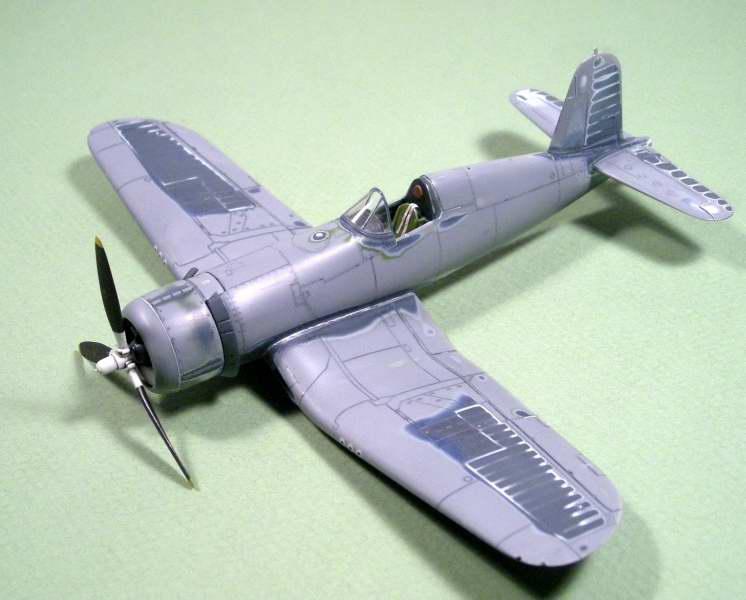
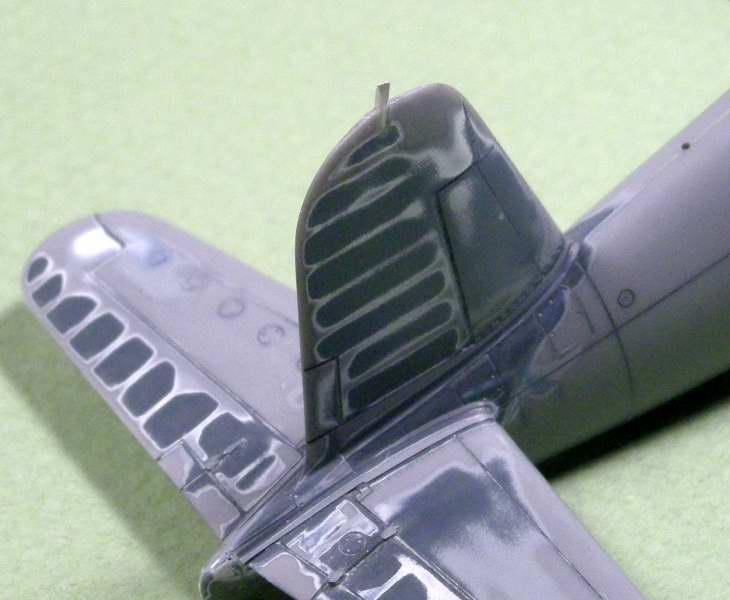
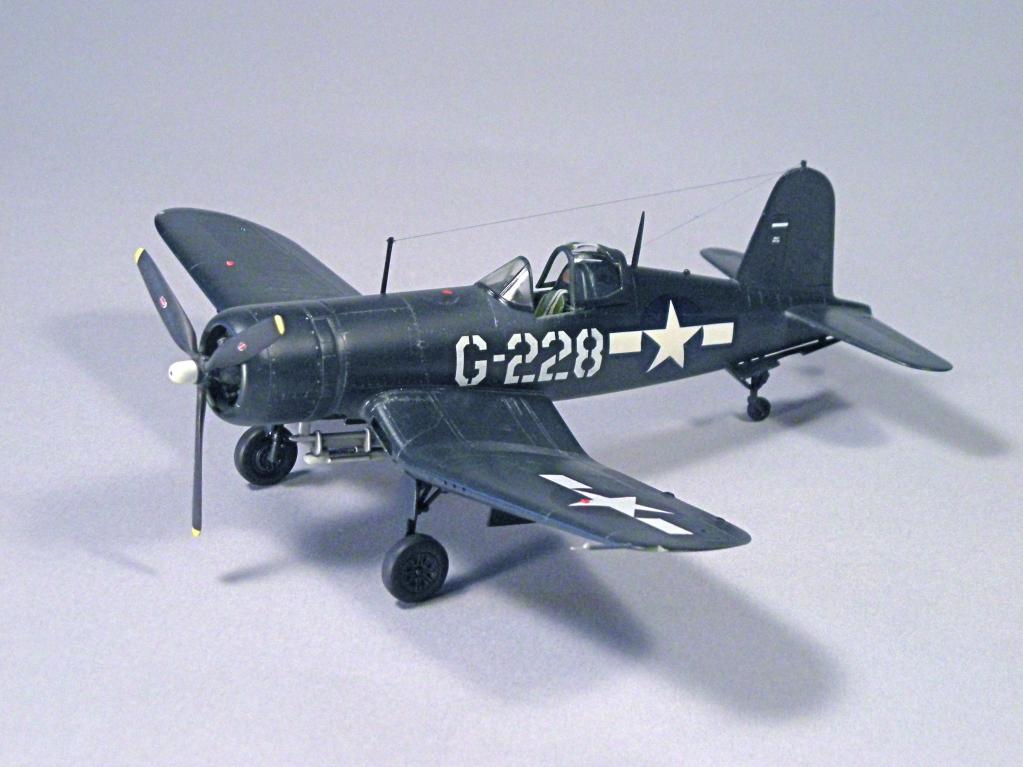
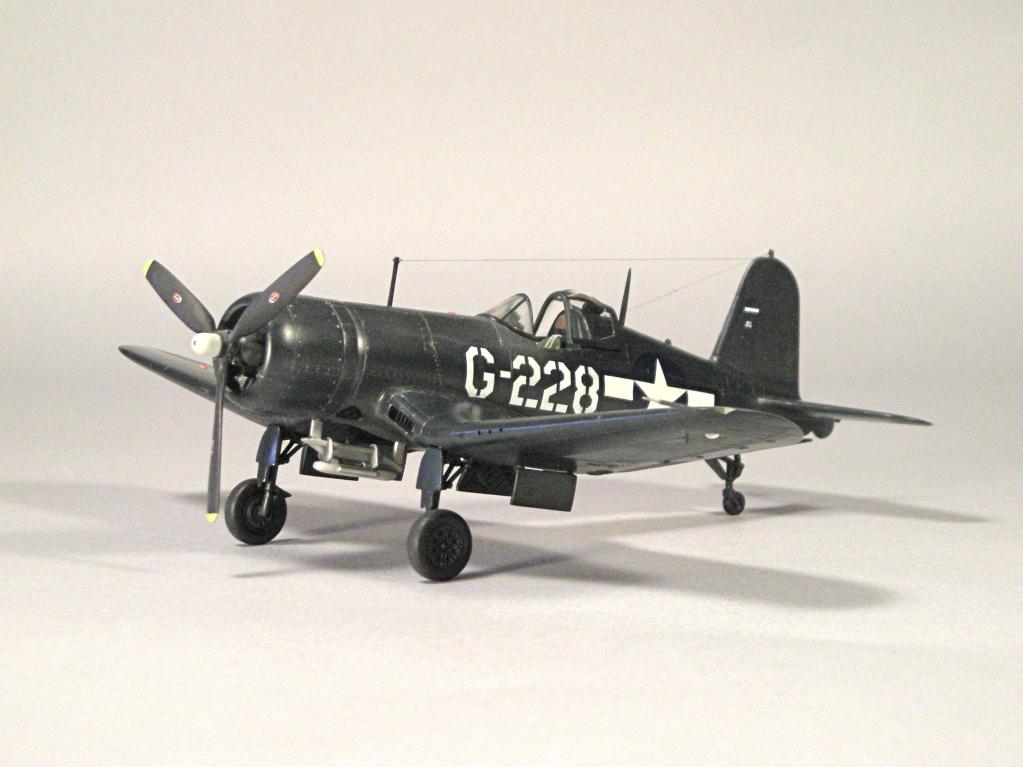
This F3A was rode hard and put away wet. Another distinctive feature of the F4U Corsair Family was the extensive use of fabric covering on the wings and tail. i wanted to add some visual interest to the model, so i masked off the fabric areas and overpainted them with Future, to which a small amount of Tamiya Flat Base was added. You have to look closely but you can see a subtle difference. Opinions vary as to whether its strictly realistic but it makes an otherwise monotone aeroplane look more interesting.

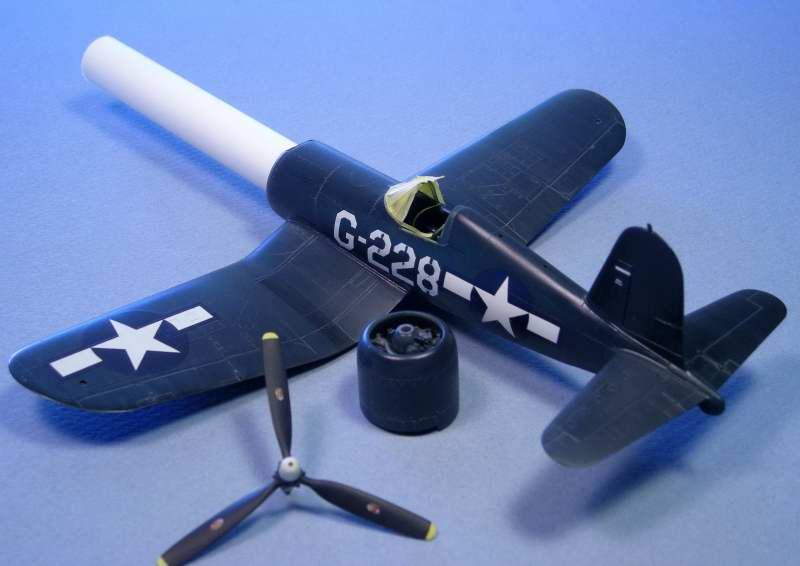
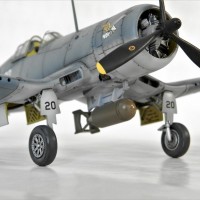
Here the model is very close to completion. The antenna posts were made from a piece of K&S Brass Rod, filed flat to a (sort of) aerofoil shape. These brass antenna masts are very rugged and not brittle like the ones contained in the kit. The wing walk ways were masked off and spryaed with a very dark gray, and the worn off spot welds were depicted with a (sharp) Prismacolor silver artists pencil, then sealed down with some Future and Tamiya Flat base.
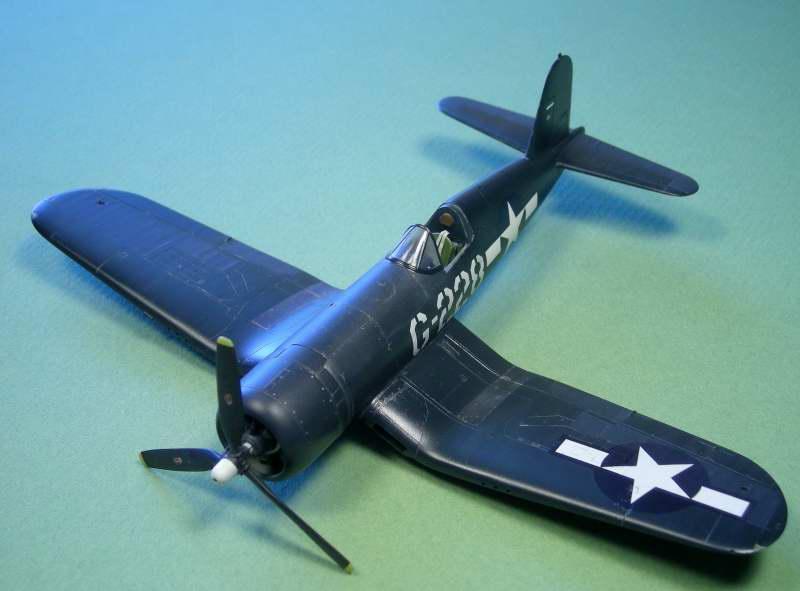
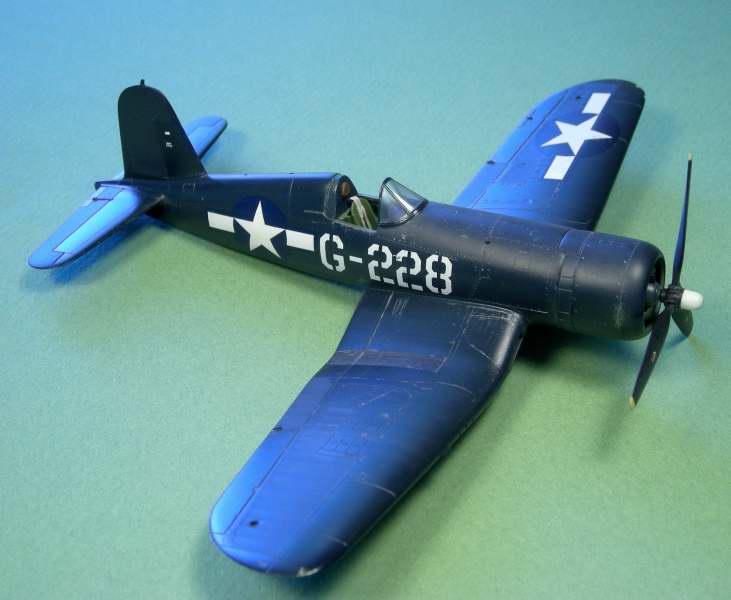
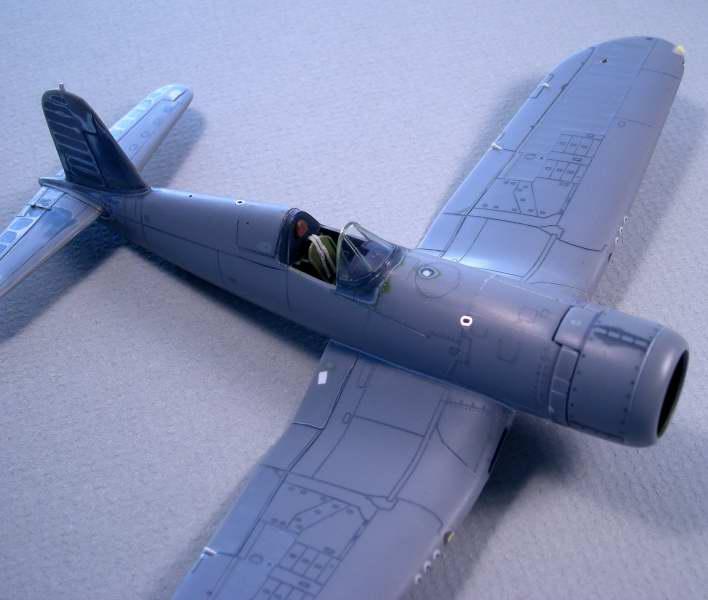
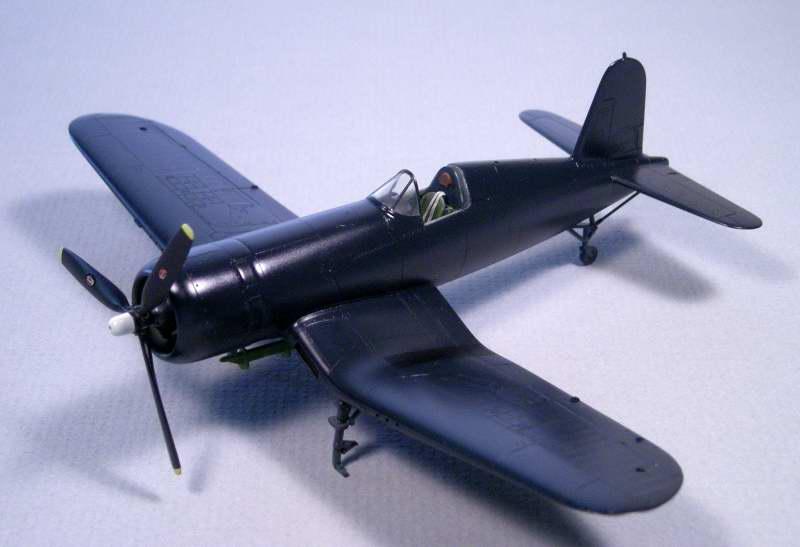
And here you see the finished model. This was one of my first attempts at digital photography as well as editing, and i manipulated the images as best i could to make the model look less black.


The Brewster F3A is the "Forgotten Corsair". Largely ridiculed and despised by those who chronicled its history and flew it, the "Brewster Battler" played an important, if largely forgotten role in training Naval and Marine Aviators so they'd by ready to perform when they got the Top-of -the-Line Corsairs from Vought and Goodyear.
But thats another story.
That would be me... have one from the same kit. painted in FAA colors 🙂 .
Great work on presenting the pictures within the text, hope that it was easy enough to do?
Hey Martin,
Yes the technique you described to me worked fine. i wanted to upload more pics to add to the narrative but i got cut off at 20, so ditched some earlier in-progress shots so id be able to depict enough shots of the finished model. A little time consuming but much quicker and easier than going back and forth between this site and photobucket.
Nice save. Never ever sand off the paint because you destroy the model in the process, as I am sure you are aware looking at things like the fabric detail lost here. Get ELO (Easy Lift Off) and use it. Apply over the paint, let it sit 20 minutes, scrub off with a teflon scrubbing pad, apply again as necessary to get all the paint off. DO NOT APPLY TO CLEAR PARTS. Be careful, the stuff will disassemble the model if you leave it on too long. DO NOT EVER USE OVEN CLEANER.
HTH
Hmm, I believe that sanding off some of that rib detail might have been intentional?
Since I'm using mostly acrylics for my painting then striping off is easy enough with isopropyl alcohol (Tamiya thinnner in really tough areas). Never tried oven cleaner, but what are the bad things that happen when you use it?
Actually, in the end the fabric areas really weren't obliterated; they were toned down so they looked a bit more subtle which i think added to the look of the finished model. Normally i prefer to not wet sand a model all the way back down to bare plastic but this was back in 2006. i went with what i had.
Besides- Hard to argue with the end result isn't it?
Doesn't look like there was any "damage" when light-sanded.
Hellraiser)))? Excellent reincarnation, painting at height, and in the end we got a very neat and pretty model.
Bravo!, David...excellent way to bring new life back to otherwise dead models. Thanks for the in-progress pix; they really show the progression from start to finish. The Brewster-built Corsair looks great.
Thanks Martin! I'm your biggest fan.
Quite an amazing restoration project given the small(ish) scale. I think the end result speaks for itself...outstanding job, David. Plus I got some edu-ma-cation in the process...I hadn't heard of a "Brewstwer" Corsair until now. I knew of the Buffalo, but always thought Corsairs were mostly Vought with a few Goodyear examples at the later stages.
As an aside, oven cleaner works wonders at removing chrome plating on car model sprues, but have never had any reason to use it for paint removal. Don't see where the difference lies (it doesn't seem to adversely affect the plastic in the afore-,mentioned process).
The sanding of the model back down to plastic WAS intentional; the fabric ribbing on the oute wings is IMHO overdone and it filled the slightly too deep Tamiya panel lines nicely. IMHO, Hasegawa is still a little bit better at recessed panel lines in the smaller scales.
In fact, i prime almost all of my models with gray or interior green, then wet sand them back down to bare plastic before painting.
Brewster built 735 Corsairs of the Birdcage and Framed, blown-hood variety at its plant in Warminster PA. From what i've been able to determine so far, the bulk of F3A activites were concentrated at MCAS El Toro, CA and MCAS Cherry Point, NC. There may have also been extensive F3A Activity at the NAS Wildwood NJ/ Atlantic City area but its hard to verify.
In all likelihood a substantial number of Corsairs were leased to the FAA and based in the Brunswick ME area for training as well; their ultimate fate is uncertain. Not sure how many F3As made it across the Atlantic to the UK. Rumors persist that a handful may have seen combat but as far as the US Navy was concerned, the plane was unfit to go to sea.
Count me as one who had not heard of this variant either. It's gotten me curious however.
"Rumors persist that a handful may have seen combat but as far as the US Navy was concerned, the plane was unfit to go to sea." What was the problem with these aircraft? Thanks, Gary
Yeah...I'd like to know why as well. What was different other than the mfg?
Hi Gary and Craig,
Brewster was a very poorly-run company during the wartime years; The company President was sent to jail for war profiteering. Some of the mistrust of the F3A appears to be from poor quality control; There were numerous reports of FOD, bucking bars, etc left in the wings of some SB2A Buccanneers that led to some fatal accidents. Some argued that Brewster had saboteurs in the plant who purposefully drilled holes in the wrong places or "forgot" to install parts.
Randolph Romaine, Chief F4U test pilot for Brewster disagrees and says the planes were just as well-built as the Vought and Goodyear examples. I don't know what kind of accident history was encountered at Goodyear, but Chance-Vought had a pretty good safety record given the nature of wartime production flight testing. However, in the end the Navy had so little confidence in Brewster that they stepped in to take over day-to-day management of the company, and ultimately terminated all Corsair production in 1944. The only significant aircraft manufacturer to close up shop when everyone else was making money (although the writing was on the wall over at Curtiss-Wright, too).
Nice job and excellent touches along the way. I'm glad you didn't throw that away! I 'll bet you are glad, as well!
Yes Kevin, in retrospect very very glad. It holds a place of honour in my display case. Thanks for the kind words!
david
Dad once said the "Brewster" had a crank forward canopy .. took 39 cranks to get it forward .. AND he loved those at El Toro MCAS, Ca. !
Ray, the Brewster F3As are still largely shrouded in mystery and their contribution was largely overshadowed by the managerial problems at Brewster. We may never know the "Truth" about the plane; i'm still struggling to differentiate between Goodyear, Vought, and Brewster Corsairs by going thru imagery. I think there's still a lot of misinformation out there, but who knows. History is argument without end.
David .. Dad says some of the reasons the Brewster was not liked aboard ship .. the hook sometimes came loose, and the limited view aver the nose caused the pilot to have to "side-slip" the bird to see the LSE when landing .. IF not careful the prop would chew up the wood deck ..and taxying after landing was a problem ... a GOOD training plane to let pilots be ready for a F4U !