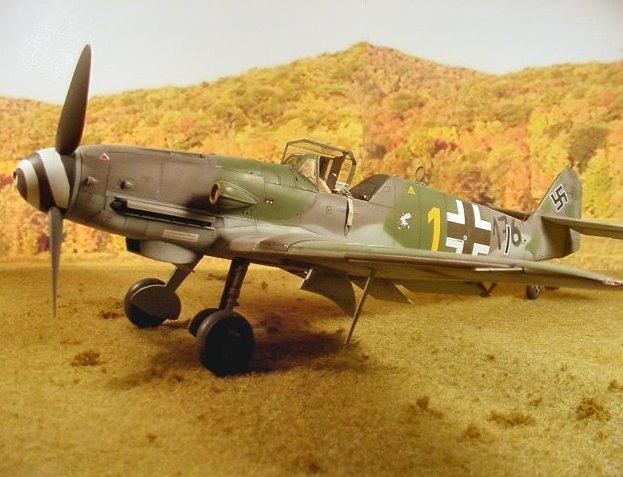
Hasegawa 1/32 Bf-109K-4

As the Second World War drew to a close, the last primary operational Bf 109 fighter variant, the K-4, was introduced to the skies.
The Bf 109K-4 was a pressurized-cabin, high-altitude capable fighter-interceptor that would draw to a close Messerschmitt's 30,000 flugzeug-plus legacy. Powered by the DB-605ASC or DB-605DC engine, with GM-1 nitrous oxide boost, delivery began in October of 1944. Armed with one 30 mm MK 103 or MK 108 cannon and two 15 mm MG 151 heavy machine-guns, the Kurfurst was poised to be a robust Heavy Killer, intended to deal more effectively with the incessant Allied bombers in the skies above Germany.
Approximately 700 examples were delivered to active units before war's end.
The kit is Hasegawa's 2003 Bf 109K-4 release, Number ST 20, an excellent kit overall.
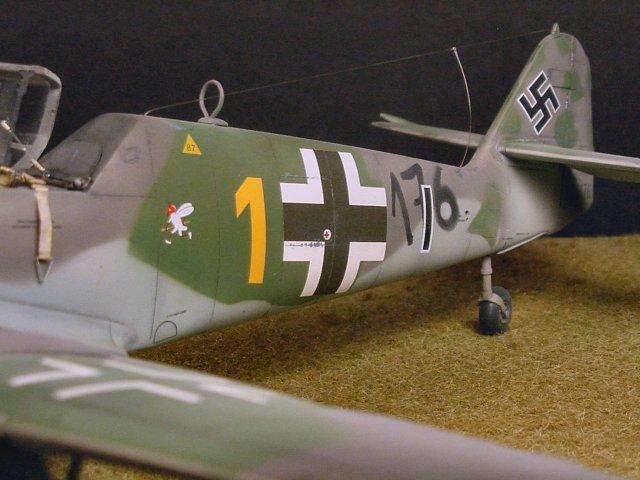
But a kit this size demands more detail, and the resin set from Eagle Editions was used. The model depicts Werknummer 334176, manufactured at Messerschmitt's Regensberg Flugzeugwerks. And was flown by Uffz. Martin Deskau, III./JG3, Germany, April 1945. You'll note the hastily sprayed suffix of the Werknummer on the fuselage. Towards the war's end, the time to correctly stencil the numerics coming out of the Flugzeugwerks was not taken…although, apparently, someone corrected it later, presumably in the field.
Construction went as one would expect from a Hasegawa kit; fairly uneventful. A few fuselage modifications are required for the Eagle Editions cockpit set to fit properly, but they are simple to do, and illustrated with photos in the accompanying instruction sheet.
The wing roots, however, posed more of a problem than anticipated. Even after grinding down the floor of the resin cockpit set with a Dremel tool as far as I dared, the one root still had a major gap, despite the ventral surfaces being flush. It was almost like the wings and fuselage were from different kits! A little styrene, a lot of Porci-Flex and Mr. Surfacer, and a great deal of sanding later, they were well-mated! The port wing was a bit better, but still a surprisingly mediocre fit. The fillet seam was rescribed on both sides.
Although I have a photo of this particular aircraft parked with the tailwheel gear doors open, I chose to re-make them shut (I didn't want to detail the tailwheel gear bay, to be honest with you, and this was easier!). I cut off the open, molded doors, and measured a piece of styrene with the two cutouts. I scribed a simple line down the middle, cemented it over the gear bay, and sanded to fit. A few panel lines were rescribed where needed, and a few access panels were added where they should be but weren't. Rivets lost during sanding/buffing were re-applied with a Hasegawa rivet tool. Aside from the required fuselage alterations for the cockpit and the wing root issues, the rest of the model assembled easily according to instructions.
Below is a summary of detailing and accurizations of the model:
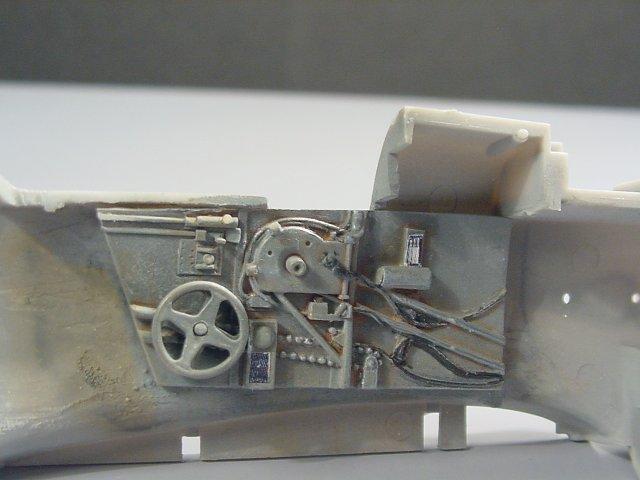
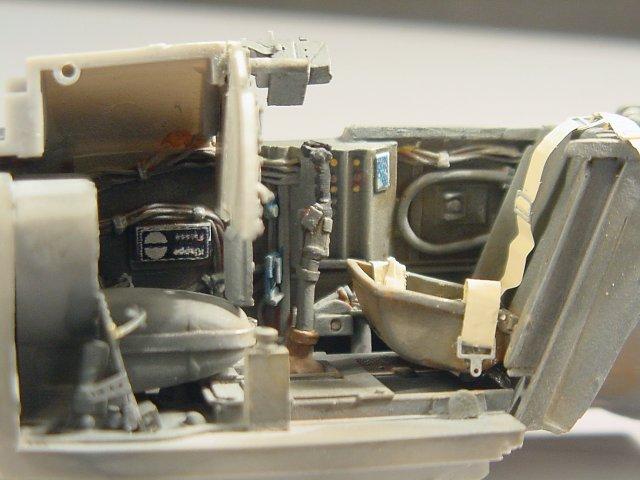
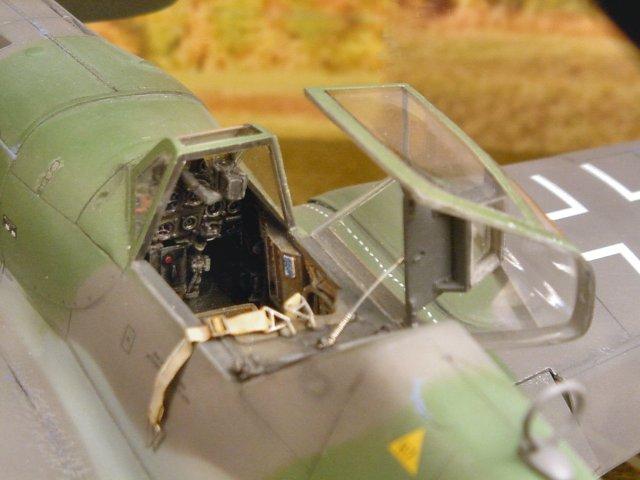
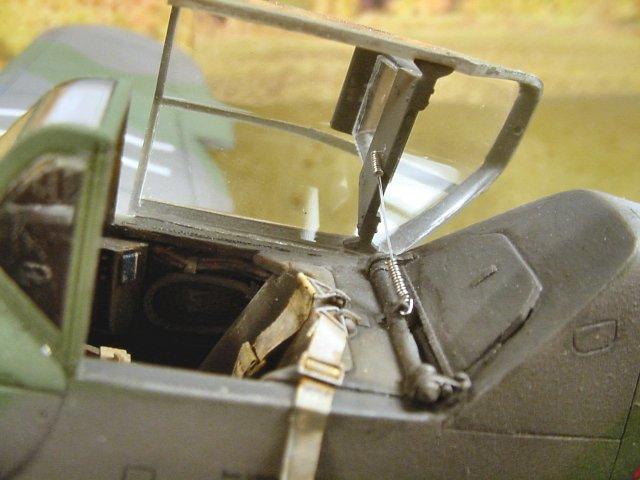
Cockpit
Eagle Editions Bf 109K-4 cockpit set #26-32
Seat Harness fashioned from 0.015” sheet brass
Canopy tensioner made from 0.015” solder
Fuselage
Cutting Edge resin ventral radiator door
Cutting Edge hollowed out exhausts
Tailwheel doors removed and replaced with scratch built doors from sheet styrene
Numerous panel lines and rivets rescribed as necessary
Cutting Edge resin MG 151 cowl-mounted guns added
Wire mesh screen added to supercharger intake
Strip styrene “weld line” added to supercharger intake
Flying Surfaces
Cutting Edge resin rudder & horizontal stabilizers added to replace kit parts
Rudder hinges fashioned from 0,20” sheet brass
Paint/Decals
Day fighter camouflage scheme replicated with Gunze Sangyo 75/76/82
Post shading done with Tamiya “Smoke” (X-19) thinned 95% with ETOH, airbrushed at 5-10 psi
Chipping done with Silver pencil and Napoleon Blue artist's acrylics
Eagle Editions EagleCals sheet #EC74 used
Spray painted “Werknummer” airbrushed using EagleCals templates (included with decals)
Instrument panel dials a combination of individually placed kit and ALPS decals.
Reheat 1/32 Vintage placard and ALPS decals in cockpit
After masking the canopy and windscreen with Bare Metal Foil, the model was primered with Gunze's Mr. Surfacer 500. I mix it 50/50 with laquer thinner. Then the entire airframe was lightly wet-sanded (?) with Micromesh pads and cloths, beginning with 1500 grit and progressing through 12000 grit.
The late-war RLM75/82/76 day fighter camouflage scheme was applied with an Iwata HP-C at 10-15 psi using Gunze Sangyo Auqeous Hobby Color acrylics (H69, H418, H65, and H422). Testor's Clear Gloss coat laquer was decanted into a 30 ml cup, and then applied.
The EagleCals decals were applied, with the hastily applied fuselage Werknummer airbrushed through a “stencil” I cut out using the provided template on the decal instructions (which also include a 1/48 and 1/72 scale template). Postshading of the panel lines was achieved with Tamiya Smoke (X-19) applied freehand at 5 psi. Final sealant coat was a covering of Tamiya Flat Base (X-21) mixed 30/70 with Future.
References
The Messerschmitt Bf 109K-4 Flugzeug-Handbuch
Late-War Luftwaffe Fighter Camouflage, Part Eight: Fighter Profiles
Bf 109F/G/K Aces of the Western Front


Nice write-up and even nicer build, James. Excellent detail work. Some nice touches there. I like it.
Thanks Craig,I appreciate it.:)
So what is wrong with a contest-winner of a model that it gets a "9"?
This is a superb model of one of the Hasegawa 109s. I guess I'm going to be stuck with hauling mine out in future.
A "10" for excellent work (hopefully followed by many more)
We can't wait!
Fantastic! I like the 109K as a modeling subject, and yours look incredible. Did you know that one of the last operations by the Luftwaffe using this type of Messerschmitt with reduced armnament and strengthened wings were used in Ramming attacks aginst the USAAF? There is a book about it called "Last flight of the Luftwaffe"
Thank you,Tom and Gregor.
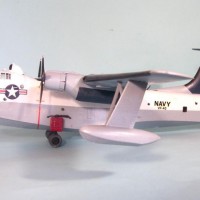
Looking forward to yours,Tom. (Loved seeing the Wildcatfish!).
Gregor, the old show "Dogfight" did an episode regarding the Sonderkommando, and the ramming of bomber streams. I miss that show...
Terrific work.
James..."Dogfights" is still on the History Channel or Military Channel all the time. AND you can buy each seasons series in a boxed set of DVD's. No need to lament the fact you "can't" watch it anymore. Matter of fact, that one you mentioned was just on (again) last week.
Beautiful build James, I really like the overall finish and while it is a little thing I love the harness hanging outside the plane. It's a nice touch kinda gives it that lived in, or should I say flown in, look. Great scheme, great work!
Ditto on the Beautiful build. My only niggle on this one is that there are not enough photos. However, I did vote and gave it a Ten...even with the handy cap of not having enough photo;s 😉
Great work on this one. Really like the paintwork, and an excellent article too.