Classic Airframes Hawker Sea Hawk 1/48

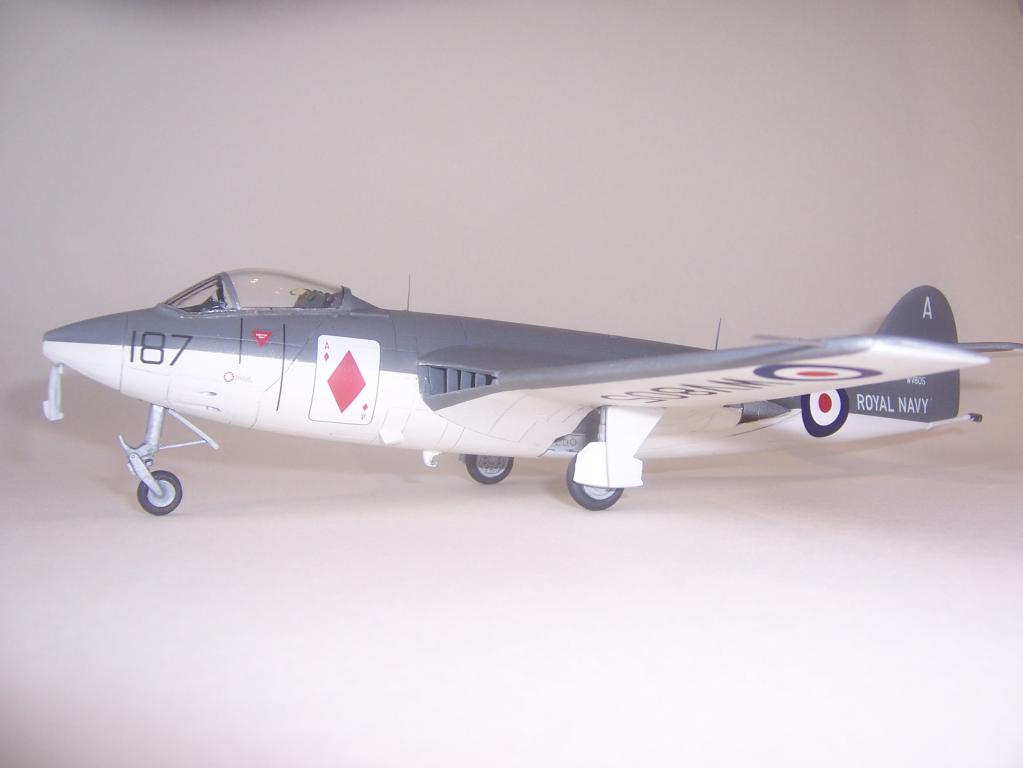
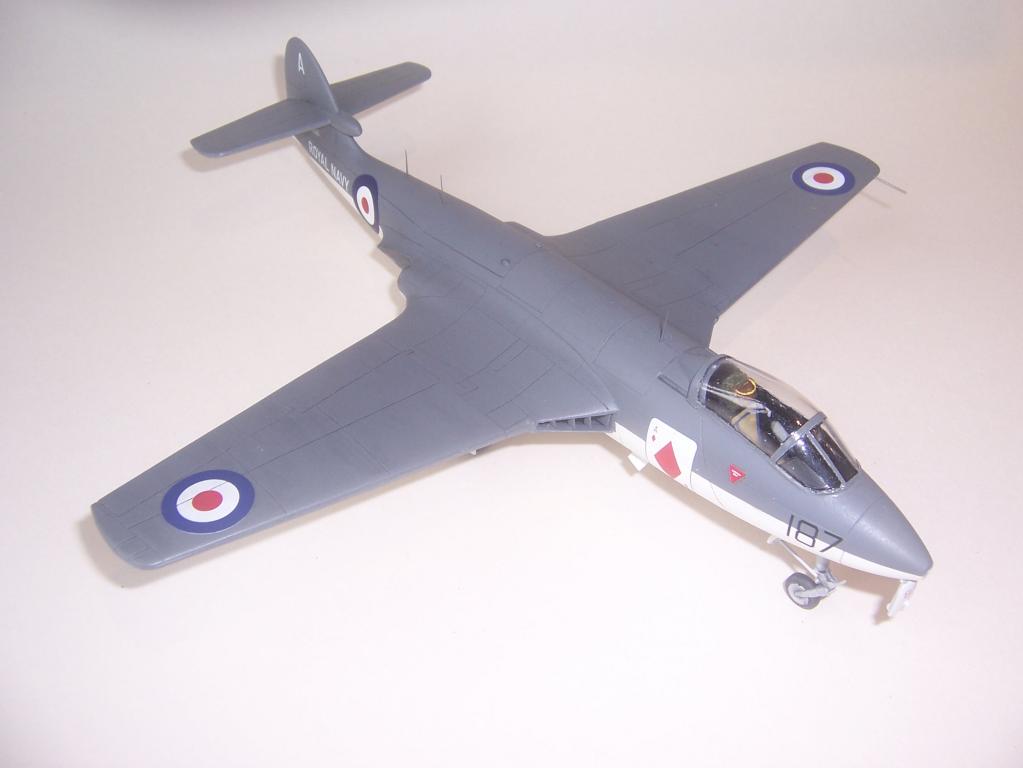
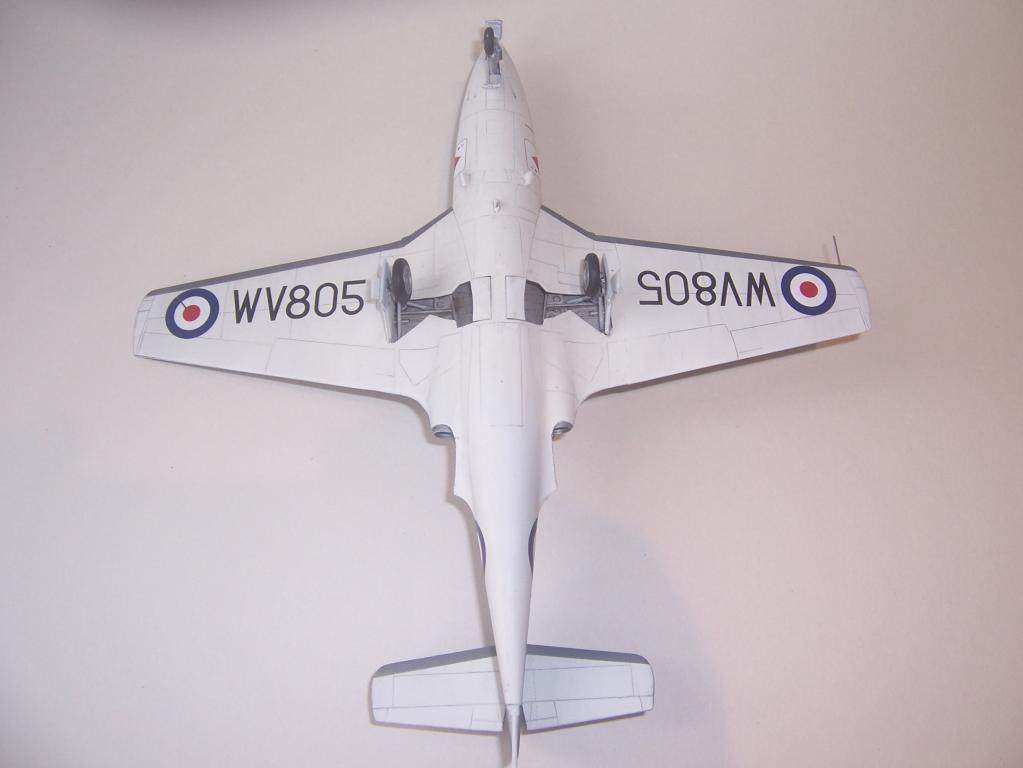
Well by hook or by crook here is my rendition of the Hawker Seahawk,I was unable to do anything about the paint showing through on the Ace of diamonds squadron insignia and so just had to leave it alone figuring that it would look infinitely worse if I tried to "fix" it, I had the same problem with the roundels on the fuselage but was able to double up using spare decals from the box, even with two decals on each side you can still faintly see the demarcation line , I bought a Falcon vacform kit just to get the decal sheet but this was instantly consigned to the bin.
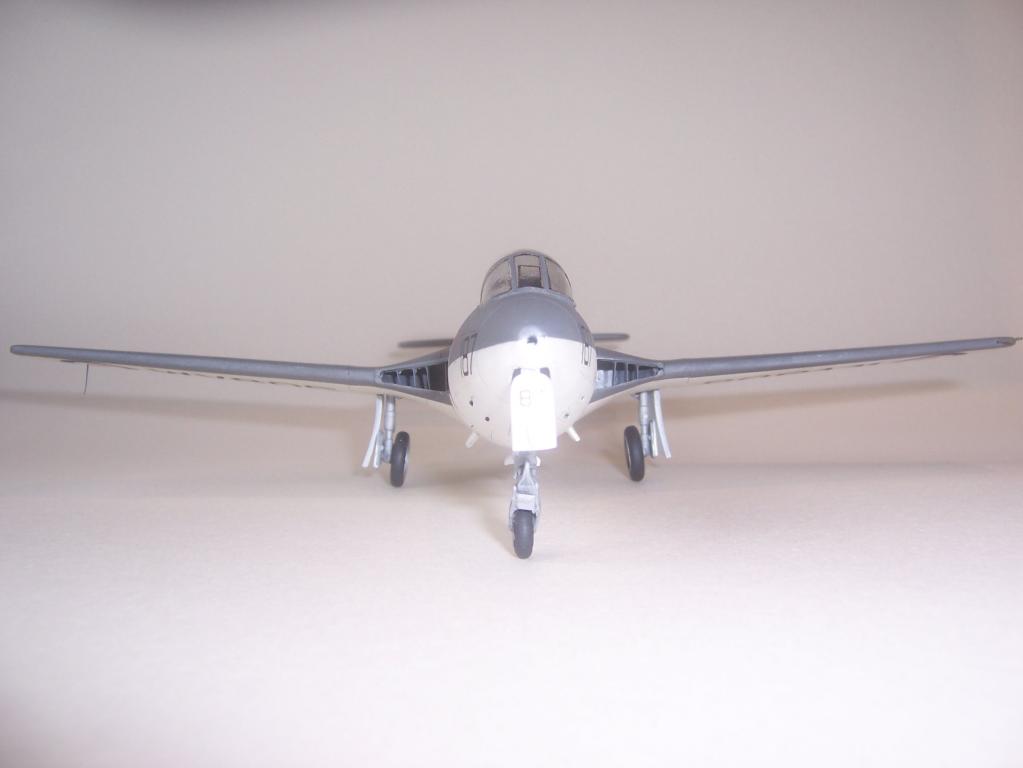
Even with the decal problem this is a nice kit with only a couple of minor problems ,I re-scribed all the panel lines as some of them are so faint they would be lost by the time the final paint was on , I drilled out the camera bay and the gun ports and fashioned a basic front wheel well as this is completely absent which is strange considering the resin main wheel well is so nice and I used a hypo needle for the pitot tube, I added quite a bit of lead in the form of squashed airgun pellets in every available space forward of the main gear which gives it a nice heavy feel as well as keeping its bum in the air. If any of you are thinking of doing this kit you will be better fixing in the inner wheel well convers before zipping up the fuselage halves.
Thanks to everyone who offered advice or just positive comments when I felt like giving up on it and especially to Seamus who really gave it some thought.
P.S I still have the nav lights to do once everything is completely dry.
N.

Good job Neil. I hate it when that happens (too often) to the decals. Perhaps your "heads up", on the transparency will help the next guy. We never know until we slide them off the paper. Looks like you made a nice comeback.
Thanks.
N.
Looks good Neil. I wouldn't have noticed the decal probs unless you'd pointed them out. Great job all round.
Cheers.
N.
The decal "problem" is barely noticeable. In fact, is less pronounced in these pics than the first set. Nice build, Neil.
Cheers Craig, the flash has bleached out the problem in the pic's, in the flesh it is still quite noticeable, though if I'm honest it's not so bad now the build is complete and varnished.
N.
Neil,
Very, very nicely done. You made a beautiful model of a beautiful airplane.
Thanks very much Frank, the annoying thing is that I was tempted to finish this build in the older colour scheme of dark sea grey over sky with a higher demarcation line which I prefer,but while I did find a reference of an aircraft carrying the same insignia it was a different code so I couldn't be certain my aircraft ever wore the older colour scheme and would therefore be inaccurate but I wouldn't have had any problems with decals.
N.
All Seahawks were built early enough that all of them carried the earlier scheme. The later scheme was a repaint. Not to mention no one - not even you - would have known if it was "right" or "wrong," and since they all cycled through all the squadrons at various times the answer would have frequently been different.
Looks nice. Surprised you tossed the Falcon decals, since they're good (I did two of them) and opaque enough not to have this problem.
Tom, thanks for the information , when I said I binned the falcon kit I was speaking figuratively the bin I refered to was my growing kit stash although I might as well have chucked it out as I am never going to attempt it, the decals were very old and yellow and crinkled but there might be some life in them.
N.
Neil, it looks like a nice clean build, and you've captured the simple lines of the prototype beautifully.
Thanks for looking George, this isn't a prototype though it's an operational aircraft.
N.
turned out great in spite of your problems