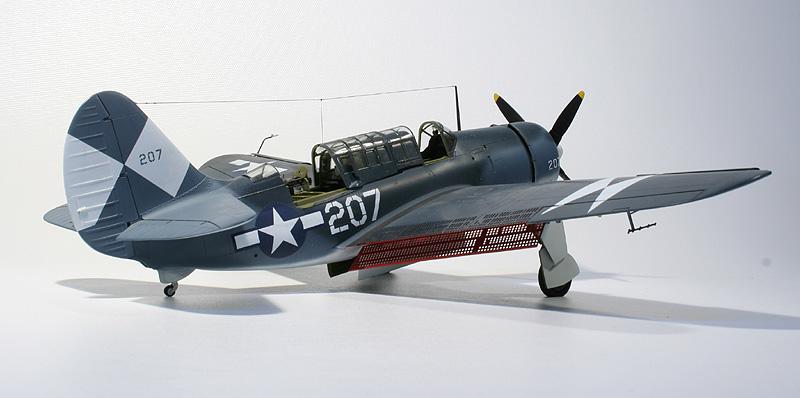
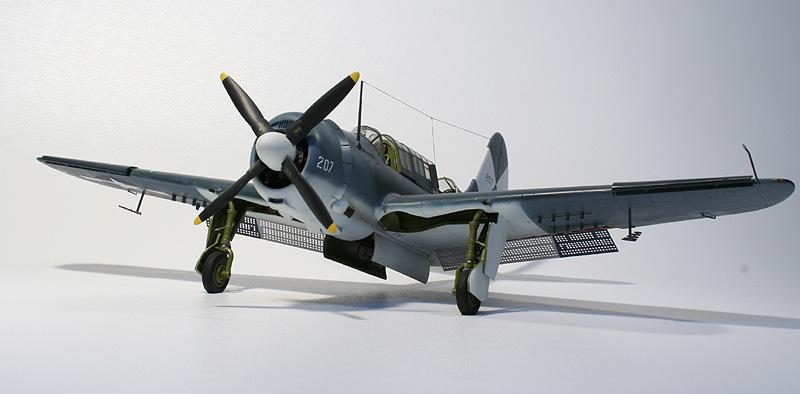
1/48 Pro Modeler VB-83 Curtis SB2C-4 Helldiver
Inspired by Tom's posting the other day of an "Essex" Helldiver, here's mine from VB83.
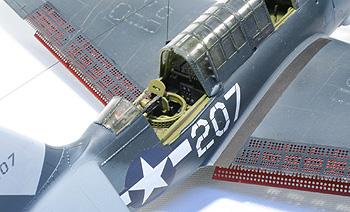
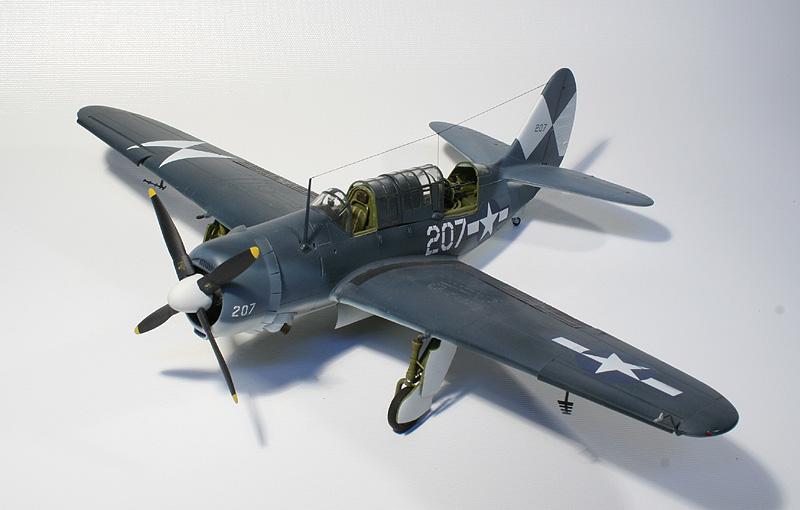
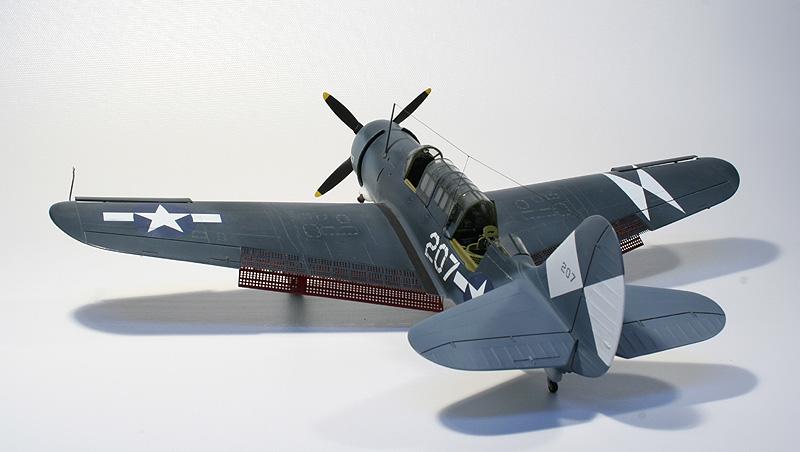
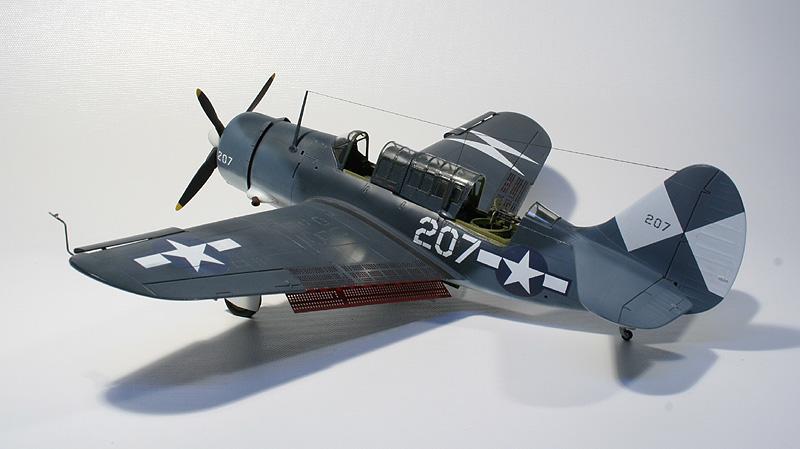
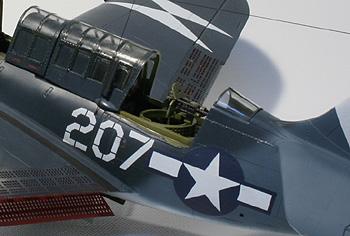
I built this one basically OOB with some minor scratch built additions to the cockpit. Construction was simple and straight-forward, I was given a heads up regarding the wing roots, but with care I found that they worked well for me. The interior was painted with Gunze Interior Green, which is a slightly darker shade than MM. It was during this stage that I did make a couple of mistakes however. I had intended right from the start to display the model with lowered flaps. However, I failed to cut the supports of the wing and settled with only dropping the PE portion. Since these photos were taken, I've raised the flaps to the upper position. The other error was in not installing the life raft in the rear cockpit until it was too late to make it fit. I just settled for that as I didn't realize this until the model was painted. Initial construction finished with masking the canopy with a mixture of Tamiya tape and Parafilm M.
Paint & Decals.
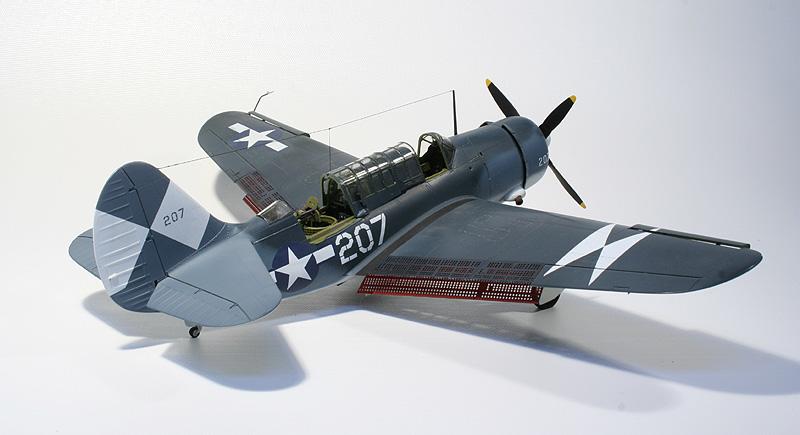
Essex's VF-83 Helldivers were -4's painted in the Tri Colour scheme, with a couple of replacement aircraft joining in late July painted in GSB. Again, I had a particular plane in mind which appears on page 68 of Barret Tillman's "Helldiver Units of WW2". Aeromaster makes a decal sheet for this particular aircraft, which I had bought and intended to use.
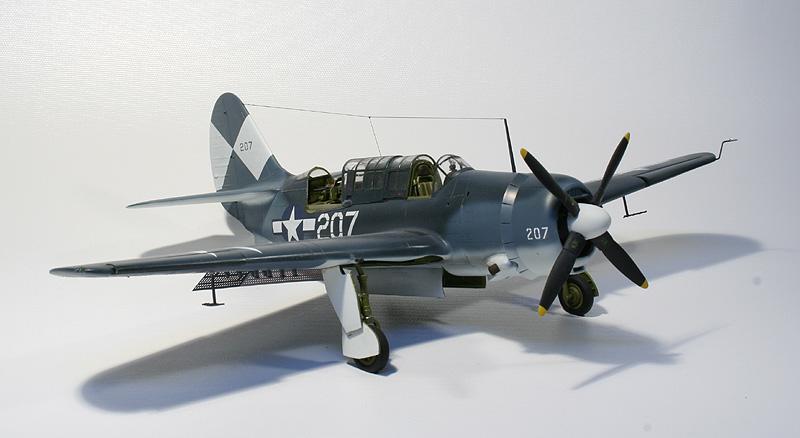
I began with the white underside, using the Badger 200, and gave it several coats of MM Acrylic Insignia White. I also painted the prop cowl white, though it could also have been Intermediate Blue; with no photo available of this particular plane I just made a judgment call. When this was cured, I switched to my Badger 155 double action and applied the Intermediate Blue, this time MM Enamel, freehand. When the intermediate blue was dry, I applied the dark blue (FS35042), again using MM enamel and applied with the Badger 155. There were some inevitable over sprays and mistakes to correct, but overall this attempt at the tri colour scheme went well for me and I was pleased with the result. Once the paint was fully cured I applied the gloss coat using Metalizer Sealer.
Decaling for me always begins with the national insignia. This one was no exception and I used the Aeromaster supplied ones. They went down well, I used Micro Sol only and experienced no problems with wrinkling or silvering. The trickiest part of the decaling process was in applying the vertical stabilizer decals. They were slightly oversize and needed some persuasion to melt down into the rudder hinge area and over the rudder tab mechanism. I eventually cut the decals to help them get over these surface irregularities and touched up with paint when they were dry. All the other decals went down with little trouble. I applied very few stencils as the photo of the subject aircraft showed very few to be present, though I am fully aware of other shots of (newer?) aircraft covered with all the stencils applied at the production plant. The only other thing worth mentioning about the decaling process was that I had to paint the G-Symbol on the wings as Aeromaster had not seen fit to included them in the sheet. This was accomplished with little trouble and the model was ready for the sealing coat and weathering.
As usual, I sealed with a couple of coats of heavily diluted light gray to fade down the paintwork, again making sure to fade down the areas in direct sunlight with the wings folded a little more. Dullcoat was next, bringing the sheen down to a semi-gloss finish. When I next picked up the model a couple of days later I discovered, quite by accident, a technique for weathering that looks (to me) quite realistic. In holding the kit by the wings, I noticed that my skin oils would vary the level of sheen on the finish and by literally rubbing my thumb and fingers over different areas of the plane I could vary the reflective qualities quite dramatically, to show heavily trafficked areas on the wings for example. This is not so visible in the photographs, but give it a try, if you don't like the result, it's easy to fix.
Weathering.
As is normal for me, weathering is done with pastels. I applied a few paint chips around the gun hatches on the wings and the engine cowls, but kept it to a minimum. Using various shades of pastel I highlighted and scuffed areas of the plane according to traffic and exposure to the elements. I added all the small and breakable bits, used stretched sprue for the antenna wire and attached it with white glue.


Nice clean build, nice photos and great narrative.
Nicely done Mark! After seeing your "Beast" and recently reading "Intrepid Aviators" (about Air Wing 18 off of the Intrepid during WW2), I've now got the burn to do an SB2C, TBF and F6F. Again, very nice/clean build.
Another Mark
: )
Beautiful, Mark !
Nice work. When I did this same bird (using the Eduard full p-e dive brakes and flaps - reviewed here at iModeler elsewhere), I noticed that good old Errormaster had lived up to their name by providing national insignia that is too big. Not a complaint about yours but rather a warning for others contemplating building an SB2C: the fuselage insignia should not overlap the folding section of the turtleback. Nobody ever says anything about that, but if you examine photos of SB2Cs with the turtleback folded down, it becomes obvious. One always needs to approach Errormaster with a close study of the photo or photos they used in dreaming up their markings fantasies.
Anyway, another nice one Mark. Good to see you showed up here.
Mark,
This is a beautifully done model. I think you ca just forget talking about what you did and did not do and accept the fact that you did an outstanding job on this. I really like it.
I agree with Frank...an outstanding build - one of the best Helldiver kits I've seen. And great photographic work as well. Nice job, sir.
Very nice build Mark. Finish looks great.
I've quickly become a fan of your work, Mark, you really know how to get a good finish on your models, they're well researched, and the write up is always interesting and informative.
Really nice work on your "Beast". Those Monogram Helldiver kits are really nice kits and a lot of fun to build-your looks great.
Outstanding build, Mark! Your article is as informative as it is well-written, too.
Thanks for all of the comments, guys.
Nice looking "Beast"!