1/48 scale EF-4C Phantom
Hello!
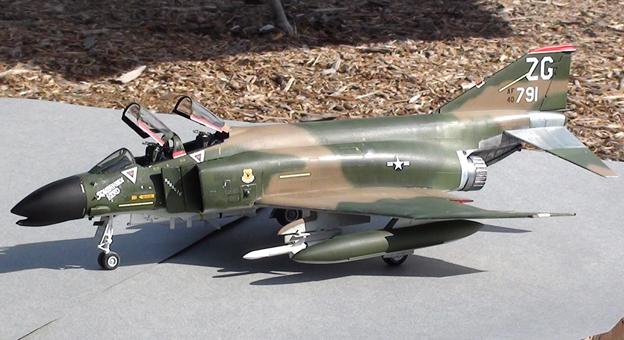
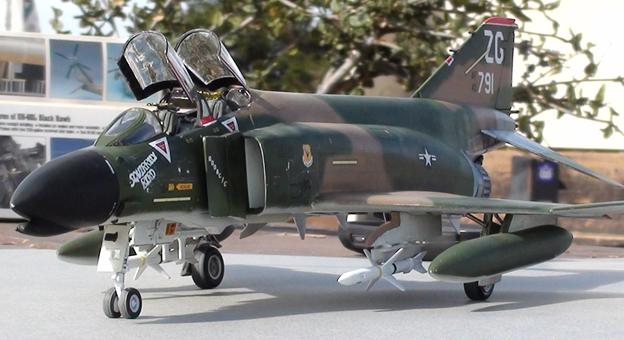
Here is my Monogram F-4C, converted to an EF-4C using TwoBobs decals and some scratch-built parts.
Before there was the F-4G dedicated Wild Weasel platform, the USAF modified some existing C model airframes by adding various sensors and antennas. The aircraft deployed to Vietnam and based on that experience, the F-4G came about.
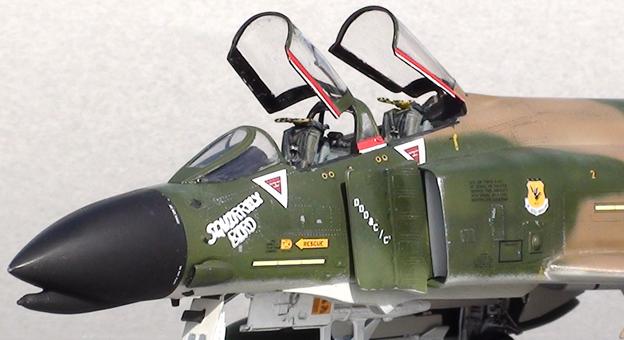
I started with Revell/Monogram's 1/48 scale F-4C kit and scratch built the antennas on the nose, intakes and parachute housing, as well as building the strike camera located in the forward left Sparrow well by starting with the little strike camera that came with the kit, then adding sheet plastic around it and cutting and filing to shape.
As for the rest of the build, I knew what to expect out of this kit and I STILL fell for the booby traps, but I won't point them out unless you are building this same kit and want to know what to watch out for. With a little effort and warning, this can still build up into a decent looking kit!
CHEERS!
-Ramon


Nice job on that Phantom, Ramon...but what "booby traps" on a Monogram kit are you alluding to ?
the mounting surface on the main landing gear struts are not square, and a bit sloppy in the slot they are supposed to fit in. every time i have built a monogram phantom, my MLG end up being a bit retracted. this time around wasnt so bad, but they are still not exactly perpendicular to the ground. also, on one wing, the aileron fits perfectly, but the speed brake under the wing sticks out a bit when in the retracted position. on the other wing the opposite configuration is true for both aileron and brake. next time, what i will do is grind away the molded-on brake struts and scratch build some replacements, then pose them open, and i'll also break off the mounting tabs for the ailerons and sand to fit. had i paid more attention and been a bit more patient, i would have squared these away this time around!
Aha...I shall be more cognizant in that area when I get to mine. Thanks again for the "heads-up" (and kudos on that finish, too).
thanks Craig! also, watch out for the cockpit installation - the furthest aft part of the cockpit needs to have a gap between it and the fuselage in order to accommodate the rear canopy hinge/mounts, and the stabilator tabs will need some filing and trimming in order to get them seated properly against each other and the narrow section of aft fuselage. good luck, cant wait to see your jet!
Ramon,
Very, very, very nice. I think you did an outstanding job on this. To add all the scratch built items is a labor of love of this airplane. Overall, bugs and all, this is another example of a good Monogram kit. I have done a couple of these and for the price you can't beat them. Granted this mold is old and some of the new stuff is far better technically but then you have to pay for that. Yours will stand up to all the rest.
The F4, my opinion, is somewhat like some British airplanes. It is so ugly it is beautiful. The surfaces go every which way. However it has an exceptional history and one of my acquaintances, a retired USN Captain, says it is one of the best airplanes he has ever flown. Your model definitely brings the the beauty of the F4 to life.
thanks Frank! i agree, you do tend to get more bang for your buck with the monogram kits as opposed to the more expensive imports. Besides, i am of the opinion that sculpting and shaping the plastic is part of the craft and i feel like i gain experience points when i scratch build extra pieces. that said, if the more expensive models weren't so much more expensive, i would be more than happy to give them a go!
🙂
Totally agree on all points!
Outstanding is the word. remarkable
thanks Bryan!
What a lovely looking model, Ramon, and I love the photographs as well. Images 7 and 8 are, I think, are extremely realistic.
Thanks George! keep an eye out on ARC.com, i plan on writing up a more detailed article,and i also have photos taken by a friend of mine - he had a way nicer camera than i did!
Magic! Superb Phantom Ramon. I've got this kit in my stash, and your comments will help me avoid any of the pitfalls you've described. Nice one! 🙂
Thanks Gregor! i look forward to seeing your Phantom!
A very nice looking Phantom there Ramon.
One of my favourite planes.
Also done in one of my fav colour schemes too.
Well done sir.
thanks Simon!
nice SEA f4
thanks Bob!
That definitely is a decent looking kit mate!
As a card-carrying member of the Monogram Mafia (:)), I gotta tell ya, that bird looks great! You sir, are a true modeler (as opposed to an assembler) and there sits the proof. Bravo!
Gary
thanks Gary!
Great looking kit.
I would like to build aEF-4C aswell but in SP Spangdahlem colours but i cant find decals for it.
Thanks Roger!
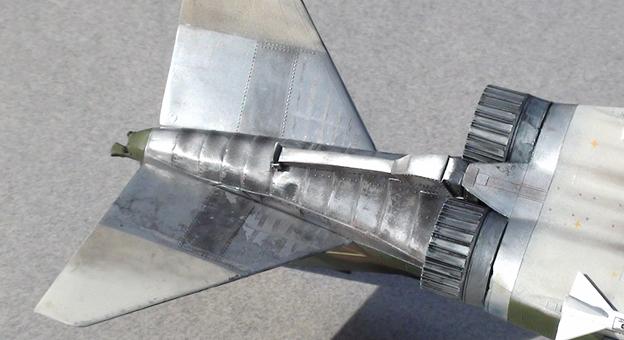
Hi Ramon. Latecomer to this thread, but, I hope you can tell me how you did the metallic on the stabs and afterburner area? You did an outstanding job there! I'll also look for this bird on ARC. Thank you.
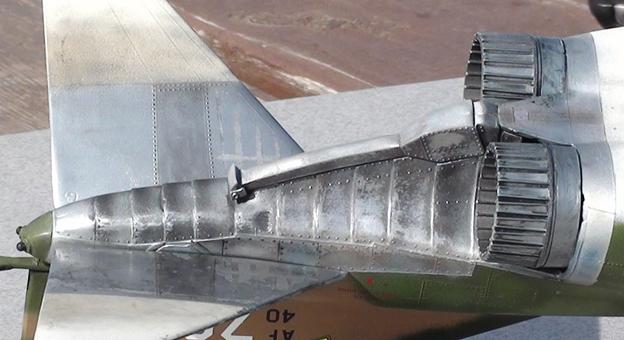
Thank Scott! the back end was painted with Model Master aluminum and steel metalizer, then I went back and airbrushed burnt metal metalizer on the panel lines, buffed it all with a used dryer sheet, and touched up a few places with metailzer steel and a brush. Hope this helps!
-Ramon