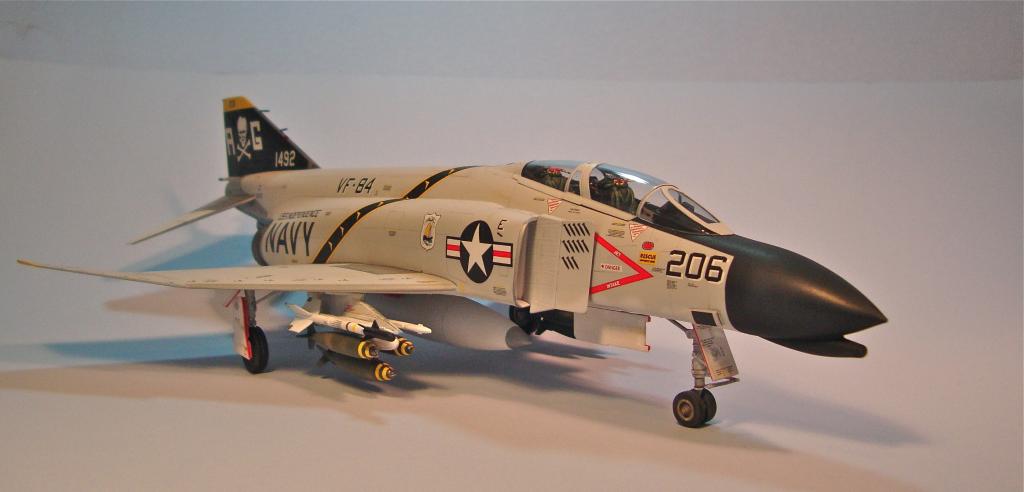
206 the hard way done!
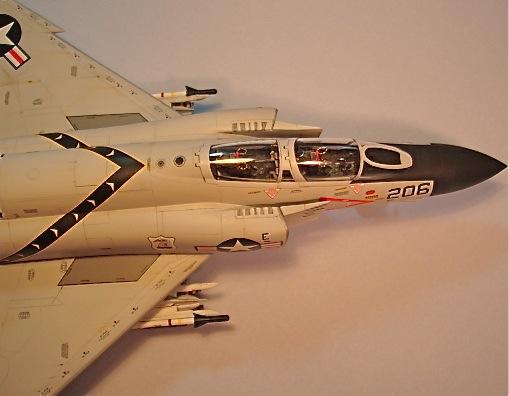
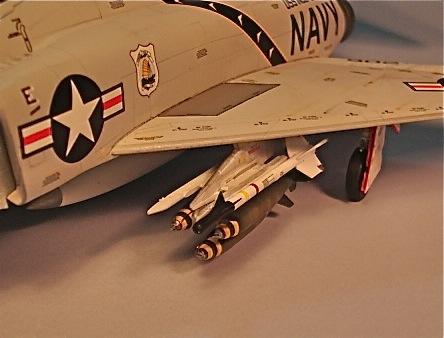
Well, I am glad she is finished, but what a fiddly kit it was to build. I think I made a few of my own problems by doing some things out of sequence, like adding the landing gear at the end (which requires modification of the mounts early on) and not test fitting the weapons pylons which are not as tight as I would like them. Also the canopy is obviously designed to be left open, but having spent 26 years in Naval Aviation you keep them closed when someone is not in them that whole flight deck weather thing 🙂 I used probably 90% of the stencils , but even then there are some missing for early Phantoms, notably the white lettering on the radome. Anyway here it is warts and all
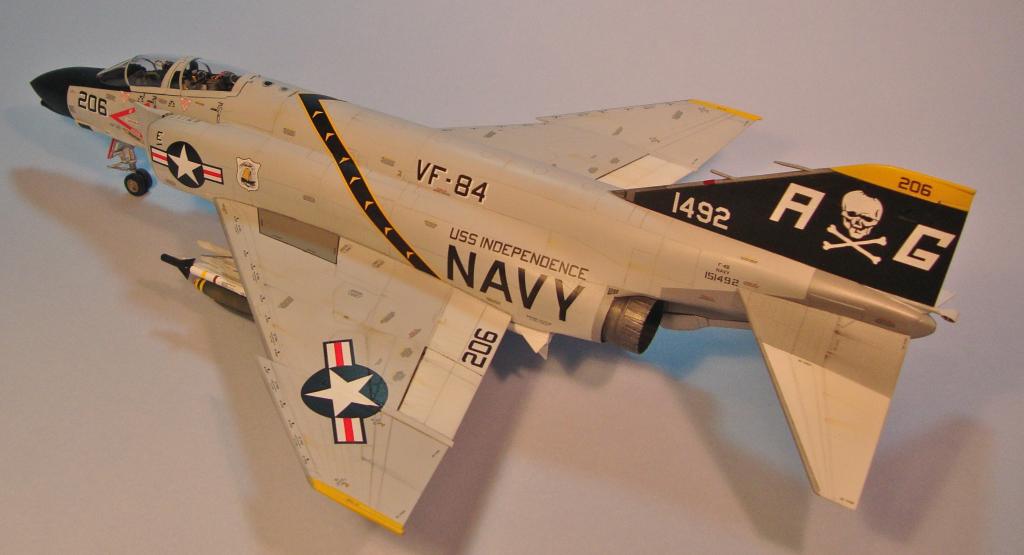
Edited to add, I knocked most of the gloss off after decaling, as it was my experience working on the E-2 and C-2 which still cary glossy schemes that after some time at sea the gloss gull grey was only shiny right after wash jobs.
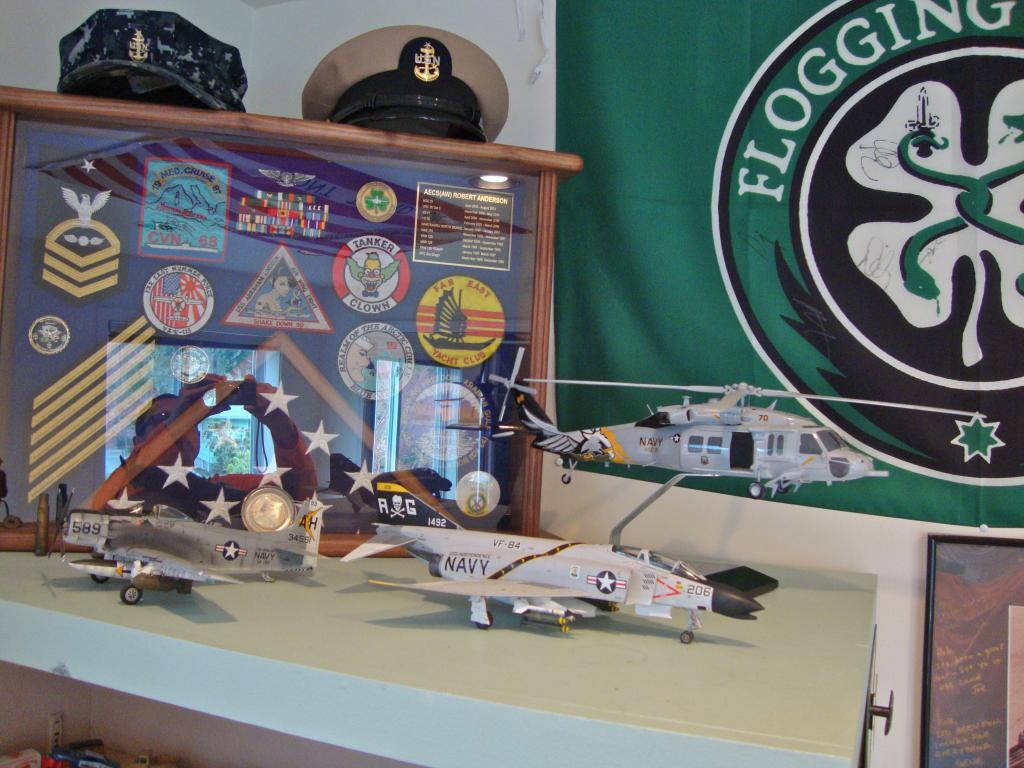
Edited the pictures some so hopefully they are a little better, also added one of the Phantom in her Navy display by my shadow box!


Kit, scale?
Dan
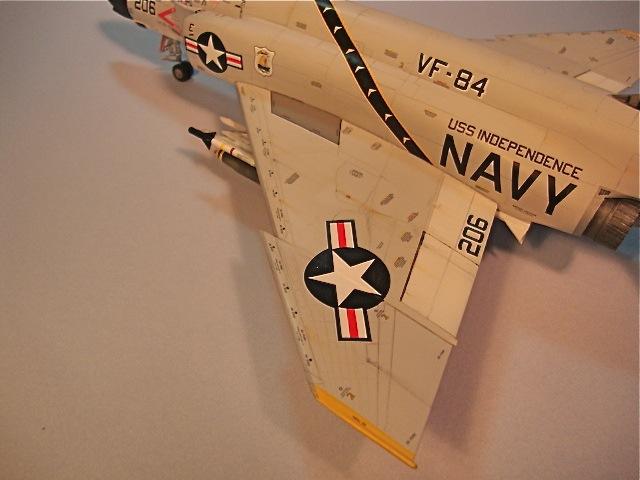
Academy 1/48, decals are a mix of Double Ugly "Dem Bones" Which ahile nice many of them do not fit! Than kit decals, and some from Furball's Bravo Mig Killers to replace things that were the wrong size on the Double Ugly set. Paint is custom mixed colors from Testors little square bottles.
Thanks Rob
dan
I know all too well of which you speak (referring to the "quirks" of the build)...IMO, this kit is a far cry from living up to all the hype that preceded it. I guess we should stick to Tamiya's offerings in order to avoid all the headaches.
In any event, your Phantom looks like it ended up really well done. Nice job.
Thanks Craig. Yes I would say that the engineering and multi colored plastic took away from what should have been the be all end all of Phantom kits. Some small parts just plain didn't fit, or the directions were so vague I could not figure out how they attached! The landing gear doors just about did me in, but I got it! Next up? Trumpeter Albatross with the Alley Cat nose correction... 🙂
Rob,
Fit or no fit, this is absolutely beautiful. I don't want to hear all that is wrong with it. I just want to admire your work and compliment you on how you have paid homage to the F4.
The end result is what counts and there is no question yours rates very high on the scale.
Thanks guys, I appreciate the kind words!
Well, Rob, given that "back in the day" of this airplane, the gull grey was flat, not gloss, you did the right thing to "knock it down."
Nice model, would never know you had all the problems if you didn't say so. Like I tell my wife, "Don't tell someone who's going to buy what you've done what the problems are if they don't appear to notice them!" 🙂
Perseverance obviously paid off. Nice work.
Rob that looks great, one of my favourite planes.
You have done a great job the .
Well done Rob.
hey nice work - it looks great!
looks great rob...love dem bones...i'm working on a white nose hasegawa version
Good job ! i like it...but you can make better pics more "white"
Olivier
Fantastic work, just great.
Hi Oliver, I have struggled here in my new house with lighting my camera is not the best either, but for some reason though I actually have more light it is not as...intense...I guess would be a good word for it. I am thinking of changing bulb styles, it used to be easy but now that standard incandescent bulbs are being outlawed here in the states it is an "experiment" each time you look at bulbs! I tried updating the pictures and got at least one that is more "white" so hopefully they are better 🙂
Rob
Excellent.
Nice clean build, I love the "old" naval aircraft paint schemes. Those "nomenclature stencils" decals on the plane's exterior must have been fun to apply. Canopy looks great (your shadow box looks great too)!
Thanks all, and Mike the shadow box is one of my prized possessions presented to me by the Chief Petty Officers Mess of HSC 21 where I retired as a Senior Chief after 26 years. Now I need someone to make a kit of an MH-60S in 1/48, to set beside it!
Maybe it's 'done the hard way', but the results are more than worth it.