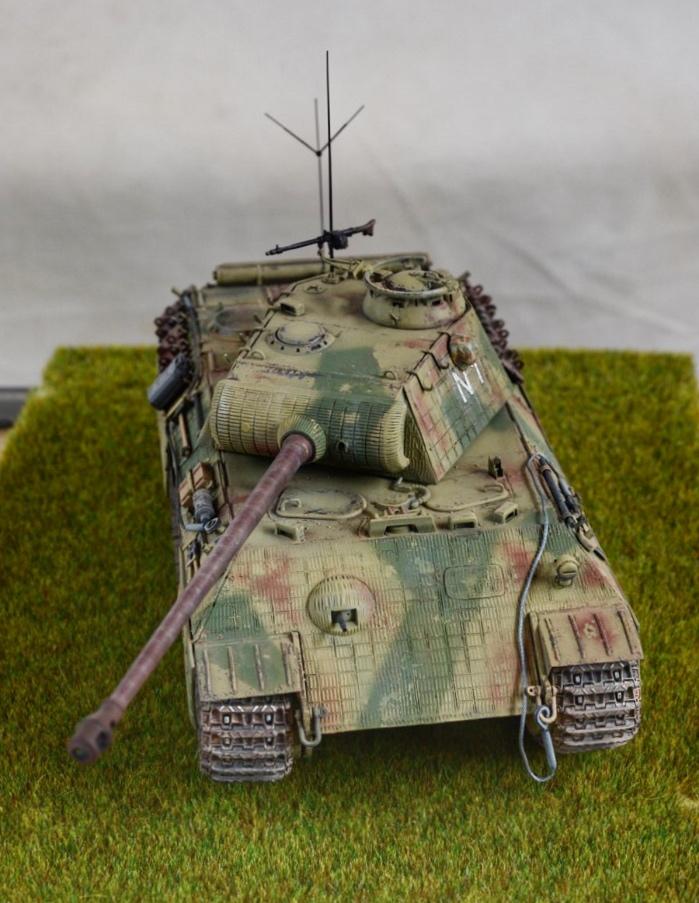
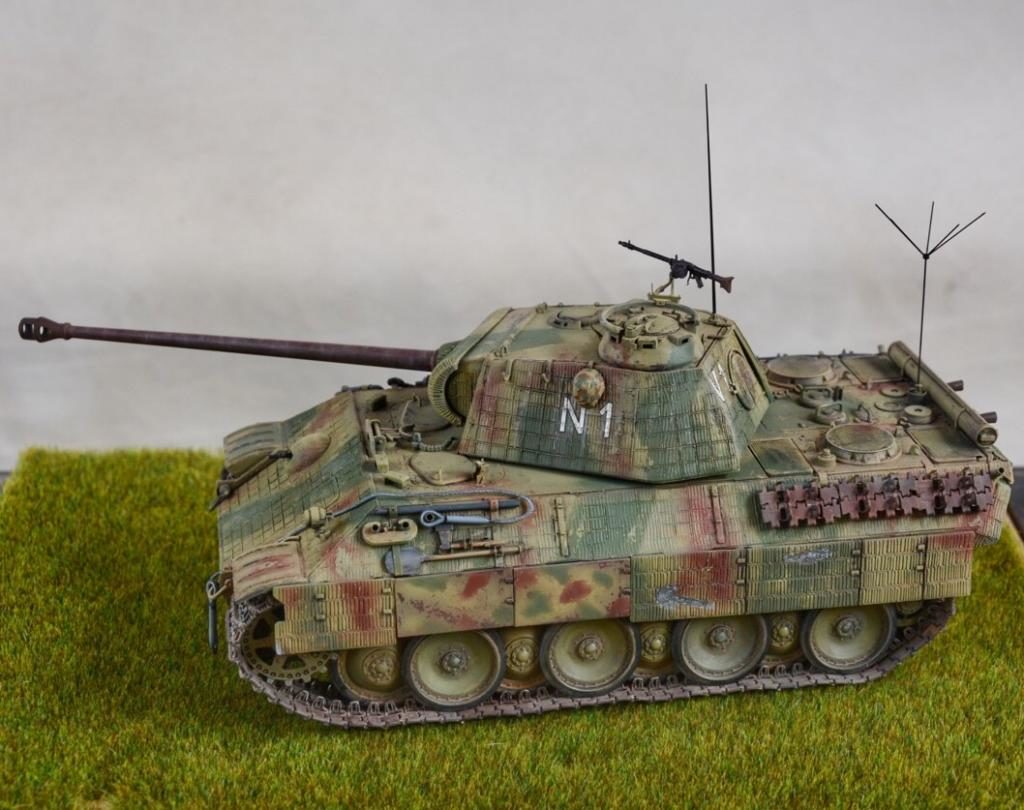
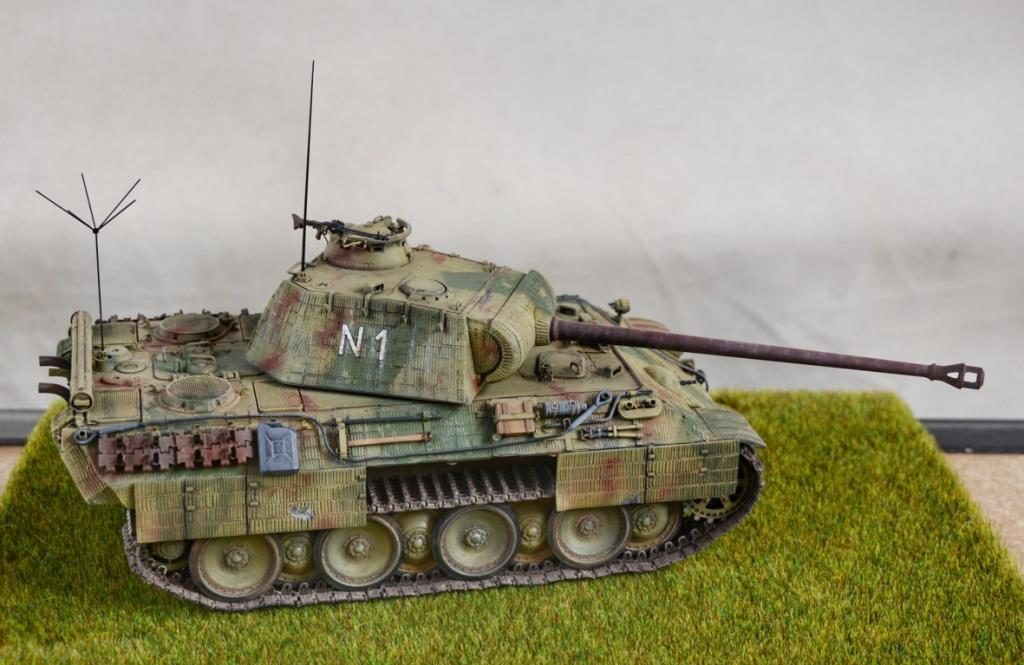
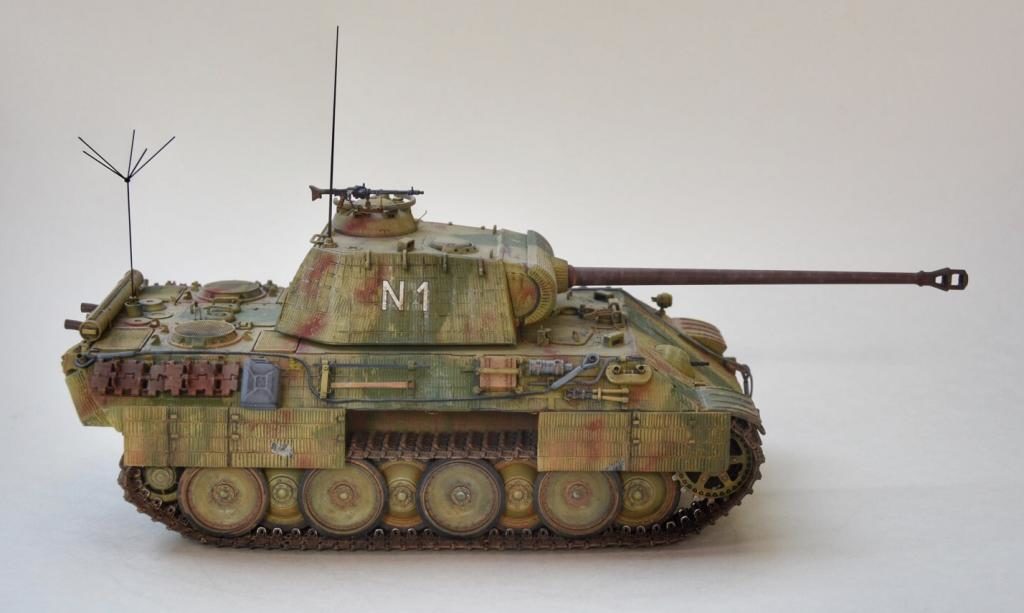
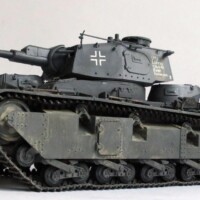
1/35 italeri Panther Ausf A.
My first German Army tank build in over 35 years. The tank is of part the Grosdeutschland Panzer Grendier Divison, Lithuania 1944.
My first German Army tank build in over 35 years. The tank is of part the Grosdeutschland Panzer Grendier Divison, Lithuania 1944.


You must be logged in to post a comment.

Thanks to the many tank / armor builders on this site, I'm becoming a big fan of these steel beast, especially when they look this good. Nice work John !
Good job on this...is that zimmermitt (sp) molded on or did you make it?
35 years since you built an AFV !
Certainly the skills haven't atrophied in that time, sir.
Ian.
Looks real good. Nice job.
Nice detail work and the finish is very well done.
Excellent build, not too much weathering, just spot on.
Did you have changed Italeris Zimmerit pattern ? Looks great !
Nice looking build! I don't know enough about armor to comment on details, but it looks nicely done and weathered.
John, first rate tank. I like the zimmerit and the bullet gouges in it. The crowfoot antenna must have been a lot of fun, also.
Great job,Looks as menacing as the real thing.
The Panther is my favorite WW2 German tank. Yours looks great. Like the others have stated, you still have the necessary skills after 35 years! I really like everything about this model.
Thank you all for the kind replies, I've only just joined the group and look forward to more inter-action with all of you. The zimmerit was an after market product from Cavalier products. It was made specifically for the Italeri kit and was applied with epoxy glue. The weathering techniques were studied and applied after much and various reading and YouTube viideo watching.
Yes sir! That tank looks great John. Congratulations on a fine build, and thanks for sharing it with us! 🙂
Very nicely done John! I'm working the Zimmerit on a Panther A model (Dragon). I used a wide variety on techniques, the best result I got was using "No more nails" adhesive. Apply a thin layer of about 1 mm and let set for about 15 minutes (depending on humidity). Then you can work the Zimmerit pattern with a screwdriver or scratchbuilt applicator. The turret pattern however requires a "heated screwdriver" method because the curved lines prevent the adhesive from sticking to the styrene. IMO Zimmerit application is very difficult but rewarding in the end.
Oooooh somehow I missed this one, what a fabulous Panther. Been looking for a proper square zimmerit Panther, did not think about aftermarket, that's the new plan. Very Cool cat there love the paint and weathering.