Yet more Hellcats!
I just had to join in on the Hellcat theme!
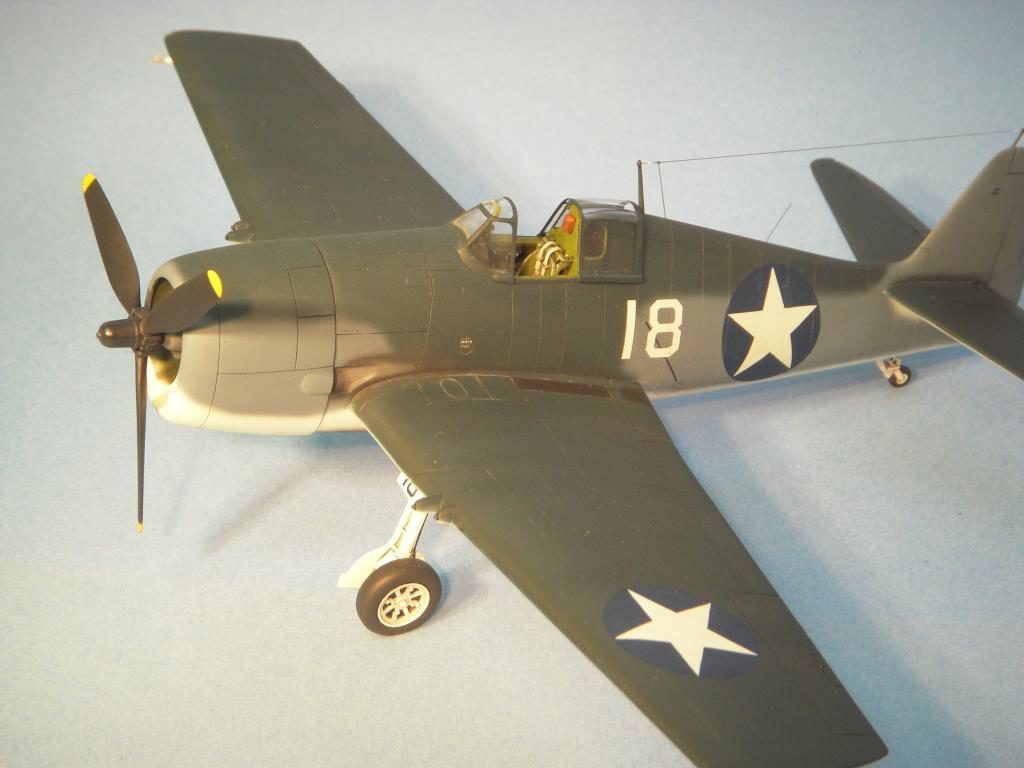
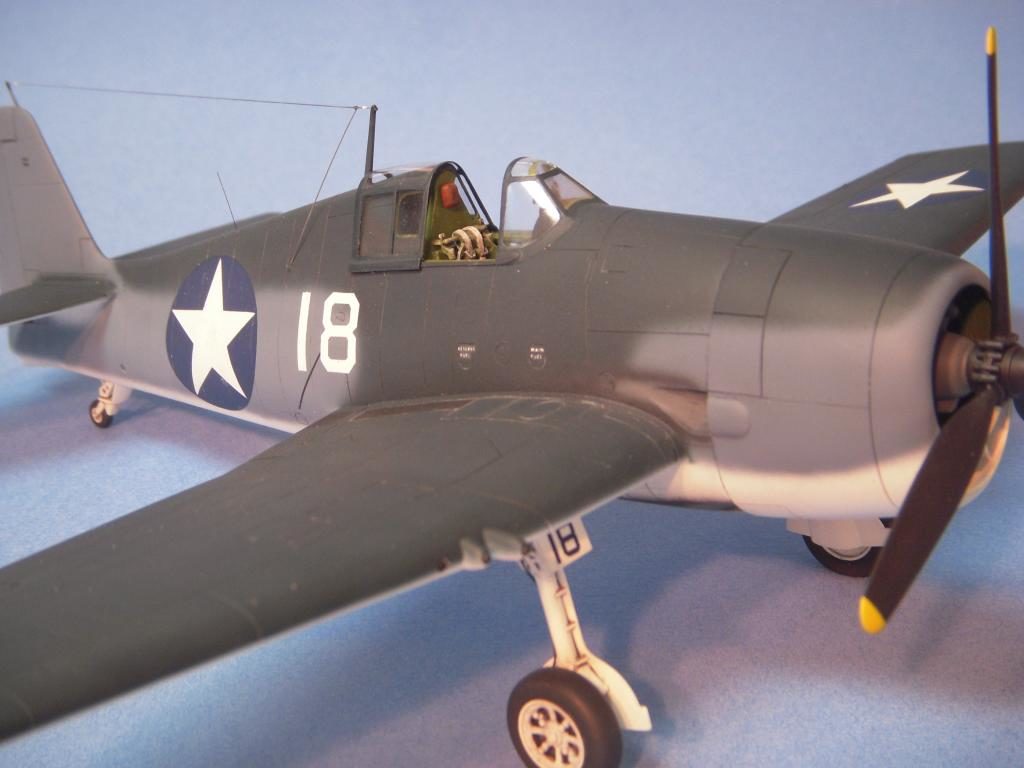
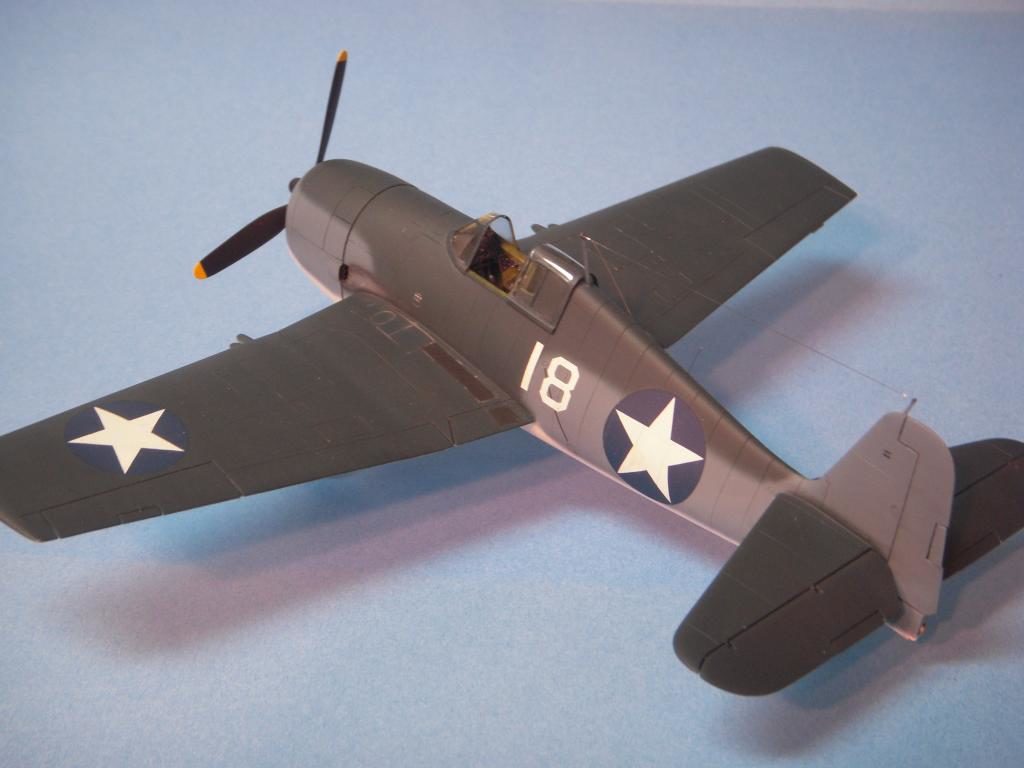
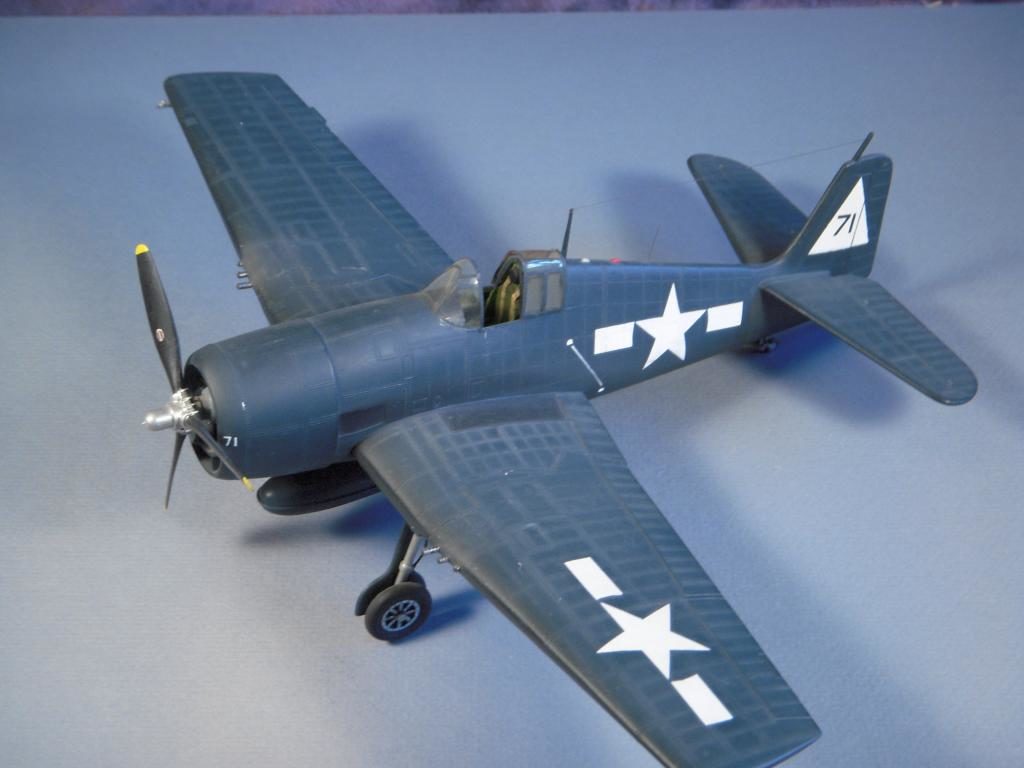
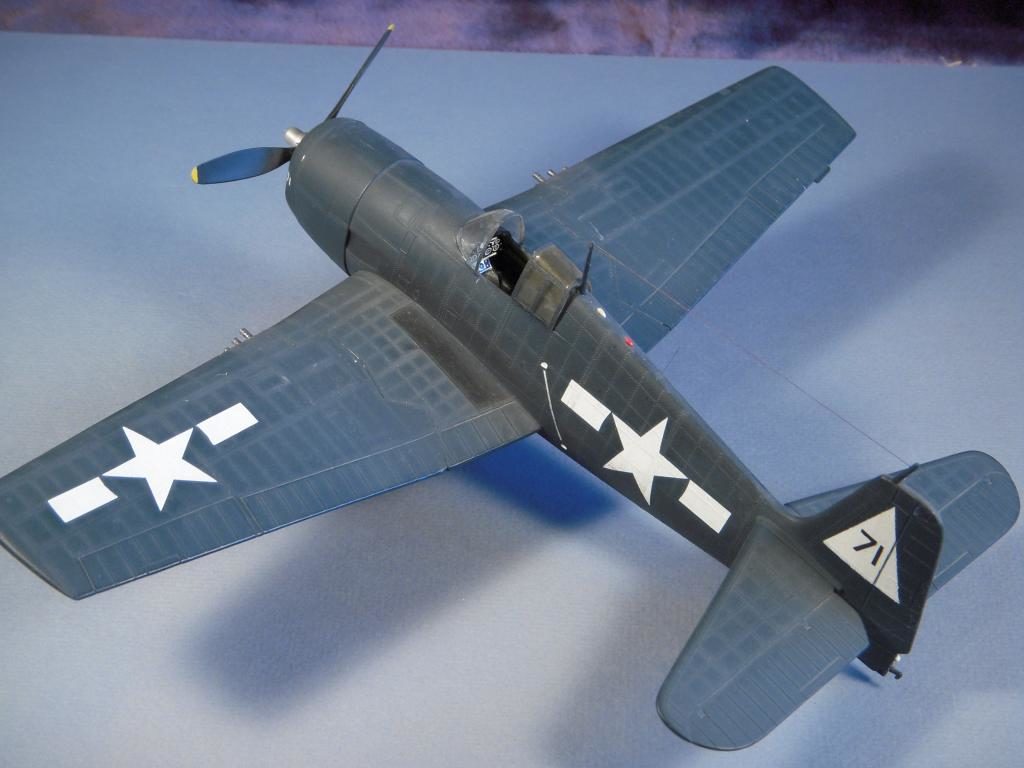
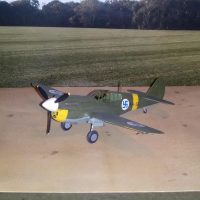
Completed a few years ago this was started with the best of intentions to be a straight forward OOB build, the urge to add a few extra details began as I realized how well the basic Otaki/Arii kit captured the shape of the Hellcat. The discovery of an aftermarket resin cockpit and a vacuformed canopy in my stash began the construction. The kit has the lower cowl flaps of an early F6F-3 and with the addition of the fairings on the guns a model representing one of the very early F6F-3s could be built. The gun fairings were fabricated from styrene. Only the first 273 Hellcats produced had these fairings and they were eventually removed in service.
The resin cockpit was modified to fit. I had to fabricate the instrument panel not only because I broke the resin panel, but this allowed me to better replicate the early cockpit layout. A scratch built gun sight and trim tab control console were fabricated and installed. The vacuformed windshield needed a lot of trimming and filling to fit properly but is a great improvement to the very thick kit pieces. Armored glass was made from thicker clear plastic and set inside the windshield.
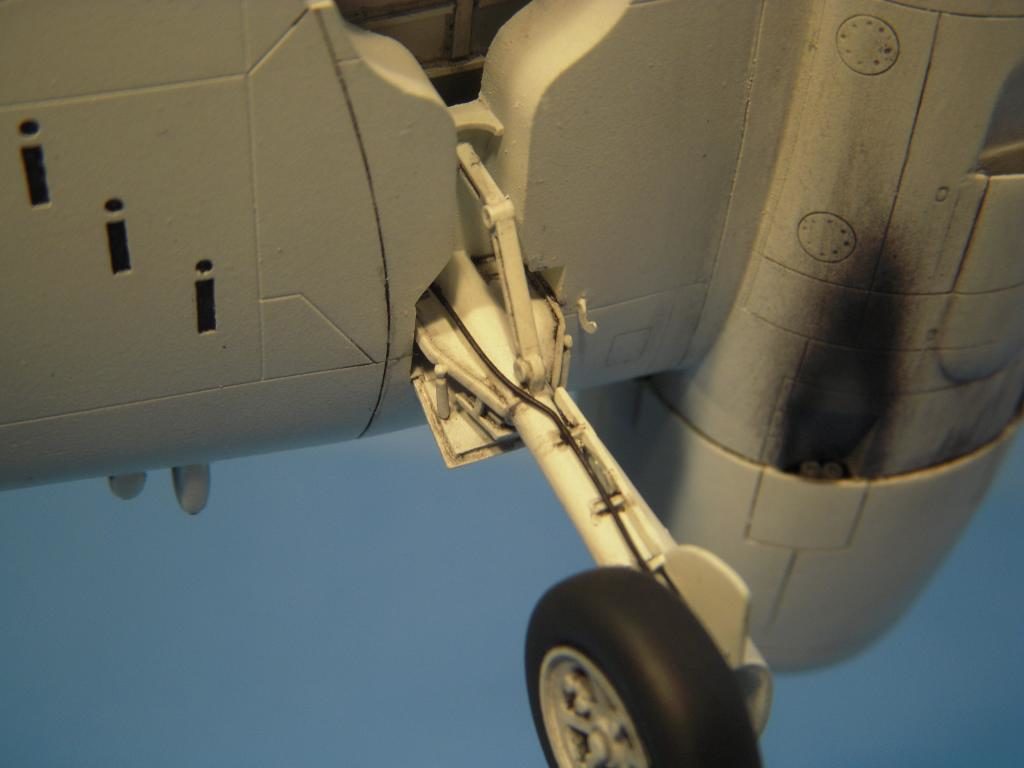
The wheel wells were too shallow caused by the well being a "box" attached to the bottom part of the wing. The wells were deepened by removing the top of the kit’s wheel well “box” from the lower wing pieces and a simple internal structure was added to underside of top wing surface.
The landing gear was detailed with various small linkages, the braces on the sides of the struts added with styrene strips. Brake lines were made from wire and the kit doors thinned by filing and sanding. Catapult bridle hooks were made from wire and added just inboard of the main gear. Exhaust pipes were fabricated from styrene rod and glued inside the outlets in the bottom and sides of the cowling.
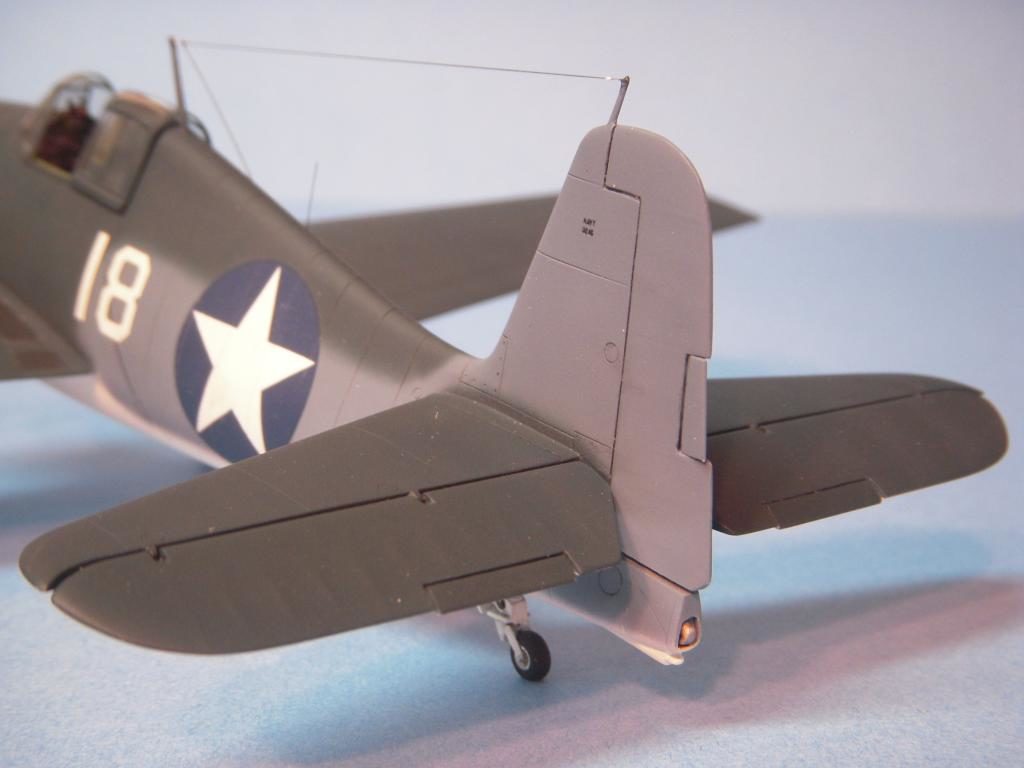
The rudder was too thick and was thinned by sanding. The fabric detail restored (though hard to see in the pics) by sanding with a rolled up piece of 400 grit to simulate the sag between the ribs and the rib tapes by a stripe of paint under the finish coats. The elevators and trim tabs were repositioned for a more natural look . (Yes, the control stick is in the nose down position!) A retracted tail hook and holdback bar were added.
The model is finished as the aircraft would have appeared while undergoing carrier qualifications aboard one of the early Essex class carriers working up off the west coast of the United States in the early summer of 1943, The paint is in good condition, the semigloss gone from the upper surfaces but not much fading is evident yet, while the undersides retain a bit of sheen. There is just a little exhaust staining and slight wear on the wing roots. With just a little bit of work, the Otaki/Arii kit can be made into a good representation of the Hellcat.
Completed more than a few years ago is the overall dark sea blue Monogram classic F6F-5. Not much noteworthy here besides its age, probably 35 years or more!
Eric aka The Yankymodeler


Eric, great pair of Hellcats. The -3 is just beautiful. The cockpit is nicely done, as is the "Norfolk" scheme.
Did you get to Maraudercon this year?
Thank you! I feel that the Hellcat is often overlooked, especially the early ones. Unfortunately I did not get to Maraudercon this year, had a pretty busy fall. Didnt have anything to take anyway, the elic Intruder/Prowler/Super Hornet build has dragged on far longer than I ever expected!
Great job on both Eric. Excellent work!
Which cockpit did you use, If I might ask?
If I recall correctly it was a Blackbox -5 that I modified to better represent a -3
The pre-shading came out great on that dash five...nice work! (as is that 'Norfolk' scheme).
Thank you, though Inhave to reveal there is no pre-shading (I''m not a fan of that technique) but simply a bit of powdered chalk rubbed into the the paint!
Great looking Hellcats Eric. Very nice work!
Good job Eric, nice looking cats.
Yet more good looking Hellcats!
Another nice pair of cats!
Thanks for sharing your Cat's with us. Awesome !
Nice work on this.
FWIW, if you sand the vertical fin from inside before further assembly, you won't lose the nice surface detail. Doing that on one of these kits from a friend's suggestion was the first time I ever tried that trick, you're right about the fin being too thick.
Thank you Tom! I have used that technique many times. Unfortunately for me this model was one of the first couple after a many year hiatus from modeling and I didn't catch the need to thin the rudder until I had the fuselage assembled.