Hobby Boss 1/48th F-14A Tomcat
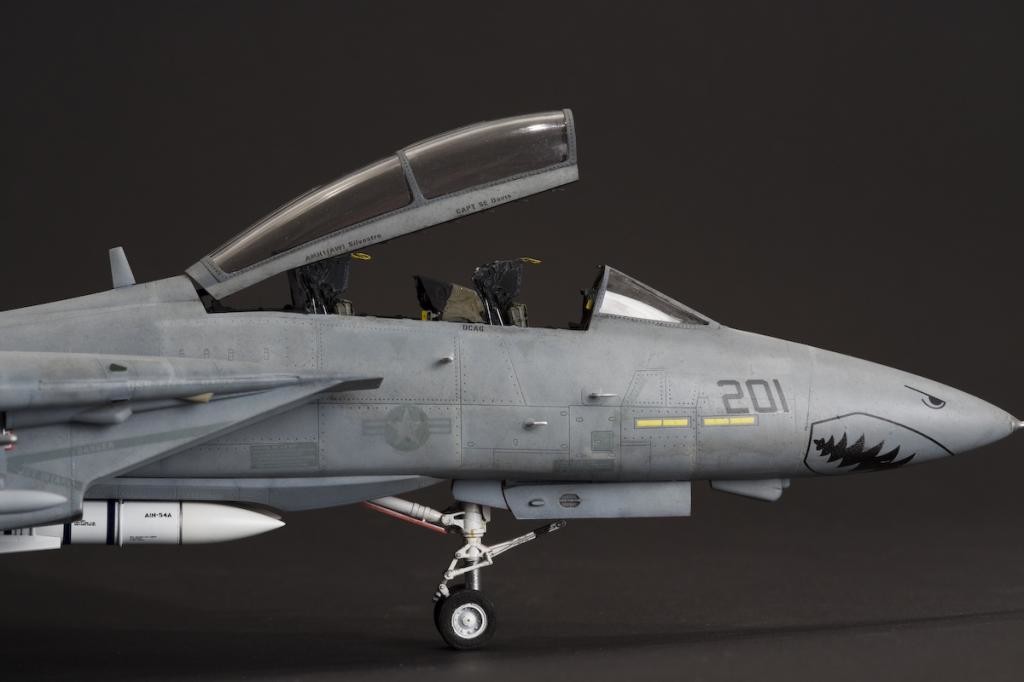
Having been brought up on a healthy diet of “Top Gun” and “The Final Countdown”, the F-14 Tomcat to me is the icon of modern military aircraft. And some time ago I decided to finally start on the Hobby Boss' rendition of this very plane.
The kit had been in my stash for almost two years, together with an Aires cockpit and burner cans, Wheeliant wheels and a very nice FCM decal set – alas, I felt a bit intimidated by a topic I wanted to do justice. Only so much space being available in the display cabinet, I knew that this would be the only Turkey for a very long time. And we don't want to cock that up, do we.
The Kit
The kit itself came out a couple of years ago and finally gave us an alternative to Hasegawa's F-14. There are some definitive advantages in this kit over the Hase, especially around cockpit detail and weapons options (as in: Hobby Boss gives you weapons, Hasegawa doesn't). Some issues, however, need to be addressed:
-
The kit gives you the option of showing the 20mm gun exposed, panels open. If you want to go for closed panels, you have to do some careful aligning, gluing and rescribing in order to achieve a proper result.
-
-
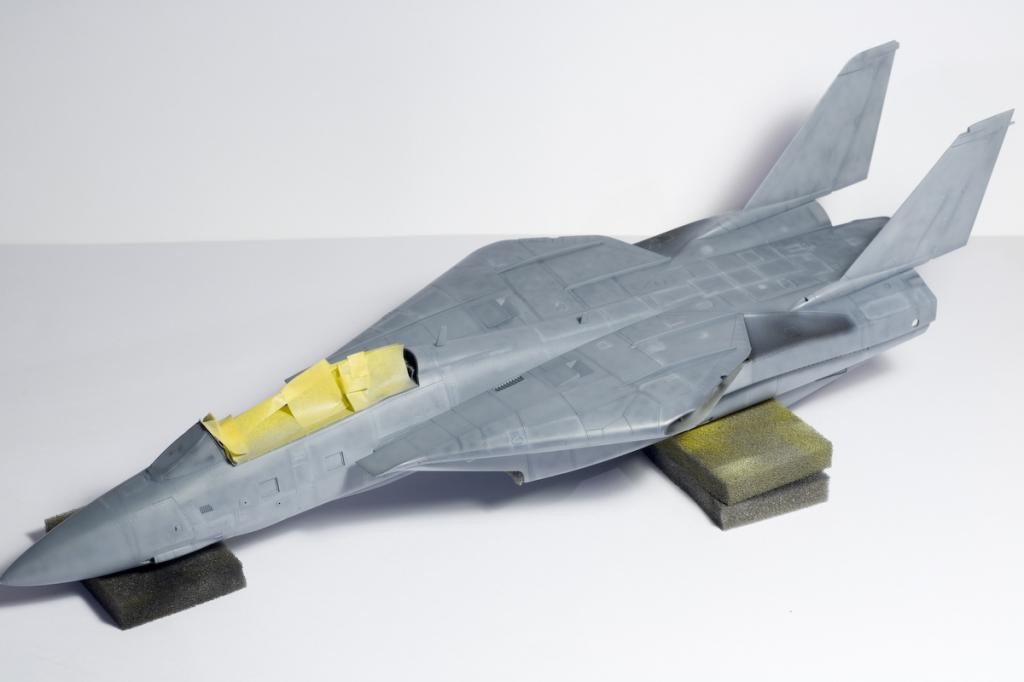
The air intake lips should not be parallel to the ground, and they are a bit thick. This was fixed by sanding the lips at an angle, thereby introducing a slight upward cant.
-
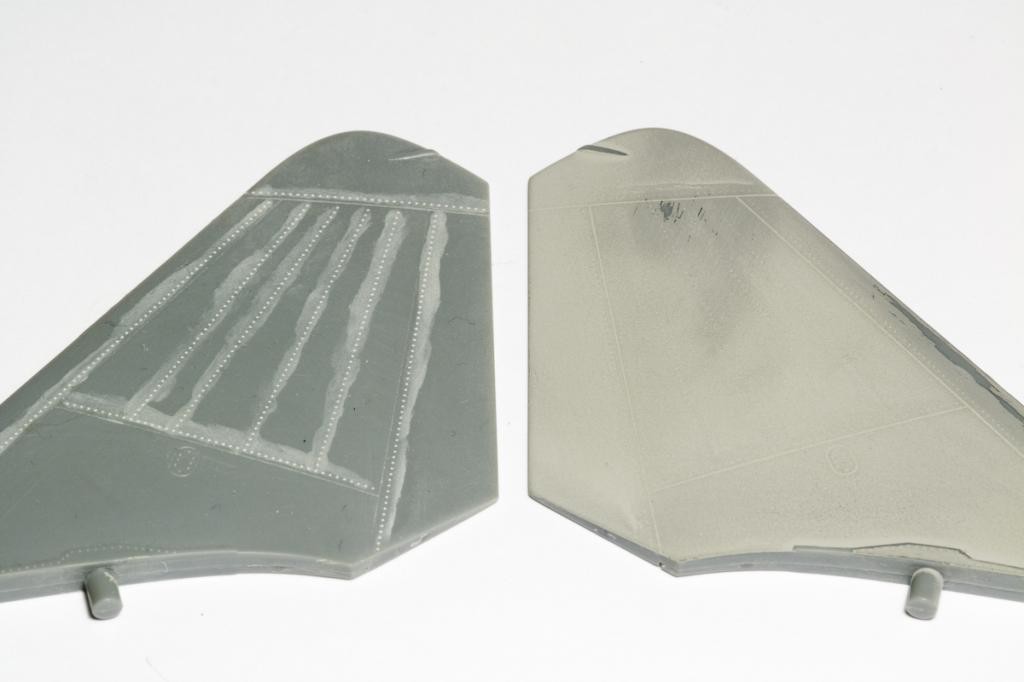
The wings and stabilizers are covered in rivets that need to be filled. Multiple coats of Squadron putty, thinned with acetone, took care of that.
-
-
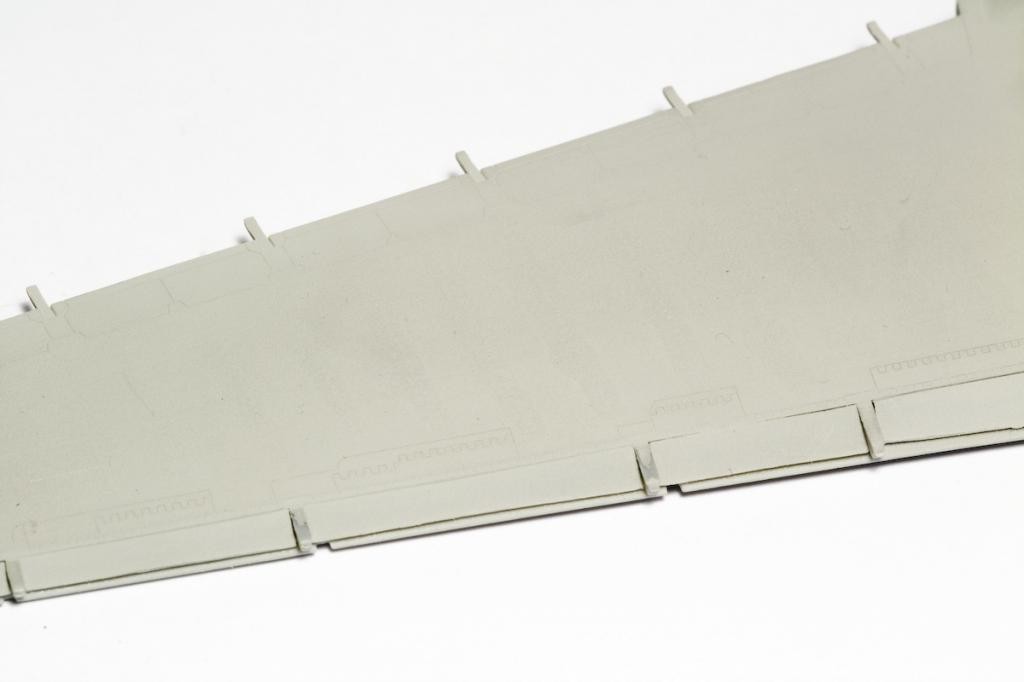
The slats, when deployed, should protrude at a slight downward angle. Easiest fix is to carefully bend their attachment rods downward a bit.
-
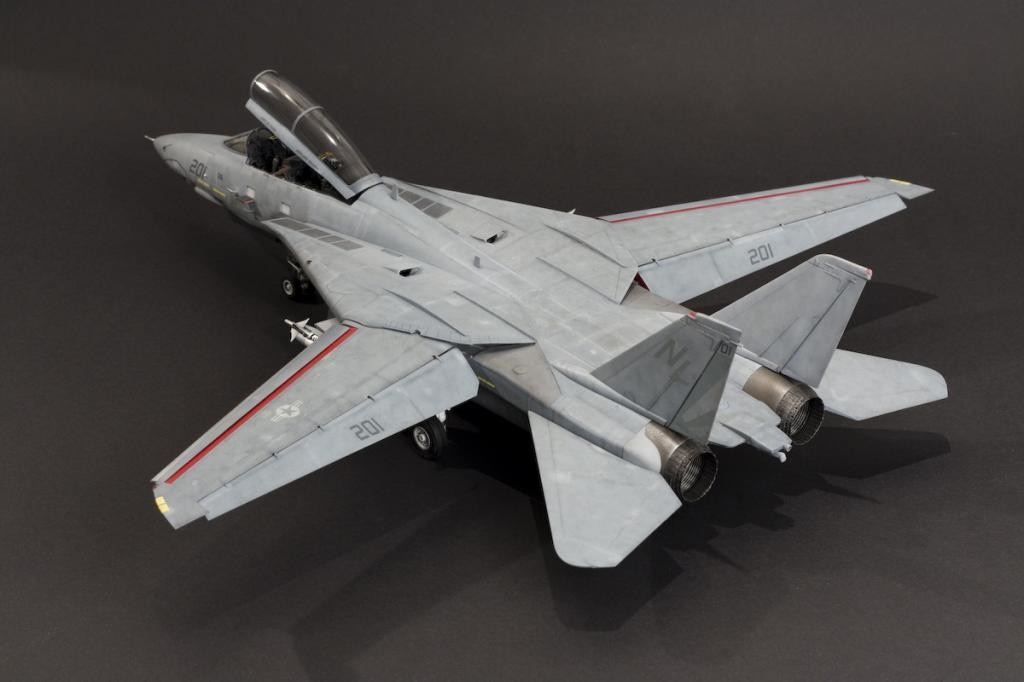
If you want to attach the AIM-7 Sparrow missiles to the wing glove pylons, they need to be positioned farther forward. I did that by cutting off the missile fin that goes into the pylon, the missile then can be attached in its proper position.
-
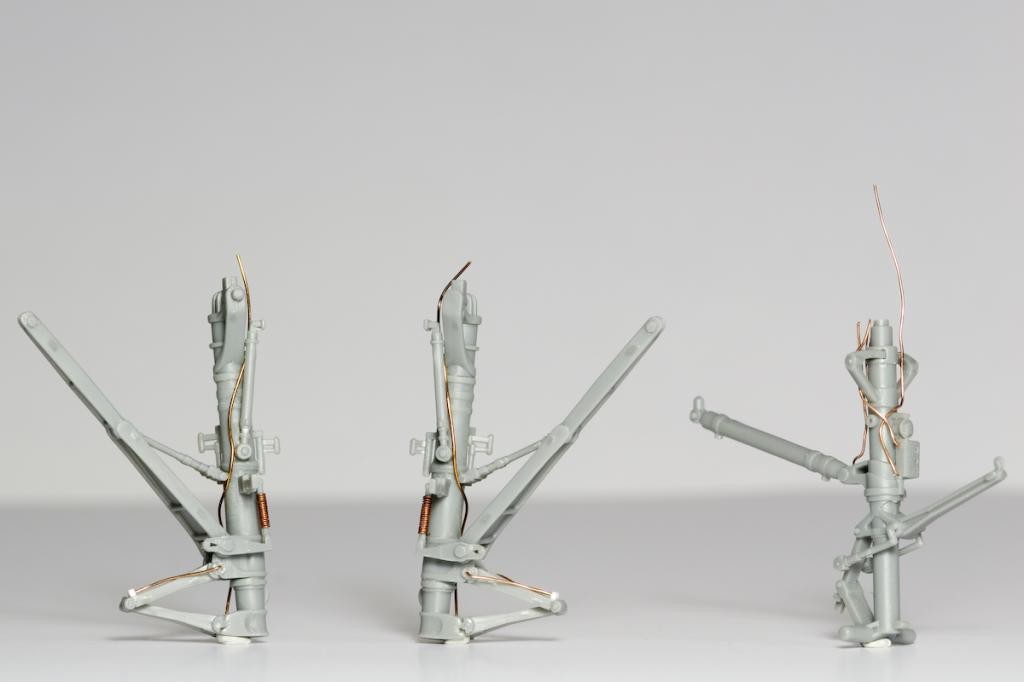
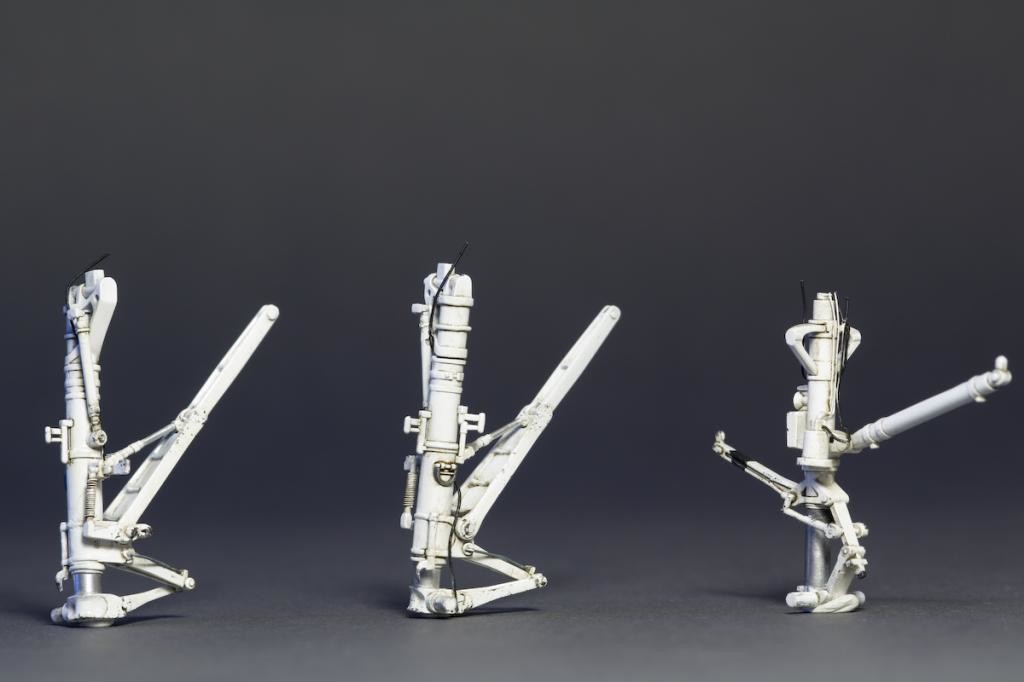
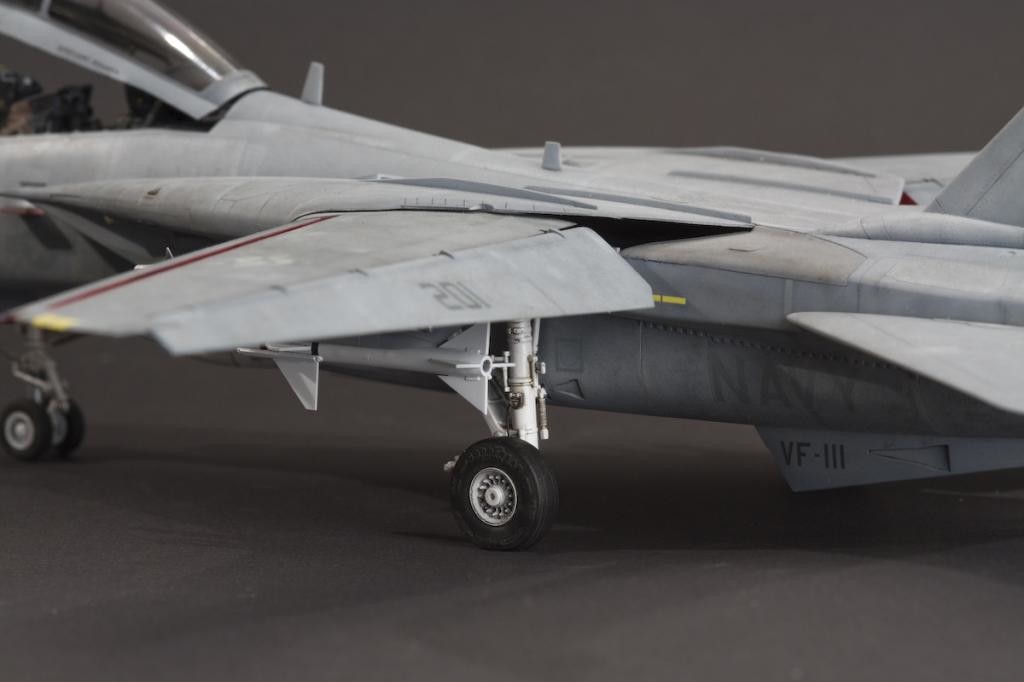
The main landing gear struts lack some heavy springs which are quite noticeable - instead, HB gives you a rather generic rod (parts F25/F26). Some thin wire, wrapped around these parts, does the trick.
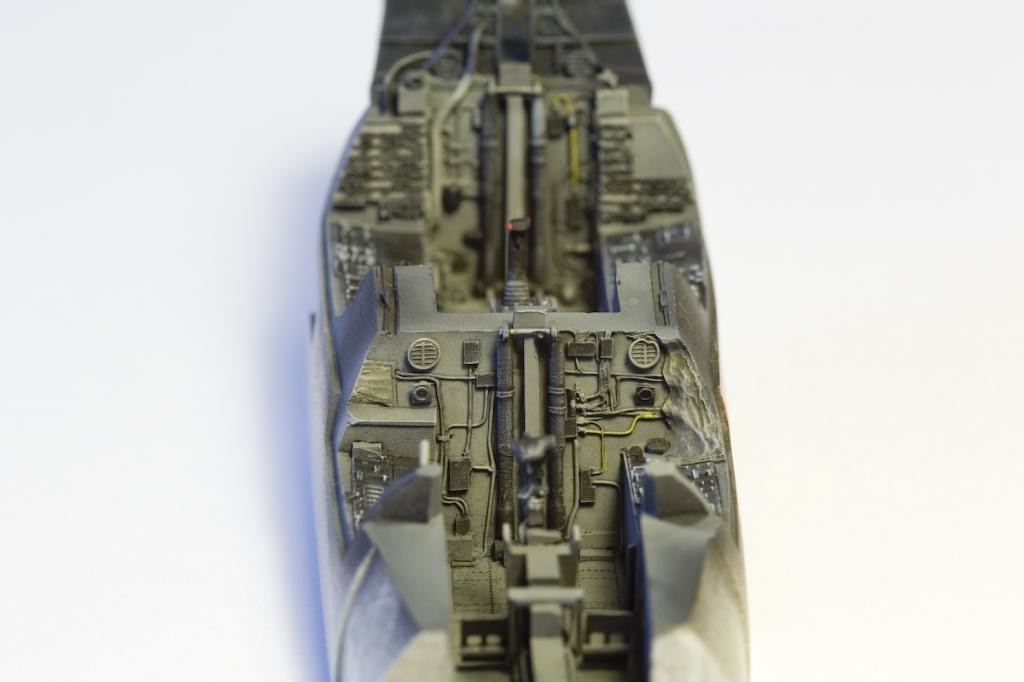
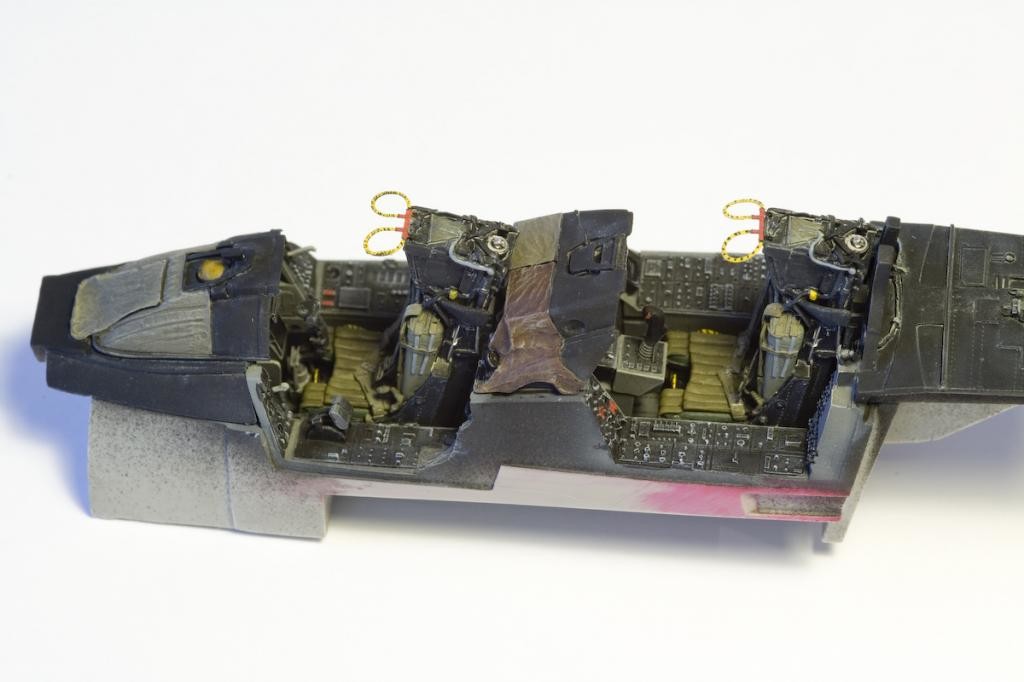
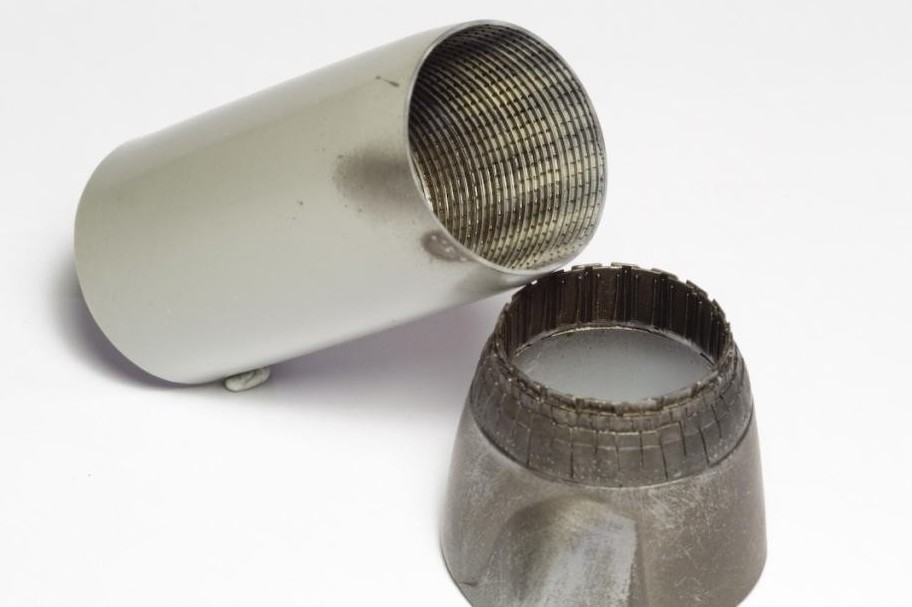
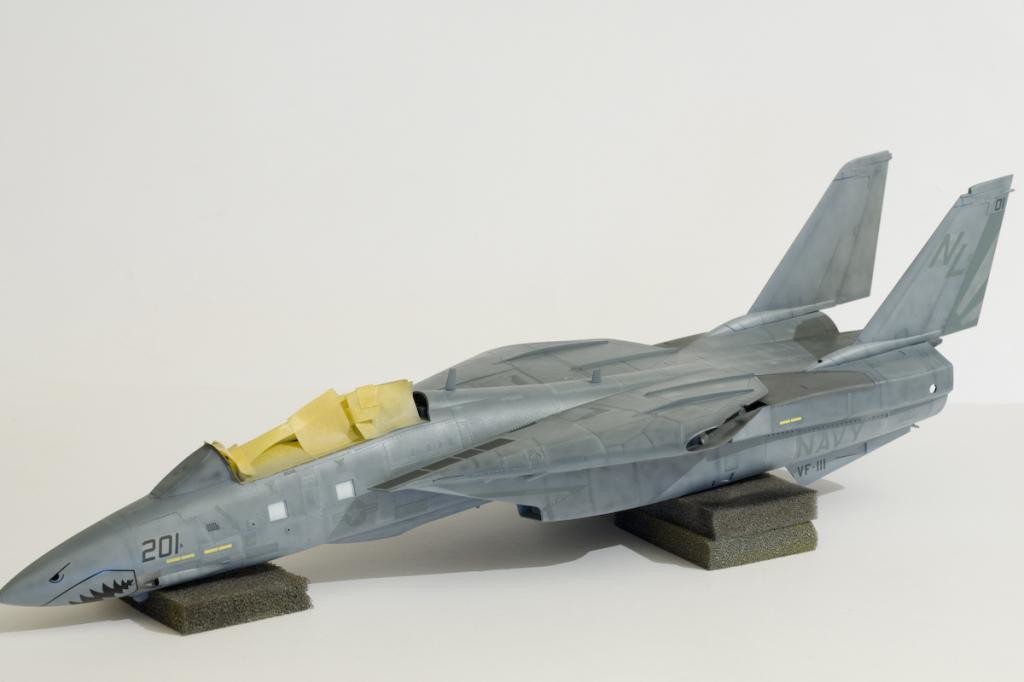
Apart from these fixes, I used an Aires cockpit set, Aires exhaust nozzles and the Wheeliant wheels set. Fitting the cockpit resulted in the usual sanding mayhem, but it's worth it. The nozzles, on the other hand, are more or less a drop fit.
-


Painting
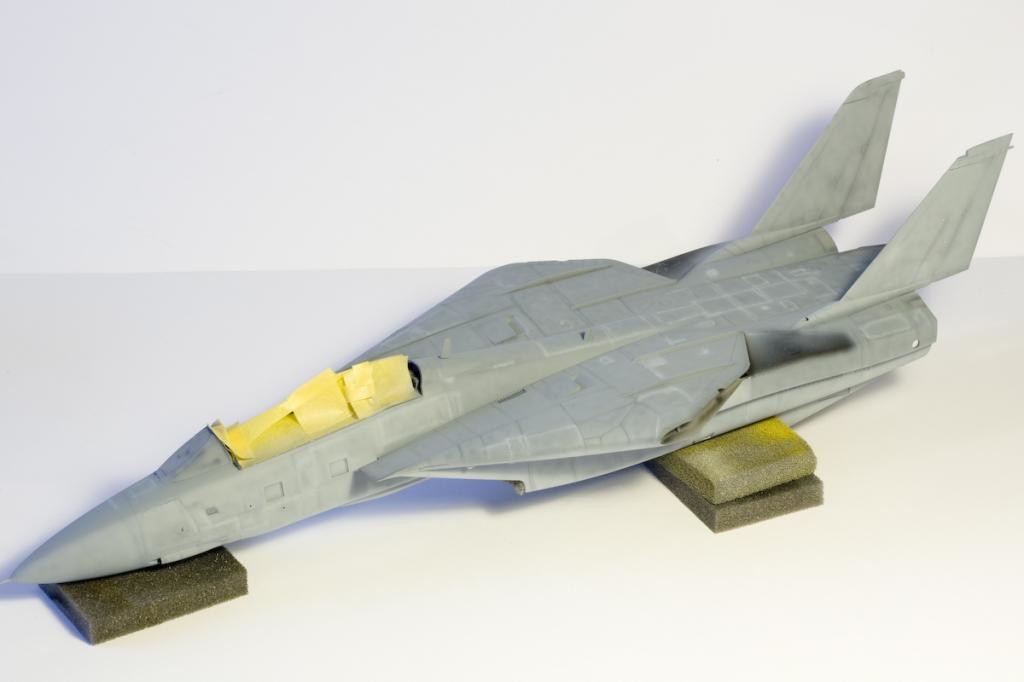
I have to admit, I am a s****r for the US Navy's Tactical Paint Scheme (TPS), therefore I spent quite some time researching colours and testing various manufacturers' paints. Having used Gunze paints for my plane builds forever, I still wasn't too impressed with the Gunze Greys (H307, H308 and H337 for FS36320, 36375 and 35237). These colours seem to be too dark and have a weird purple hue to them when compared to a neutral grey card. As TPS doesn't show too much contrast between paint and markings, these deviations in tone can be rather problematic when applying your decals later on, leading to markings literally disappearing into the paintwork. Ask me how I know…
After testing a couple of different brands I settled on the Lifecolor range - which can be very tricky to get out of your airbrush. Some experimenting later, I finally have it worked out for me. The trick is to thin them with Vallejo Airbrush Cleaner and to keep your air pressure down.
So, after a primer coat of Tamiya XF-19 and some very random preshading, the Lifecolor paints went on without a glitch.
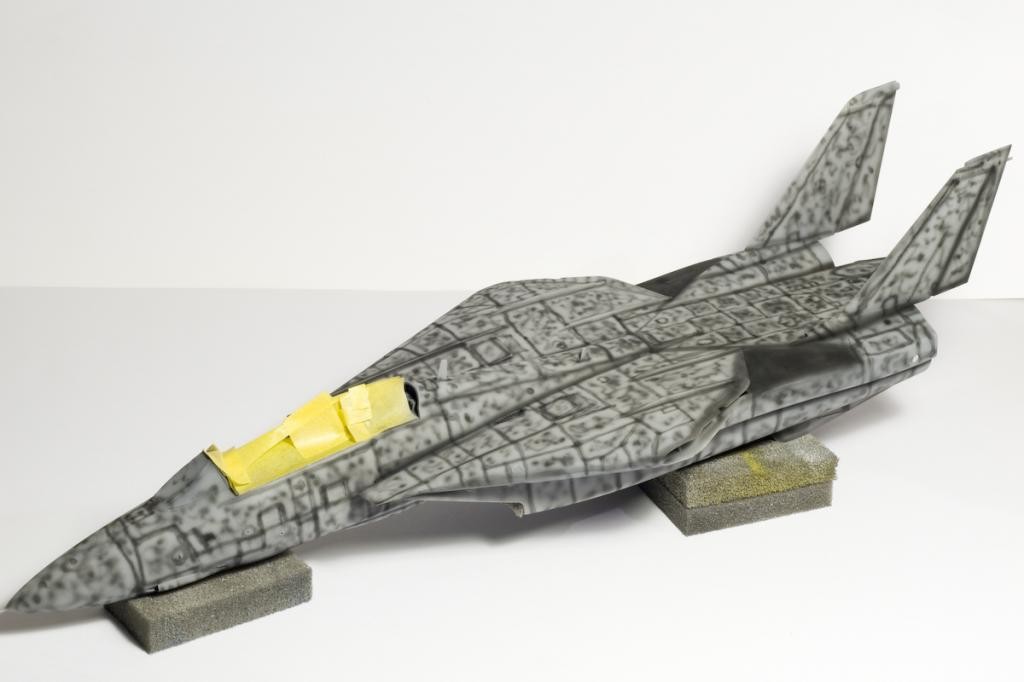
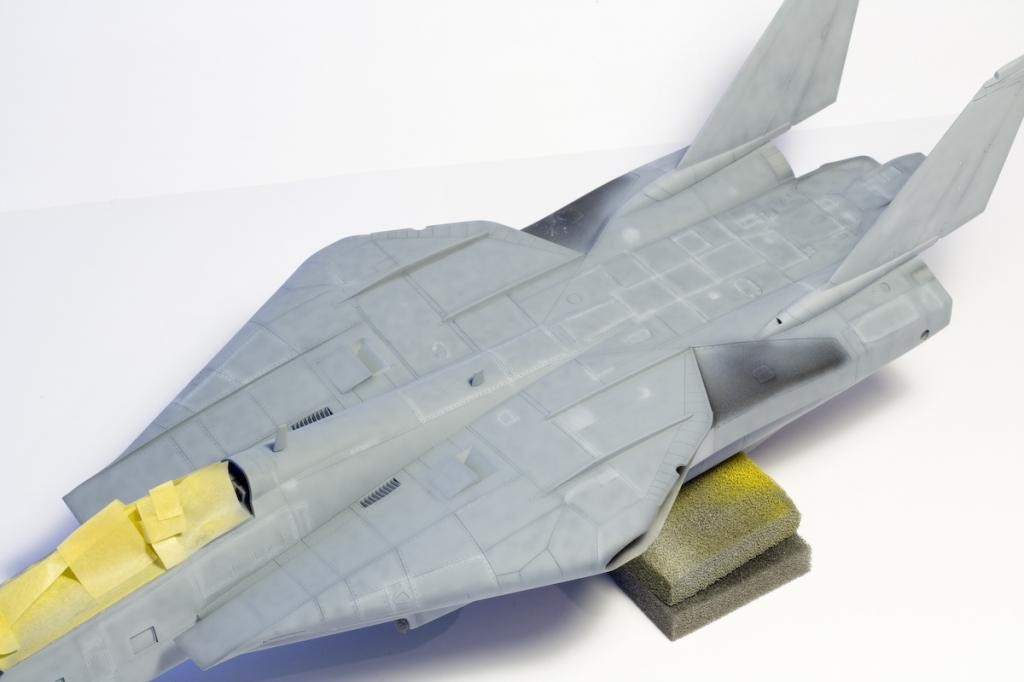
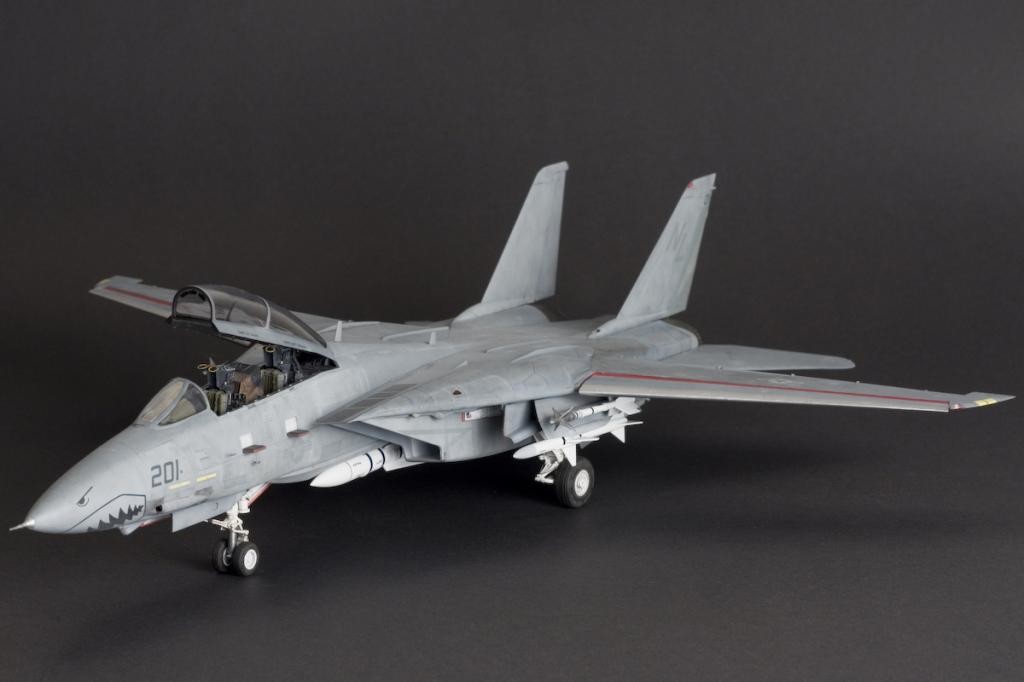
The most fun part with modern Navy planes is recreating the paint touch-ups and anti-corrosion work these birds undergo on a regular basis. To achieve that, I went over the whole airframe with highly diluted paint of a lighter shade, focusing on fasteners and panel lines of inspection hatches.
Decals
As I wanted to depict a bird from VF-111 ("The Sundowners"), I picked up a sheet from fcm Decals. Very nice, the decals are thin, the instructions complete. so everything went well - until I applied the last two decals. The large black "Sundowners" decals for the fins would first not adhere to the surface properly, then they wouldn't react to any setting solution, and in the end they decided to crumple up really bad and produce a general mess. No clue what caused that, my only idea would be the colour used for these decals - all the grey ones behaved very well, it was only these two buggers that just wouldn't work.
In the end, I had to use the markings for another aircraft from that sheet, which meant stripping and repainting the tail section and all the areas were the other markings specific to that plane had already been applied.
Finish
After the usual coat of clear gloss (Tamiya X-22), I initially wanted to apply some salt weathering. I actually did start on the horizontal stabs, but then changed my mind. This method simply doesn't cut it for me - not enough control over the final output, and too messy. Don't get me wrong, there are some amazing models on the net that have been weathered using this technique, it's just that I like to take my time and work slowly and deliberately. So back to my tried and tested method of oil filters and washes, various sizes of soft brushes and a couple of happy hours stippling away. By stippling the drying wash, reactivating it with small amounts of thinner, I found it easy to create that chuffed and beaten look so typical for Navy planes.

Thank you for assembly details.
Excellent job! you certainly got the TPS done to perfection.
A real beauty! You've got an excellent touch on the TPS scheme - so nicely rendered and weathered. Love it!
Nicely finished and presented, sir...an outstanding build.
Such an excellent result. I picked up the Tamiya one and reports of it are pretty good, however, I doubt I would be able to get the top finish with mine that you did with yours. Very finely done, sir.
Not knowing much about this subject (Top Gun is also one of my favourite films, but more for the car and motorcycle) I really enjoyed reading your article. You must be very pleased with the result, I guess this takes pride of place in your display cabinet.
Nicely done! Just the right amount of weathering.
🙂 ... Greetings ... 🙂 :
This article was so entertaining and so insightful that I read it more than twice.
The stages upon the construction as well as the photographs to depict thus is so well configured in a very short and direct way.
The final work shows your attention to details and the best part of it ... NO HEAVY PANEL MARKINGS ... the weathering is so well done and the cockpit is just pure joy to see . It is so nice and good to see one painted this way.
Thank you for sharing the images, very good modeling Boris .
Good job man! Having worked around these aircraft and many others in the tactical grey scheme I can say you did an excellent job weathering. The Tactical scheme definitely weathers heavily, and touch up paint rarely matches exactly, but many folks just plain over do it. You did a great job. Nicely done!
Great work Boris.
Hello Boris! Great job!
Excellent result, congrats!
That's an amazing build! A great article as well!
Great work, Boris. Very well documented description of what you did here. BTW, if you're not adverse to enamels, Humbrol's grays are pretty good for TPS planes. #127, #128, #145, etc...
Thanks everyone! Rob, means a lot to me hearing this from someone who has been around the real thing:)
John, thank you for pointing out the Humbrols! Sadly I am a strict Acrylics & Laquer guy - I simply love the fast drying time!
Great work, Boris! Your build article is excellent, and the finish and weathering on your Tomcat are just superb! I have this kit in my stash, and hope mine turns out half as nicely as yours.
Very nicely built. Clean with realistic surface look. Very decent work with salt - just enough to take my breath away. 🙂
My jaw has droped...very nice and "clean " work...so jealous 🙂 !