Review: Thunder Model 1/35 Scammell Pioneer Tank Transporter – Build Review, Part 2
This article is part of a series:
The Tractor Unit
As usual, there are a couple of subassemblies which need to be built up and painted before proceeding any further – in our case this will be the engine, the cab interior, the winch, and the trailer mount.
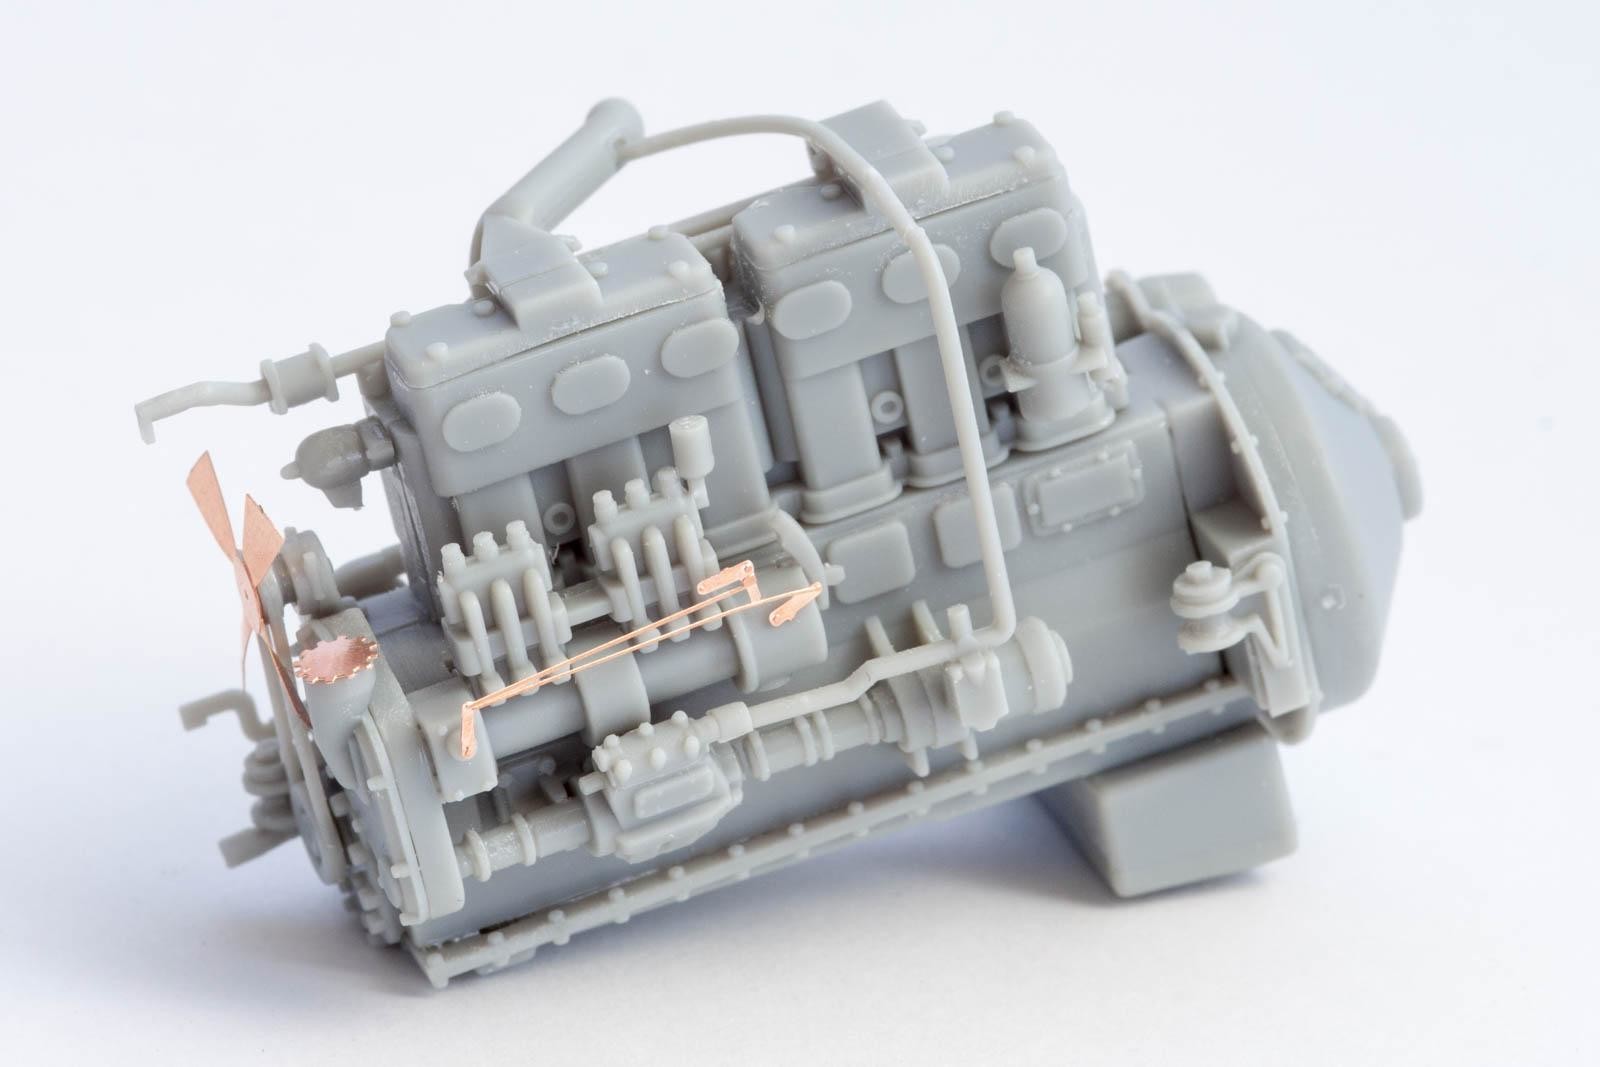
Engine assembly is straight forward with some 30 parts including PE parts. The only issue is the order in which the instructions tell you to put everything together. Attaching the radiator to the engine by means of two tiny pipes does not make sense, as it is way safer to attach the radiator to the chassis later on and mount the engine separately. I would also suggest to attach the air filter pipe (part B31) now, as this will give you a way better idea of where the additional piping (D14) should go.
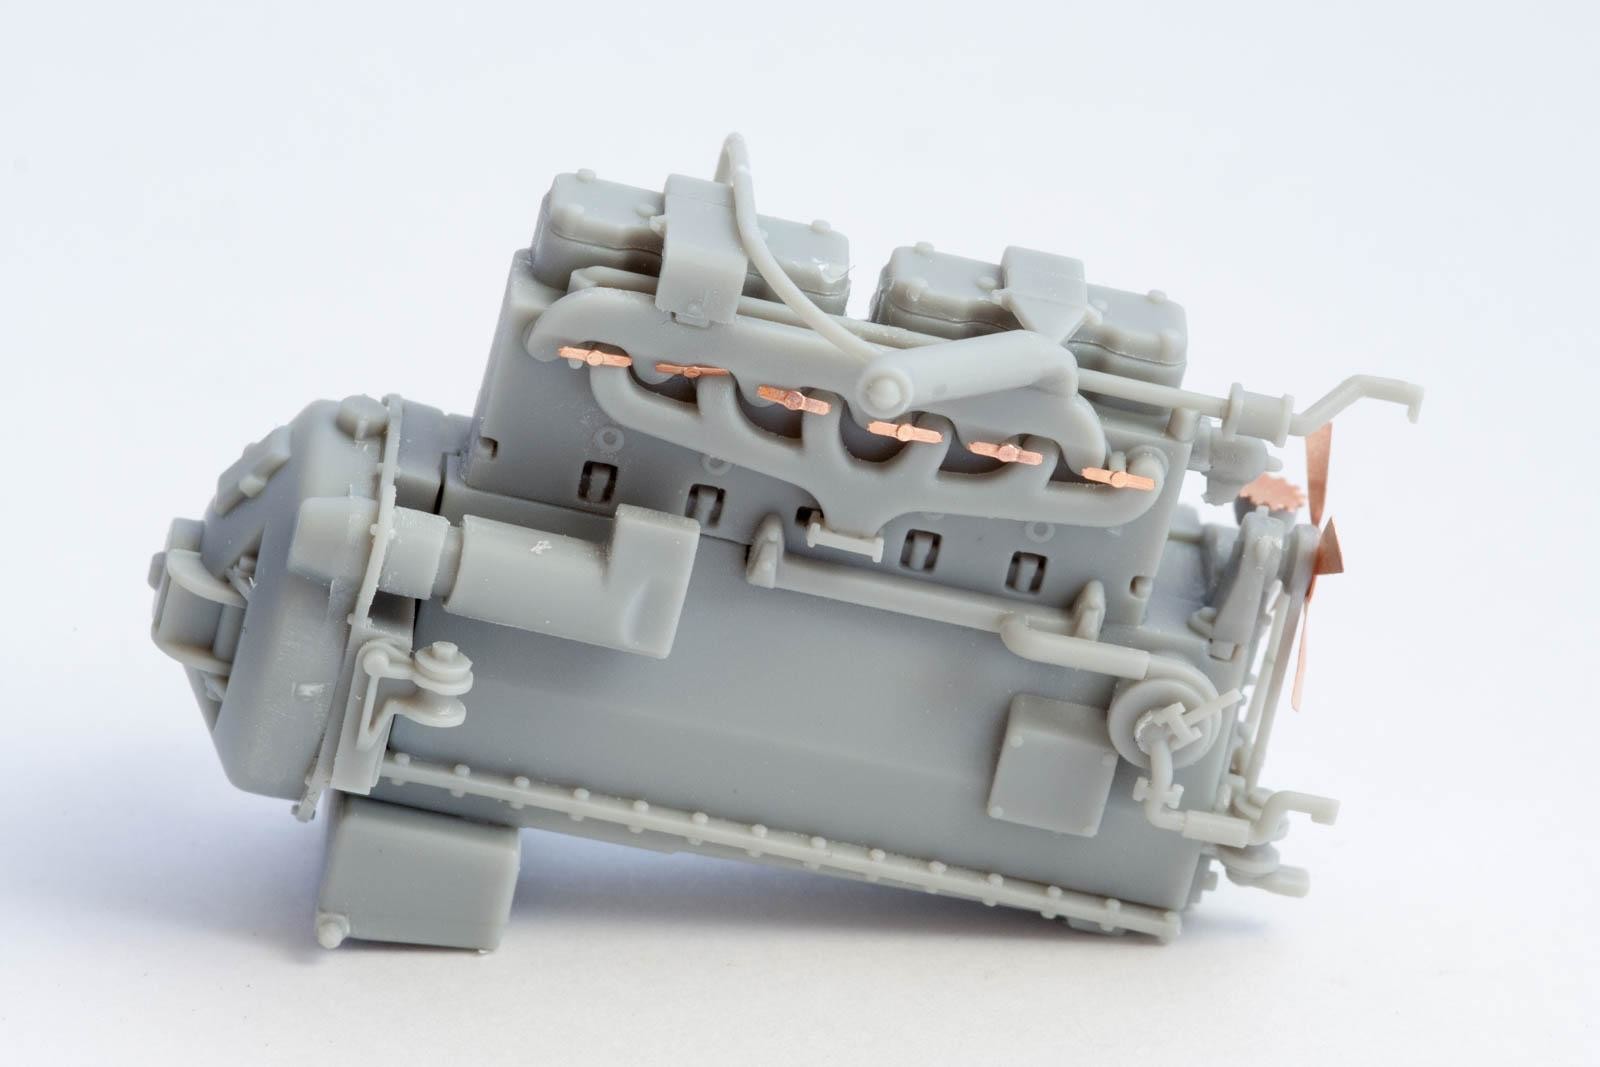
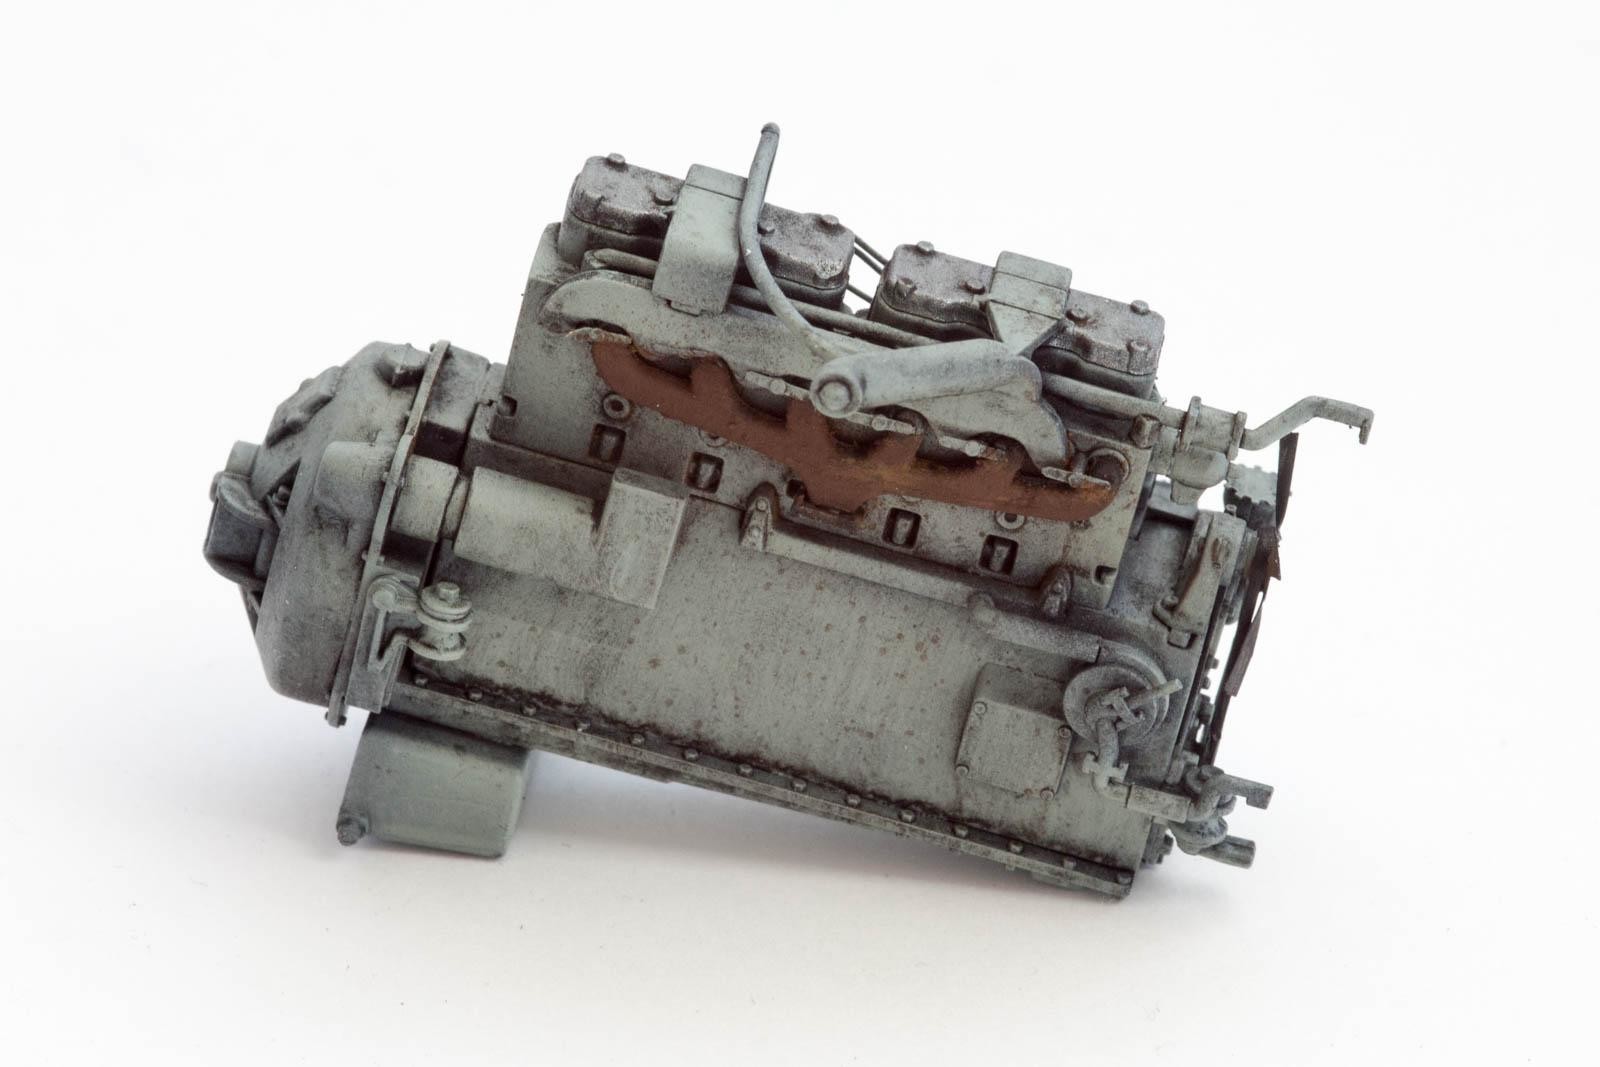
Painting the engine was done with a green/gray mix and various Vallejo metallic colors, weathered with oils. The exhaust system was treated with pigments. As the instructions' paint guide is a bit meager, your best bet will be searching the internet for images of the real thing.
A word of caution: Thunder Model stated a couple of days ago that they had an issue with the design of the radiator. Basically the wrong CAD file was used for creating the molds. They are in the process of molding a correct replacement part and will provide a means by which to order it on their website.
Le Chassis.
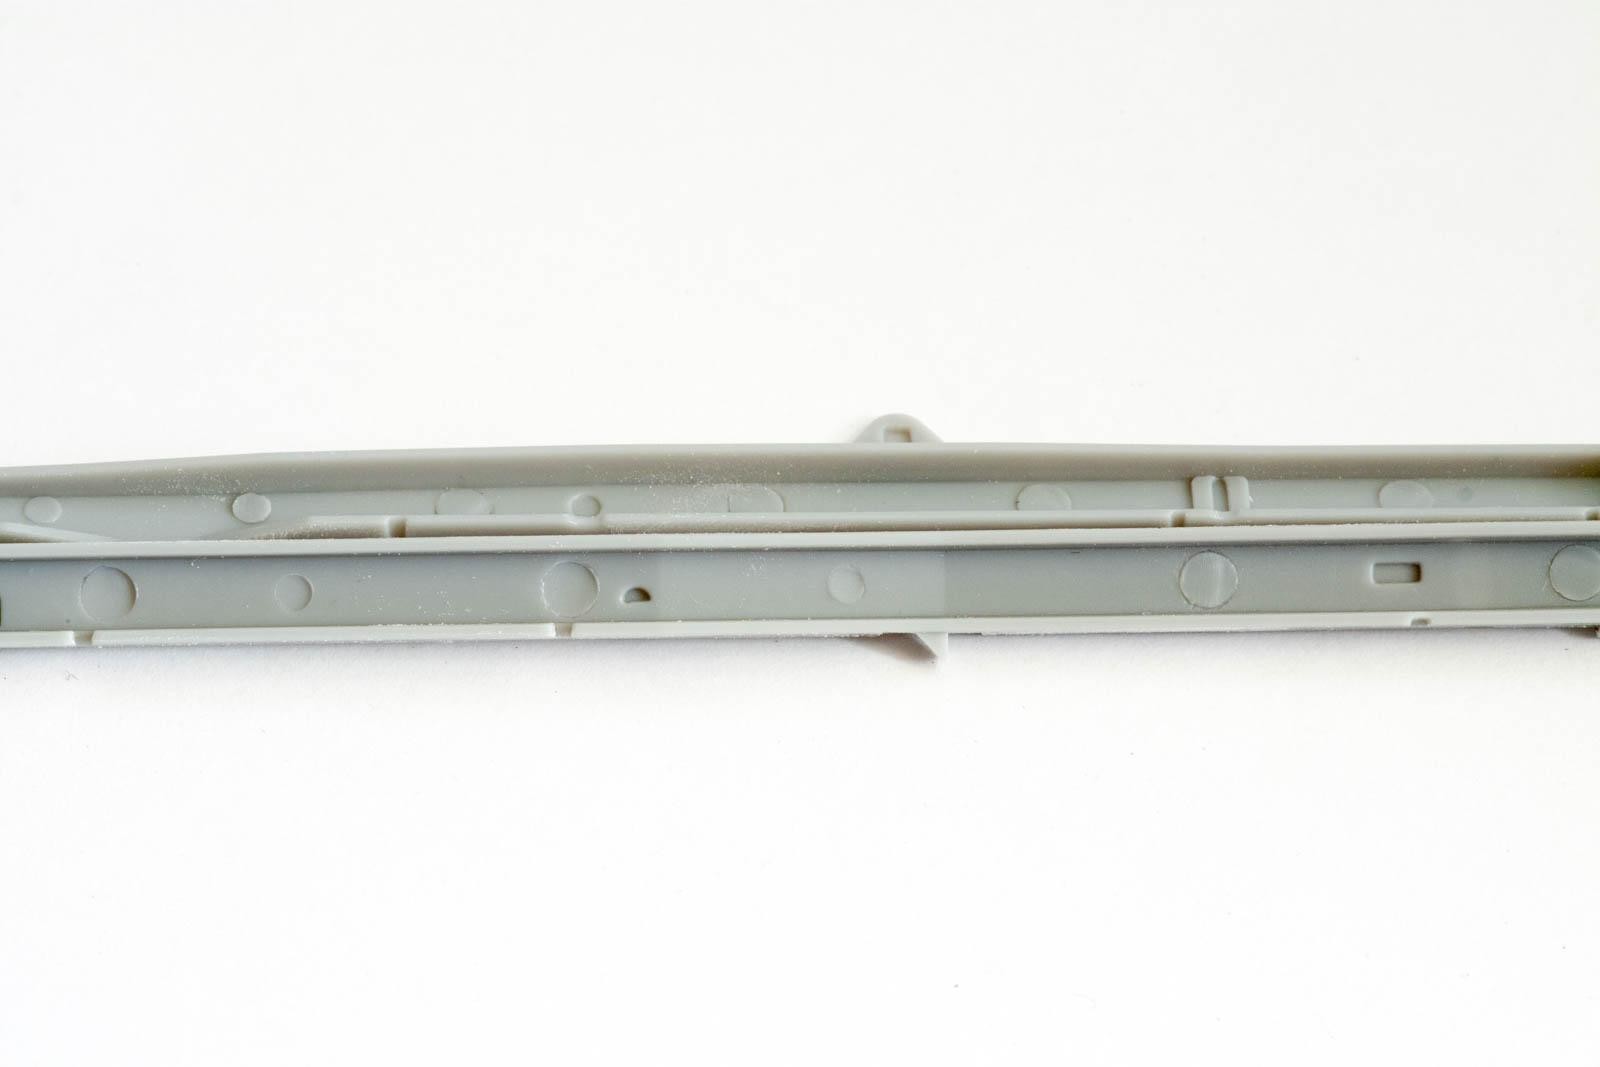
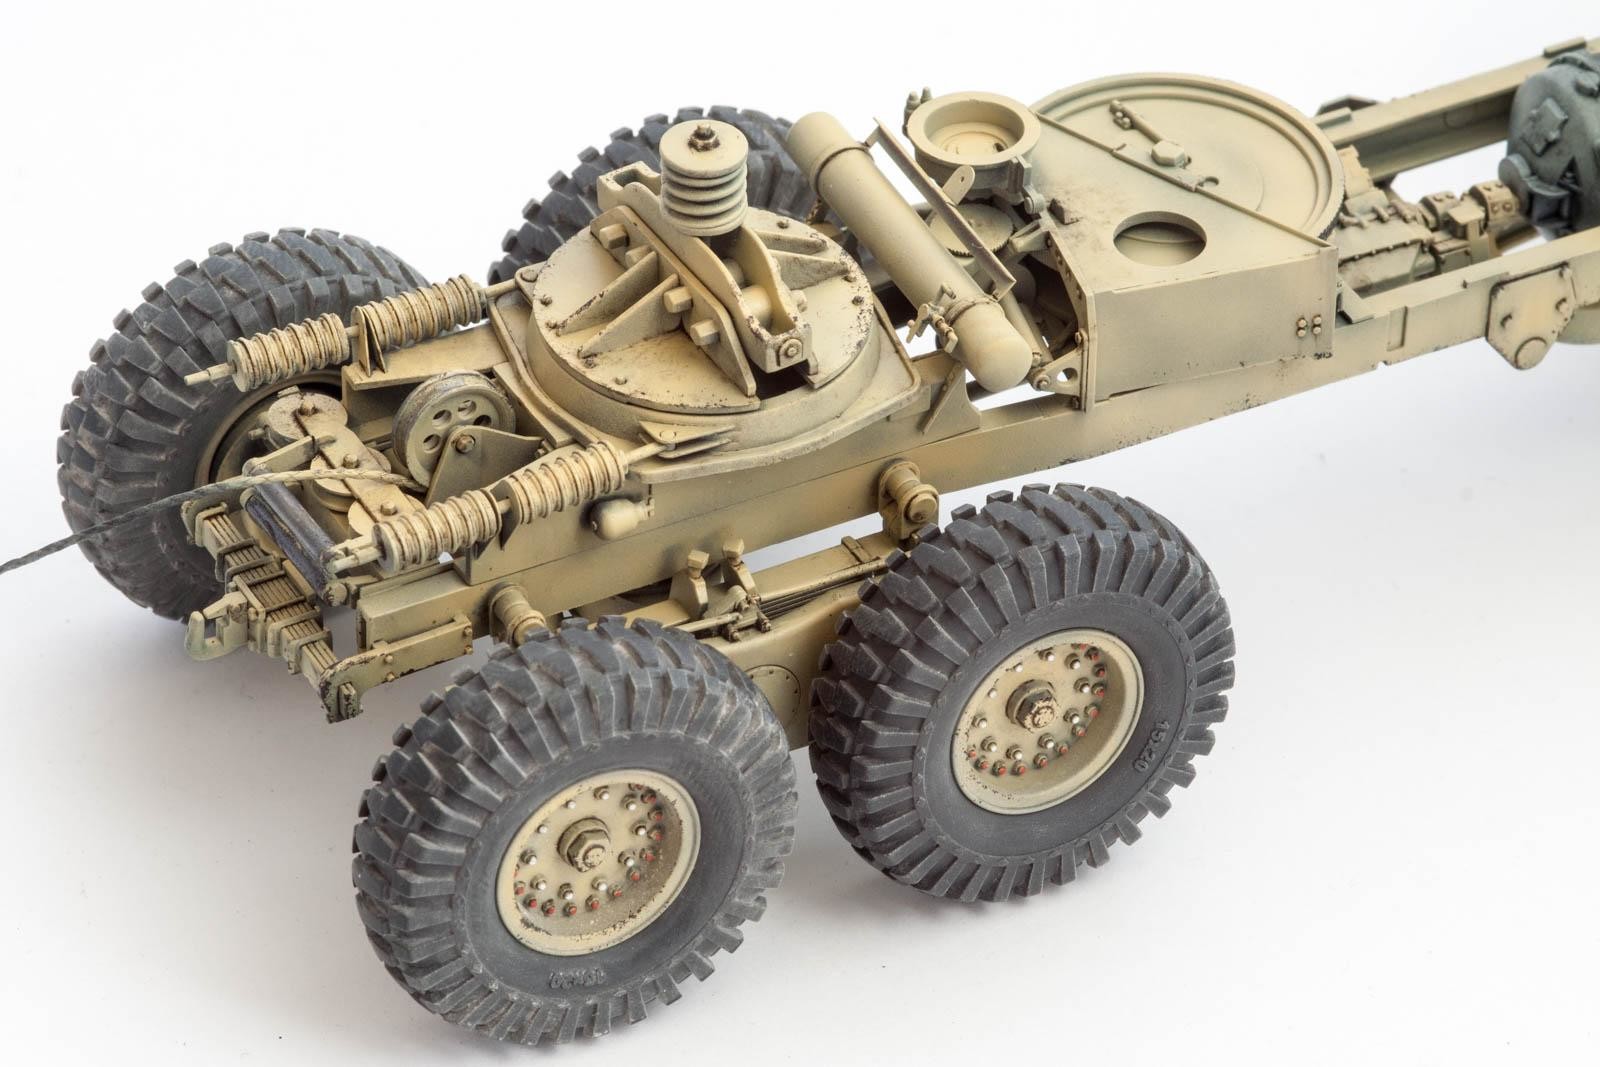
Moving on to the frame you will first have to decide what to do with all the ejection marks. Most of them are either raised or very shallow, so a thin sanding stick will make short work of them.
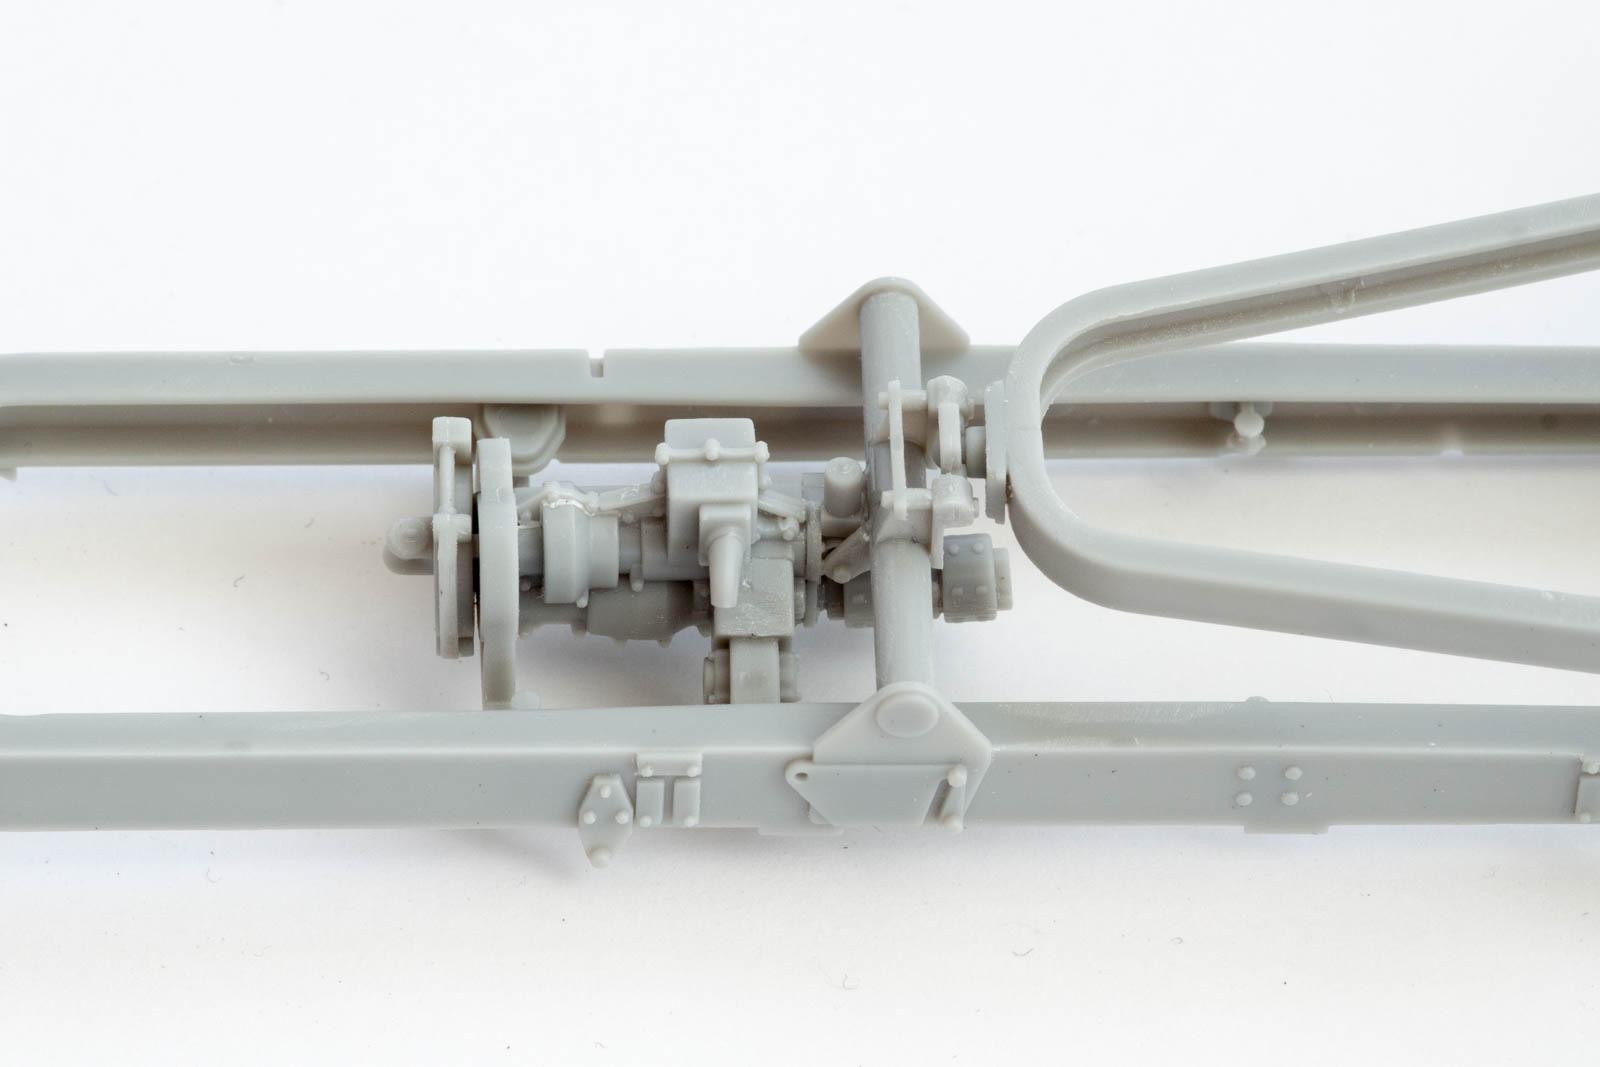
The front axle allows you to pose the wheels at an angle; it is, however, not moveable, so you will need to decide on the angle now and glue everything in place. While doing that I attached the wheels temporarily to give me a better idea of where things were headed.
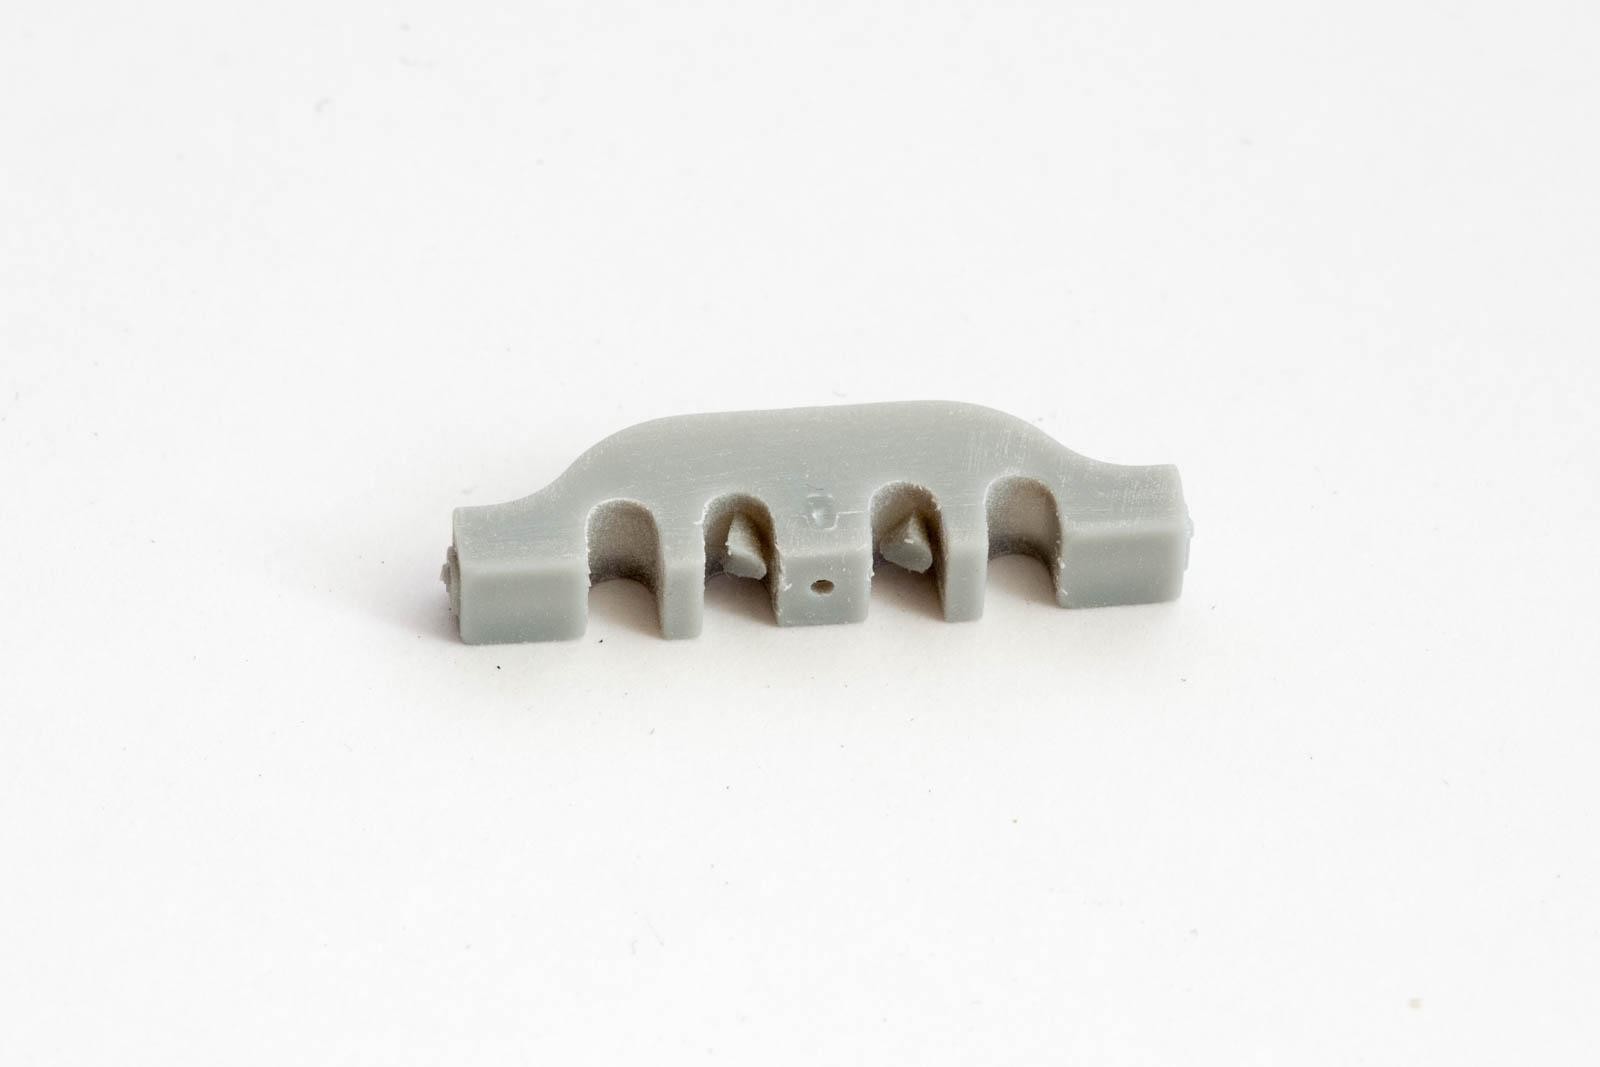
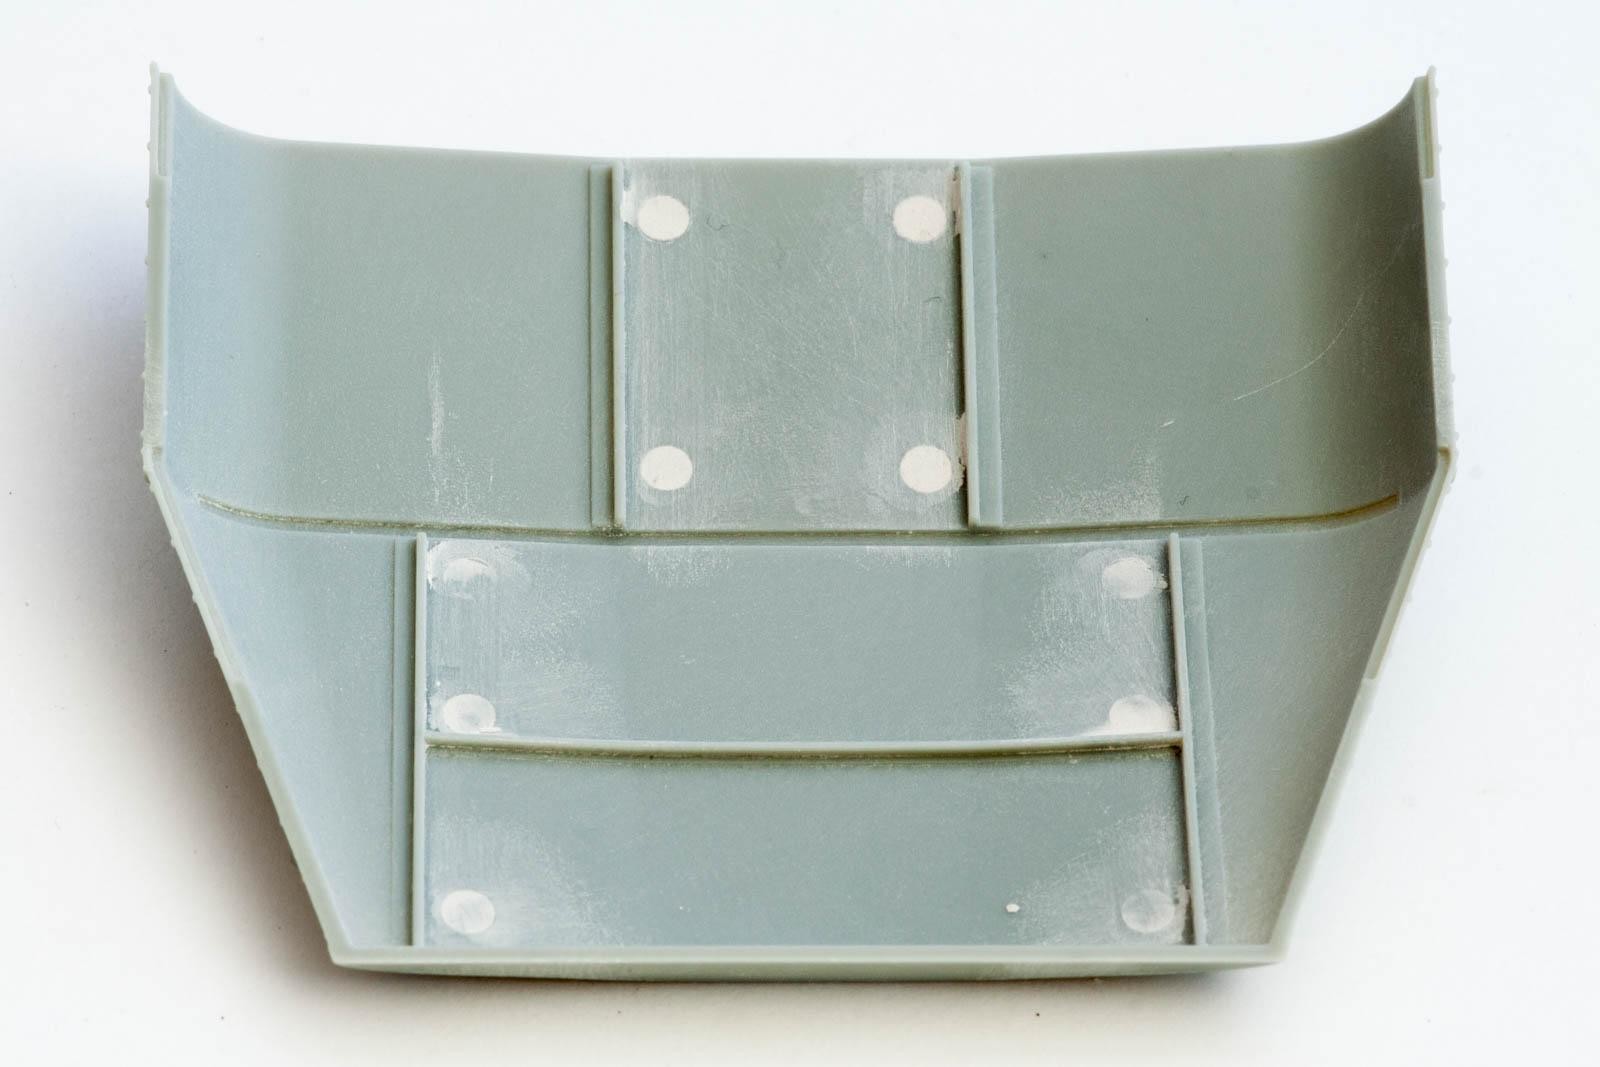
Building the frame is a bit time consuming due to the amount of small parts and multi-part assemblies that need to be filled and sanded.

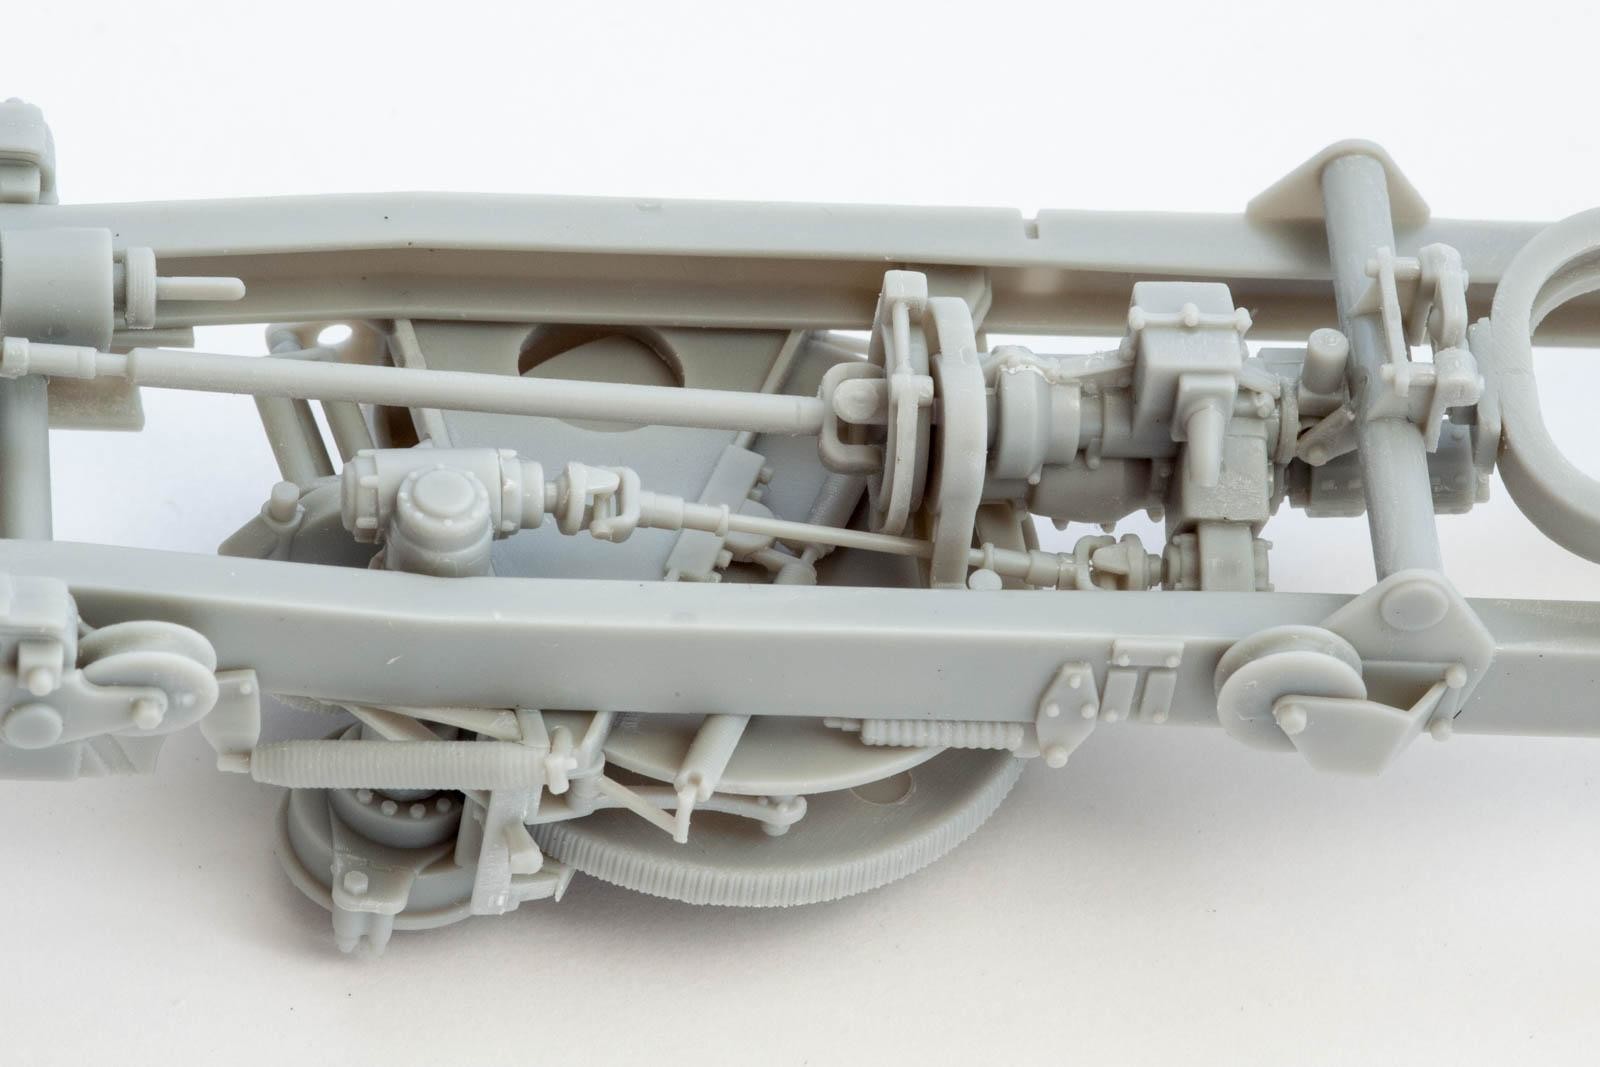
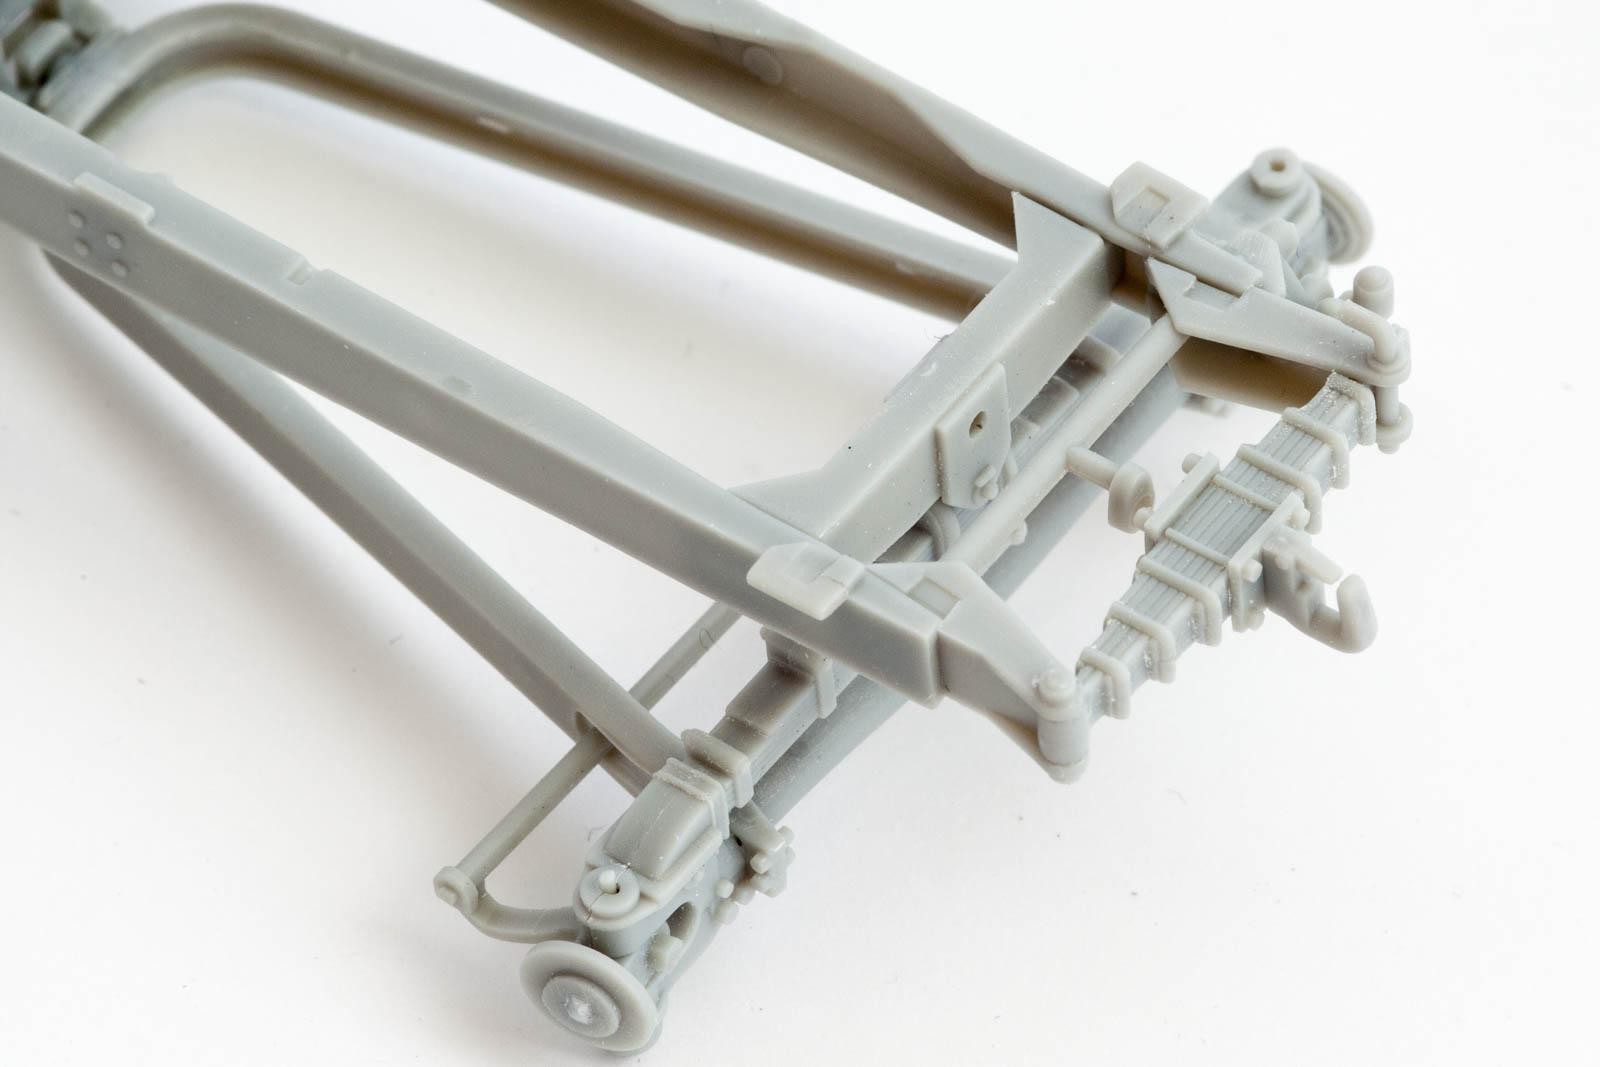
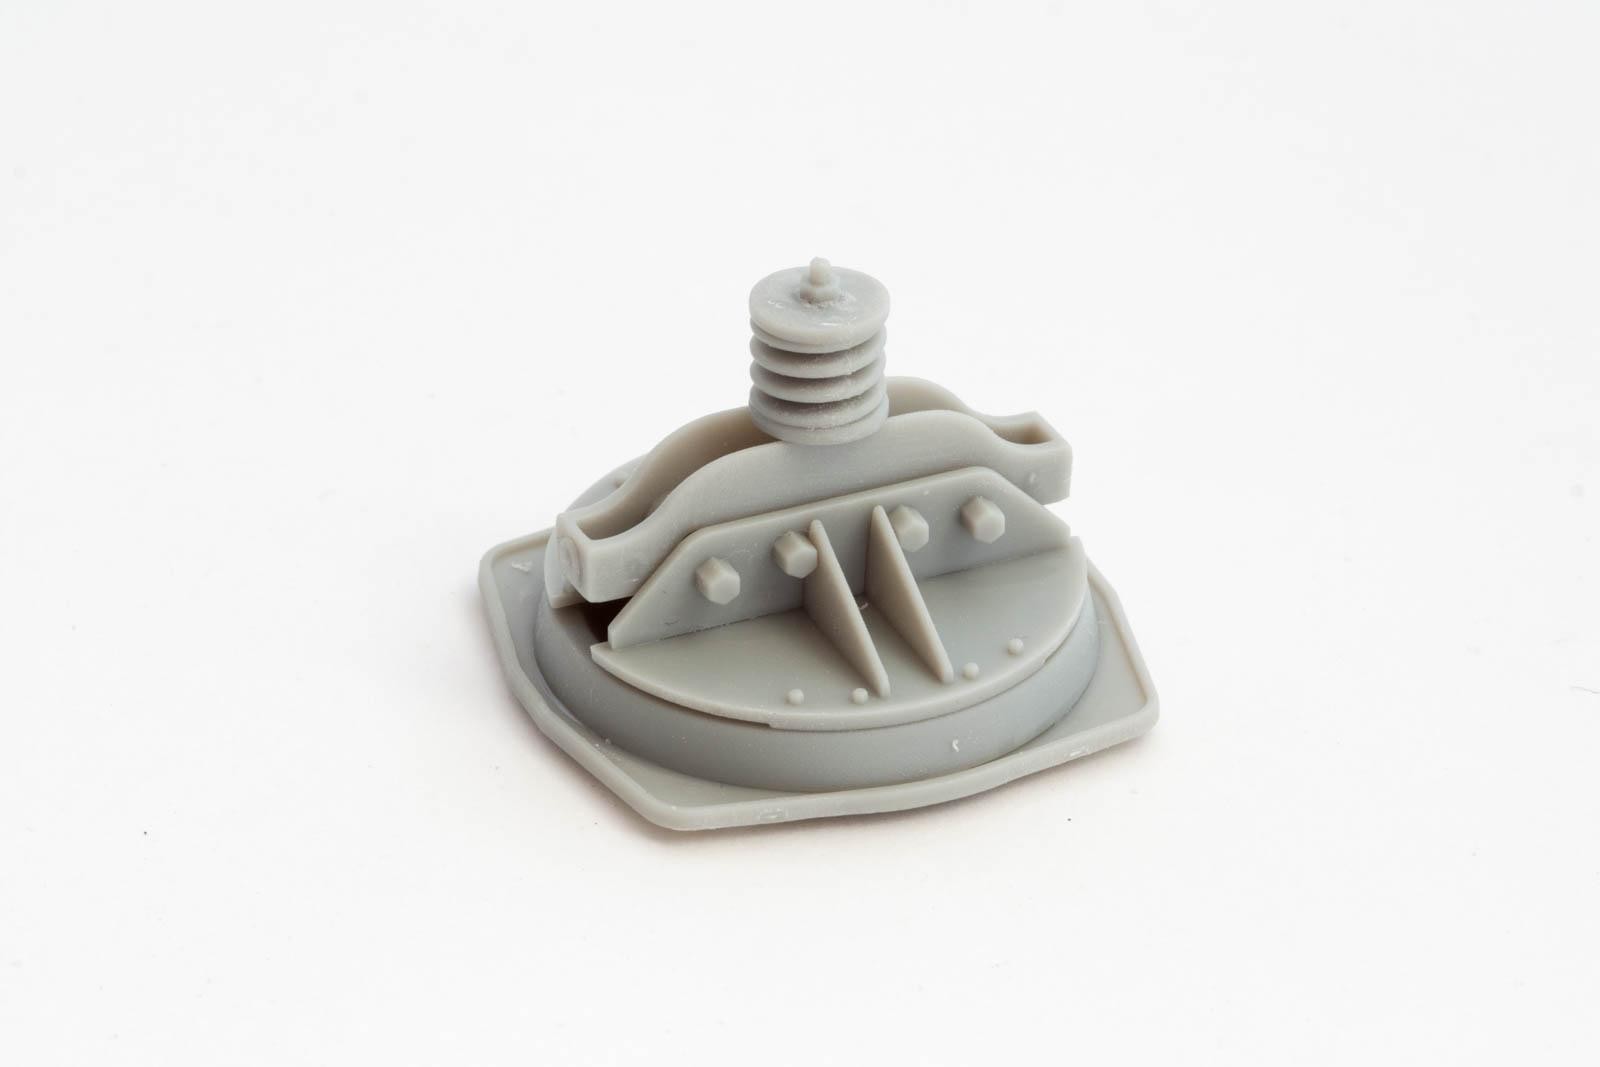
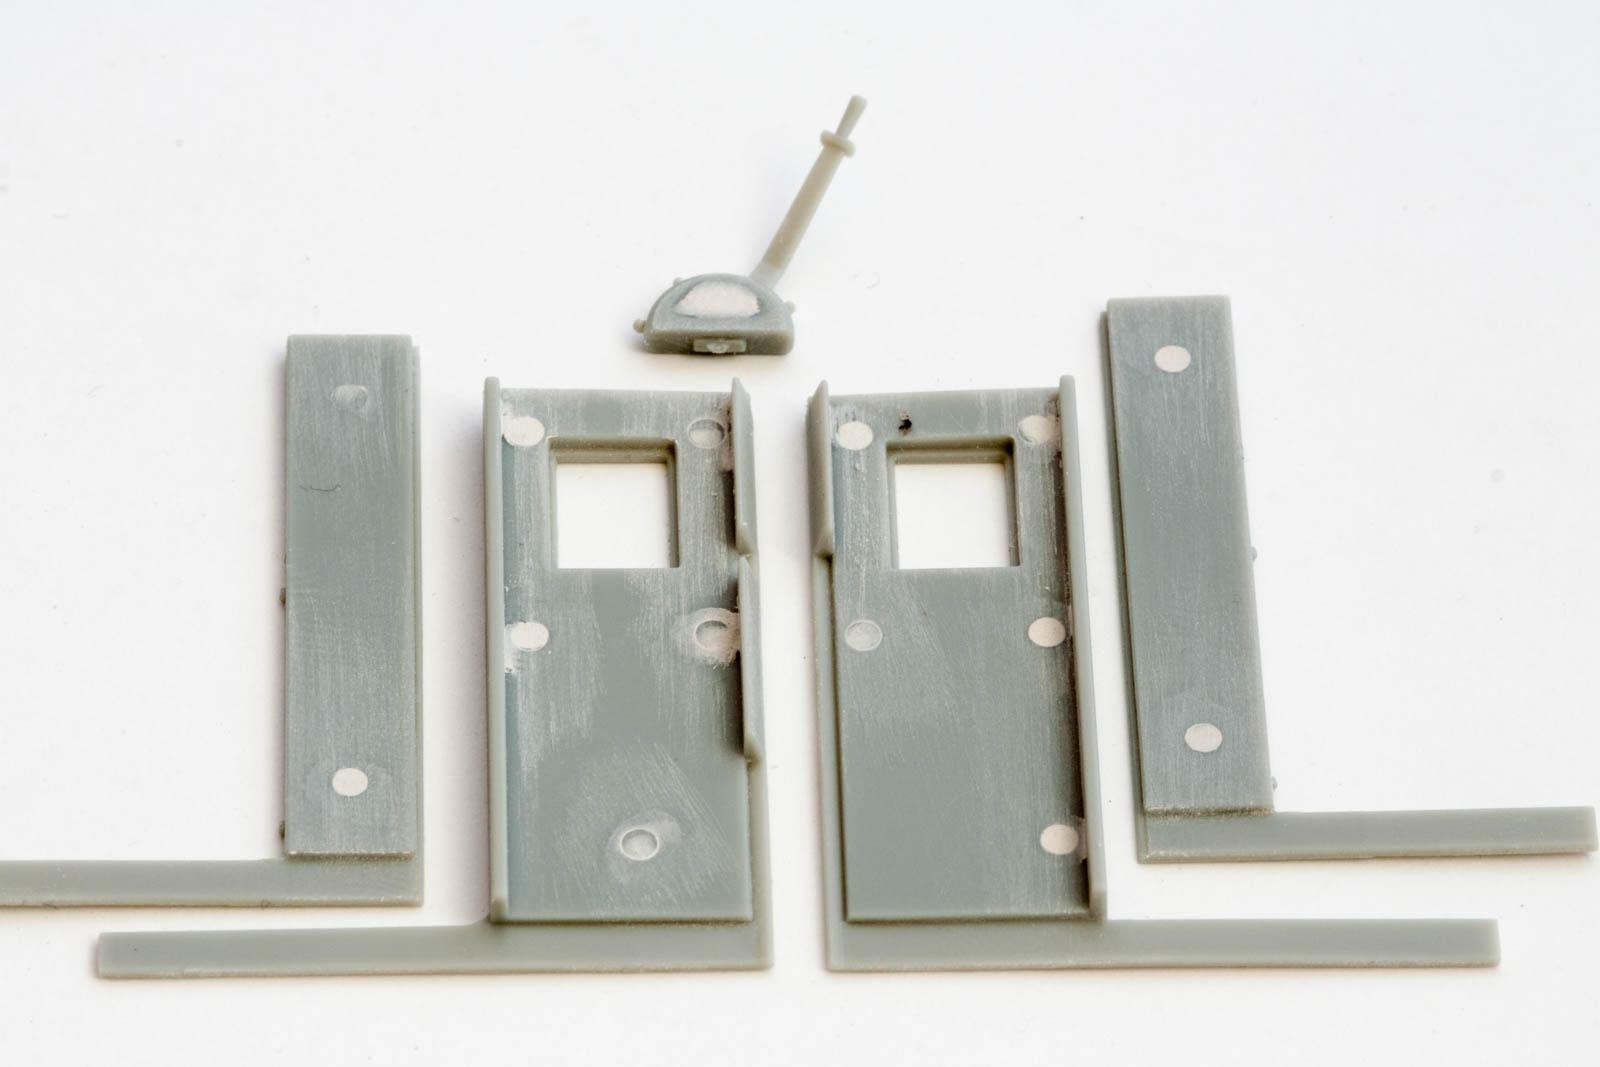
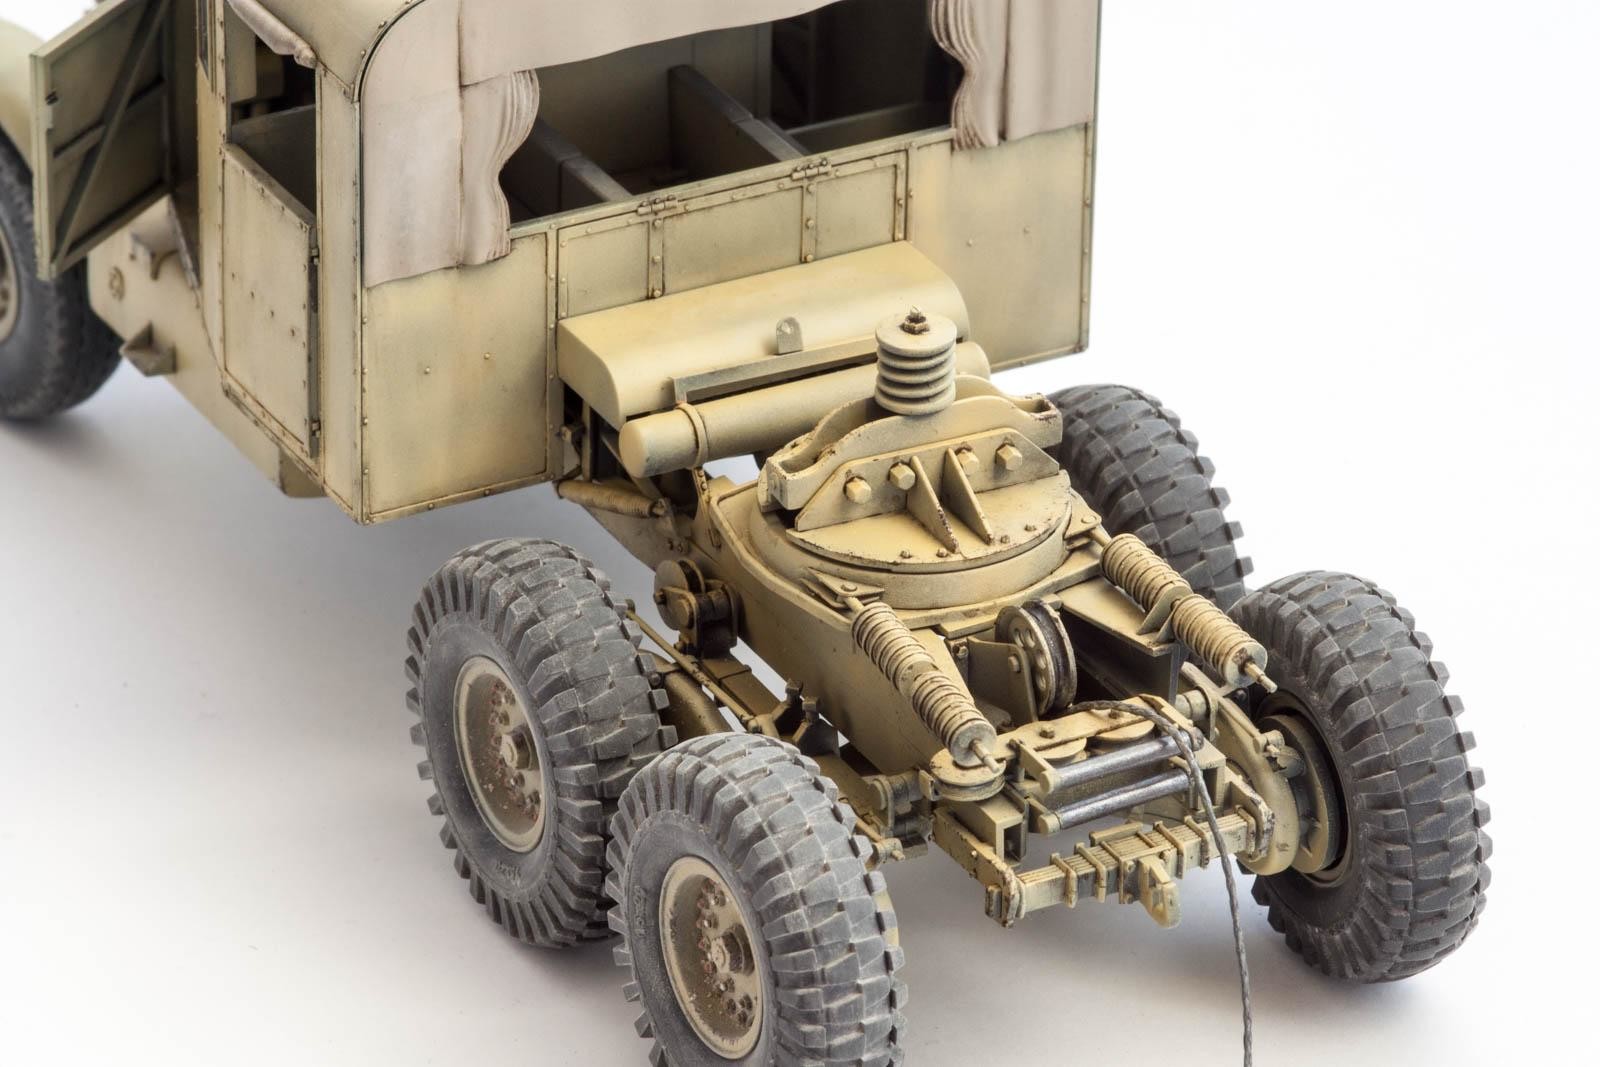
The trailer mount and the winch are beautifully detailed and go together fairly easily. The only thing you will have to look out for are these weird ejection pin “towers”, some of them seriously affecting fit if not removed.

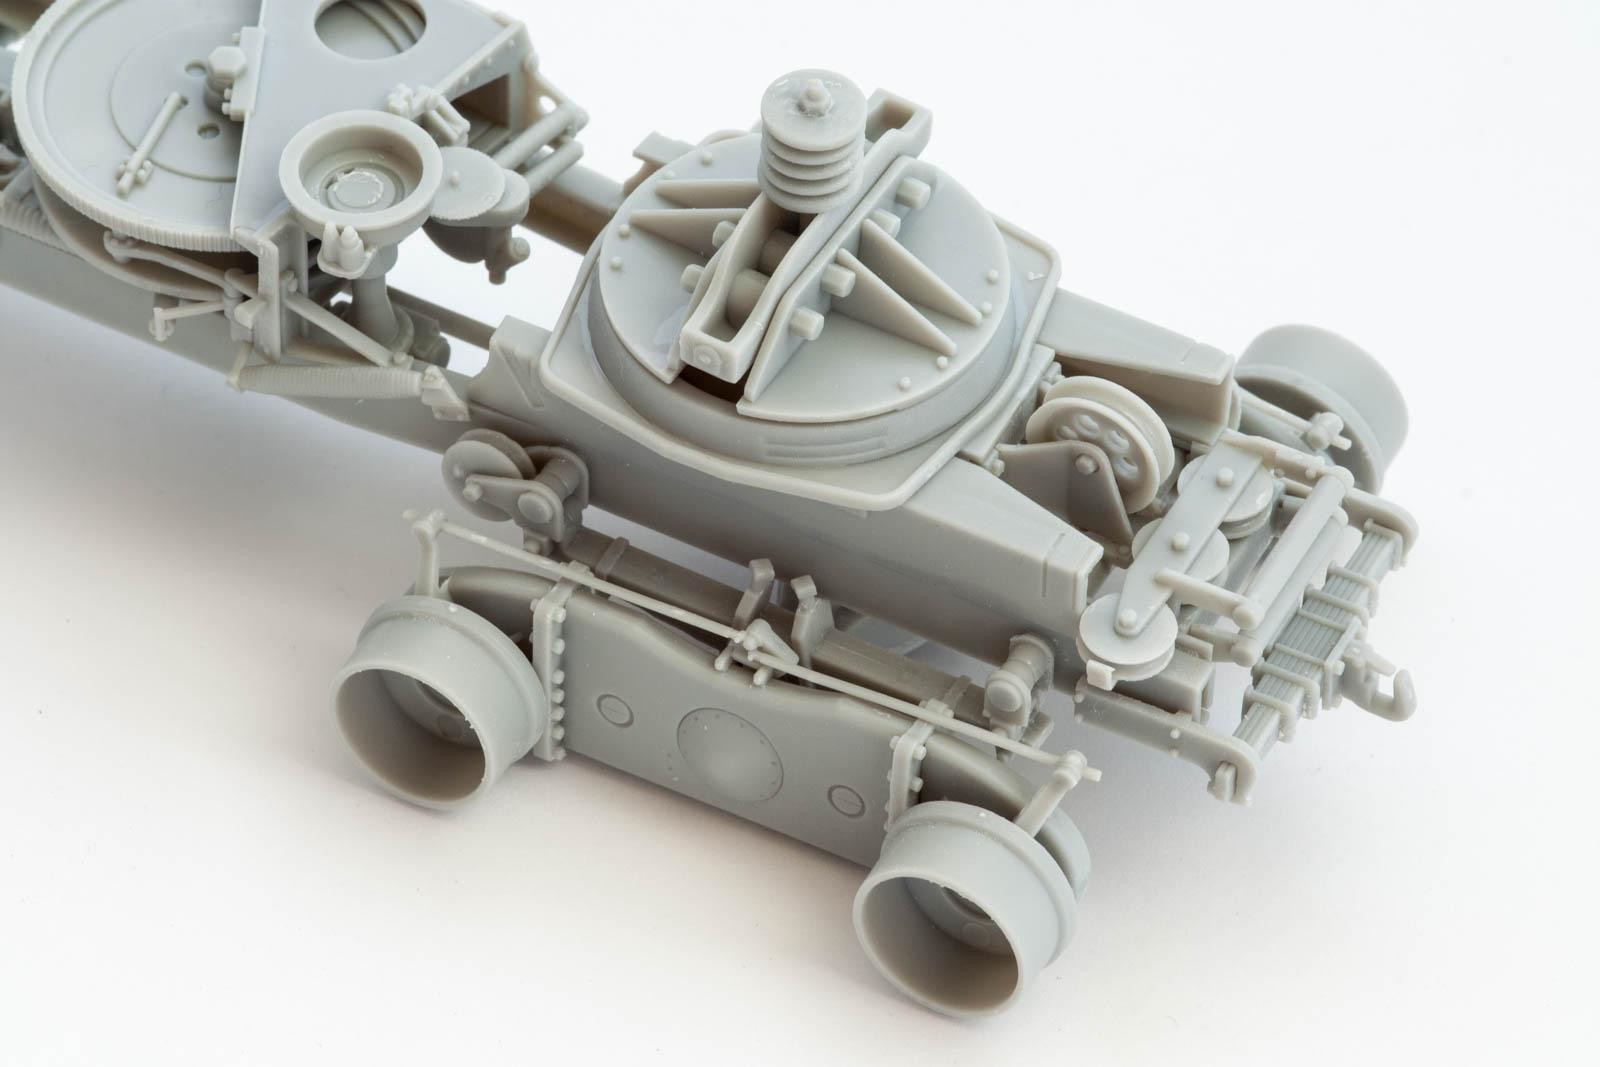
Before installing these subassemblies I gave the chassis a quick coat of Tamiya Flat Black – getting to all the hidden spots may be difficult once winch and mount are in place.

Cab, anyone?
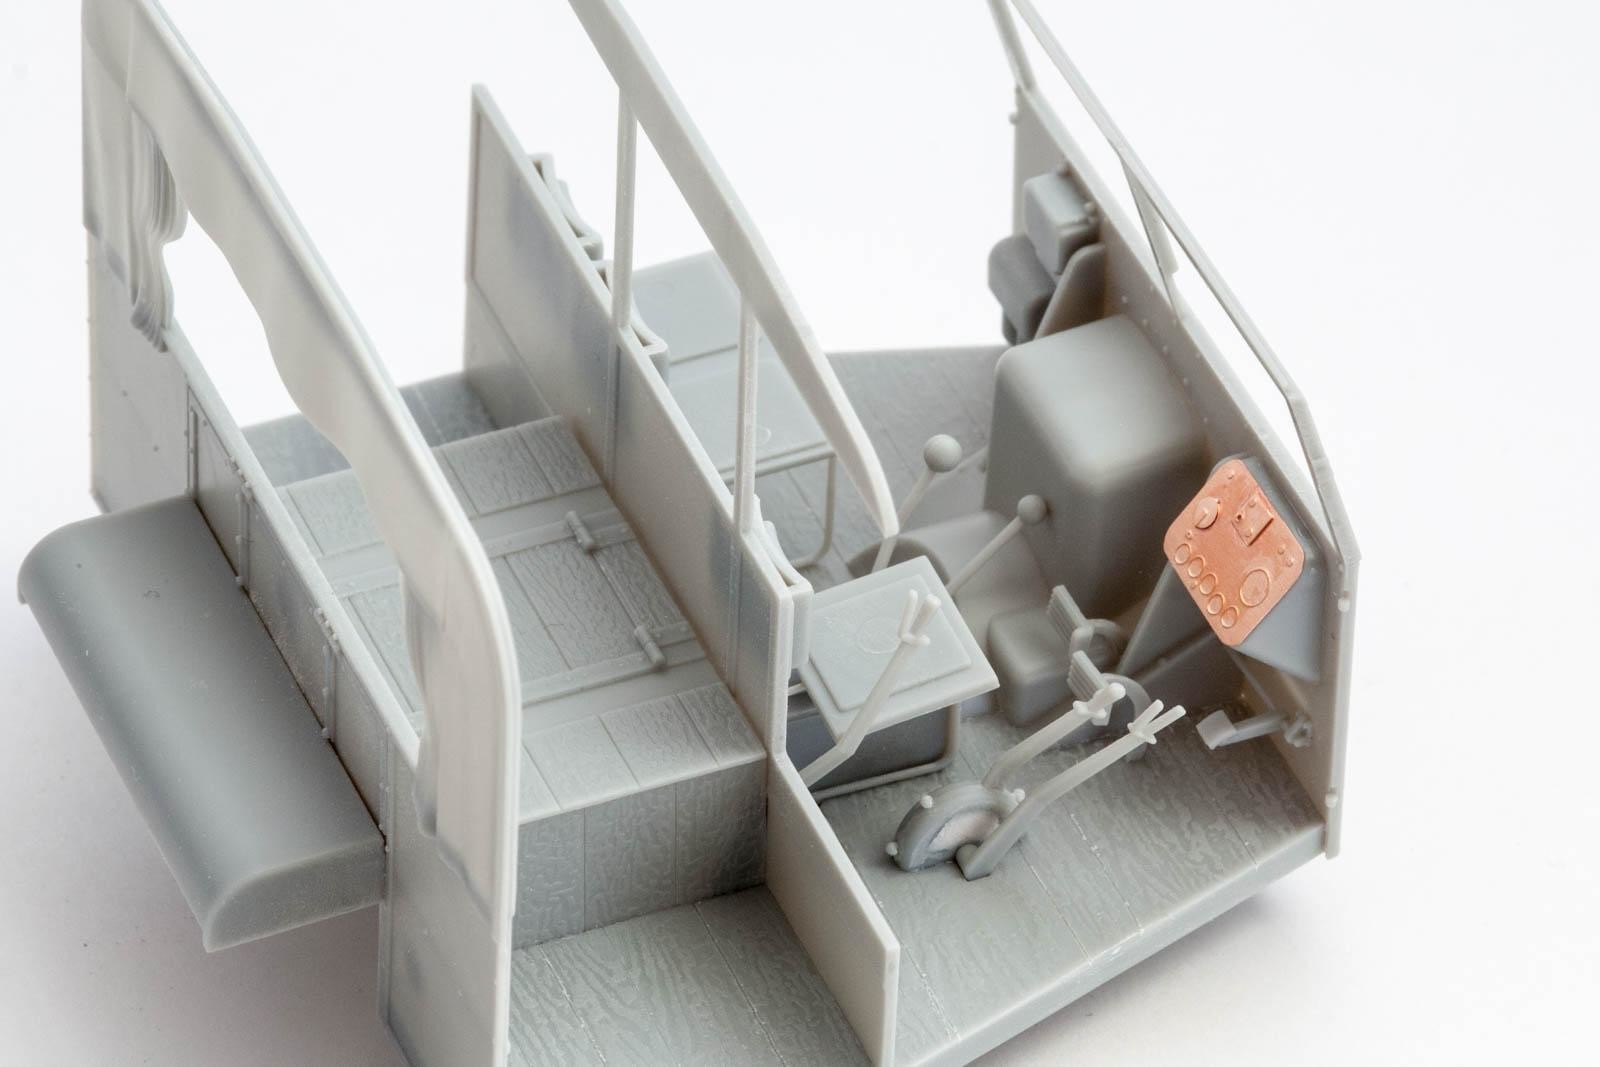
After getting the task of filling all the ejector pin marks out of the way, I could start on building the interior.
As mentioned before, the wood structure of the cab's floor looks strange. I smoothed everything down with coarse steel wool and rescribed the lines between the individual wood panels. The rest goes together very quickly, but care has to be taken when removing the shift levers et al. from the sprues, as these parts are very fine and prone to breakage.

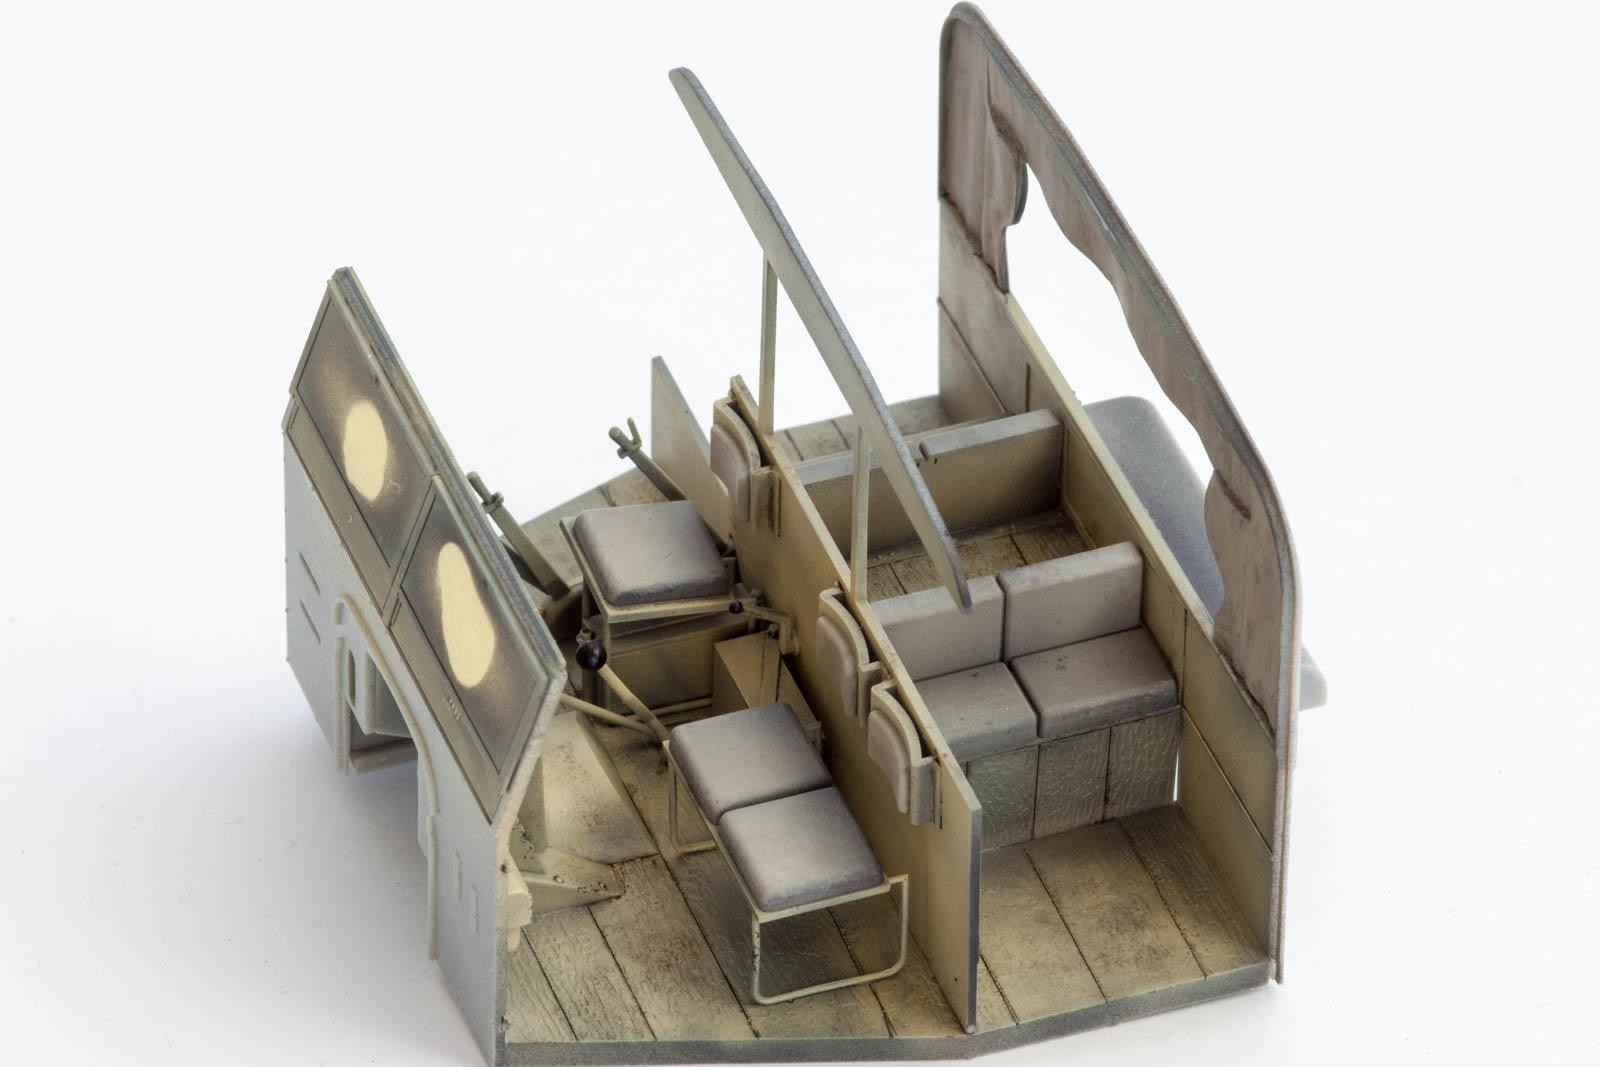
After a basecoat of Flat Black, the interior was airbrushed with AK Real Colors “Light Stone”. As these paints dry totally flat, I had to apply some Tamiya Clear Gloss before the usual procedure of washes and gentle chipping.
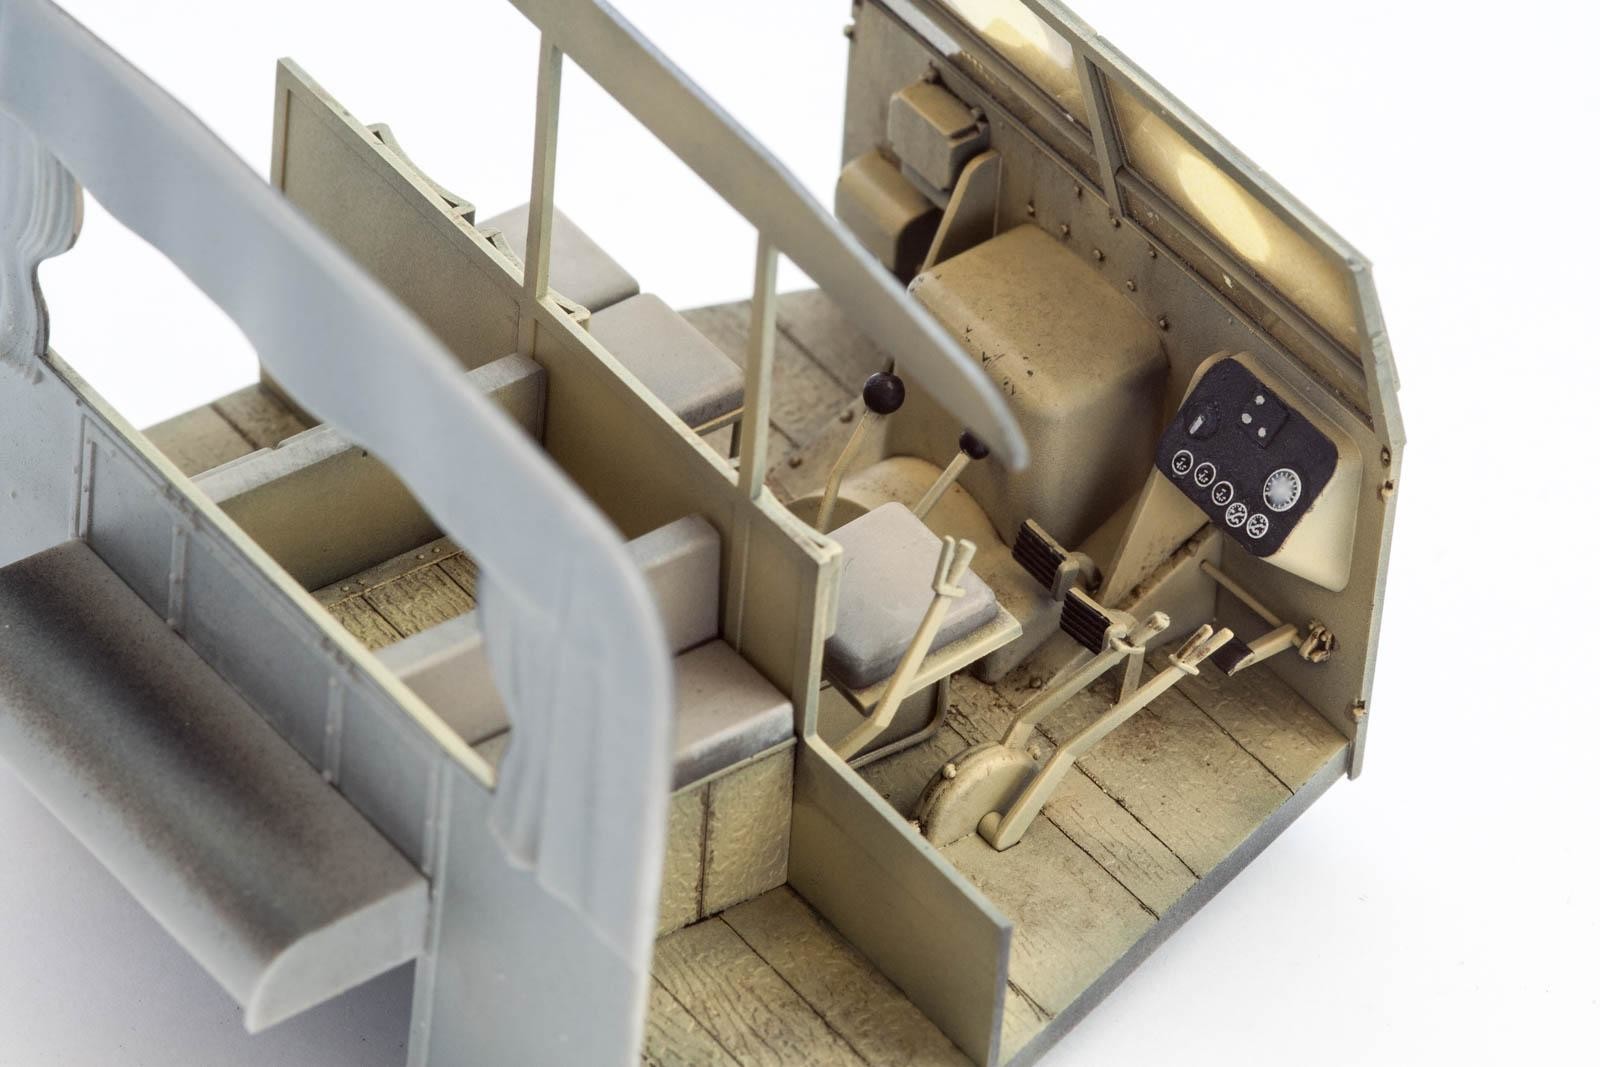
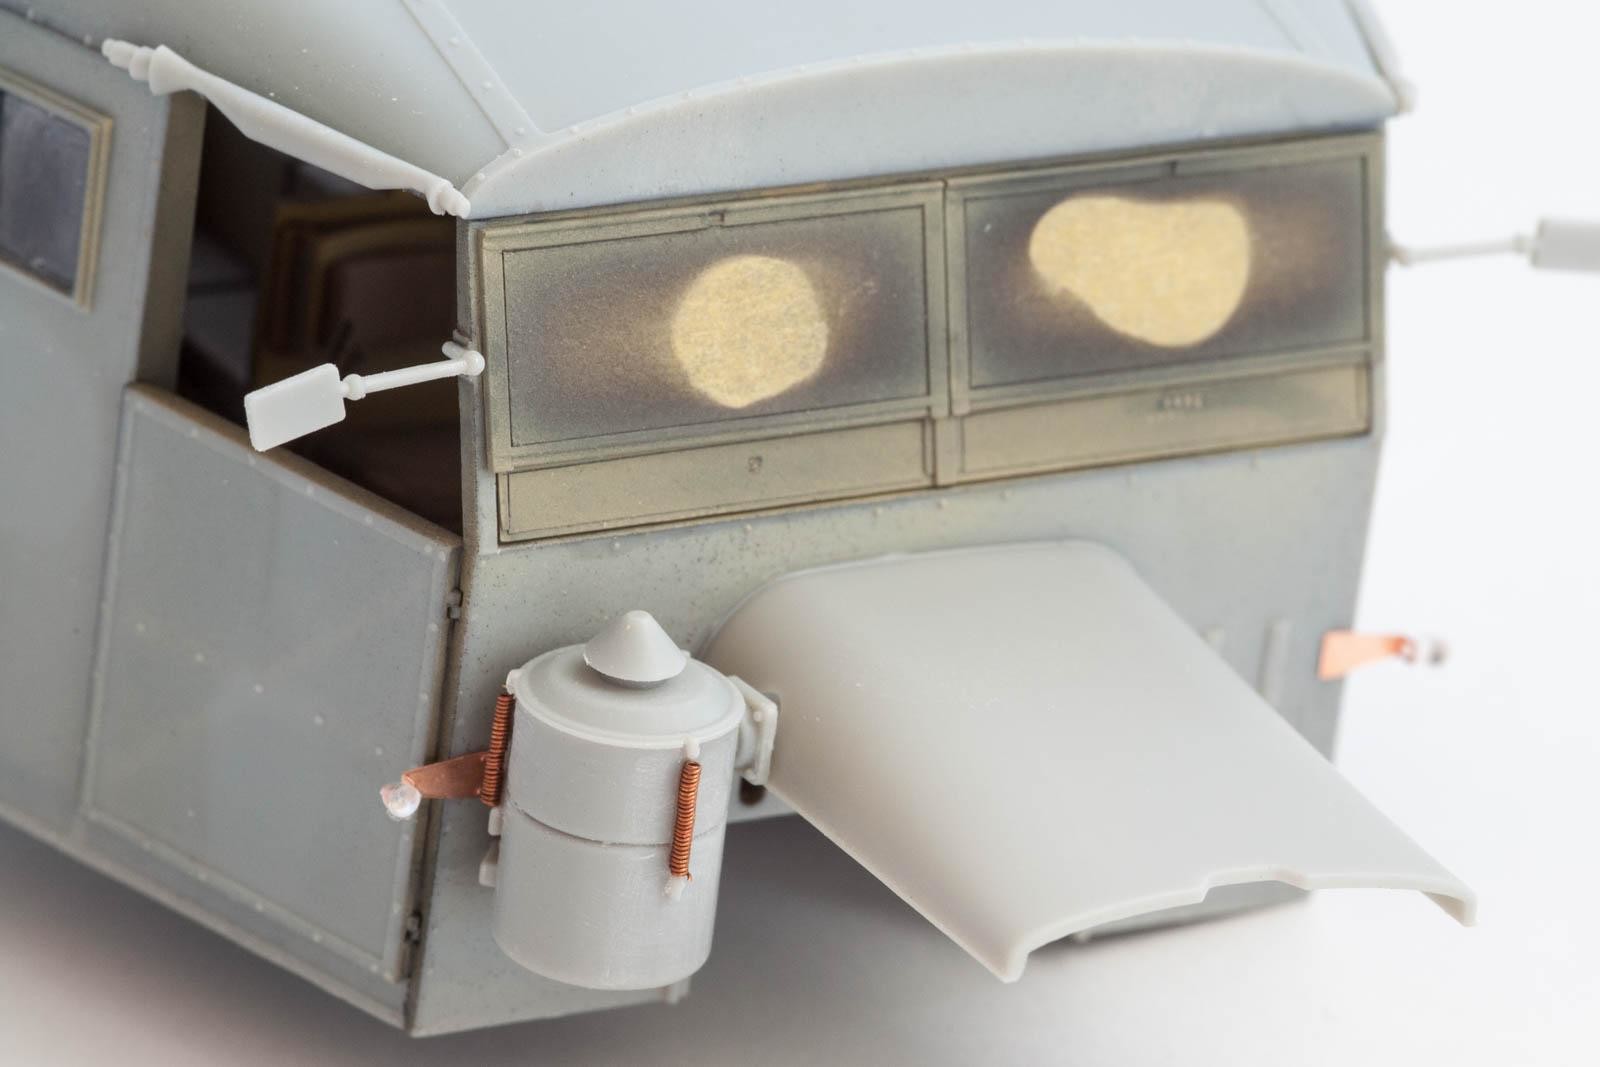
Moving to the outside of the cab, the only part in need of some care is the air filter. Out of the box, the springs holding this thing together aren't all that well detailed.

Scraping them off and making new ones from thin copper wire takes only minutes and considerably improves the look.
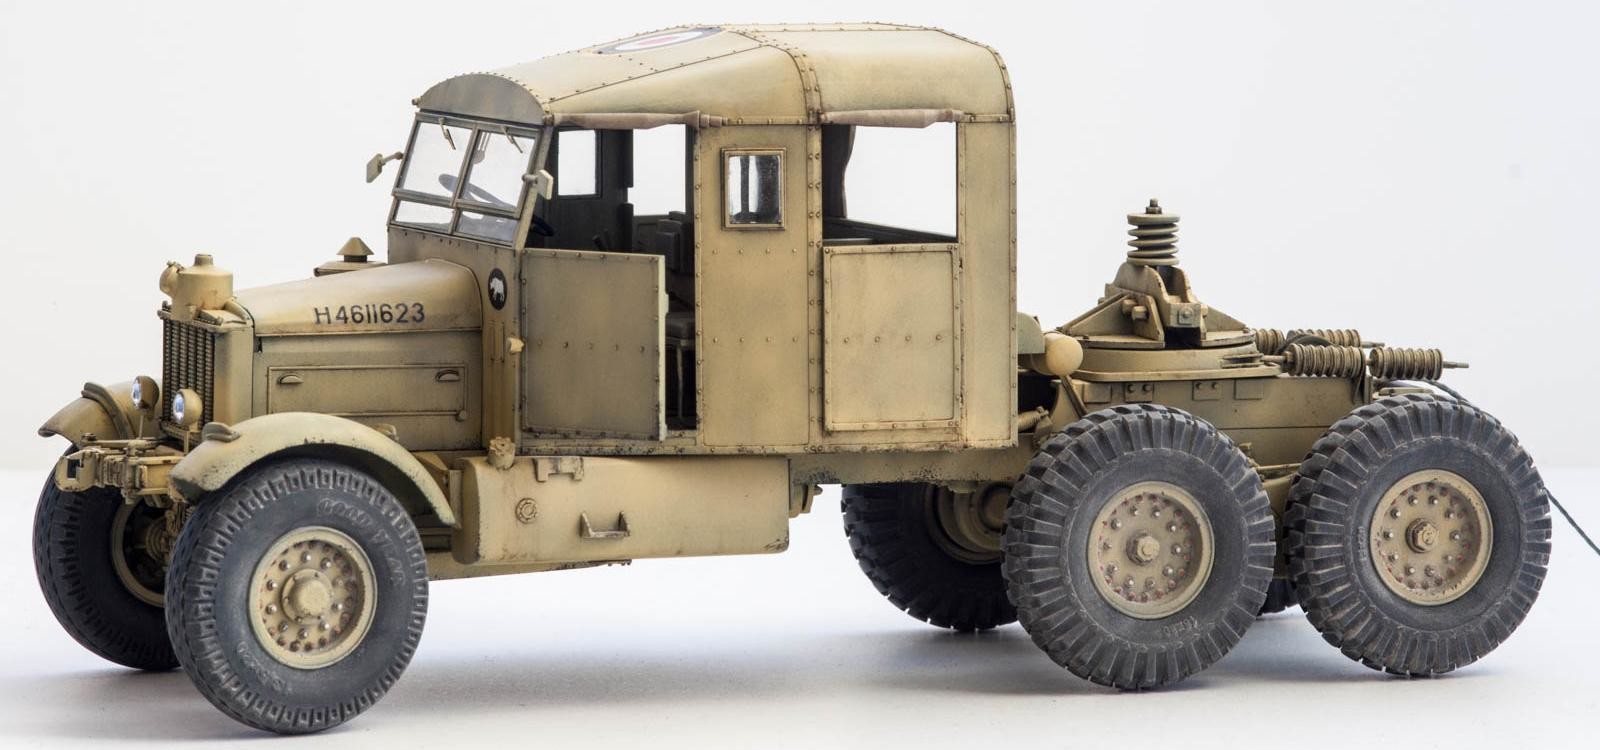
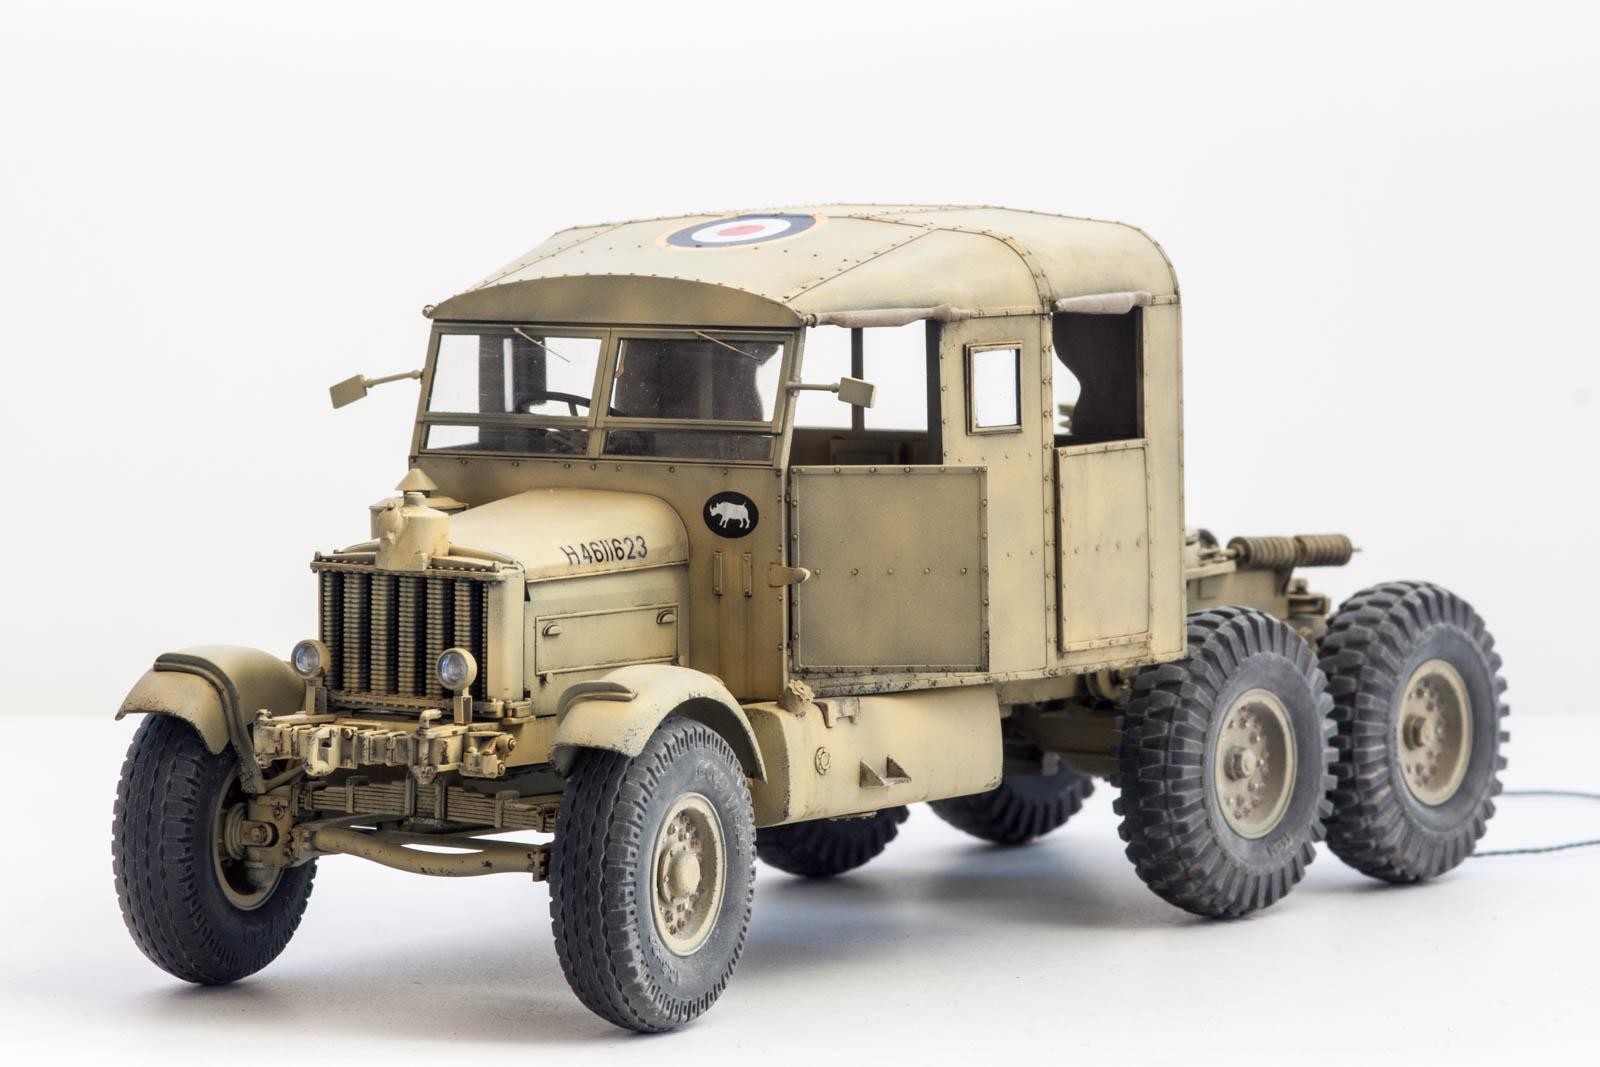
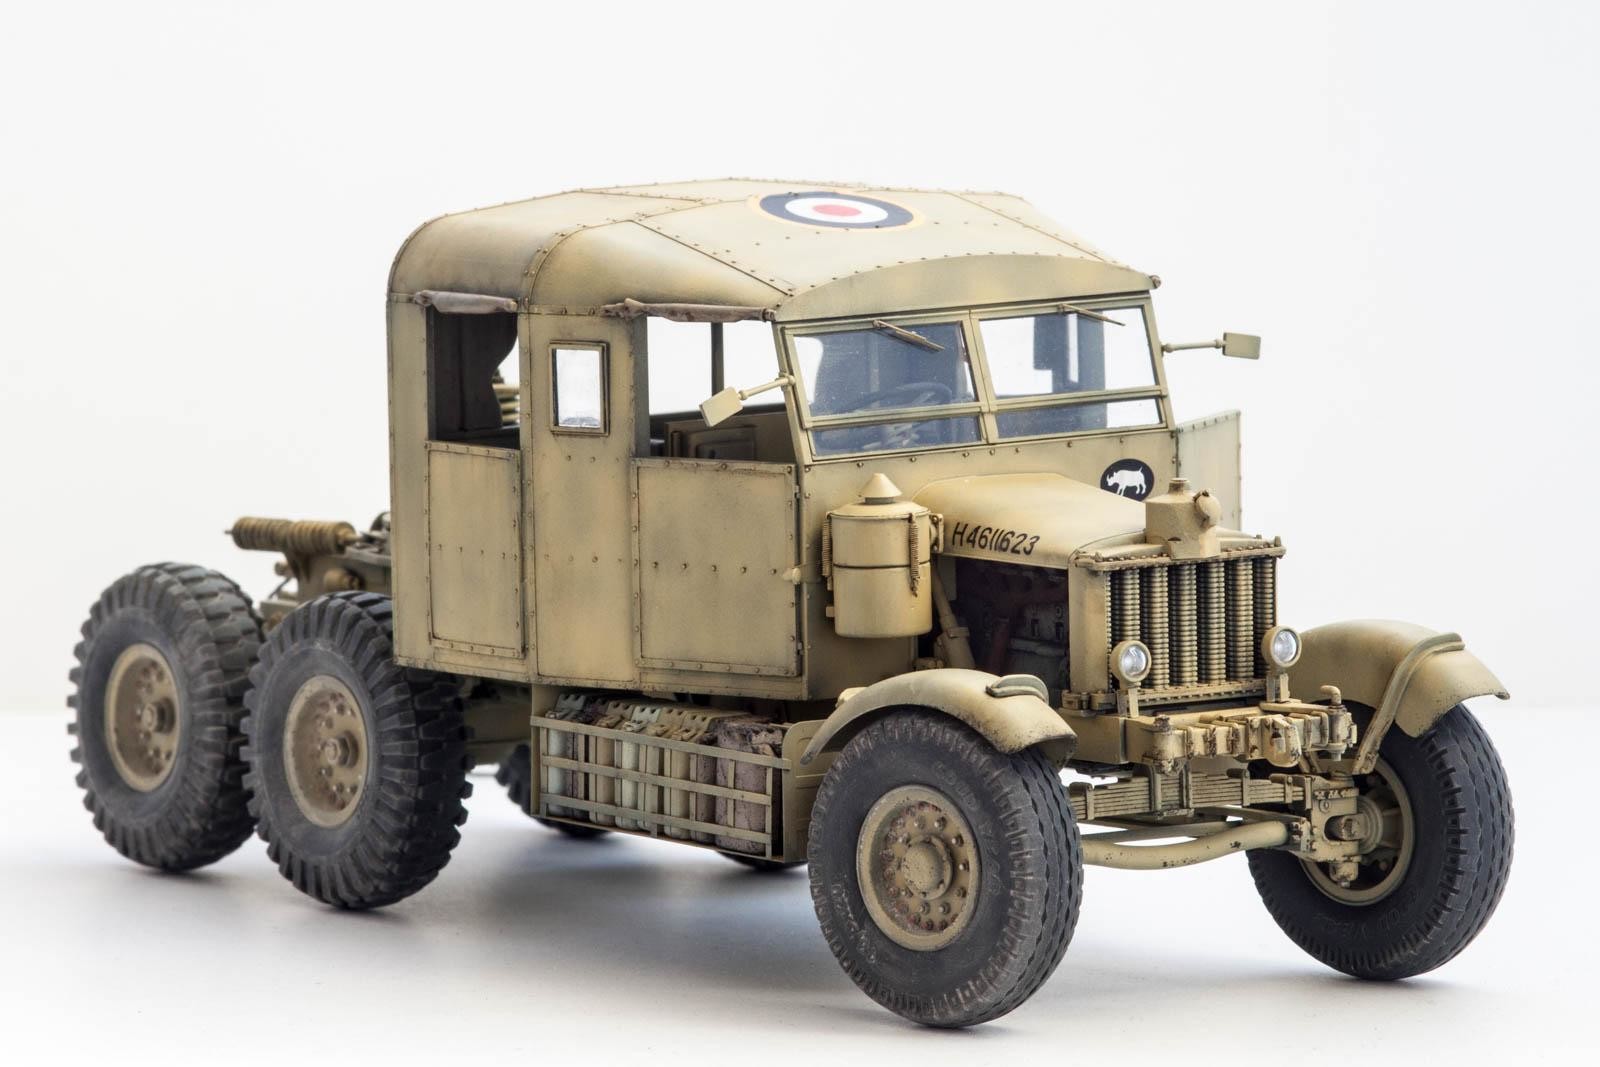
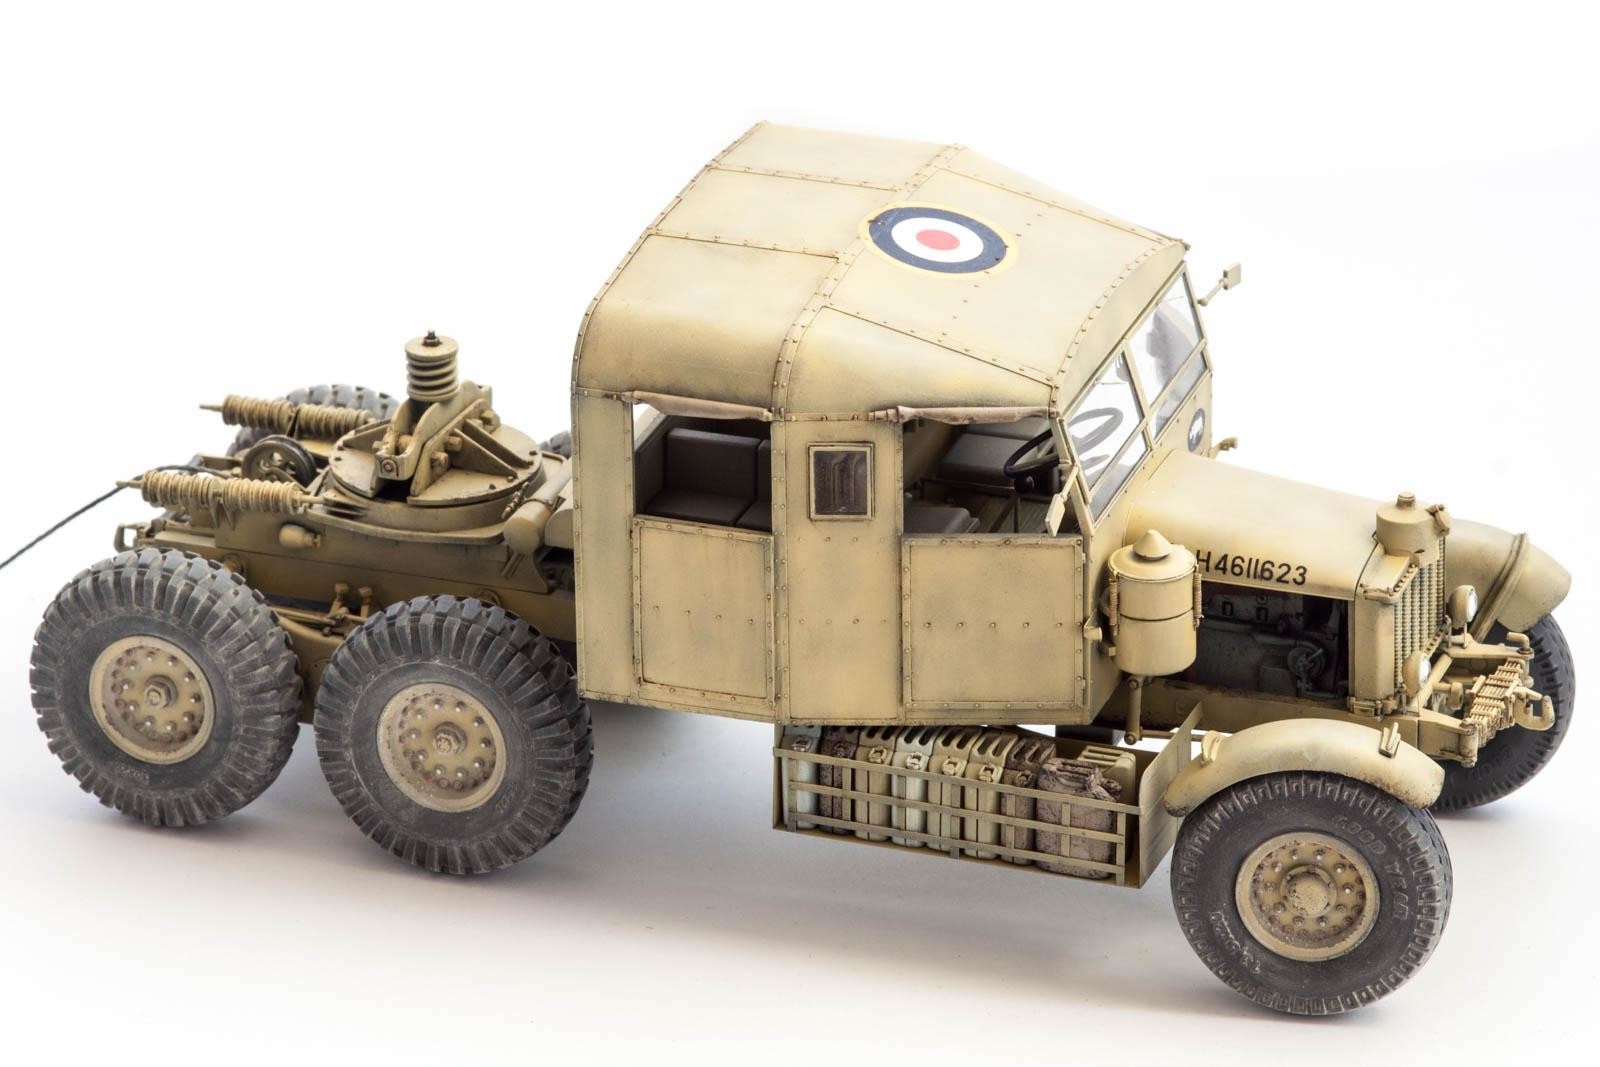
Sandy Bottom. And Top.
Out of the four options in the paint guide, the plain sand-colored one may seem the most boring. I decided to go with it nonetheless, as I think it will show the kit's pure amount of detail without distraction.
The chassis, wheels, and cab where painted separately from each other to facilitate weathering and detail painting. Again, everything got a primer coat of Tamiya Flat Black, followed by AK Light Stone. After another session with Tamiya Clear Gloss the decals were applied, using Revell Decal Fix as setting solution. The decals behaved flawlessly, the only thing I noticed is they need to soak a bit longer than other manufacturer's.
The tires received a coat of Vallejo Black Grey, and the whole vehicle was given pin washes with Ammo Panel Line Washes, followed by sponge chipping using a mix of Vallejo Black Grey and Dark Brown. For dust effects on the wheels I used Ammo Light Dust pigments.


Final assembly includes attaching the cab to the chassis and installing the exhaust pipe and steering mechanism. This can be a bit fiddly, so make sure to bring a steady hand and take your time.

The very last part I attached was the stowage basket underneath the driver's side, in this loaded with a bunch of old Italeri jerry cans painted in various sand tones. The basket is a simple yet effective PE assembly, just be careful when bending it as the PE material is rather thin.

So there you go. Building the tractor took about two weeks, almost straight out of the box. I did not encounter any problems whatsoever, and the whole process was the most enjoyable experience. Are there negatives? Sure. Quality Control could take another pass at the instructions and the paint guide, and the number of pin marks on the cab parts does seem quite exaggerated. But how I wish these where the only issues of every kit out there…
The next and final part of this review will deal with the trailer. I have to admit I have already started on it, and boy, is this a huge beast!


Amazing build Boris! I like the extra detail scratchbuilt on the air filter! Keep up the good work!
Thanks Michel! British stuff is way out of my comfort zone, but this kit is just a gem.
Fantastic work on the Scammell Boris. I'm following your build with great interest as this kit is high on my list. The amount of ejector pin marks and "towers" is remarkable for this high end kit made with modern techniques.
But besides that it looks fantastic and I'm looking forward to the trailer part.
Stellar craftsmanship, sir...absolutely beautiful work..! 🙂
Stunning ! It looks like you shrunk a real one down to size... The photography is top notch as is the build article. I especially like how you painted the exhaust system. The engine looks very authentic too. I'll be watching for part 3 ! Now you need a Grant, Valentine or a Matilda for the trailer... you could even build a knocked out Panzer for it... That would be cool !
The tractor unit has turned out even better than I was expecting, not only due to the quality of the kit, but also your painstaking attention to detail and careful building technique. Like the others I'm also looking forward to seeing the completed trailer with a suitable load, but, why not have the wreckage of some poor unfortunately aircraft rather than a tank?
Excellent workmanship.
Hello Boris,
This model looks like a real winner. My compliments for the way, you tackle this model. Thanks for sharing, and I will follow the rest of your WIP.
Regards, Dirk / The Netherlands.
These Thunder kits are growing in popularity and the range is improving too. Great scope for detailing and weathering. Cracking model!
Beautifully done, Boris. It looks ready to jump in and drive away!
Excellent build - looks great!
Great great great
Great build, it looks great even if it wasn't designed to win a beauty contest!
Thanks Derek 🙂 You are right - the designers definitely chose function over form!
EXCELLENT build there buddy. GREAT attention to detail and the overall paint scheme is subtle yet perfect. I have one niggle...put some flat spots on the tires...it will give the truck a better "sit" on the display table.
Cheers,
Laurie in WInterpeg, CANADA
Thanks Laurie! Good point regarding the tires, they could use some sanding if displayed on the shelf. I plan on having the Scammell integrated in a desert scene, so I think I'll be able to get away with the tires sunk in the ground a bit.
I have just received this kit for xmas...as I get started ill ask a few questions as I go along...this is my first build for 15 years so a nice challenge to start with...you build looks great
Hi Boris first of all what an excellent build. On the subject of tyres I was reading on the net the other day and it would seem that Scammell's had very little in the way of flat spots on the real thing. Also I see Libor has made a set of replacement wheels for the kit what are your thoughts on those? Thank you.
Thanks Gary. As to the tires, I think the way I photographed the kit enhances the effect of the tires (white surface, high contrast between tire and base). Anyway, if you want to completely accurate, you might want to sand a small flat spot on every tire. With 14 wheels total for the tractor and trailer, it would be quite a task to get all of them equally flat.
As to the resin replacements, they offer you different patterns from what comes in the kit - looking at the pictures on the LZ Models website, however, it doesn't appear to me like they are flattened.
Heya Boris,
A truly magnificent job there!
Am wondering if you may be able to help me out. I'm finishing my Scammell Transporter off here, and am currently working on the cab interior of the tractor at Step 14 of the instructions, but am having some trouble figuring out the actual placement of Photoetch part PE 16. The instructions are no real help because they don't show this part anywhere in subsequent steps!
I checked out your pictures above and it seems you may indeed have omitted this part, as I'm thinking of doing myself, but thought I'd check first in case I've totally misinterpreted its placement according to the instructions, which if I follow won't permit fitting of either the drivers seat or battery box(?) parts A22 + A23. Any advice?
Regards,
Scott
Hi Scott @Scott1970,
Thank you! I really had a blast building this kit - and then there was PE 16... You got me here, I omitted it in the end, because I could not figure out its placement (and I had already glued in the gear shift lever and everything). Placement is indeed tricky, but this thing should go inside the rectangular depression:
1. This one...
You will only be able to fit it in if you haven't already glued the lever - its knob is too large to fit through the PE part.
Here's a walkaround I found (of course too late for my build), if you scroll down a bit you'll find two pictures of that area: http://www.univem-paris.com/en/galerie/scamell-sv/
Unrelated to that, there are two PE parts on one of the frets not referenced in the instructions:
1. This one...
2. ...and this one.
These are the boarding steps for the rear crew compartment, you can actually see them on the box art.
I hope that helps - and show us your Scammell once it's finished! 🙂
Cheers,
Boris
Heya again Boris,
Wow, that's very kind of you to provide all that information, and also somewhat reassuring that I'm not the only one who's struck this infernal issue which indeed is the very essence of any experienced modeller's worst nightmare! lol. When I reopened your excellent build diary, (which actually inspired me to get one of these kits and begin it straight away), and saw that you'd omitted PE 16 I thought you may be just the person to seek some advice from.
After letting me know PE 16's correct location, the excellent photos within the extra link you've also provided also solve the next question about how doing this actually only then fouls the other lever with the rounded knob (part D8) which the kit instructions show as also being placed inside this rectangular depression on the passenger side of it, and which these photos show is apparently canted off on an angle towards the passenger seat rather than in the 'front to back' line which the instructions show. I'll remove D8 and drill another hole in the floor for it just outside the rectangular depression.
Thanks once again for the enormous and very generous assistance you've given me here, I'm hoping to get this project finished within the next few weeks the trailer and tractor chassis is already 95% complete and painted in Tamiya TS46, just the cab and engine and driveshafts to go on the tractor then I'll try to get a weathered finish akin to the one you've achieved which is simply excellent.
Have a Tamiya Lee Grant that's been in my stash for about a decade now that'll look great on the trailer with some AFV Club tracks that are waiting for me to pick up later next week, and should only take a few nights to knock together.
Will send some pics once I'm done friend, again, thanks heaps for your help mate.
Regards,
Scott
Happy to be of assistance! This area of the kit is not really helped by the instructions, but apart from that I really like what Thunder Model did there. I have already built the R100 Artillery Tractor, which is another gem, and have the wrecker version on the bench at the moment. Now if I would find the time to actually post an article about them...
Adding a Grant to the trailer will sure make for an impressive combo. I am waiting for Miniart to release theirs, as it is supposed to come with a full interior (and probably a gazillion parts :-D)
Cheers,
Boris