Review: 1/48 scale Airfix A05128 Boulton Paul Defiant kit review
Way back in October 2016, I was picked for the "random model of the month" award here on Imodeler. My Hobby Boss 1/48 scale F4F-3 "early", (which was painted in a Yellow Wings paint scheme), was chosen.
This is the kit I received from Martin and his staff. When I got the model I told Martin that I would build it soon and post it here online.
One thing led to another, and before I knew it, about a year and a half had passed by. I was busy building other things for various Group Builds, and neglected the Defiant. It sat in the "to build" pile patiently waiting...
Now that we have a Group Build called "100 Years of the Royal Air Force", the timing is perfect to get cracking on this one. So I started a build log over there.
As part of the build, I wanted to include a kit review. After getting some new posting tips and pointers from Martin (the Editor here on Imodeler) and Boris Rakic (one of the Imodeler Team members), I decided to give it a go. Thanks for the feedback guys !
So here it is.
Over the years there have been several BP Defiant kits produced in 1/48 scale. The first Classic Airframe kit was well... kind of "so so" from the reviews I read. Then I'm fairly certain that the kit was retooled and was then much more acceptable.
Being a limited run kit, the end results were very nice, but it wasn't a "shake and bake" model and required attention with the assembly process. Resin parts and photo etch made up a portion of the model. Either CA kit (early / late release) could build into a nice model, but were not recommended for the beginner. Having said that, many believed a main stream model company would never release a Defiant. We were fortunate to have Classic Airframes do this for us at the time.
Then along came the "new" Airfix and they released this kit. This happened several years ago. When I heard that the new Defiant was getting good reviews, I had to get my hands on one.
Then Martin and his crew came to the rescue and provided me with a list of various models. When I saw the new Airfix Defiant was one of the choices, I knew right away what my choice would be.
About a week later, this kit arrived on my door step...
The rest is history.
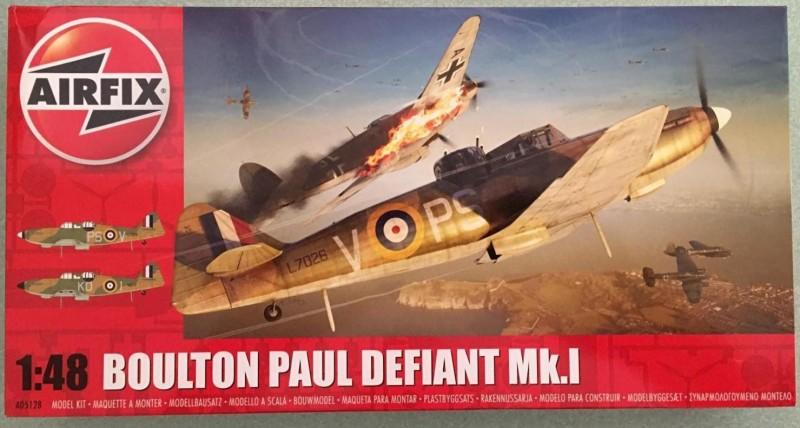
The Airfix Defiant is packaged in a sturdy red box that we have become accustomed too. All of the new tool kits manufactured by Airfix share this feature.
It has some attractive artwork on the box lid.
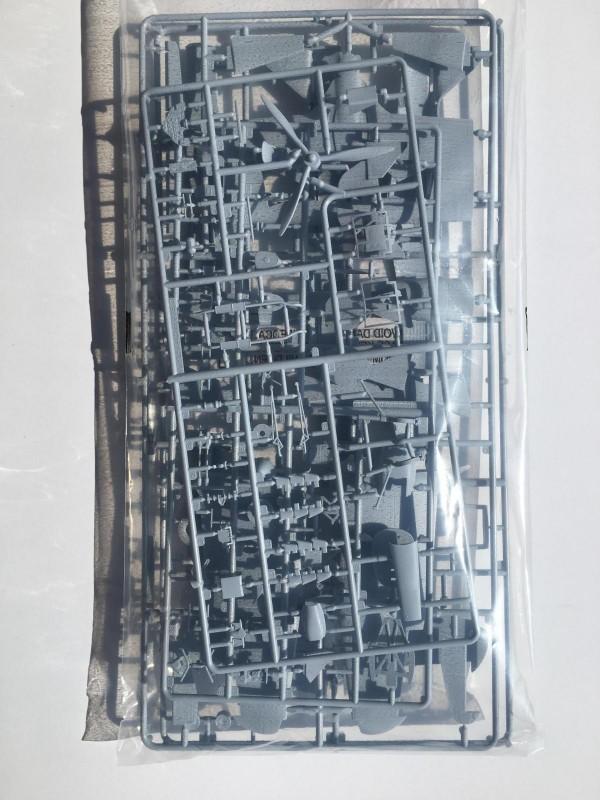
Once you open the box, you will find the plastic parts sealed inside two separate bags. There is a bag for the light gray parts,
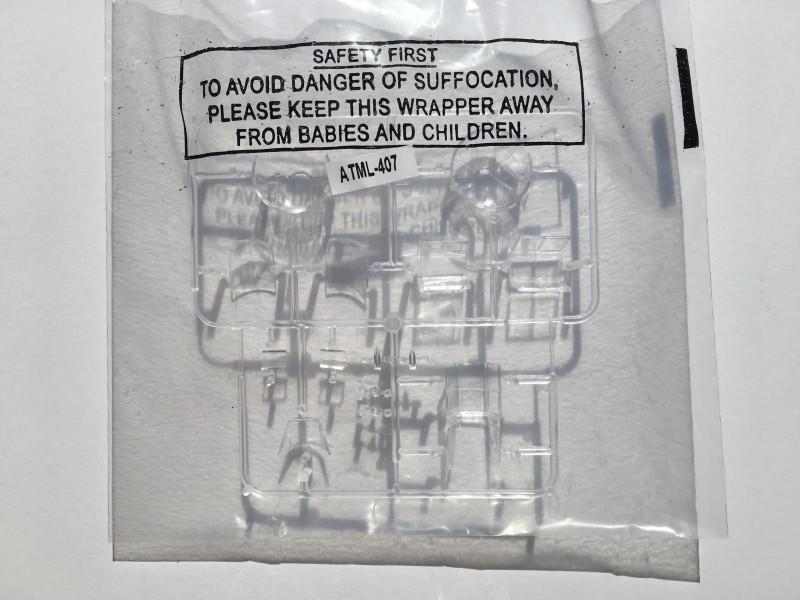
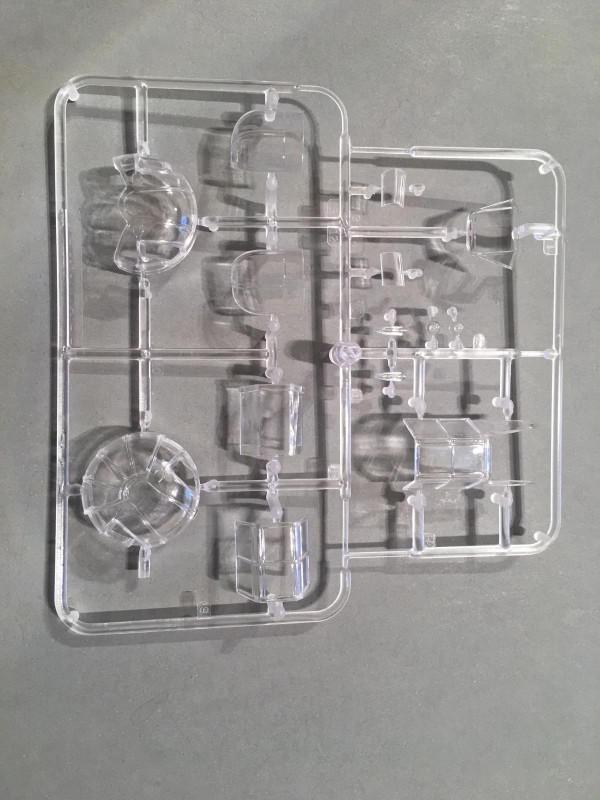
and a separate bag for the clear bits too.
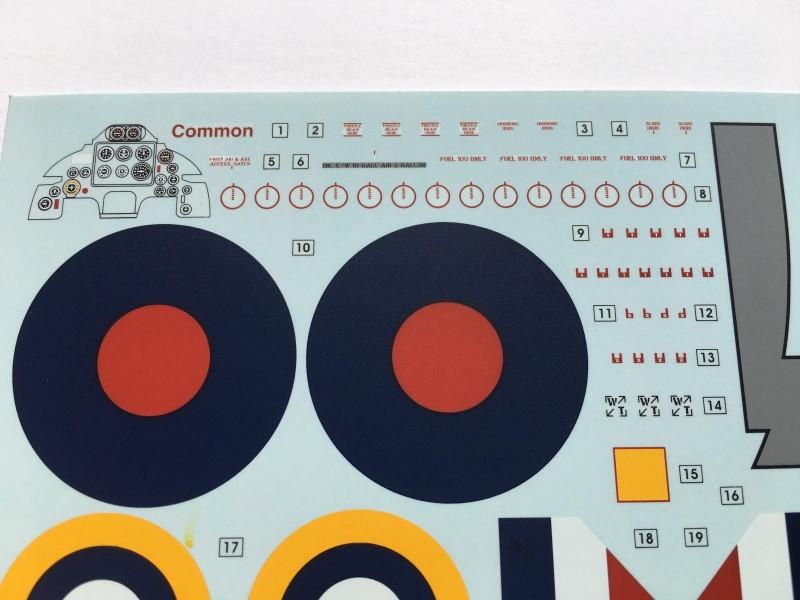
There are two decal options provided. The decals are nicely printed. My set was in perfect register, and have a nice flat finish to them. The decals do not appear to be thick.
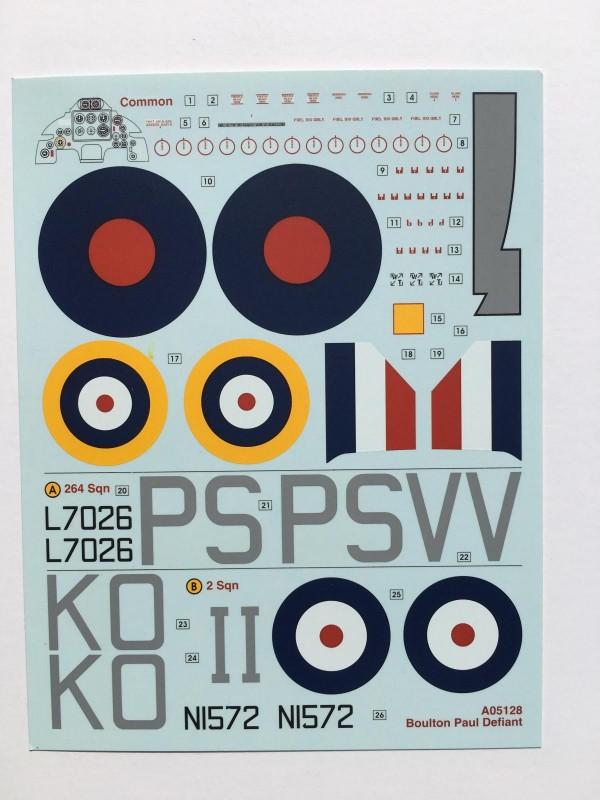
The instrument panel has it's own decal, should you decide to use it. More on that later...
There are a single set of stencils provided, listed as "Common" markings.
The instructions, consist of 16 pages and are printed in color. On the cover page, there is a short type history and specifications listed , which are written in five languages.
There are 71 construction steps listed. Some of these steps are shown as installing a single part.
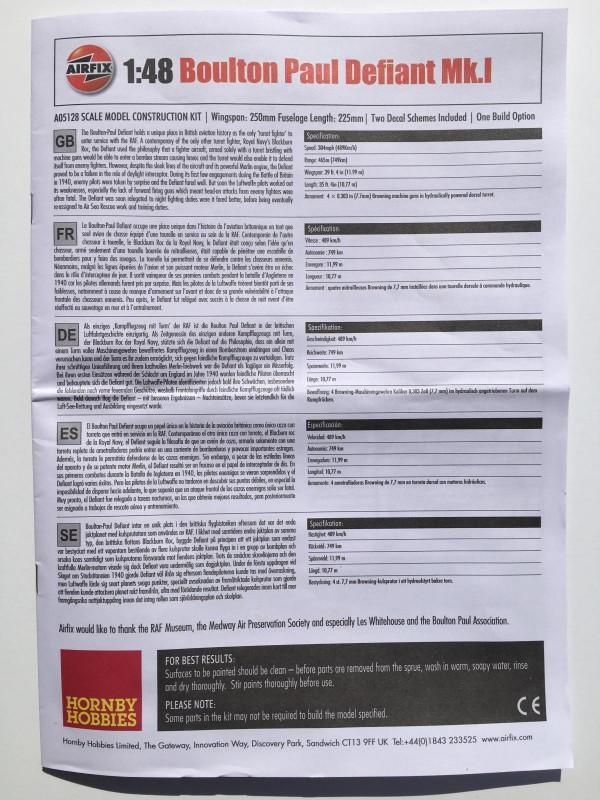
On the inside of the cover page there are assembly instruction notes. The assembly notes are listed in twelve different languages. At the bottom inside of the front page, there are universal icons instructions listed. These icons are for things like "Cement", "Do not cement together", "Alternative Part(s) Provided"... you get the idea.

This is a picture of the first assembly page. Construction begins with... wait a minute... the cockpit. You guessed it !
Here is where you will notice the painting color call outs are listed with a number. The numbers correspond with Humbrol paint colors. I'm not so sure I like this, but others may. I like the old school way by listing a paint by it's name instead, since not everyone has access to a paint number reference.
I'll try to make a list showing the conversions of the numbers into color names (that are easier to use) during my build log.
If you look close at this picture... zoom in to step 1, which is installing the pilot's seat. The majority of the seat is listed as color #78, while the padded seat back is listed as color #29.
The actual seat is part number C-26. See what I mean... well maybe you don't. 🙂 OK I'm old. kind of...
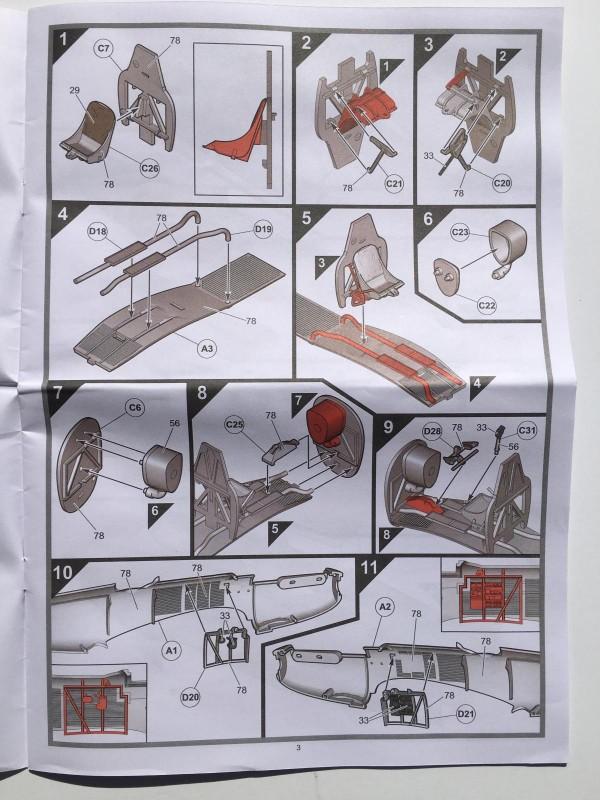
Airfix has included a picture in the instructions that indicate the final position of a part once it is properly installed. The parts final location will be indicated in a red color on the part. The part will be illustrated as being the red colored part.
Once the cockpit assembly is done, the fuselage halves are joined together. Then the assembly sequence start with the wings.
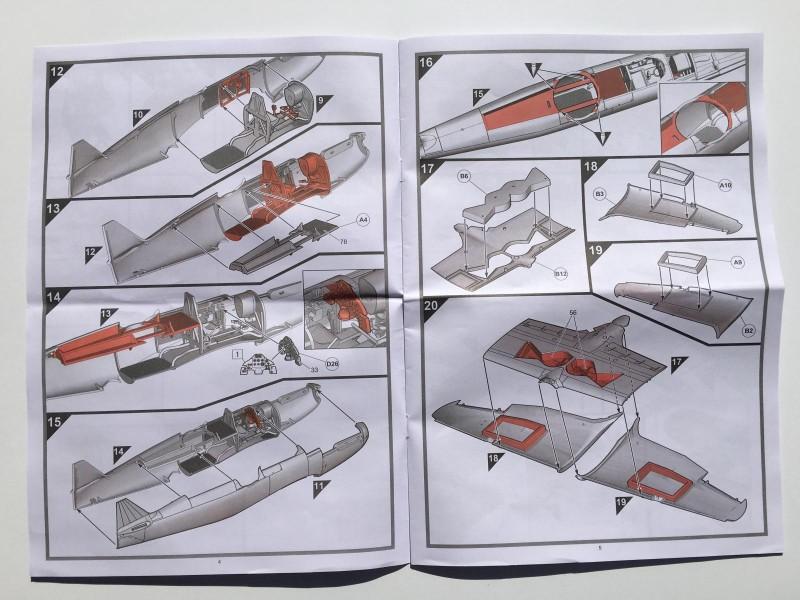
The wings are built as a unit, then are installed. One thing I like with the engineering of the kit is this: They have molded the center lower section of the wing as single part. This part sets the dihedral angle and also located the main landing gear well. The upper wing sections are glued in place to the lower center part.
The control surfaces are molded separately and they can be posed. Airfix has even included the proper degree angles these parts should not exceed in deflection. For example, the rudder should not exceed 25 degrees to Port or Starboard. The elevators should not exceed 22 degrees positive or 10 degrees negative pitch...
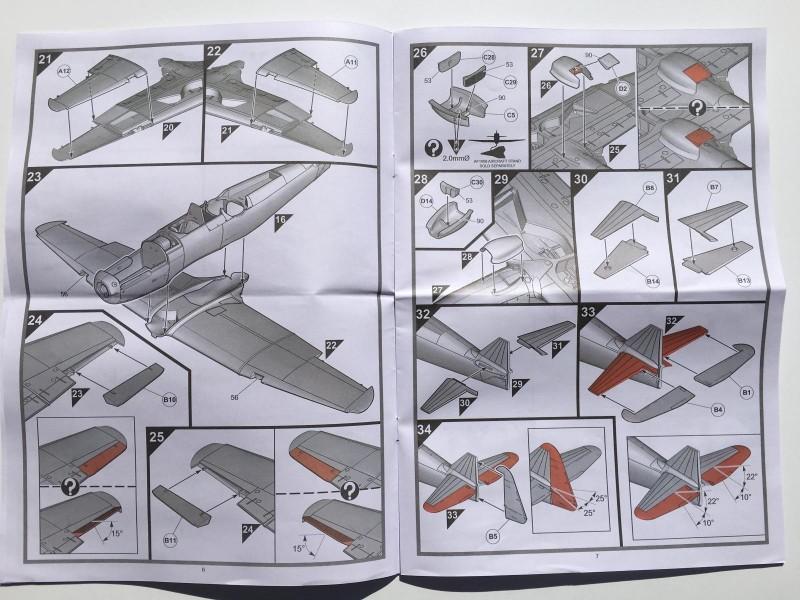
Here's another nice touch... The main gear can be installed in two positions. Lowered or Raised.
The cool part is Airfix has provided a set of dedicated closed doors if you decide to build your kit wheels up. This will eliminate a possible gap that can happen when the "individual" doors that are normally provided in a kit are not positioned perfectly. By giving the builder a separate set of gear doors specifically designed to be installed in the closed position, they have made this kit even better.
It's little things like this that make it stand out from the rest.
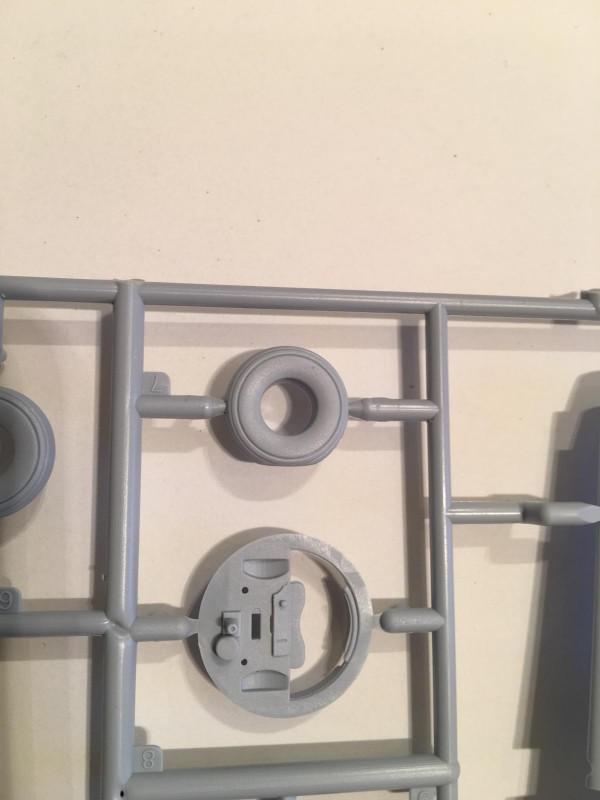
The main wheels are molded separately from the tires. This will make painting much easier, and the end result will look much better. This is another nice touch. Speaking of the tires, they are molded with a subtle flat spot to depict the weight of the aircraft sitting on them.

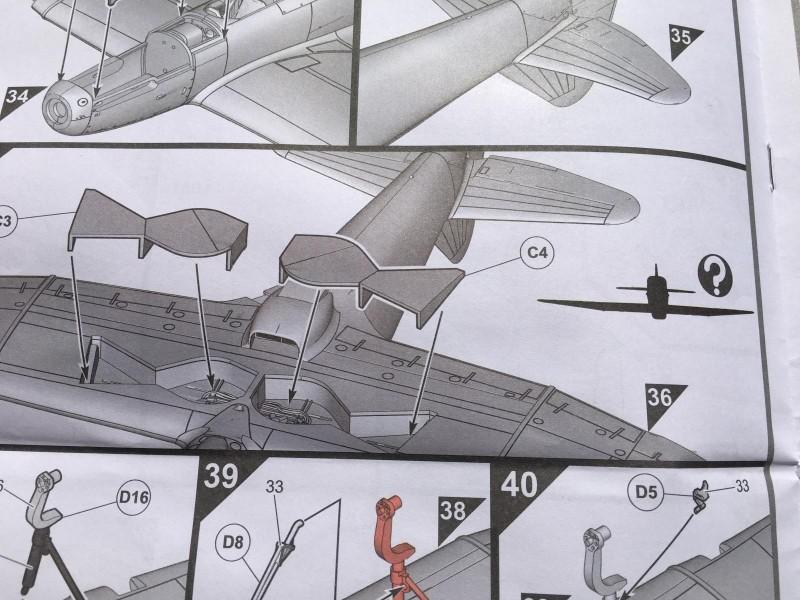
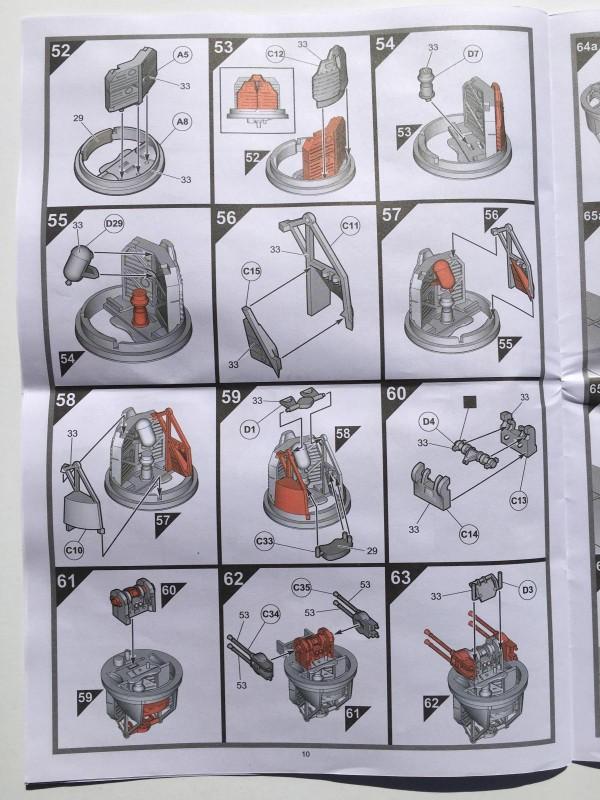
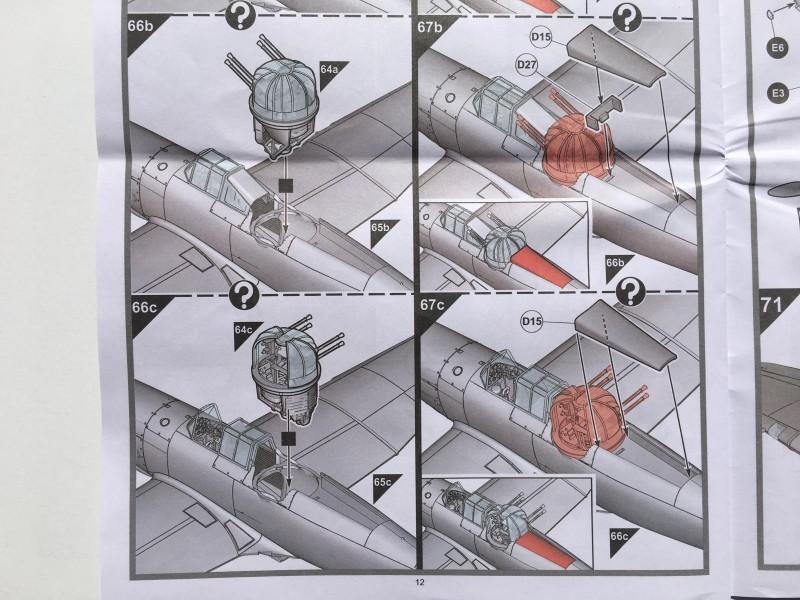
Then we start assembling the turret. This looks to be very detailed, and is a kit by itself. There are at least 13 steps in constructing the turret ! There are options provided here too. You have the choice of building the turret with the entry doors open or closed...
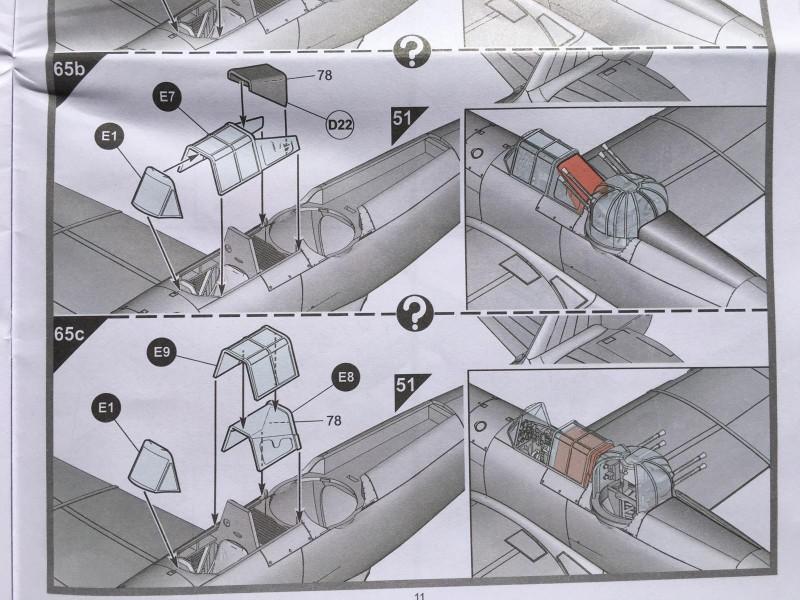
The following steps are for installing the clear parts.
Then the turret gets installed... It looks like the turret can be installed with the fairings raised or lowered.
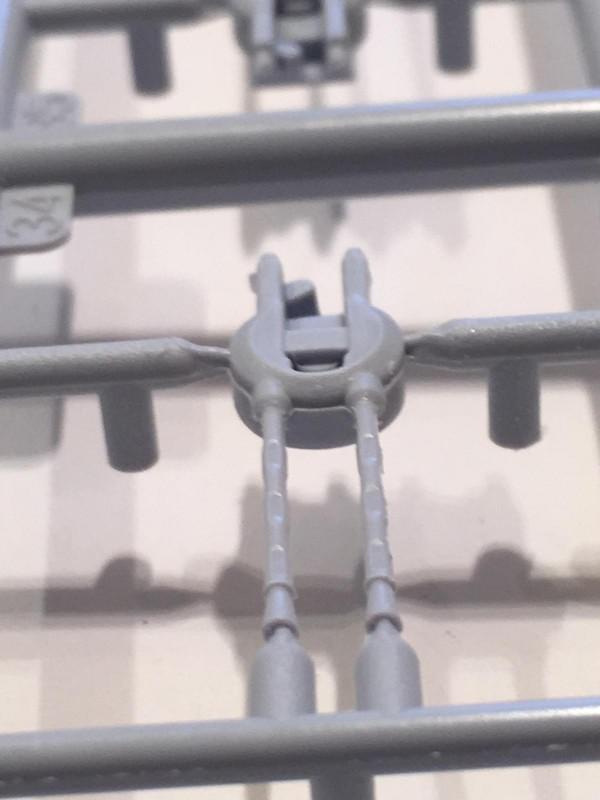
The last step is when the "fiddly" parts go on. ... They have you install the propeller and exhausts, then things that get broken so easily like the pitot tube and antennae's.
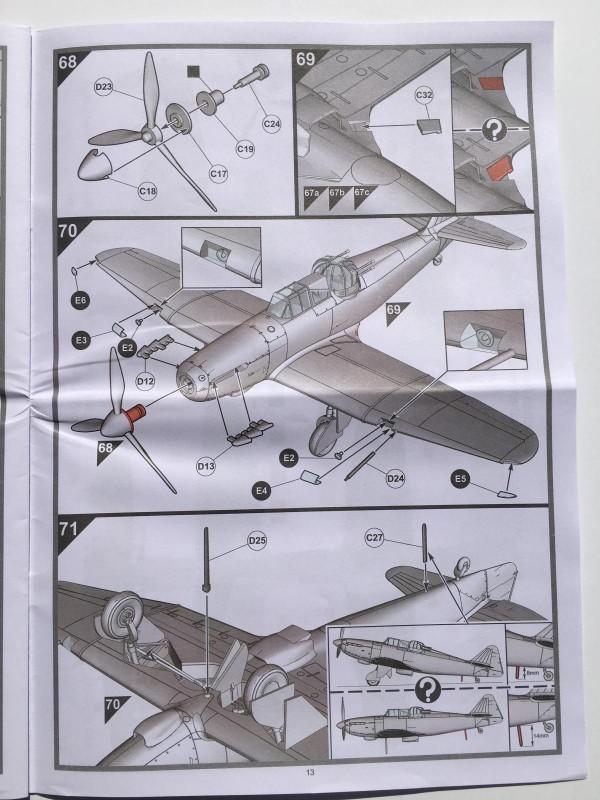
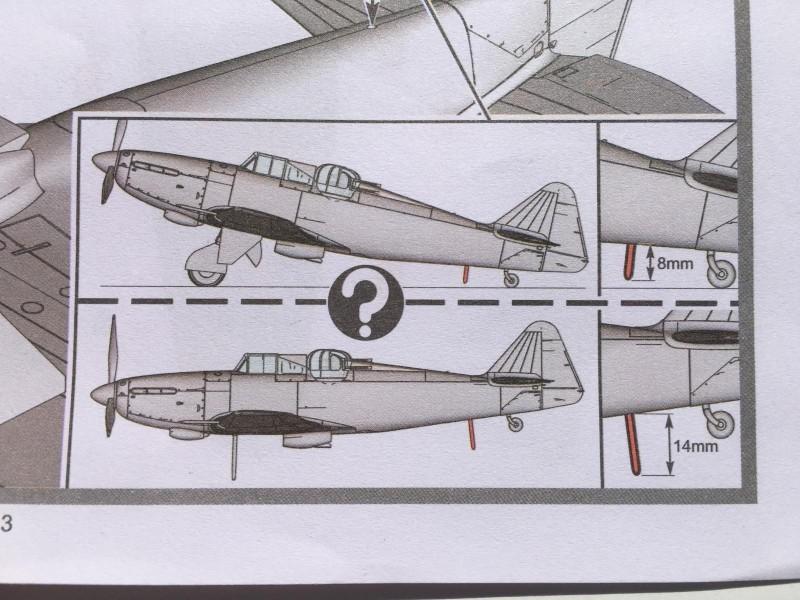
The lower fuselage antennae has to be built according to how you have built the landing gear. If you built your plane with the gear raised, the longer set of aerials are used. If yours will be displayed as it would be sitting on the ground, you need to use the shorter set...
Apparently the real Defiant had antennae's that were retractable. This depended on the position of the landing gear. Wheels up... Antennae's down. and vice versa. The antennae's were placed under the fuselage to prevent the rear gunner from shooting them off.
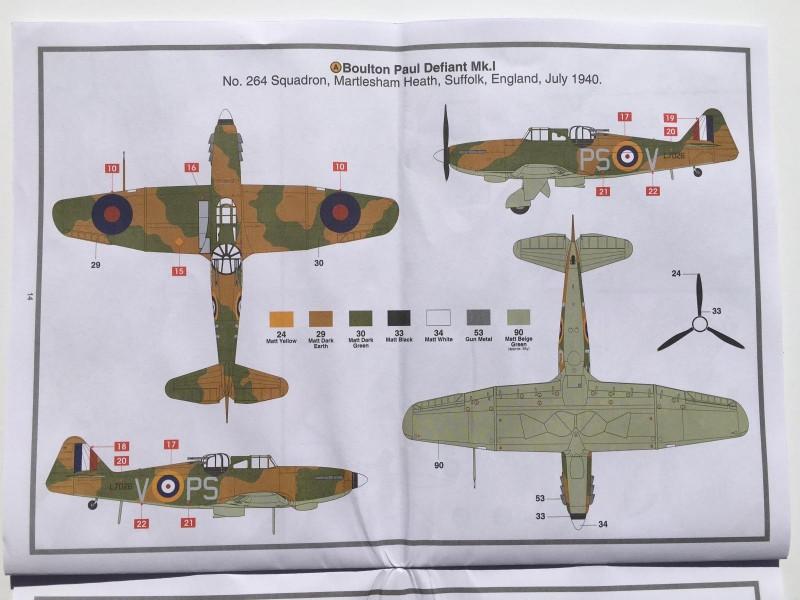
As mentioned before with the decals, there are two options provided.
First up is the one I'm going to be building. It's also shown on the box art.
"PS V" flown from Martlesham Heath. No. 264 Squadron July 1940
The other option is "KO I", flown from South Yorkshire, England, Septemeber 1940.

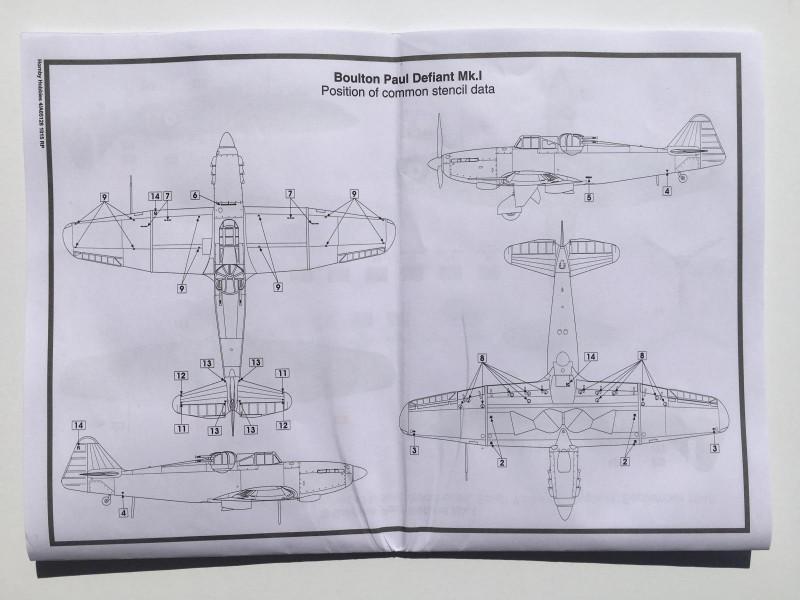
The final part of the instruction booklet is the stencil placement guide. It is shown on the back page.
Inside the largest plastic bag, there are four plastic trees, molded in a light gray color. Two of the plastic trees are larger than the others.
The plastic parts are crisp, and I didn't find any flash present. This is how it should be, especially since these are new molds. I can not comment on how soft the plastic is, or if it is brittle. But I can say the parts look to be very well done.
I will report on my findings once I start building this kit, and I experience first hand how the plastic reacts to building and cutting.
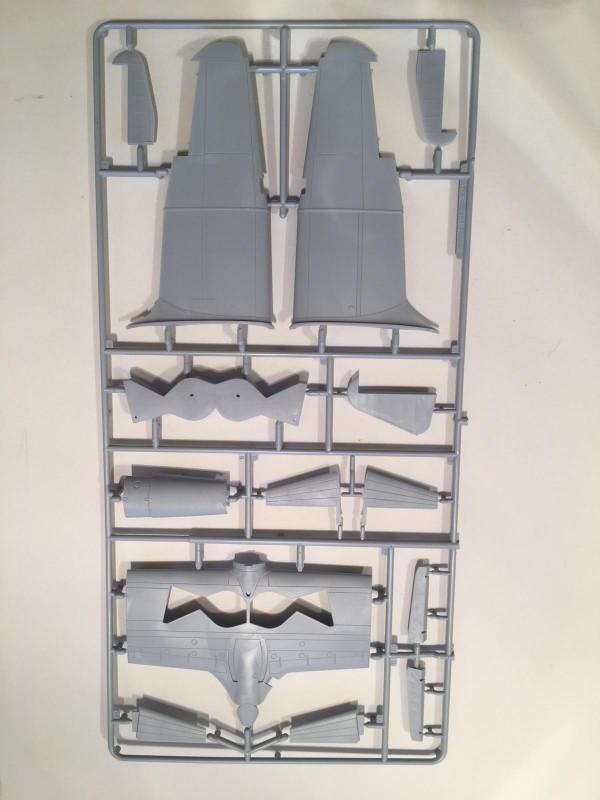
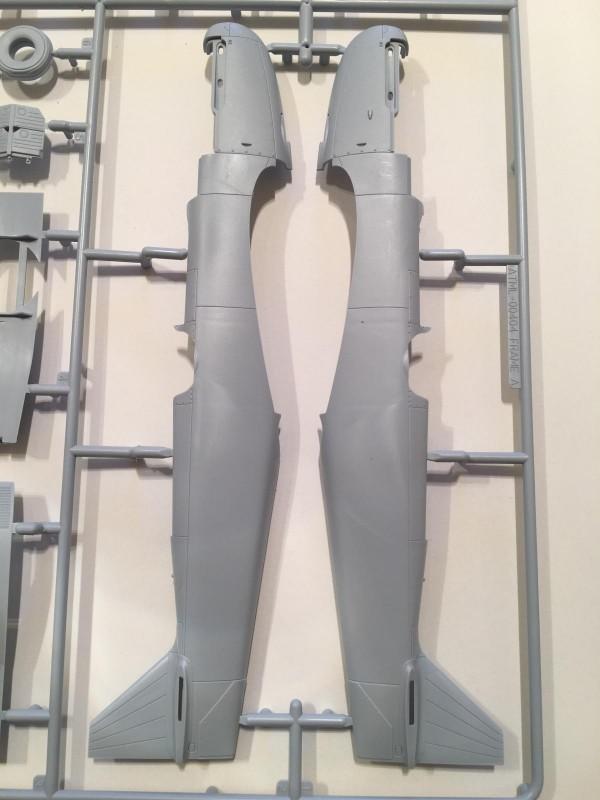
Here is the tree containing the fuselage halves and lower outer wing panels. This is one of the larger plastic trees I mentioned above.

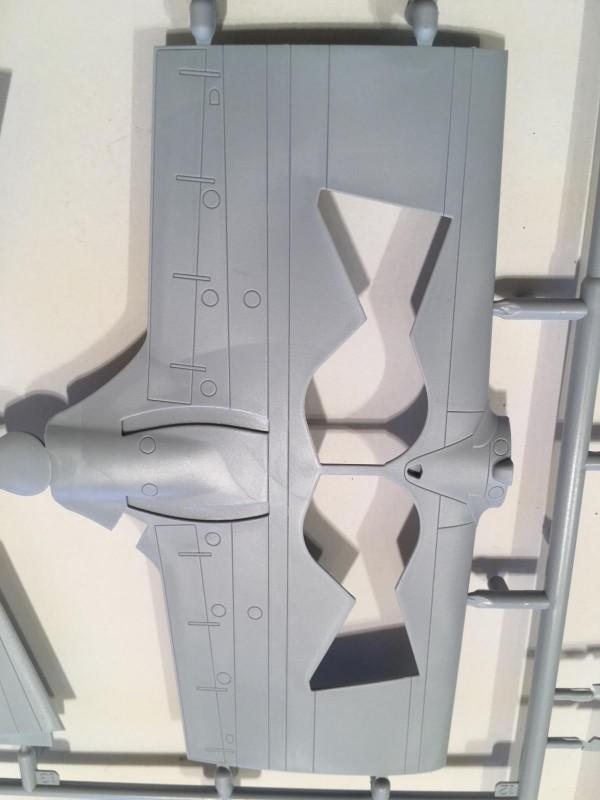
Next is another large plastic tree. This one contains the Lower Center wing section and upper wing halves.
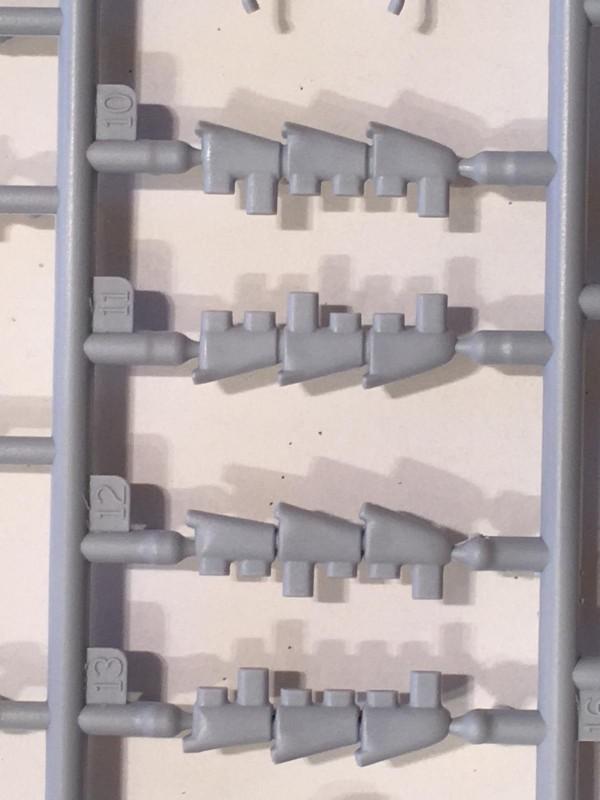
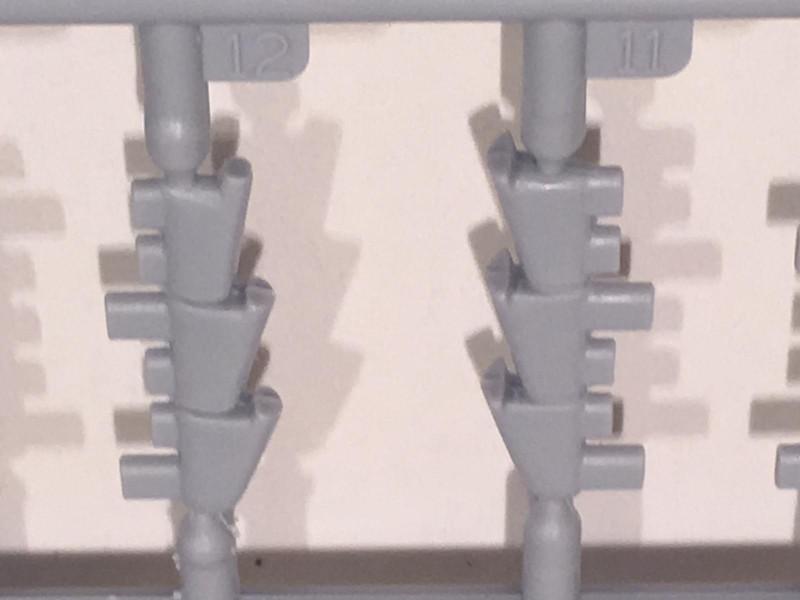
Now we get to the smaller plastic trees. This one contains the main gear doors, both the open and closed versions.
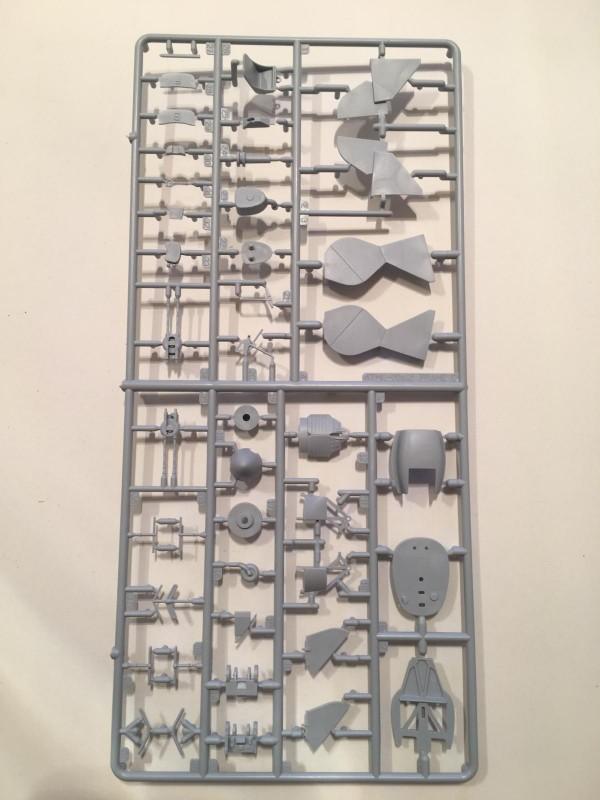
Next is the last small gray plastic tree. This one has the propeller, landing gear and two types of exhaust.

Remember the wheels and how I mentioned they were molded separately from the tire ? The tire has been molded with a flat spot. Here's a close up of the tire, so you can judge for yourself.
The lower / underside outer wing panels have some nice detail on the recessed panel lines. Some may say the lines look too deep. I think they will look good once painted.

Here's a close up showing the same details on the fuselage halves.
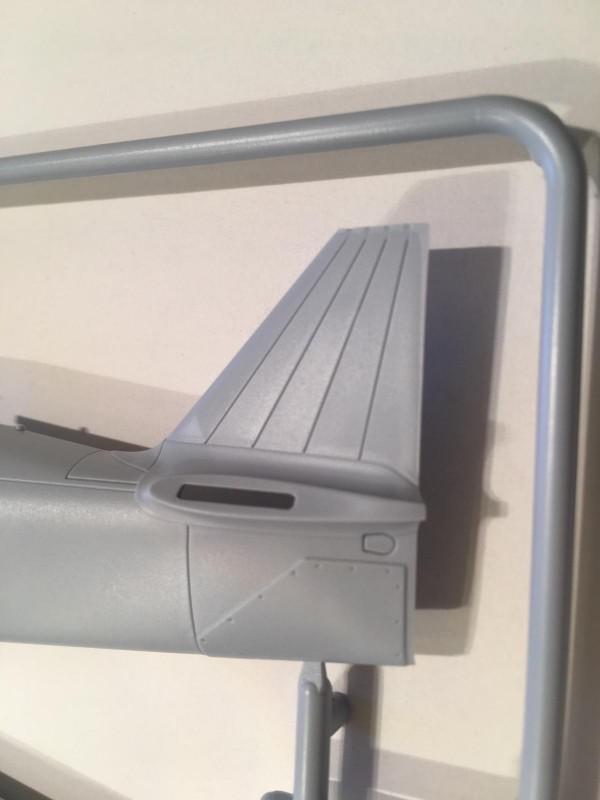
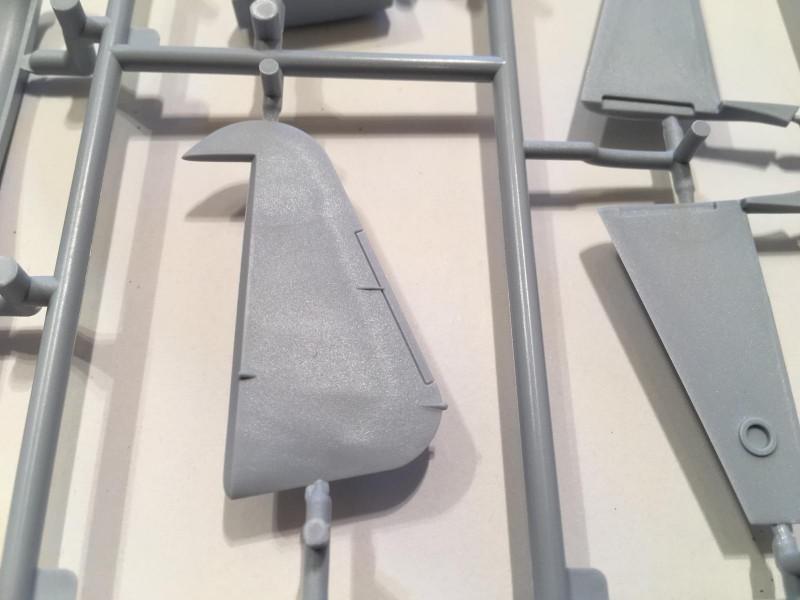
This photo shown below, shows the panel lines on the fin. These may be a tad deep, but with some paint they should look just fine. I will soon find out...
Since we are talking about the fuselage, here is a close up showing the details molded on the inside. There are a few ejector pin marks visible. However these marks are very shallow. I don't think the are in a location that will be visible once the other cockpit parts have been installed. This will probably not be a problem. If it is, I will report my finding in the build journal, and amend this article to reflect this.

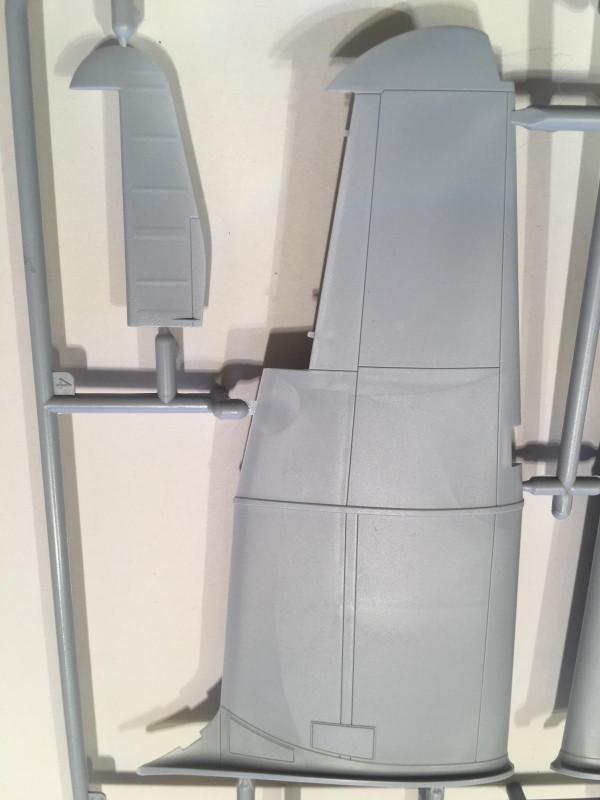
This is a close up photo showing the upper wing halves and the recessed panel lines molded into them. They look very nice. In the top left portion of this picture, you will see the rudder. it was fabric covered and Airfix has depicted this in the molding of the part.
This shows the lower center section. The details look very good as can be seen in this photo.
A close up of the fabric covered ailerons: If you look close, you can see the faint outlines of the inner metal structure. If this part is painted too heavy, these details may be lost.

The same can be said for the rudder...
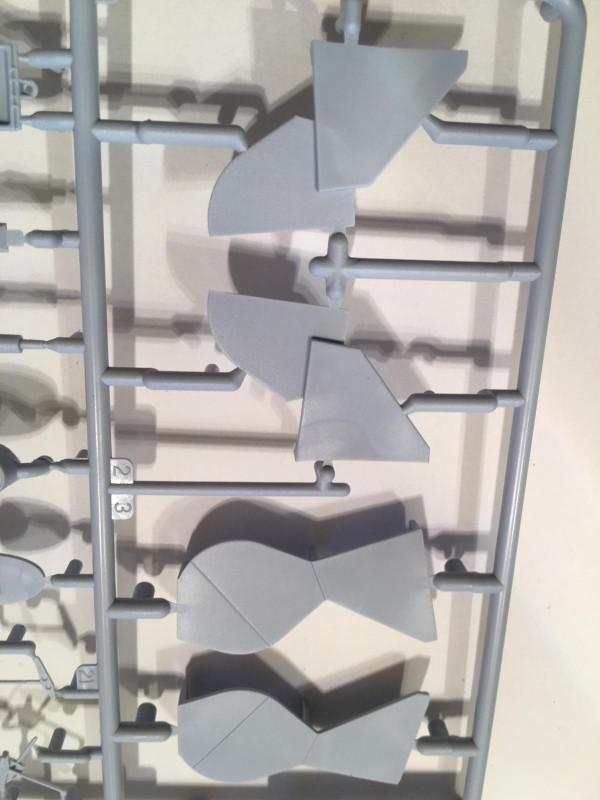
Here are the two sets of main gear doors. The lowered gear door set is visible in the top of this picture. You can also see how the gear doors overlap in this position. The one piece doors for the raised position are shown in the bottom of the photo below.
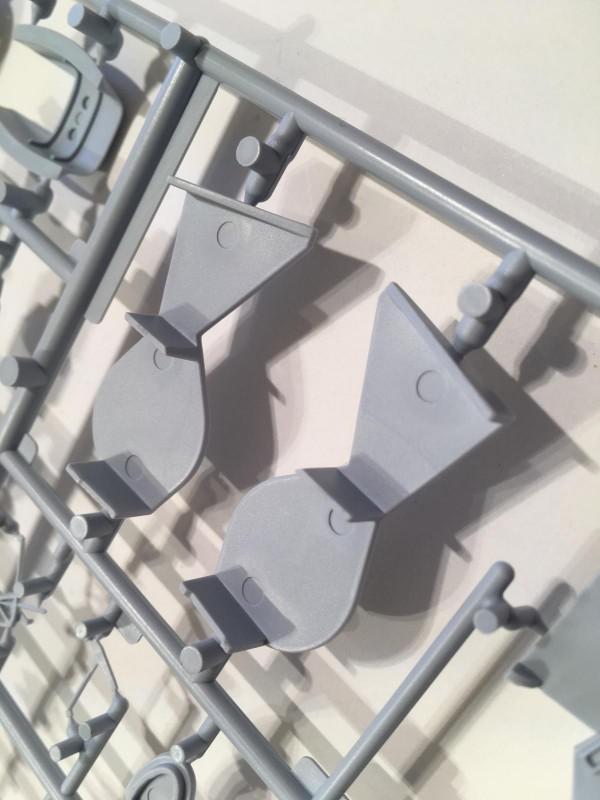
This picture shows the inside of the raised gear doors. There are several stands cast into the part that will ensure proper depth once installed. This is another nice touch...
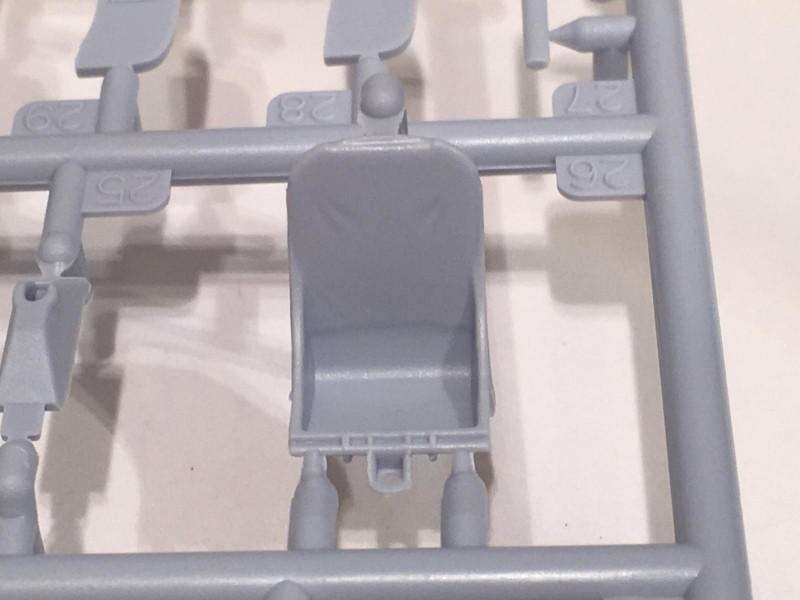
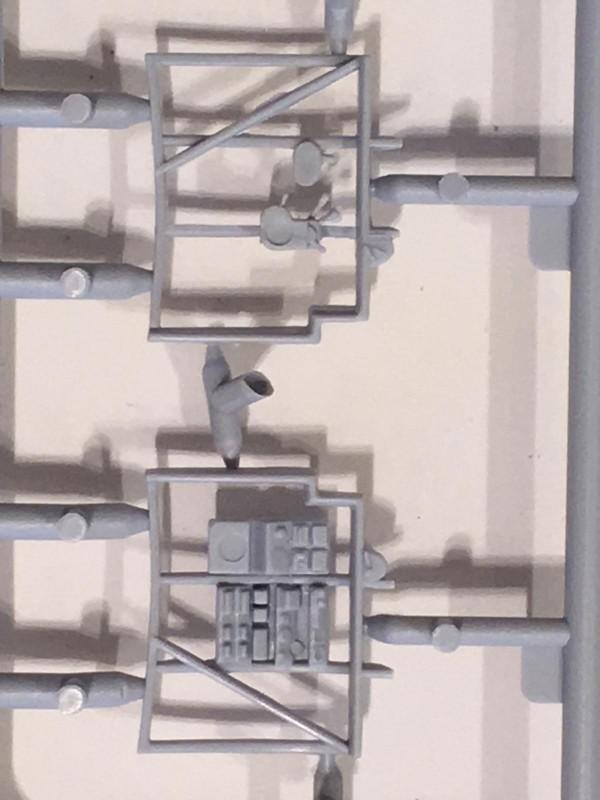
The pilots seat... notice the little "wrinkles" cast into the seat back.
The details cast into the turret guns look pretty convincing.
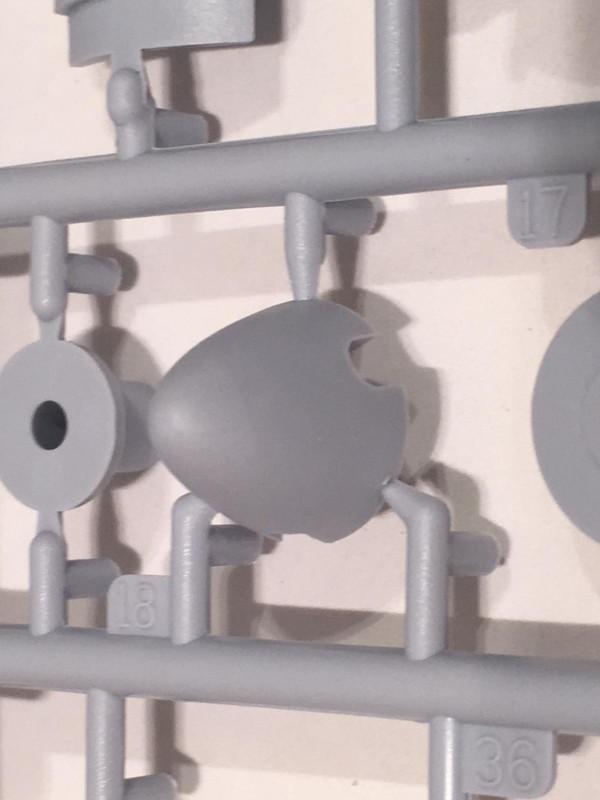
The spinner looks good too...
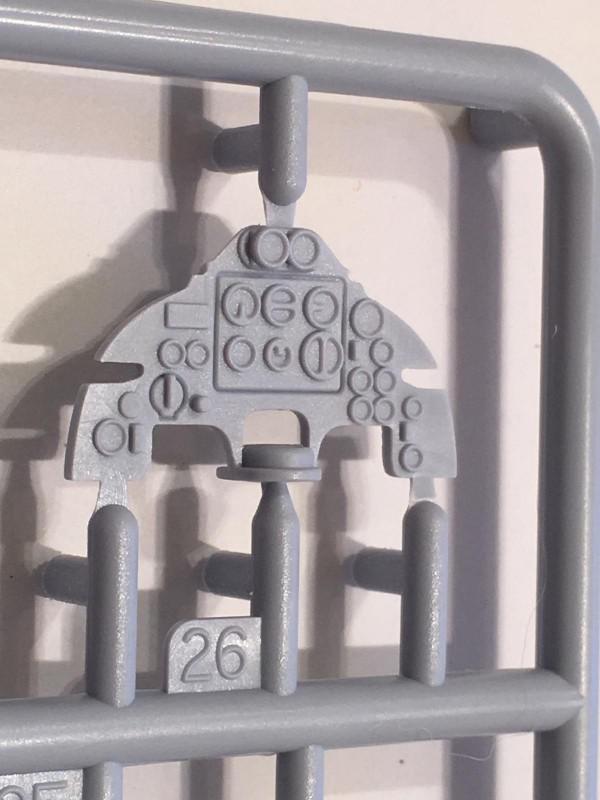
as does the instrument panel. It looks like one could paint on the details if desired. A decal is provided too. If a person was so inclined, they could use individual instrument decals ...
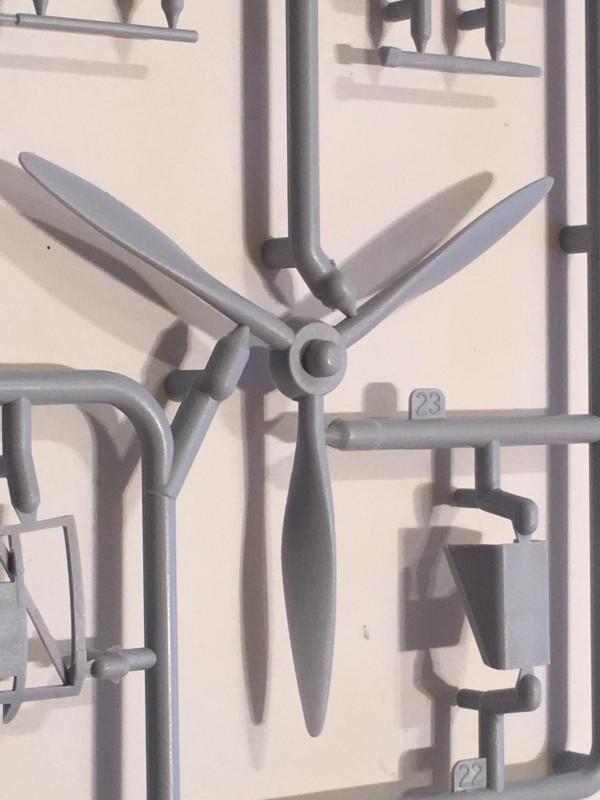
The propeller is shown here. It looks great and I didn't notice any casting flaws in my sample.
The main landing gear legs are shown here. The little details cast into the parts are visible in this photo.
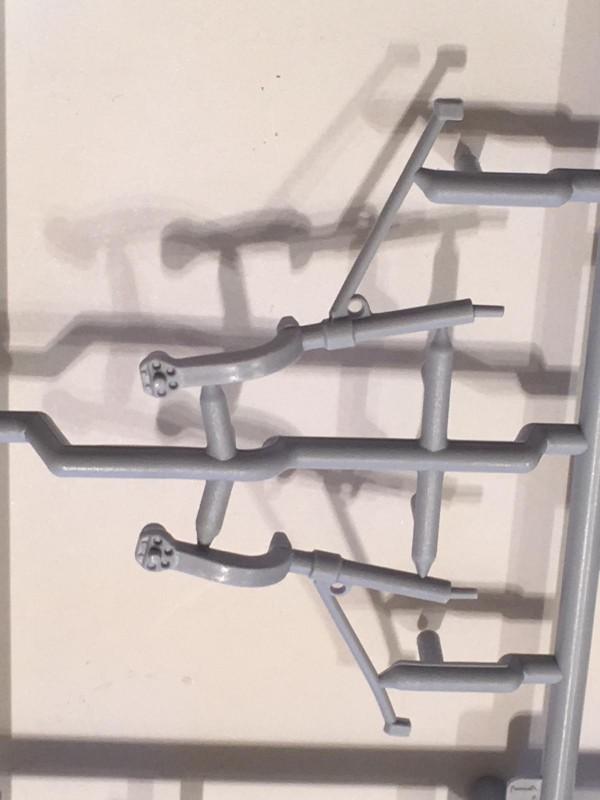
There are two types of exhausts provided. They look the same... until you look at the exits
Where you will see that one exit is round, while the other is shaped more like a "D"... There is a tiny mold seam visible at the exits. A few swipes with a file or a sanding stick will take care of this. The exhaust may benefit from drilling out the ends. I still haven't decided on what I will do on my build.
Here is a close up photo showing some details found in the cockpit sidewalls.
Then we go to the clear parts... They are nicely molded. Thin ... and very transparent.
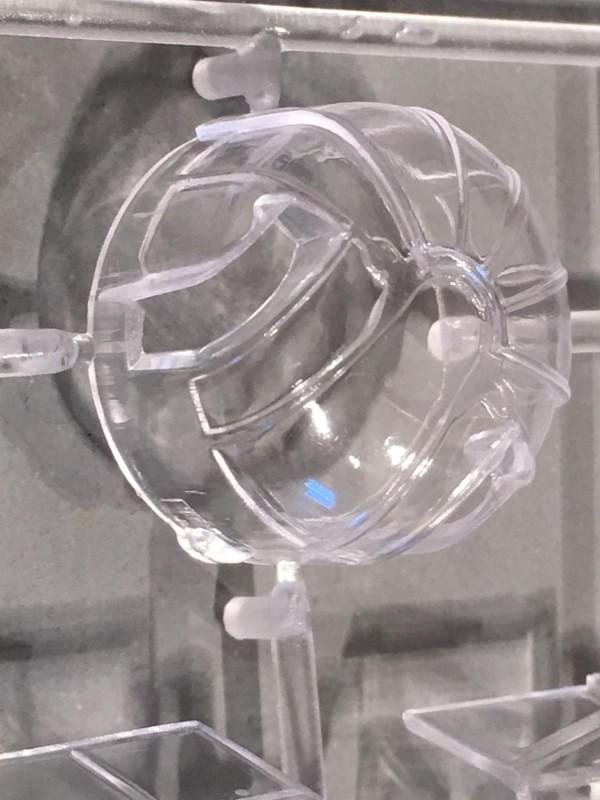
Here's a close up showing the turret and canopy. Both the turret and the cockpit can be built in the open position or closed. The choice is yours.

These parts are used for the open turret.

This photo shows the "closed" canopy for the pilots cockpit.

Lastly, here's a close up showing the closed turret...
You can see for yourself how nice this kit is. Please look at the photos I have provided and judge for yourself.
Personally, I am going to get busy on this one right away.
I'm not an expert on the BP Defiant by any means. I didn't measure anything or compare the fuselage half (or wing outlines) to a scale drawing. It looks good to me.
Would I toss out the Classic Airframes kit ? No, as it still builds into a nice model from what I have read.
But this one will be much easier to build in my humble opinion...
Please follow along with me as I build mine over in the "100 Years of the Royal Air Force" Group Build.
If you haven't done so, please check it out...
http://imodeler.com/groups/100-years-of-the-royal-air-force/
If your really adventurous, join us and build something of your own...
Thanks for reading this. I have tried to be as honest as possible during this review. I pointed out the small things, the good things and the very little bad.
As per my usual sign off...
Comments are encouraged.
That's a really nice review and photo array, Louis (and it looks like it's a top-notch kit)...but I have to tell ya - I've always thought that airplane is/was butt-ugly - jus' my .02 🙂
It's ugly in a cool way... Sort of like a Stuka. That's what I like about it. Thanks Craig !
I suppose it has a certain charm to it, but it is an ugly bugger...
Hey Robert ! I'm glad you chimed in... I printed out the missing pages from the instruction booklet to the 1/48 scale ICM Ju-88 A-5 you sent me. Thank you ! I will be doing a review on the 88 tomorrow ... So please stay tuned buddy.
Yes this Defiant has a certain "Charm" to it...
Cool Louis, can't wait to read it!
Craig, I know what you mean, the Defiant, sort of plane only a mother could love. In fact pilots in the RAF referred to it as 'Daffy' - I think in reference to Daffy Duck, who in turn made his Hollywood debut in the late '30's.
Great review, Louis - I've loved your reviews on the recent Luftwaffe releases from Airfix - but I think it'd take a 'Tammy 1/32' rendition to tempt me with this bird. Really great job on the photography also. Great to see Airfix getting some game...
Now this is good stuff David ! I learned something new too. I never knew the Defiant was called Daffy...
Thanks for the compliments on this review...
I plan on writing an article on the ICM 1/48 scale Ju-88 A-5 and posting it up tomorrow night. The original plan was to write it up about a week ago. But my instruction booklet was missing pages 11-14 !
Luckily Robert Paschall provided me with the missing pages ...
So please stay tuned for another one.
It's as nice as you say it is, Louis. Builds up very easy.
Thanks Tom. I'm looking forward to building it for sure...
Great kit Louis, and nicely presented. I'm sure it builds into a fantastic model and the details look very pleasing.
I've build the new tooled 1/72 version from Airfix and it was a pleasure to built. The 1/48 offers a lot more detail and I'm temped to have a go myself, but for the moment I'm sticking to 1/72.
I'm looking forward to your built on this one, and looking forward to your article on the ICM 1/48 Ju-88 A-5 as well.
I've seen some good reviews for the Ju88, Louis, so look forward to seeing what you think. I really like the 88, despite the Revell 1/32 being the only kit I've ever binned.
Hey David !
I have the Revell 1/32 scale Ju-88 kit, and quite ironically, I have plans in store to do a kit review on it too very soon. Plus I am doing a review on the 1/32 cousin to it, the He-111 P (also by Revell). Then I just picked up the new tool P-51D-5NA, and the He-219 A-0 / A-2. These too are all 1/32 scale, and are all in my plans for future kit reviews.
These kits along with the brand new 1/48 scale Tamiya Bf-109G are all in the "reviews" list for the very near future... So please stay tuned buddy.
Hello Ferry, Thanks for the kind words. I no longer build 1/72 scale, since my old eyes won't let me anymore. So I have limited myself to 1/48 and larger in aircraft, while I stick to 1/35 in Armor builds.
This does look like a good kit. It also looks to be well engineered. I don't have one built, so I am kind of anxious about it.
Please stay tuned for the ICM Ju-88 review. If things go as planned, I hope to post it up tomorrow night.
Think I saw this at Telford last Autumn- a very well engineered kit. As to its ‘ugliness’ I think it needs to be seen in context of the time- a 1930s design desperately re-engineered to meet a more immediate danger.
Hey Rob. It does appear to be well engineered. I am looking forward to building this one... It's been sitting in the "Build pile" way too long. One of the things I like about this plane is the turret. They did what they had to, and at the time this was acceptable. Then the Luftwaffe figured out what was happening and the Defiant served mainly at night. Later in the War it was used as a target tug. So even though it may not have been combat effective for very long, it still was a useful plane.
Lovely kit review, Louis, thank you very much for taking the time to do it. The Defiant always seems to attract comments on its looks, some love it and some think it’s ugly. Personally I’ve always loved it, especially the turret.
Thank you George. It pleases me to hear that you enjoyed reading this article.
I personally like the looks of the plane. The turret is my favorite part too !
It is kind of ugly, and that is what I like about it. I would describe it as a Stuka... You either love the looks or you don't. There doesn't seem to be much "in between" ground there... and I like the Stuka too.
Please stay tuned for future "kit review" articles. I have been corresponding with Martin and Boris about writing more of them... and I have some pretty cool ones scheduled.
Nice review, Louis. I don't think it's that ugly, always liked it, maybe I'll try their 1/72. The Phantom's not too pretty either, but you gotta love it.
Thanks Robert. I say give it a go and build it. From the responses I have been getting the 1/72 scale kit sounds like a great choice.
I have always loved the Phantom. There was just something about it that I was drawn to. Sort of like a moth to the flame.
Louis, good info, and yes its an ugly airplane, kind of reminds me of moving grandma's green house on the back of a Hurricane. I've seen this built up very nicely. I look forward to your finished model.
I think that the Luftwaffe often mistakenly identified these planes as Hurricanes when they first encountered them. The turret was a nasty surprise until they realized it was there and how to counter it by using different tactics. Thanks for the kind words and I hope that I don't disappoint you guys with how mine turns out. Please stay tuned for updates !
What a thorough and well presented job. I am not the greatest fan of the BPD. But this review even has me tempted. I think pilots and gunners at air training schools were pretty crest fallen to be put on these. If the hydraulics failed the gunners were sitting ducks ( not Daffy presumably). Brave men who flew them! Can’t wait to see the Iron Works put this through its paces!
So happy that Airfix retrieved its mojo!
Hey Paul. Having had a good close look at this kit I can fully endorse it. I say get one and go for it ! I think that you're going to be happy with it.
I can only imagine how it must have been flying in one of these into combat. Now imagine what happened when the turret failed or was damaged by incoming fire.
Doesn't sound like a good place to be. Brave souls indeed.
Airfix is back ! I'm looking forward to seeing more of their next releases. The new Stuka and Hawker Sea Fury look like good ones too.
I love this bird for the reasons you name, Louis: anomalous, ugly, loaded with character. And what a way to go with a nice Airfix edition! I want one!
David my friend. Good to hear from you Sir !
This kit is a good one from what I have seen so far. If it builds up as nice as it looks then I'll have a great plane once I'm done.
Go for it and get one. I think that you will like it.
This plane has plenty of character. I like it too. A hurricane with grandmas green house is a pretty good description. I think Terry is on to something there.
Late to the party but a great review Louis. I am currently finishing up my Daffy and will post it shortly, a day or so. I also noticed that you were building it so I'll pop over and have a shufti and see if you encountered any issues I had.