1/48 Scale Revell P-40E Warhawk
The P-40E Warhawk that is currently put out by Revell is, in fact, a true Revell aircraft kit. I had never built this model as a kid, as it was Revell, and not Monogram (back in those days, there was brand loyalty, especially with aircraft models), so I was not familiar with this kit at all. This version was the Revell of Germany issue, and I was in the mood to build a P-40. I choose this model because I wanted to build a P-40 that was in the Philippines during the days right after the Pearl Harbor attack, and this issue had those decals as an option.
In the Beginning
Opening up the box, I found that there was a fair amount of parts. The cockpit and the wheel wells both had decent detail (the wheel wells were not just holes in the lower wing, they had enclosed areas), and all the panel lines were engraved. Looking at the main wheels though, I thought that they looked a little too big, and they have the “weighted” look to them, which I am not into. But everything else looked good, with crisp molding and almost no flash. After some very light clean up, the fun began.
Construction
Construction began with the cockpit. Like I mentioned earlier, the cockpit had decent detail, so I assembled the whole cockpit area (floor, seat, stick, instruments panel) separately, then installed it into the fuselage. The interior cockpit area was painted Interior Green, as well as the cockpit sidewalls. The tail wheel assembly was constructed at this same time. After these assemblies dried, the tail wheel area was installed and painted Zinc Chromate. At the same time, the air intake below the nose area was installed and then both the air intake and the main wheel wells were also painted Zinc Chromate. When the paint dried in these areas, the main fuselage was glued together. After the fuselage, had set for a day or two, the seam work was started, which went very well.
After the fuselage was ready, I did the wing assembly. This gave me a little trouble, primarily in the main gear door area. The instructions were not super clear on their assembly, and it took me a little while to figure them out. Be careful on this part, as these pieces are a butt fit onto the lower wing, with no pin or recess for the door part to sit in. The directions (which are printed like newsprint, on newspaper like paper) are not clear on this, and I had the doors on upside down at one point. But for the most part, the seam work on the wings went very good, and after all was judged to be in order; I glued the wing and fuselage sections together.
I did have to do a little work on the seam where wings met fuselage, but again, the fit was not horrible. After this step, the stabilizers were installed, along with wheels, pitot tube, and any other small parts that I had left off during the main construction. After everything was allowed to sit for a day, it was off to the paint shop.
Painting
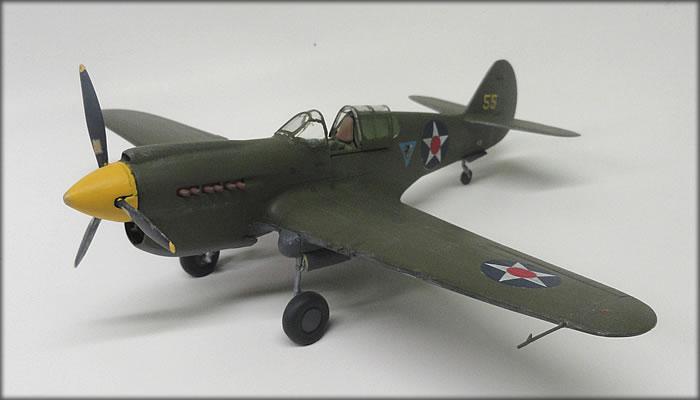
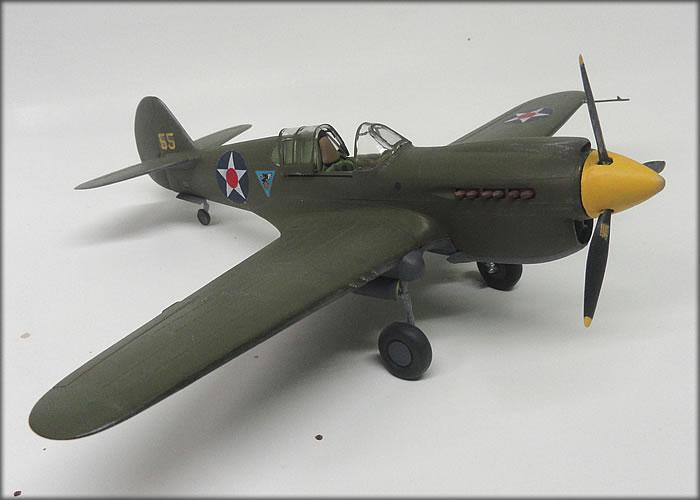
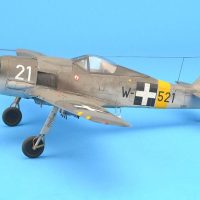
The paint scheme on this bird was Olive Drab over Neutral Grey, with a RLM 04 Yellow spinner, thus it was fairly straight forward and quick. I employed my paint brush and Qtip method of painting, and it came out pretty good. The only concern I had was how weathered should the paint be, more on this below. After small touch ups were done to the paintjob, it was off to make this bird part of a squadron.
Decaling and Weathering
The decals I used were the kit decals that came with the model. The aircraft that I decided on was a fighter from the 23rd pursuit group, 3rd pursuit squadron, based at Nichols field, Luzon.
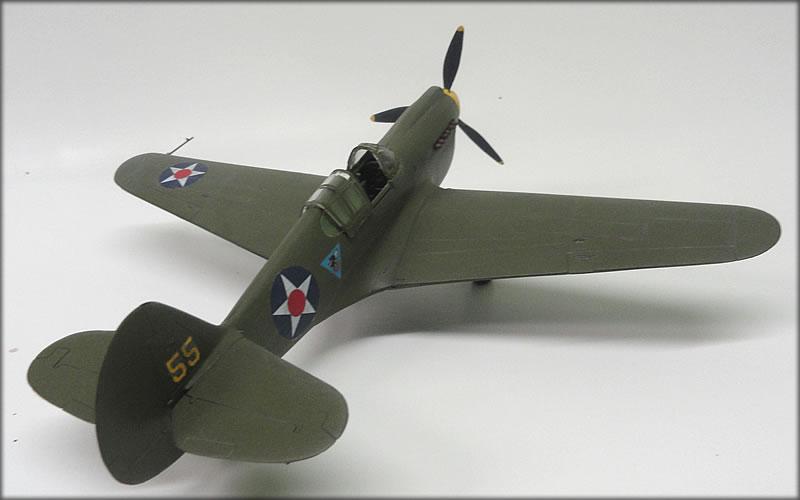
After making sure the model was as dust and dirt free as possible, I sprayed a layer of Glosscote straight out of the can. After letting the Glosscote dry for a day, the decaling phase began. I was surprised in that there quite a few decals with this kit. There are the two different types of national insignia (I had to add a red dot in the middle of my version), a ton of stencils (I used some of the more prominent ones, but not all of them, it would have taken hours to decal if I has used them all), squadron insignia, and individual aircraft number. You also get the always cool US ARMY lettering for the lower wings.
The decals went down very nice and they all reacted quite well with Microset and Microsol. After making sure the decals were set, I covered everything with another layer of Glosscote to seal the decals and cover any silvering that might have occurred. After letting the Glosscote to dry for a few days, I laid down a good layer of Dullcote to seal both decals and paint.
After the flat coat was laid down, I did the usual weathering, with aluminum chipping along the all leading edges and the engine cowling. I also did exhaust and gun powder staining, as well as fuel spills. I had done some research on P-40Es that had been sent to the Philippines, and a lot of accounts say that the paint jobs were done quite quickly and hastily, especially on the P-40Es and the P-35A Lancers. Even though reports indicate that the humidity made the paint peel quite badly, I did not go too wild on the peeling paint, as most of the P-40E's were shipped just before the Japanese attack on the Philippines, thus I suspect that there would not be a lot of flight time on them.
I finished the weathering with an overall wash of grimy black over the whole model and a light dry brushing of mud on the lower wings, rear fuselage, and back wheel area. I then did a dry brushing of grimy black over most of the decals to tone them down.
Final Assembly
After the final weathering, I painted the hated canopy lines (which actually went pretty good this time), installed the canopy (in the open position) with White glue, and did the inevitable last minute touch ups.
Conclusions
This bird was different in that it is an original Revell mold (before the merger/buyout), but it looks great, even though I always thought that the P-40Es were not a sleek looking as the P-40Bs of Flying Tiger fame because of the large radiator chin. The only issue I have with the kit is the wheels, which are the bulged type to show weight. Because of this weighted look, the tires look like they are over inflated, and they remind me, for some reason, of Mickey Mouse's feet!
Until next time...


Nice P-40! In markings not usually seen, well done!
I agree...nice-lookin' work, sir! 🙂
Yeah boy...always an iconic war bird. Nice work.
Nice to see one built! After Revell, Monogram had an enhanced version with PE and figures.
I was a Monogram fan as well - as were MANY here! Revell's aircraft models just weren't quite as nicely engineered back then, but the newer offerings - and from Germany seem much better.
Well done - It's an icon!
Nice!
Come on, Kip, we need more photographs.