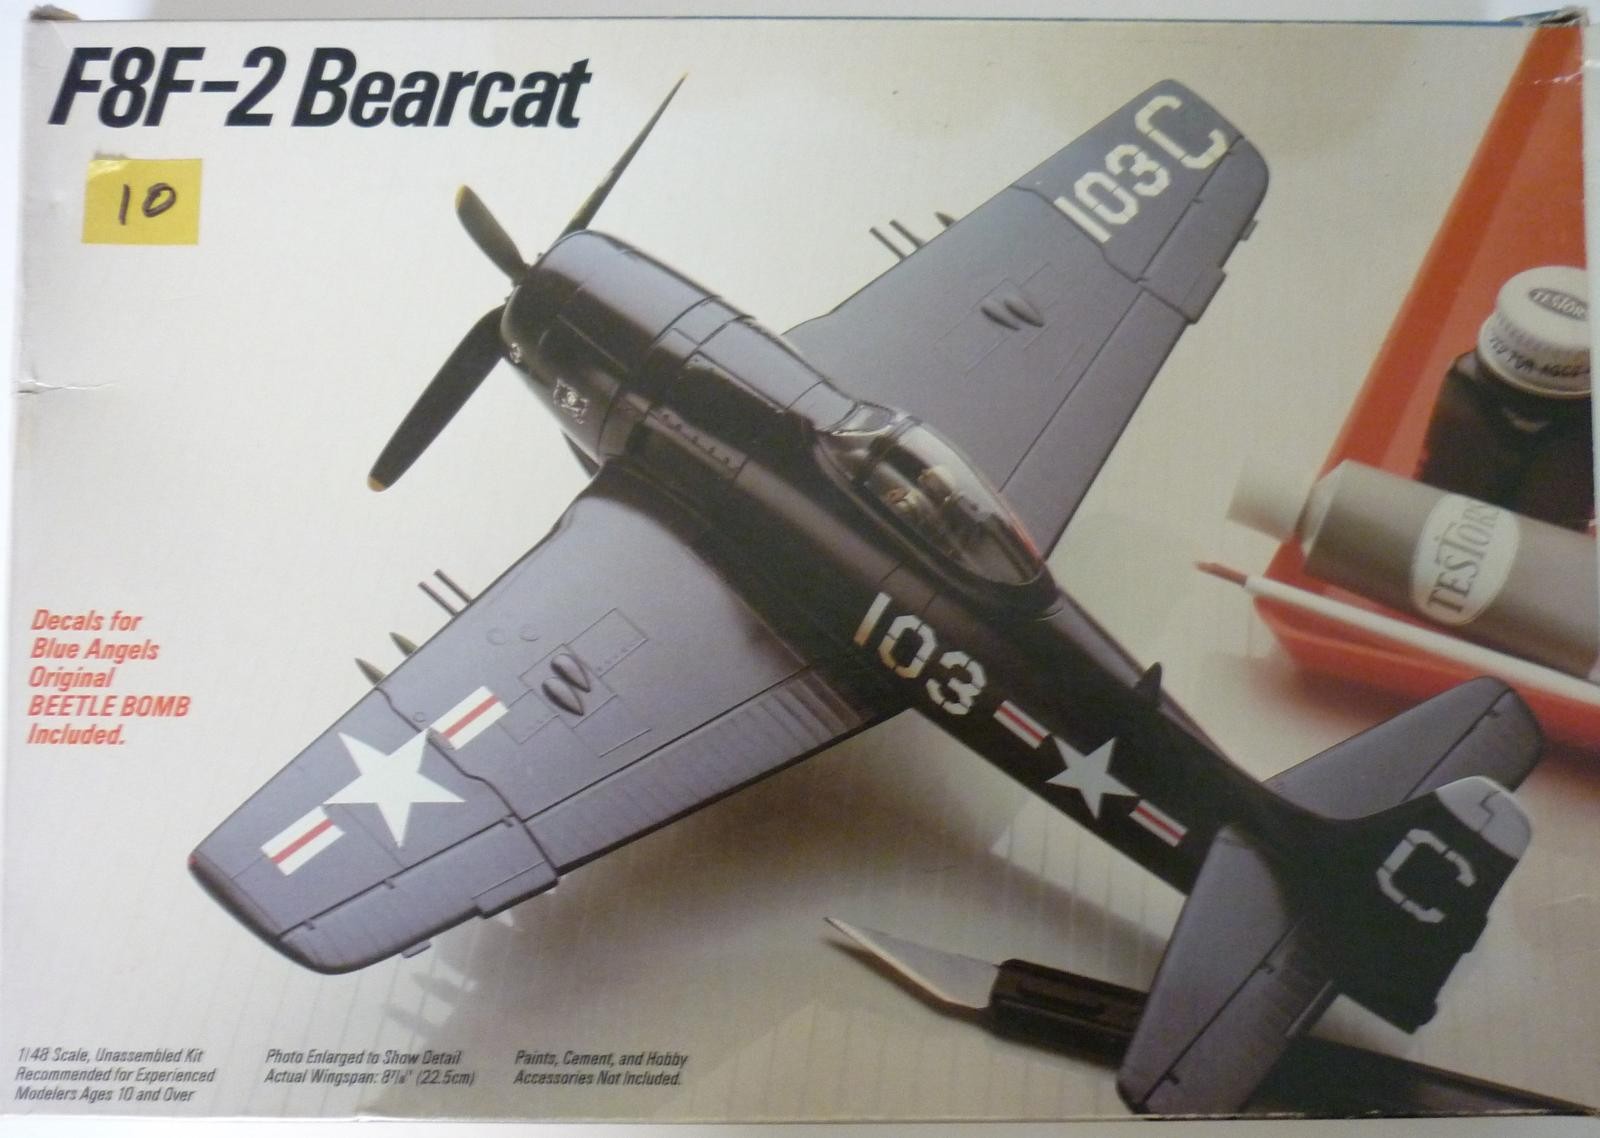
I want to thank Louis Gardner for starting this group build and inviting me to come along with my cat entry. Since I was a little late to the party I picked a kit that I thought would be simple and fast. So presented for your view today is the ancient
Testors/
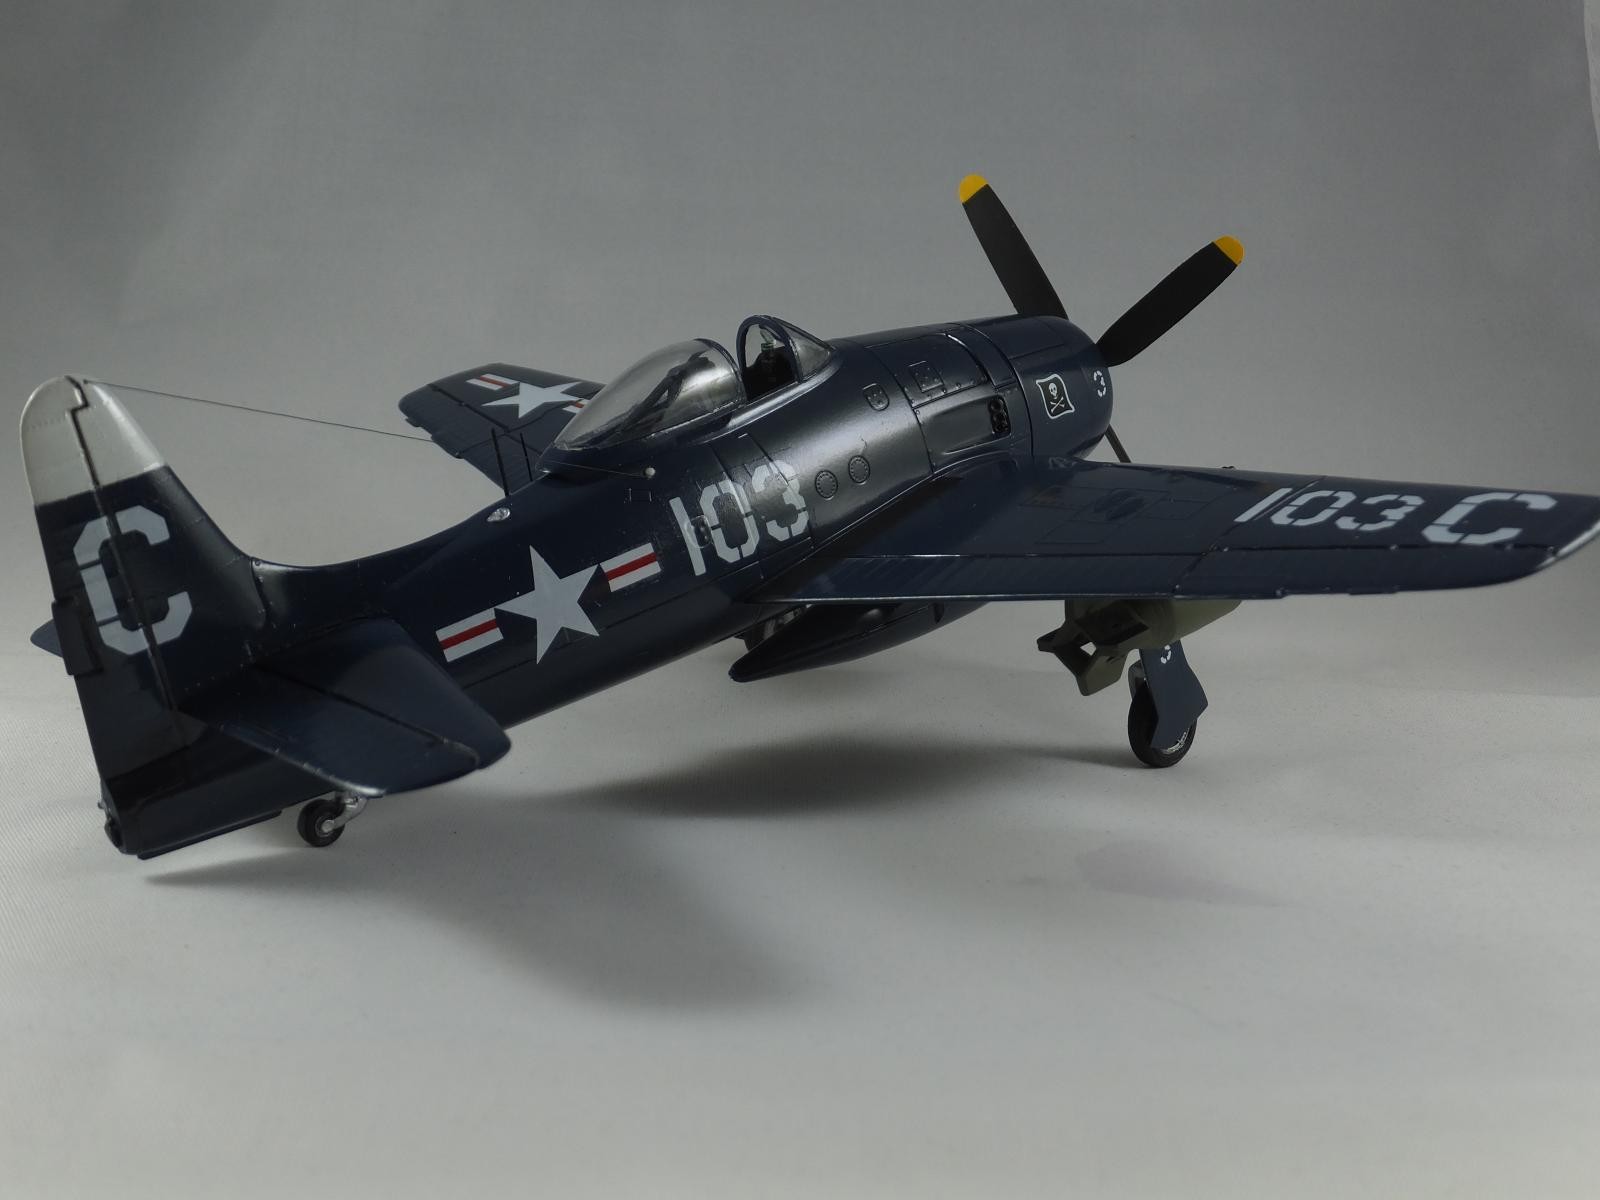
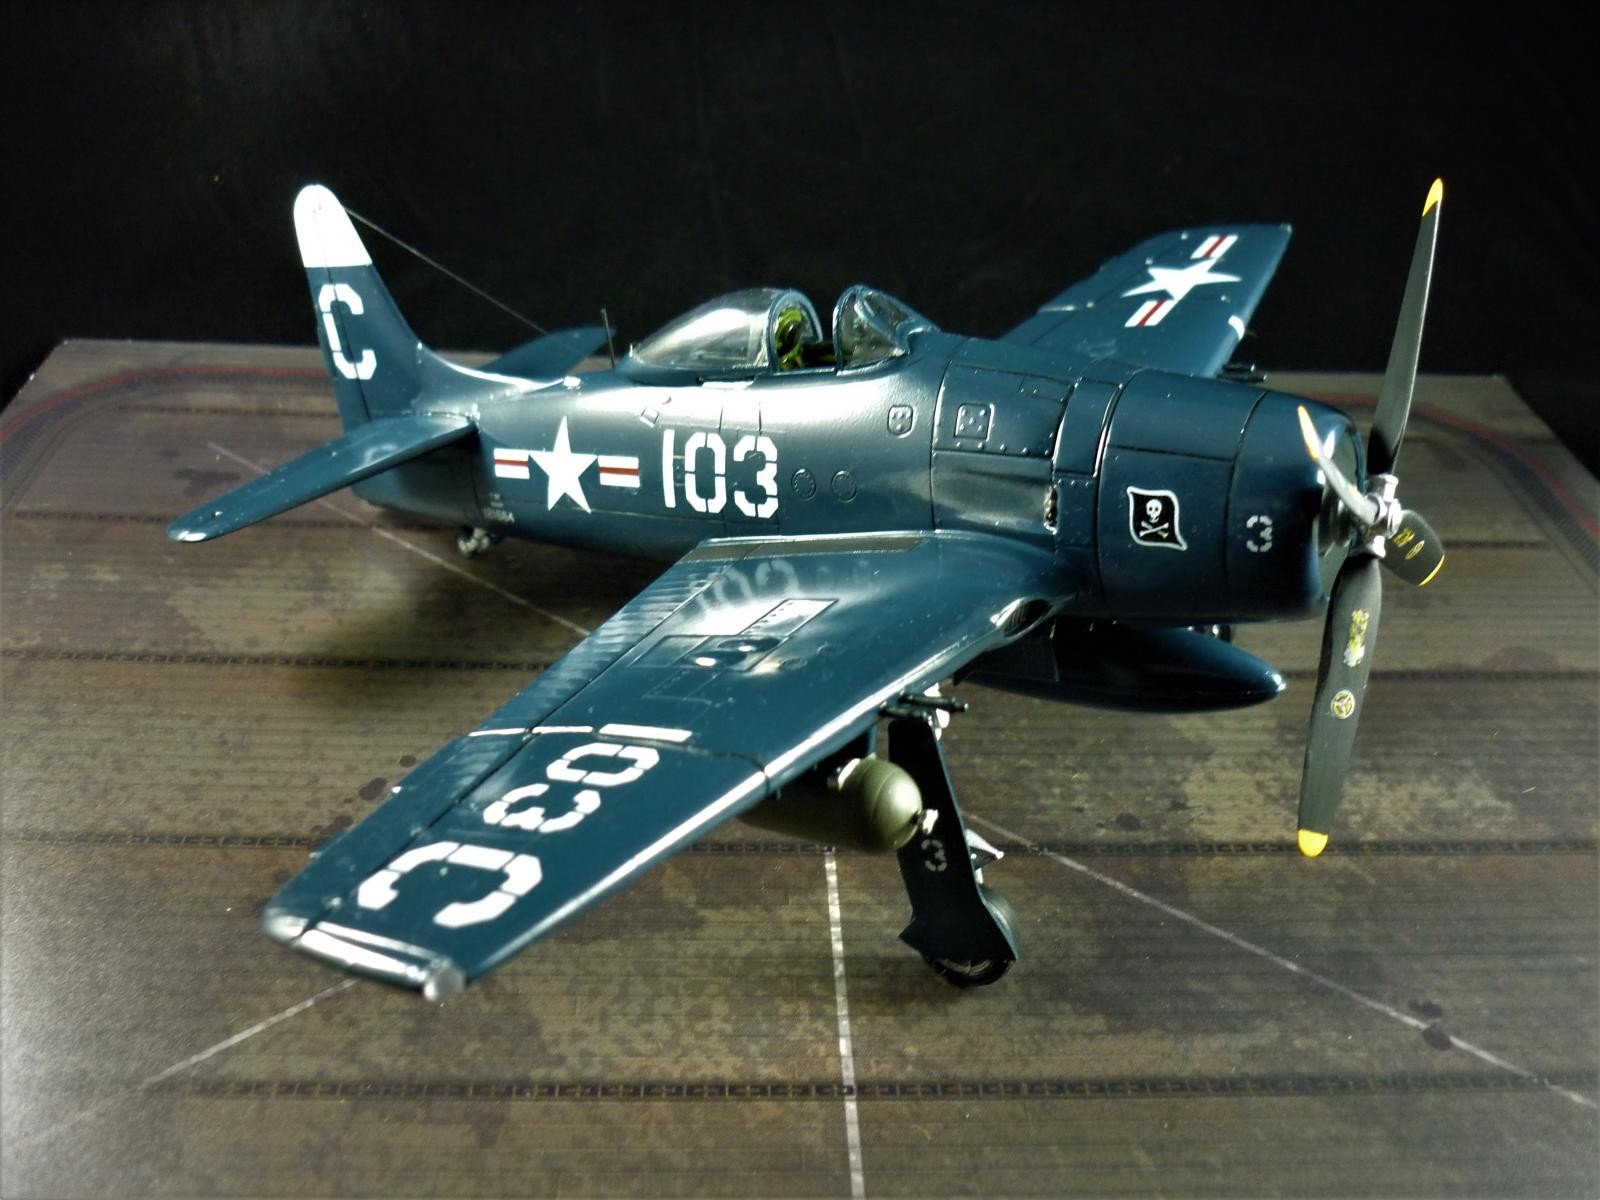
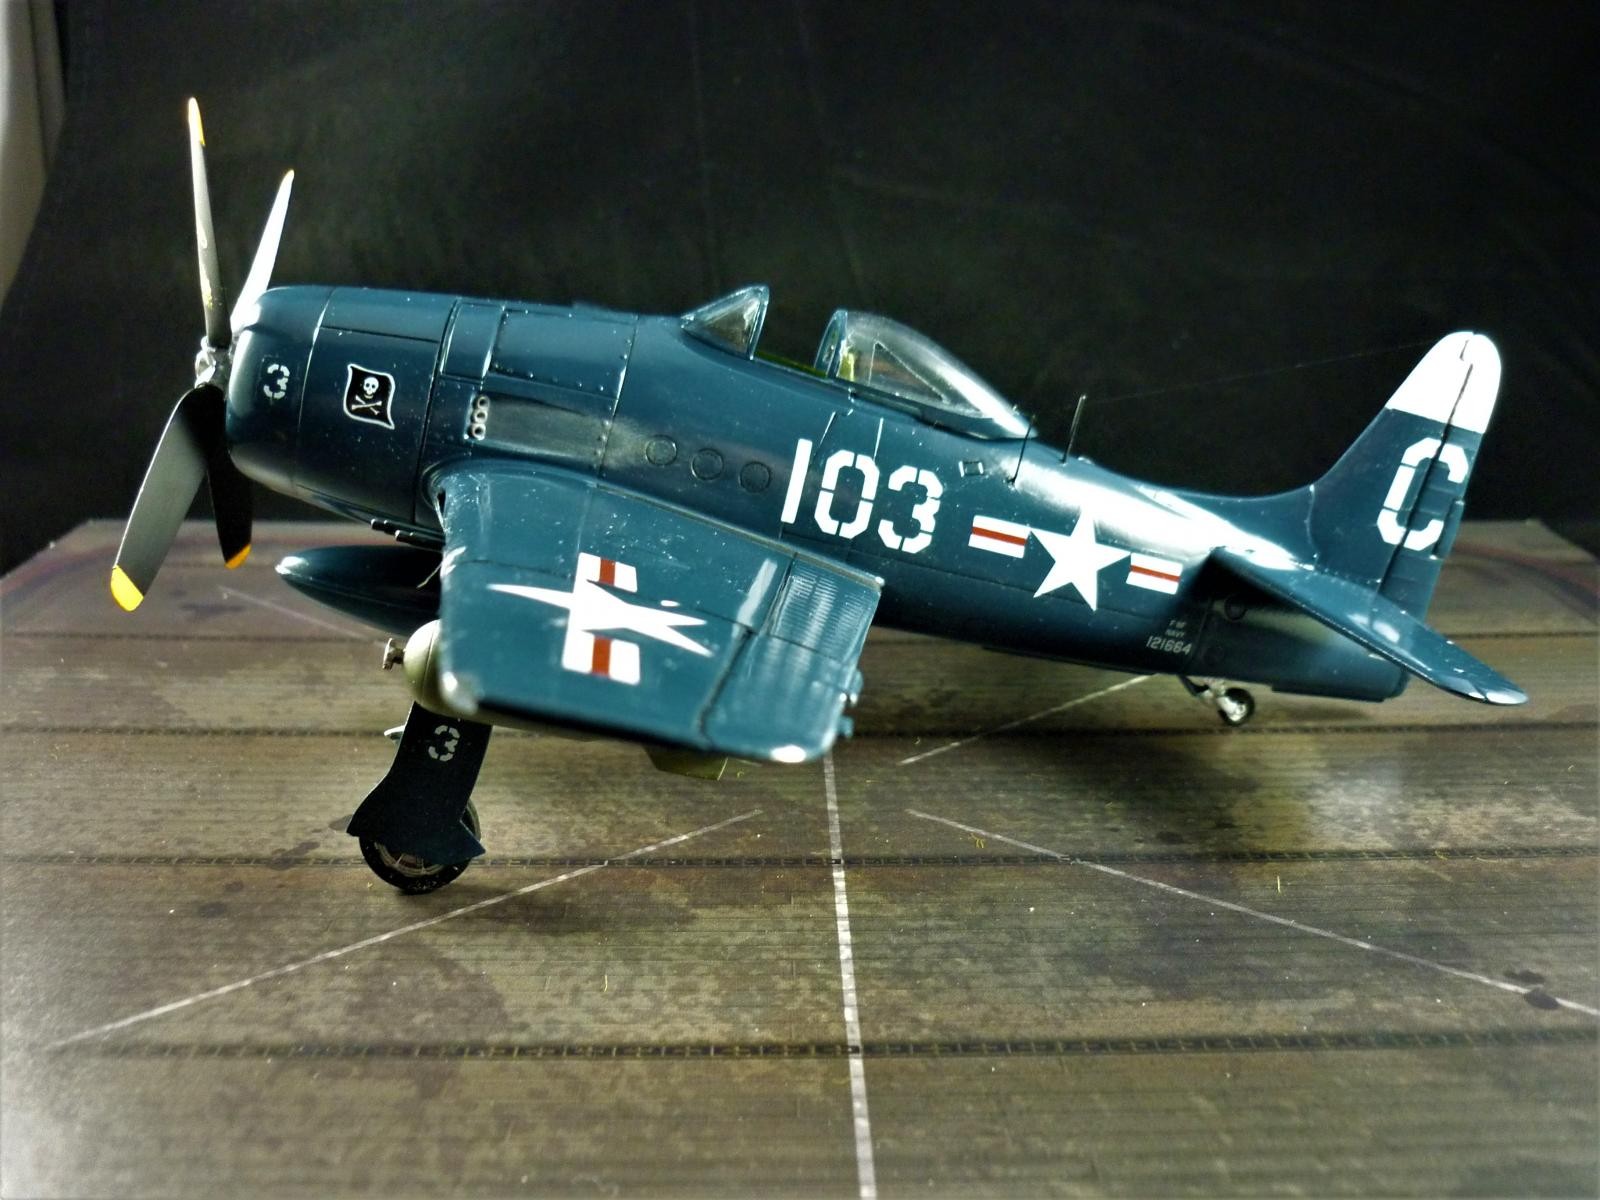
Hawk Bearcat, which would be Grumman's last single engine fighter built for the U.S.Navy. Developed too late to see combat in WWII for US forces, the French actually used her in Indochina in a ground attack role. The concept behind the Bearcat was simple, take a big radial engine, the P&W R-2800-30W. Use what worked with the Hellcat ,discard a lot of weight, a ton to be exact, and you now have a highly agile airplane with a spectacular clime rate. So lets build this oldie but a goodie.
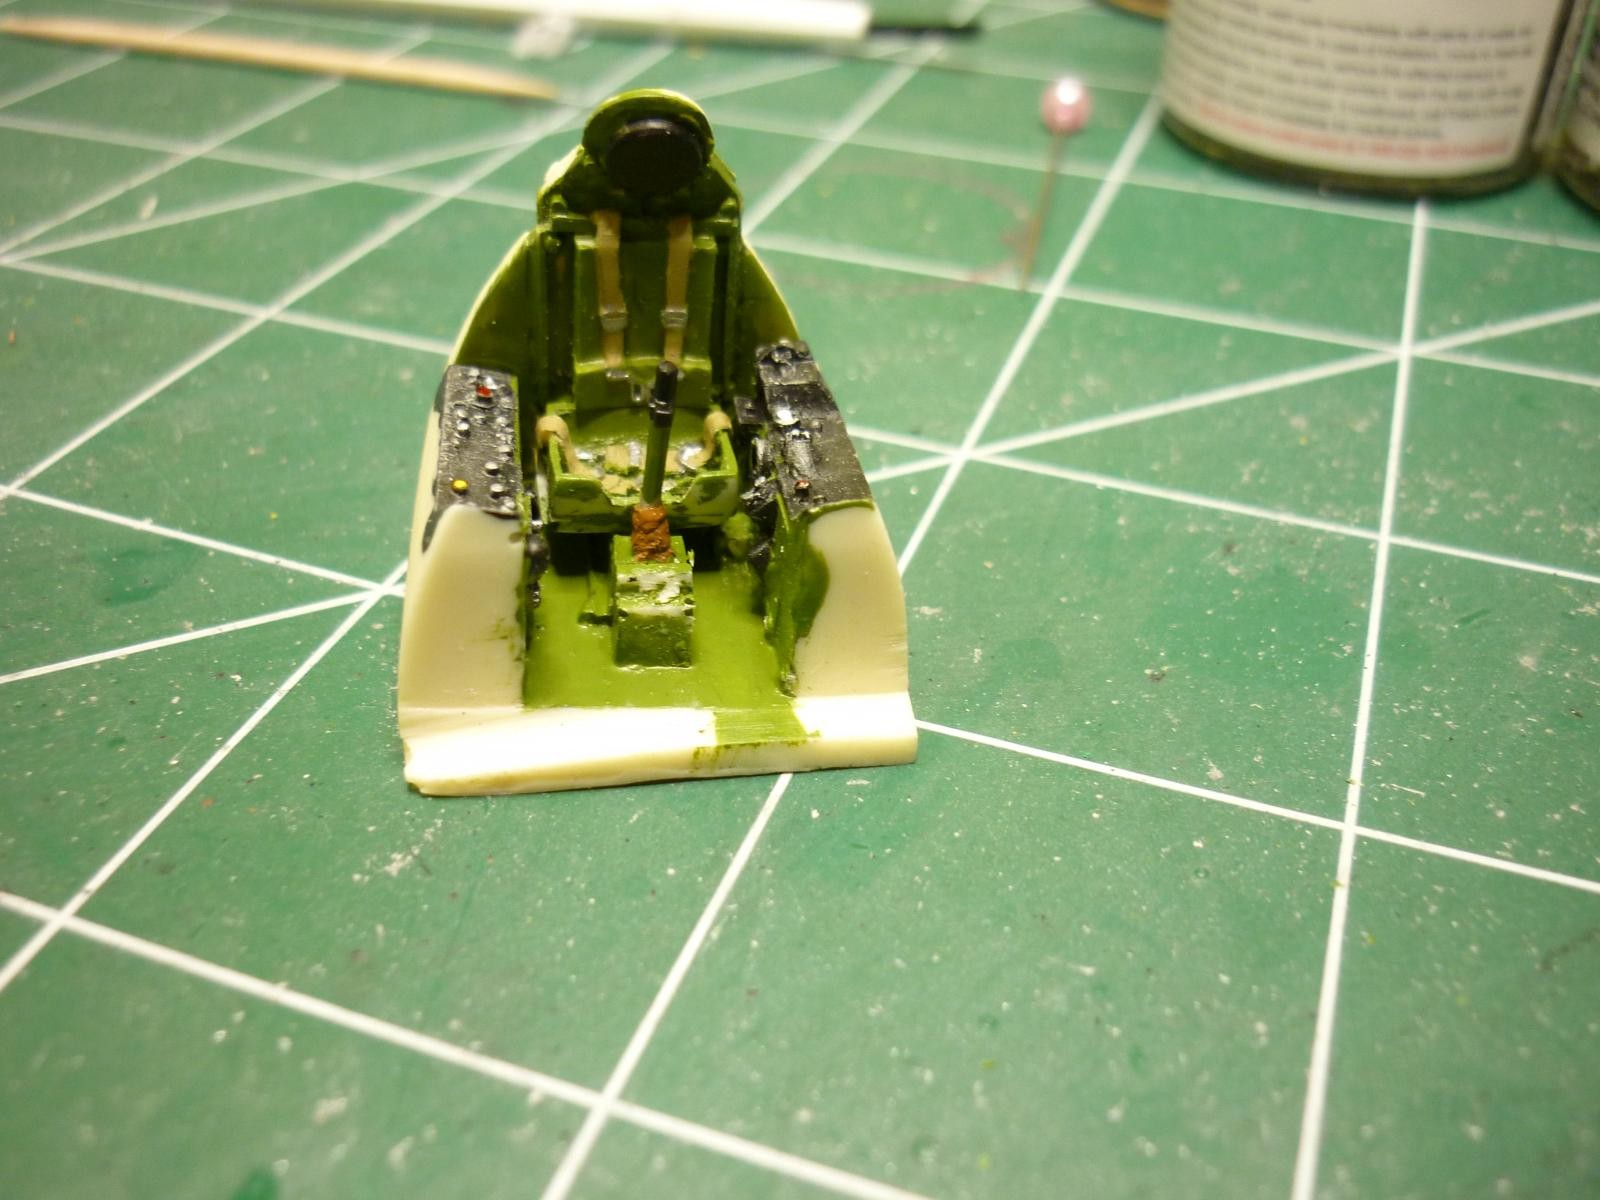
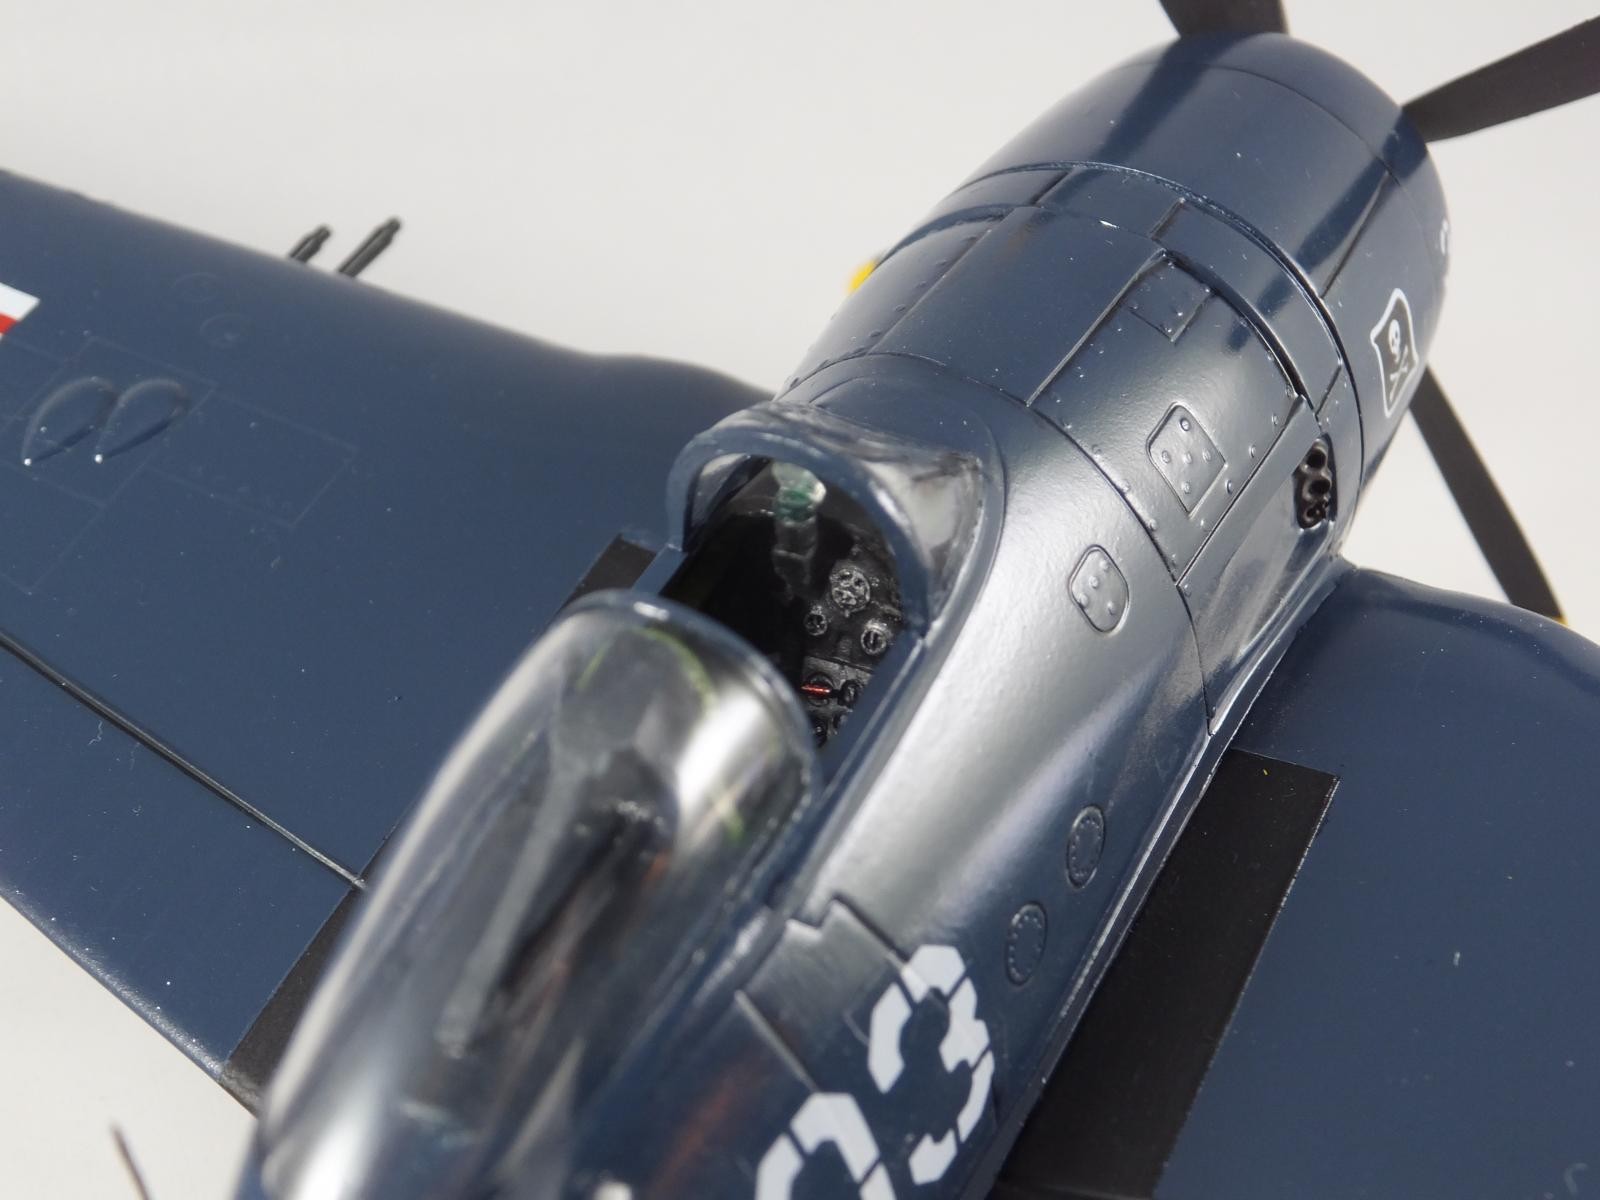
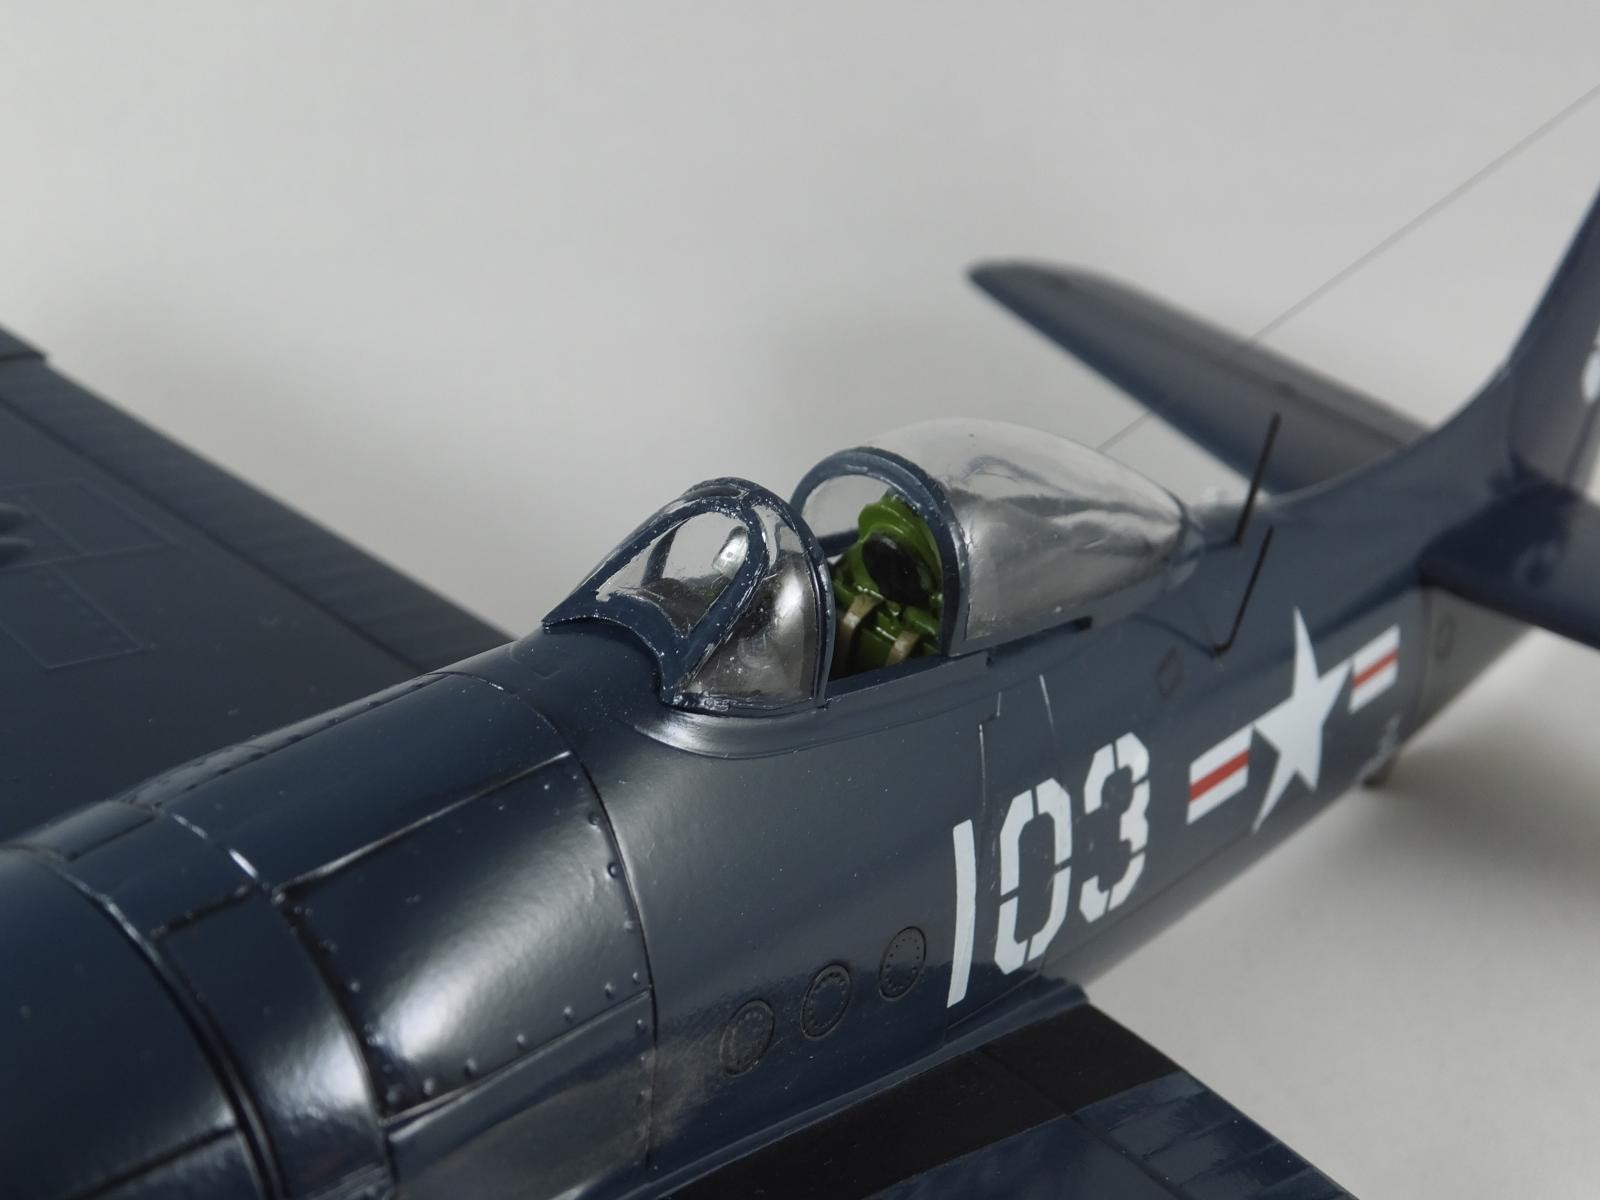
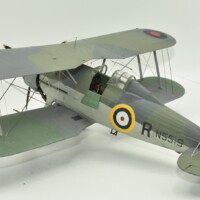
This is a very basic kit with not a lot of parts. Consequently, it doesn't have a lot of detail, so what to do? Why buy or make some detail as any self respecting modeler would do. Since the cockpit is really spartan I picked up an after market one from Lone Star Models
. It was designed to fit the Hobby Boss kit but Mike West assured me it would work with the Testors as well. It does, however, it takes a little work, lots of test fitting and of course some elbow grease with sanding sticks. And admonishing remarks from my better half to watch my language.
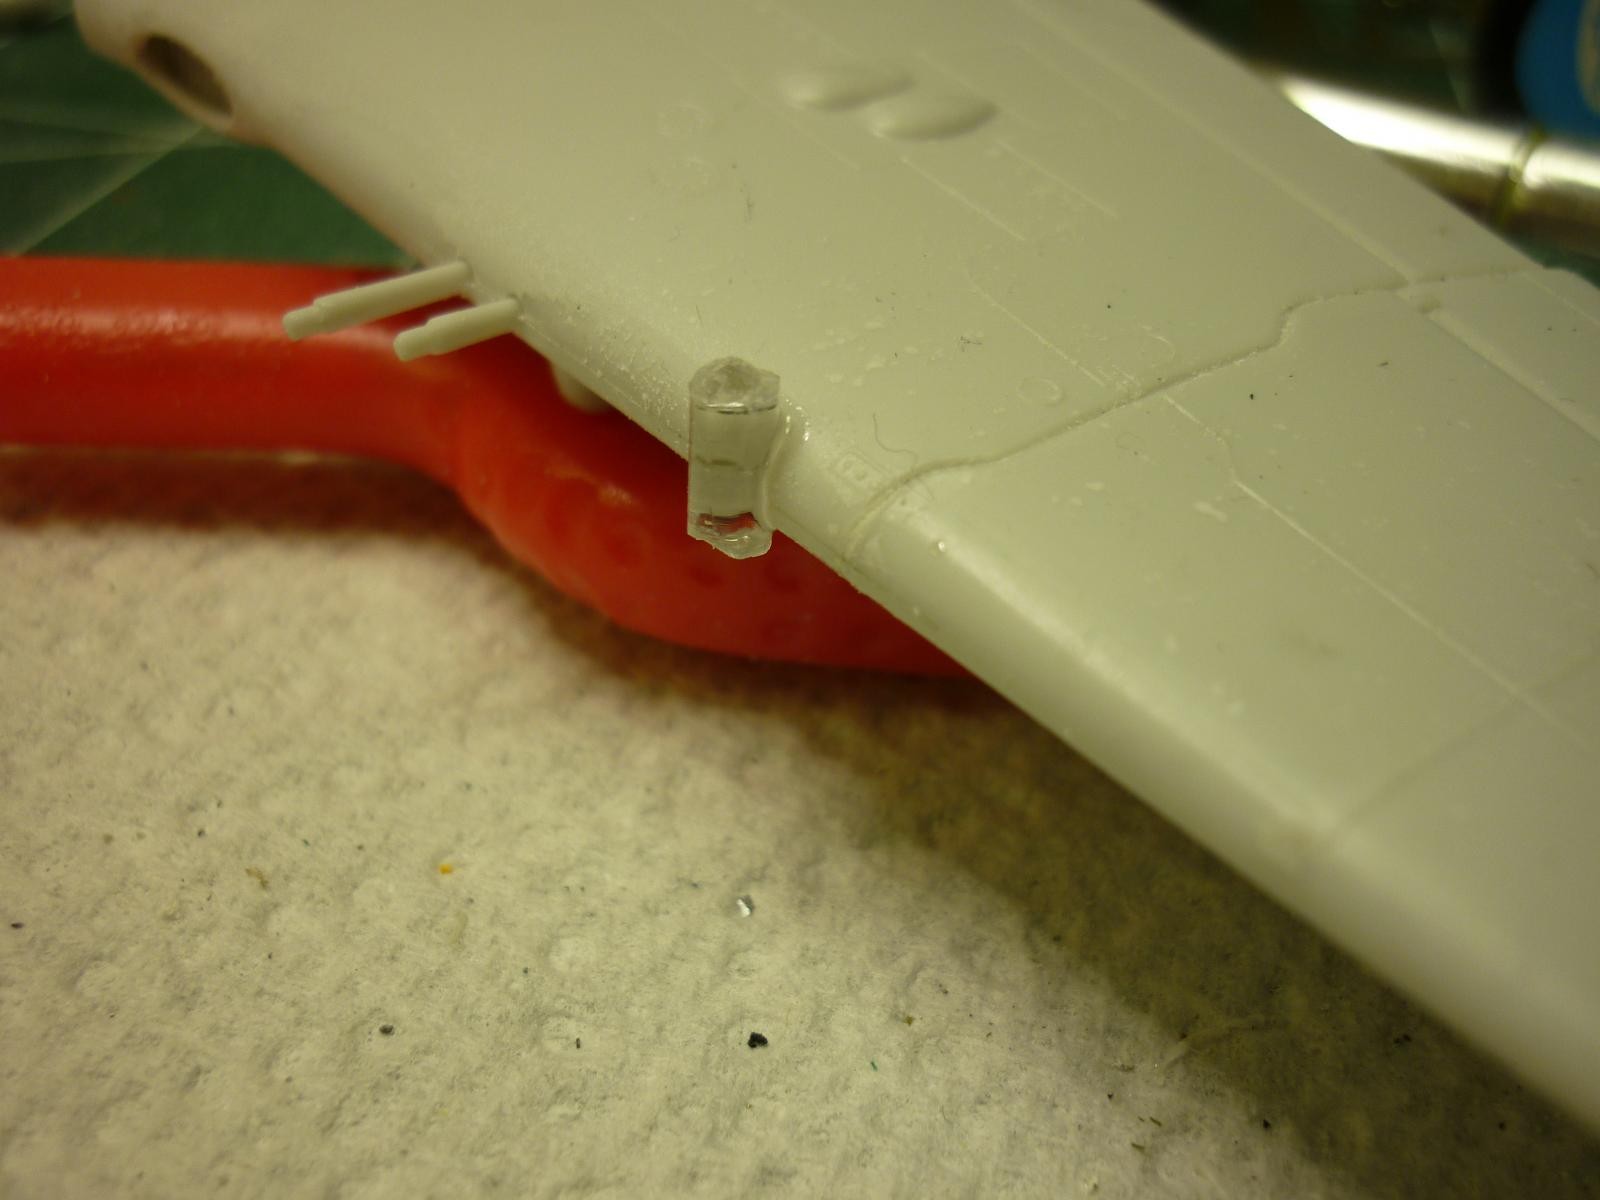
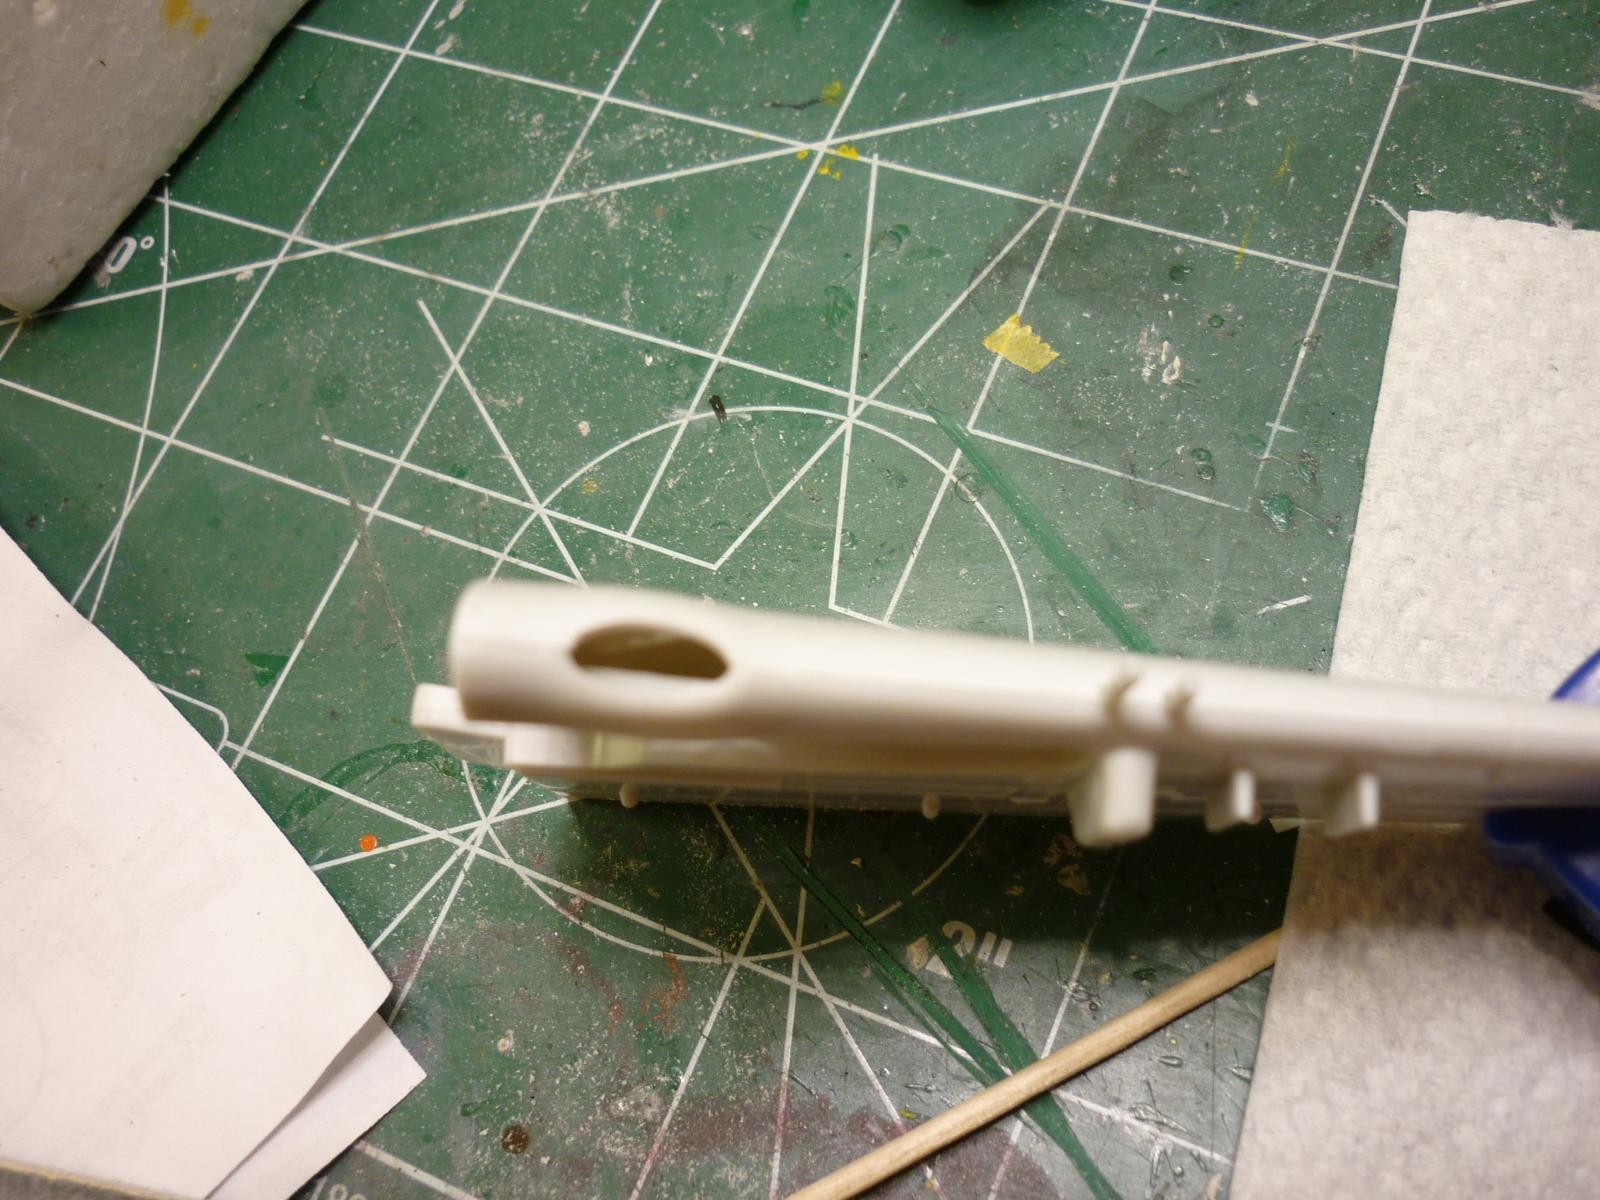
Next the Nav and landing lights are represented with panel lines so those had to go. I cut them out and replace them with pieces of clear sprue then sanded them to shape followed by polishing them using various grades of sandpaper.
The wing air intakes were merely holes, so something had to be done there as well.
Found some items in the spares that looked like filters so they were added to give depth and represent the air filters.
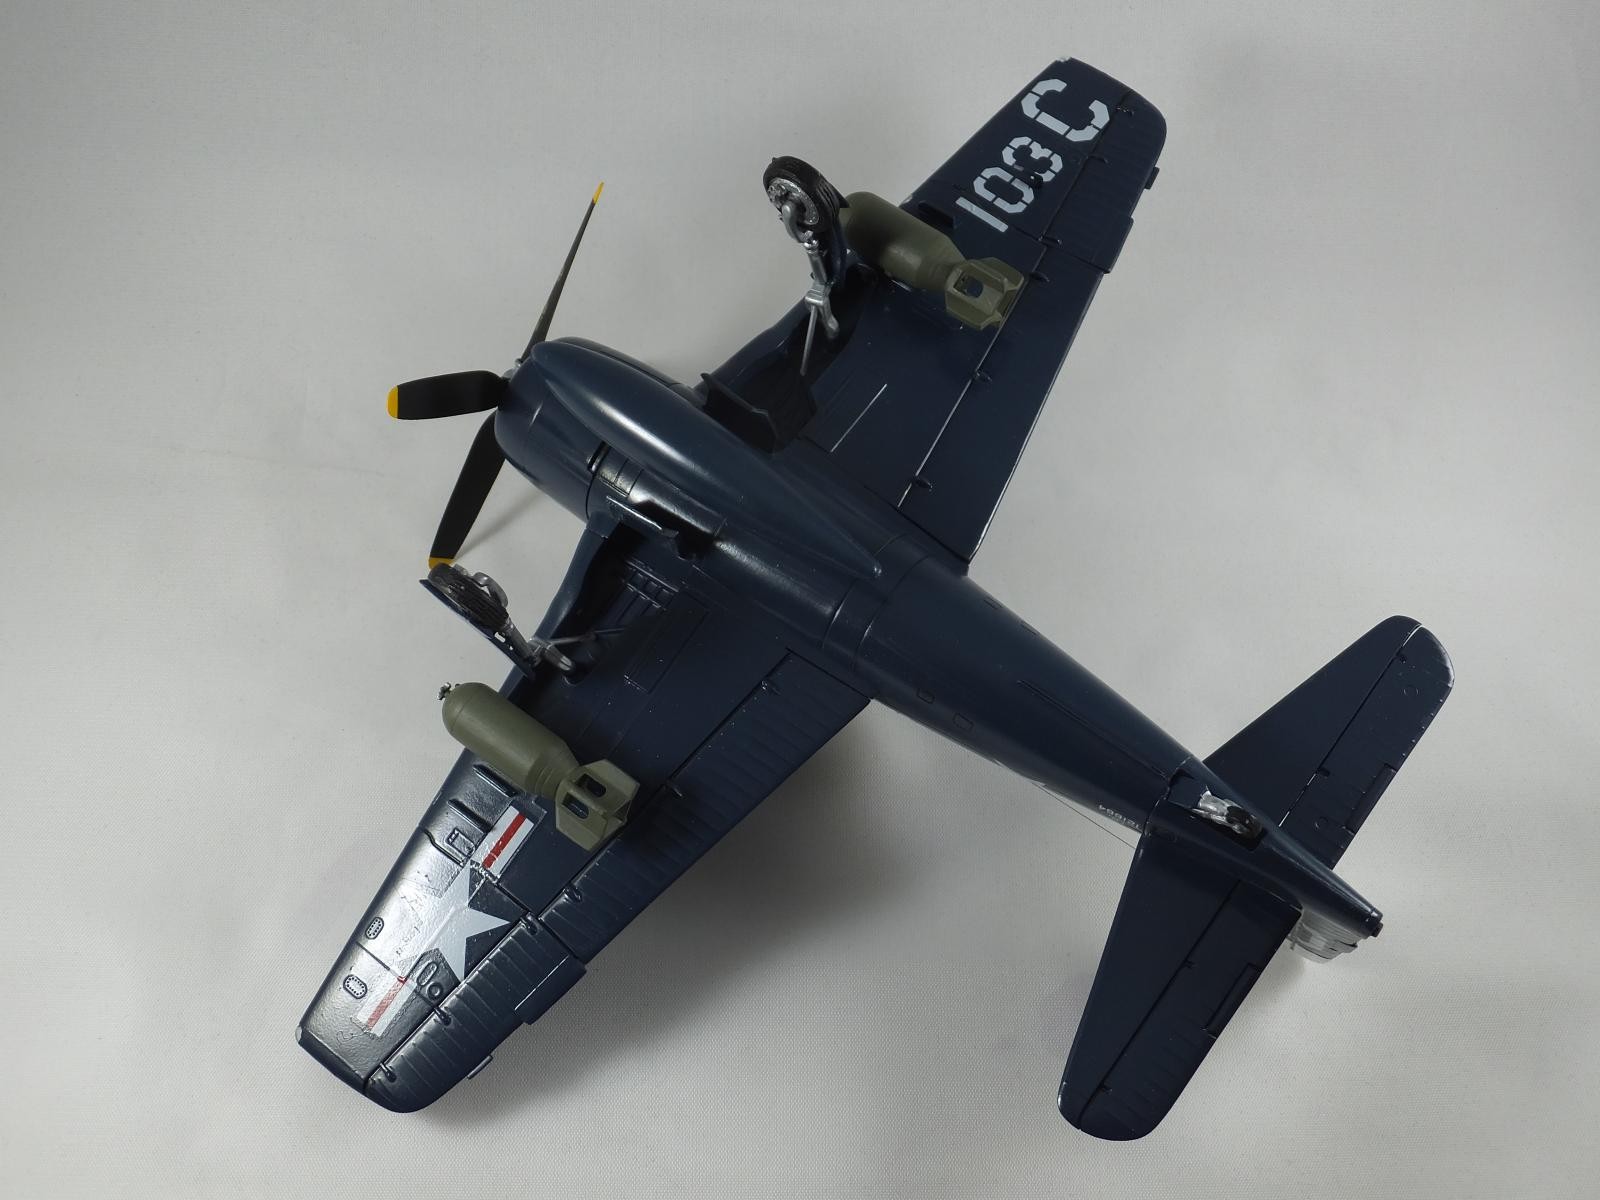
Seemed to have worked so we closed up the wings and attached them to the fuselage which fit really well and required no putty.
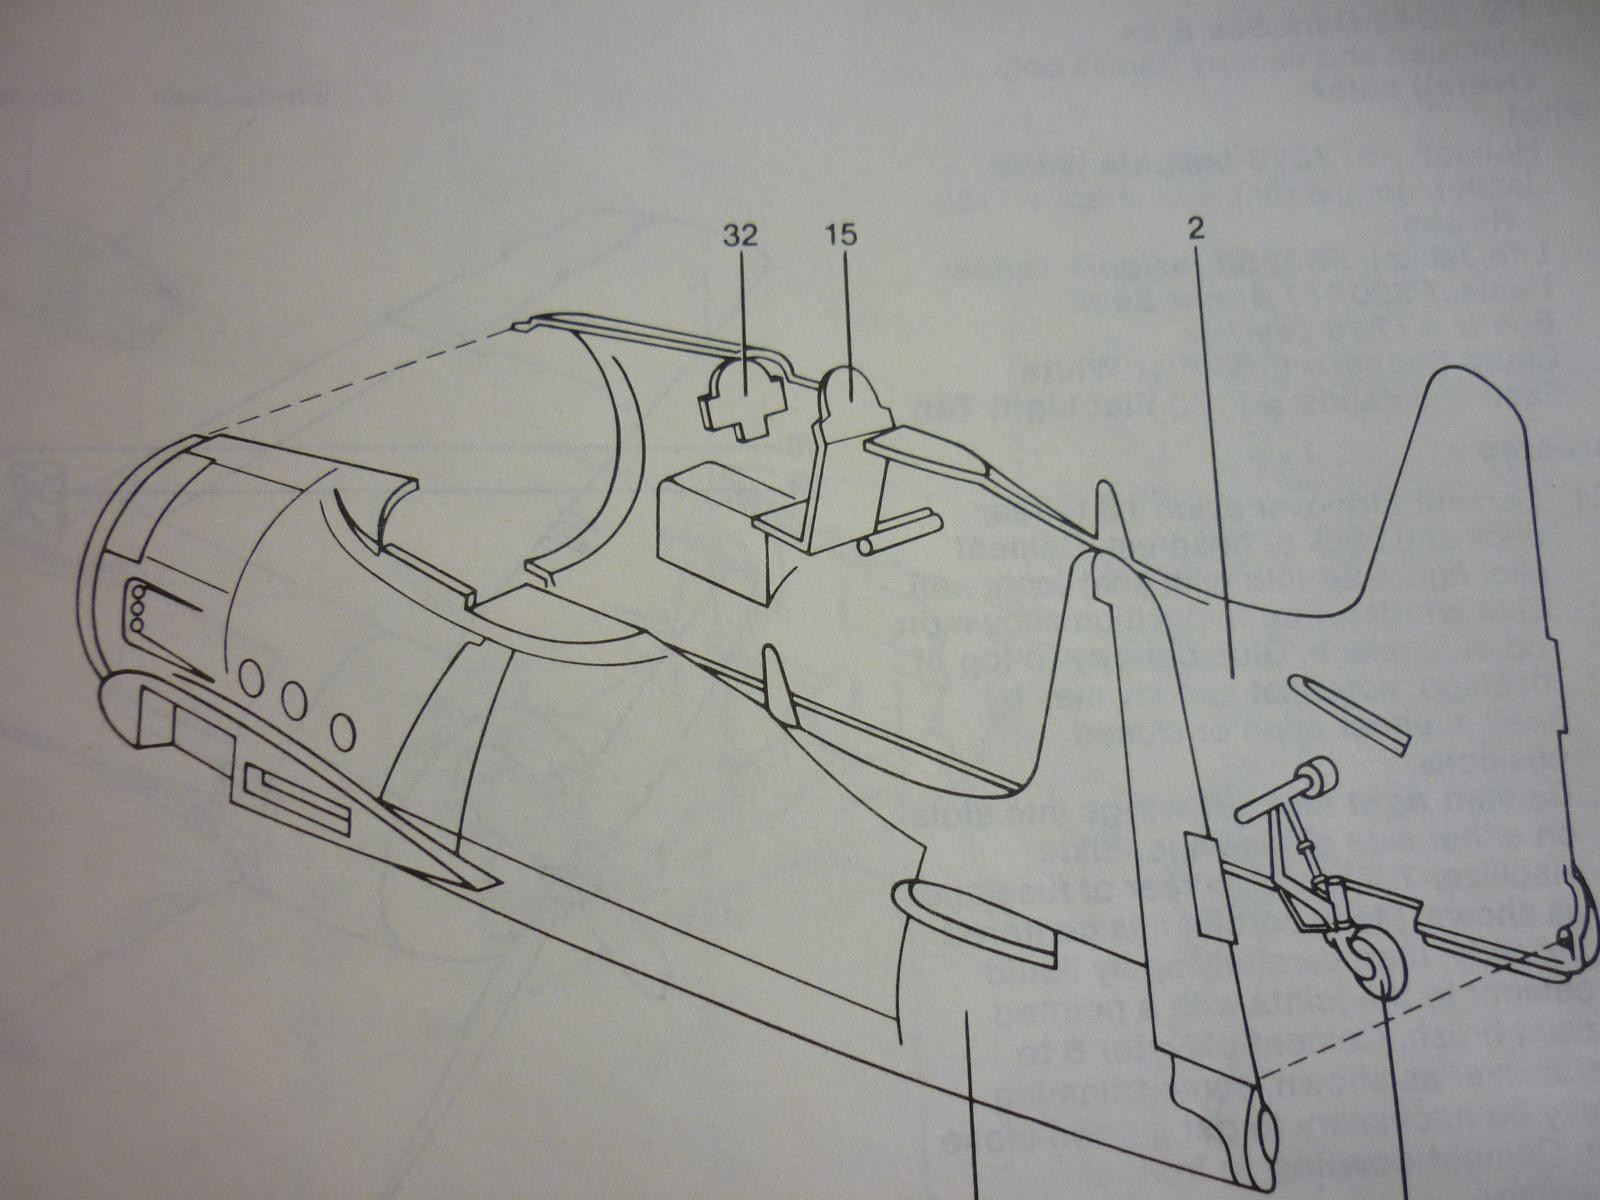
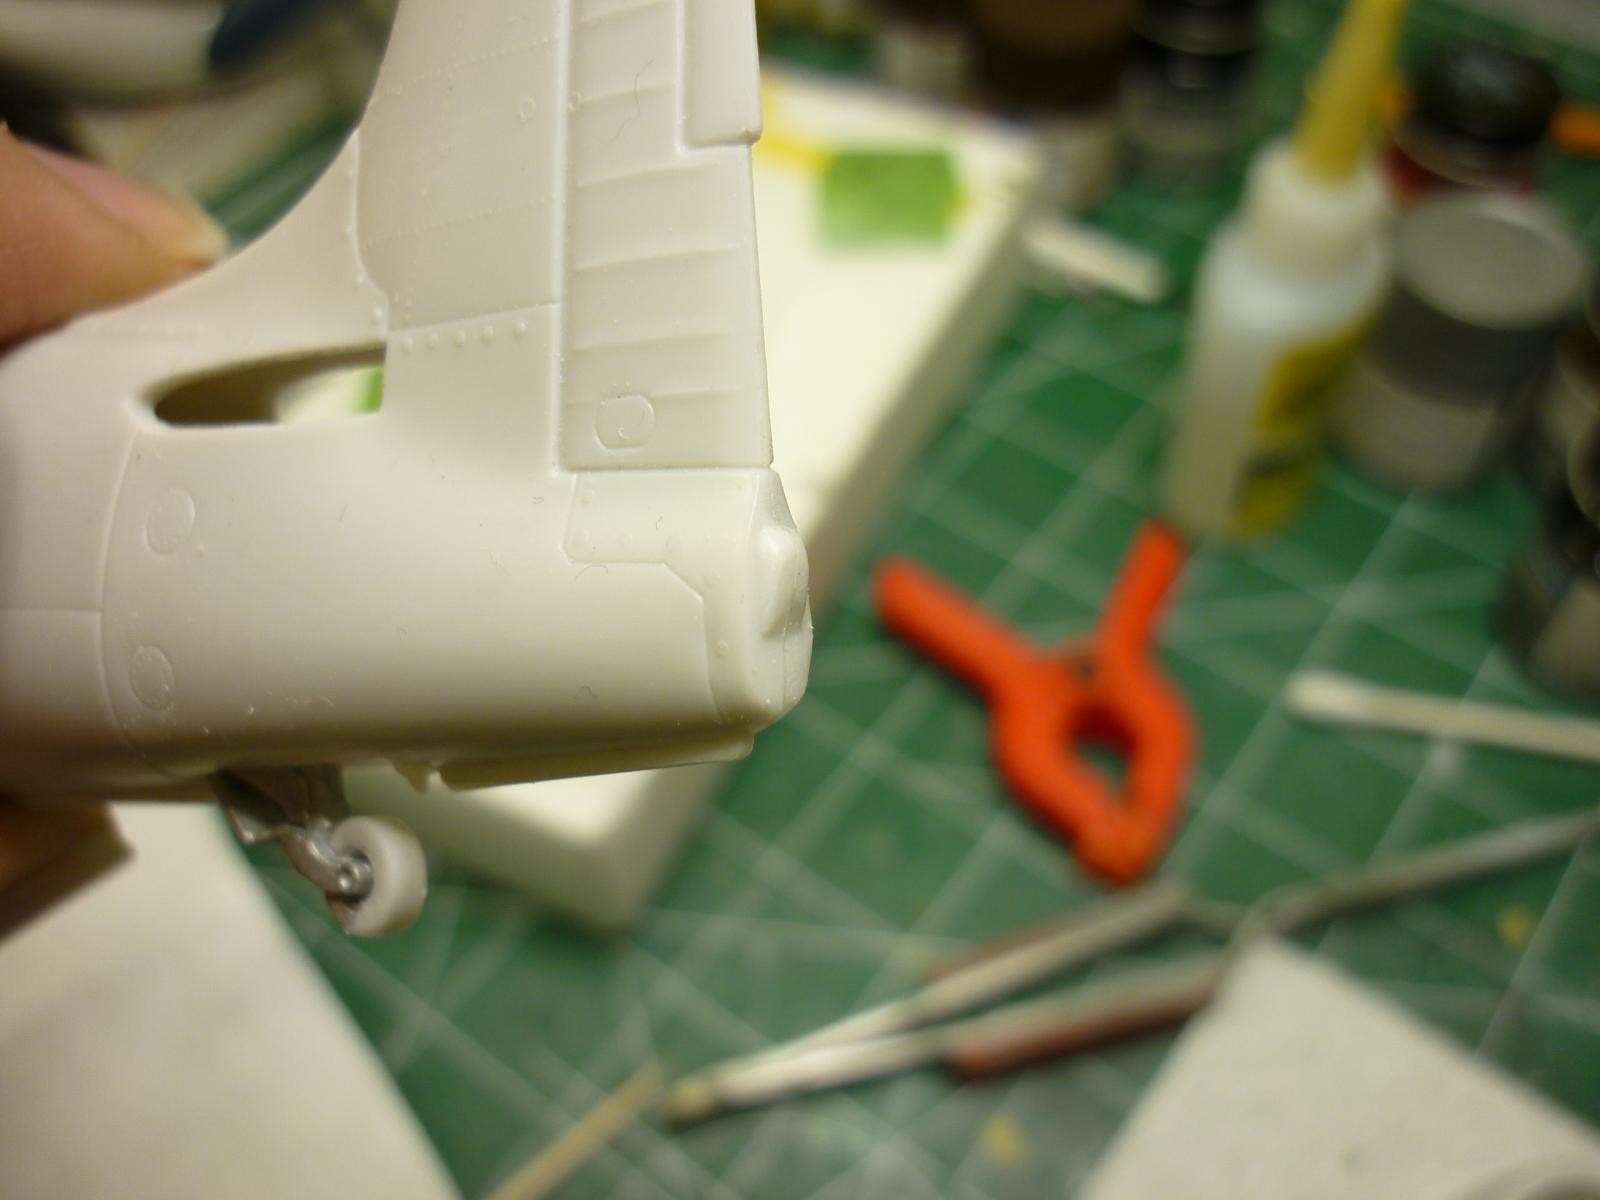
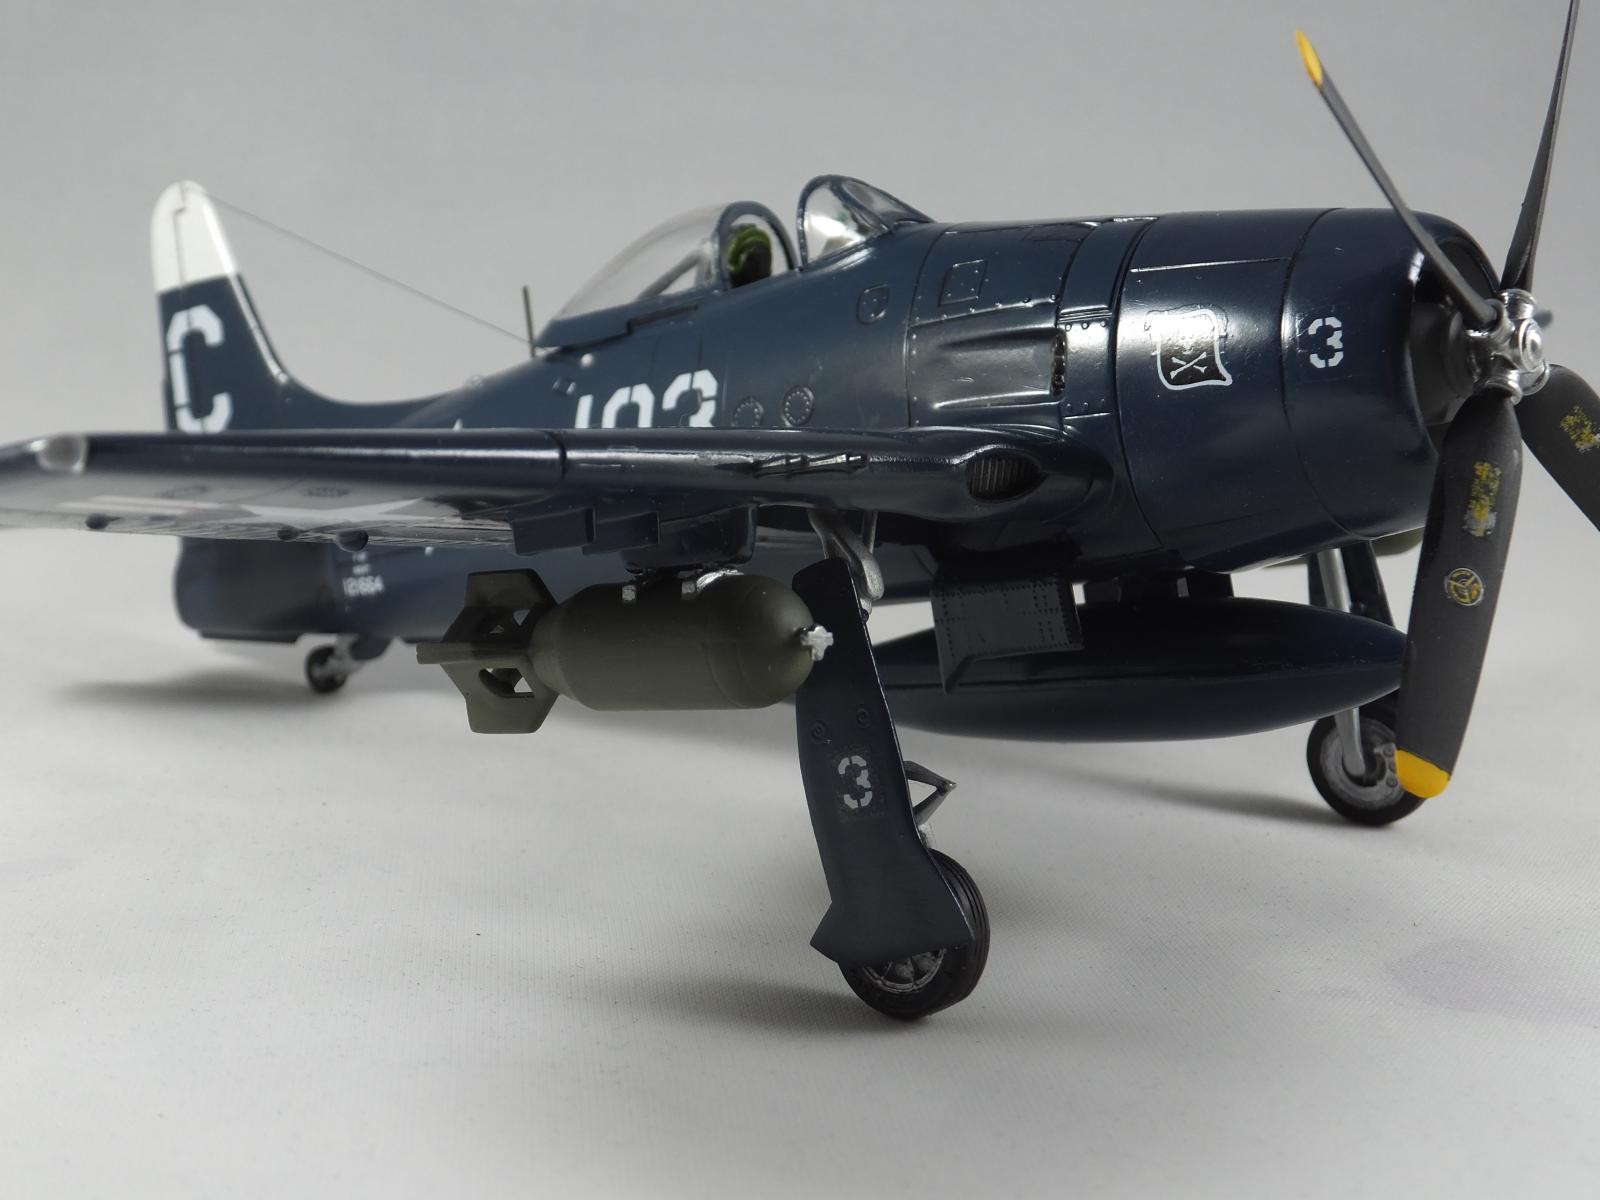
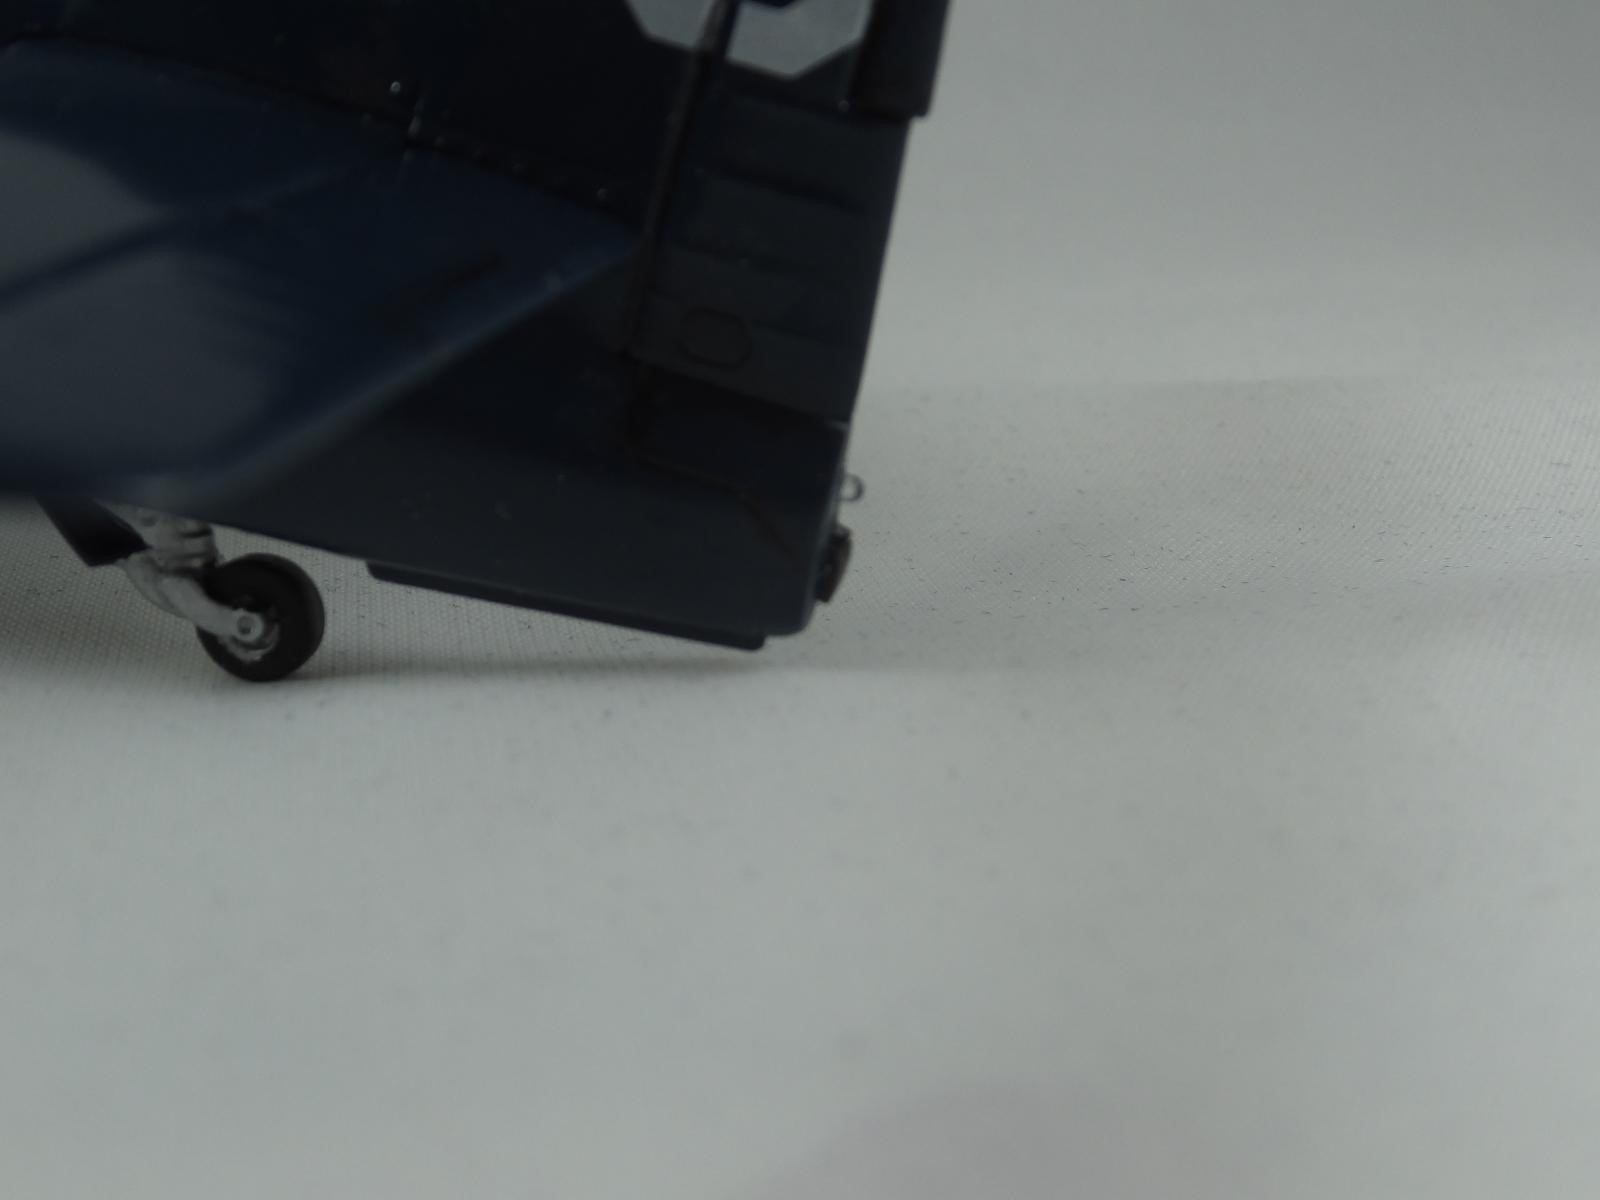
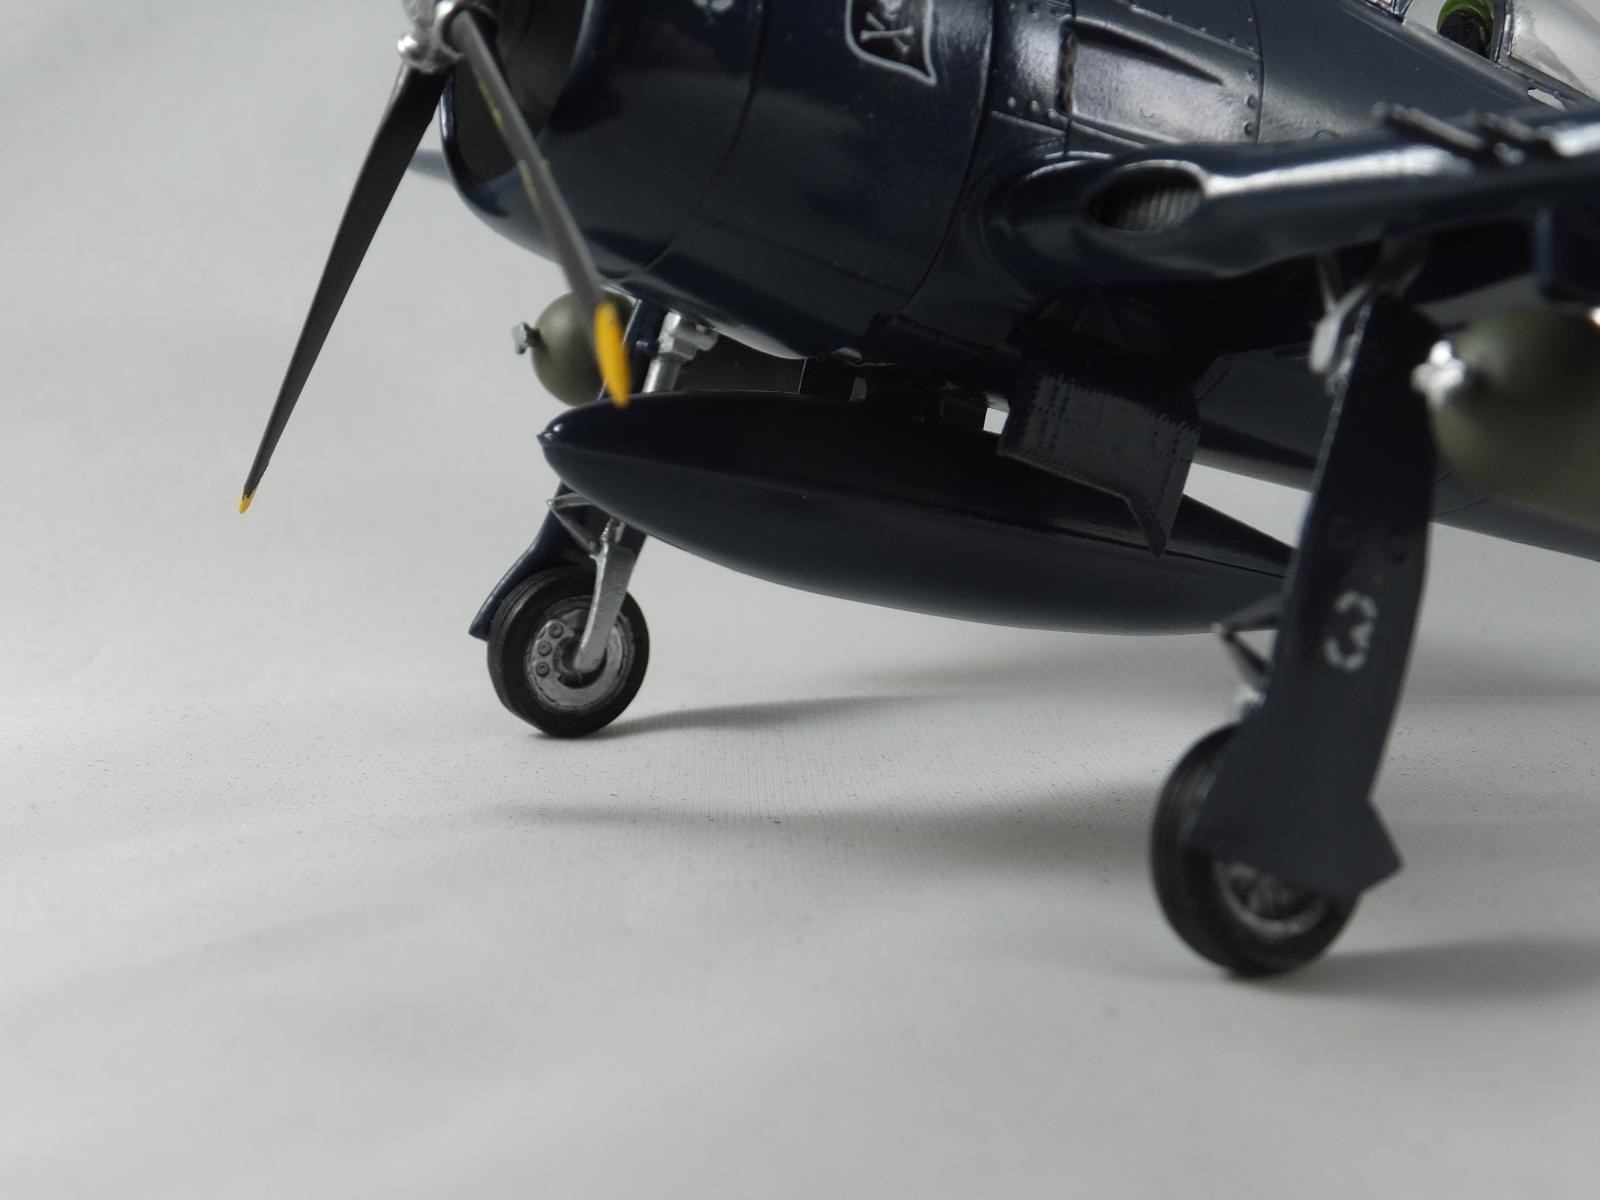
Now the tail hook was represented with what I would call a bulge or bump of molded plastic in the rear. So I sanded her off, constructed a home made arresting hook and then added the rear light as well.
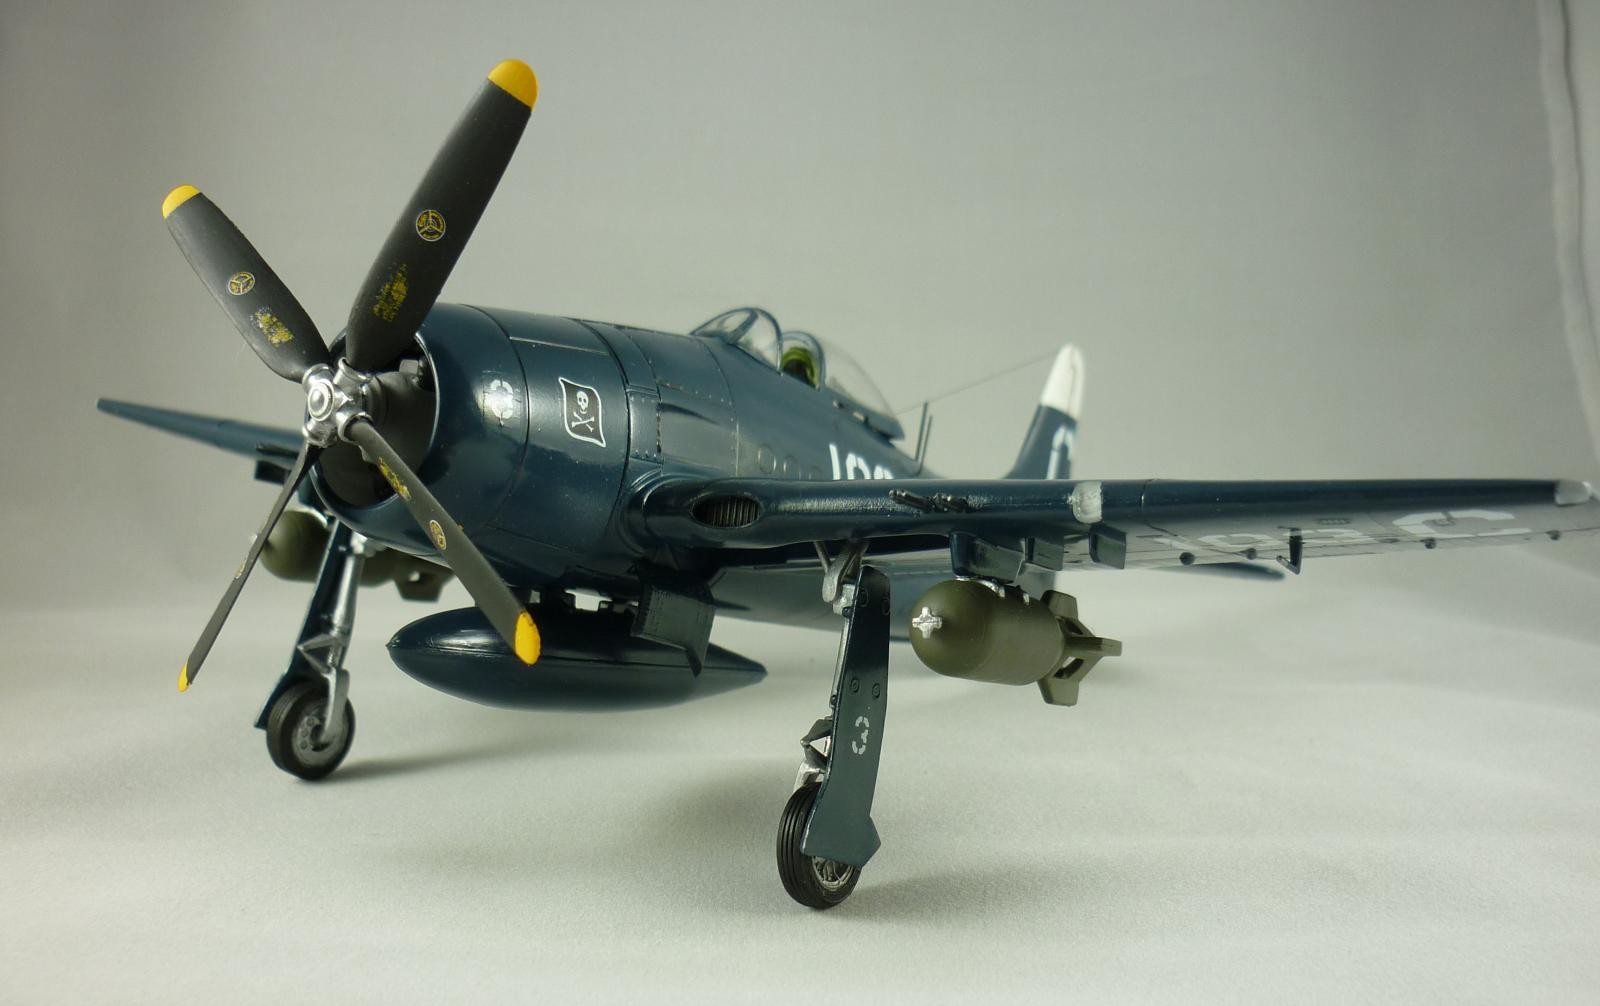
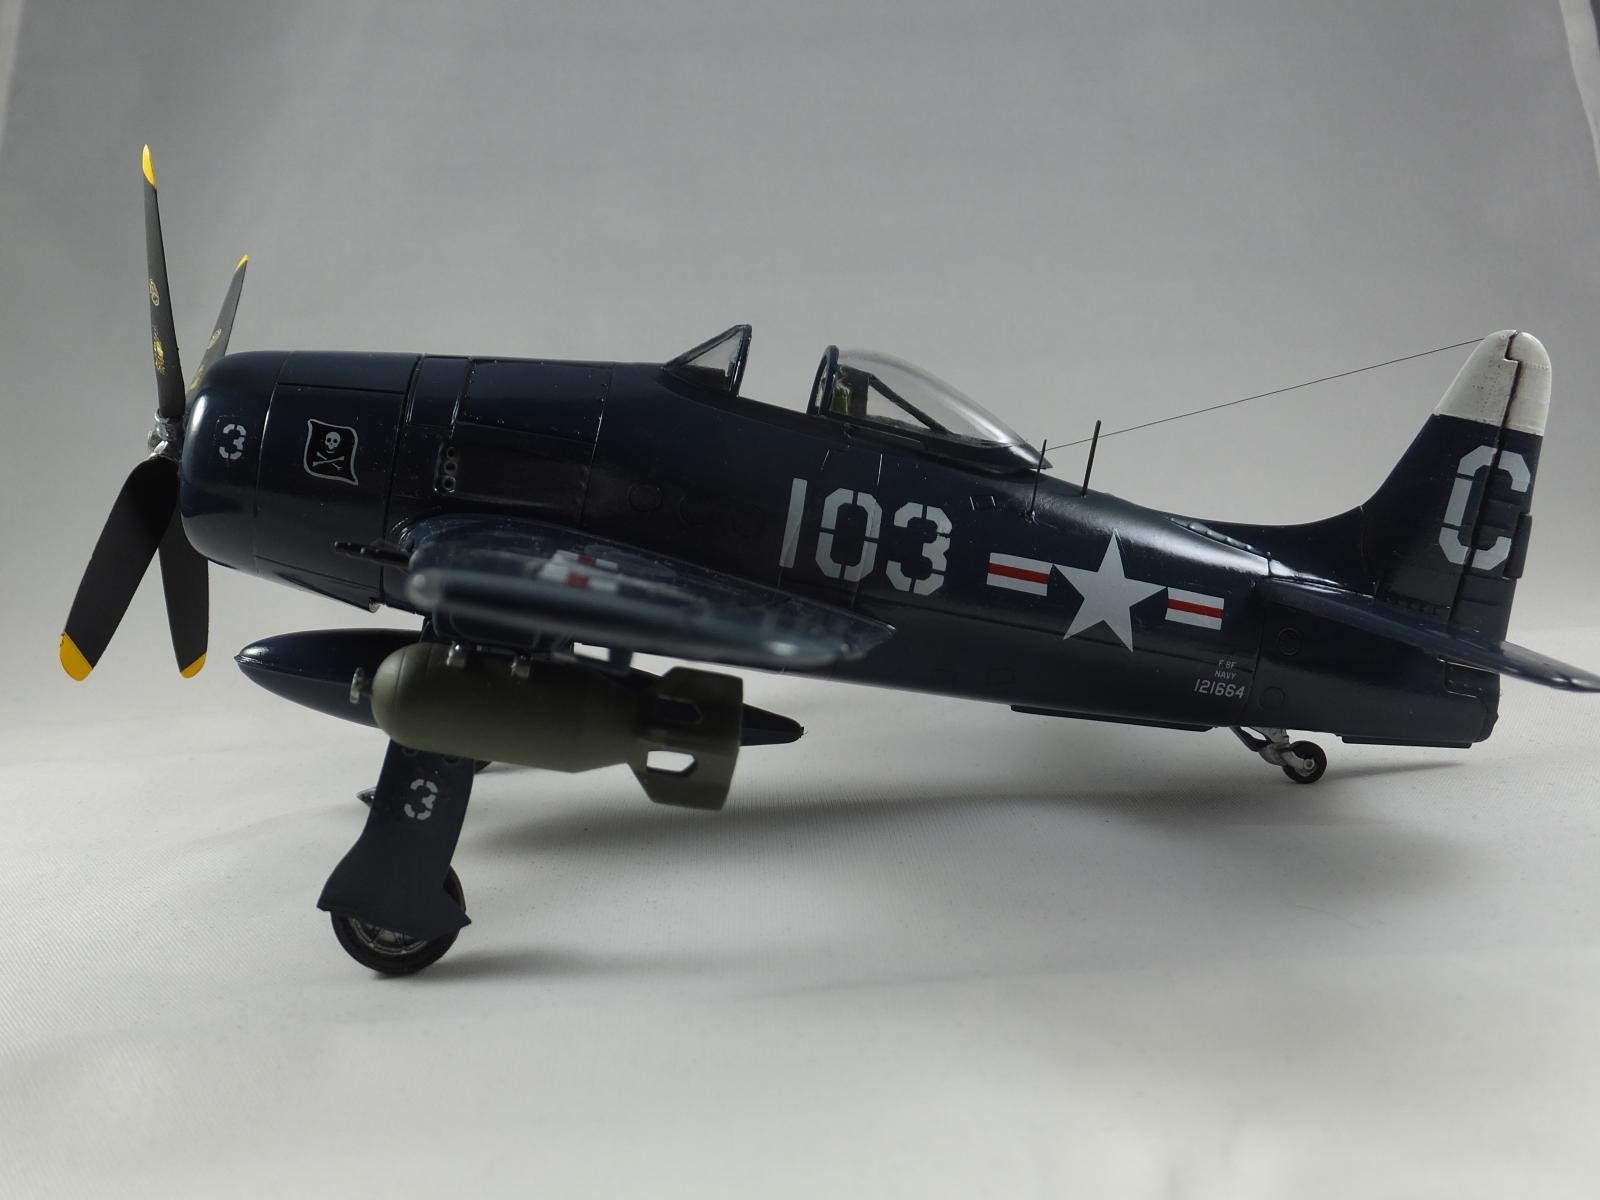
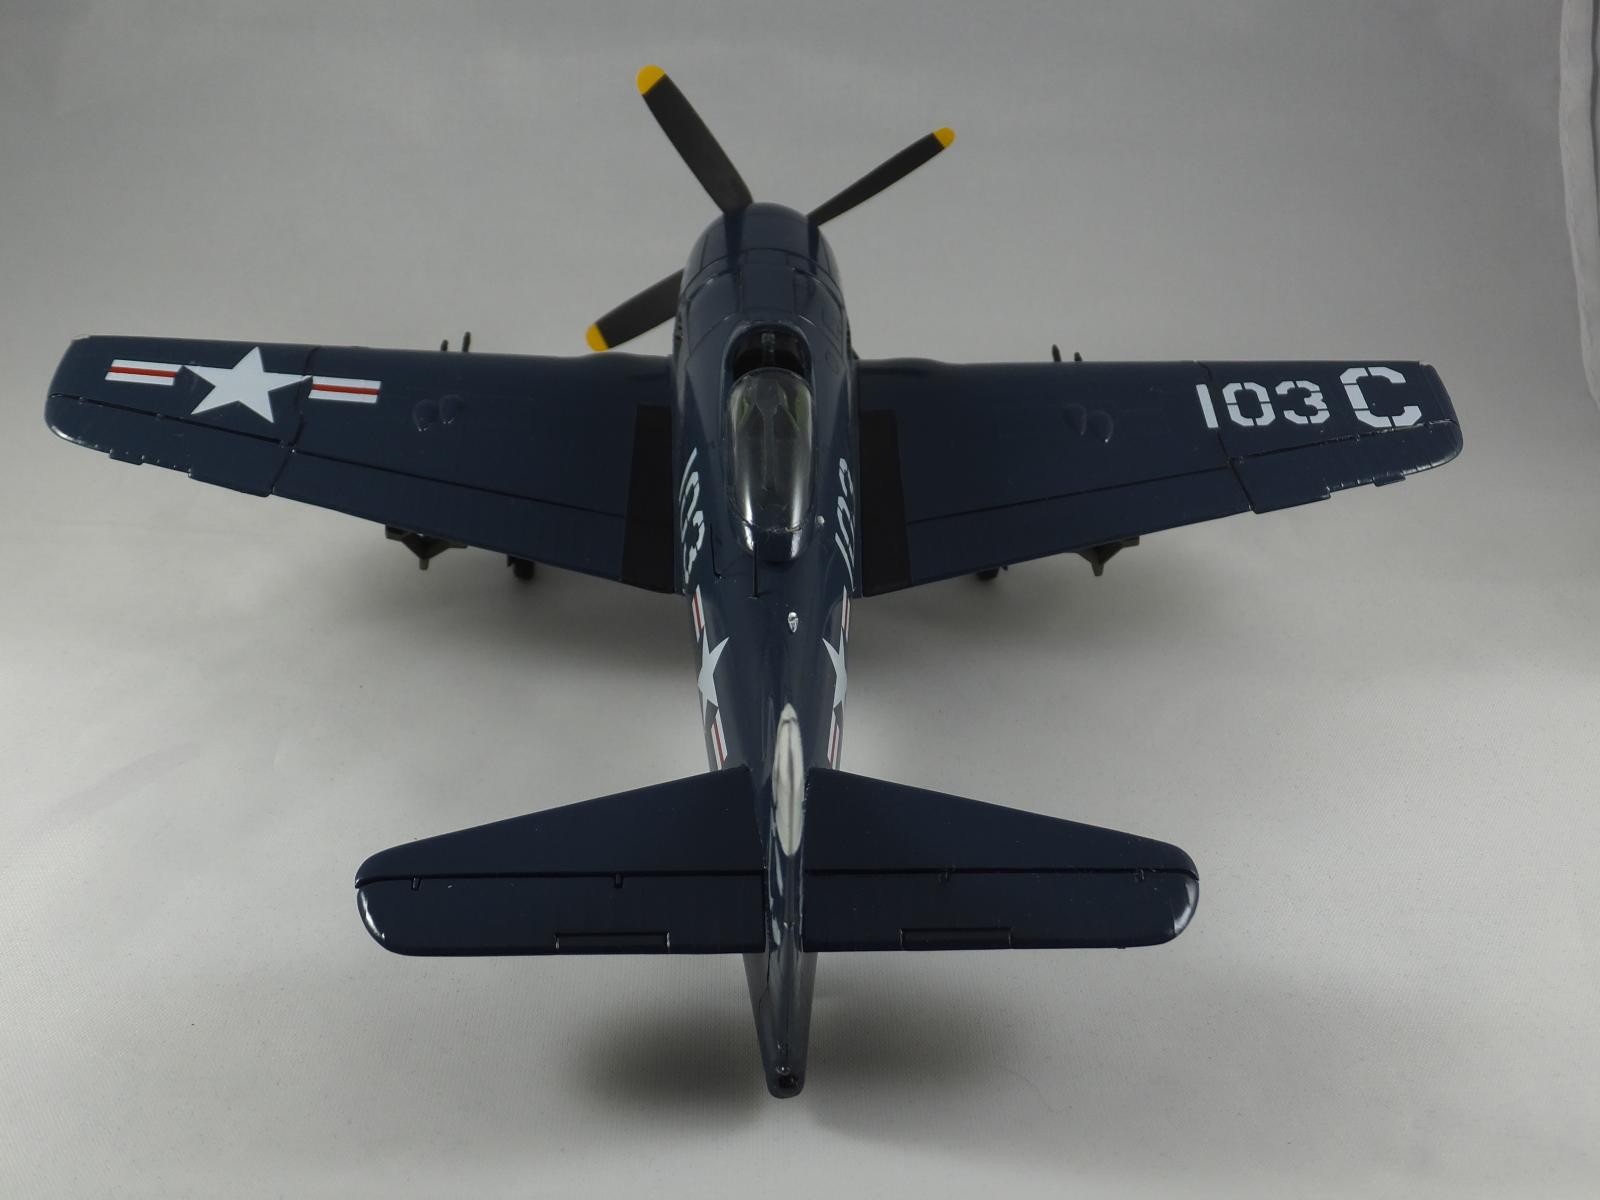
Off to the paint shop where she was sprayed with Tamiya AS-8 from a rattle can and a coat of Future was applied before attaching the decals. The decals are from the kit and represent VF-61 from the U.S.S. Franklin D. Roosevelt, 1949. They are rather thick but went down well and didn't require ant setting solution. The only other additions were the bombs, again from the spares box as the kits bombs had no anti-sway bars on them. I purposely left off the rockets as they seemed to be out of scale and poorly made. Last but not least I use tires from BarracudeCast as I thought they really looked great. The antenna are a combination of nylon thread and copper wire. I was going to put a coat of semi-gloss finish one her but really liked the shiny look so another coat of Future was applied.
Altogether it was fun but some what of a challenge with the cockpit, but it does look like a F8F-2, and it rounds out my Grumman collection of piston engine fighters. So I'm satisfied, and thanks for looking.
15 additional images. Click to enlarge.


Tom, This turned out very nice, Well done !
A great result from a not-so-great kit...very nice indeed. I like it.
I love to see the old kits built up so nicely. Great job!
Good looking Bearcat Tom, came together nicely, like the finish, well done.
Wonderful Kitty, Tom! The Bearcat is such a great airplane and yours does them justice. Good job "making" the cockpit assembly fit, too.
Nice lead into the GB on your Bearcat. Haven't seen one of these in quite awhile. I only have the Hobbycraft kit in the stash. Well done and thanks for sharing a classic.
Nice work has brought this old kit well up to scratch, great addition to the group build.
To all above thanks for the nice comments, however, if Louis hadn't started this GB, I more than likely would not have had the inspiration to build this kit. Not sure how or why I acquired it but I'm satisfied with how it turned out. It was a fun challenge and that's what this hobby is all about.
I am glad to hear you enjoyed yourself with this one... It turned out pretty darned good too ! The resin cockpit really helped out, as did the numerous other little things you did to it. It's a total sum of it's parts... Well done buddy.
Your braver then I but it paid off for you. Great job!
Wow Tom !
Your Bearcat turned out fabulous... You worked wonders with an old kit that many scoff at.
I'm very pleased that you joined our Year of the Cat GB. Your work is always a welcome addition to any group. I have a few of the Hobby Boss Bearcat kits in the stash. After looking at yours, I'm tempted...
Did you know that originally the outer 4 feet of each wing was designed to break away if the pilot stressed the airframe with too many "G's" during a roll ? This was a feature that was wisely dropped on production planes.
Well done my friend. I have been watching and waiting for the reveal.
Two thumbs up Sir ! I like it... a LOT.
In fact I did read about the separating wings, but as usual there were issues with it. Apparently one Mal-functioned causing the death of a mechanic so they were abandoned on all production runs.
I think they used explosive bolts to cause the complete separation if memory serves me. But I could be wrong too, so don't quote me on that.
I remember building this kit as a kid. Mine was the "Chrome Plated" version. I bought it and the Lysander at the same time because they were both chrome... at that was cool back then. Too bad the glue didn't stick on the chrome parts. Then the light went off and I scraped away the chrome. Presto ! My building skills left a lot to be desired back then...
Tom, great work on an old favorite. Hawk turned out this, the OV-10, F-5 and the Lysander, seemingly all at once. I was real happy! . Compared to the latest kits, basic detail, but it's easier to add, than to remove the wrong. Always a pleasure to see one built.
Lovely work Tom - excellent result!
Very nice Bearcat Tom.
Very nice work!
Love te Bearcat
1 attached image. Click to enlarge.
Sweet! Thanks for posting Tom
Very nice iteration of a personal favorite of mine. Lovely work, Tom.
Hi Tom. I'll tell you something, your build is a WHOLE lot better than the kit shown on the box. Terrific job.
Love it ! You brought the kit to life.
Tom, I have enjoyed following this build and learned a lot. - The final product really reflects all of the effort and extra touches you made to improve on the parts in the box - brilliant work! Great photography too - really shows off your great build wonderfully well!
Terrific work on your Bearcat, Tom! You turned that ancient kit into a beautiful model.
Thanks Drew and Paul, it was fun as well as a challenge to try to take a basic ancient kit and see if I could enhance it. Could turn into a habit as some of the new kits are really expensive, especially if you screw them up. I've wondered why some manufacturer hasn't made an improved and modern version of his plane.
Fantastic work Tom! It's allways nice to put in the extra work and improve an older kit. It's a great cat!
Great to see such a good job on the Bearcat. Brings back memories too. Hawk's Mustang, Thunderbolt & U2 all in chrome. Mustn't forget the Banshee either. That really was basic!
Thanks Tony, I see you've built a nice looking Bearcat as well. I wonder why Hasegawa/Tamiya hasn't produce an accurate and more detailed version of this A/C ? Any respectable modeler would add it to their collection of Grumman Cats.