Part 4: Tamiya A6M2 Zero—Having some fun with the initial weathering process
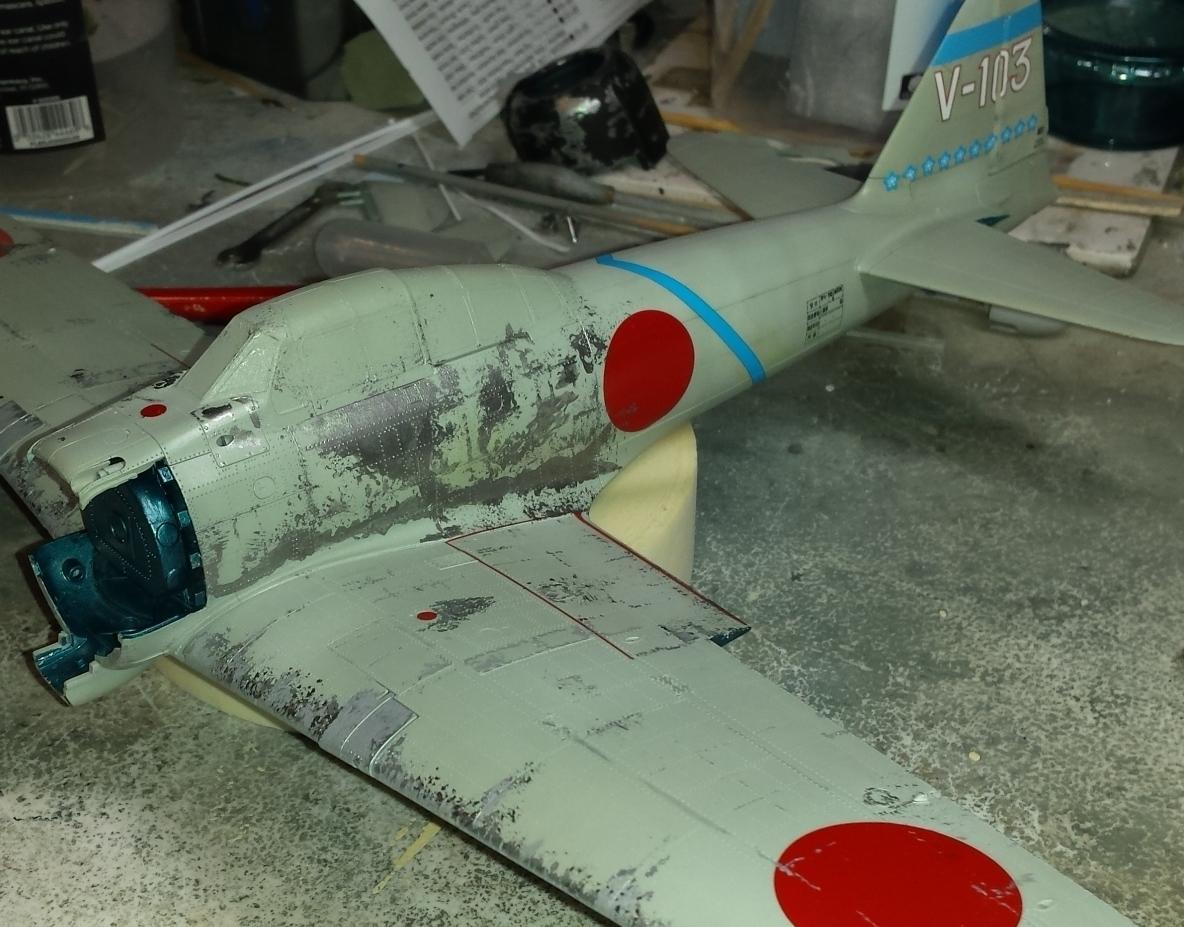
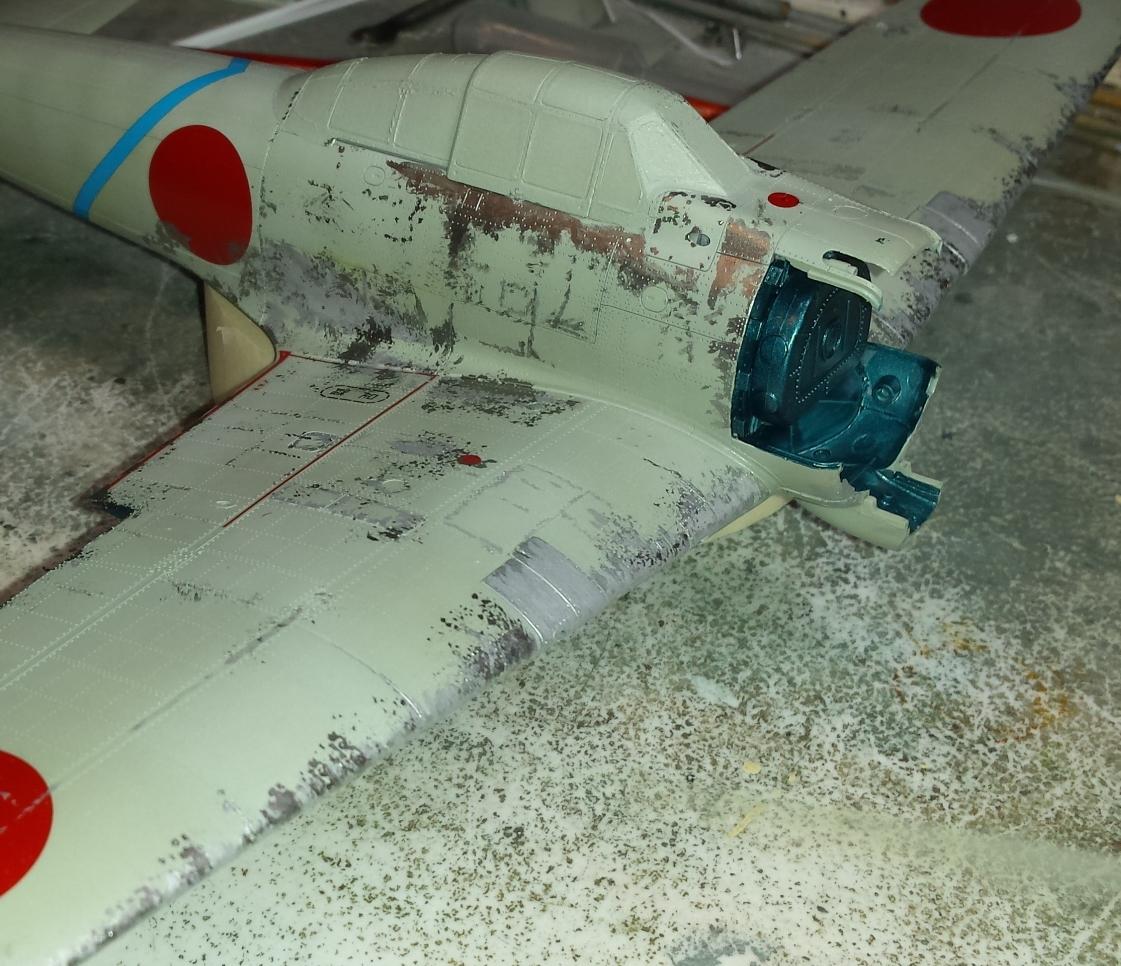
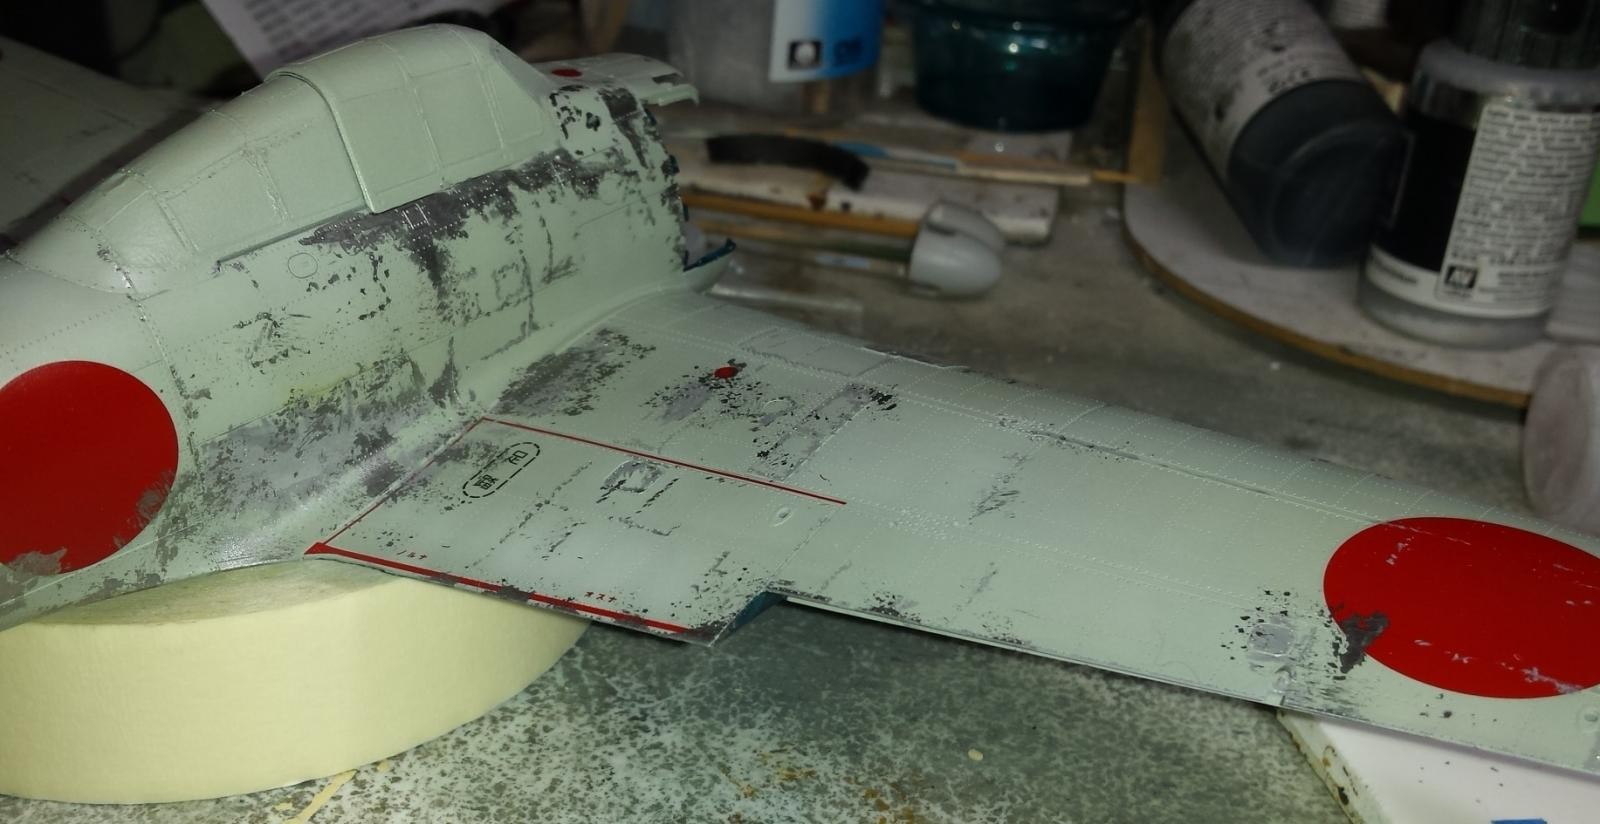
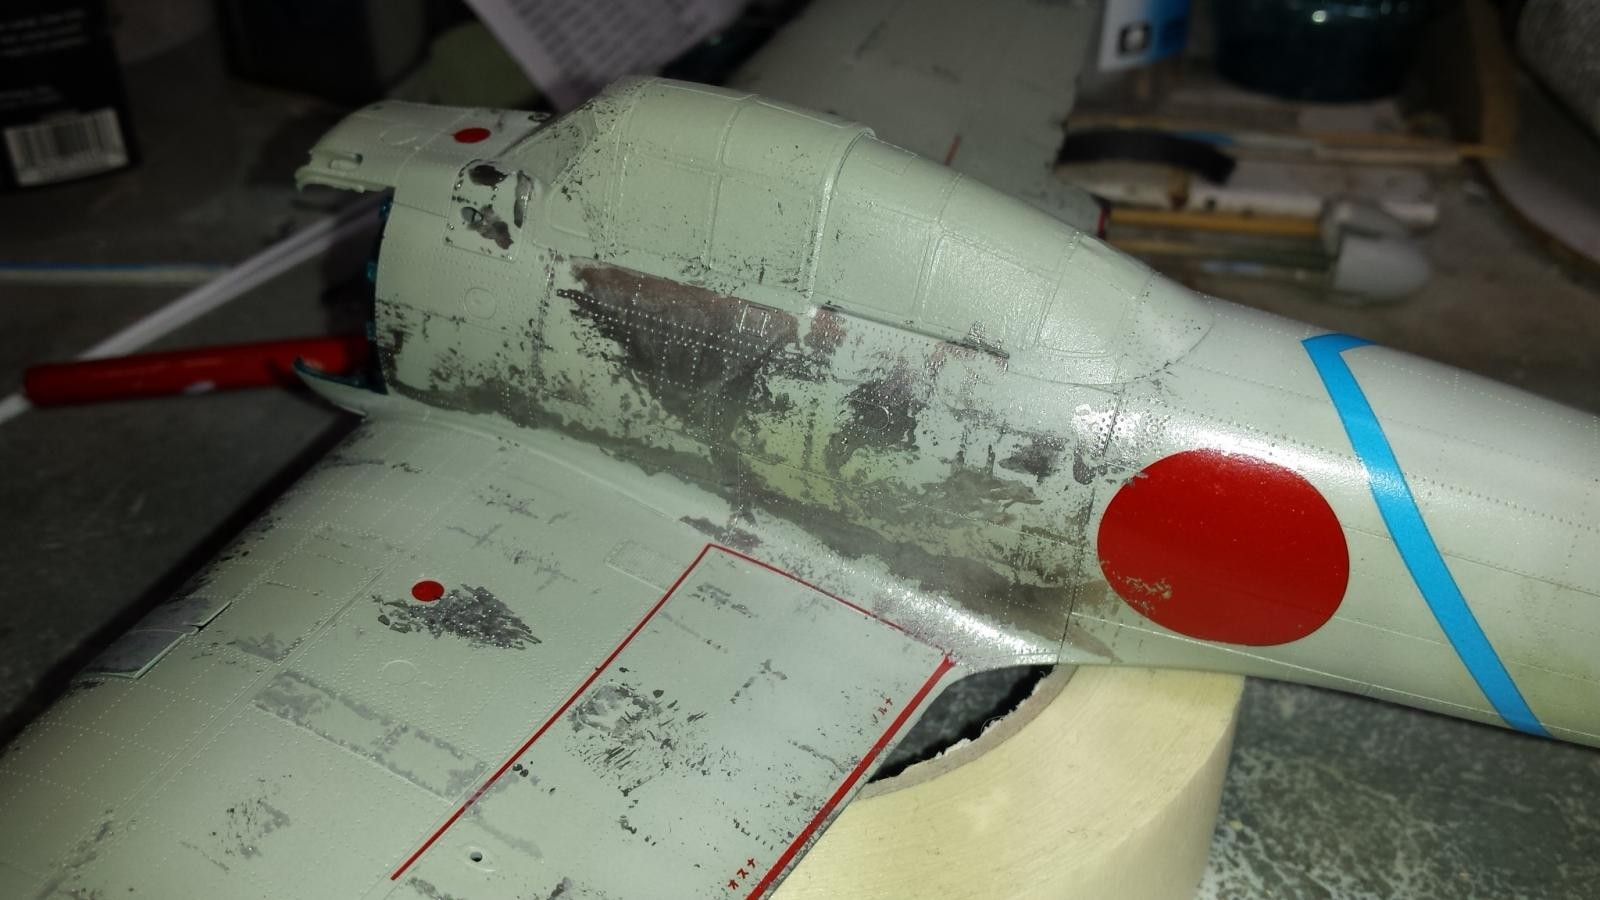
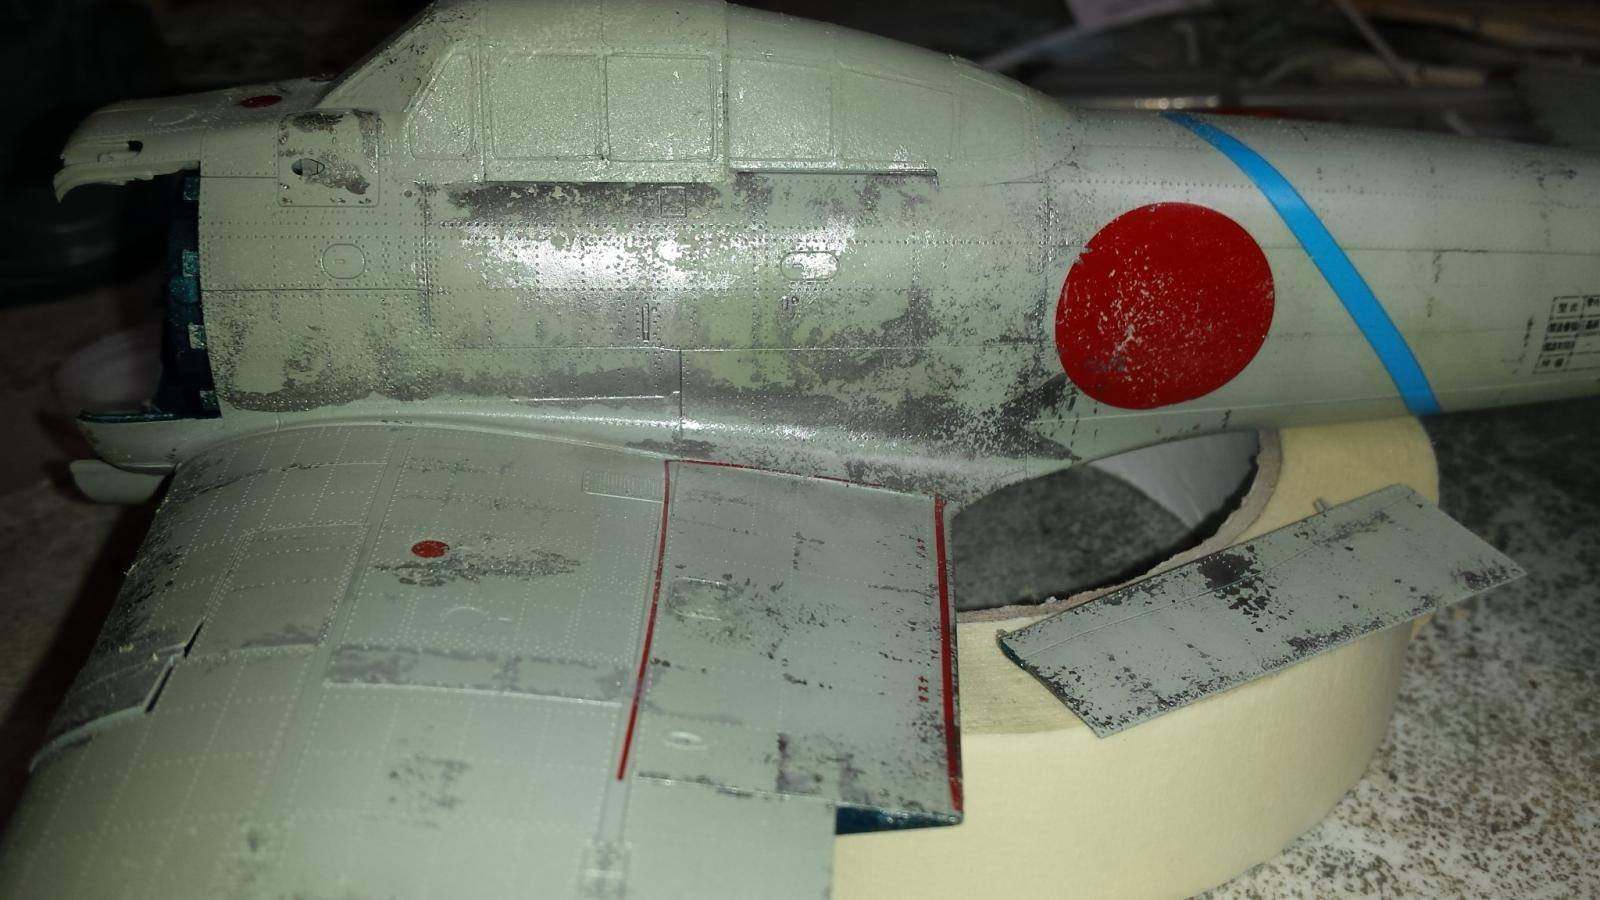
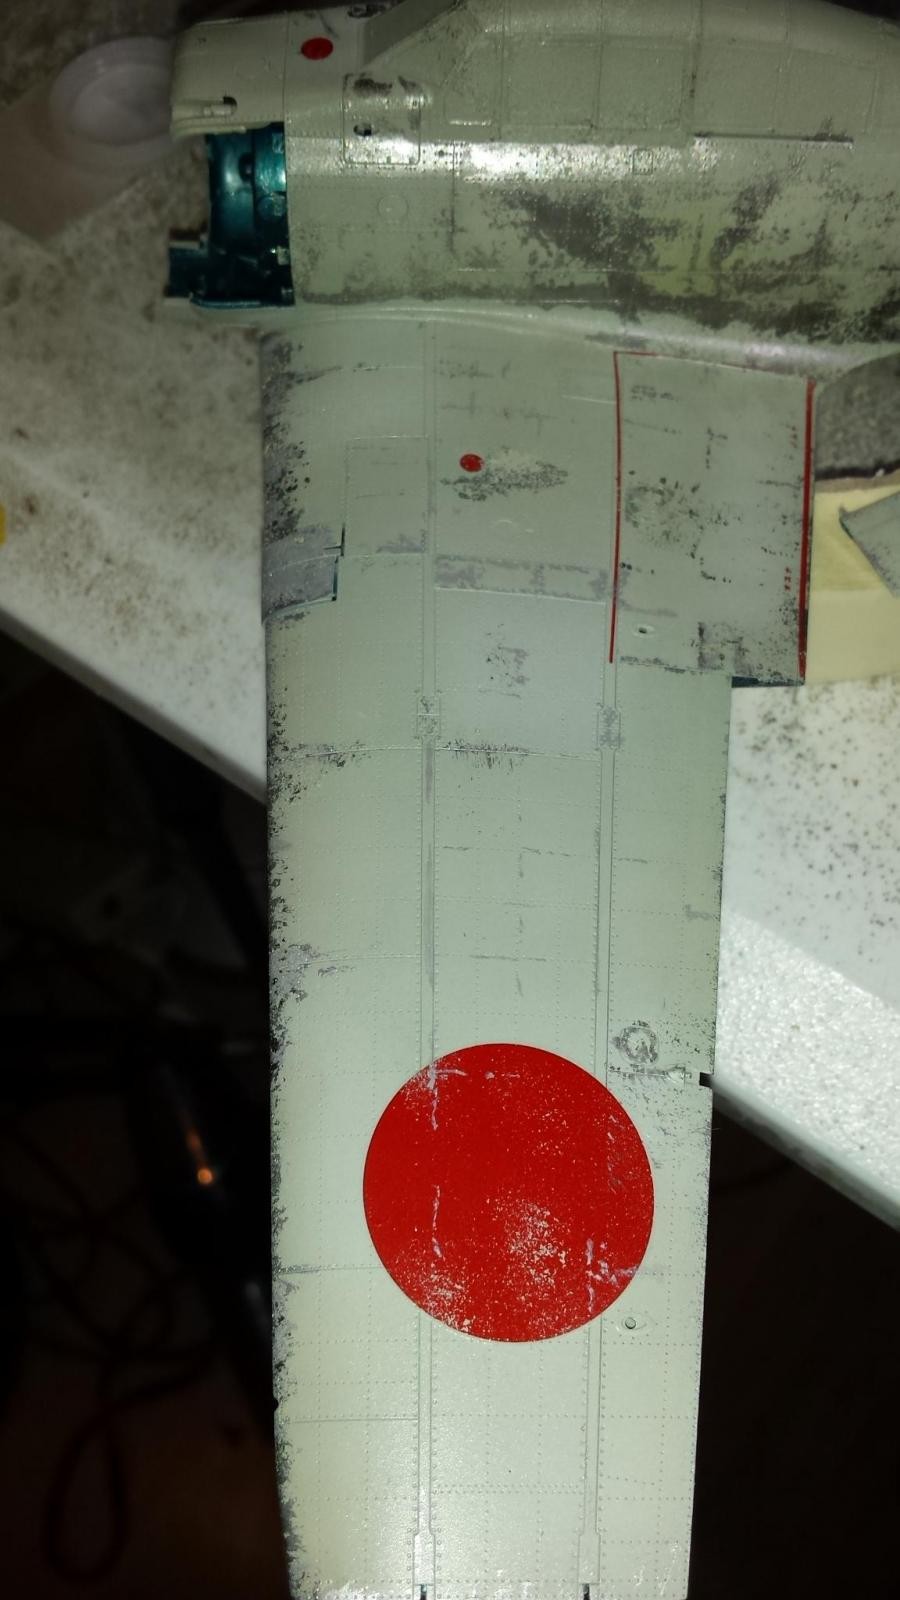
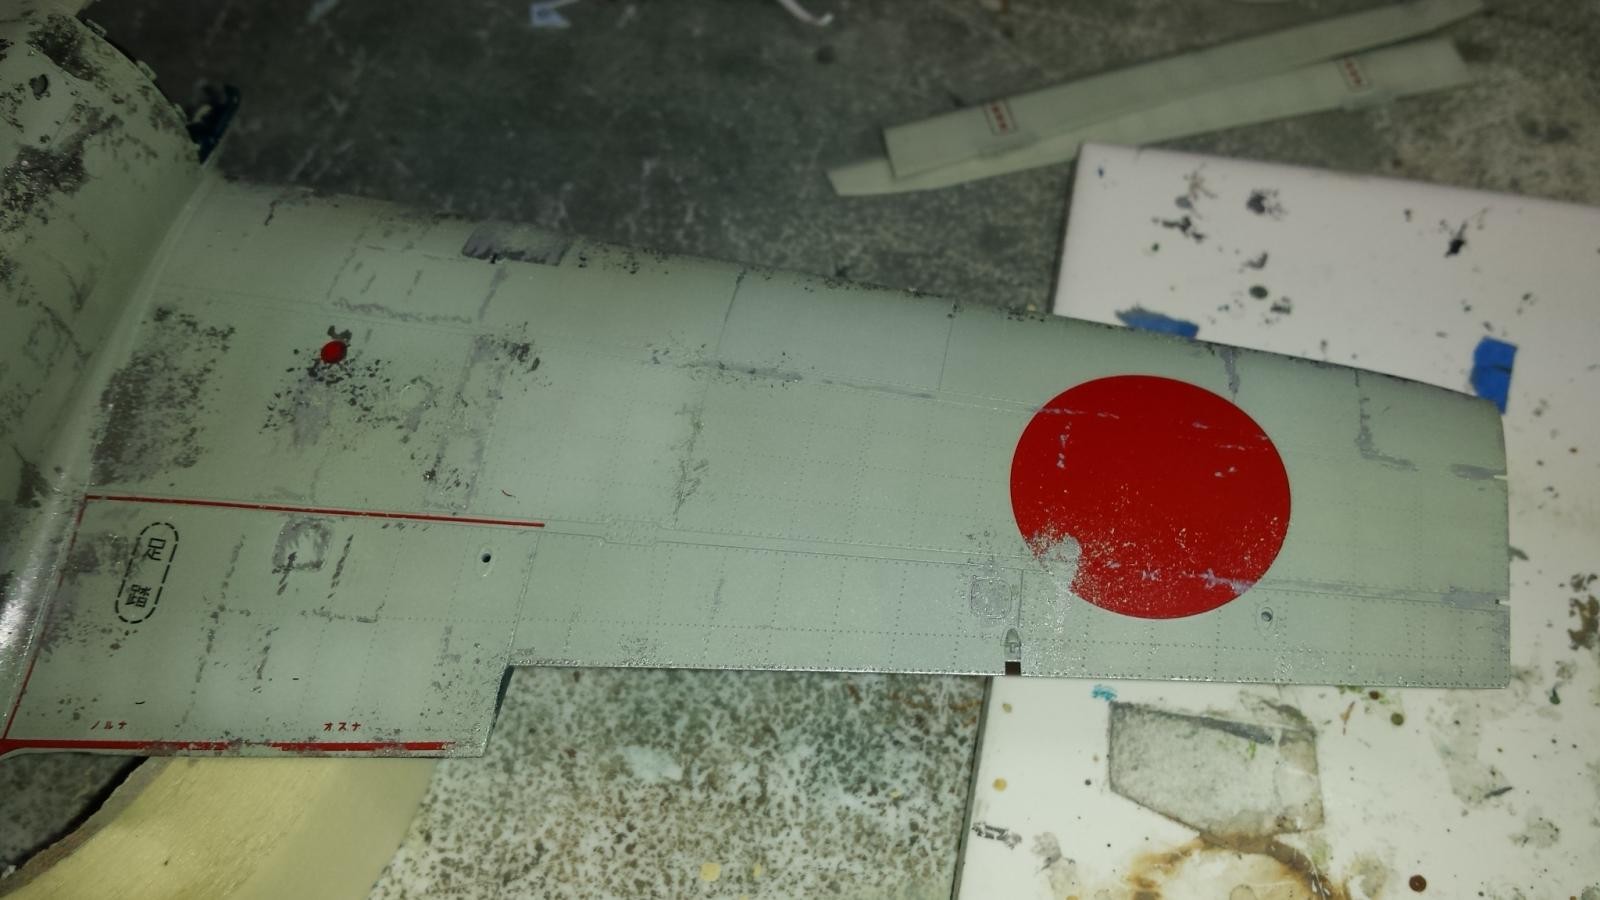
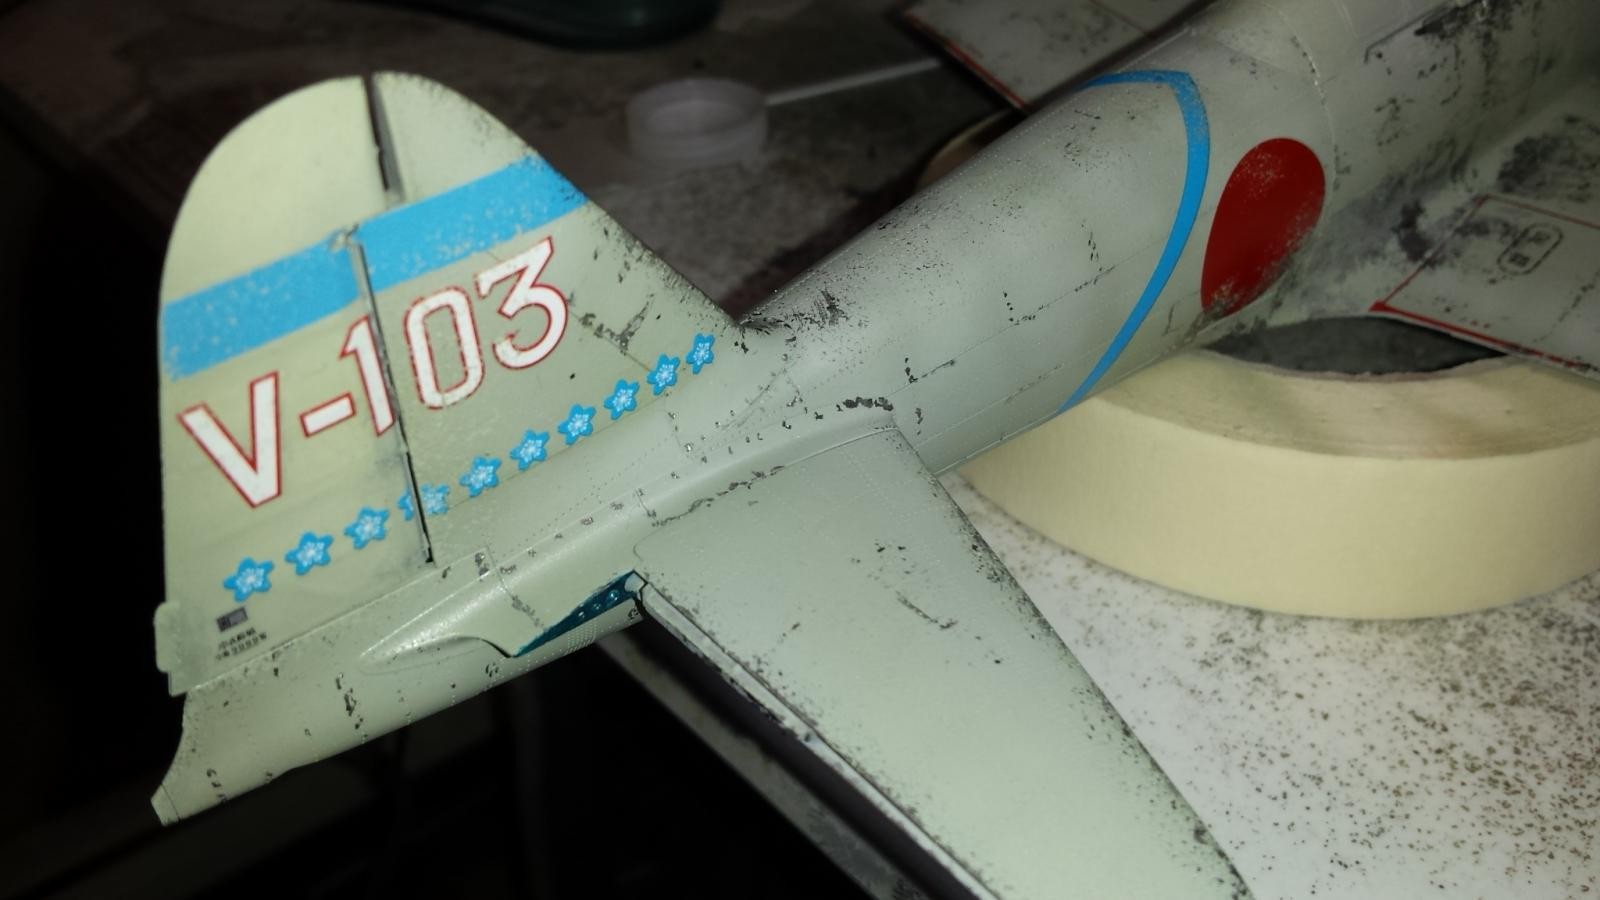
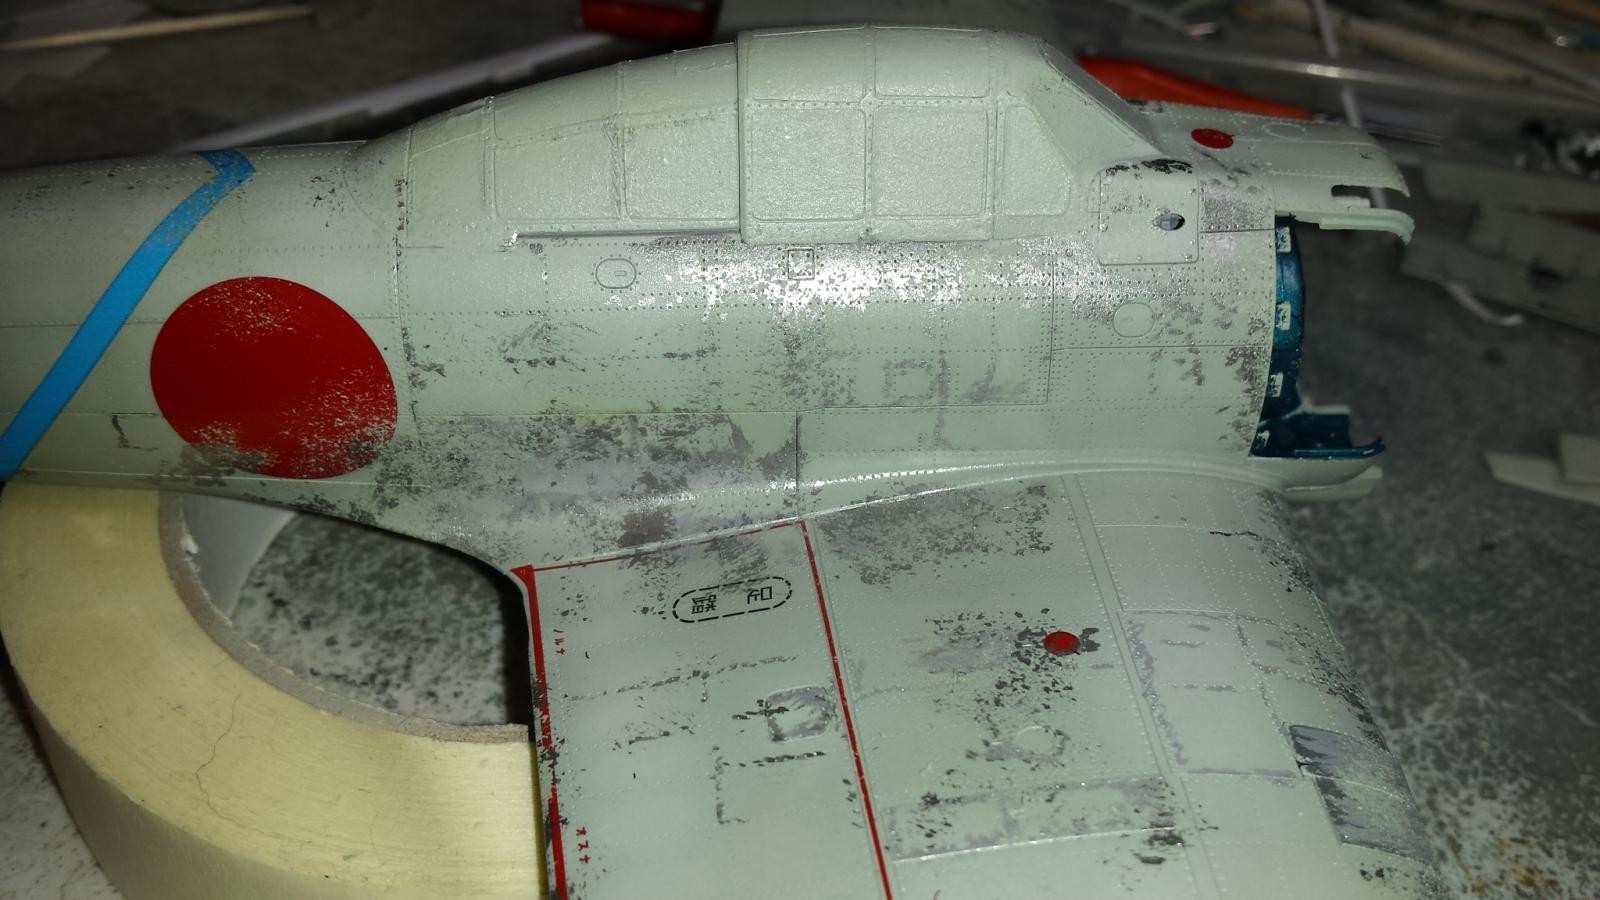
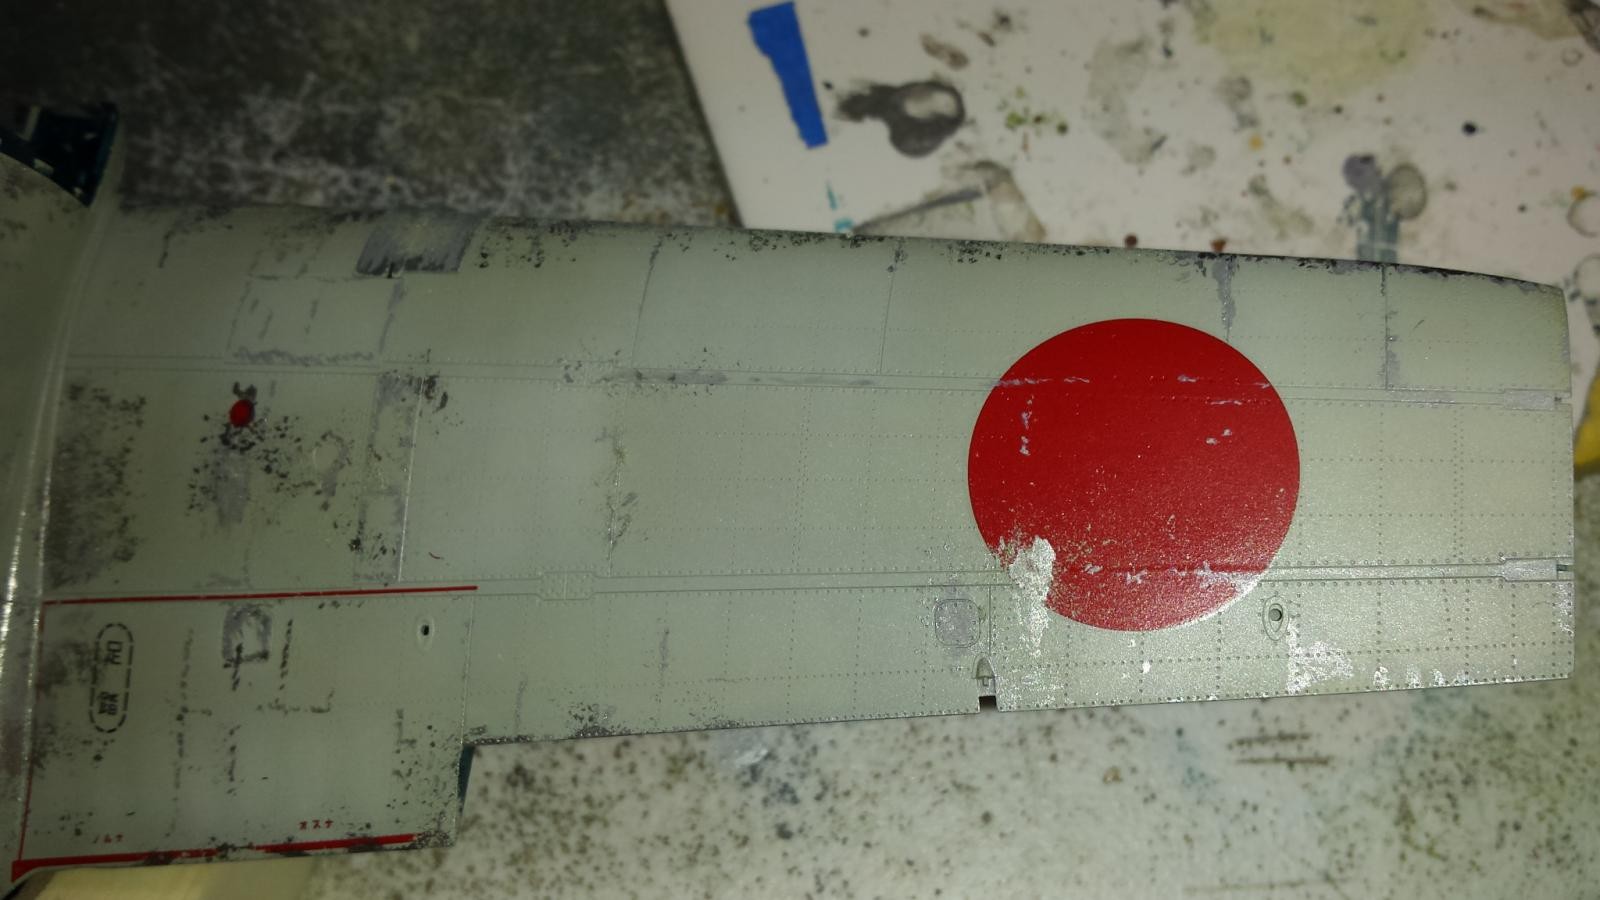
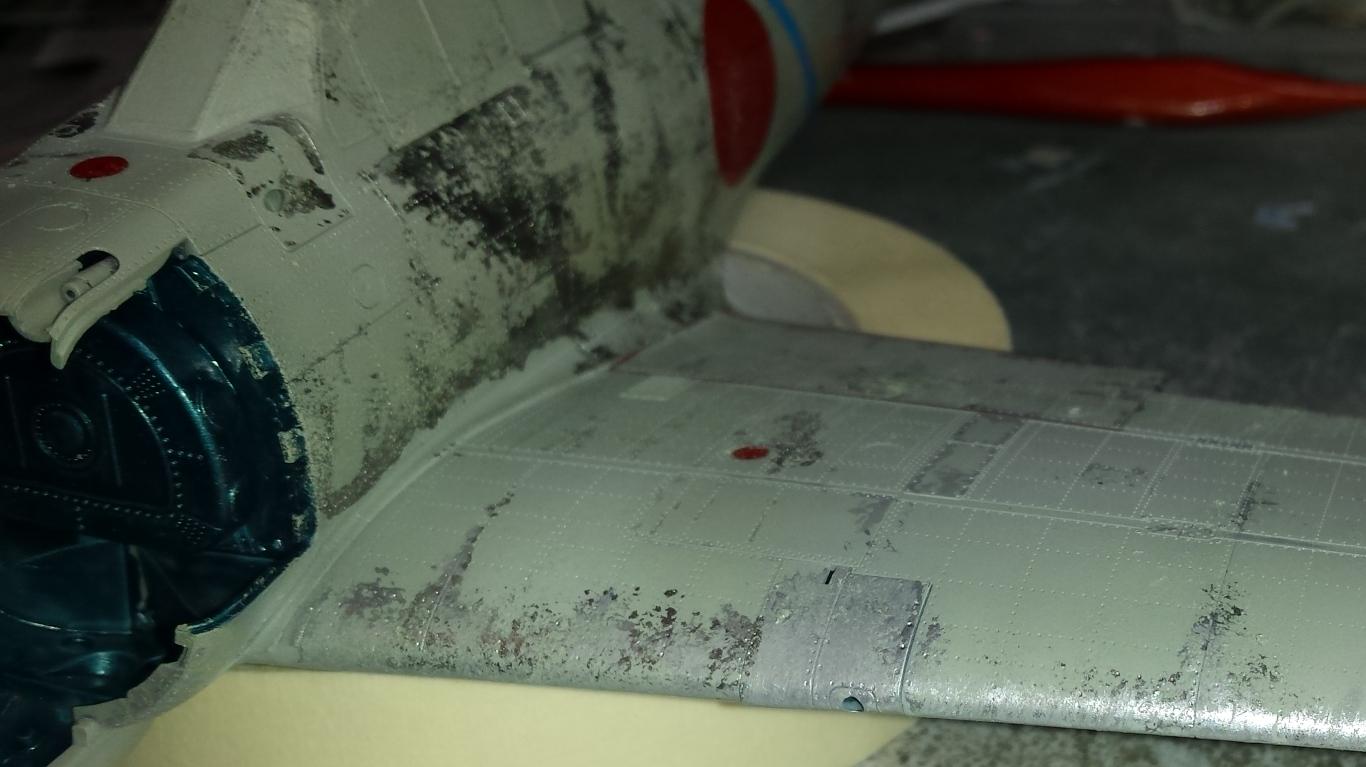
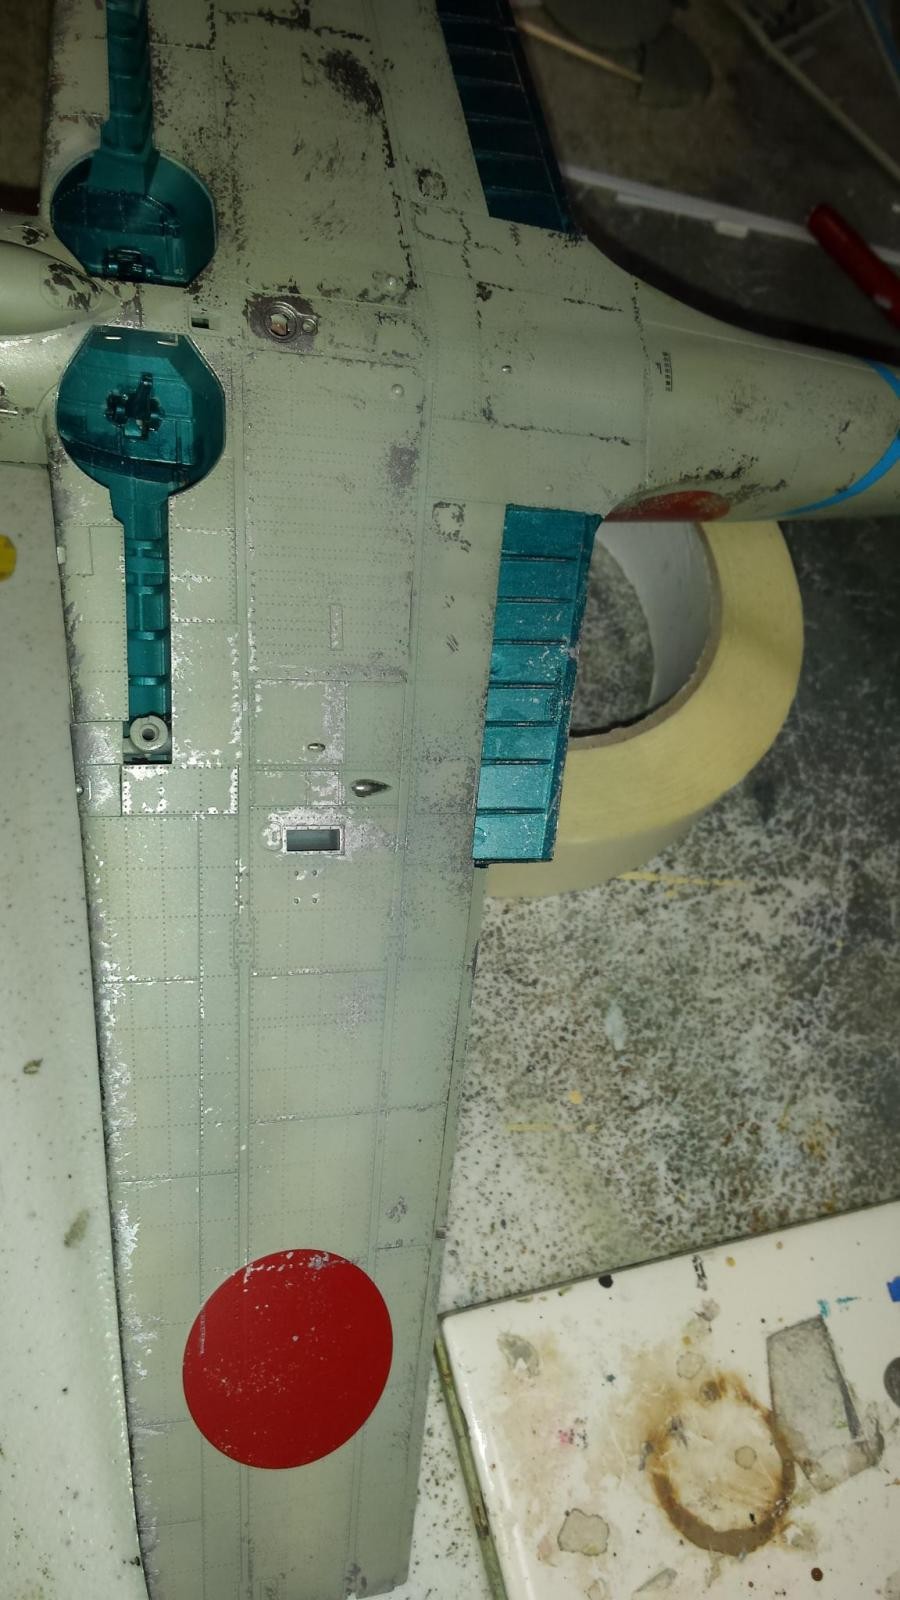
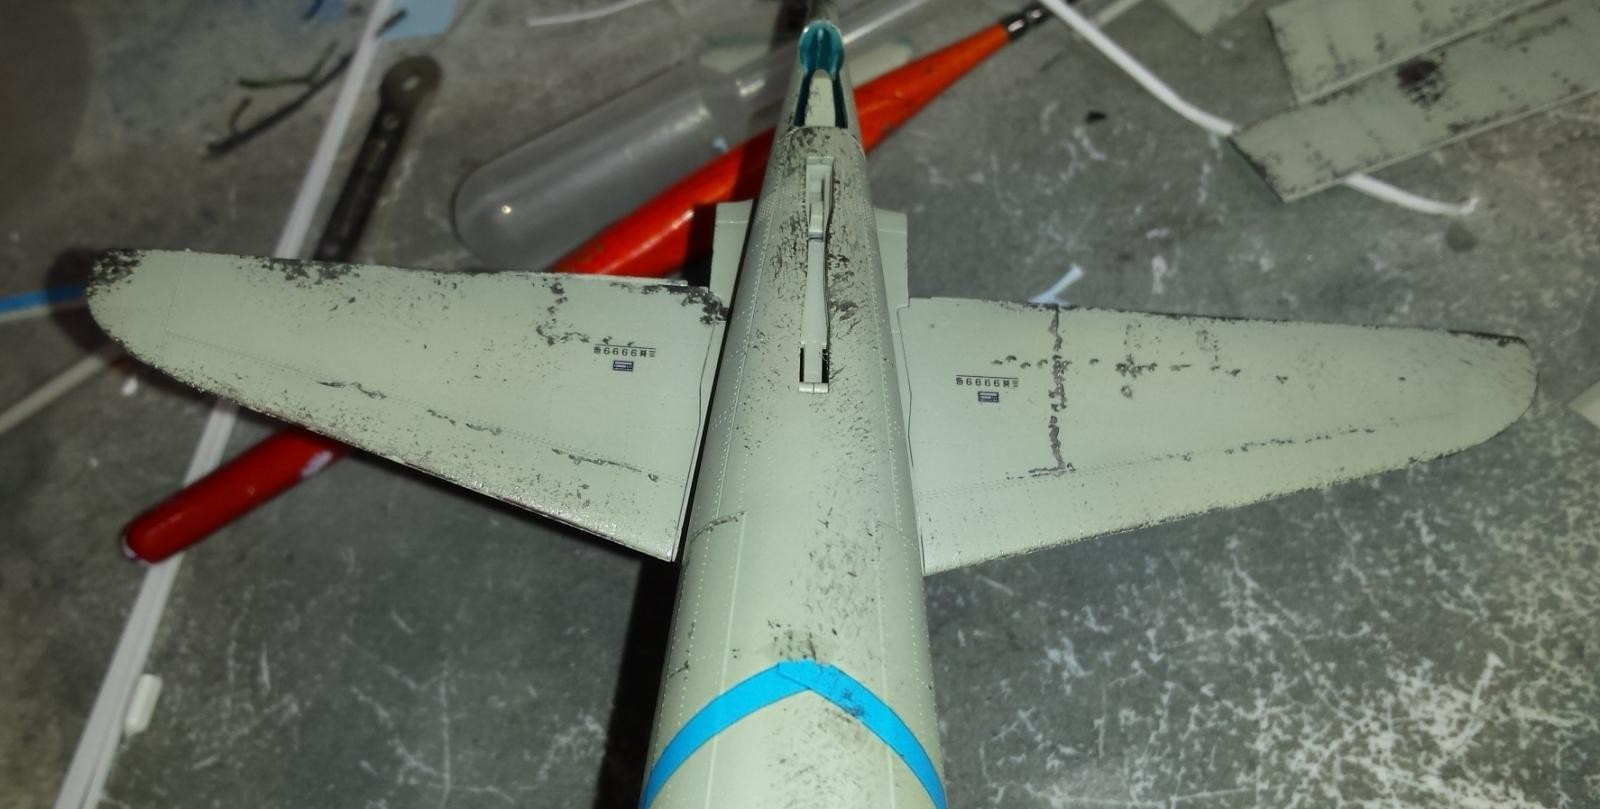
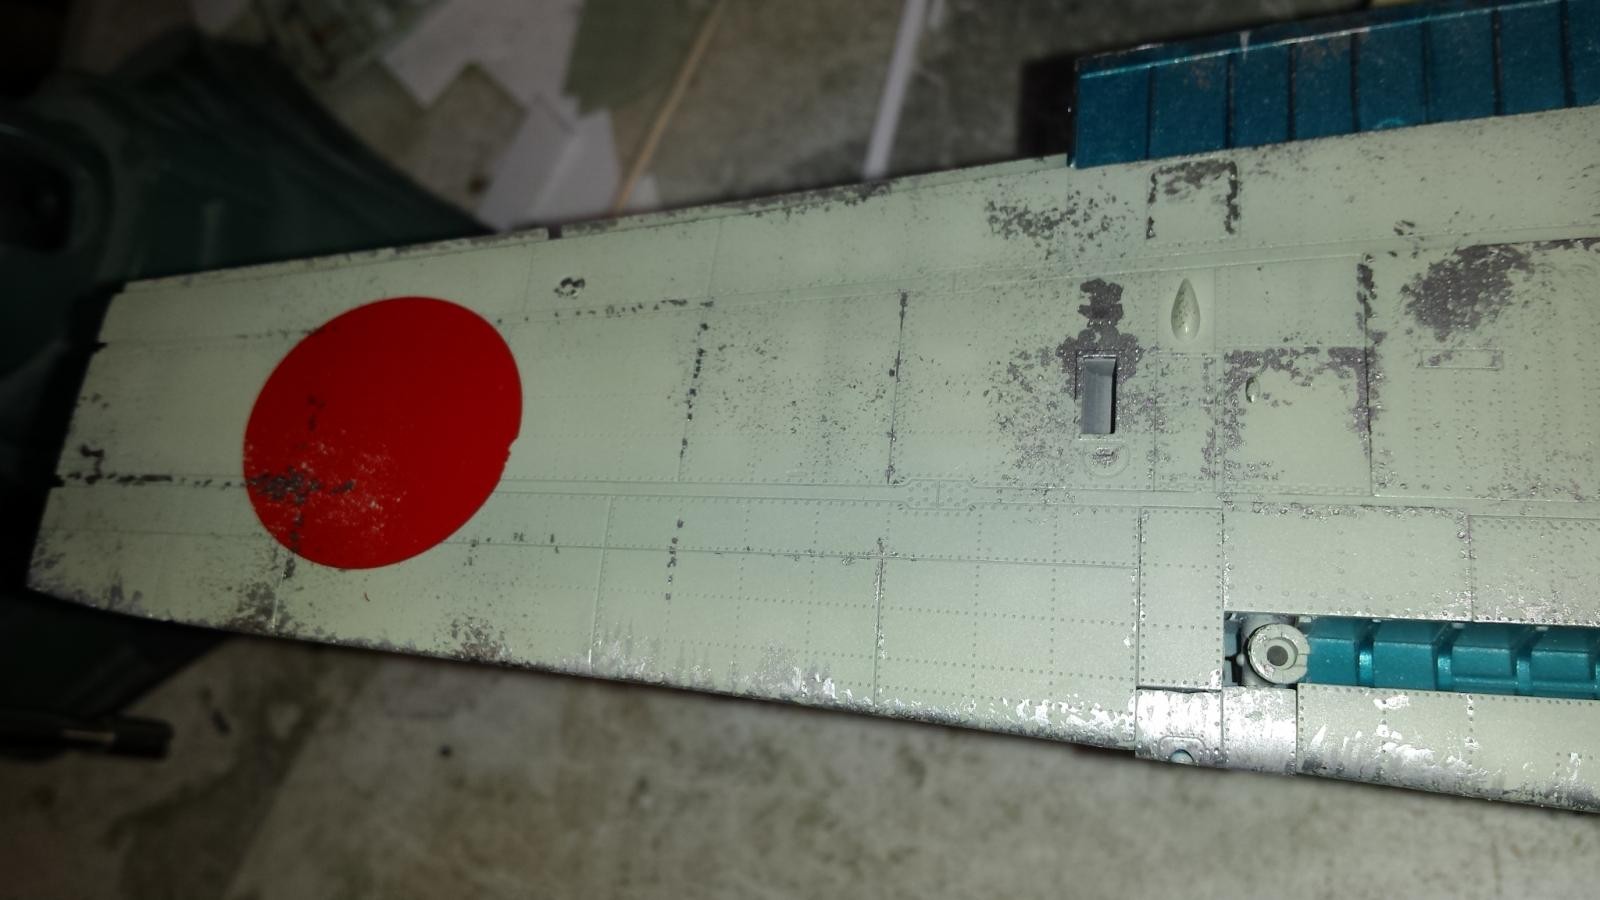
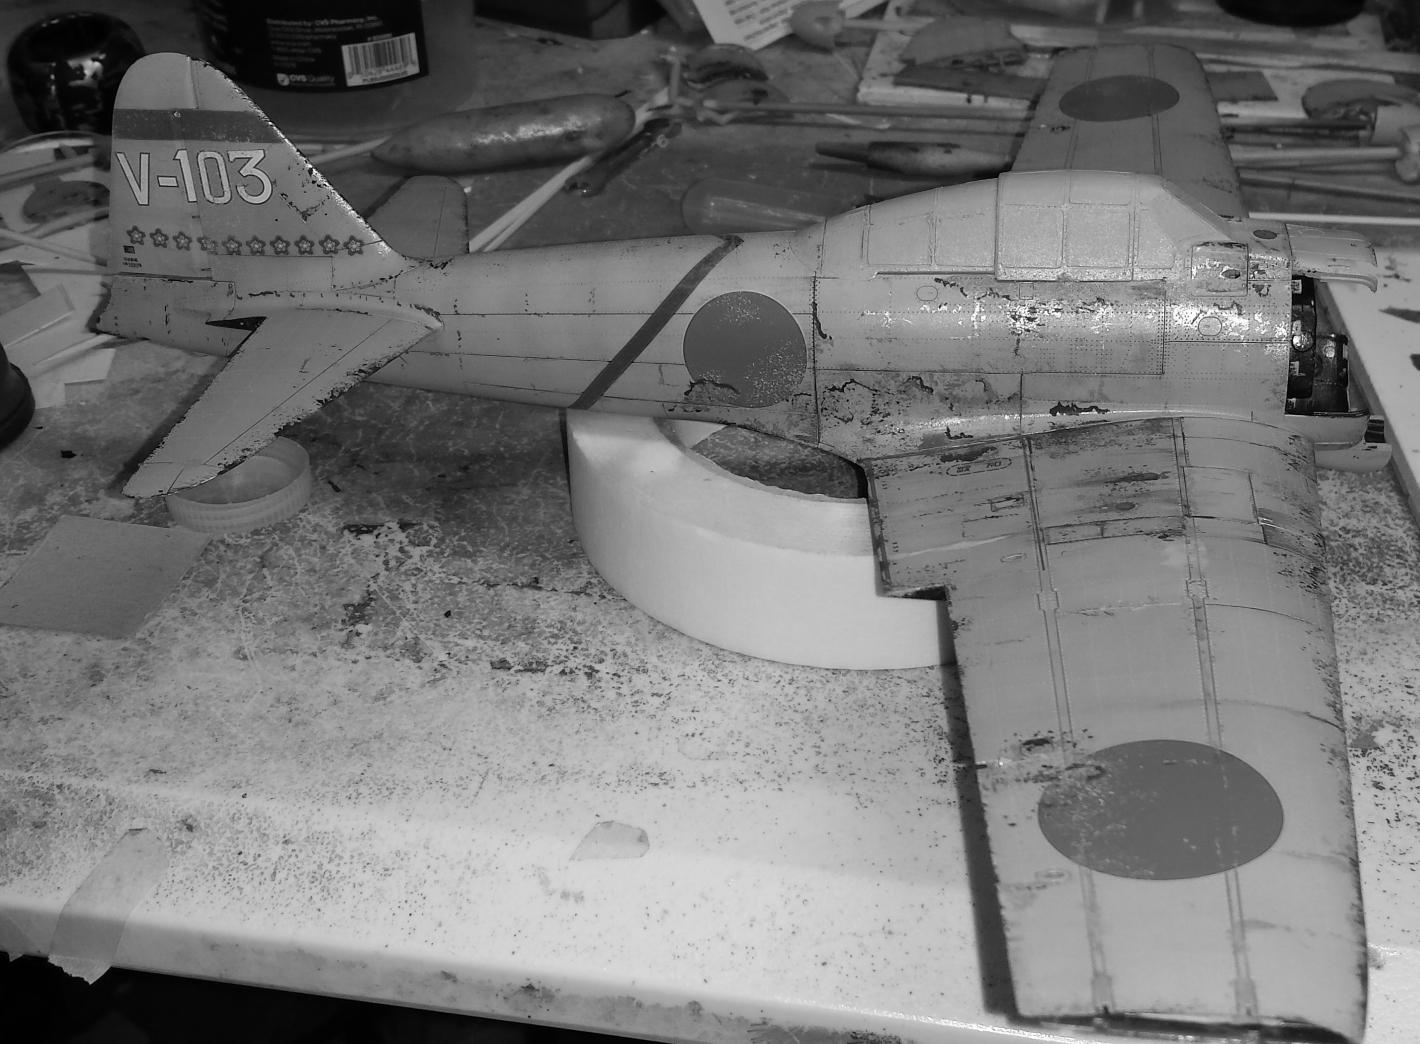
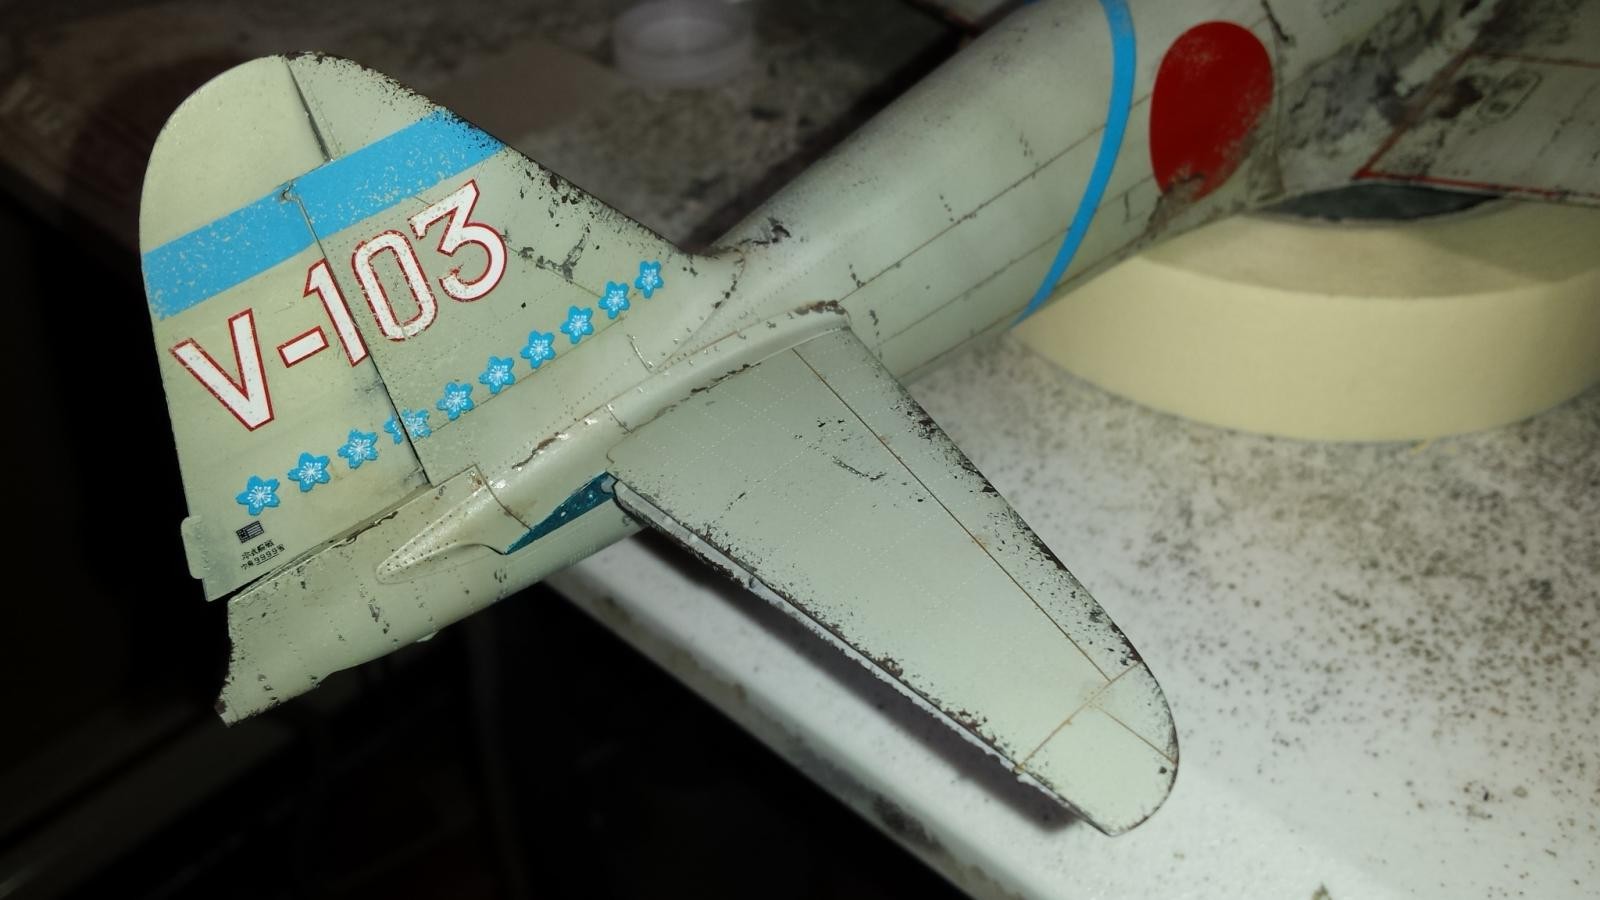
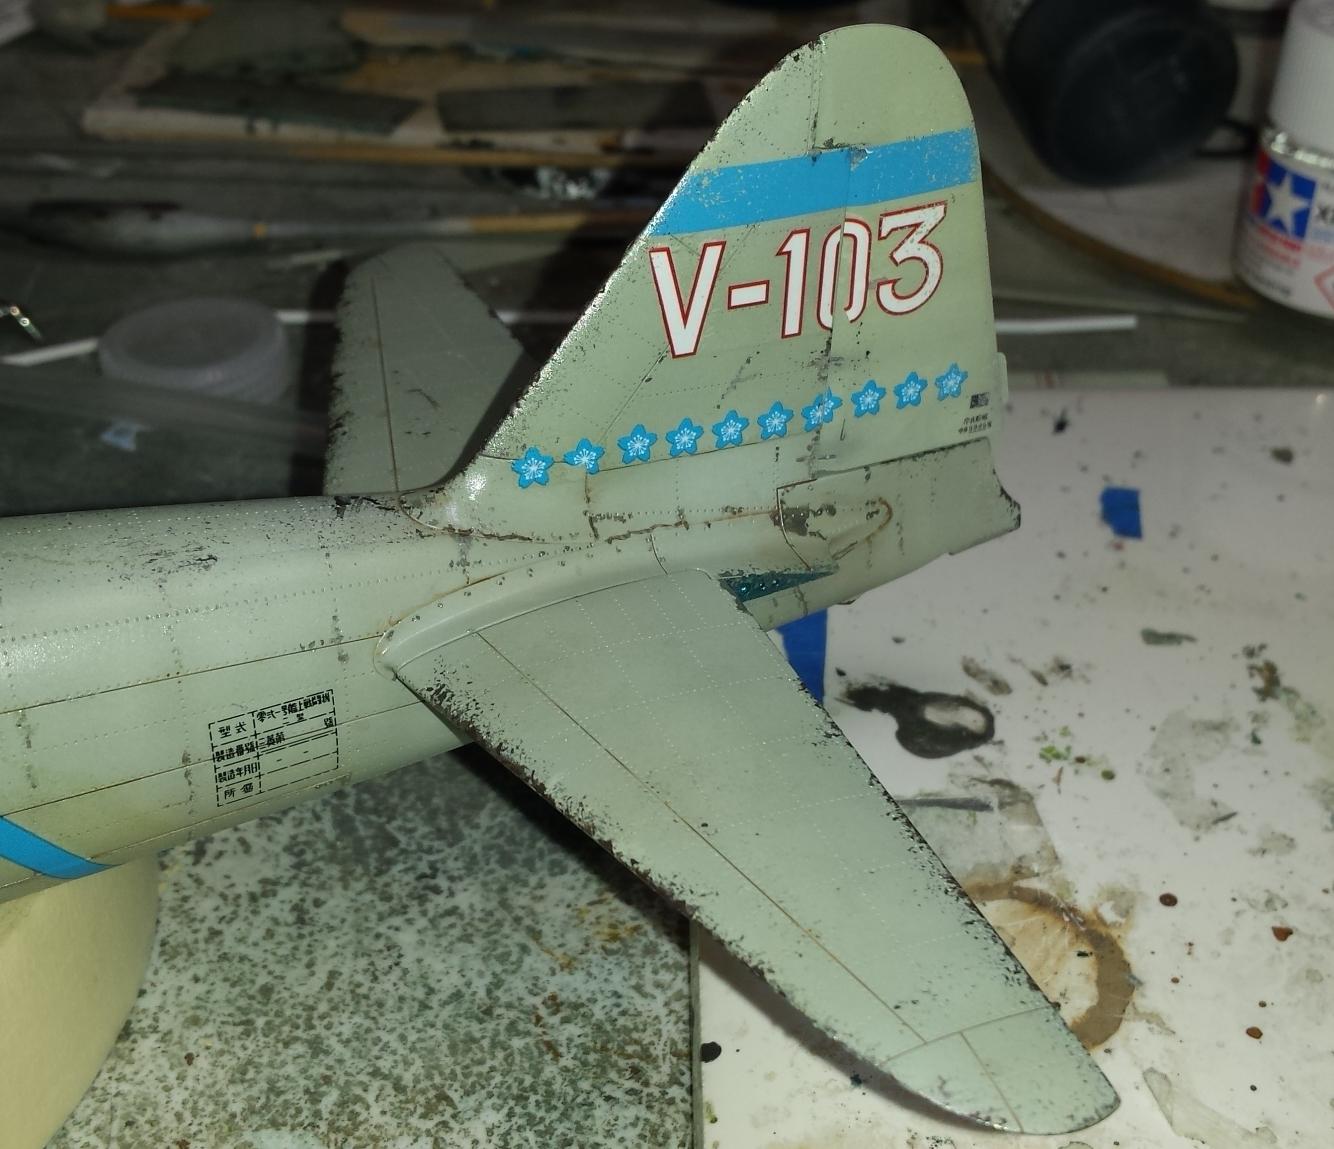
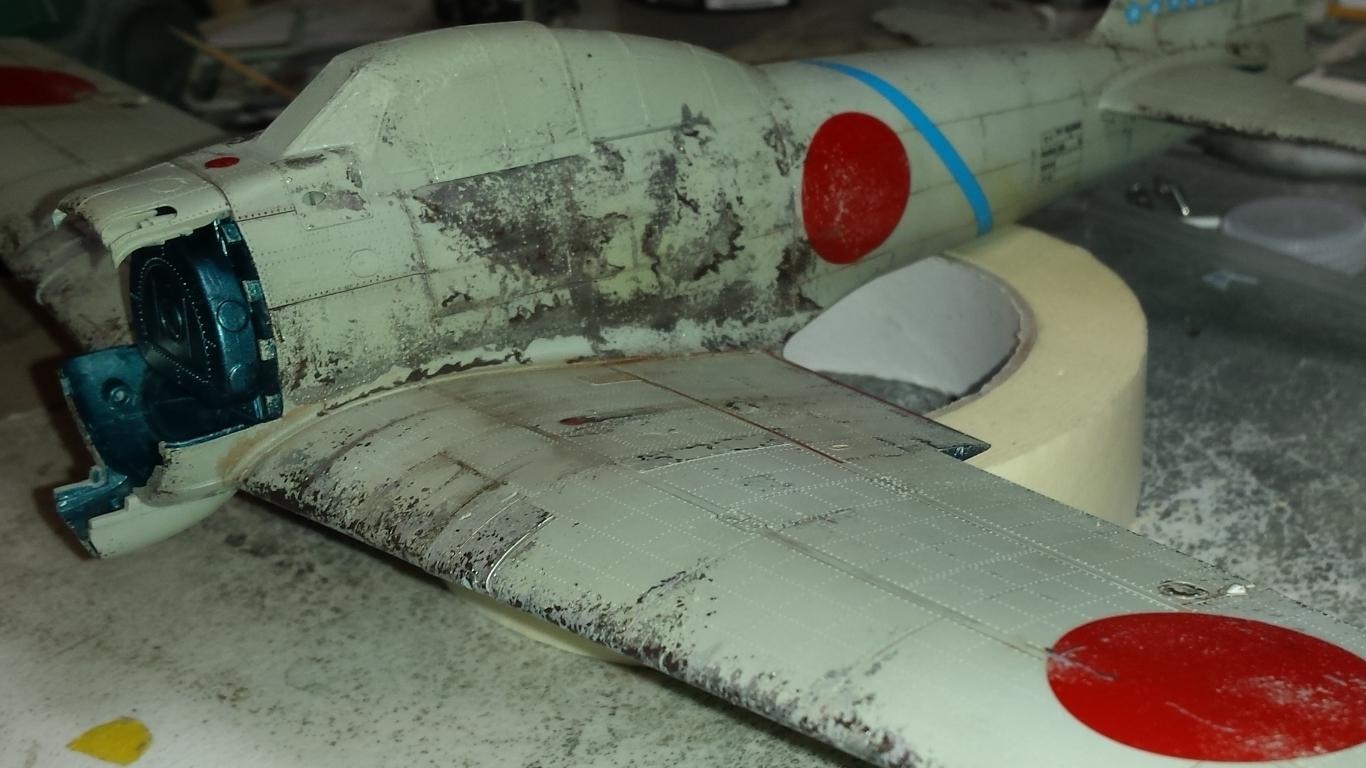
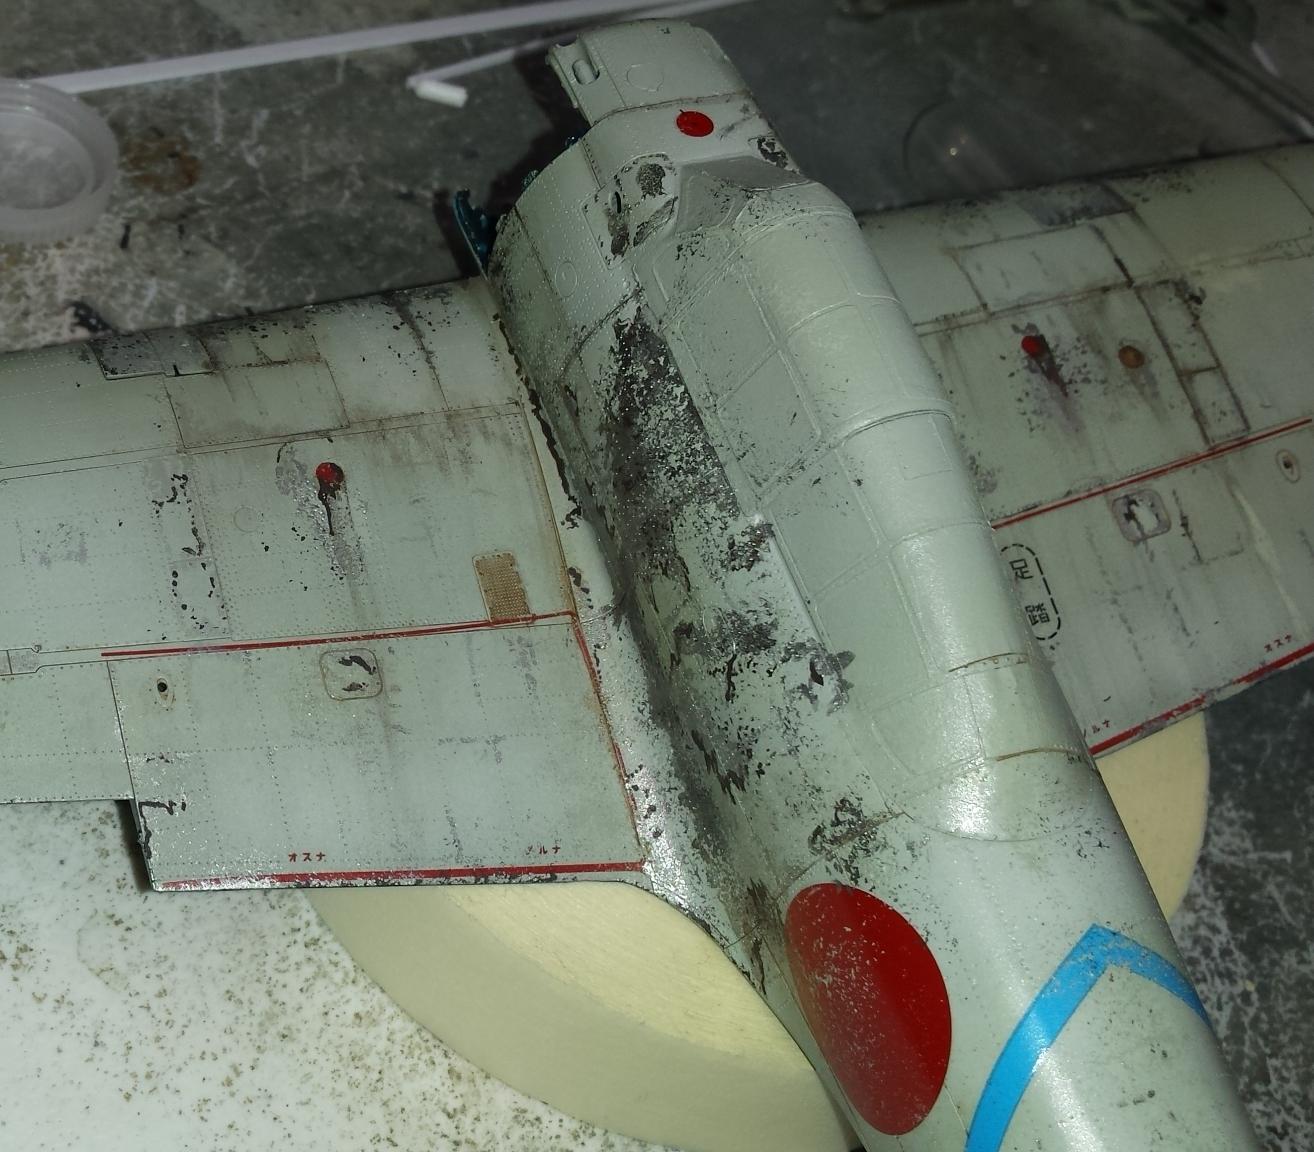
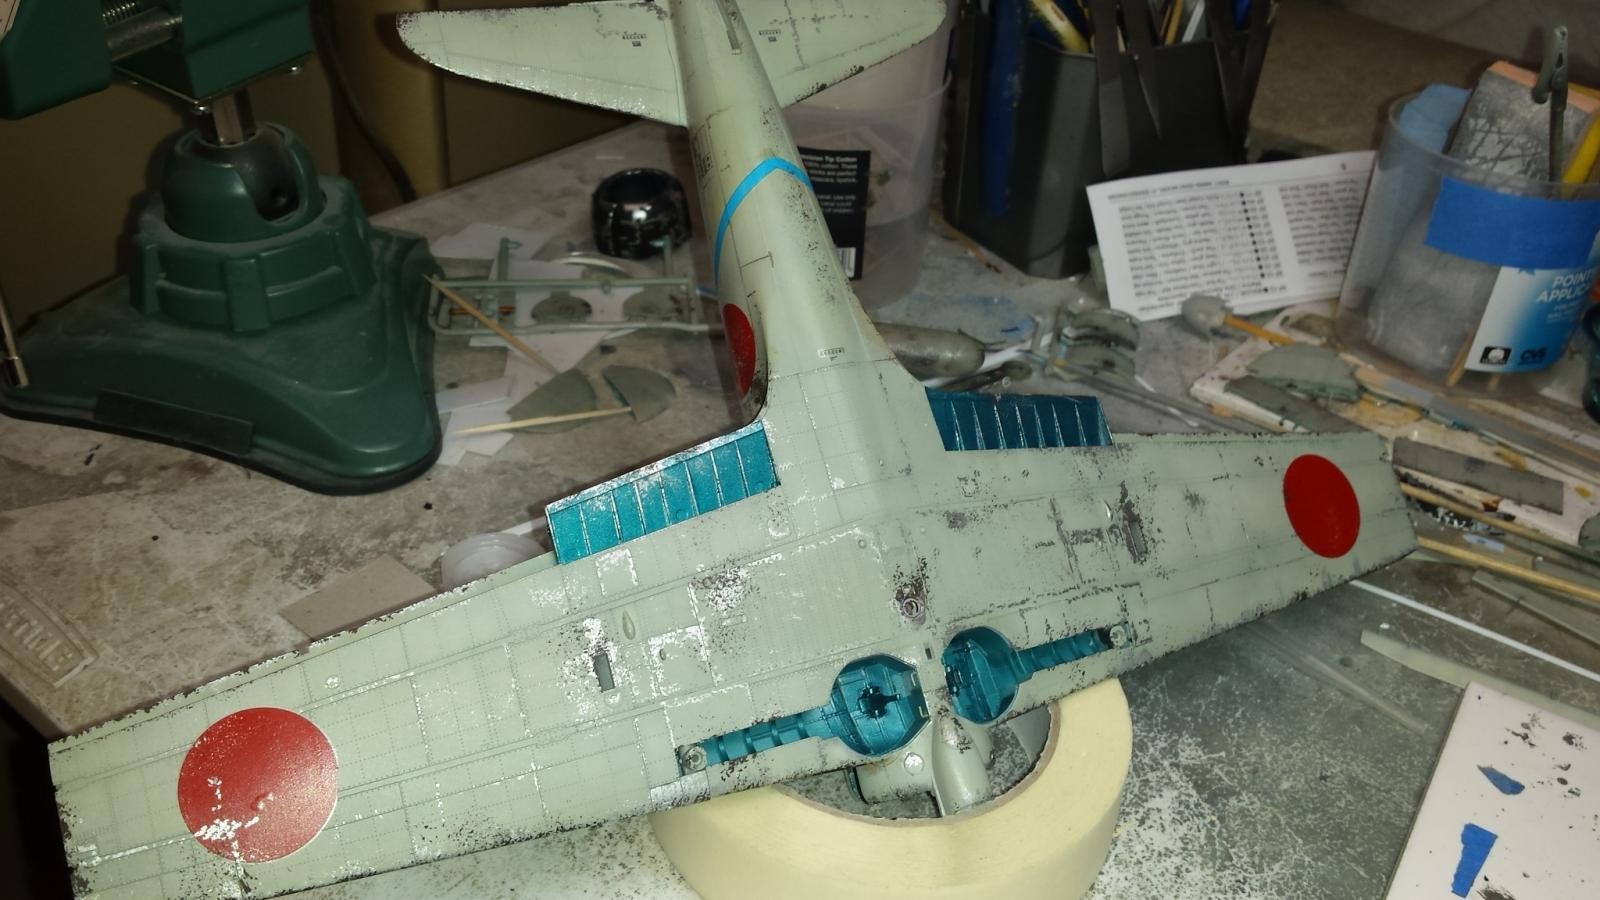
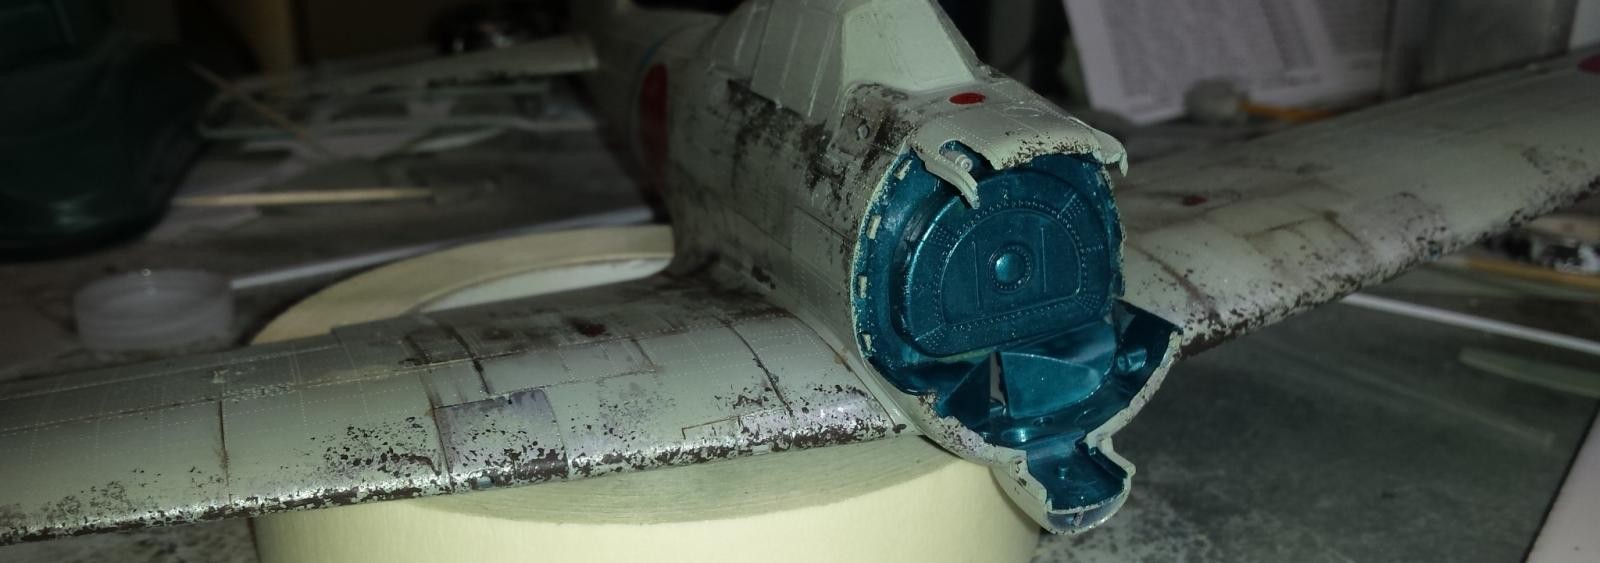
I really should be building the engine assembly and the landing gear but just could not get motivated for more complex assembly work. So instead I decided to start the weathering process with some basic paint chipping and staining. The attached photos may look the same but there is subtle differences in the progress of the process as the pictures progress. I used a Zero reference photo to give me ideas of what to weather and where to weather it. This plane is being weathered to look like it is on it's final leg, with long exposure to tropical island conditions, and minimal maintenance by its crew.
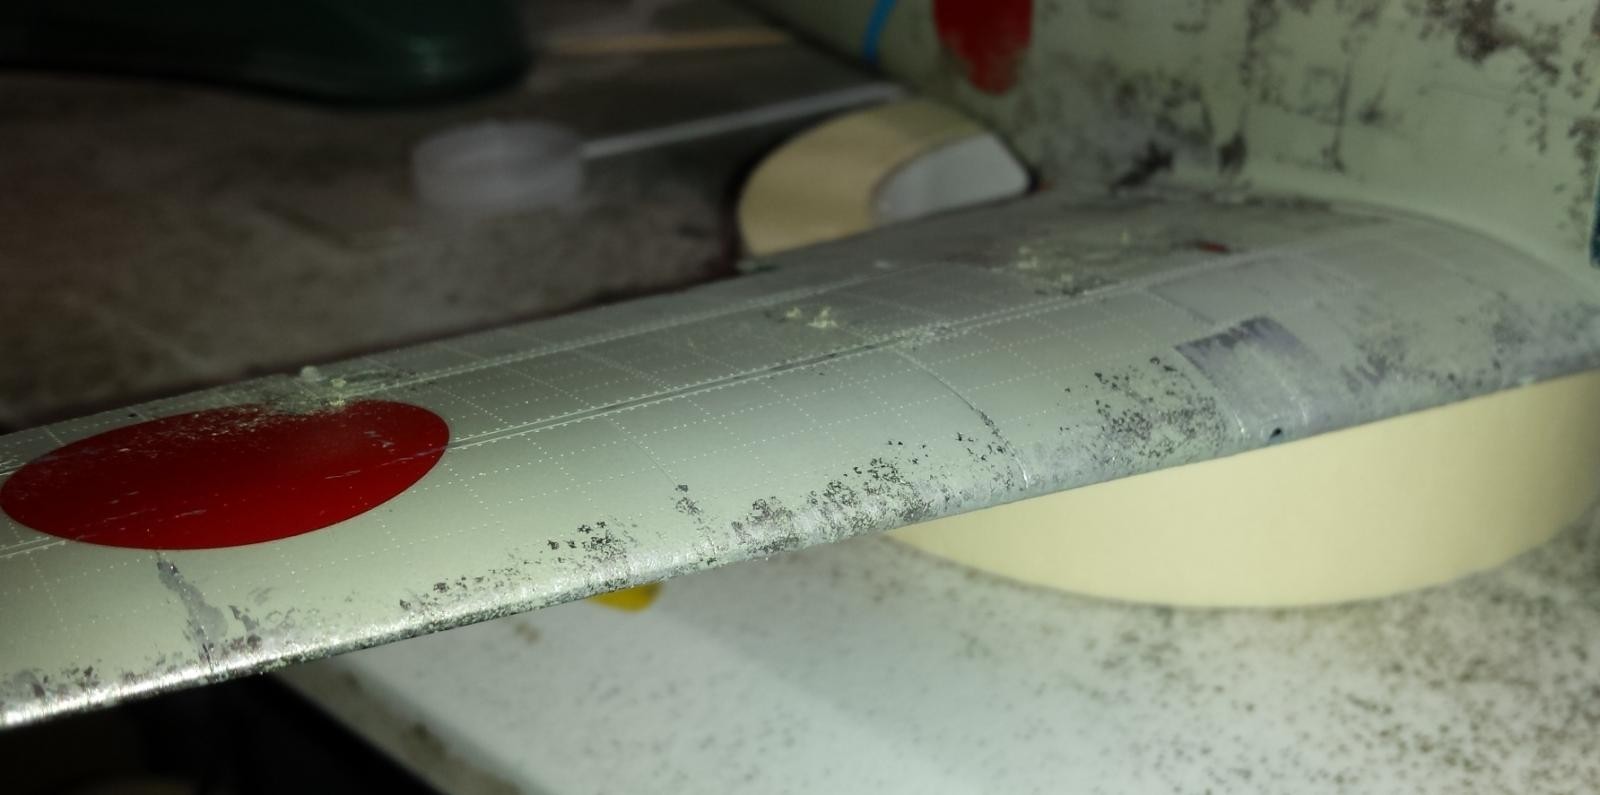
1st stage: In this stage the goal is to lay down some paint chipping were the IJN Grey Green is worn down through the primer to the bare aluminium. I used a pointed paint brush and some various shades of Vallejo Metallic paints to outline the worn areas trying to make the outline of the chipped area as jagged as possible. I then went back and started to fill in these same areas so it had an almost solid appearance. I then add some random chipping spots across the whole model using the same paint brush. i focused on rivet and panel lines. At this stage the chipping often looks to bright but it will be toned down and blended when I apply a final flat varnish to whole model.
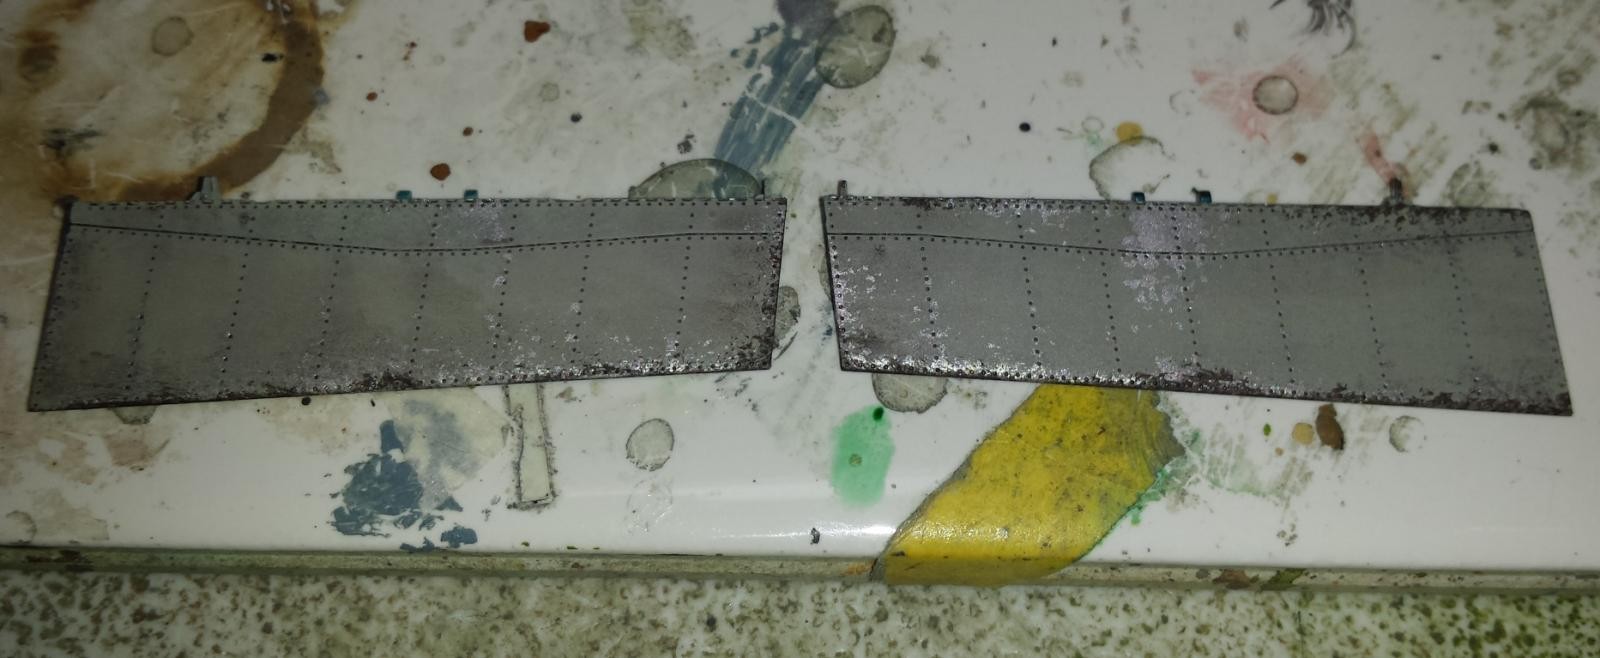
2nd Stage: I am still working on basic chipping with aluminium paint but I am going to use the sponge method to apply the paint creating a more random, speckled pattern. I do this to the leading edge of the flying surfaces and other surface edges. I also use the sponge method to produce a more random, speckled look to the outline of the larger chipped areas already painted with the paint brush.
3rd Stage: The A6M2 Zeros used a reddish-brown primer to protect the aluminum. An aircraft with this much wear and tear, and chipped paint, would also show some of the primer showing through especially at the very edge of the aluminium chipped areas. I used some Vallejo Hull Red and Brown paint to recreate this primer. I used a fine brush to apply very thin strips with jagged edges of primer to the edge of the bare metal spots, as well as, randomly in places of common wear, but not so heavy as to wear down to bare metal. I also applied this same paint using the sponge method in various and random spots to produce a very speckled appearance. This primer color can really over-power the chipped paint look so I am very sparing on the use of this color, but its use does bring the chipping alive with more visual interest and more realistic appearance.
4th Stage: I have not completed this stage but it involves some basic staining of the paint in specific areas. I applied thin lines of the primer mix along panel lines and receptacles. Before the line could dry I would smear it out with cotton swabs swiping in the direction of the line. I also smear perpendicular to the line to mimic some stains blown by the slipstream of the plane in motion. I will do more of this at a later stage using oil paints. The other process in this stage is the start of the panel line wash. I applied Tamiya Brown Panel Line Wash product as a pin wash to the recessed lines on the wing surfaces and rear part of the fuselage. This process will be repeated at a later date in areas that I have not hit in this step across the entire aircraft. I am not using the panel line wash as a surface wash, or to enhance the many rivets. I will use an AK Interactive dark brown armor wash thinned heavily with enamel thinner to wash all the surfaces of the aircraft so that I can hit all the rivets and other nooks and crannys. Tamiya Panel Line wash works great as a pin wash but is not designed to be a filter or large surface wash. I have tried it and it does not work very well. This later wash will also act as a filter creating color variation across the base paint, as well as, allowed to build up in areas that I want to be darker such as specific access panels and engine panels. Again, at this early stage some of the weathering is to stark, and needs to be blended when I airbrush the final matte varnish finish.
Again this is just the initial stage of my weathering process. There are still many steps to come. I hope you enjoy this article, and the included pictures. Please feel free to share comments.


Terrific work and thanks for talking us through your thoughts and paint processes.
Love it!
Thanx
Absolutely in total agreement with David on this...nice job indeed !
I'm rather in awe of the whole thing and wish I could be there to see you do it.
Wish I had the equipment and knowledge to make video for YouTube or something. But I have learned a lot of this from watching many videos of people doing the same thing. A few things are trial and error, but much of it was learned from others.
What a tutorial! The one thing that would make it even more effective would be to add the narrative picture-by-picture (inserting the pics inline with the text), so it would be easier to discern between the steps as you describe the application of each product with the various tools. Loving the education I'm getting here!
Really well done, Paul. Great how-to as well.