DFW C.V Progress 4
And on we go.
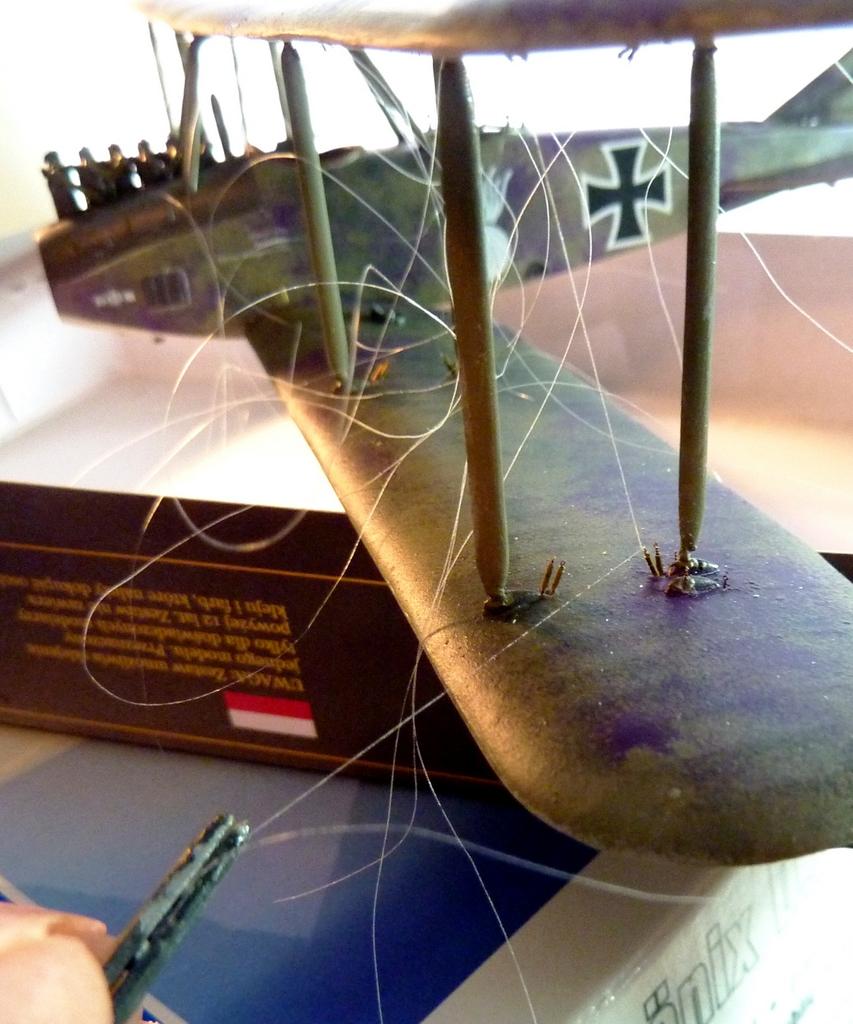
It's time to set the top wing and sort out the rigging. Depending on the kit, the process can be straightforward or arduous. With this resin kit, there are few if any positive locating points and the fact that the top wing is indeed resin makes for a hefty bit of weight atop the spindly struts.
The cabane struts are four in number, but instead of affixing at four points near the cowling and cockpit, like four vertical posts, they angle back from said points to the ventral centre strip of the top wing, like inverted Vs when viewed from the front.
I double-checked the Datafile for clear references, and with a dot of cyno set the cabanes in place on the underside of the wing, then held the wing over the respective areas on the cowling for the correct width of placement, marking these points with the tip of a sharp blade.
The wing was set to rest with the weight directly on the now-set cabanes on the cutting mat, ensuring the wing was levelled and supported at each end, so that wing and cabanes effectively became a single firm unit. With a sharp blade the marked points on the cowling were opened slightly to create positive fixing points for the cabanes. These were given a dot of cyno and the wing was positioned.

It's also very important to ensure that the top wing is square to the bottom wing, and to remember that the wing is effectively balanced on two tiny central contact points alone and is very fragile.
The main struts are then placed, in this case eight as the aircraft is double-bayed. The struts are set outward from the fuselage to maintain a firm frame overall as work progresses. I had read somewhere that all the struts were too long, but these seemed fine.
Just to say again that with both cabane and main struts, they've been moulded with a strand of wire for added strength.
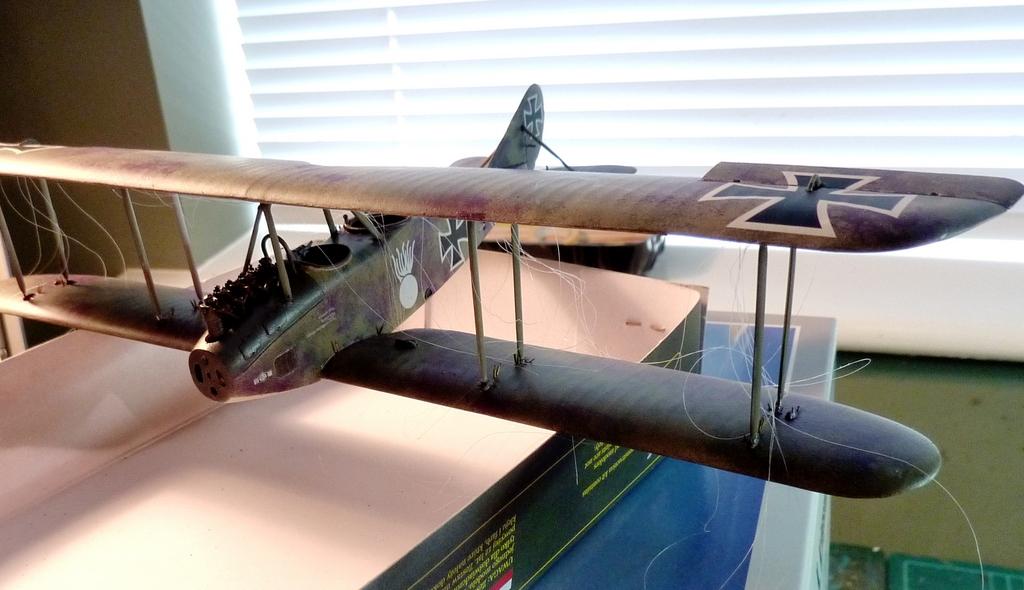
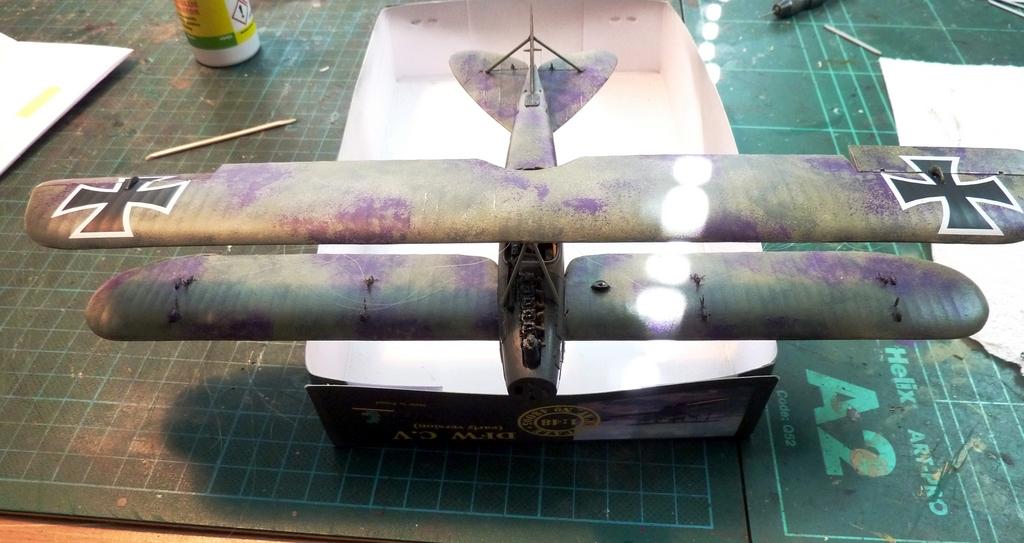
As in the main photo, the rigging is then begun. The four sets of transverse Xs are done first, so that the rigging process works outward to avoid having to reach through/over previous work.
The process is repeated on both sides.
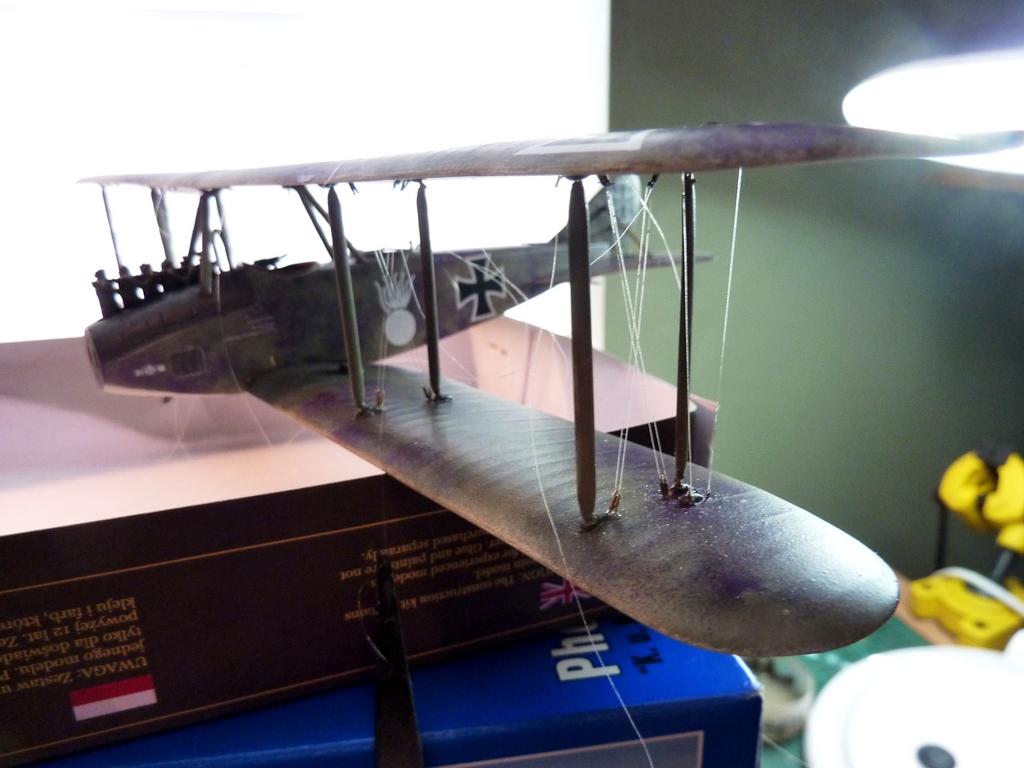
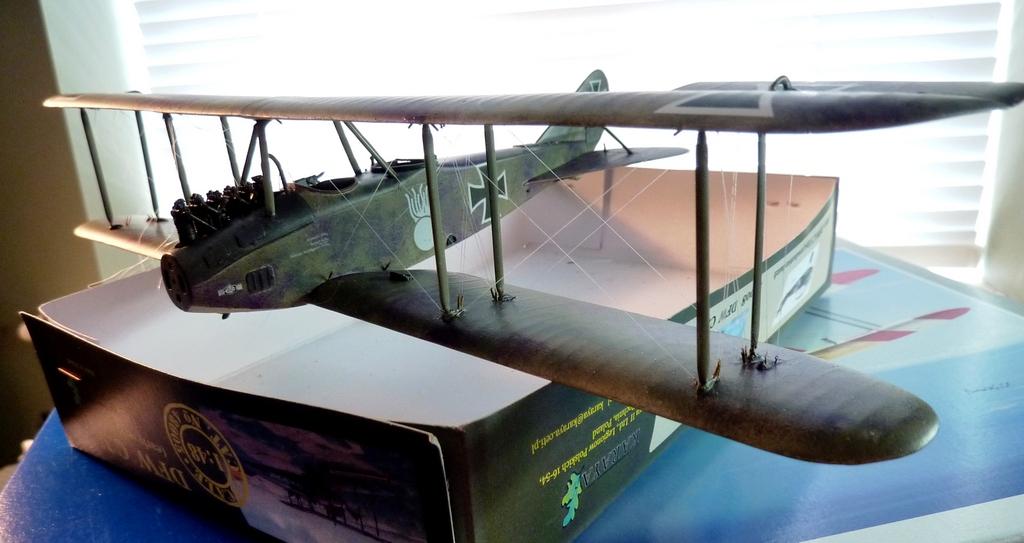
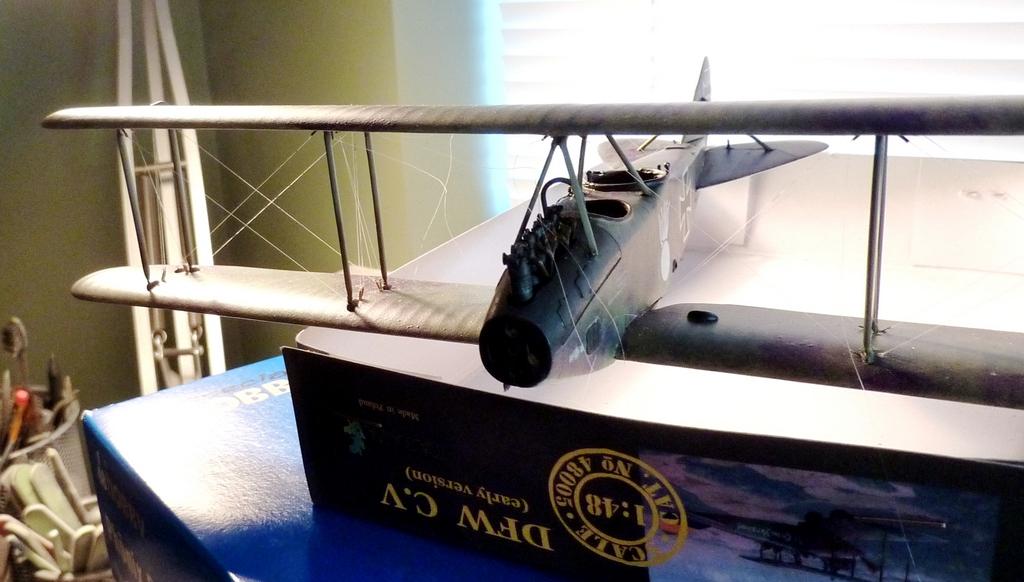
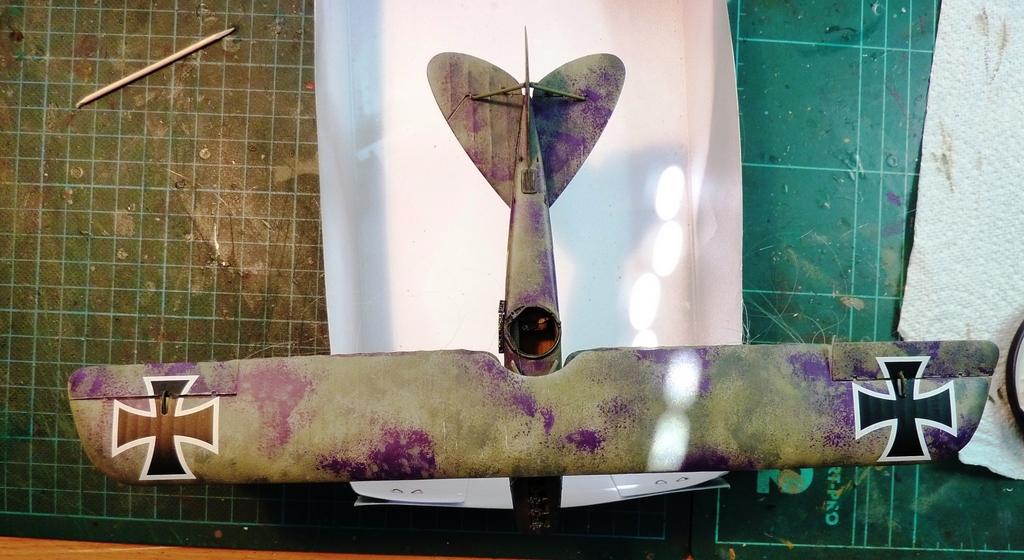
I used a small brush to apply a dark metallic finish to the lines. A weak mix of Lamp Black and white spirit was used at the turnbuckle contact points on the wings, for slight weathering effect.
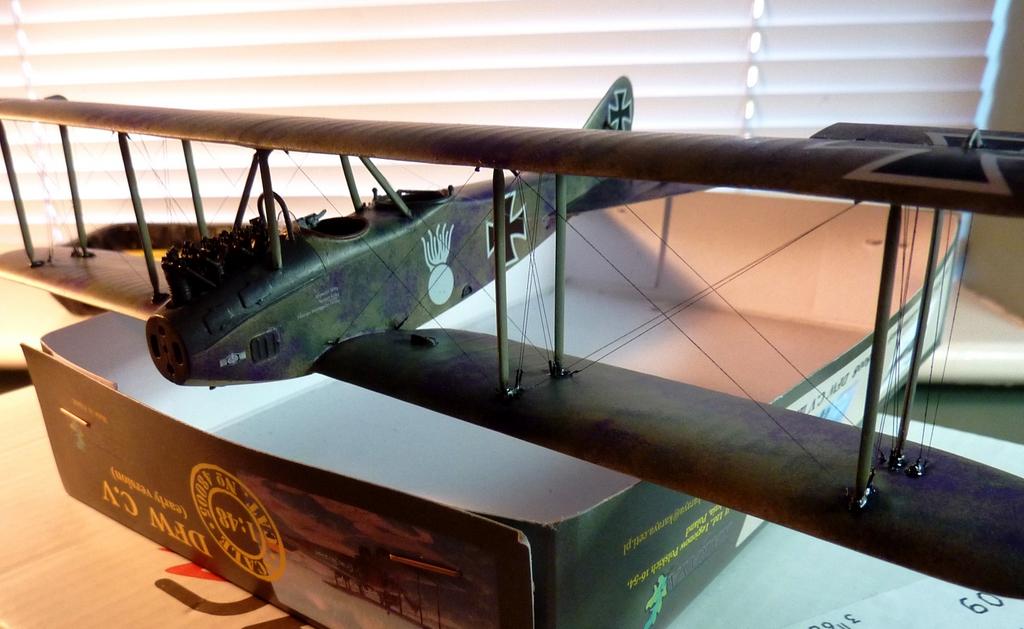

You may notice a couple of loose lines in these latter photos. When the undercarriage struts are in place I still need to fix turnbuckles where the forward undercarriage struts meet the fuselage.
Apart from the undercarriage, which perhaps doesn't sound so complicated but is in fact quite so, I still have the radiator to set, also deceptively complex, and then a few final items, such as the Parabellum.
Amazing build and good progress on this one Rob!
That is a lot of complex, eye straining, mind blowing detail work. That last photo, particularly, is a real eye catcher.
You are going to need a holiday after this build.
Yes when you consider the length of the top wing is about the length of your hand, it’s a lot of close work. It wasn’t until I got the Datafile that I realised the transverse Xs we’re doubled so not the most straightforward work.
Despite how extraordinarily well this is looking, it most assuredly doesn't look like a "fun" build - at least to MY way of thinking. Then again, after seeing some of your past ship models, THIS rigging must seem rather easy (another term I wouldn't apply were it me). And I agree with David...you'll probably wanna do a nice uncomplicated jet or something after this. 🙂
It will be fun to be done, I suspect!
Not fun exactly, but a steady skills challenge. Makes you think carefully and think ahead as well. As it happens, just managed to get the undercarriage in place and rigged, which is a relief. It’s sitting with a slight lean to the right at present, when viewed from the front, but this is because of the weight of the aircraft on the spindly u/c struts. It will be corrected when the last two lines are fed into the areas near the nose and tensioned.
A technical challenge, then. Between the rigging, the struts, turnbuckles, and the issues around the undercarriage (not to mention the challenge with balance that goes with biplanes and the difficult color scheme) it's a nice piece of work to get your mojo back.
Respect, Rob.
Amazing work here!
Like DAvid above, i say respect Rob !
Whew - way to bring order out of chaos! Looking fantastic.
Beautiful, Rob. The camouflage on the wings is absolutely superb.
Well done, Mate!
Yet another fascinating build coming along, Rob, your meticulous attention to detail is going to make this model really stand out.