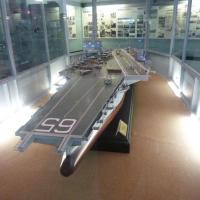
Kitty Hawk F-101C Voodoo

I've had this Kitty Hawk kit since it came out a couple years ago, but it kept getting put on the back burner due to other projects cutting in line. Well, I finally decided to finish the Voodoo, especially since Kitty Hawk has decided to release the "B" and "RF" models. It should be mentioned that Kitty Hawk (like some other kit manufacturers) has tried to maximize their mileage by using common sprues. Ordinarily, this works out OK, but in this case Kitty Hawk has failed to recognise that some parts on the "C" model are different from those on the "B". This is especially true with the intakes, which, on the "B" model, hev a forward sweep on the upper part of the intake, as well as on the splitter plate. The intakes and splitter plates on the "C" model (as well as the RF-101C) are more upright, requiring some correction during the build. The correction entails removing approx. 1/8" from the upper intake lip, and some filing/sanding to blend things in.
This kit comes with full intake trunking, running from the intake to the compressor face; this feature is nice, but problematic at the same time. The intake trunking comes in a Y-shape, connecting both intakes together. If you follow the instructions, this Y-shape is trapped between the upper and lower halves of the fuselage, followed by installation of the wings to the fuselage. The wings have the fore part of the intakes, which are supposed to connect to the Y-shaped intake trunking. Well, there is really no way to get a tight, smooth connection between the wing intake section and the intake trunking, as per the instructions. What I did was to cut the Y-shape in half, and used each half to get a good fit to the wing portion of the intake. Now you have the wing sections connected to the intake trunking, but you still have to insert each wing and trunking into the fuselage. I found that some very minor sanding to enlarge the fuelage opening where the trunking fits through, allows you to insert the completed wing and trunking into the fuselage with good results. The wings fit really good to the fuselage sides, with just a small amount of superglue run into the seam to glue and blend things together...no sanding required, if done carefully.
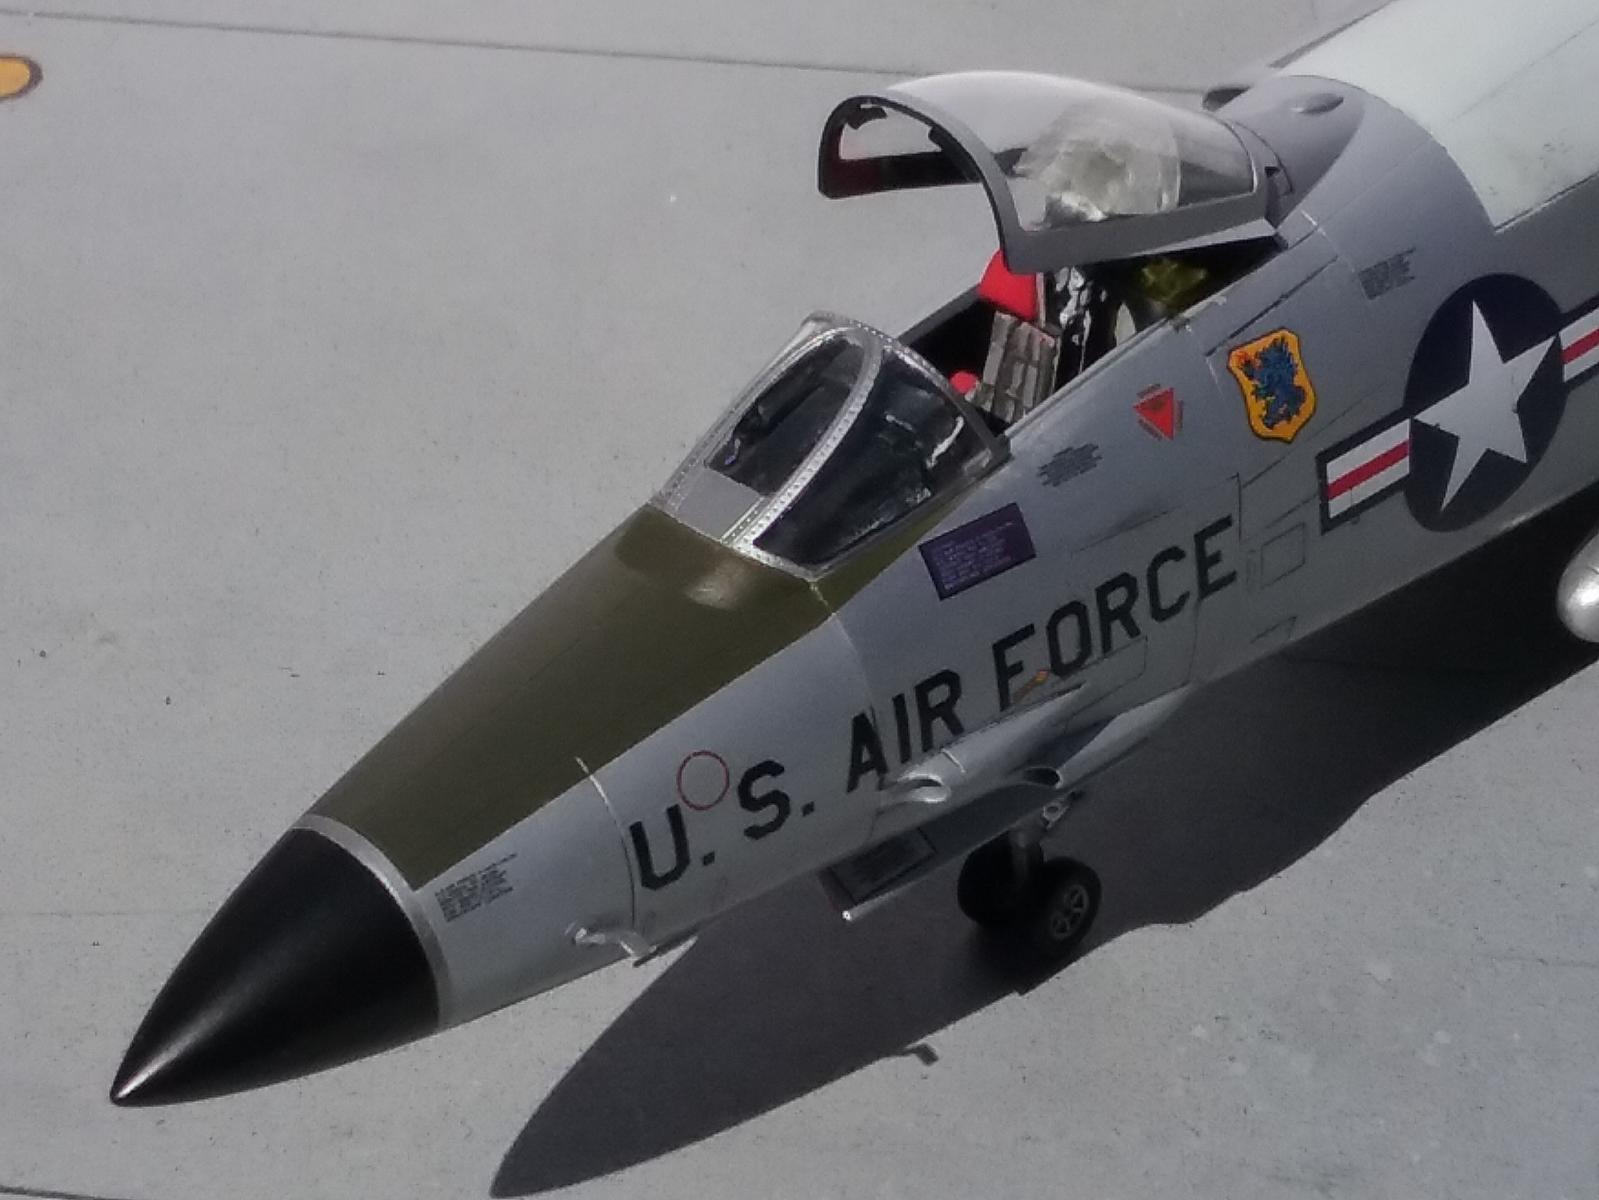
The cockpit really does need some help; there is very little detail included, even though KH provides decals and photoetch to go in the cockpit. I wound up using the deacl for the instrument panel and the PE for the side consoles. I added some thin plastic rod to the PE consoles to give a little relief from the flat boredom of the PE.
Most of the molded plastic parts are very good, and god together without any problems. I did find, however, that some of the small, fiddly parts are prone to breakage, especially while trying to remove these small parts from the sprue. I think the plastic used by KH for this run was deficient, and prone to breakage. Perhaps the newer KH releases will have this issue corrected?
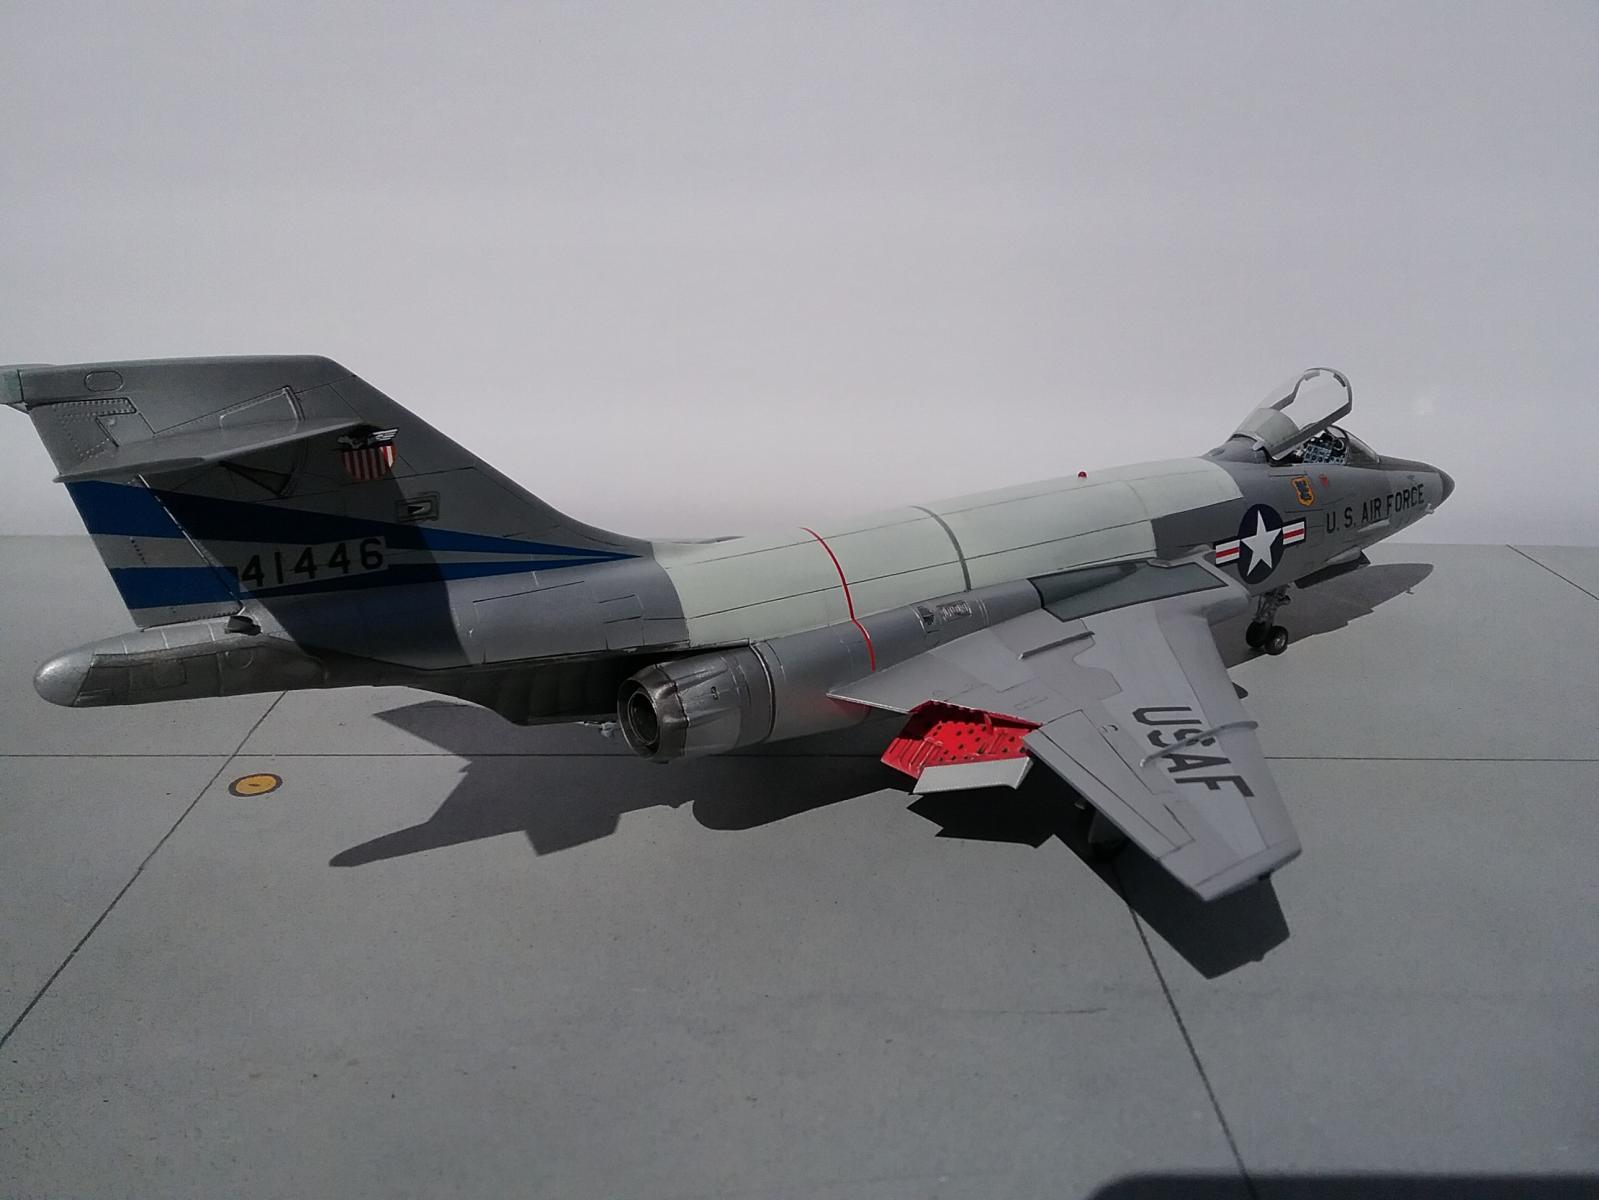
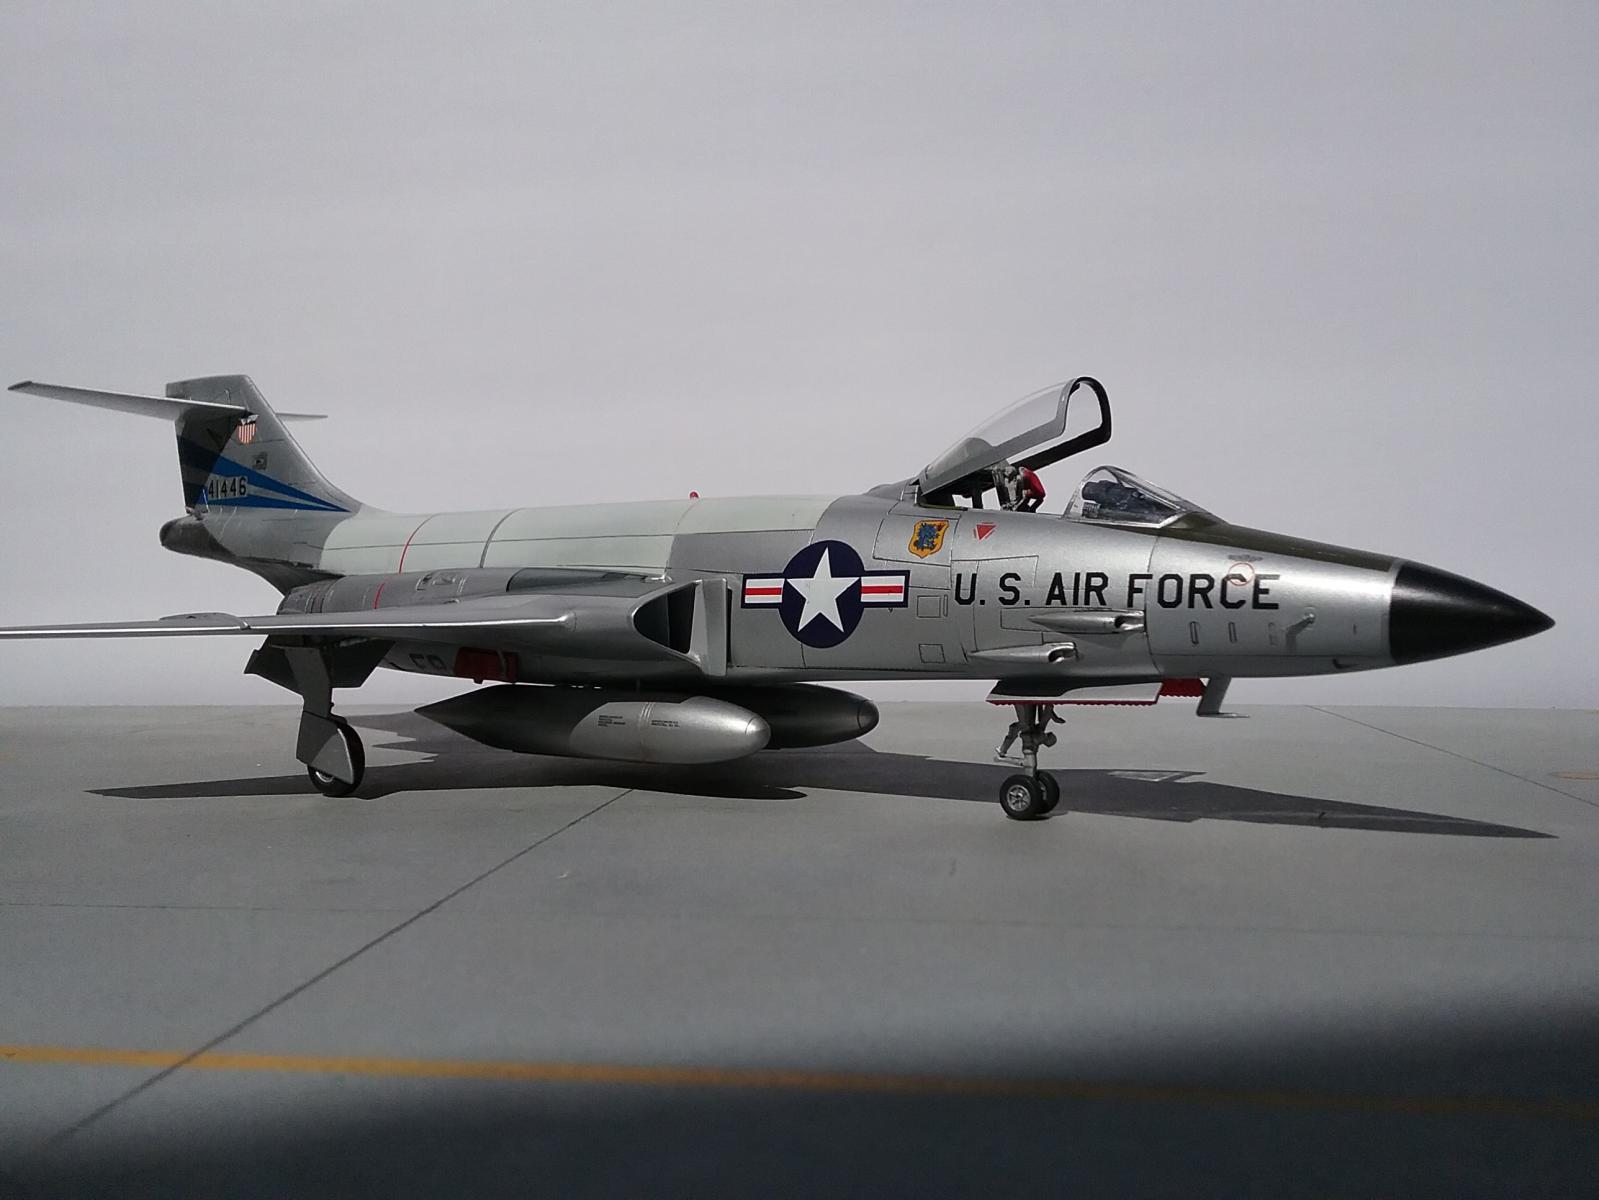
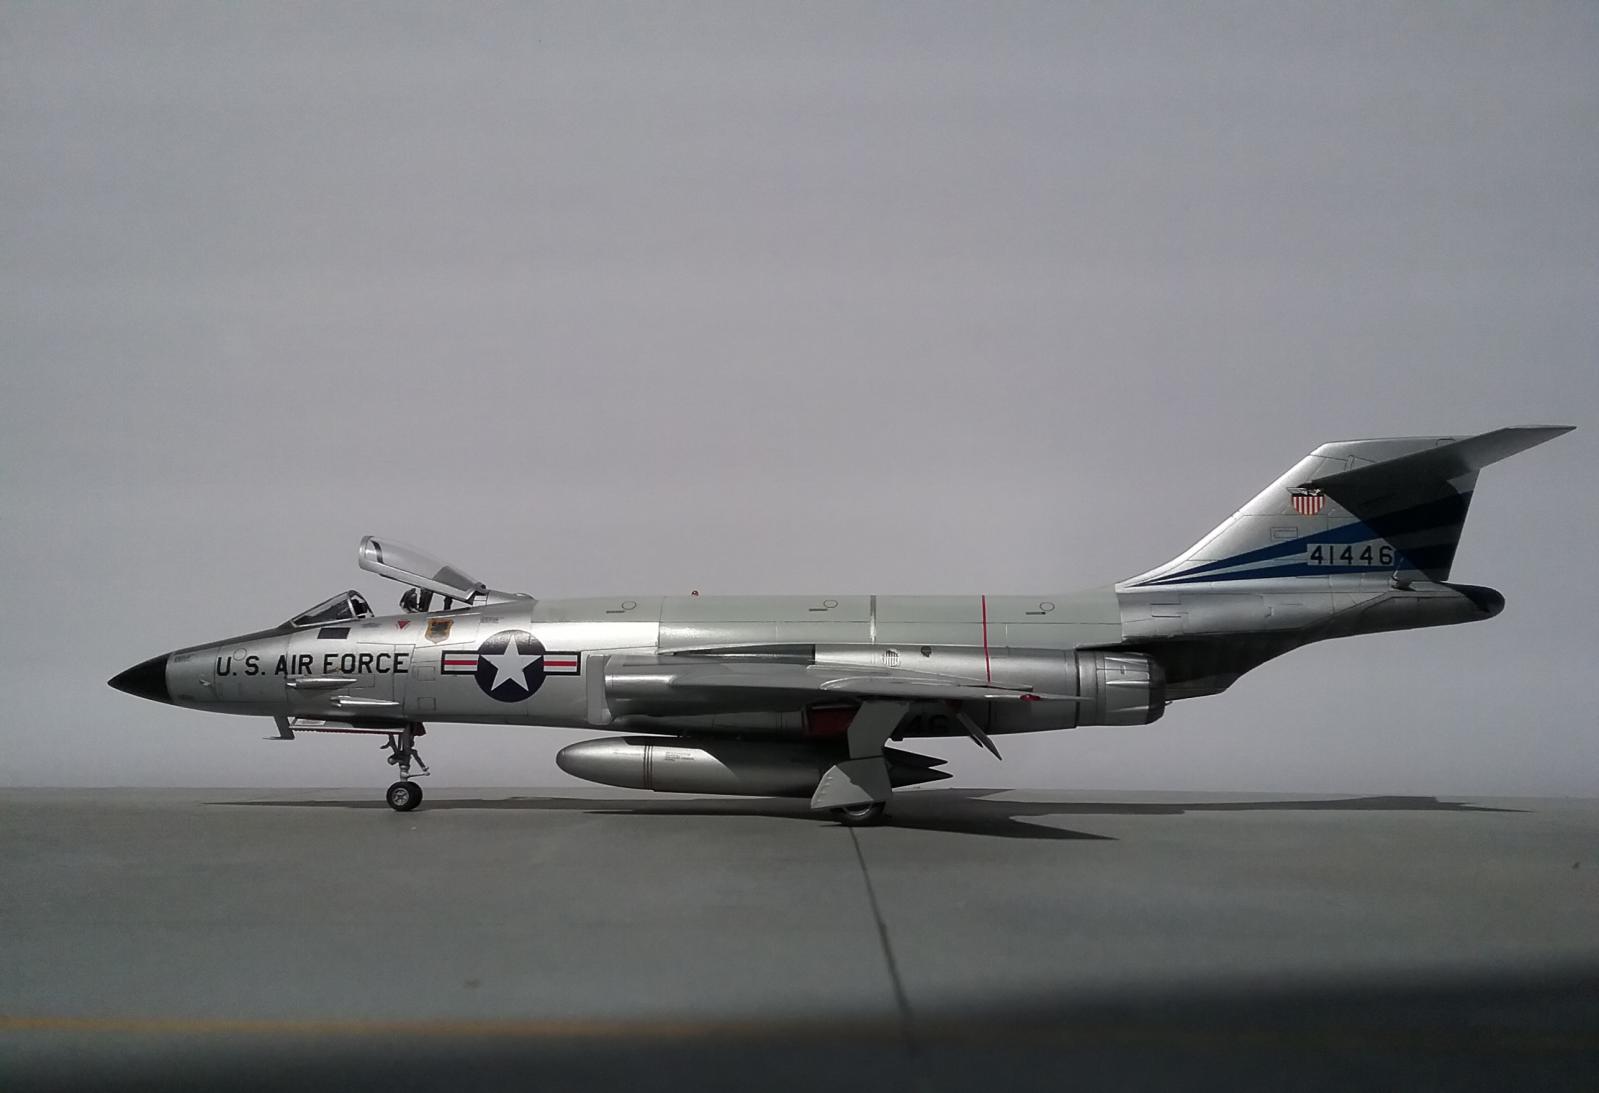
Anyhow, the F-101C Voodoo is finally done. Except for the very minor inclusion of small plastic rod to make some knobs on the PE consoles, everything else is OOB. I used kit decals and I was impressed at how well the kit decals conformed (with very little decal set used). The model was painted with Alclad II aluminum color, clear-coated with Future (Pledge floor finish) for the decals. The upper portion of the main fuselage was painted Model Master F.S. 16473, as seen on some Voodoo's as corrosion control.


Very nice! My dad flew the C out of Bentwaters, and I'm still hoping someone pops a nice C version in 1/72. There was a conversion set years ago but I've had difficulty finding one. Love the 101 in the NMF finish - yours looks great!
I agree, Greg...it DOES look great (despite any imagined or real issues with KH kits) - and thanks for the 'update' re your PM. 🙂
Greg, a company called Valom released the A&C models in 1/72 a few years ago, don't know how good or bad they are.
1 attached image. Click to enlarge.
Great Job Marvin it really looks the part.
Nice to see one of these kits actually finished!
Congratulations
Thank you, David. I imagine some of these kits are on the "Shelf of Doom", just waiting to be rescued.
Beautiful build, Marvin..!
Craig, thanks for your wonderful comments...I appreciate them.
That's nice. Still hoping for a CF-101D in 1/32 , like that will ever happen other than vacuform. If it does I'll expect a CF-100 as well 🙂
Thank you, Robert. Your comments are appreciated. Keep hoping, 1/32nd scale...who knows?
Great looking model. I'm old enough that there were several National Guard units still flying the 101 when I joined the Air Force in 1973. I've always had a soft spot in my heart for the Voodoo. I still have several Revell/Monogram F-101's hanging out in the garage.
Thanks, George. I live in Fresno, CA, where we have the 144th Fighter Wing. This ANG unit has always been an A2A unit and, as such, has always had interceptors, that is, except for the F-89 and the F-101 Voodoo.
The 144th started with F-51 Mustangs, then went through the F-86D, F-86L, F-102, F-106, F-16A (ADF), F-16C, and now we have the super fighter, the mighty F-15C. Who knows what's next?
The 144th is one of the best things Fresno has to offer, for sure.
LOL, I remember visiting my grandparents in Clovis and got to watch some of the 106's fly. Loved them.
Great work on the Voodoo! Saw several CF-101's up close when they visited El Toro back in the day.
Marvin, This is beautiful, another nice finish (as expected) from Marvin's work bench !
Thanks, Terry...Steve made me do it!
Great looking Voodoo!
Thanks, Robert...I appreciate it.
Very nice
Thank you, George.
Looks perfect.
Mon:
You are too kine...thank you.
Very nice
This bird is in my bucket list and will be finished like this one.
1 attached image. Click to enlarge.
Tolga:
Thank you. The decals to do that one are included in the kit. You have to do one now. Thanks again.
Great looking Voodoo, Marvin! I've always liked the look of the F-101 series. I thought they looked ultra-modern when they were in use.
Thank you, Jeff. The Voodoo is a looker, for sure.
Excellent work on a kit that's such a pig it finally put me off KH kits forever. After all the industrial-strength pushing and shoving it took to get that #@!@#@! fuselage to come together, I was really glad to find a photo of a really weathered one, which is how I chose to finish it, so it would distract from everything else.
You are definitely to be highly, highly commended for sticking with this through to the finish with such a nice result. Very few other modelers can say the same.
Tom:
Thanks for the wonderful compliments...I really appreciate it.
You are absolutely correct about this kit...it is a tough one to finish; I had to let it sit for awhile before I finally had the resolve to complete it. This is one of those "I'm not going to let it beat me" situations. Anyhoooooo, thanks again.
Gotta love a voodoo
Marvin, it is a truly splendid looking Voodoo.
When finished, it certainly LOOKS like an F-101, but clearly some out-of-the-box thinking is called for in order to get it across the finish line.
I was put off by the pebbly texture of the pieces but from what i've seen in photos, the surface textures in the F-101B and RF-101 kits is much improved.
But those intakes...
Really? They're fixable, but they shouldn't have to be. It's just one of those things that torques people about KH kits. Clearly they can knock one out of the park, if they put their mind to it but if they want the same respect as Hasegawa or Tamiya they gotta clean up their act.
Marvin,
Super job. After waffling for months about the RF-101C kit, I finally broke down and ordered it. I mostly couldn't make up my mind because of the intake modifications required and the slightly squashed appearance of the windscreen and canopy. I'll modify the intakes like you did, and I'll live with the canopy shape, because after seeing your build, it doesn't look all that noticeable. Your efforts have given me the inspiration to add this cool airplane to my 1/48th scale collection of post-war jets.
Sincerely,
Scott
I finished one of these and it finished me for kits from this company till the FJ-2, which amazingly enough is a kit that actually wants to be built and doesn't fight to the last ditch for the privilege of being binned.
That said, you have obviously put stubbornness and talent to work to obtain a victory over plastic here. Nice result!
Thank you, Tom; I appreciate it. Yes, Kitty Hawk kits can be troublesome, but, as you mentioned "stubborness" can overcome a lot. I built this kit after the Pheonix nationals, after a friend of mine mentioned that he wanted to see one built. While this was not a challenge to me to build one, I decided that I, too, would like to see one built, so I did. The Kitty Hawk kit fought me ever inch of the way, but, "stubborness" and perservearance, eventually overcame the problems, so I managed to complete the model.
BTW, I am currently in the middle of reading "Mig Alley", and I must congratulate you on a very fine effort, on a terrific book. The lack of preparedness by the USA in the period just before the outbreak of hostilities, would, today, probably prompt numerous, unceasing investigations by Congressional Democrats. The details that you have included in your descriptions of the conditions of that time, both here and overseas, as well as the icy circumstances that existed between world powers, are well-presented. Thank you for giving us another historical gem. I read a lot, and you, sir, are among the best out there.
@marvin, I missed this beauty first time around Marvin. She is a real looker and worthy of every compliment she receives! Great scale modeling sir! 🙂