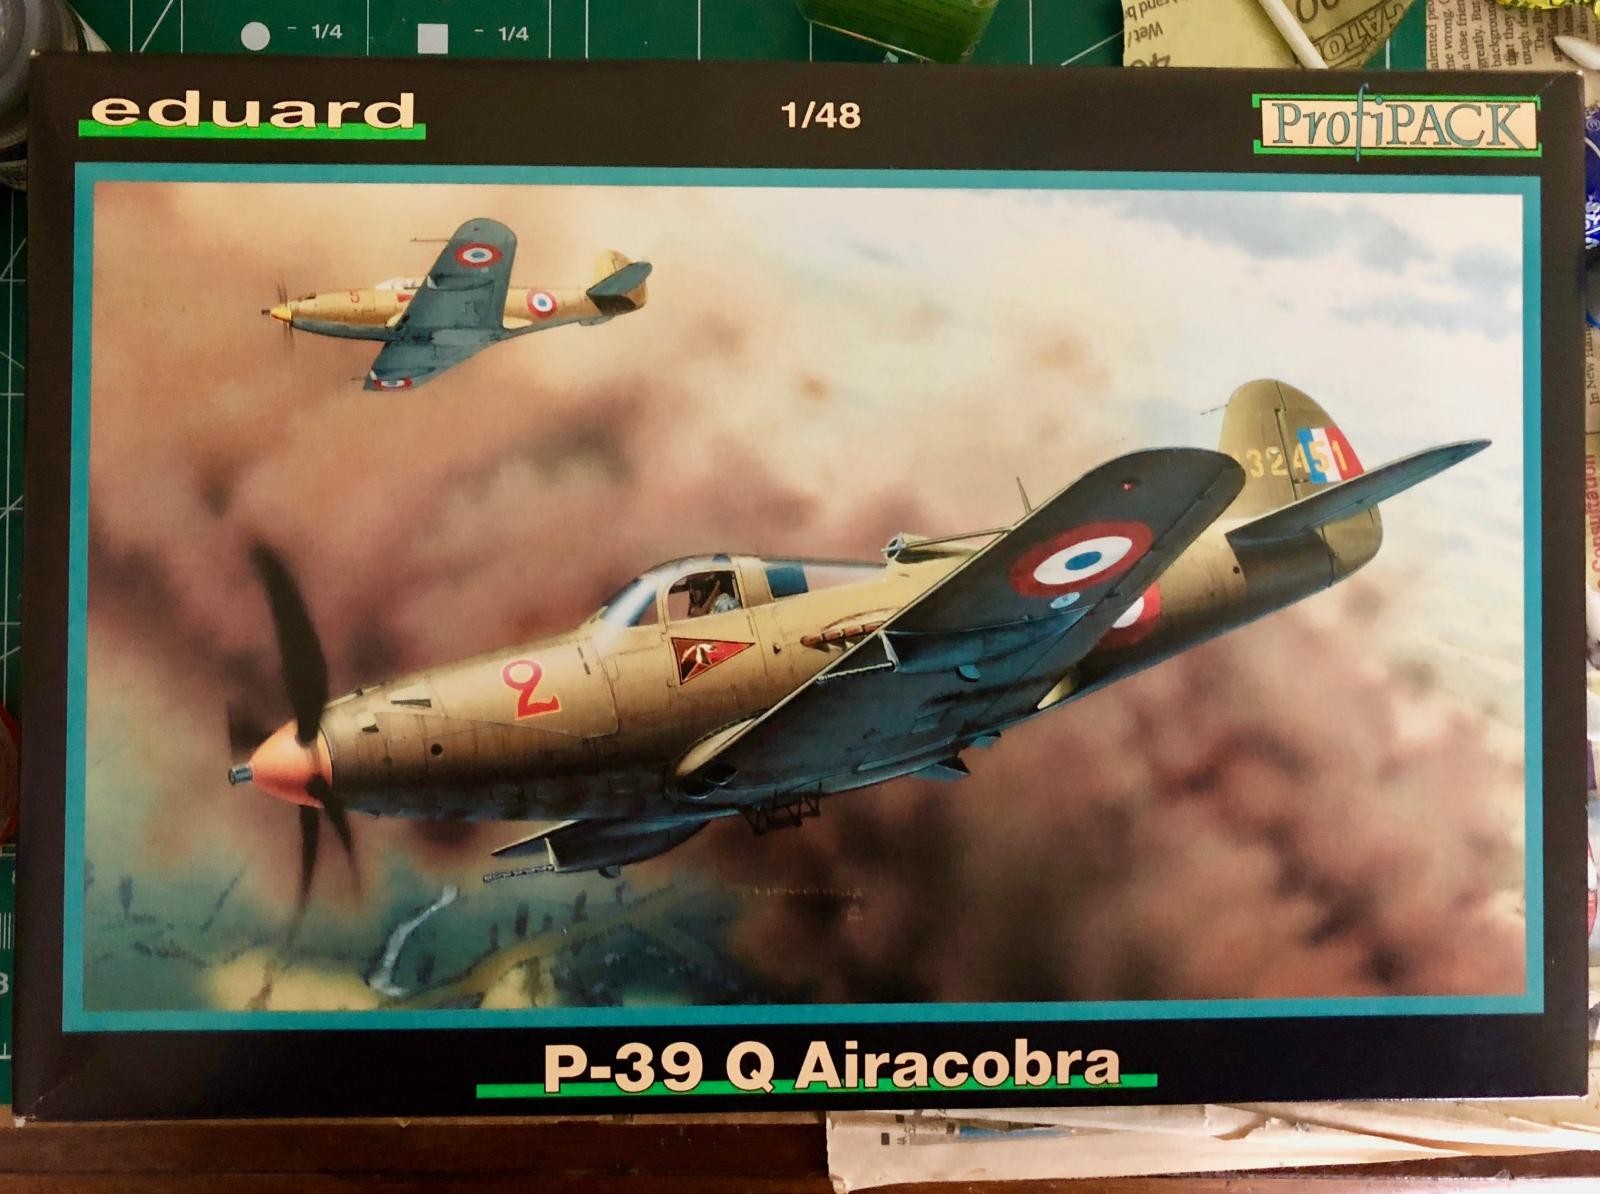
Eduard 1/48 P-39Q
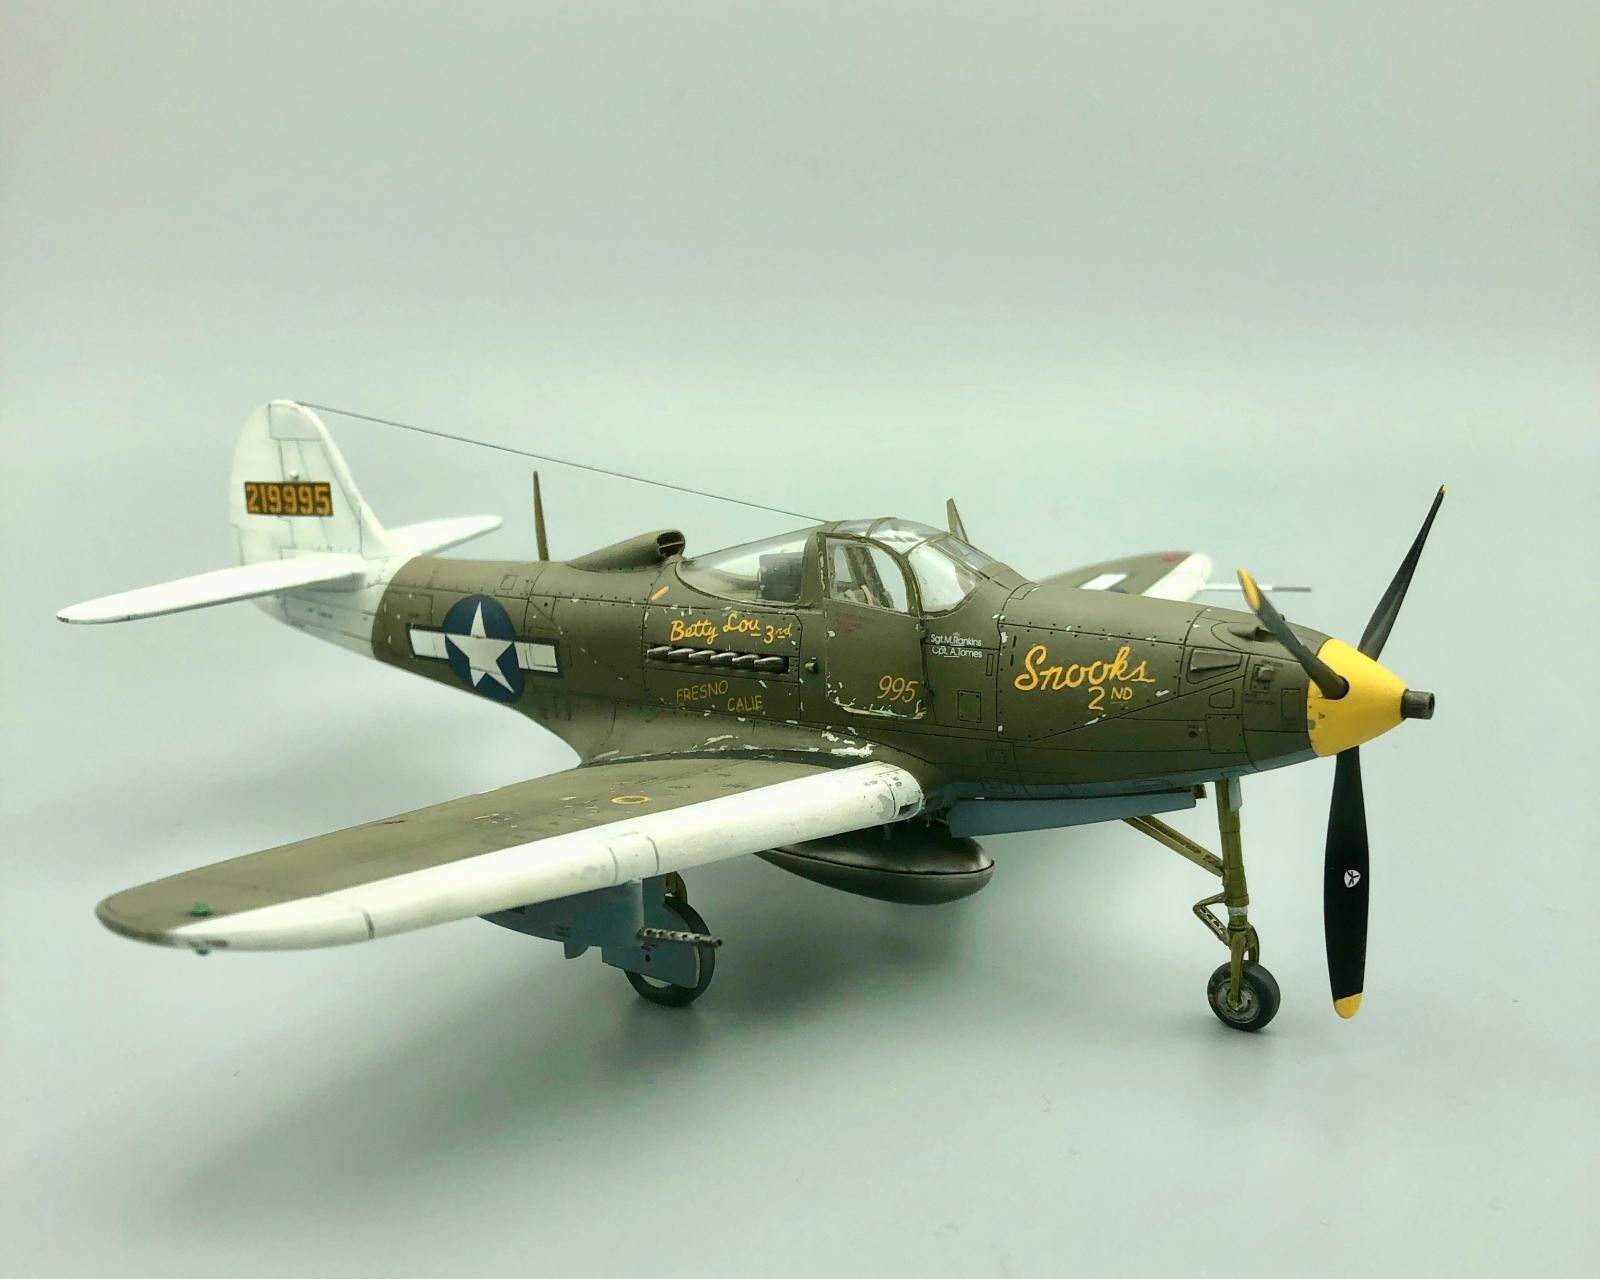
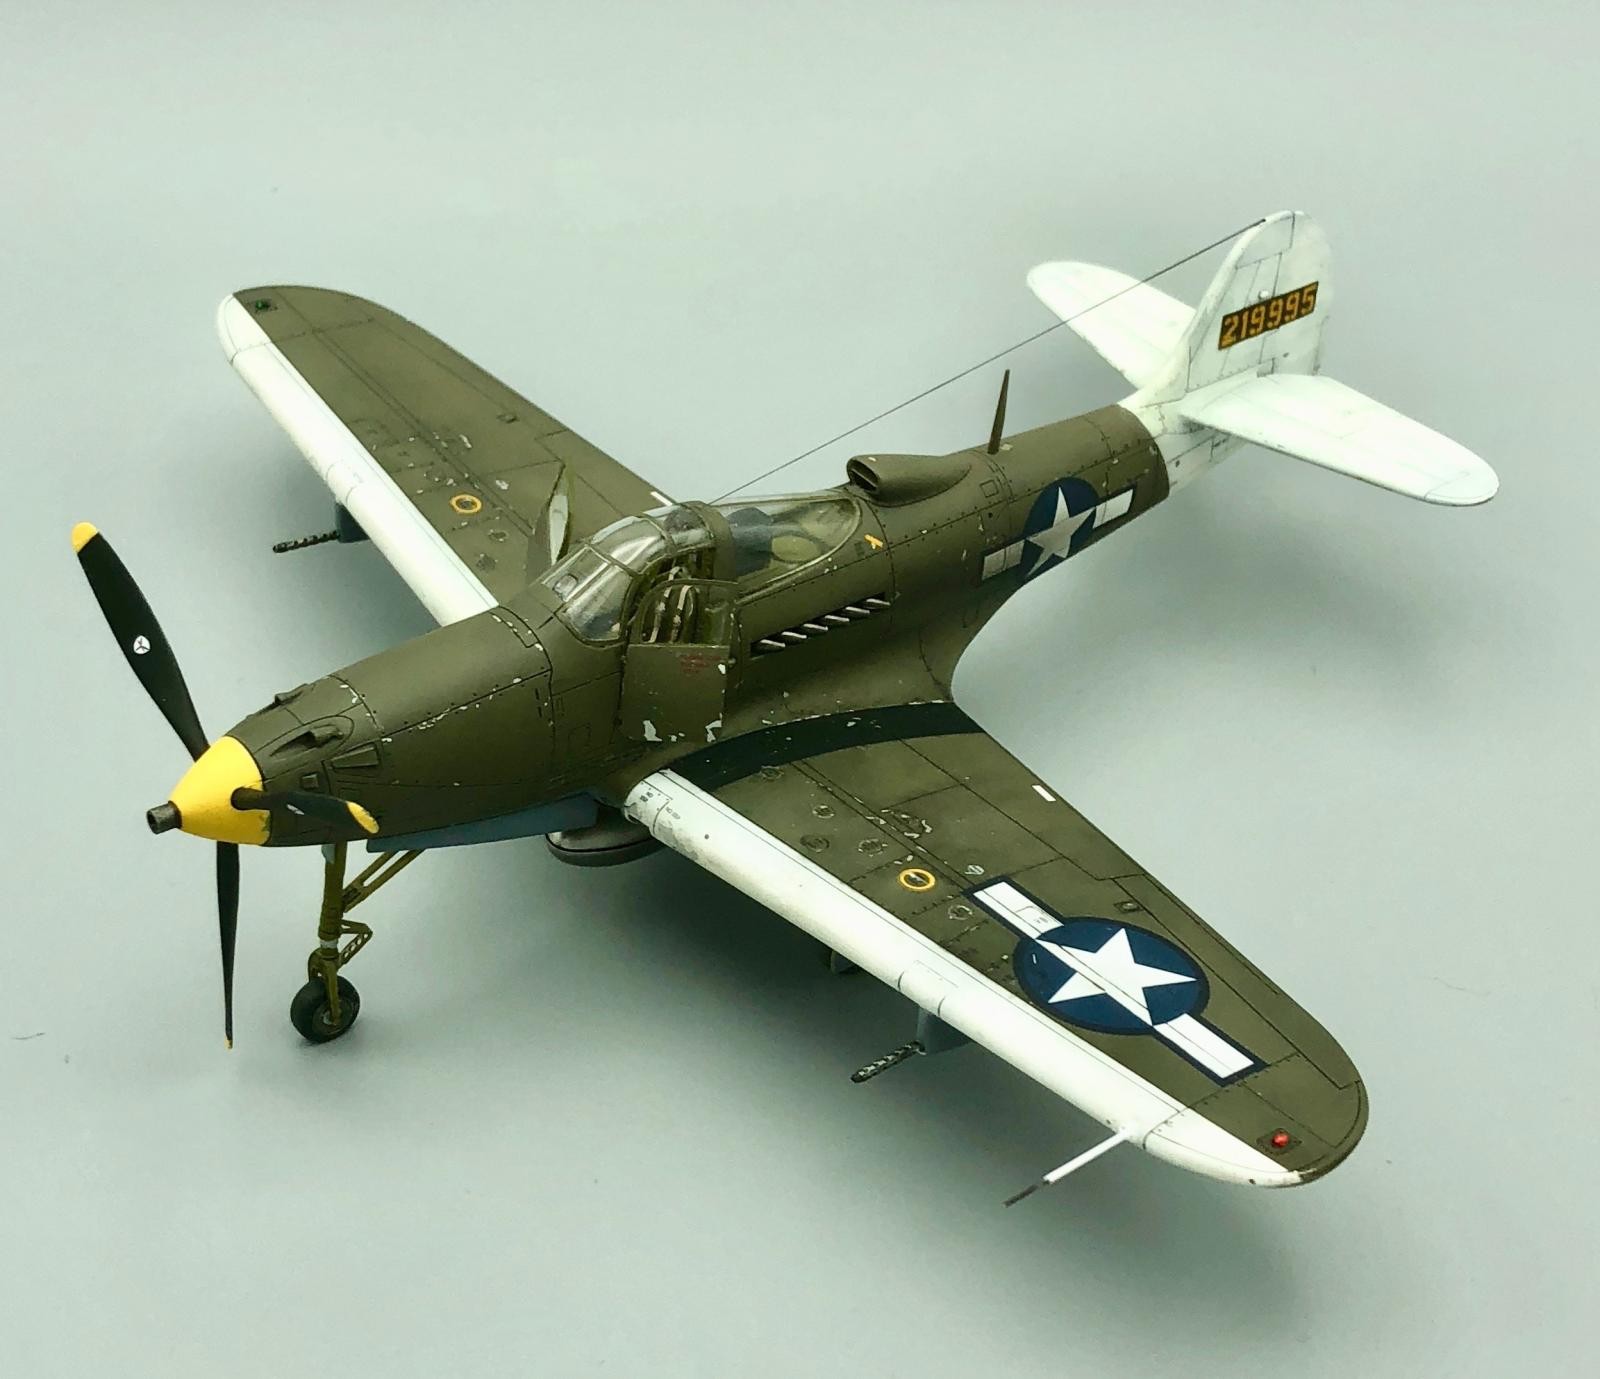
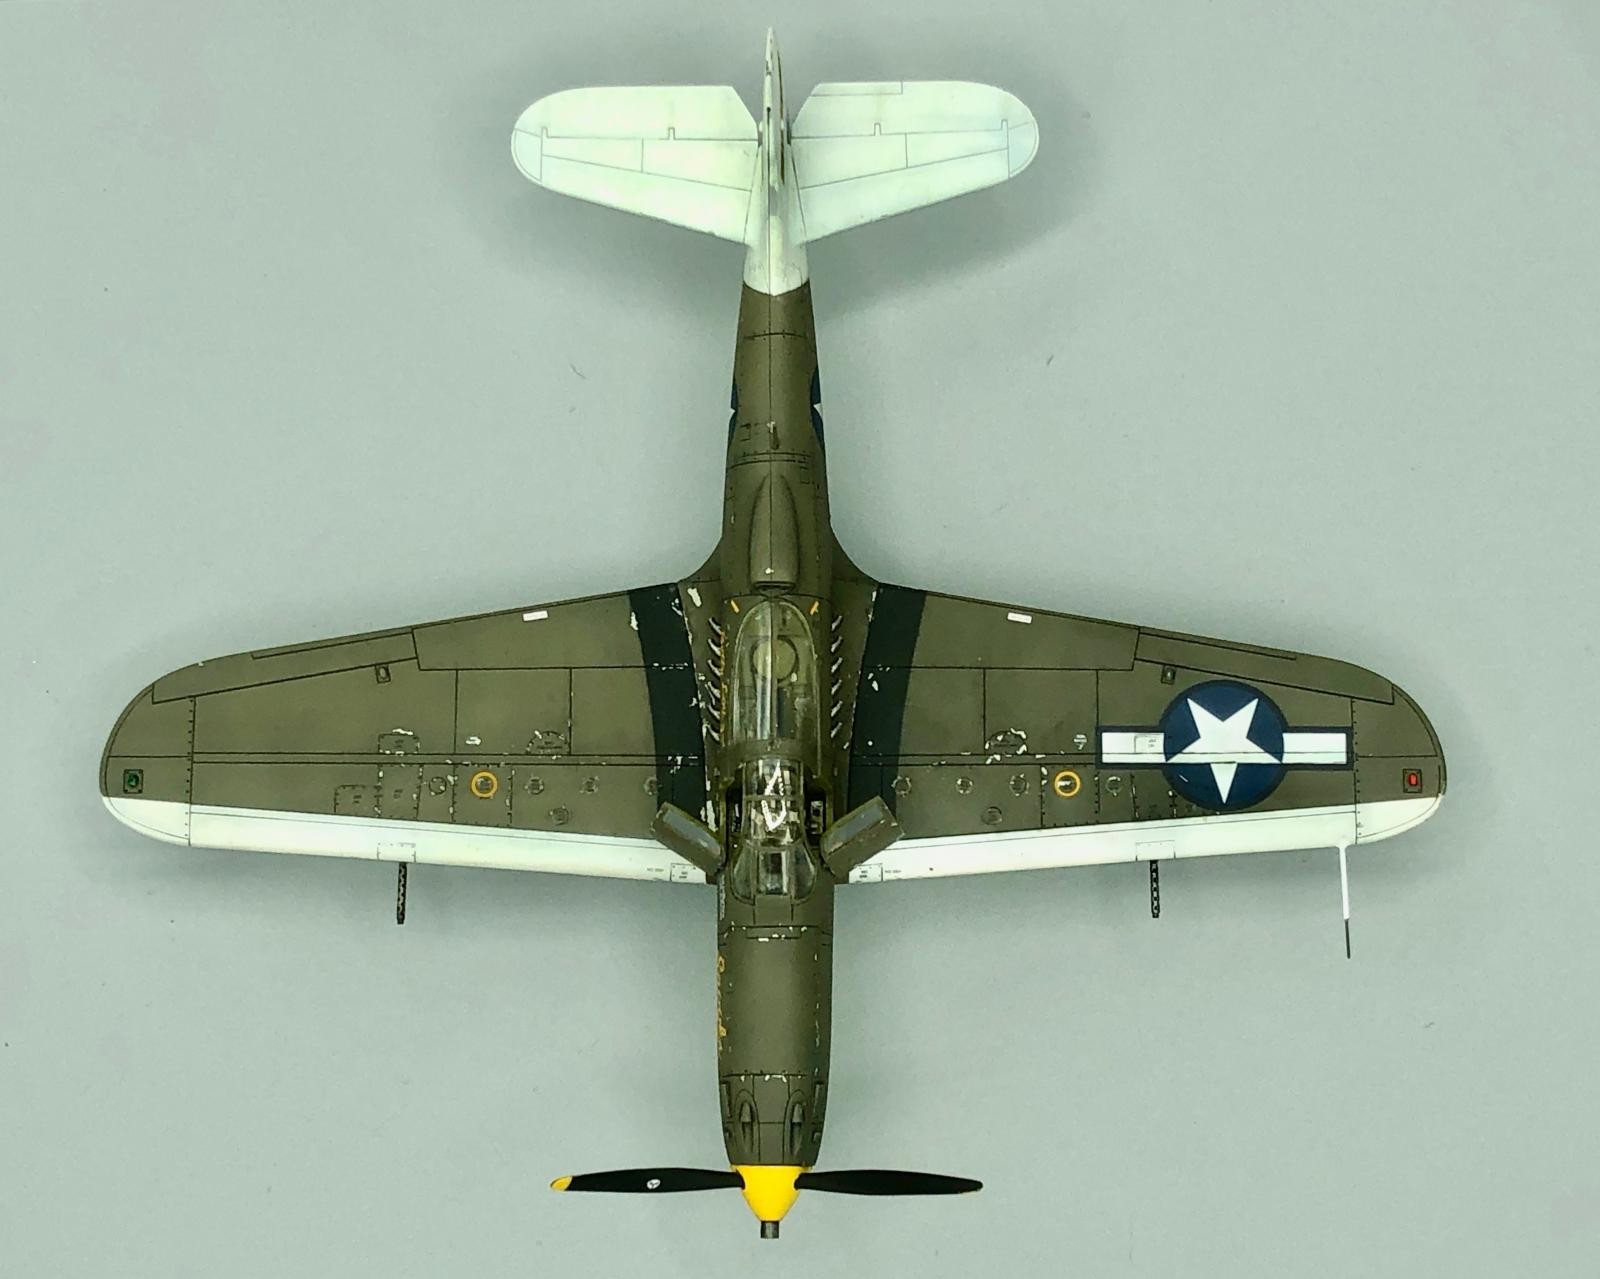
Eduard 1/48, P-39Q, 42-19995, CPT William A. Shomo, 71st TRS, 82nd TRG, New Guinea, 1944. CPT (later MAJ) Shomo was nicknamed the “Flying Undertaker” because he actually trained and worked as a mortician in Pittsburgh before the war. He was awarded the MOH for action later in the war.
https://www.pacificwrecks.com/aircraft/p-39/42-19995.html
I built several P-39's as a kid in the late 50's. I think they were made by Monogram, but I'm not sure. Because I have become “addicted” to Eduard kits, I decided to give this one a try. Though out of production for a while, but I was able to find this kit online. I know Eduard has newer P-39 kits out now but I wanted a ProfiPACK kit with Shomo's markings, so this was it.
I guess I can claim that this was an “out of the Box” build, except I replaced the kit P/E and vinyl masks with newer Eduard colored P/E and paper masks. Of special note, is the softness of the kit's plastic. This was a bit of a surprise, but once I realized that, it was actually very easy to work with…almost like a hard clay.
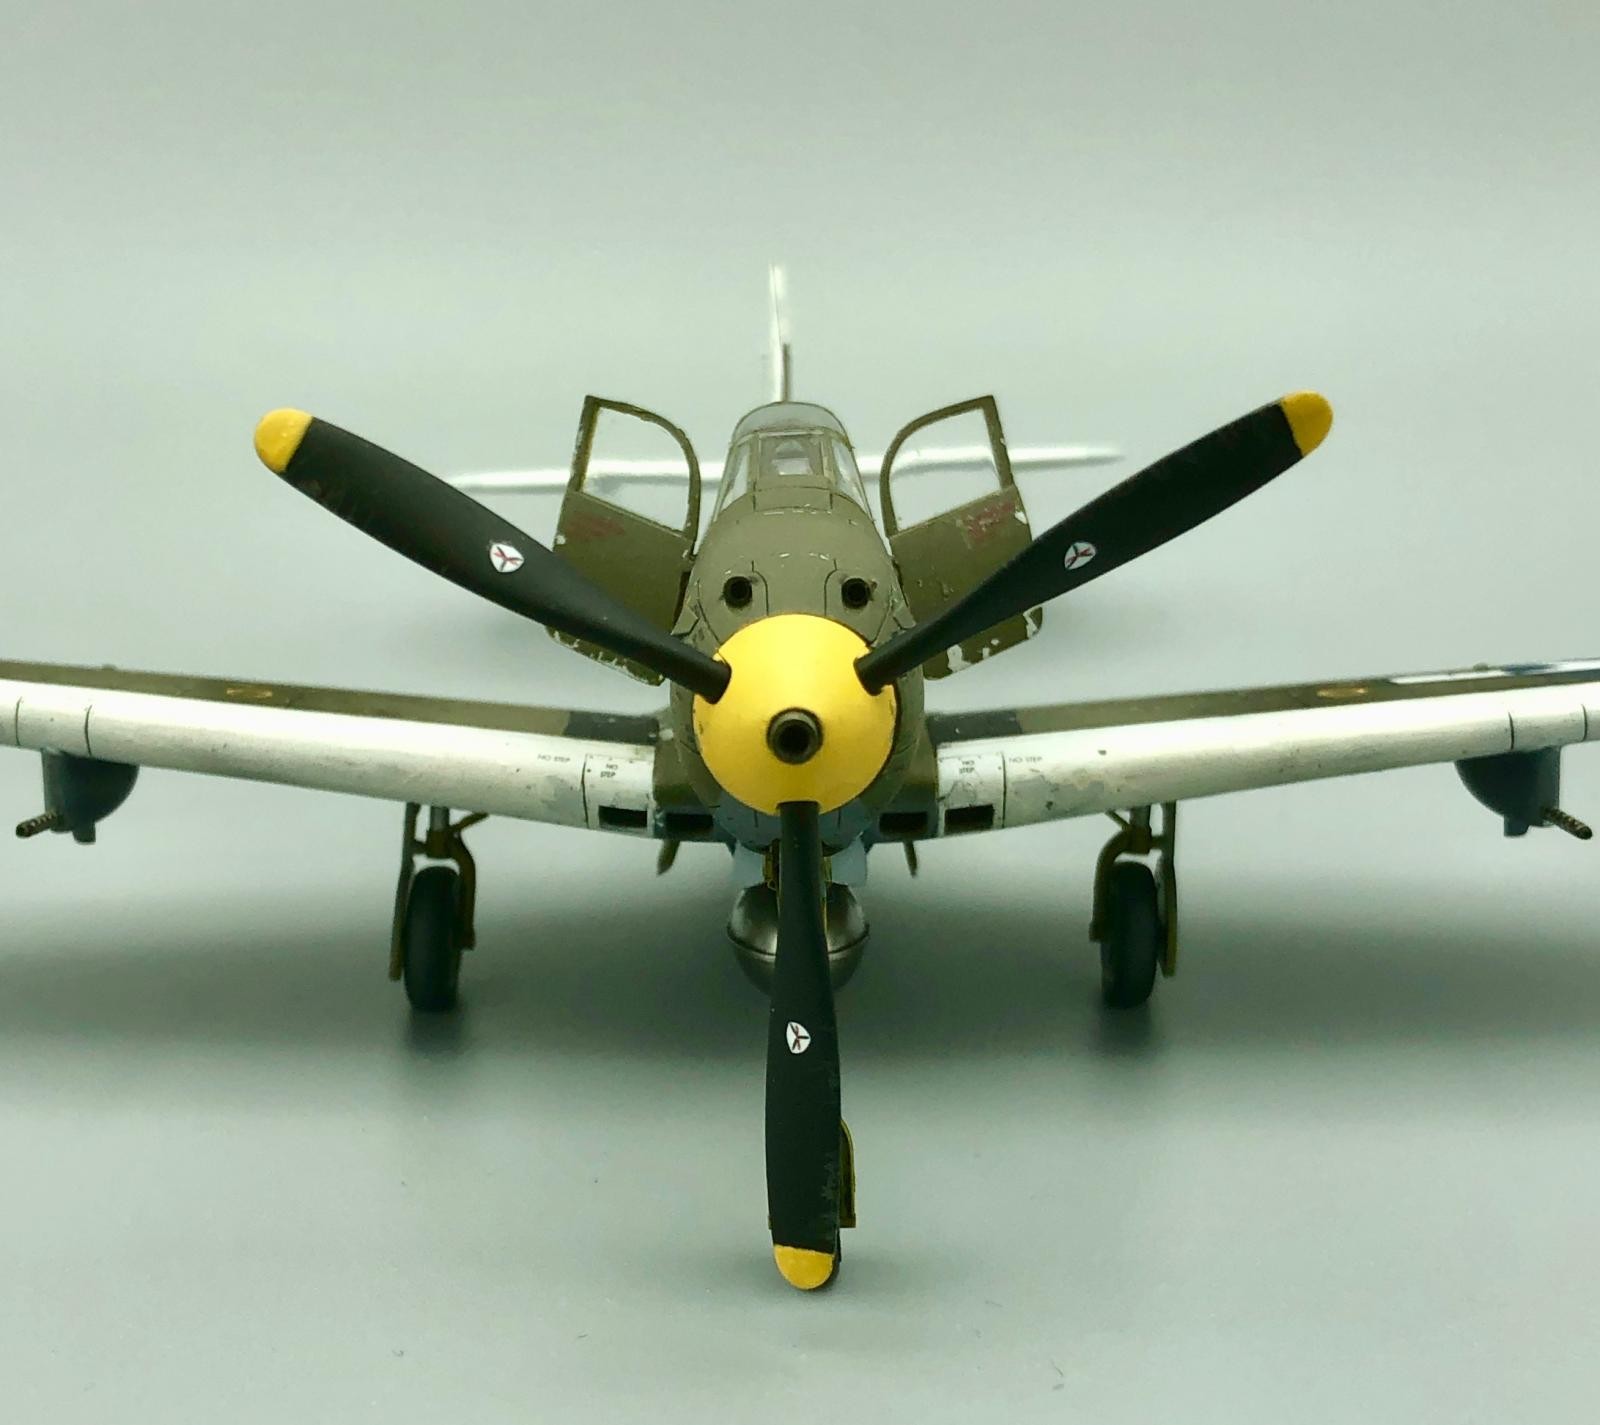
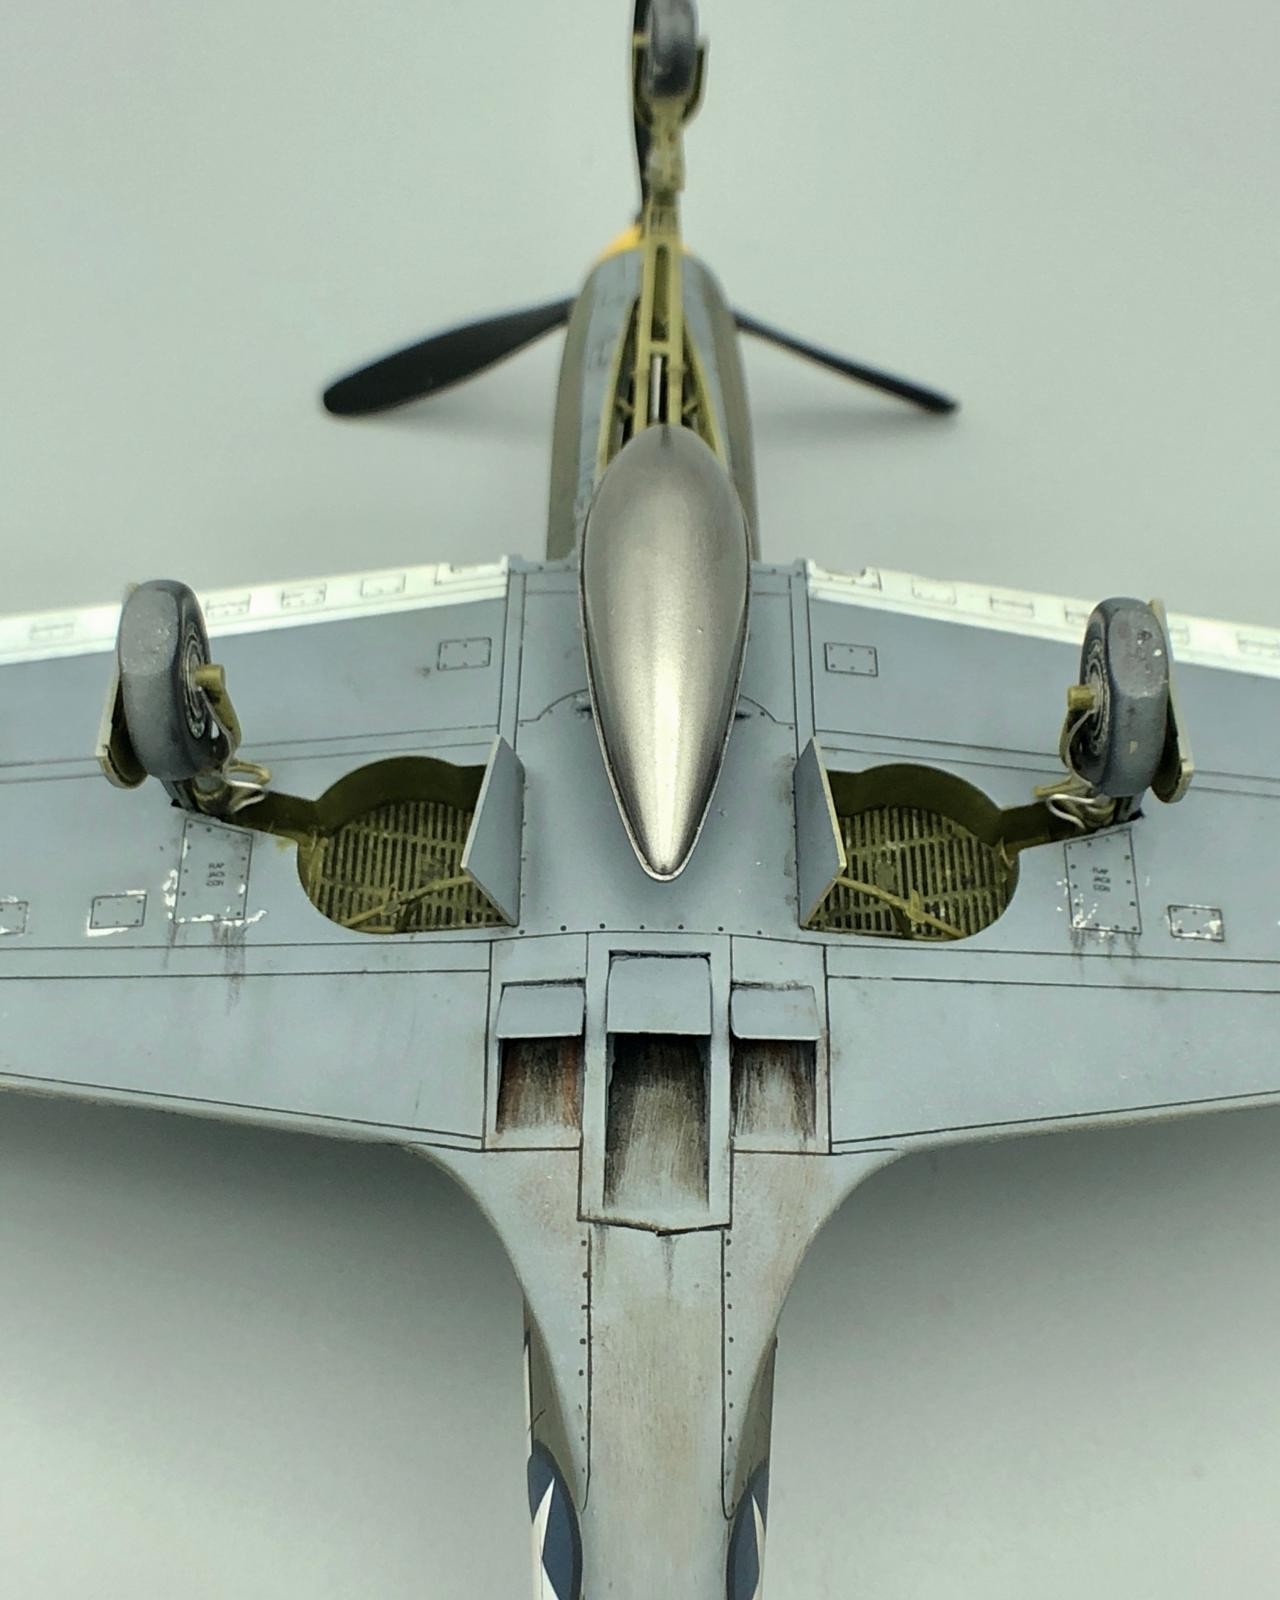
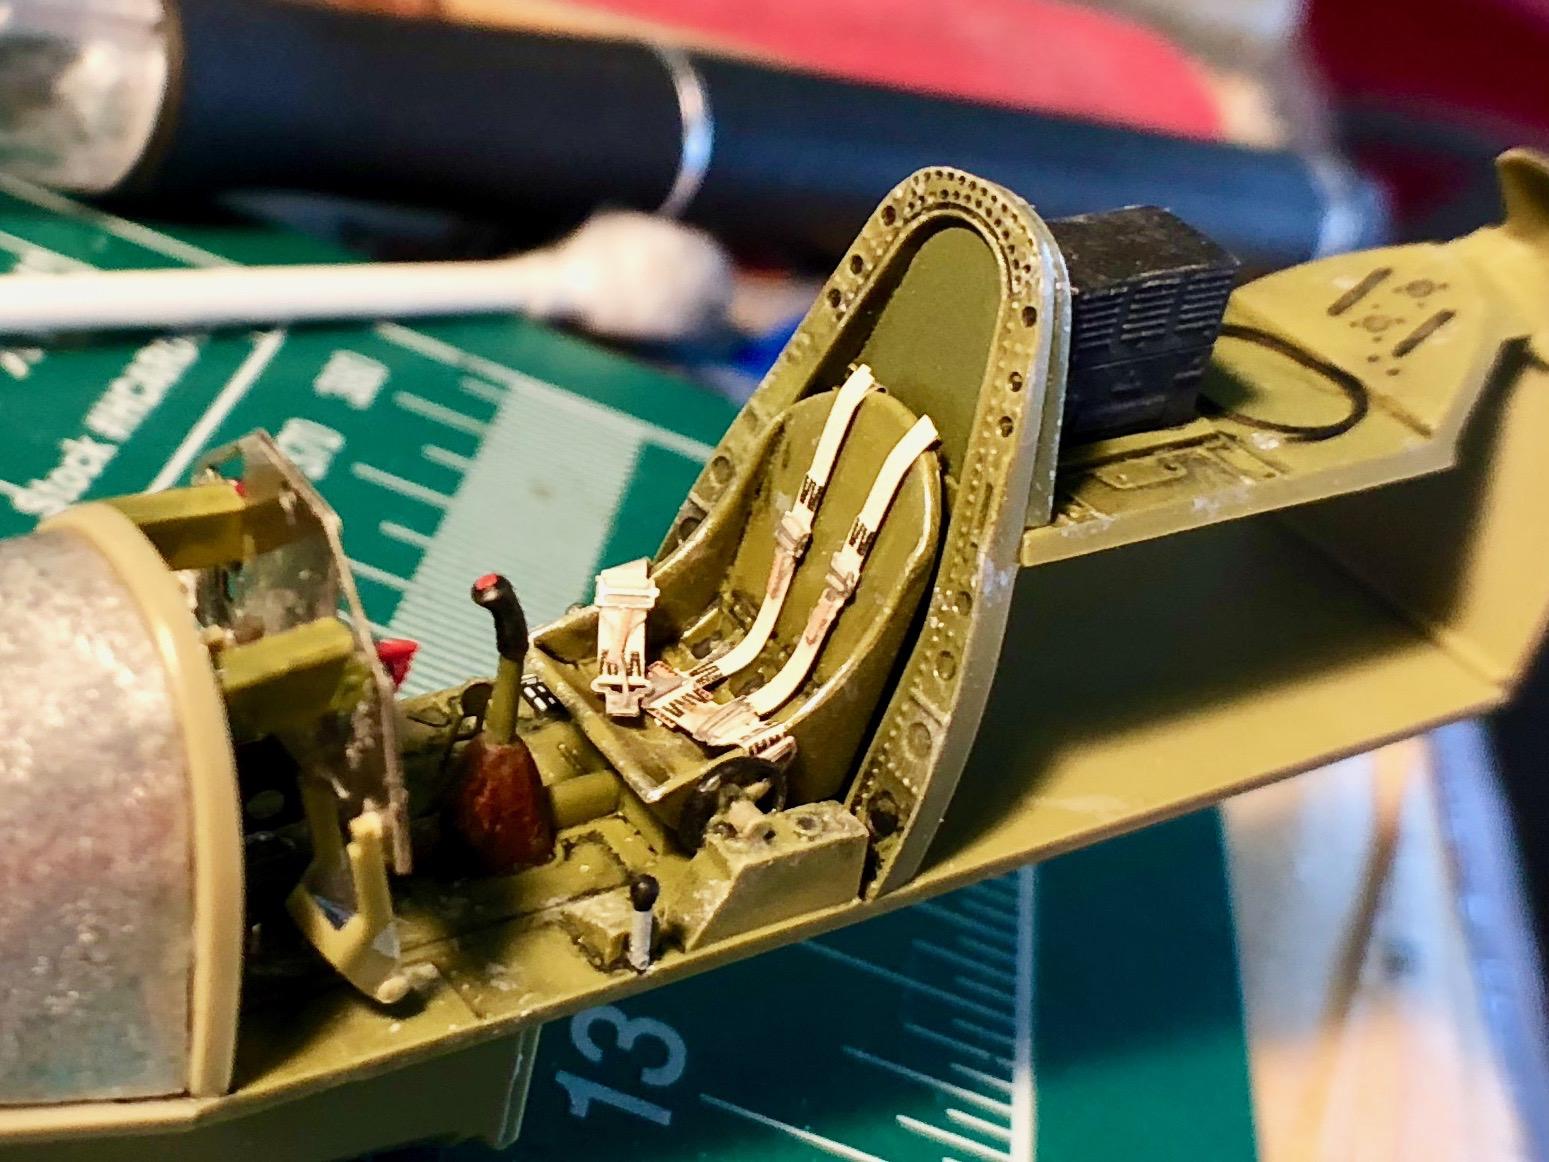
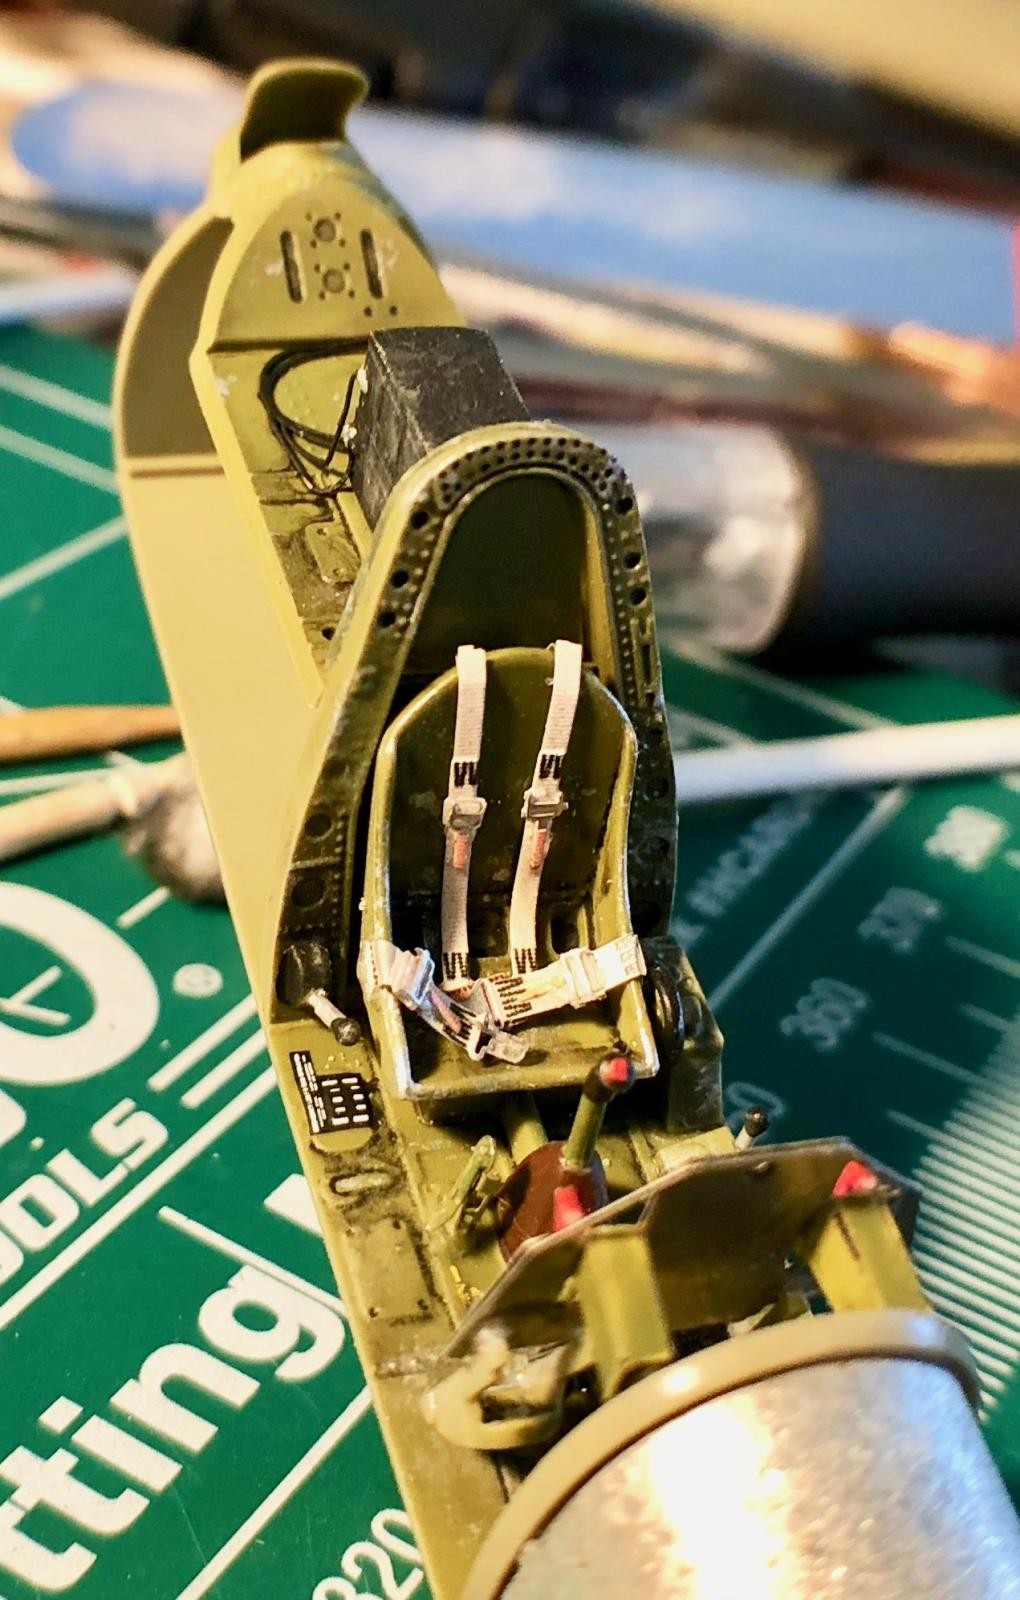
As usual, construction began with the cockpit. Eduard color P/E is “the bomb” and adds so much realism. A very big plus for this kit was the nose weight that came as part of the ProfiPACK kit. It took all the guesswork out of how much weight was needed and where to hide it inside the nose. The weight also formed the top of the nose wheel well, which was a plus. The overall fit was very nice, went with out problem, and very little filler was needed. I only needed CA glue to ensure I had no visible seams where none were needed. One issue I found is that the gun pods on the underside of wings fit perpendicular to the wing and not perpendicular to the ground as depicted on actual blue prints. A small detail that is easy to overlook, but easy to fix, and makes a real difference in the look of the build. Another issue I found was posed by the “car door” design when it came time to prep for priming and painting. I didn't want paint to leak past the door seams and ruin the work I'd done on the cockpit detail. I filled the interior with cotton to catch any leaks and then tacked the doors on with PVA glue…worked great. OBTW, the Eduard masks worked great too.
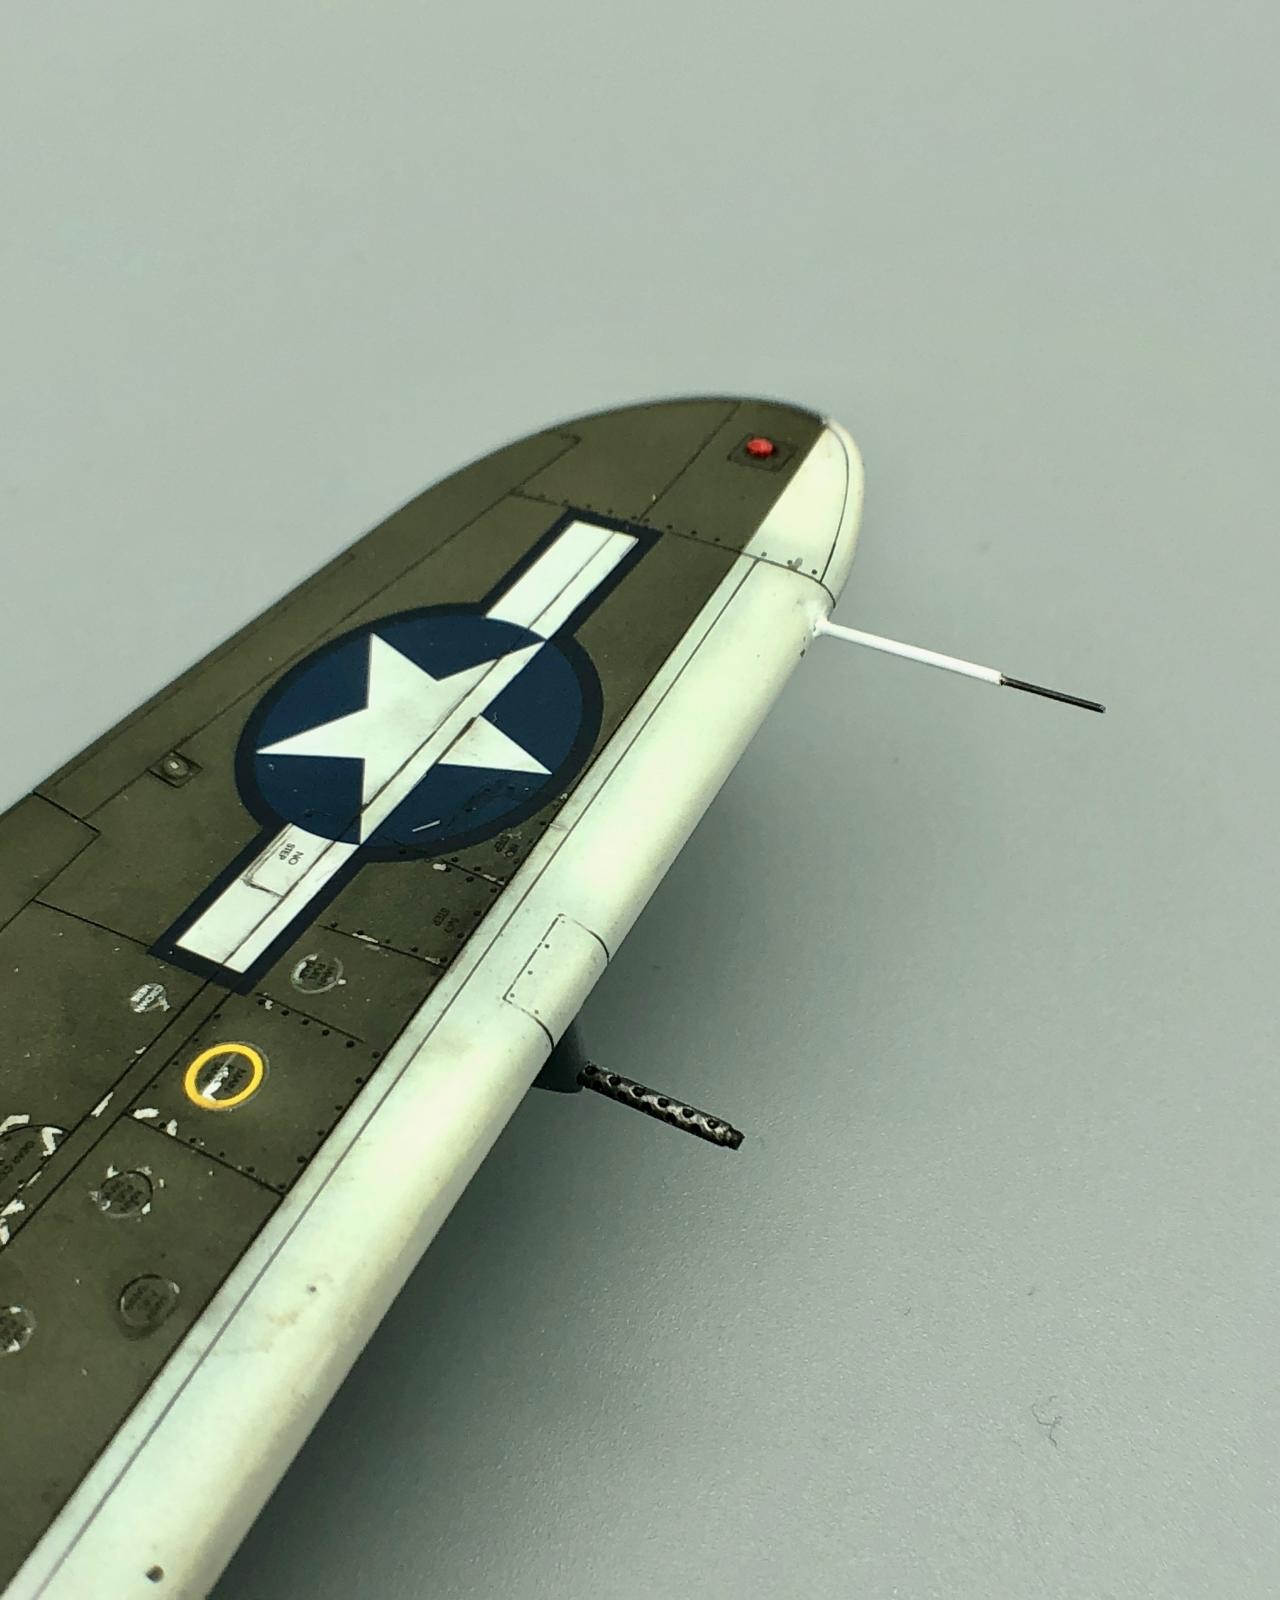
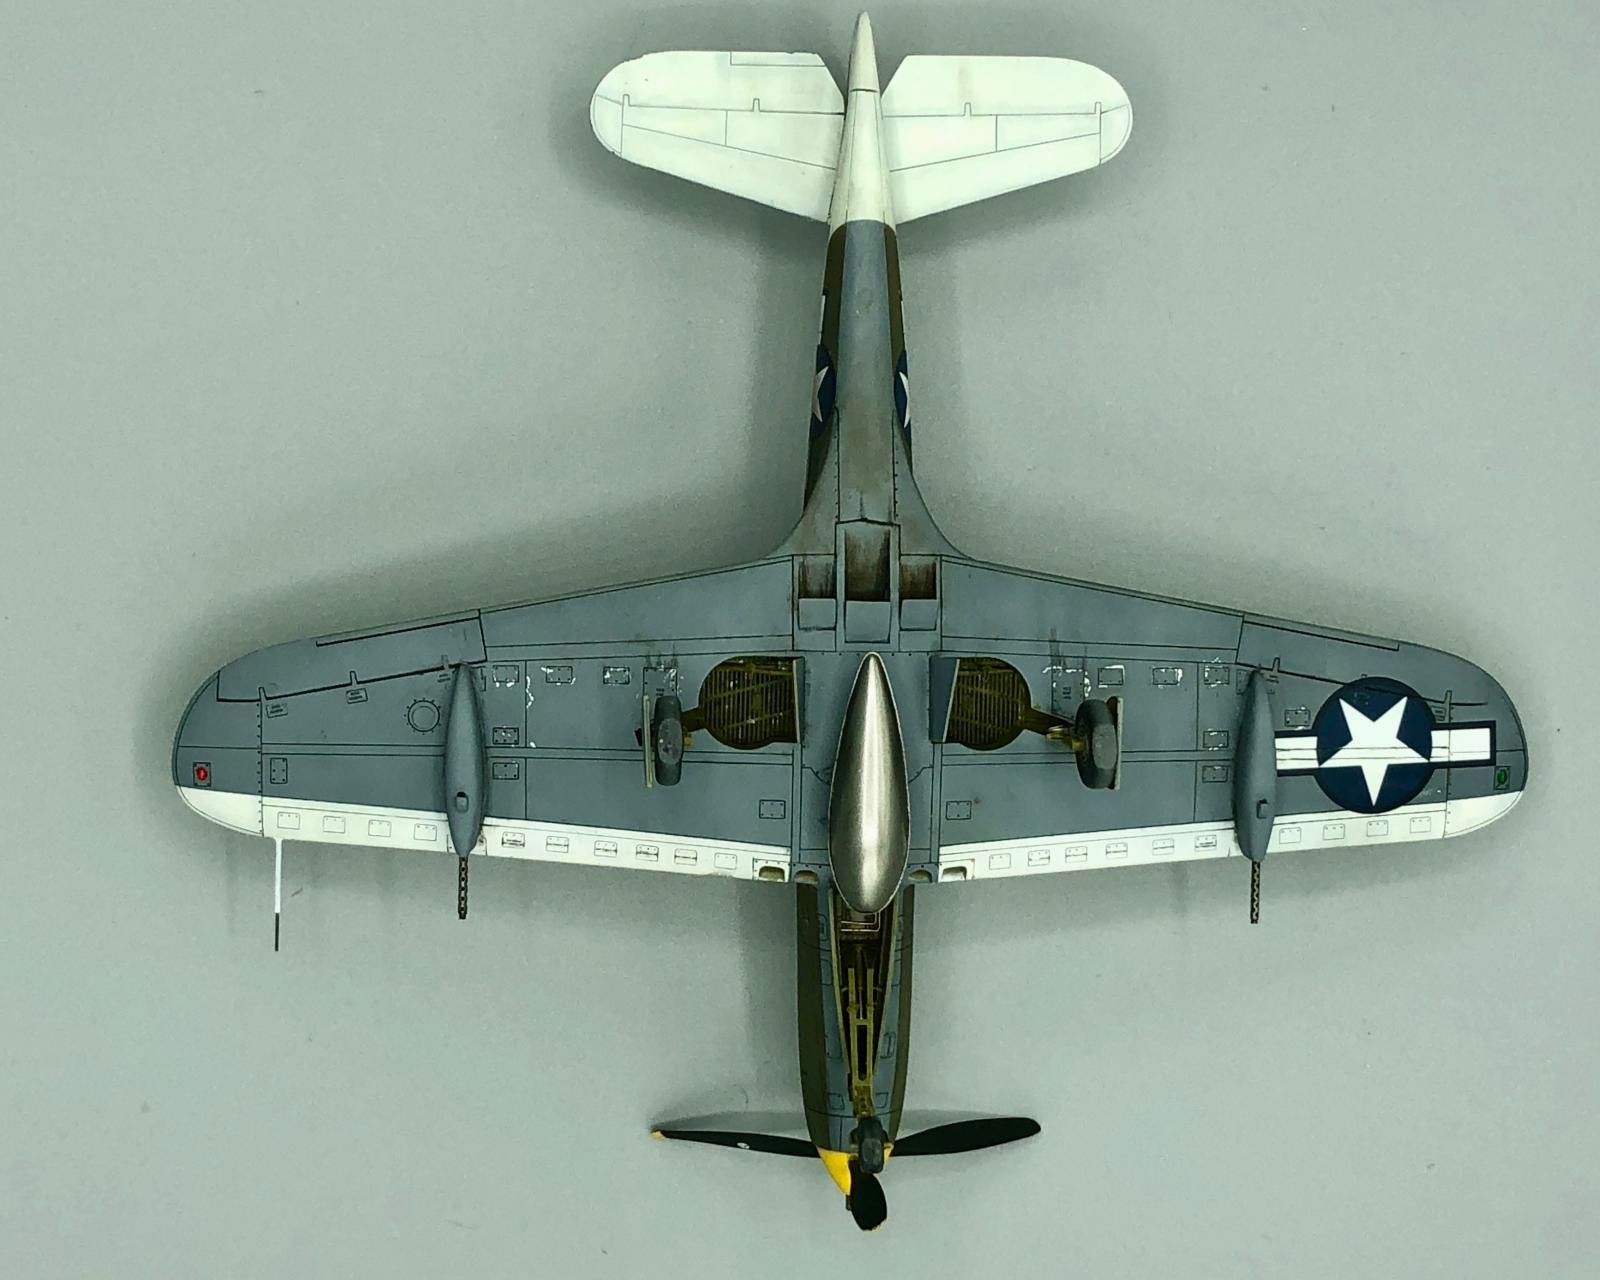
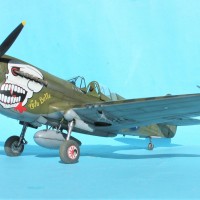
Now was paint time. I used with white Stynylrez primer…the best I've found so far. It sprays smoothly, dries quickly, and really brings out detail. I sprayed some Vallejo aluminum on areas I wanted to chip and then applied MiG chipping fluid. Next came Tamiya acrylics, Olive Drab (XF-62) and Neutral Grey (XF-53) for the overall paint scheme. These colors seemed too dark after I initially shot them, so I added a bit of white to each and resprayed to get a “scale” color I liked. Using a wet paintbrush and toothpick, I chipped the paint here and there. This was followed by a coat of Alcad clear gloss and kit decals applied with Micro Set and Micro Sol. After another coat of clear, I applied an oil pin wash to bring out details and add some more grime and weathering. I finished the paint job with a coat of Vallejo Satin varnish. I feel that gives a better “scale” flat finish than using actual Matte varnish. The last details were a “bullet proof” pitot tube made from hypodermic needles (27 gauge inside 22 gauge) because I hate it when they break and radio antenna made from Easy Line.


Always a nice looking model. Good work, Tom.
Thanks Rob.
Really nice job Tom!
Beautiful rendition...love it!
Nice job, Tom.
Lovely, Tom. Great photos, and great build. The white tail and leading edges look fantastic. Just the right level of weathering, too.
awesome model, P39/P63 is one of my favorite planes of all time.
I've always had a soft spot for "different" designs and love this airframe and you sure did it justice with your model, beautiful!
Can't say that I blame you for liking the Eduard's kits as this one looks fantastic. The scheme really pops with the details. Taking a normally mundane OD/NG scheme with some white and yellow really does create a nice visual appeal. Weathering is well done, subtle yet enough to show the environment this Airacobra operated in. Overall an outstanding piece. Thanks for sharing.
Nicely done Tom, one of my favorite A/C along with the P-40. Have done several P-39's, Monogram, Haseqawa as well as Eduard, most of which I've posted on iModeler. Really like the way this one turned out.
You've done quite a few, Tom. Very nice work!
A great looking P-39!
Well done, Tom. All good.
Great P-39, Tom! I often like the "underdog" aircraft, so I've always loved the P-39. It was my favorite Aircraft as a kid. I made several in 1/72nd scale and my last one was the (then) new Monogram 1/48th kit. That was back in the early 1970s and they are all broken and unsuitable for showing now but I have a "new" still-in-the-box Monogram kit that I'll build. Some day. (Heck, I'm still not done with the F6F that Tom Bebout so kindly gave me last year! But someday I WILL get it {and others} finished.)
Well done, Tom!
Thanks, for the comments. That’s how stashes grow...build one kit, get two more, haha.
Outstanding build, very nicely done.
Excellent work and a great result.
Thanks Tom. I followed your advice about thinning the trailing edges of the wings. It mad a big difference. The soft plastic made it easy to do...almost like sculpting. Cheers.
Tom, I never thought much of the P-39 until I built one (Hasegawa offering), then I realized how really neatly designed the actual aircraft actually was. Therefore I always enjoy a well made model of one, as we have here. This is an excellent looking model. well done !
Maybe I am the only one, but I think that Eduard plastic parts are often too thick and then you have to spend quite a lot of time to reduce the thickness of visible details. That said you did a great job and the final result is beautiful. Bravo ?
Alex, I did spend some time on thinning the trailing edge of the wings to make them look more to scale. I learned this detail from masmter modeler, Tom Cleaver. The soft plastic made the job fairly easy, though.
Very nice! I love that scheme, and it came out nicely with all the chipping and weathering you did. Great build.
Great job. I haven't build many Eduard kits but have quite a few in the stash