Project Completed: 1/72 MENG Fiat G.91R Light Fighter Bomber

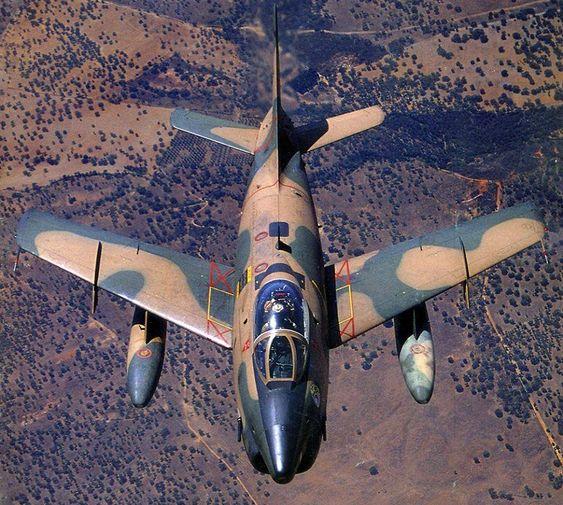
I always loved the look of the Fiat G.91. I think it is the coolest looking little hot-rod of a fighter jet. For the longest time I thought it was a modified F-86, but it is a completely different all Italian designed NATO jet. I have never before built a model of this cool looking little jet mostly due to a lack of decent kits in any scale. My preferred scale is 1/48, and/or 1/32. The only kits I am aware of of the G.91 in 1/48 is a very old ESCI's kit. Many years later Italeri re-boxed this vintage ESCI kit. It is not a very good model but in plastic it is the only game in town. Then there is a very nice 1/48 all resin kit produced by a small company called ADV. This model is long out of production and very difficult to find. If you do find it the cost will be very high.
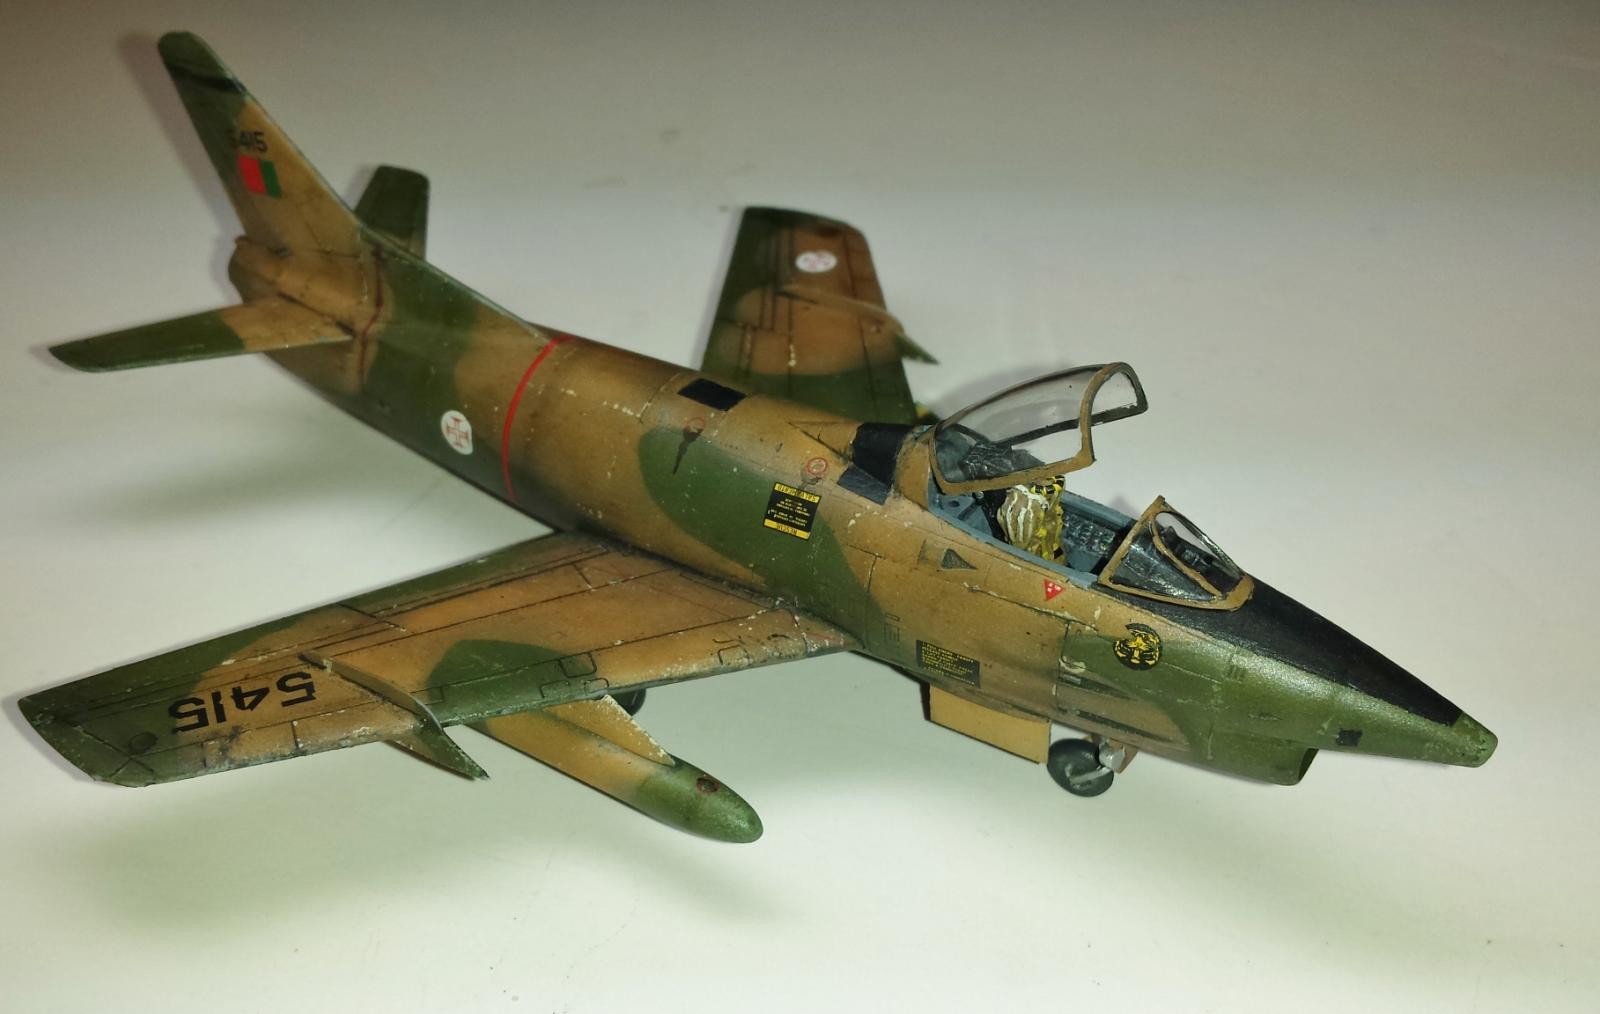
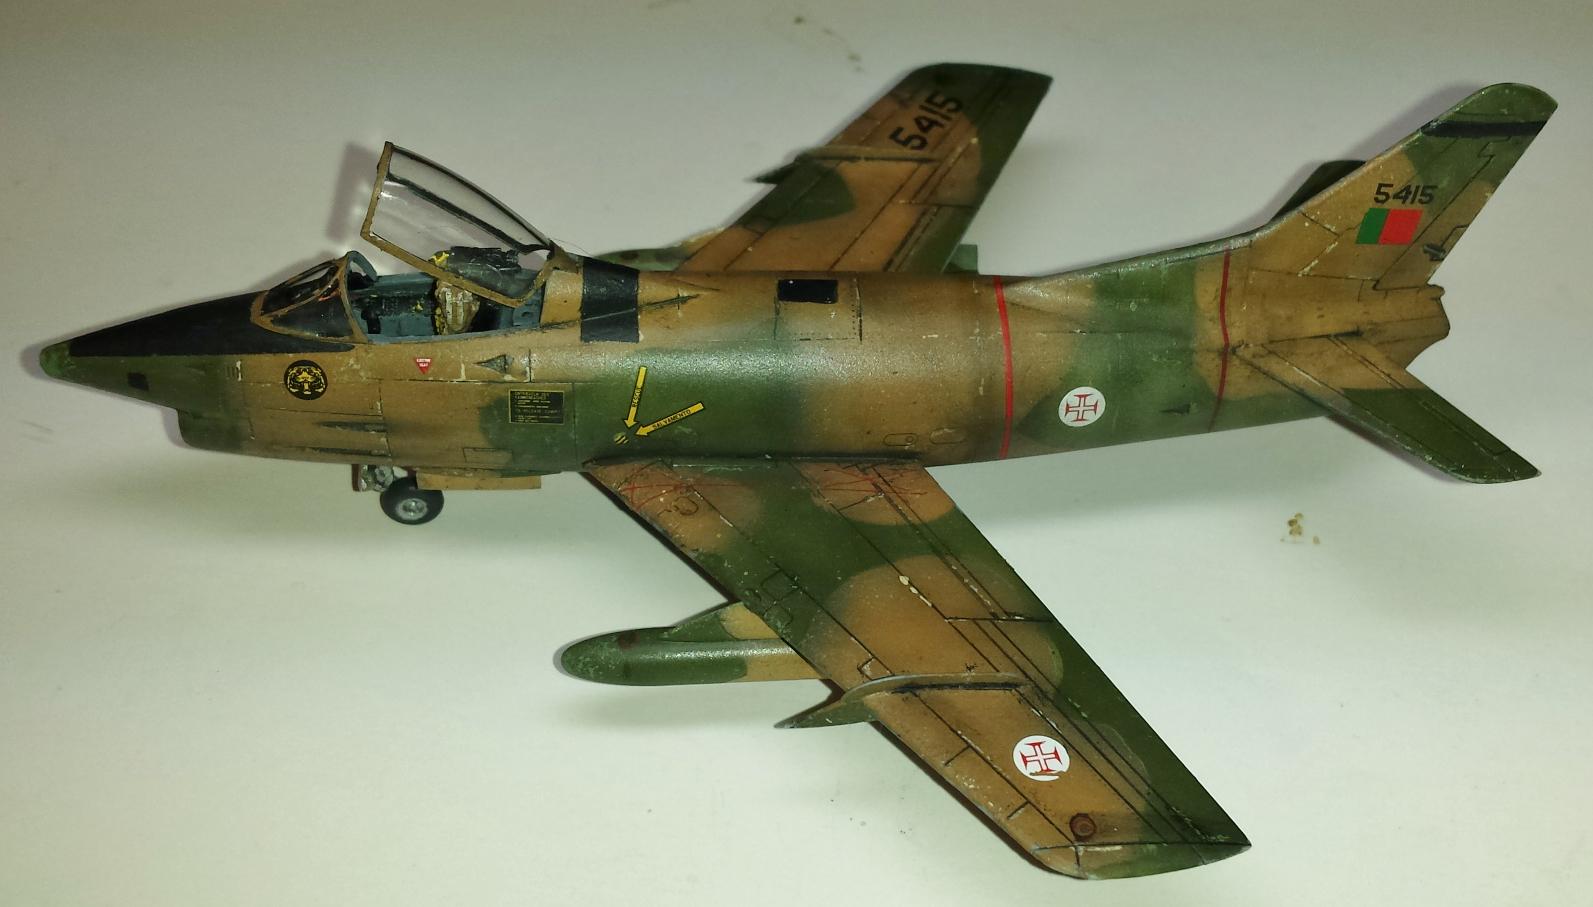
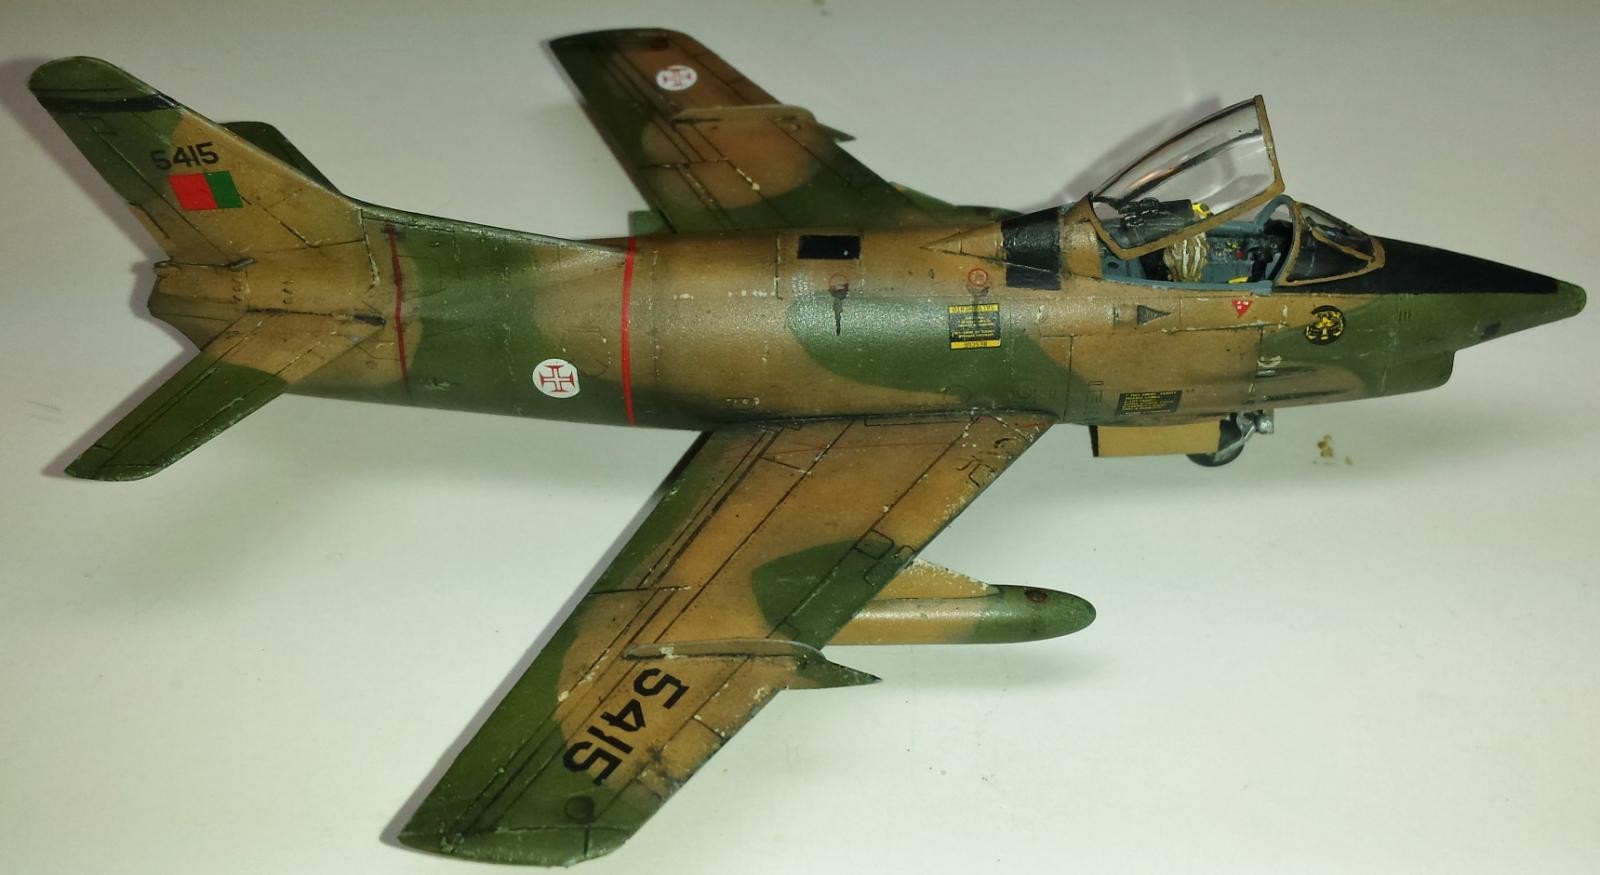
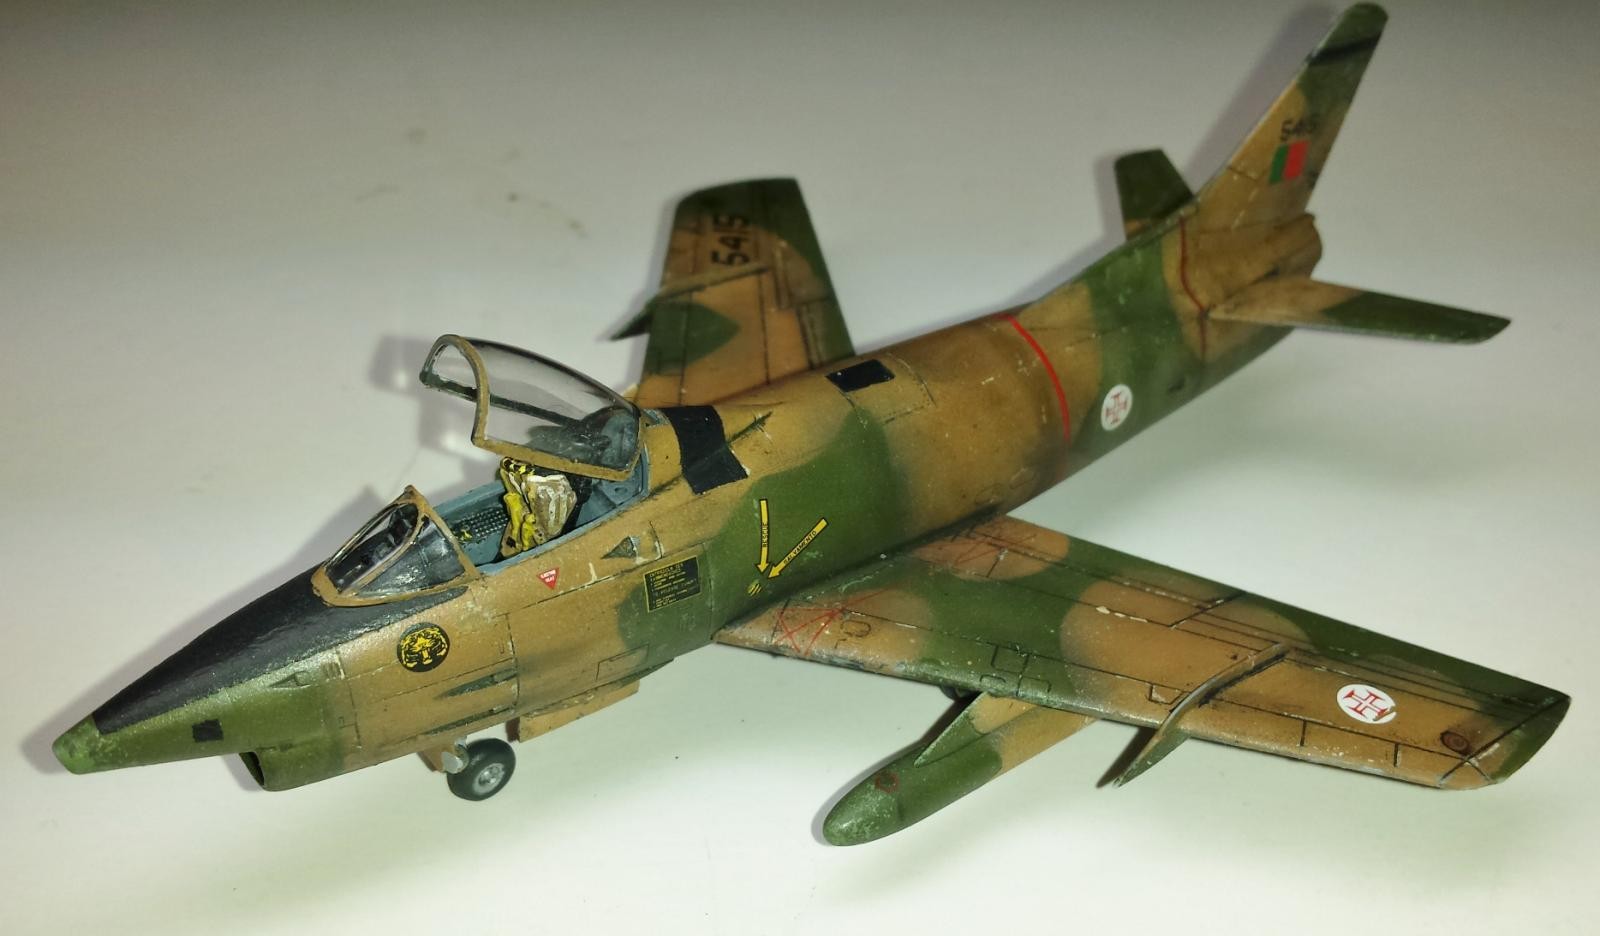
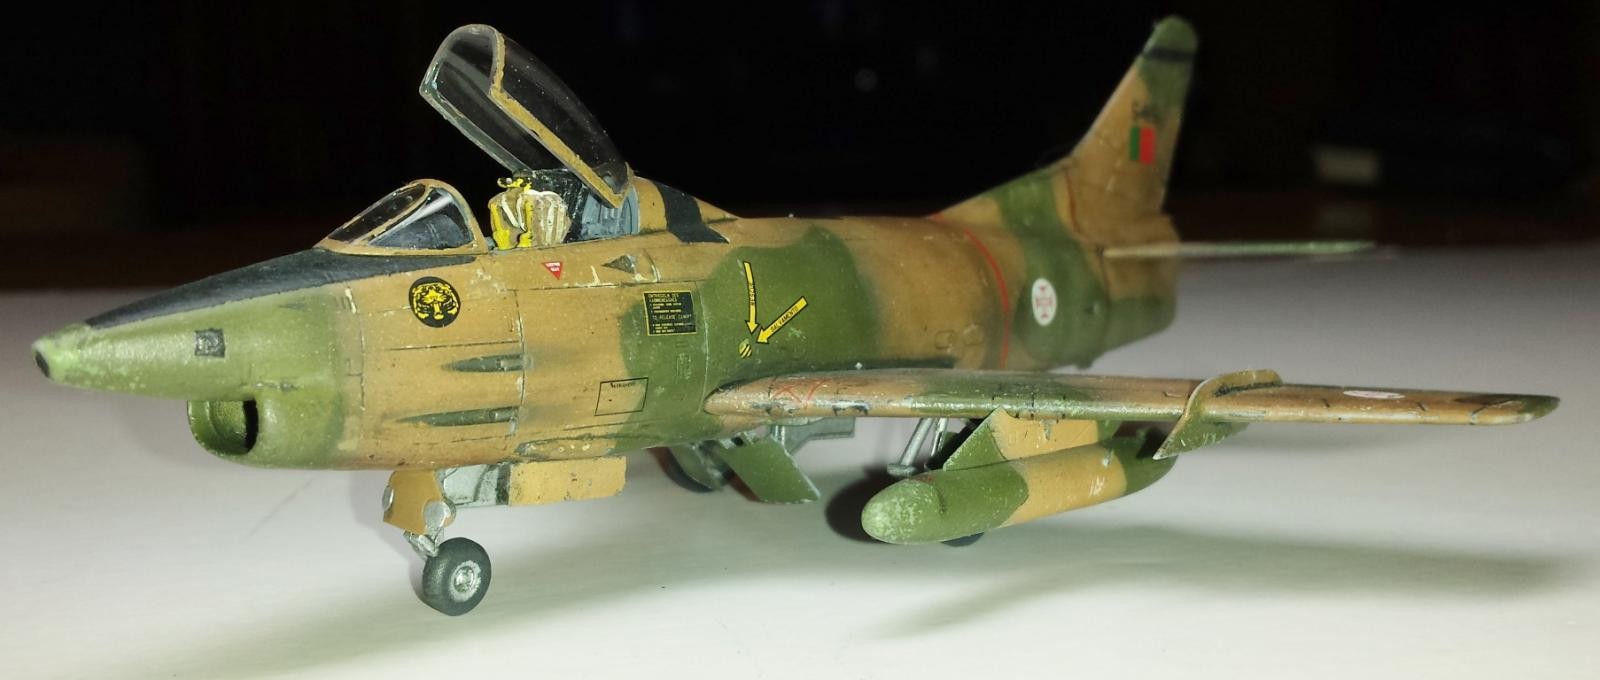
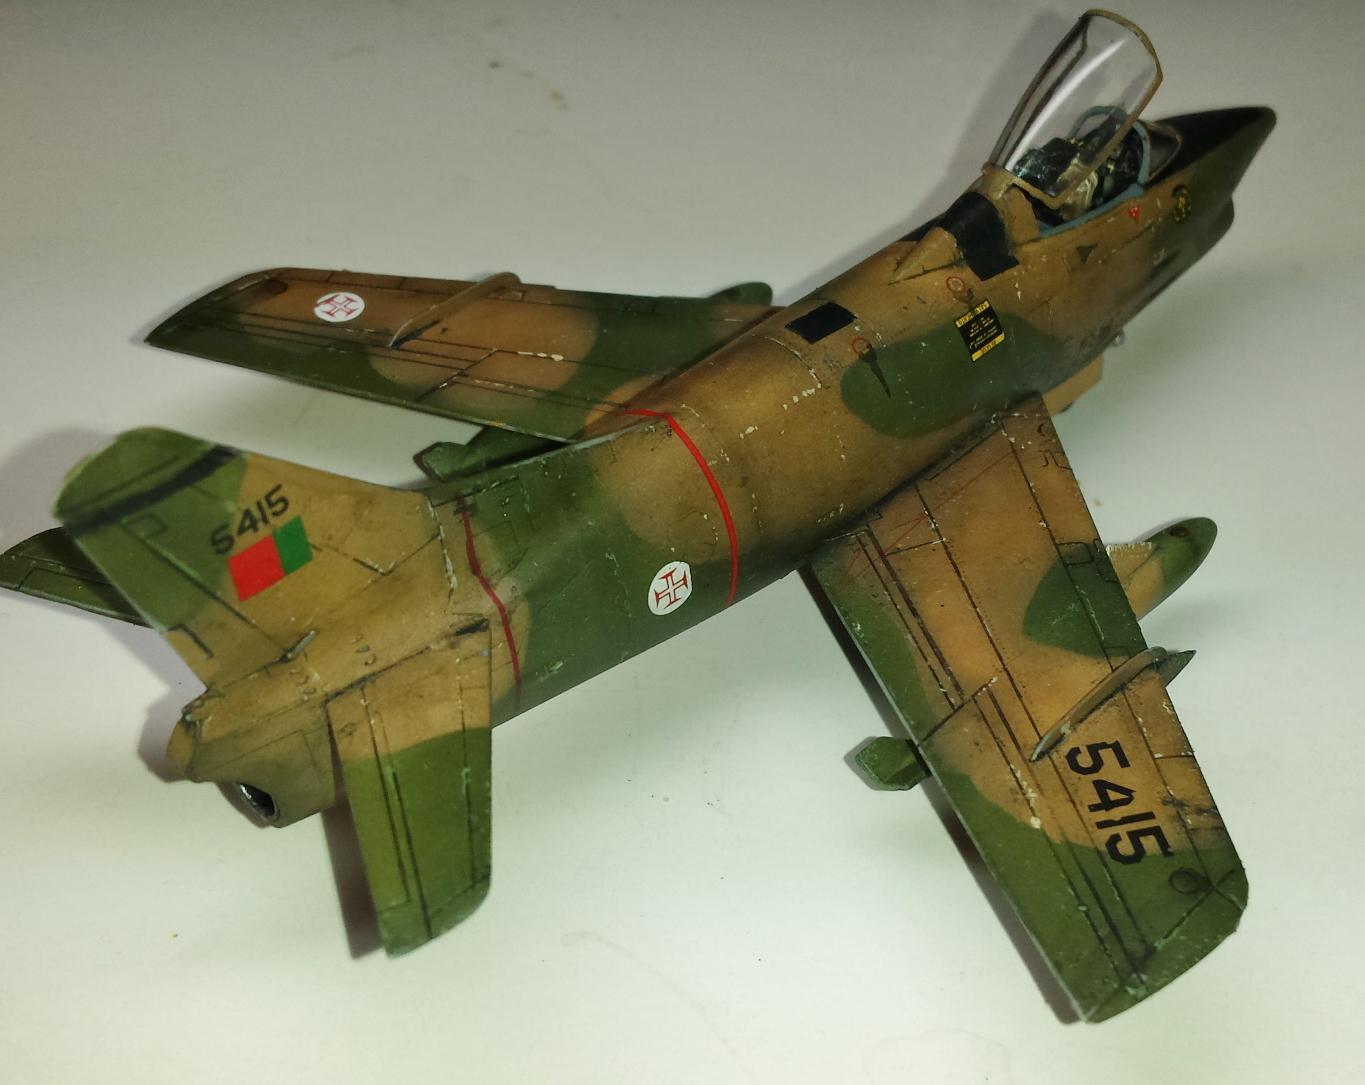
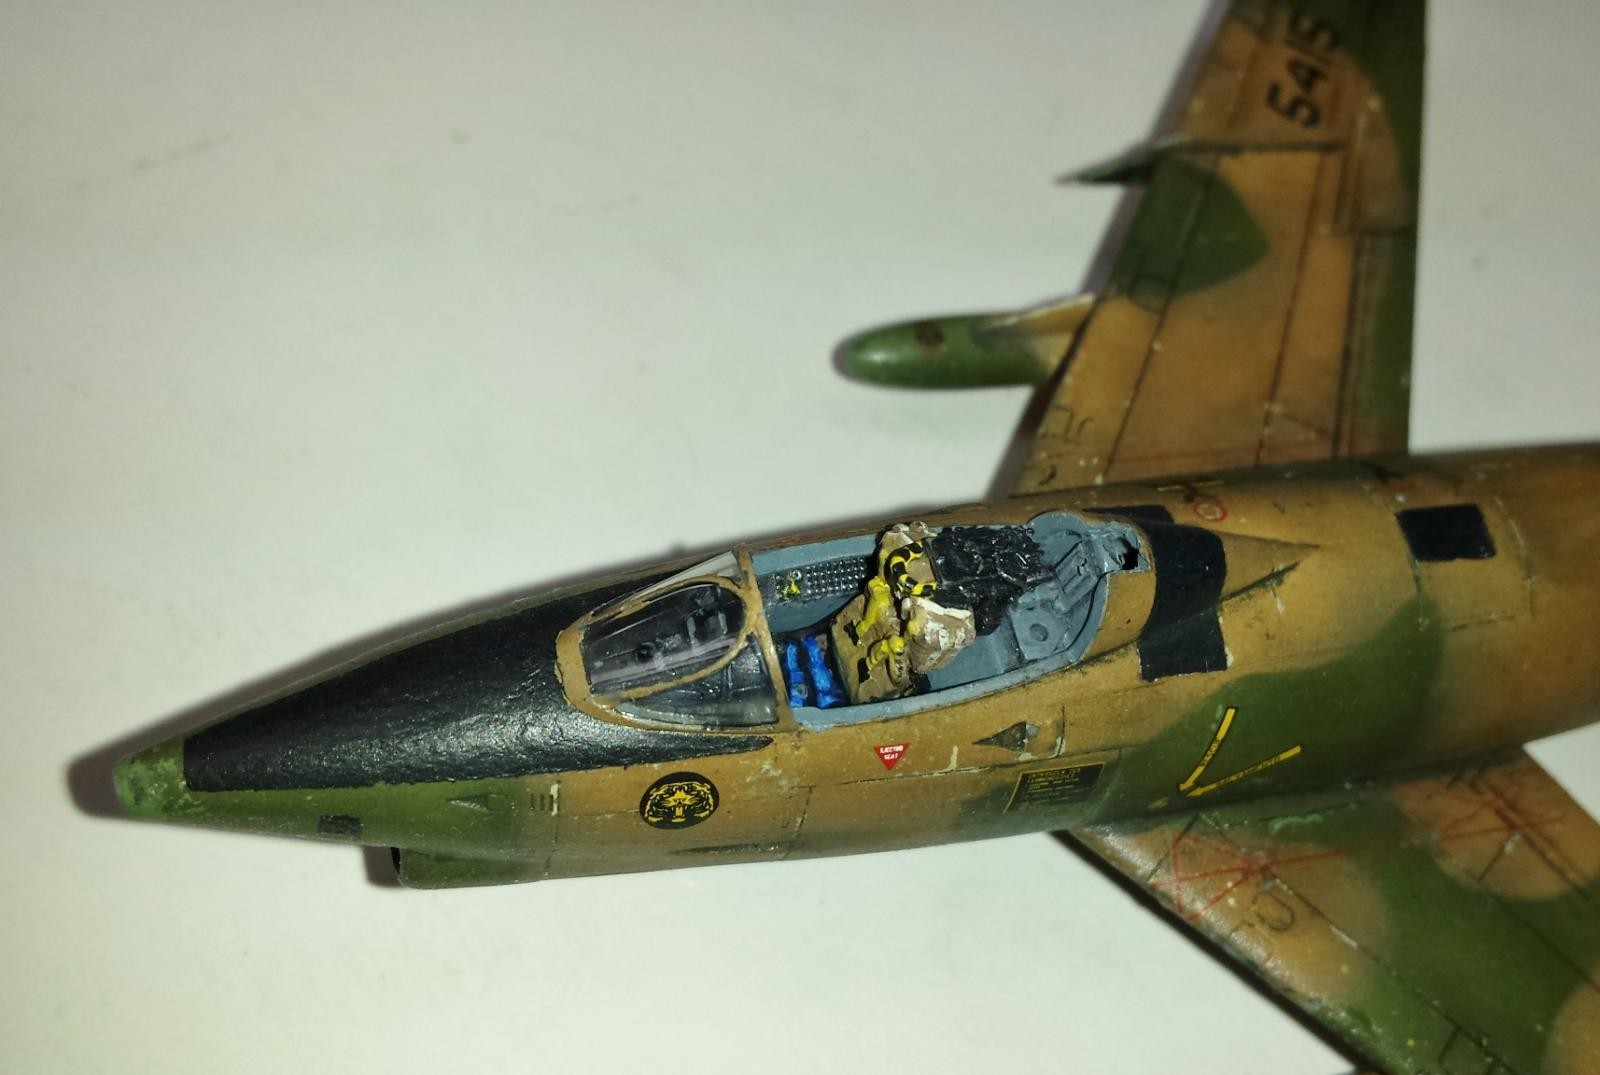
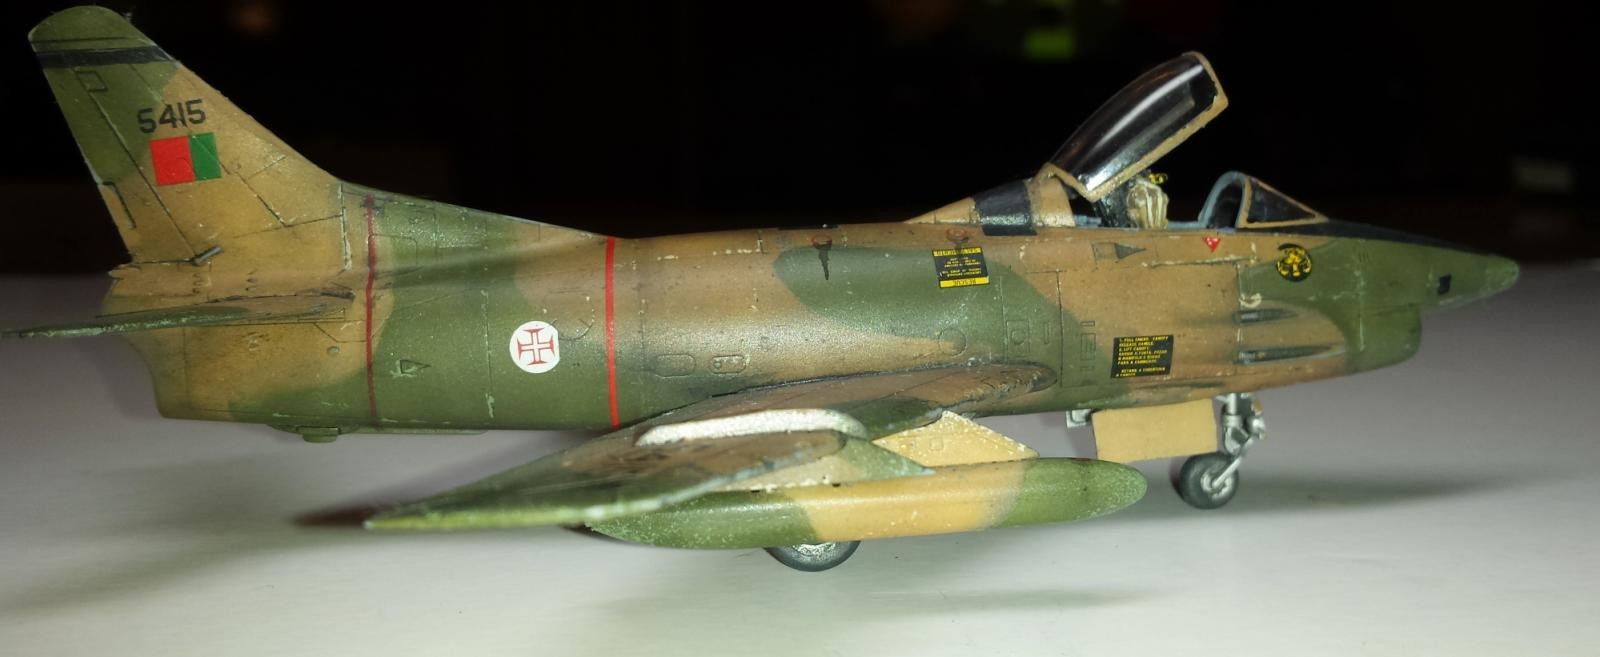
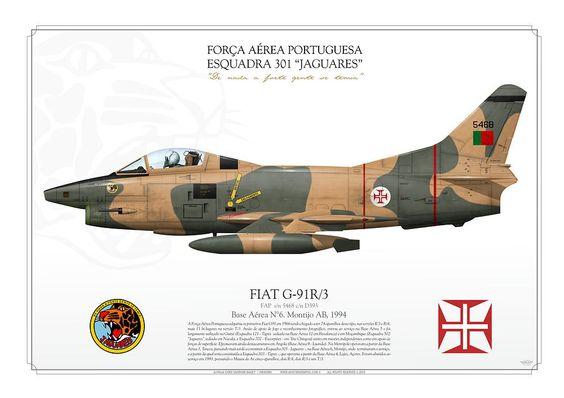
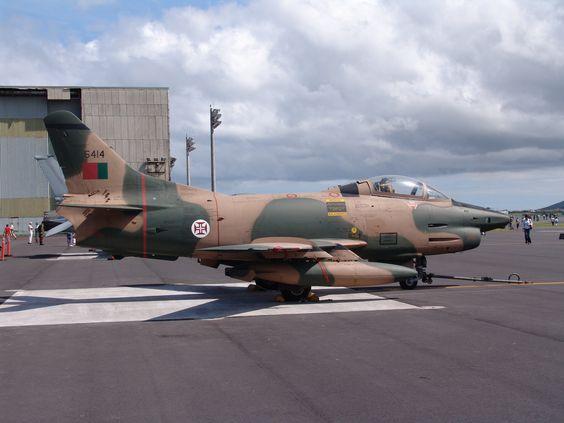
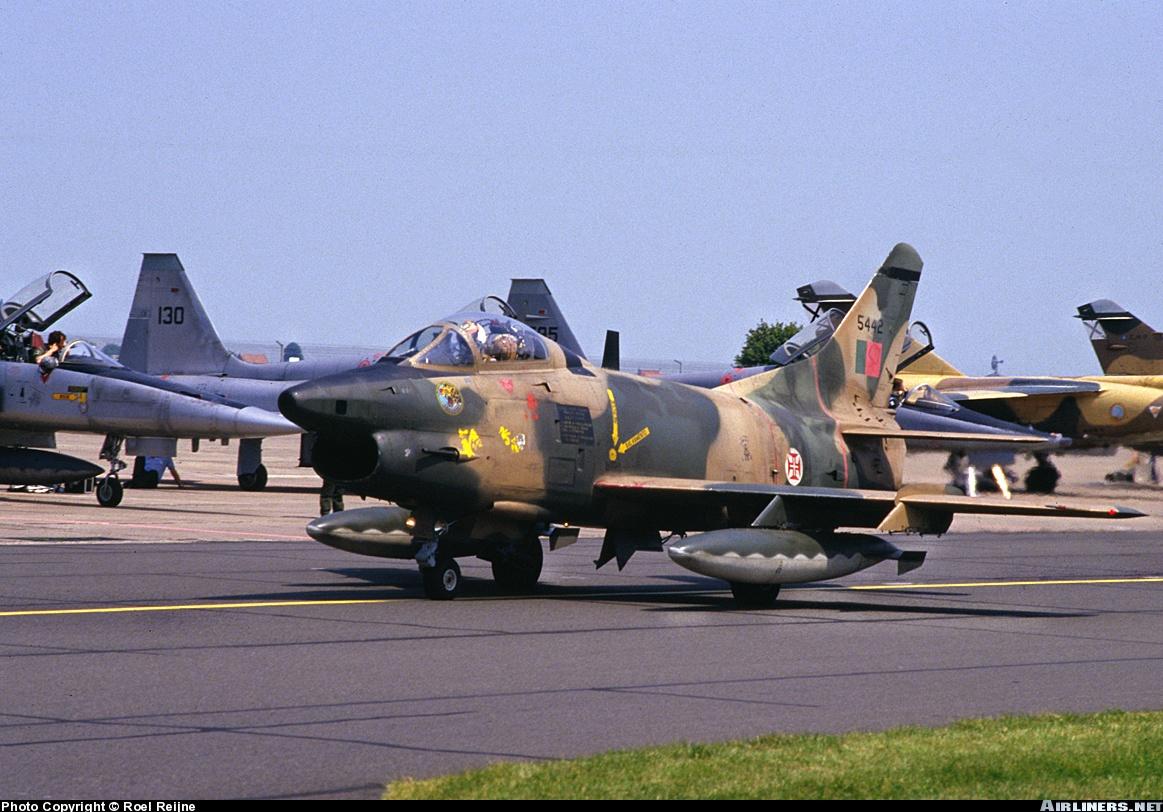
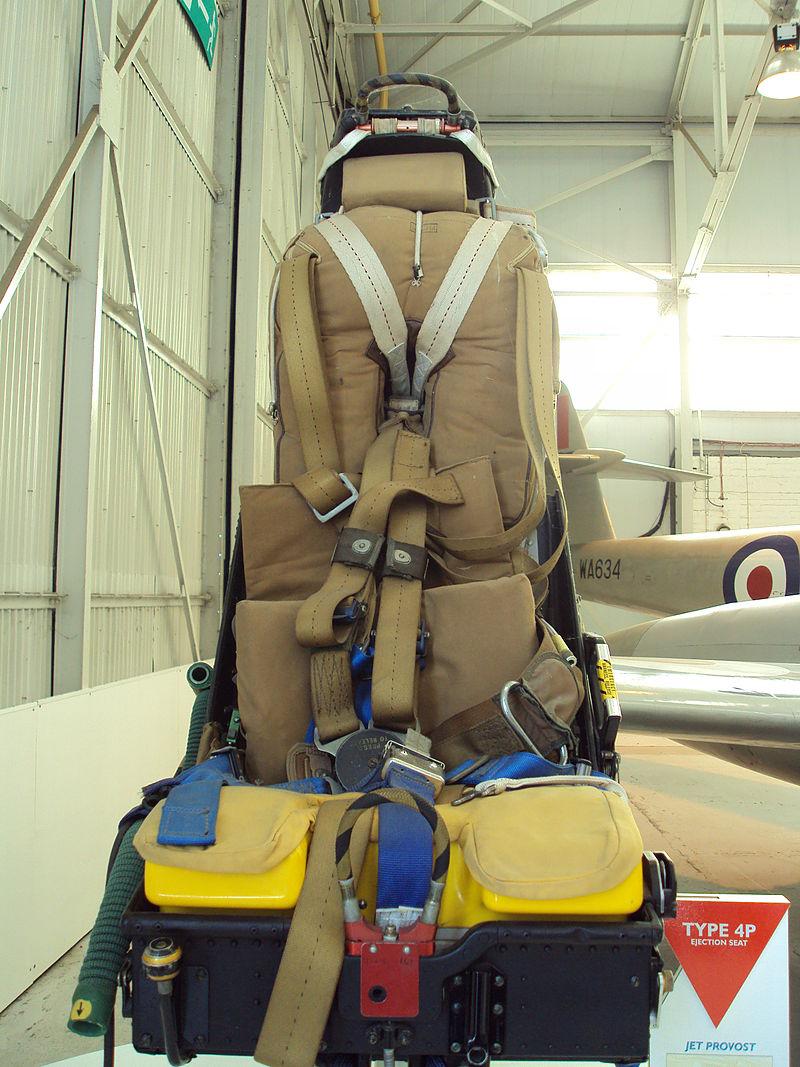
A few years back MENG released this 1/72 version of the G.91. I put off purchasing it because of its small scale. I then built the awesome, highly-detailed MENG 1/72 F-106 Delta Dart. Despite this being only 1/72 the real F-106 is large so this model was large, and incredibly detailed inside and out. So, based on this experience with the MENG F-106 I decided to give the MENG 1/72 G.91 a shot; had no other realistic option. I was able to find this model at an on-line auction for $9.00 plus shipping. At that price what did I have to loose. I wanted the jet's MB Mk.IV ejection seat to be a detailed feature of the small cockpit so I purchased an after-market resin seat to replace the kit seat. I also wanted to model it as a Portuguese Airforce jet so I needed to purchase some after-market decals. This was an easy find. I was motivated to model the Portuguese version because although I am American born I am of 100% Portuguese decent and I am very proud of my heritage. I have never modeled a Portuguese aircraft so this was my chance. I also just loved the look of the beat-up Portuguese NATO Camouflaged G.91. It looks like a well used, mean, fighting machine.
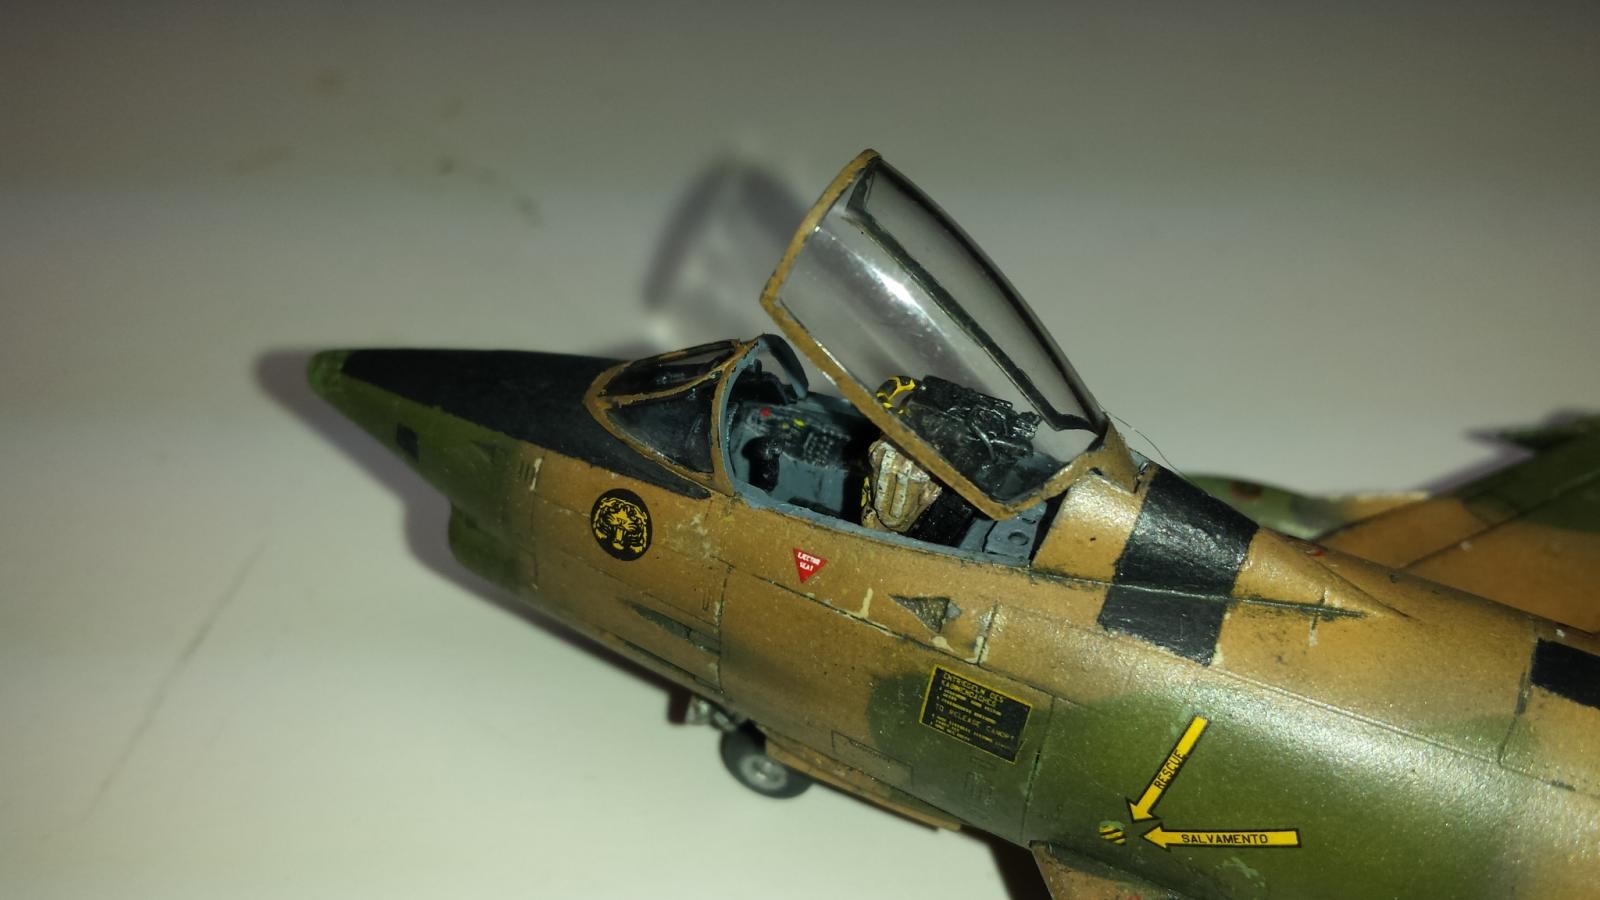
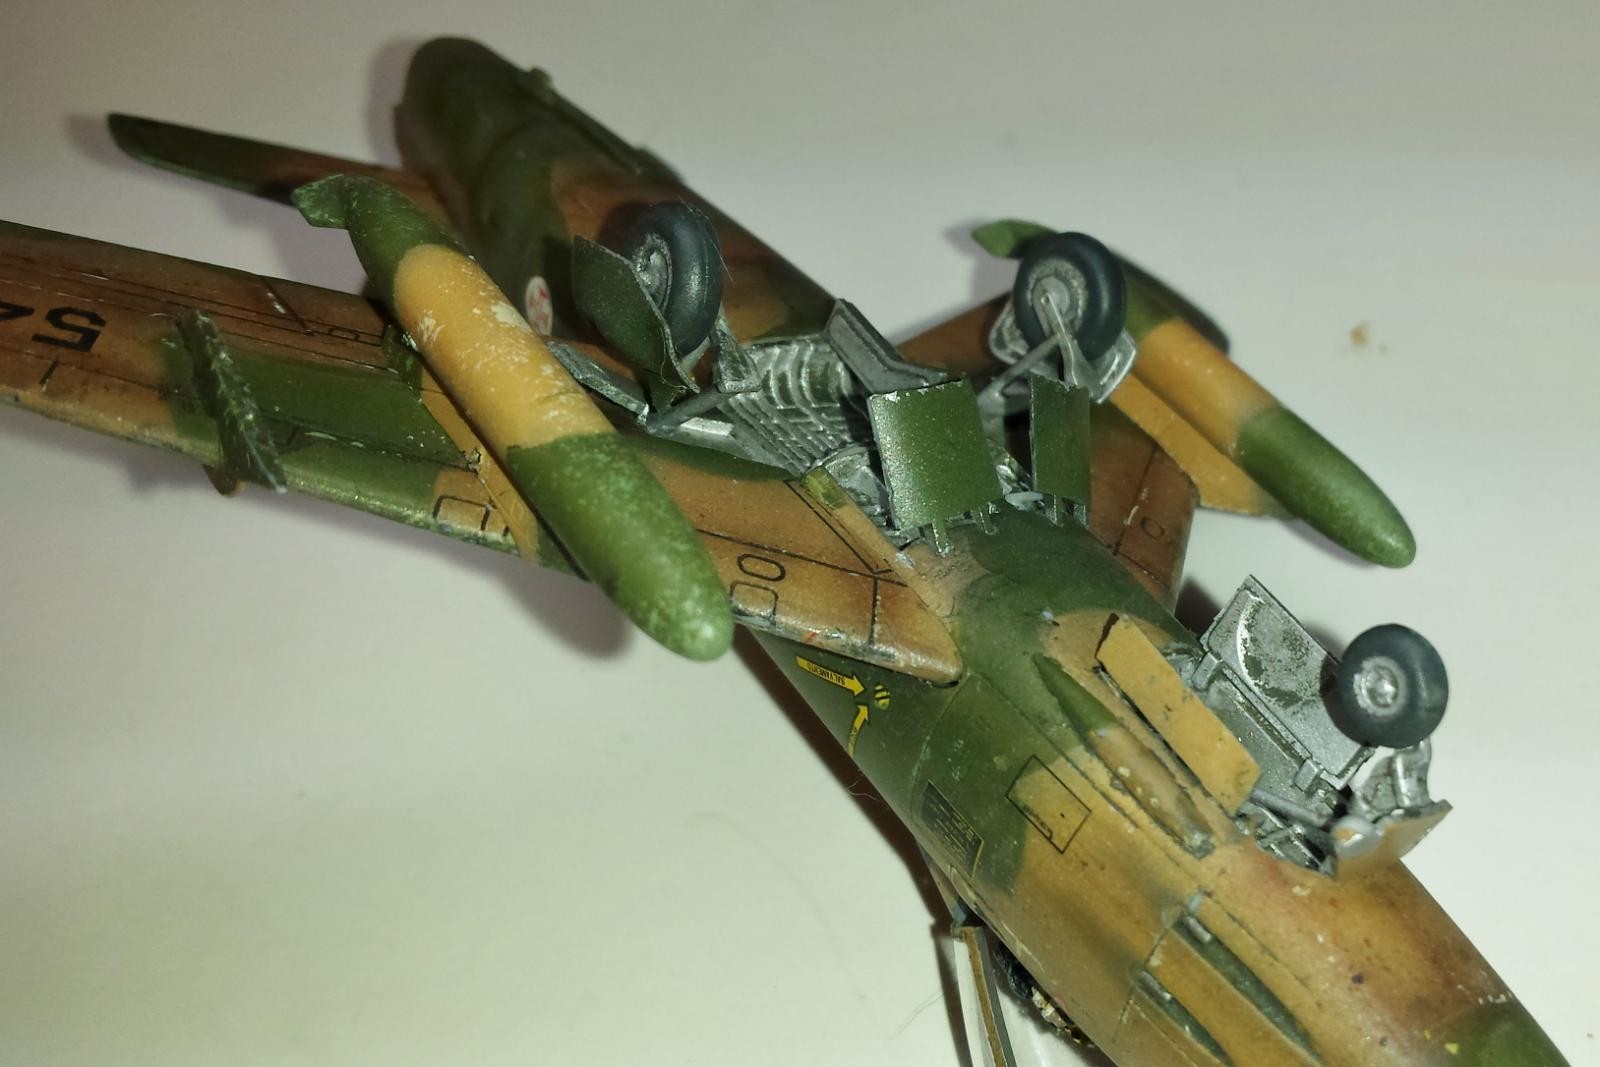
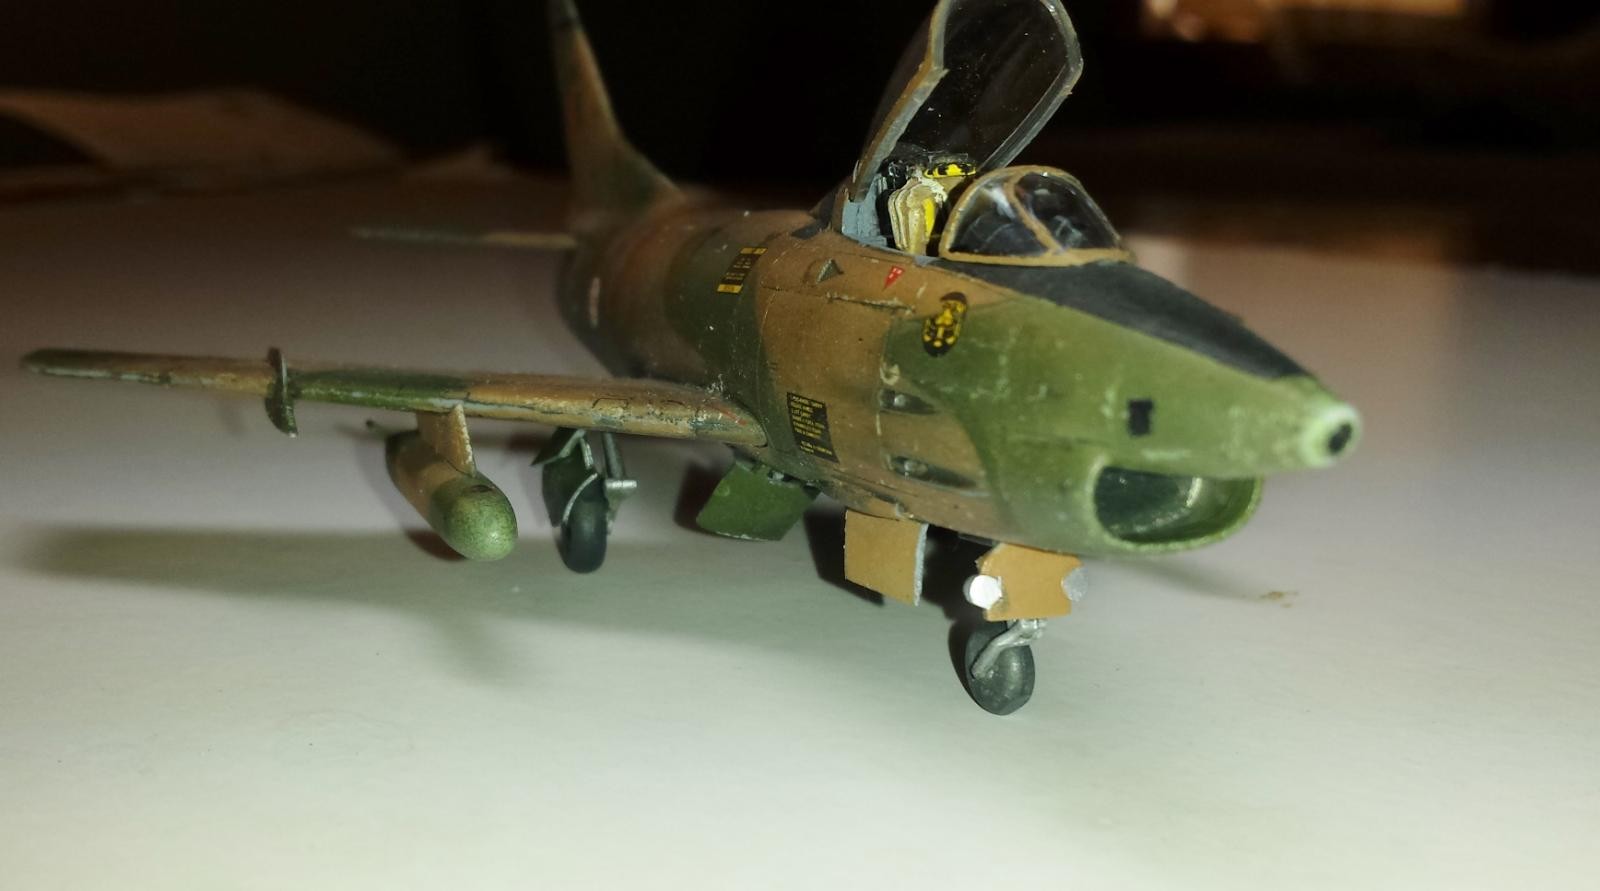
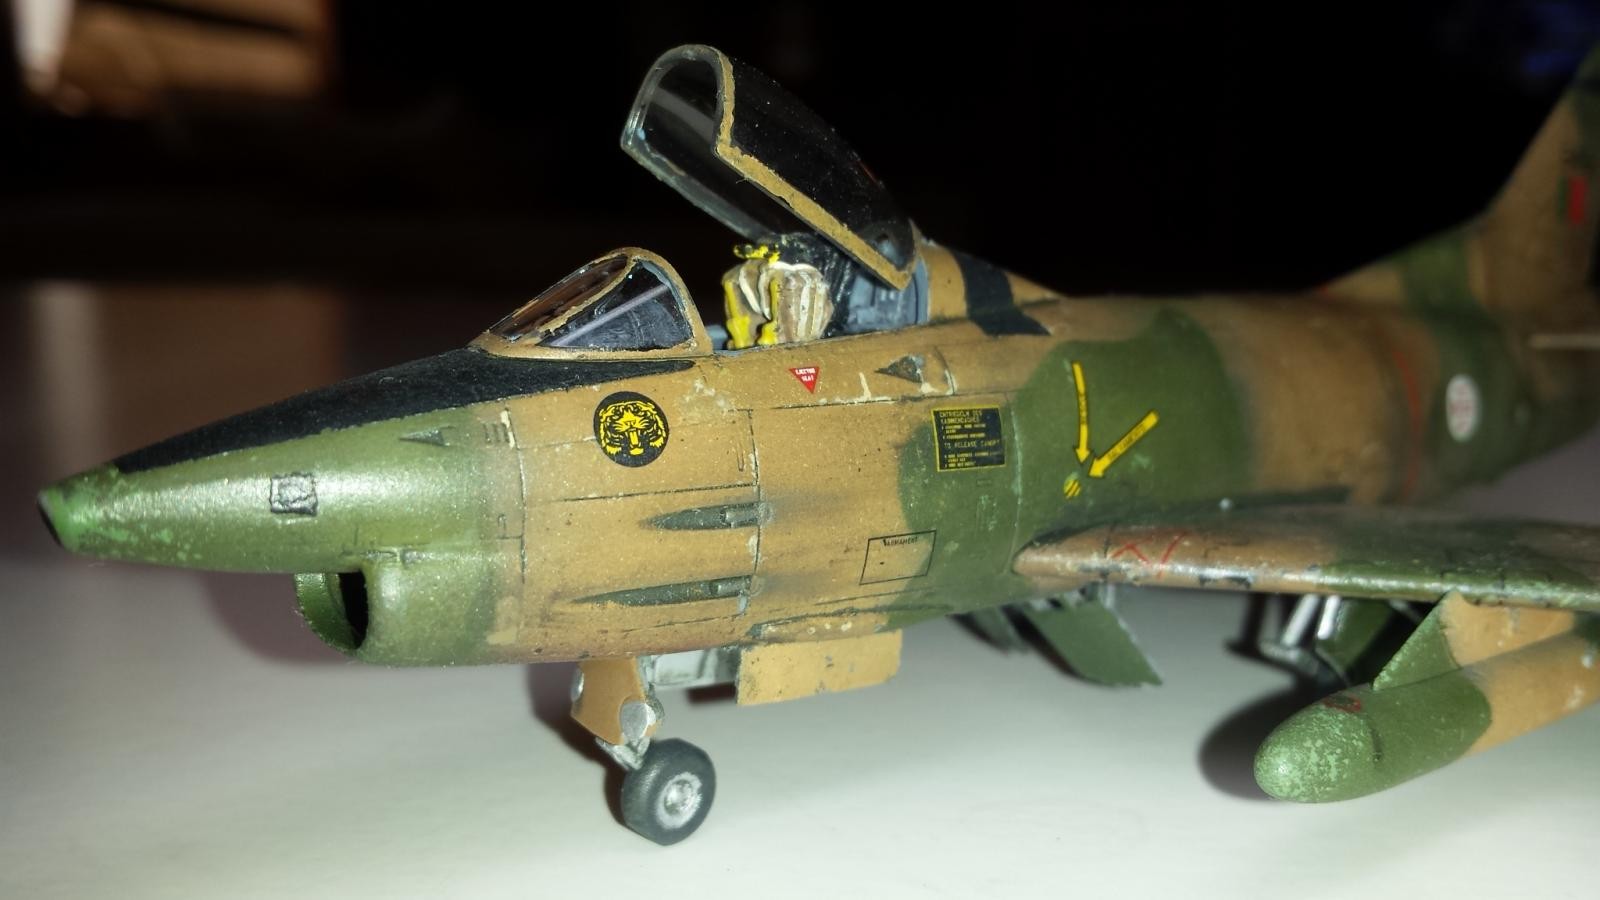
When the G.91 arrived I was excited to open the box. In 1/72 I knew it would be small but I was shocked and a bit disappointed at how small it really was. I have to say that I think this is the smallest jet I ever built. I also quickly assessed that this would be a simple, fast assembly prior to painting. In fact I competed the majority of the kit in 1 sitting. After my experience with the MENG F-106 I was a bit disappointed with the overall detail of this kit. I think it is a bit simplistic with a real small parts count and average to mediocre detail levels. Again I was spoiled from my last 1/72 MENG build. I was happy I purchased that after-market seat b/c the kit seat definitely lacked refined detail, no seat belts, and just blah. The instrument panel had very subtle raised detail so needed to use some spare decals to busy that up. All the control surfaces were molded in the neutral position and the flaps could not be extended although the dive brakes could be extended and they had some decent detail. The wheel wells had good details, but the landing gear was overly simplistic and lacked refined details. MENG definitely stepped it up when they moved onto their F-106 from this earlier kit. To match the busy look of the real cockpit area I needed to busy up the turtle deck behind the ejection seat and the IP cowling area. I did this with bits and scraps of plastic and old kit parts. The other thing I did not like with this model is the very faint recessed panel lines. The good thing is that they are to scale and not over-done for this scale, but in 1/72, "To-Scale" means almost non-existent. They are "overly-shallow", is that an oxymoron...LOL? This becomes a real issue for me after multiple layers of primer, base paints, pre-shading, post shading, and weathering.
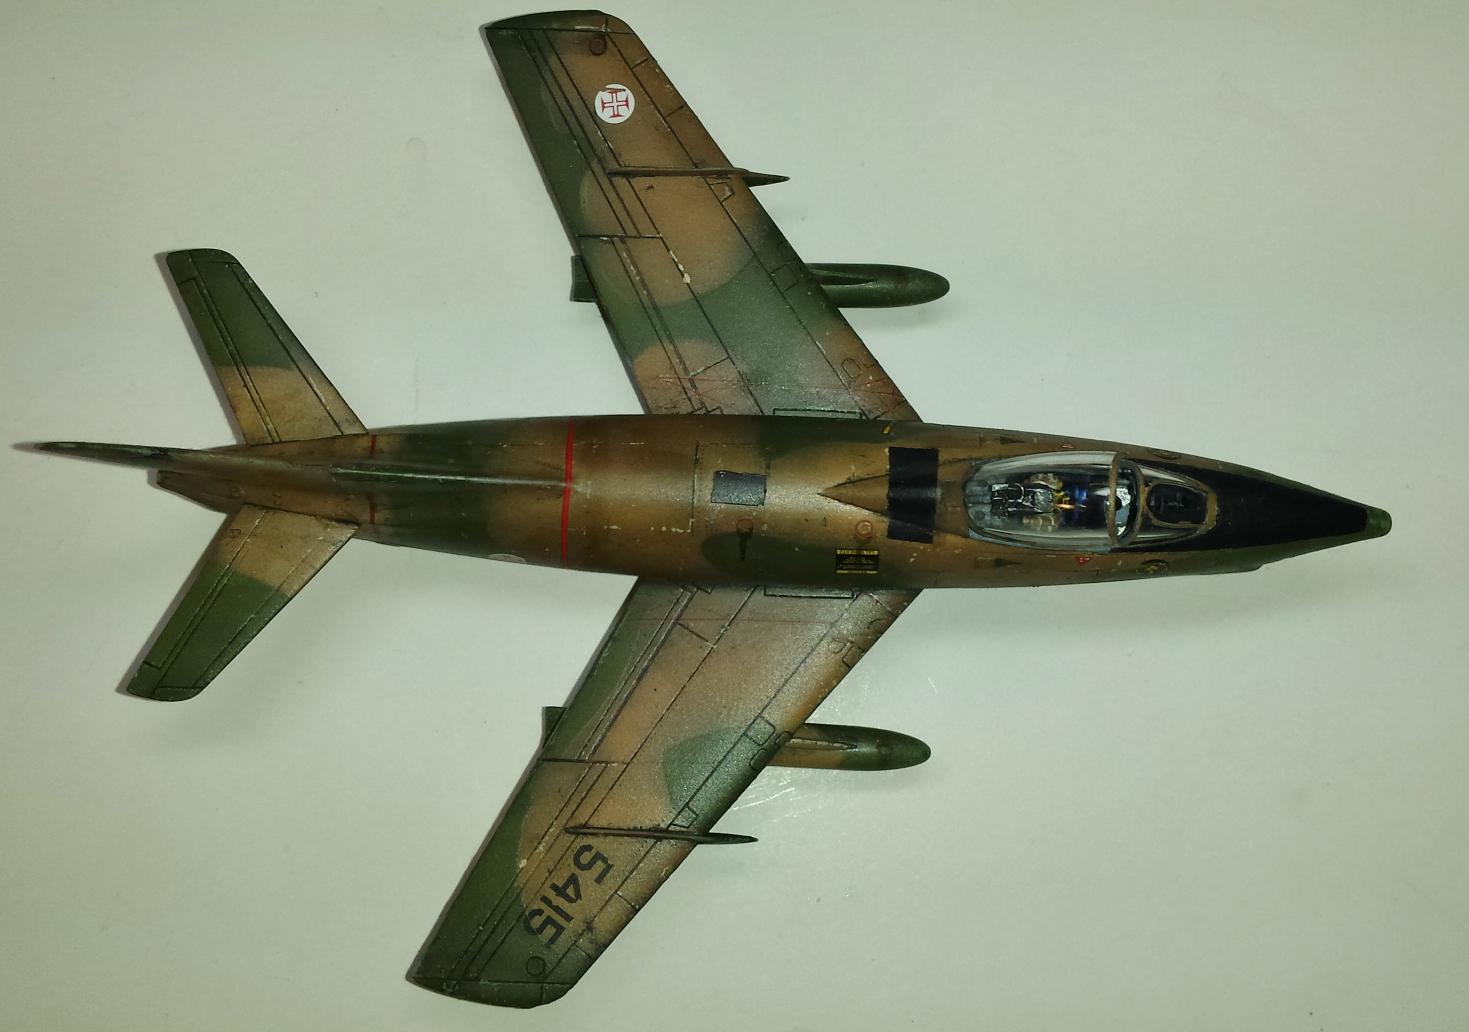
The good news is the kit is very well engineered with excellent fits throughout. I needed no filler and little sanding was required. The over-all shape looks accurate but I did not perform any measurements...I never do. The resin ejection seat needed lots of modification to fit the cockpit tub and not extend outside of the Canopy area. Basically it was to tall, and to wide for this model. I am not sure if this is a deficit of the resin seat, or a problem with size of this model? Optional parts are provided to build 1 or 2 options which is either a R1 or R3 version of the aircraft. The canopy and windscreen are molded very well, fit perfectly, and are very clear. You do need to put weight in the nose to avoid tail-sitting. As mentioned before the construction proceeded without any challenges, and it was completed quickly. I highly recommend this kit as a 1st build for any neophyte modelers.
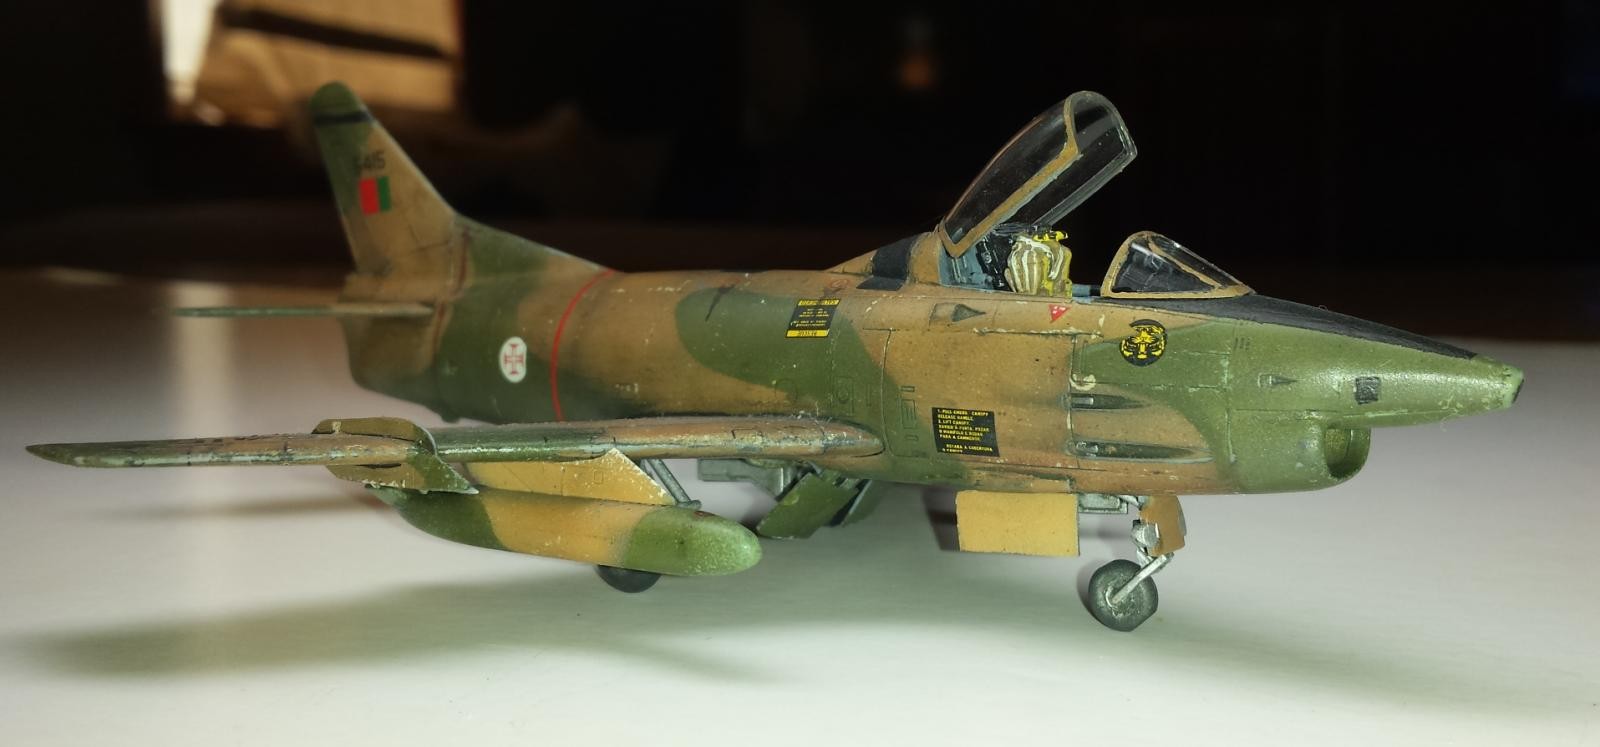
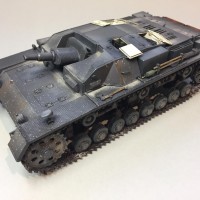
Regarding finish, I utilized my usual painting methods starting with a dark-base of Vallejo German Grey primer. I then engaged in some pre-shading by using a light grey acrylic to mottle the dark primer base. This was followed by AK Interactive Acrylic camo colors to recreate the Tan and Green colors. The camo pattern was outlined using a white water-color pencil over the primer coats. I then filled in the tan sections with a slow build up in very fine layers allowing some of the pre-shading to show through. I used Blu-Tak poster putty to mask off the tan why allowing for soft demarcation lines. I then applied the dark-green camo color using the same techniques. Considering the small size this was a fairly quick process. I applied some minor post-shading using a darker brown to highlight some panel lines. I then applied a thin layer of Future floor wax and applied decals. I engaged in the weathering process using some Tamiya black-pin wash, an overall dark-grey sludge wash, and application of some powered pigments. I also did some fine chipping using a sponge and fine paint brush. The pin wash was difficult due to the shallow recessed lines which were partly filled in by the layers of paint, and varnishes. As a result a lot of nice surface detail was lost when completed. I sealed all this work with several layers of AK Interactive acrylic matte varnish. If I was to build this again I would attempt to deepen the panel lines with a scribe tool.
The whole process was completed in several days. In summary this kit looks like a G.91 but it is so small! The shape looks great and it is a very easy build to construct due to excellent parts fit. It is detailed well-enough for the average 1/72 model builder, but will disappoint builders who require better then mediocre, average detail levels. Especially from a modern, cutting edge, model company like MENG. Despite the 1/72 scale they really could of done a better job with the detail levels. They proved this with the release of their F-106 model in the same scale. If you are a model company and are reading this please release a modern tooled, new version, in 1/48, and/or larger scale, version of this popular, wonderful, very successful, long service life cold-war era fighter jet.


i've always loved the "Gina"...i've had the 1/48 Heller kit in Luftwaffe markings factory sealed for years...and i definitely see a "Saberdog" in there somewhere, it's not just you...i don't think many recessed panel lines are deep enough to hold color even 1/48 Hasegawa...then i learned guys rescribe them...lot's of luck...then some are sidewalks...sabres p-51's and corsairs are disappointing in 1/72 i catch your drift...i love your work and this is no exception
An unusual subject, Paul, and a great result.
Love it! I recently finished the Airfix 1/72 version in Luftwaffe scheme. I love the look and shape of this little jet. The Airfix kit was woefully inadequate and I had to scavenge for some pylons, create a tail pipe, etc. Looks like the Meng kit at least has an overall better exterior to work with! I like the well-worn look you achieved with this one. Well done!
There's a definite 'Teixeira' school of painting and this is a classic example. Lovely subtle work on the finish to give a weathered but looked after finish.
Elegant presentation, Paul.
Yep...what they said ! 🙂
Paul, this one is one small jet, about the same size as the AlphaJet and a lot smaller than most American made jets. Still it’s a beauty, often neglected by air enthusiasts and definitly by model companies. I agree with your opinion about this kit, it looks right but lacks finesse and details. Perhaps when Meng or any other company decides to scale it up to our favourite quarter scale we’ll have a definitive model for the Gina. Congrats for model, it looks good and that seat really enhances not only the cockpit but the whole model...that and the Christ Cross 😉
Another great build! I agree it does have that Saberish look.
I have the Italeri kit in my stash. I would like to do it in the tiger pattern of the Portuguese air force, but it may be too difficult for a novice such as myself. I will probably go with the fiat G91 alla Frecce Tricolori. Your camo scheme is very original and well executed.
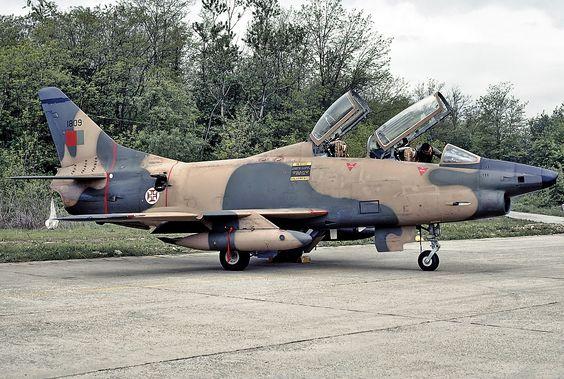
Great build! Its a shame that no one issued a decent 1:48 Gina or at least a G91Y in any scale (except the Matchbox one in 1:72 - long time in my stash). There many interesting paint schemes around - I especially like the shark motif annyversary G91Y. Thanks for the pics about the real plane!