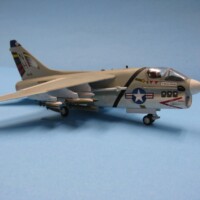
X-1 Machbuster – Revell 1/32

Impressions
The Revell kit is listed as a Skill Level 2 with an overall length of 12-3/4", a wingspan: 10-5/8", with a total of 50 parts. The kit is molded in light gray, a big improvement over the original orange mold from years past. The kit features fine raised panel lines, a fully detailed cockpit with an optional pilot figure, a full rocket engine (that you can't see when the fuselage is closed), an optional position cockpit door and water slide decals.
The Build
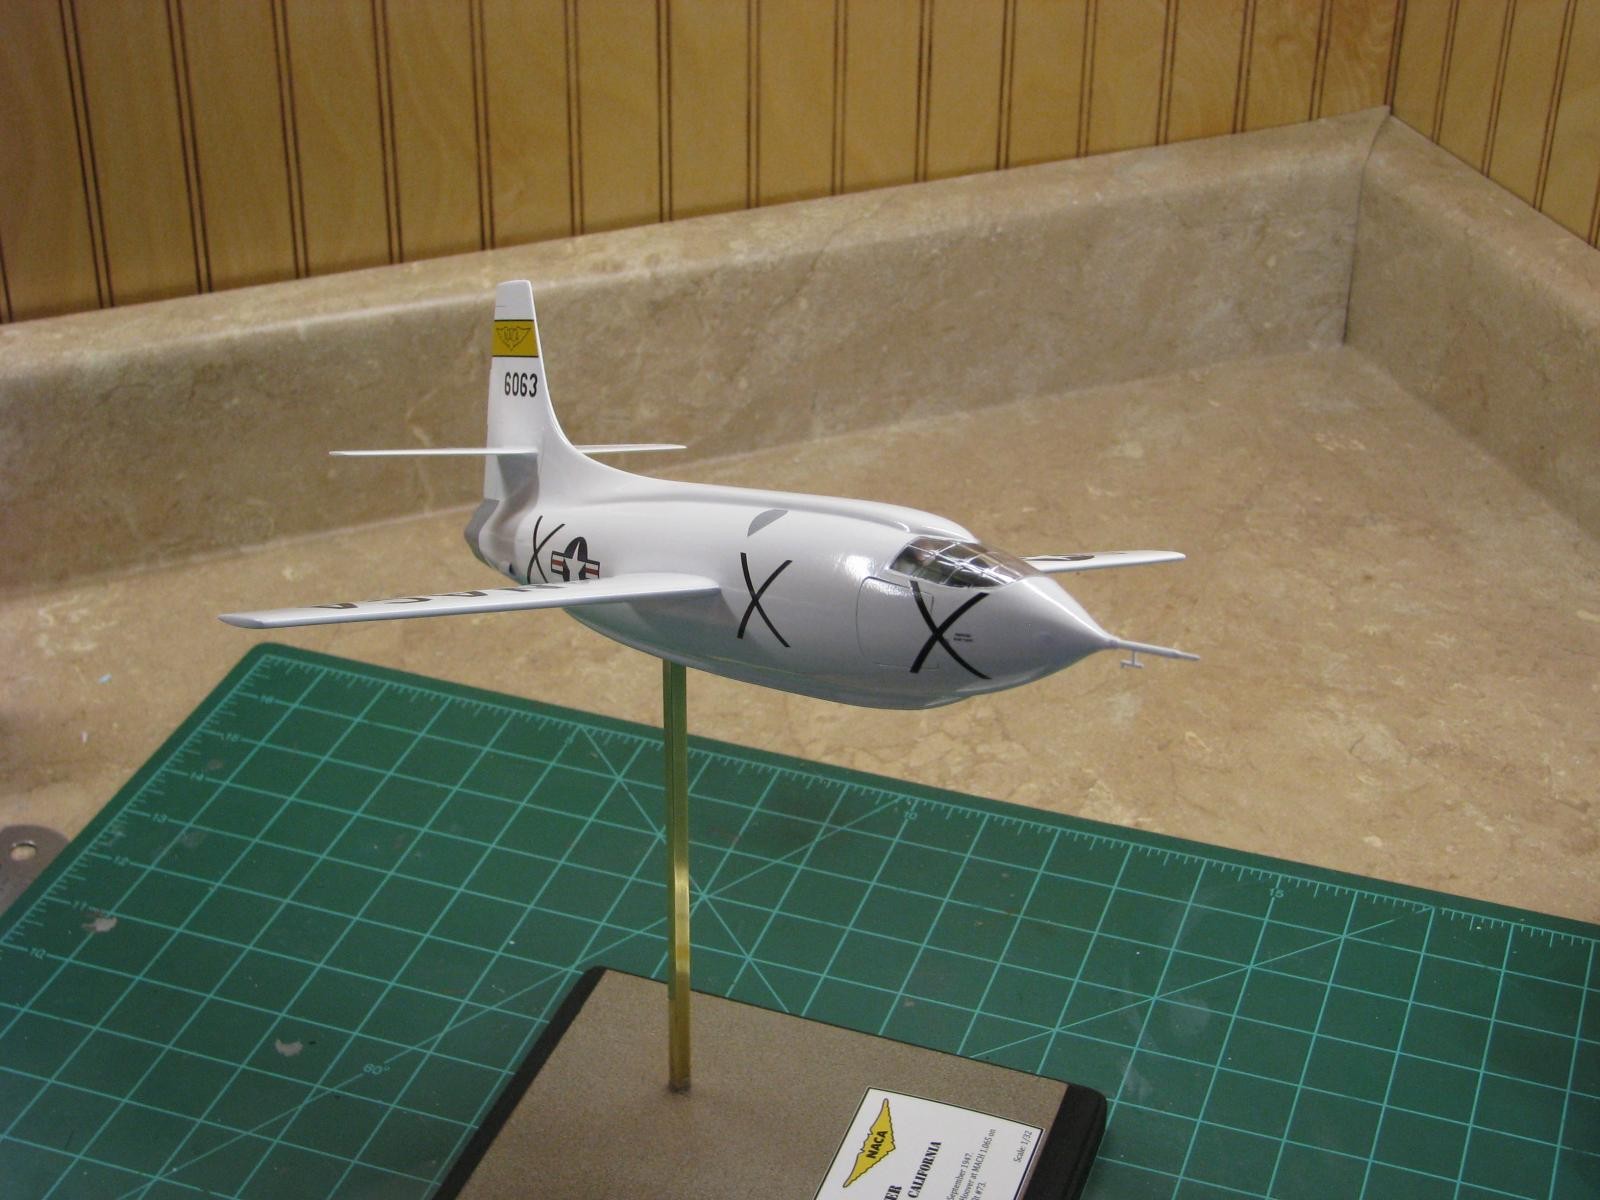
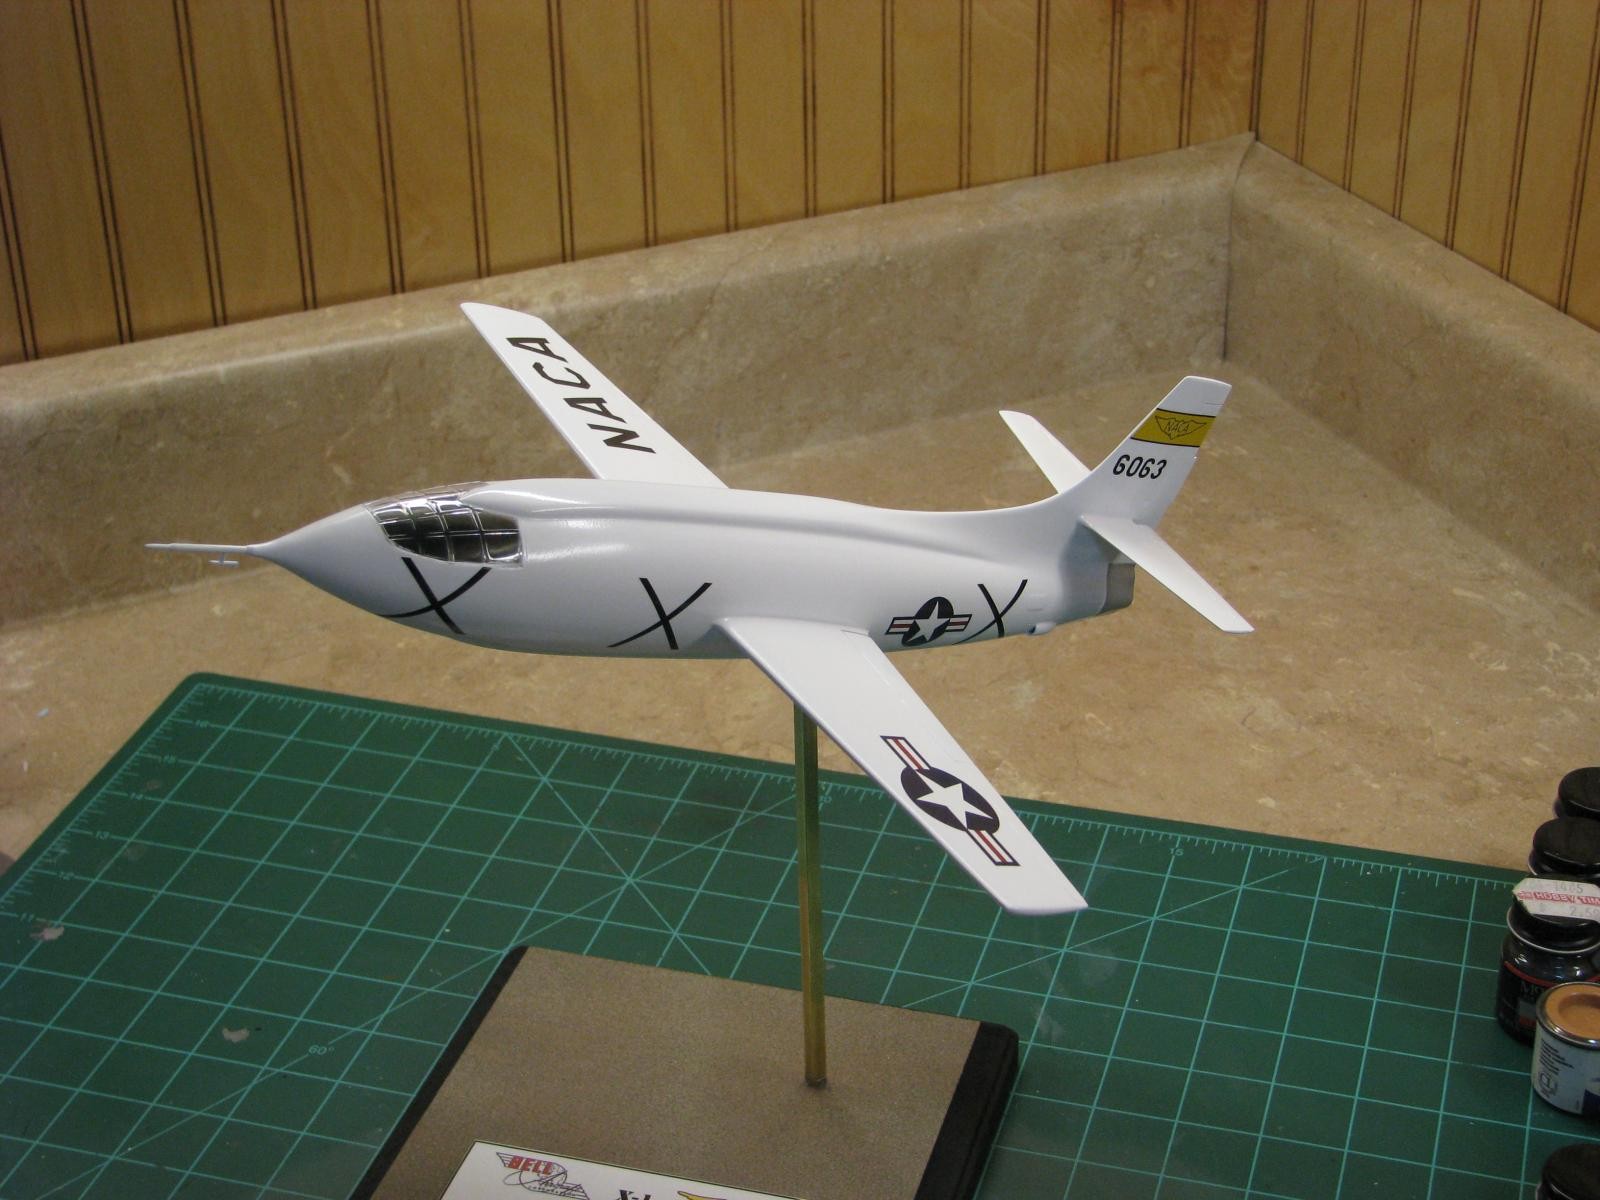
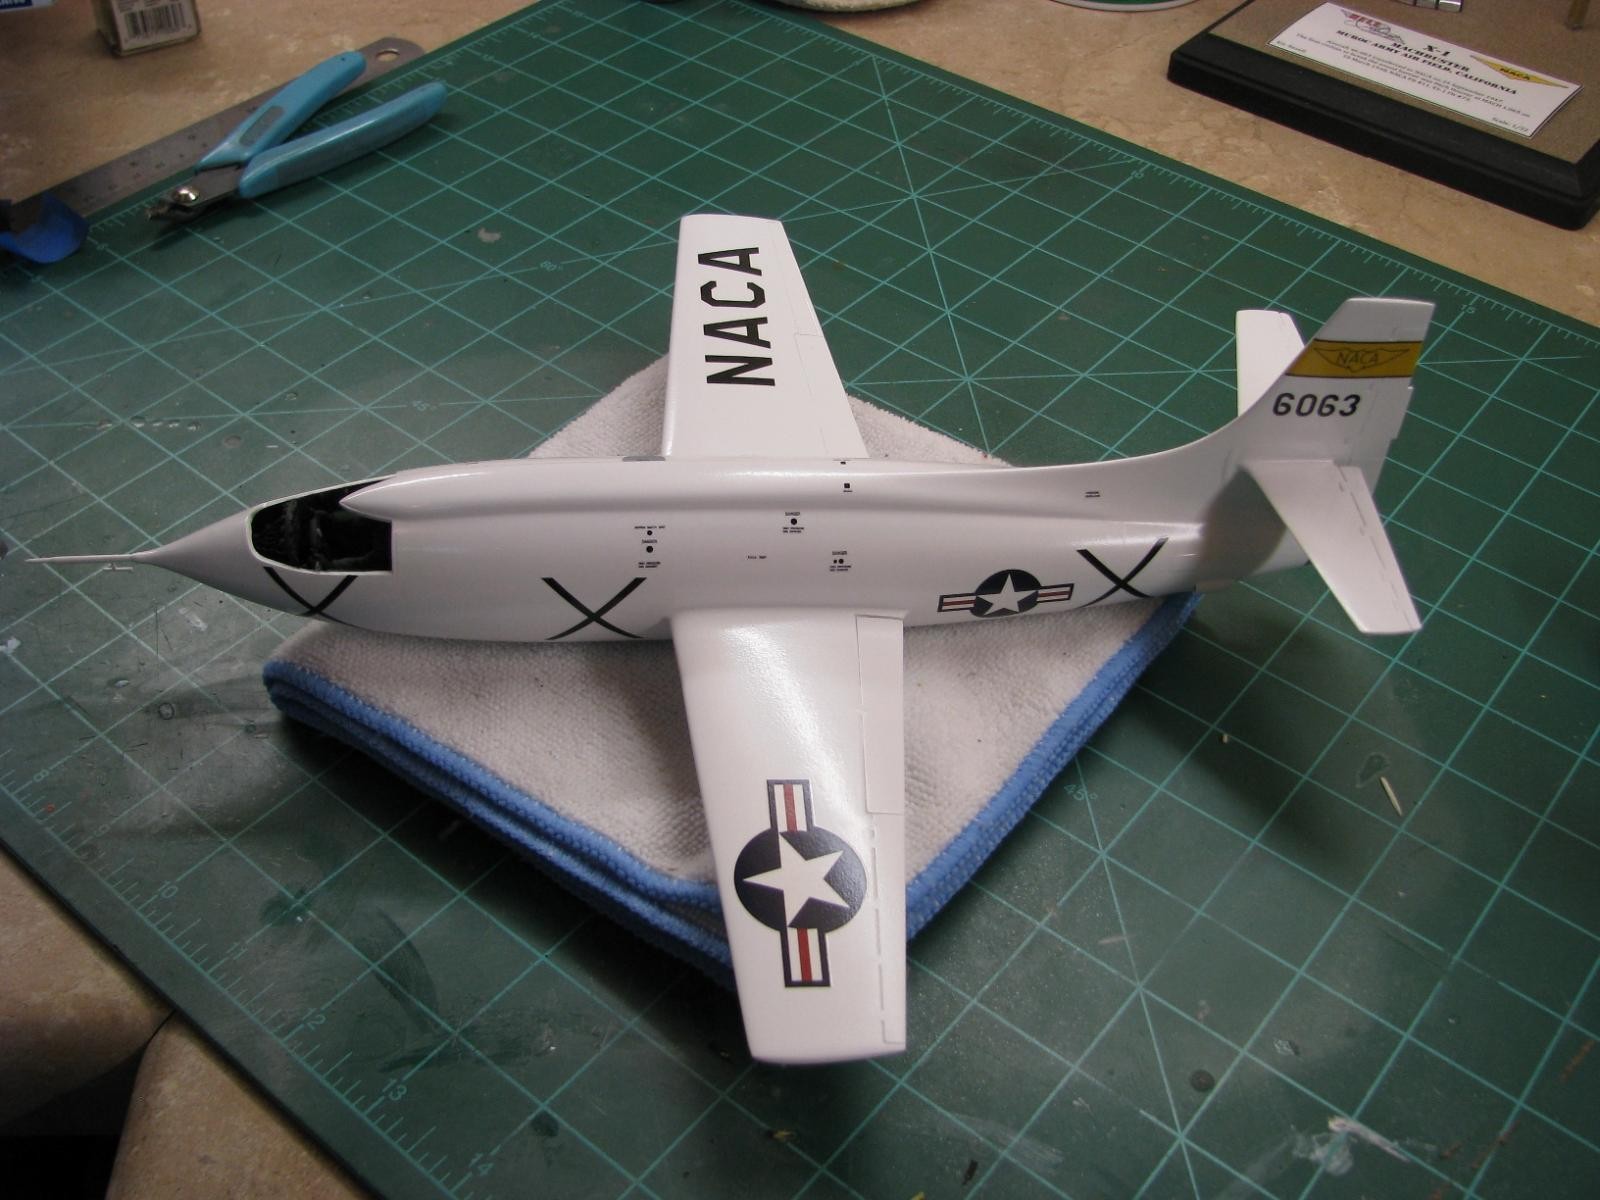
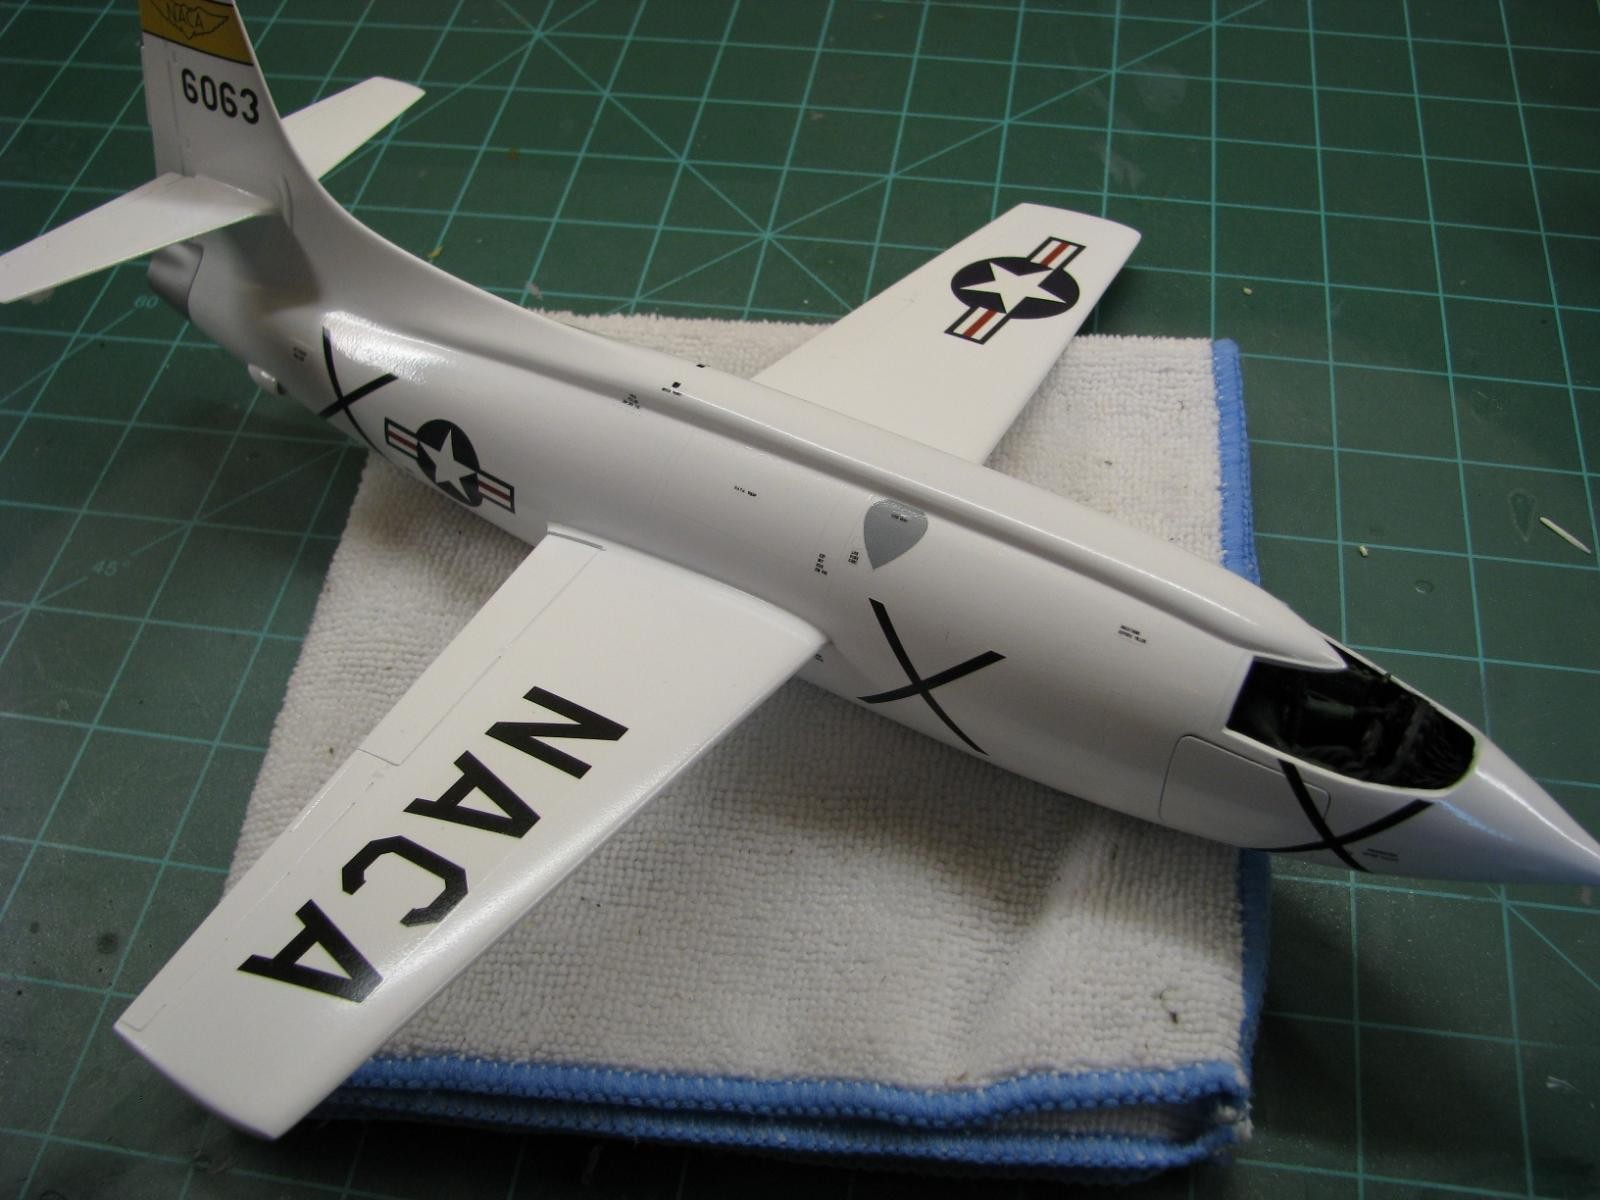
I decided early that this build was not going to be “Glamorous Glennis”. It seems everybody builds the record breaking aircraft. I already built this version using Eduard's excellent 1/48 scale kit. With that in mind, my options were limited to aircraft 6063 in either the early overall orange paint scheme or the later NACA white aircraft. The overall white appealed to me. I don't recall ever seeing one of these built in person and the aircraft is colorful with the yellow and black NACA tail band and the stars and bars.
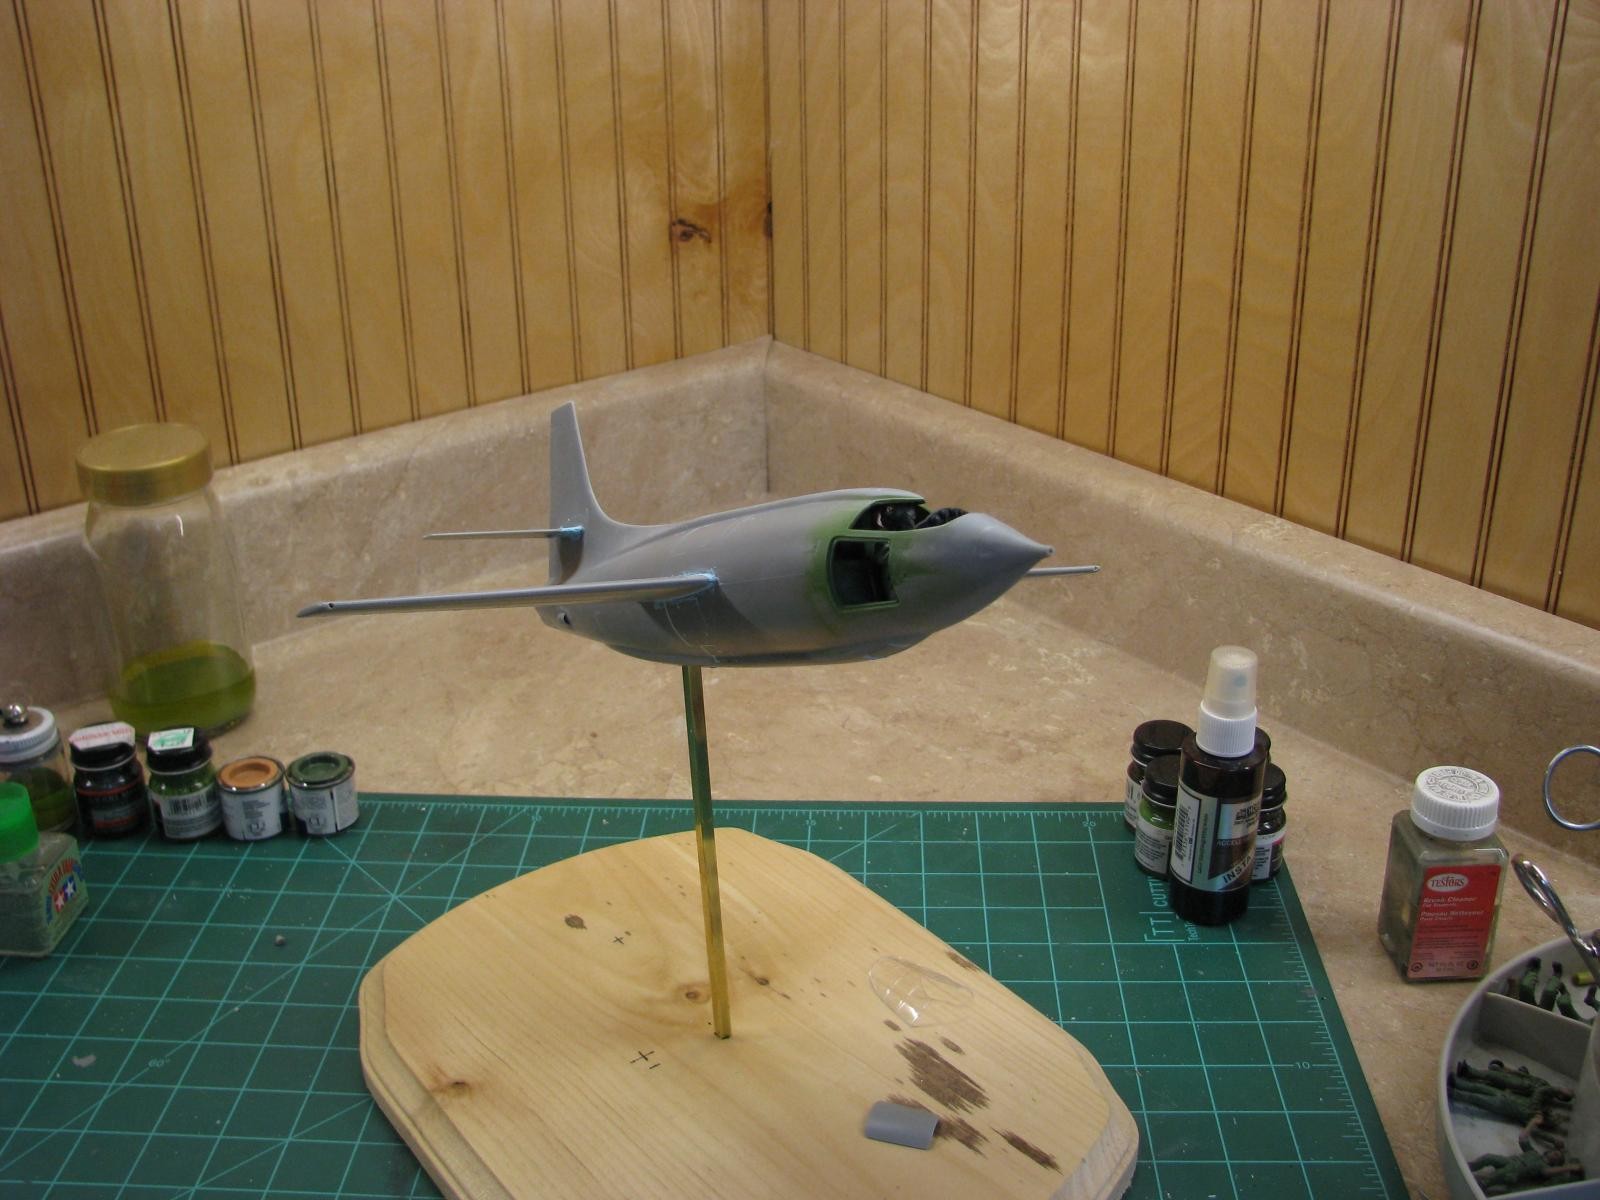
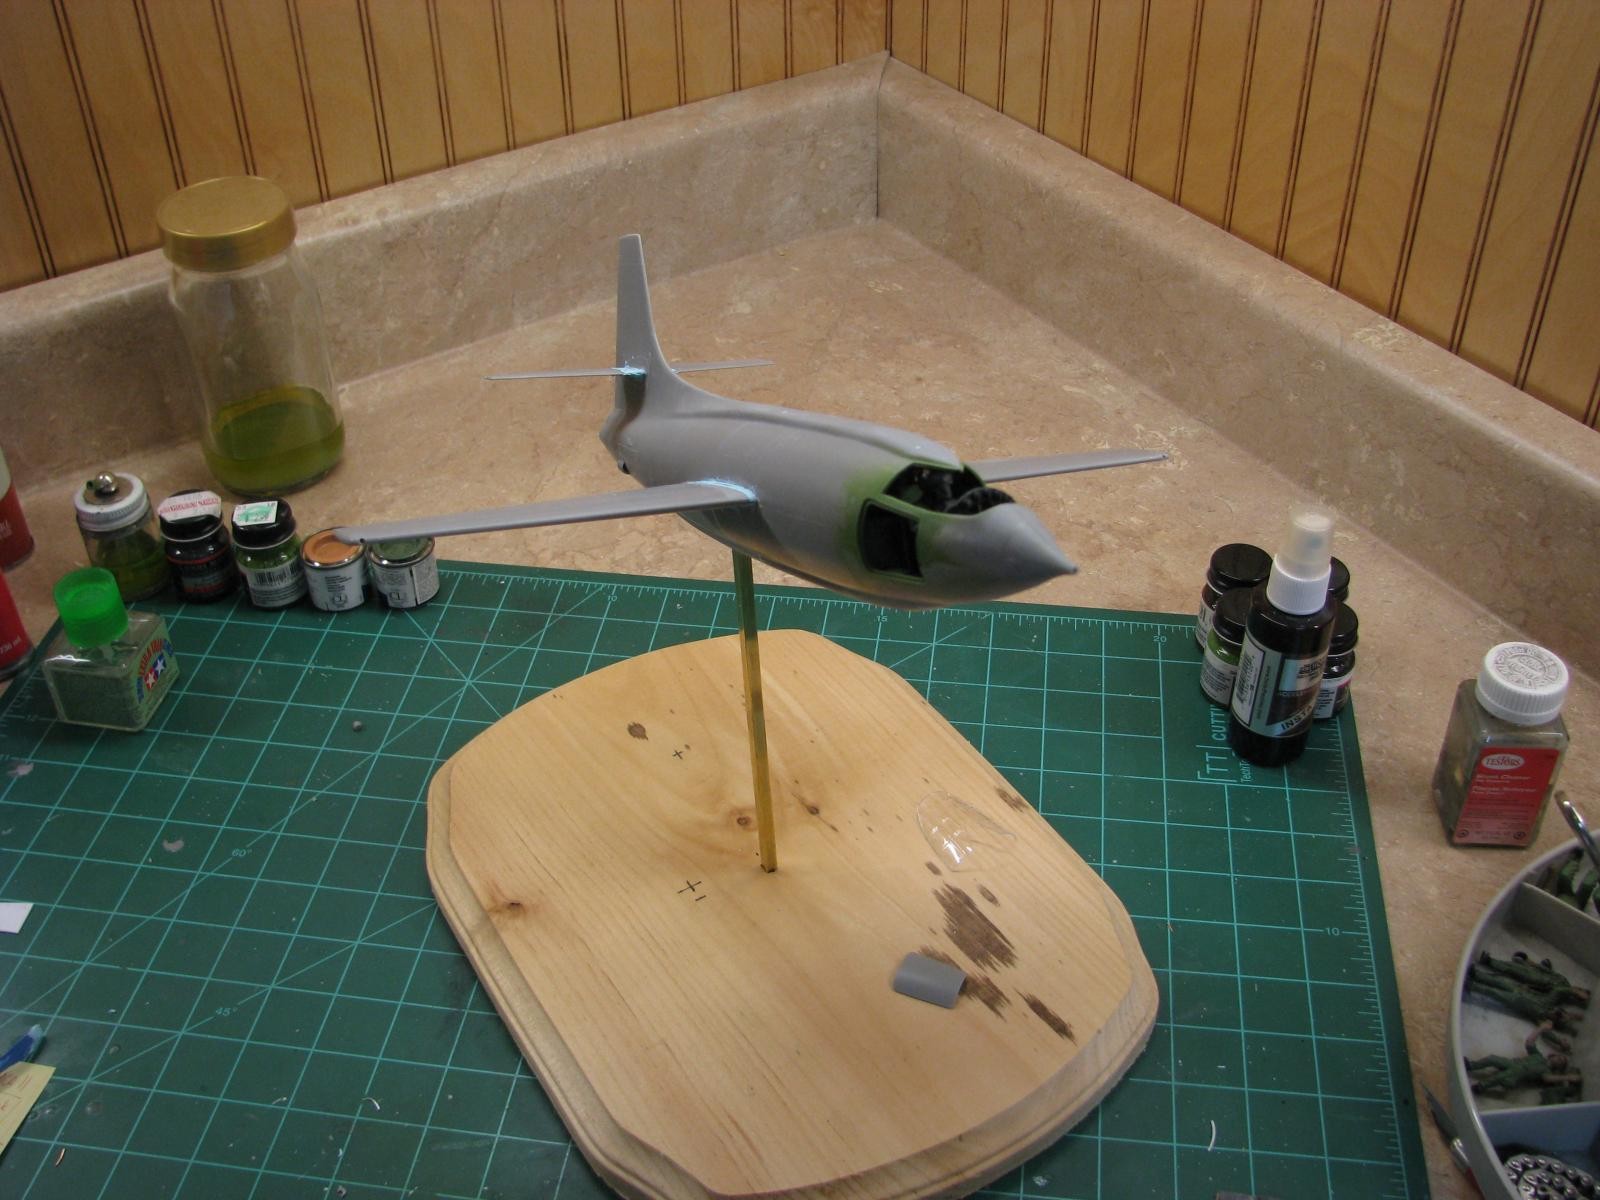
I also wanted to pose this model in flight. When I worked at Bell Helicopter, our HR director had a nice 1/32 scale desk model of “Glamorous Glennis” sitting at the corner of his desk. It always caught my eye when I was called to his office. With that said, that was my inspiration for putting this model in flight. I normally like using clear acrylic rod, but until recently, I have used square Evergreen tube in the aircraft and a brass square rod on the base. This allows the aircraft to be posed and then it is held into position without it swiveling around and having to glue it in place.
Fuselage and Cockpit
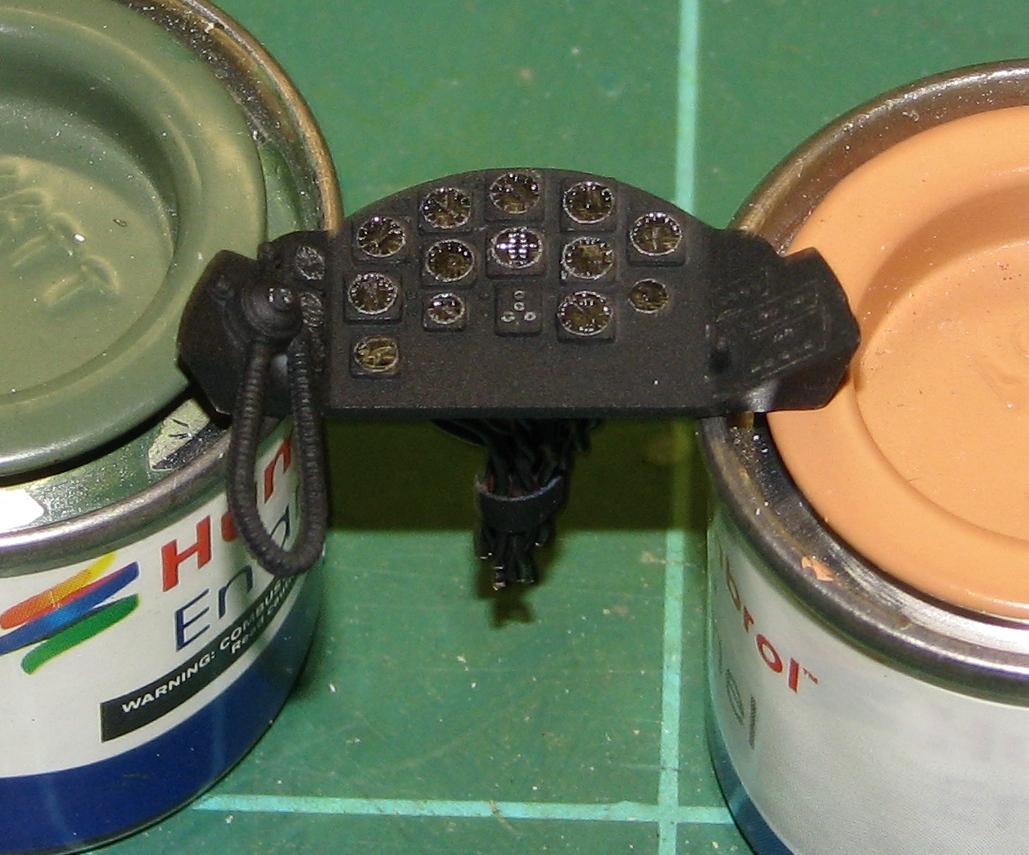
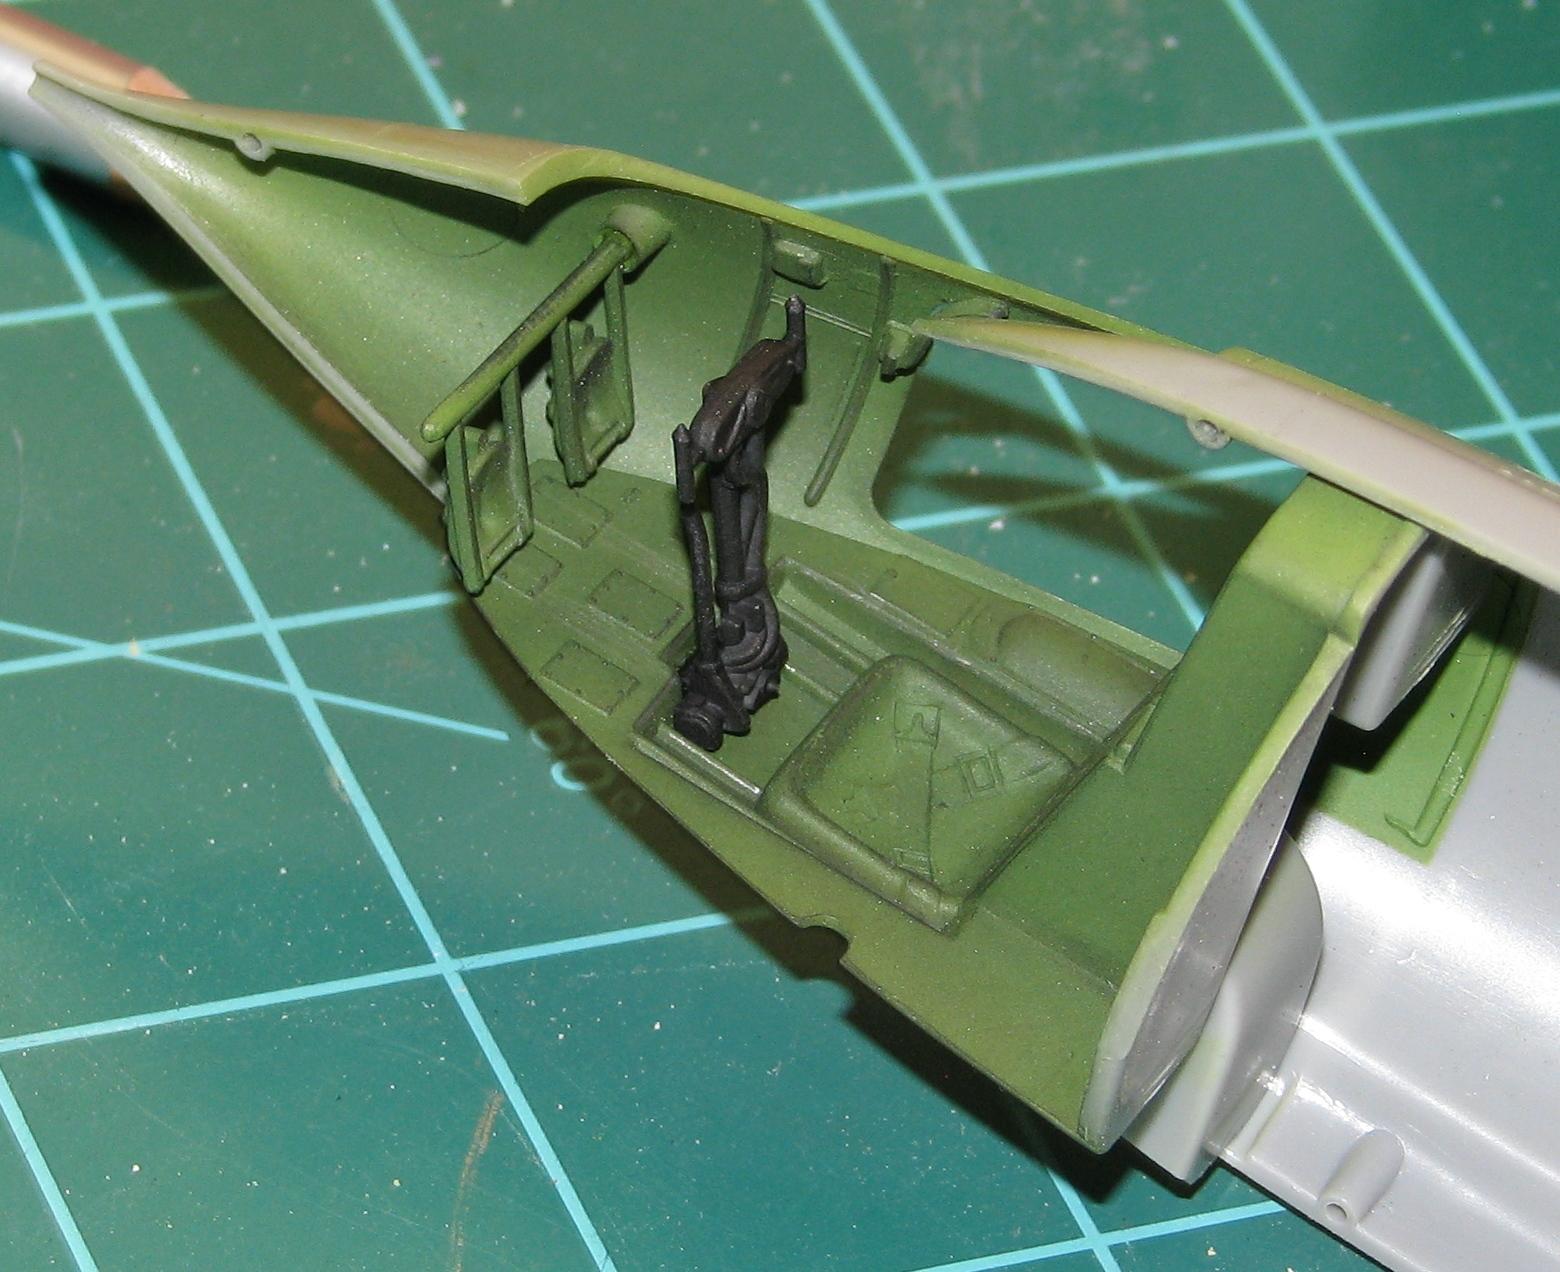
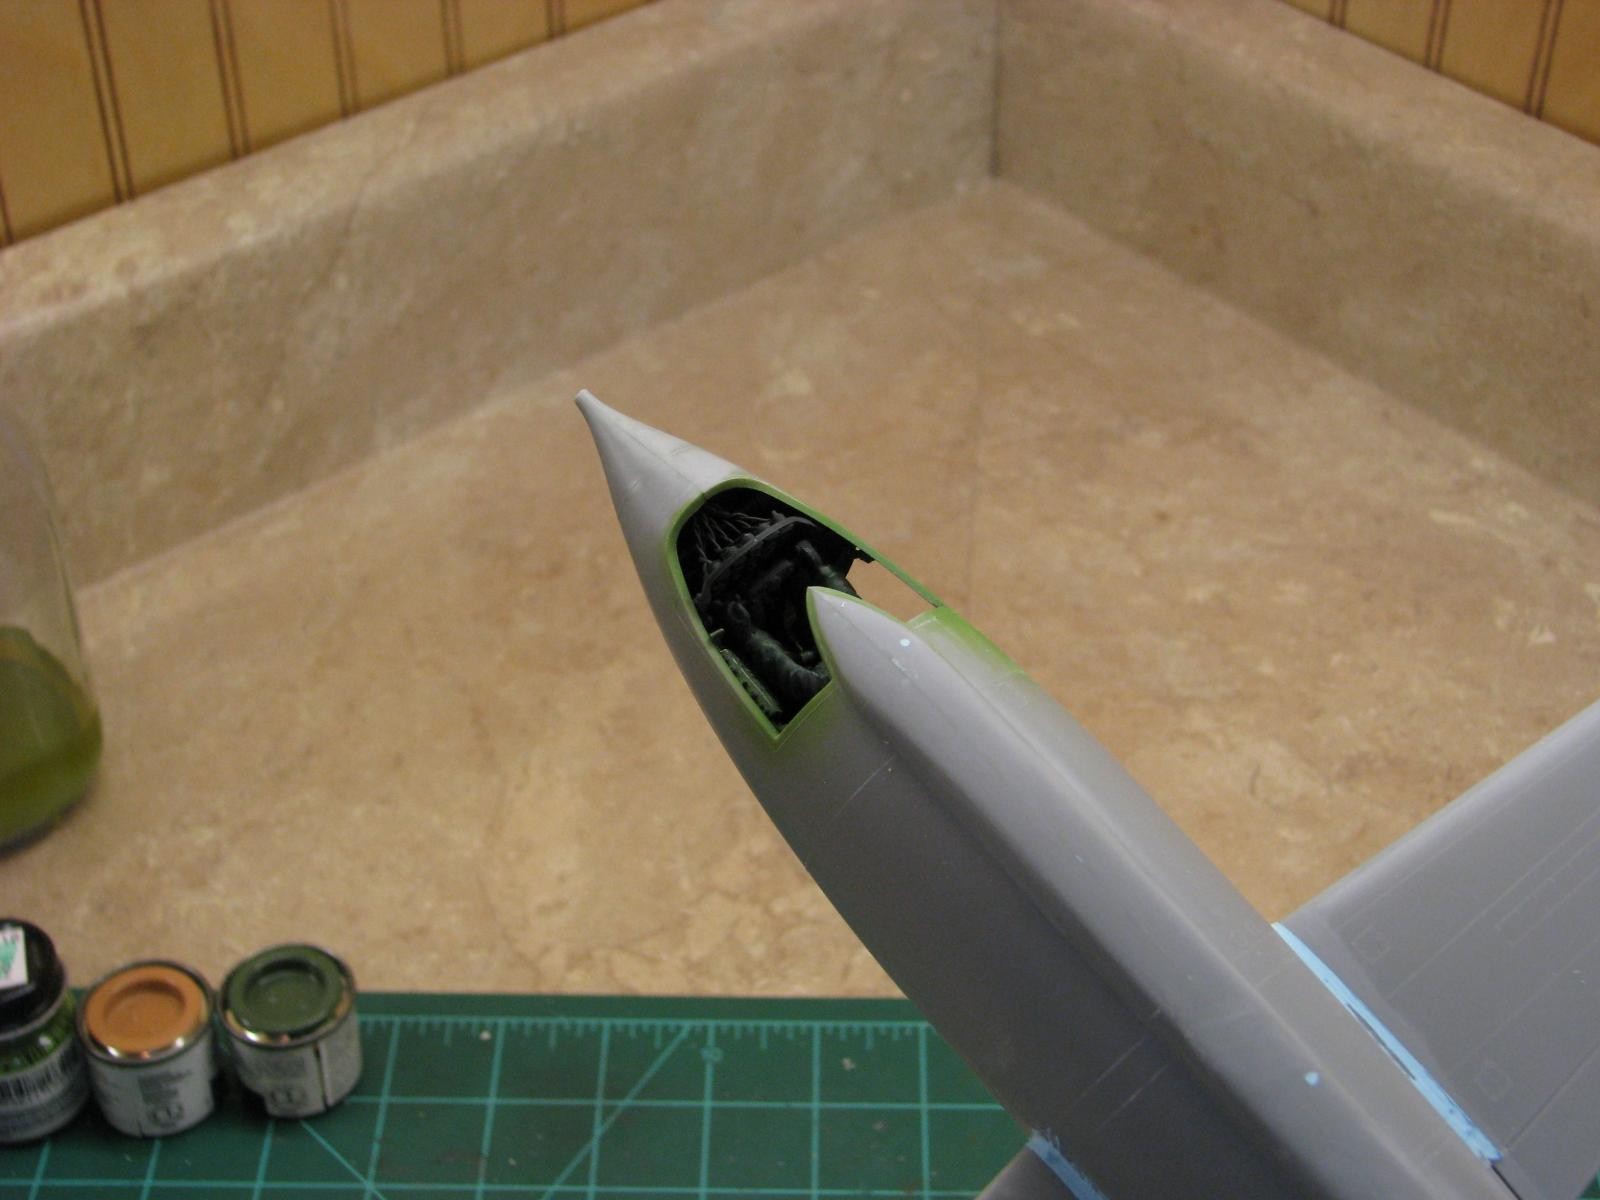
This build, like most aircraft builds, start out with assembling the cockpit. Assembly is straight forward to no major issues were encounter. I painted the cockpit parts, sidewalls and the rocket motor area Model Master Green Zinc Chromate prior to assembly. The back of the instruments were drilled out and wire super glued into each instrument. The instrument panel was painted Model Master Interior Black. The details on the instruments were picked out using a silver PrismaColor pencil. The instruments were then sealed with a drop of Future on each instrument face. The control yoke was also painted Interior Black.
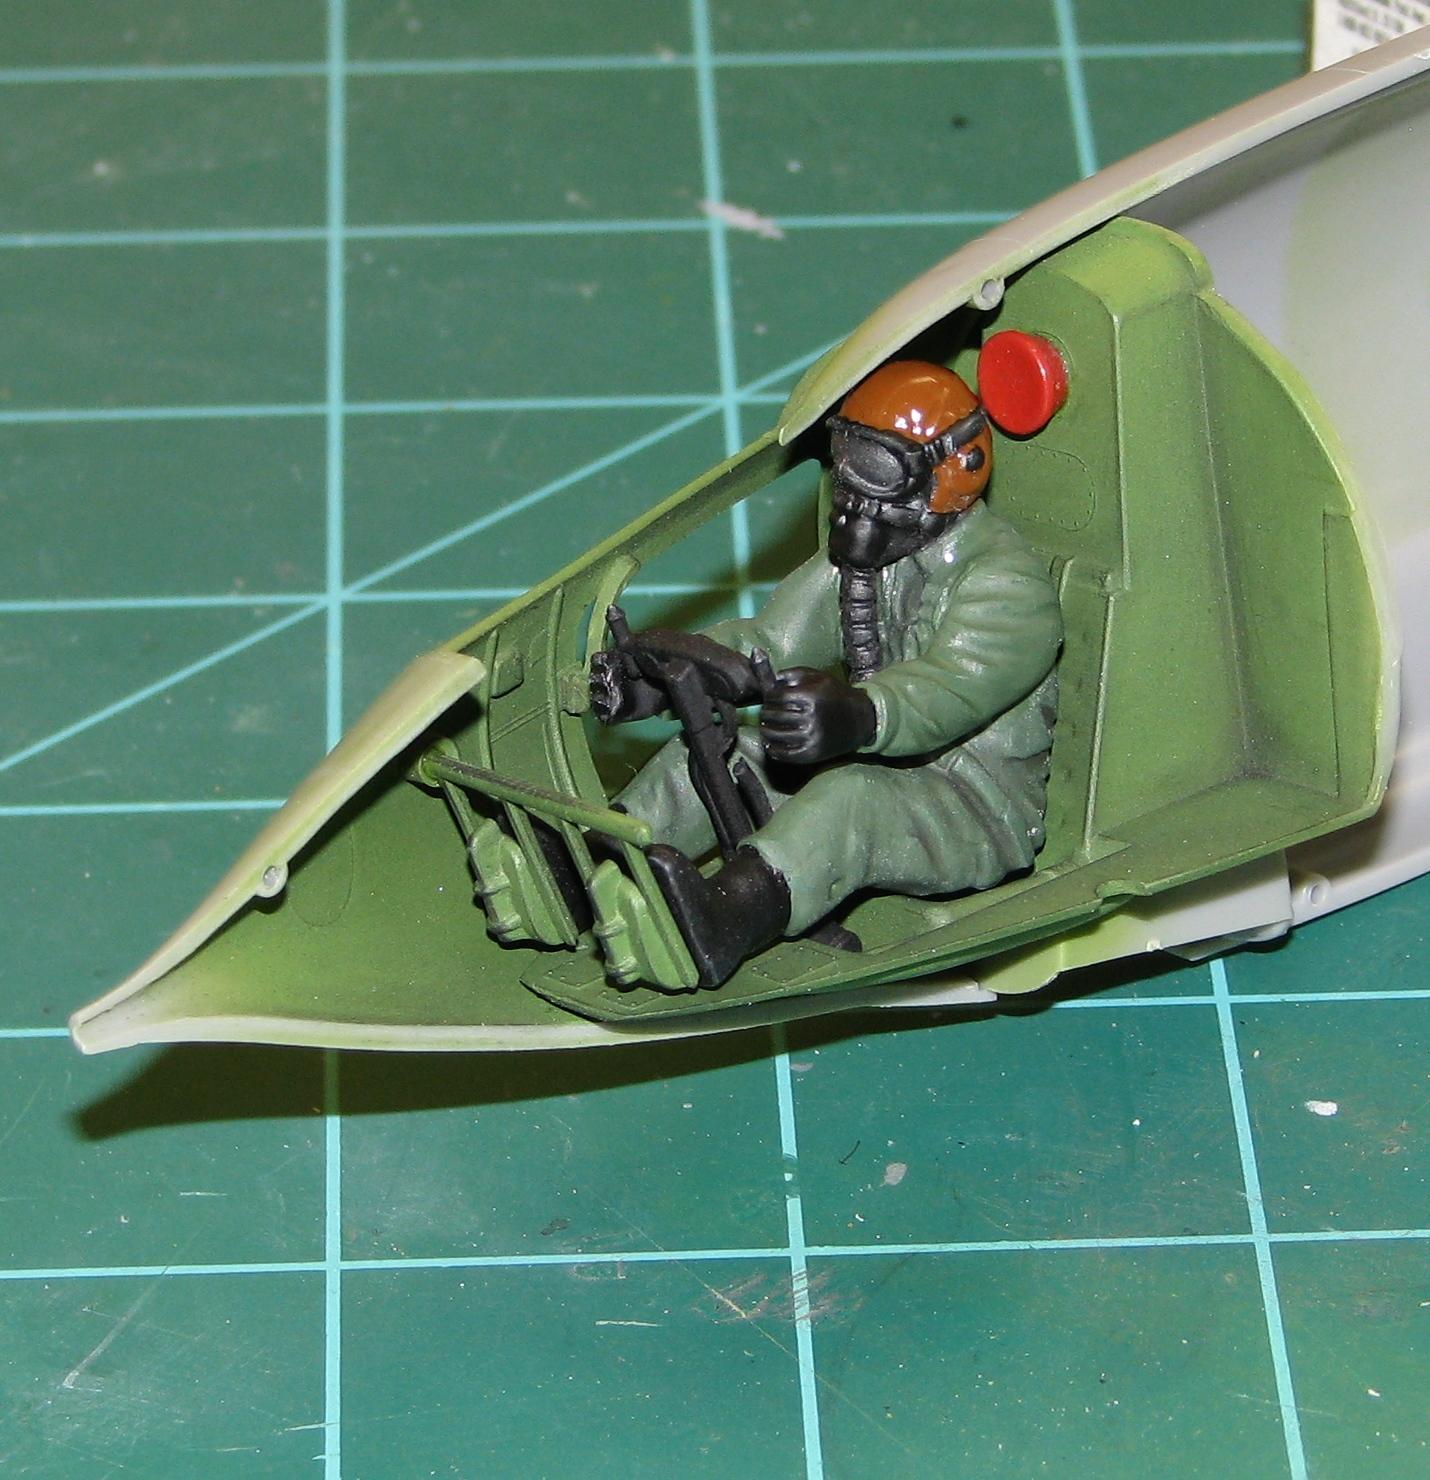
Since this is an in-flight display, the next step was the pilot figure. The pilot is broken down into an unusual left and right head half, front and back torso and legs and left and right arm. I assembled the head and the body. I placed the arms into the position and noticed immediately that the opening between the left and right arms was too narrow for the control yoke. I super glued the back side of the shoulders in place on each arm, using the yoke as a guide for the correct distance. I filled the front shoulder gap using 3M Blue Acryl putty.
The kit instructions show the pilot in a khaki color flight suit. I opted to paint the pilot in the standard sage color flight suit. The helmet was painted Model Master Leather and the goggles where painted flat black with gunmetal lenses. I also decided on flat black flight gloves and flat black flight boots. I painted the oxygen mask Interior Black with gray pastel post shading to lighted it up a bit. I post shaded the pilot using an array of pastels and then sprayed with Testors Dullcoat to seal everything. After drying, I coated the goggle lenses with Future.
I now needed to decide where I was going to place my square Evergreen tubing. I wanted the aircraft in a climbing, banking pose. I cut a square in the center of the bottom spine (for the lack of a better term) and positioned it accordingly. I reinforced the upper part of the tube by gluing pieces of styrene, boxing it in, to give it added support and prevent the tube from coming loose.
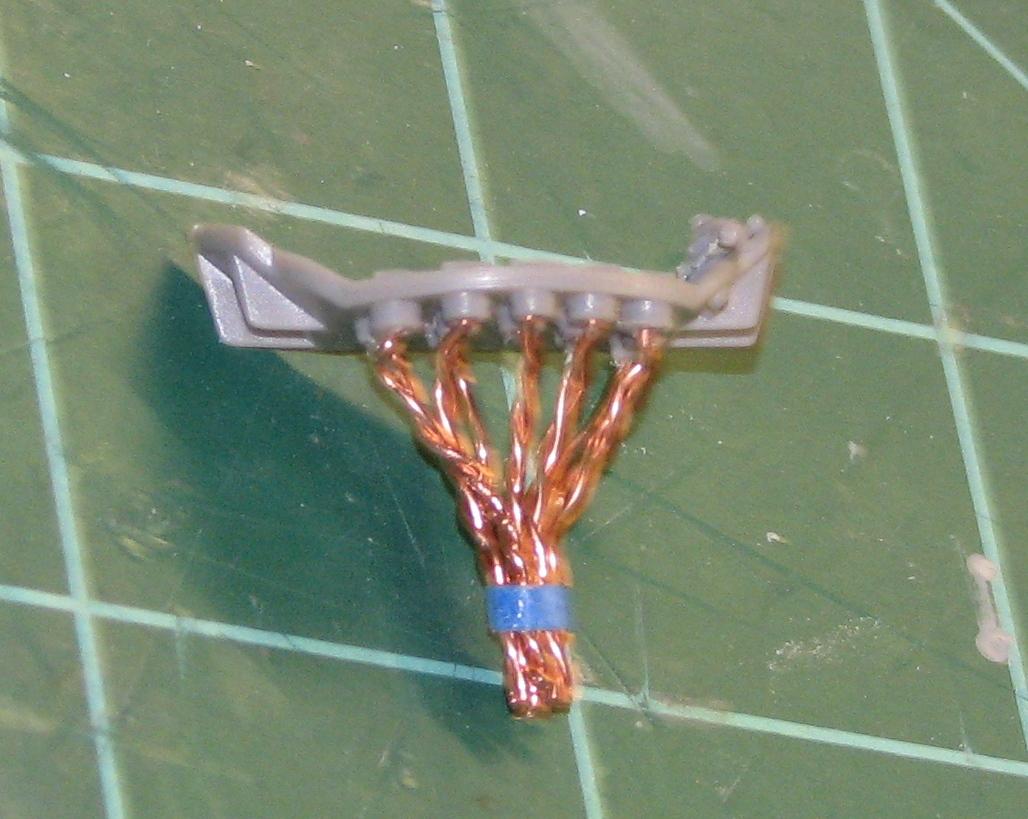
Rocket Motor
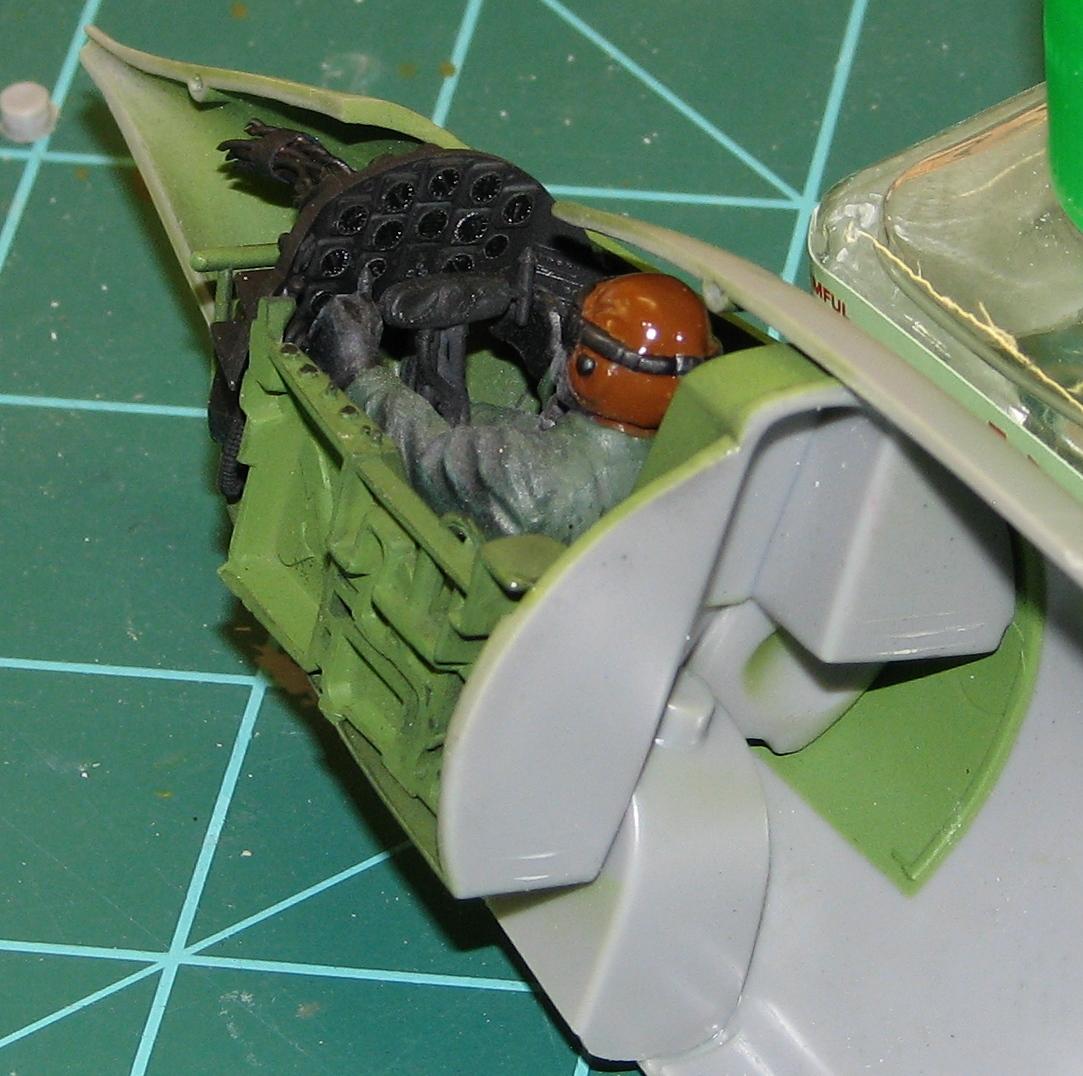
The rocket motor is made up of three parts left and right half and the exhaust section. Assembly of this was very easy, but I wanted something a little more. I decided to add four pieces of aluminum tubing to the exhaust section. After drying, I sprayed the entire motor gunmetal. I wasn't too worried about the overall results since it wasn't going to be seen anyway. I was only concerned about the nozzle section. There are two alignment pins on the motor that attach to the left side of the fuselage. One of the pins was way too long. This was one of those easy trim to fit situations. There is a sizable gap between the fuselage halves and the exhaust section. I guess I could have used styrene and gone along the outside of the nozzle piece, but I decided not to bother with it.
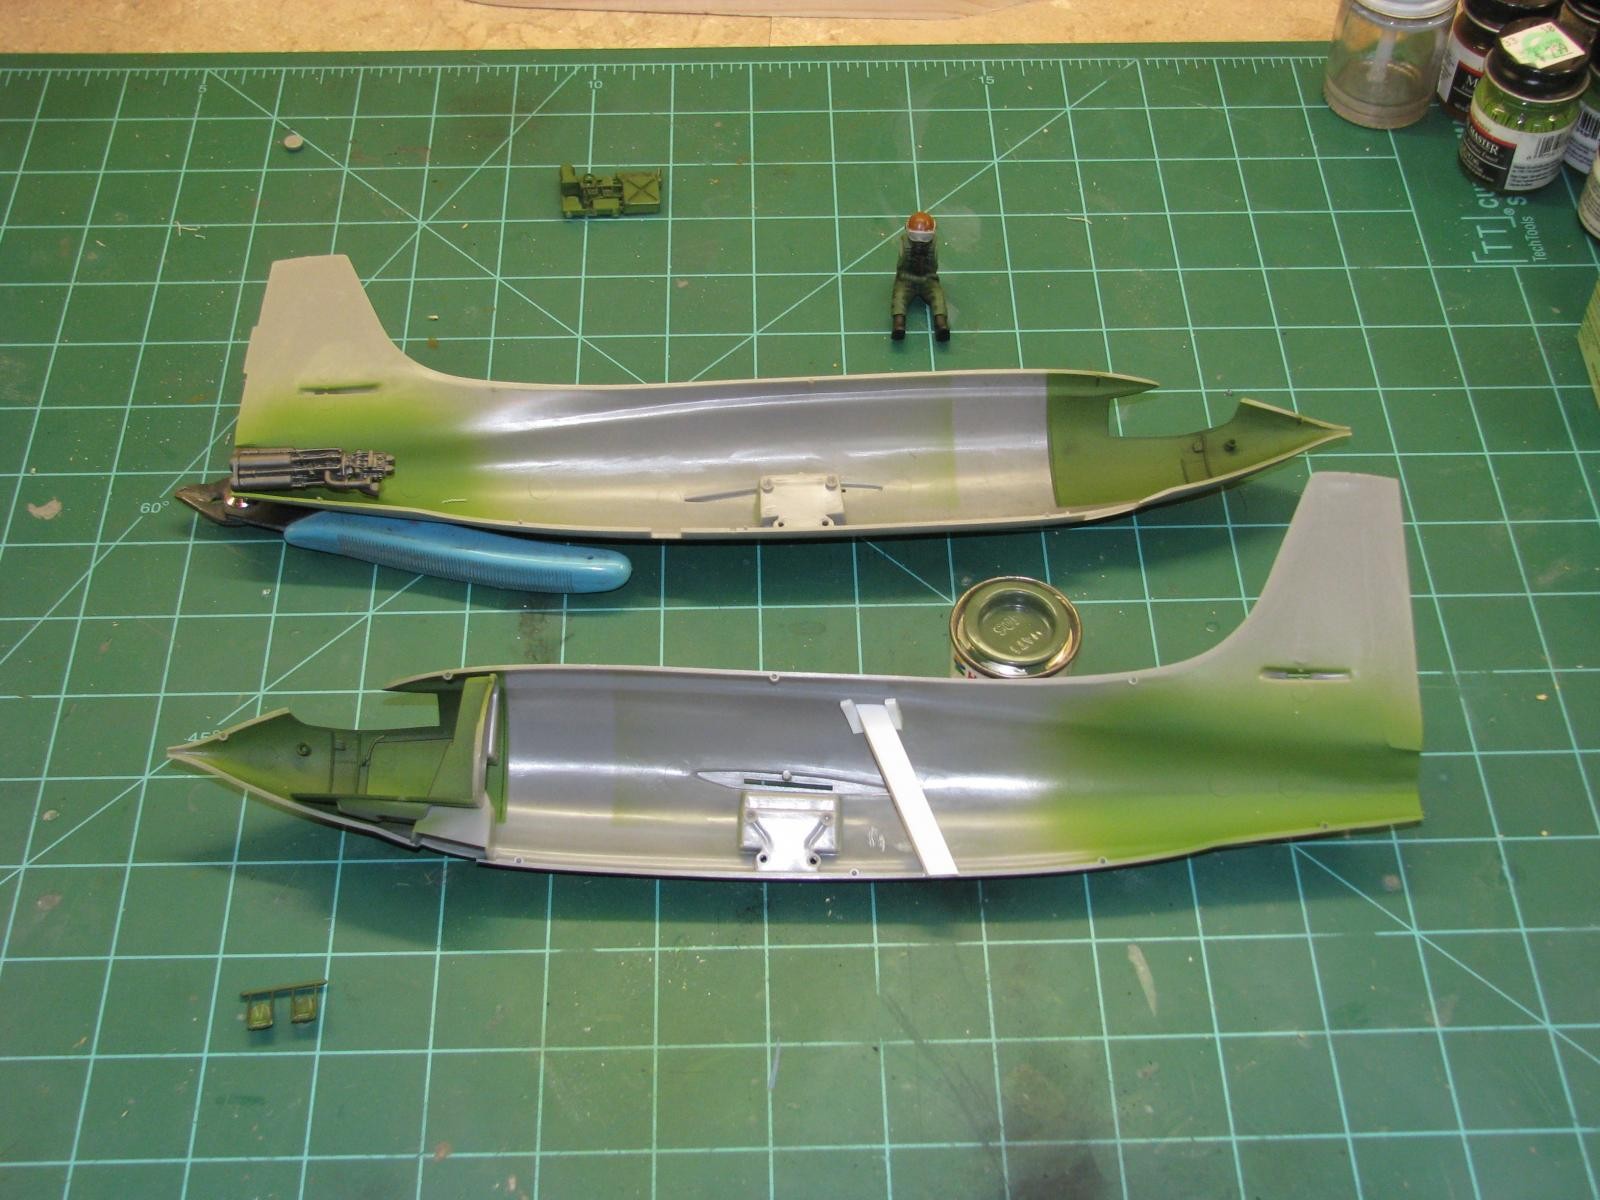
Closing up the Fuselage
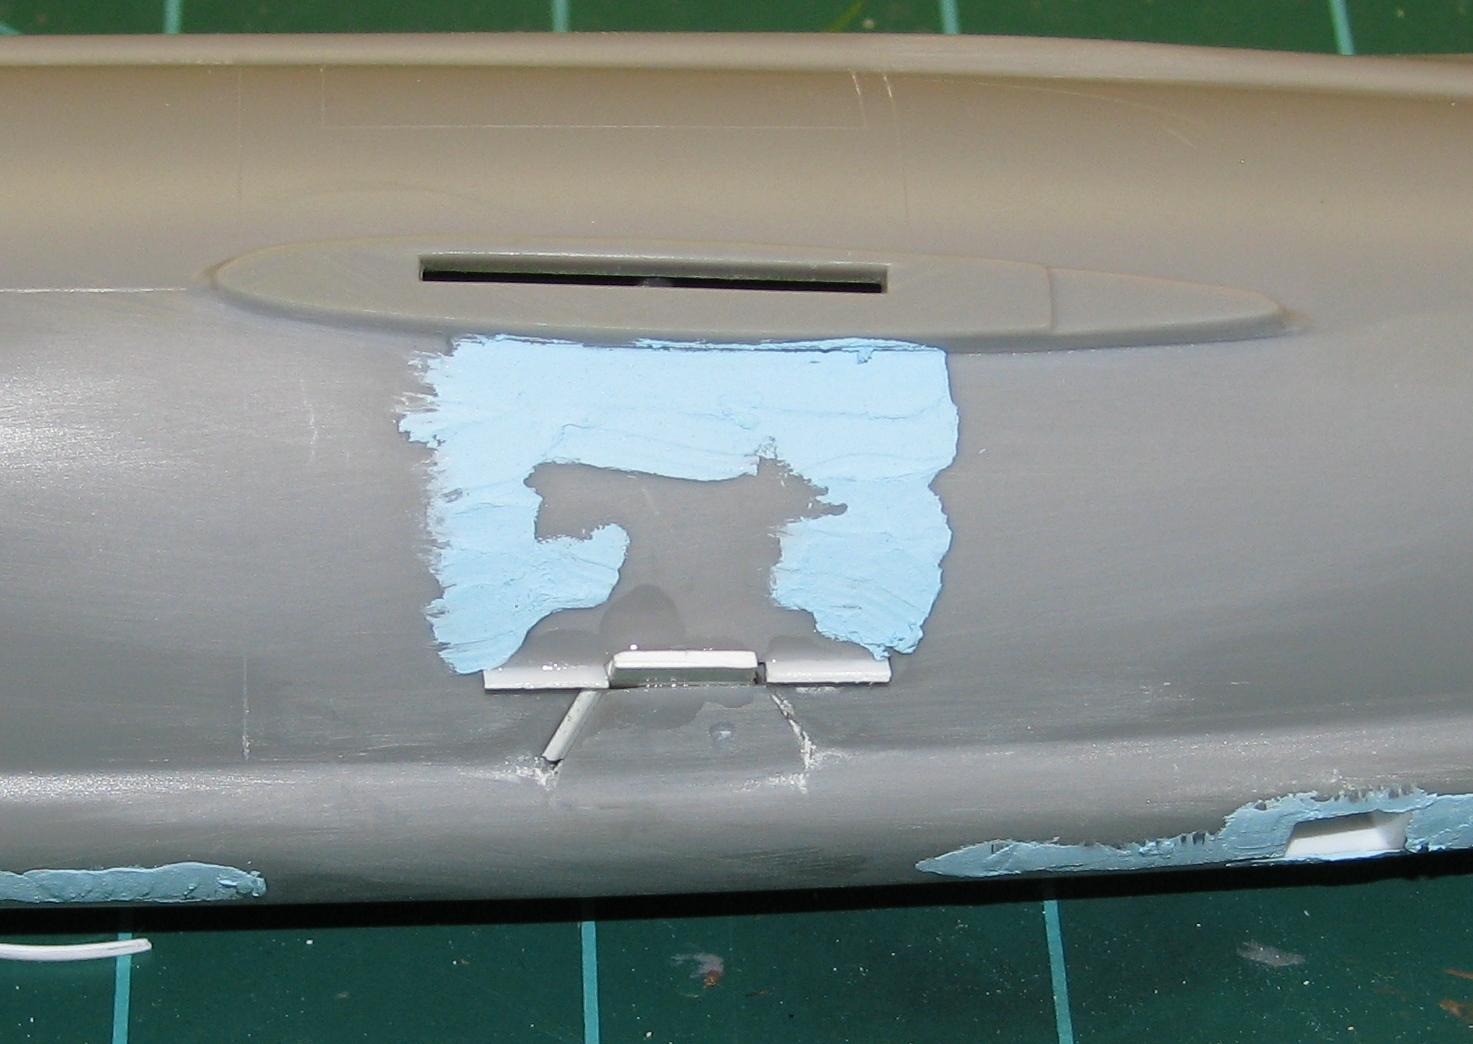
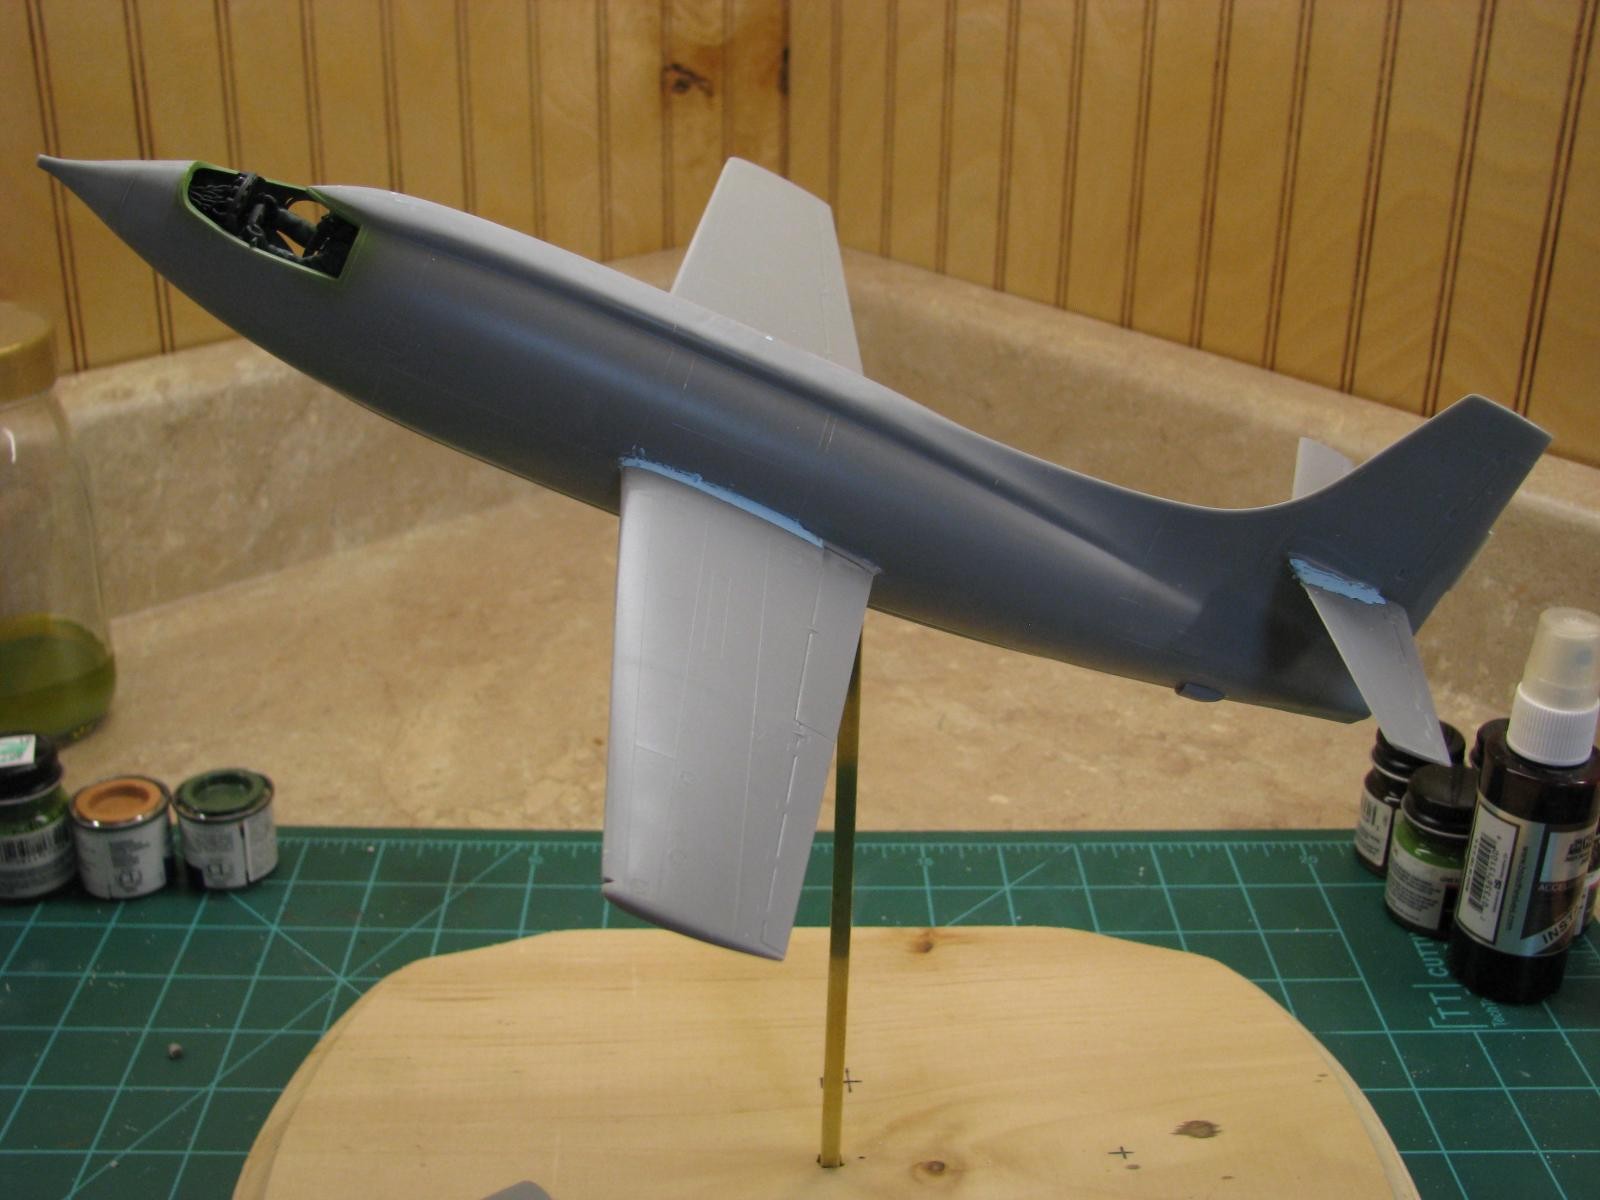
I didn't have any difficulty closing up the fuselage. Although one side of the vertical tail was warped. (This would come back to haunt me later.) I sanded the seams and filled any gaps with 3M Blue Acryl spot glazing putty dried overnight. I have discovered with Blue Acryl, it is a minimum of three filling jobs to get the gap adequately filled. I like using this because it doesn't shrink too much and it can be scribed. There were a few sink marks on the fuselage these were filled at this time as well.
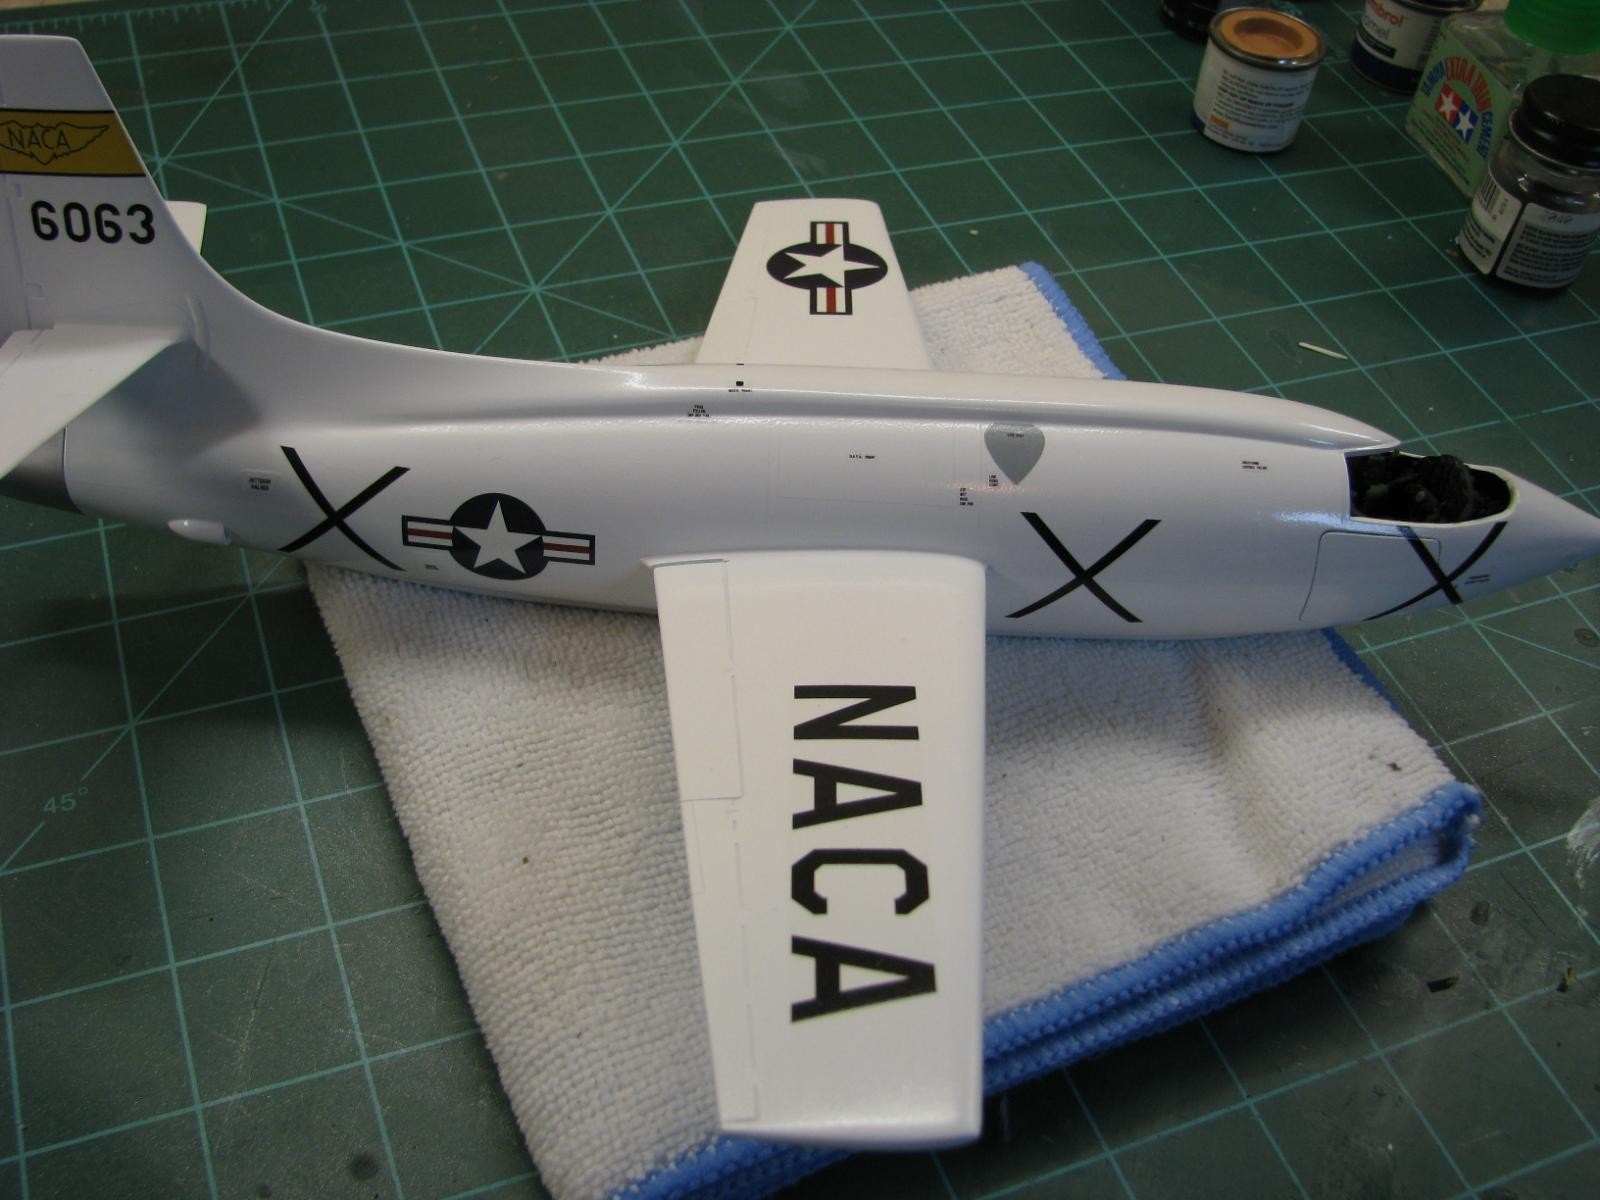
On the aft fuselage, X-1-2 had two inlet scoops not found on X-1-1. Revell didn't do their research when they decided to include 46-063 markings on the decal sheet. These were easily robbed from a Panda 1/35 UH-1N kit. The UH-1N doesn't use these scoops on the roof. So, it worked out quite well for the X-1 kit.
Landing Gear Doors
I figured out real quick that Revell never intended for the landing gear doors to be in the closed positions. The doors are undersized and require shims to be put in so they could be closed. The shims were put in raised and sanded flush. Most of the filling and sanding was done on the gear doors.
Winging It
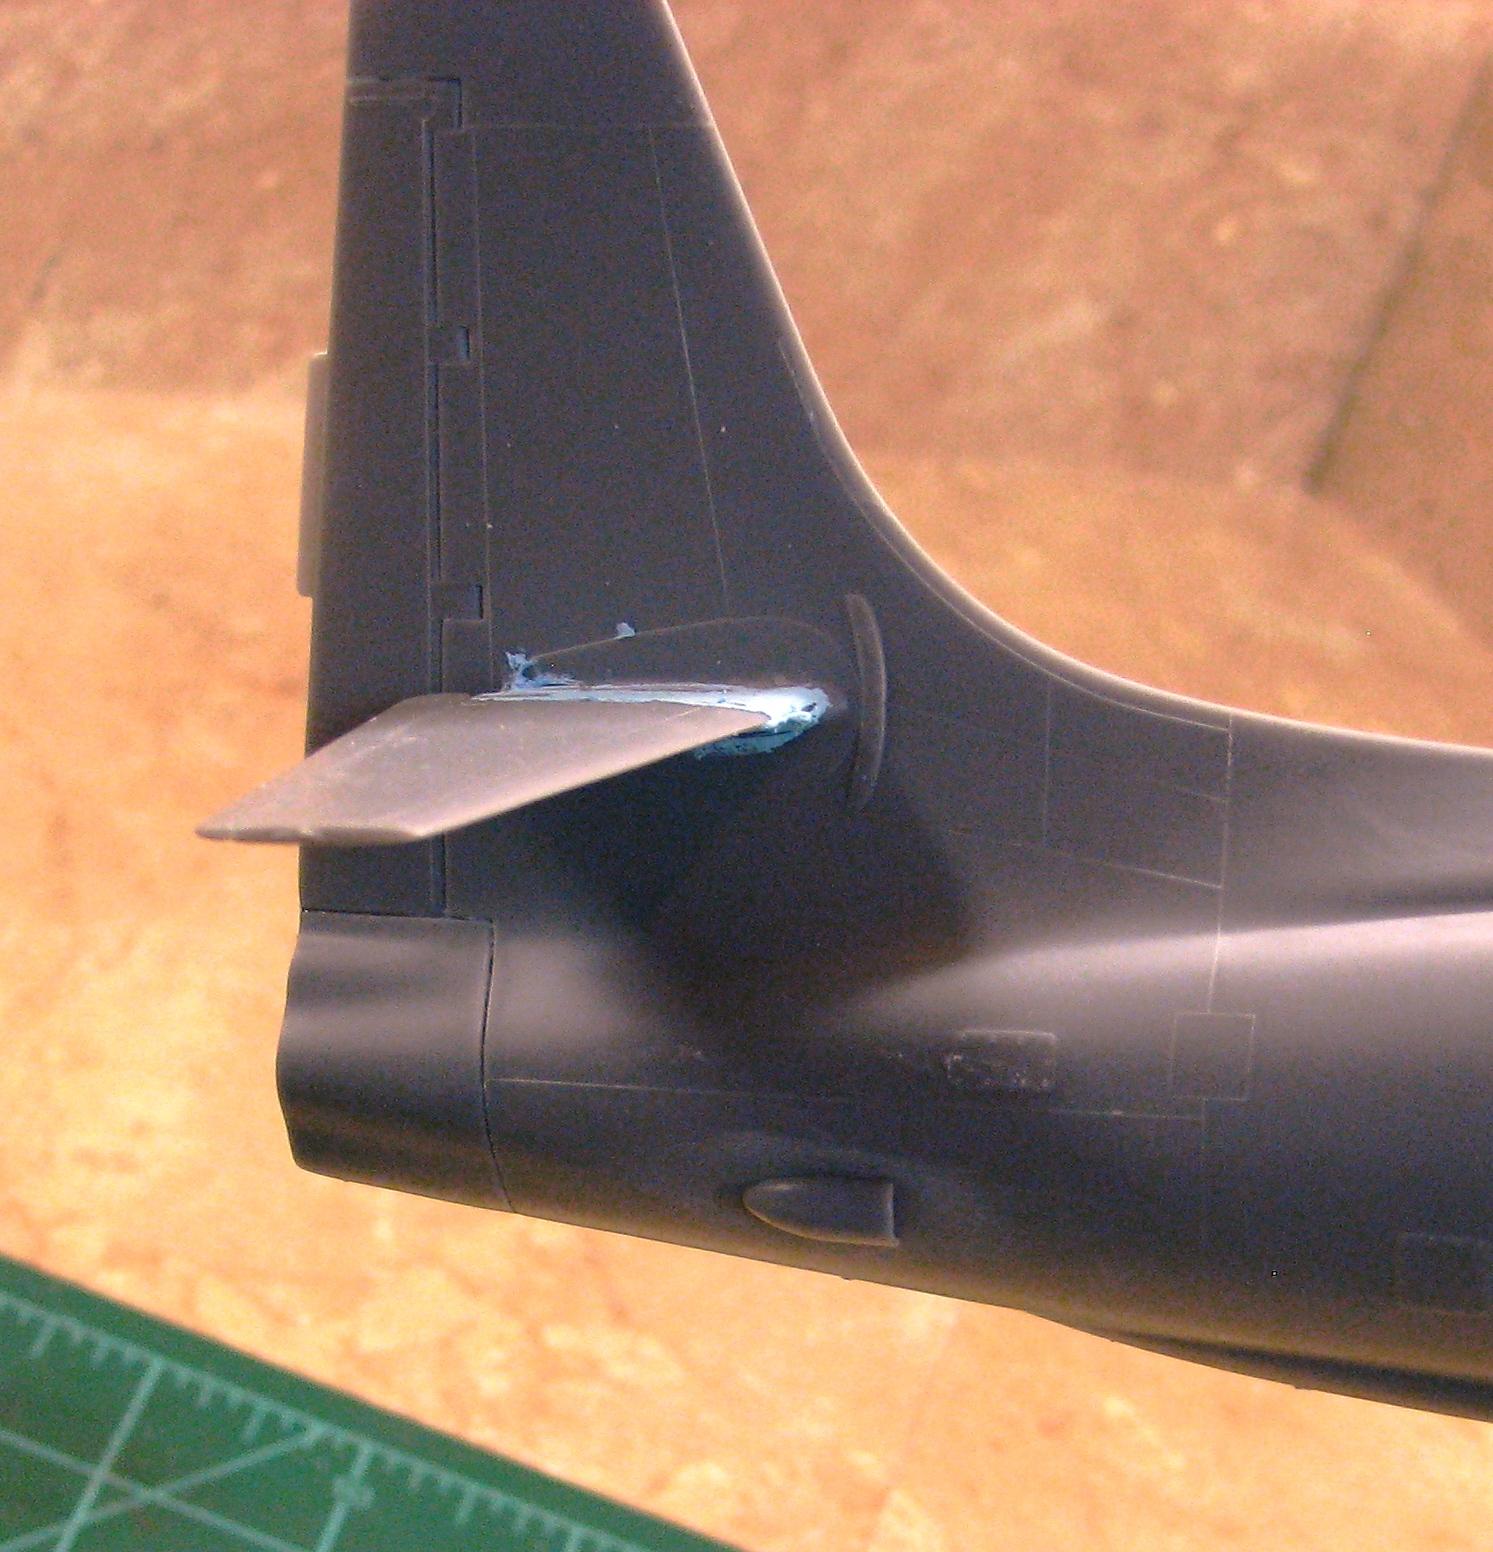
The wings of the X-1 are completely straight and parallel with ground with no droop. Care needs to be taken when attaching the wings to the fuselage. The locator tabs on the wings are an upper and lower tab. The tabs need to be in the proper place to ensure the wings are straight and level.
Final Assembly
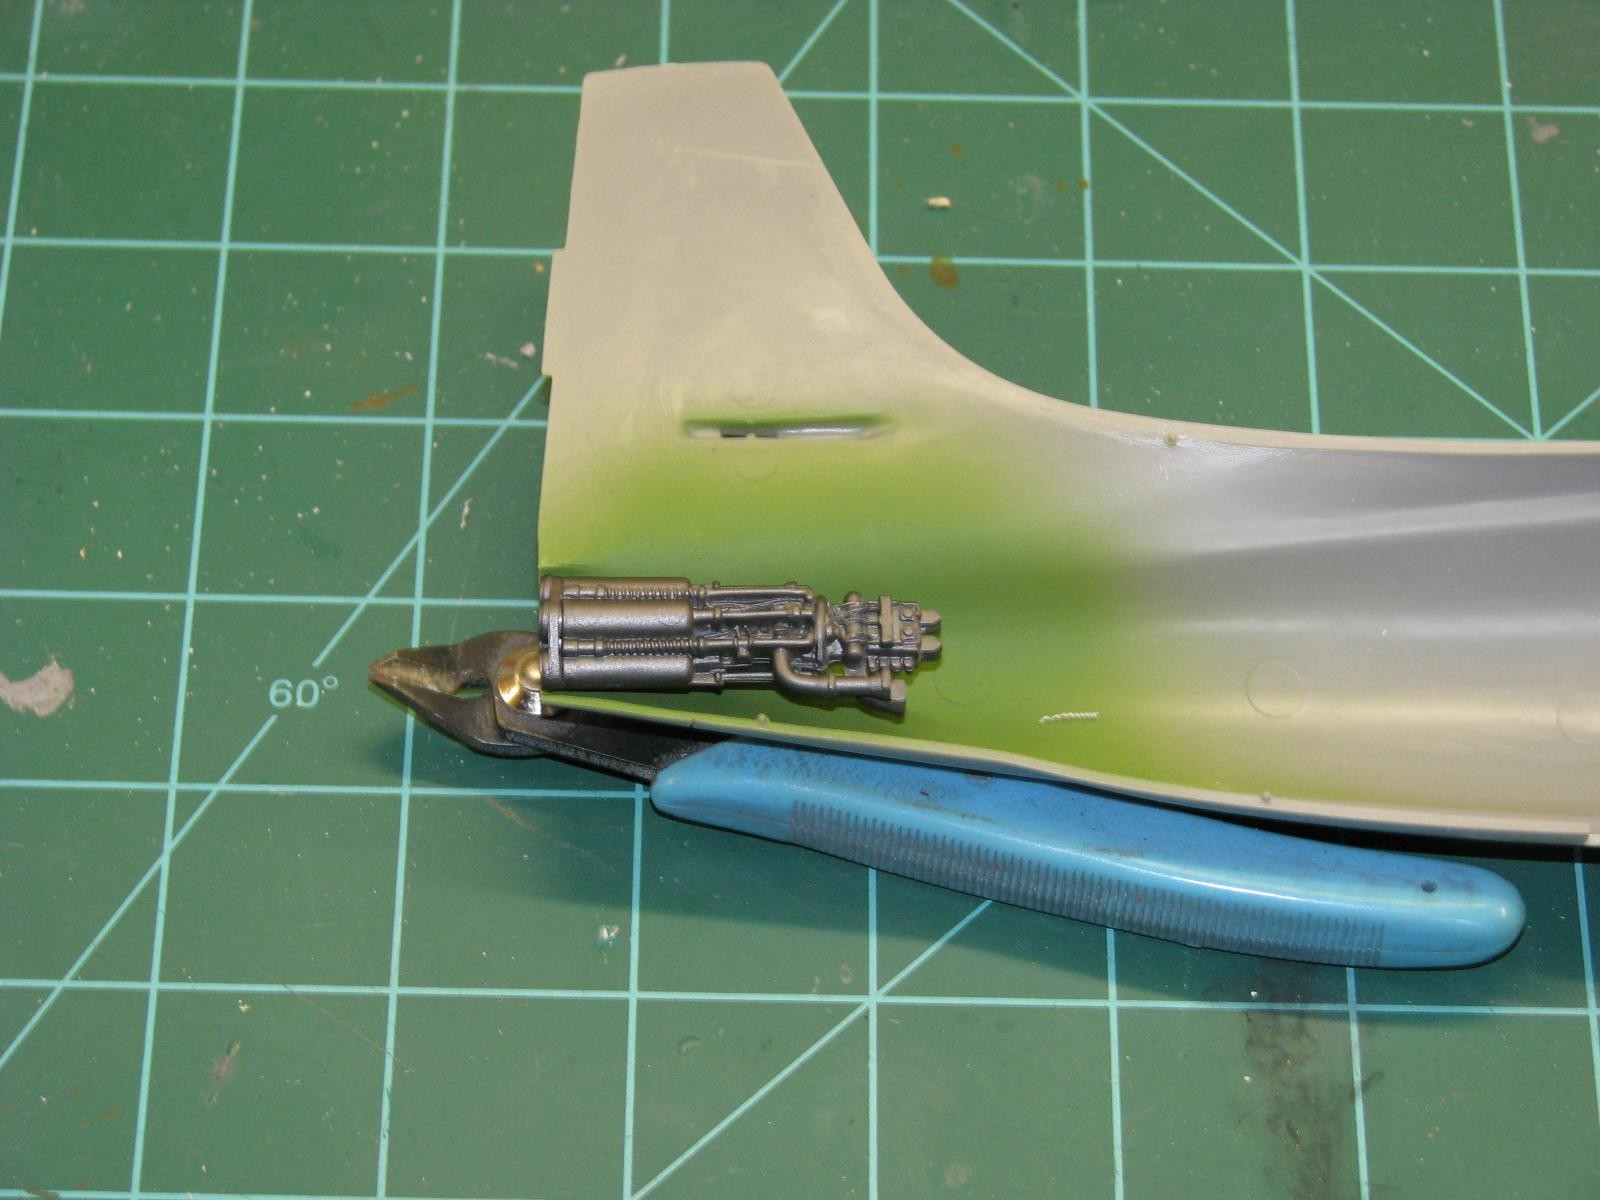
After everything was closed up and put together, I attached the horizontals to the tail and it was very crooked! So, I popped the seam and twisted the fuselage to correct the warp. I guess they pulled the parts out of the molds a little too early on this run of the kit. With that fixed, it was time start filling and sanding and get prepped for paint.
Painting and Markings
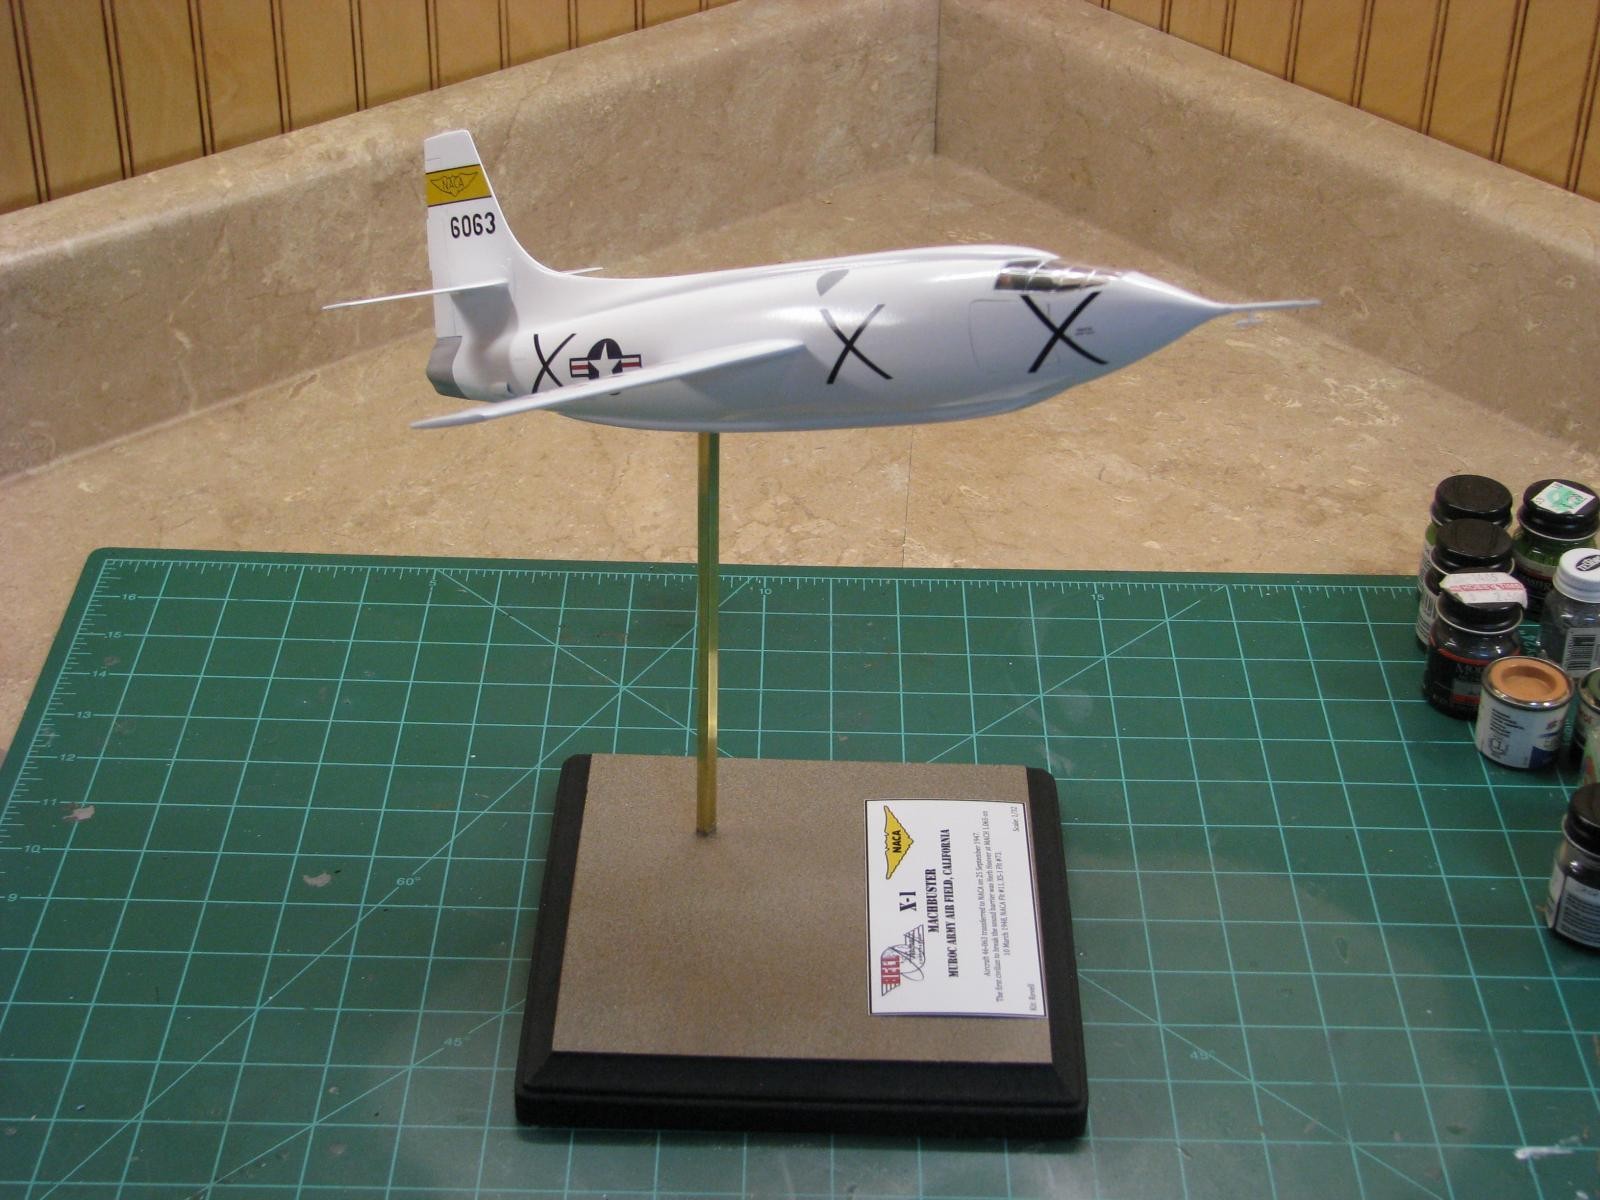
NACA operated X-1s were painted over all Gloss White. The NACA discovered that the aircraft were easier to track when painted white, instead of the overall Reefer Orange or natural metal when operated by the USAF Flight Test Division.
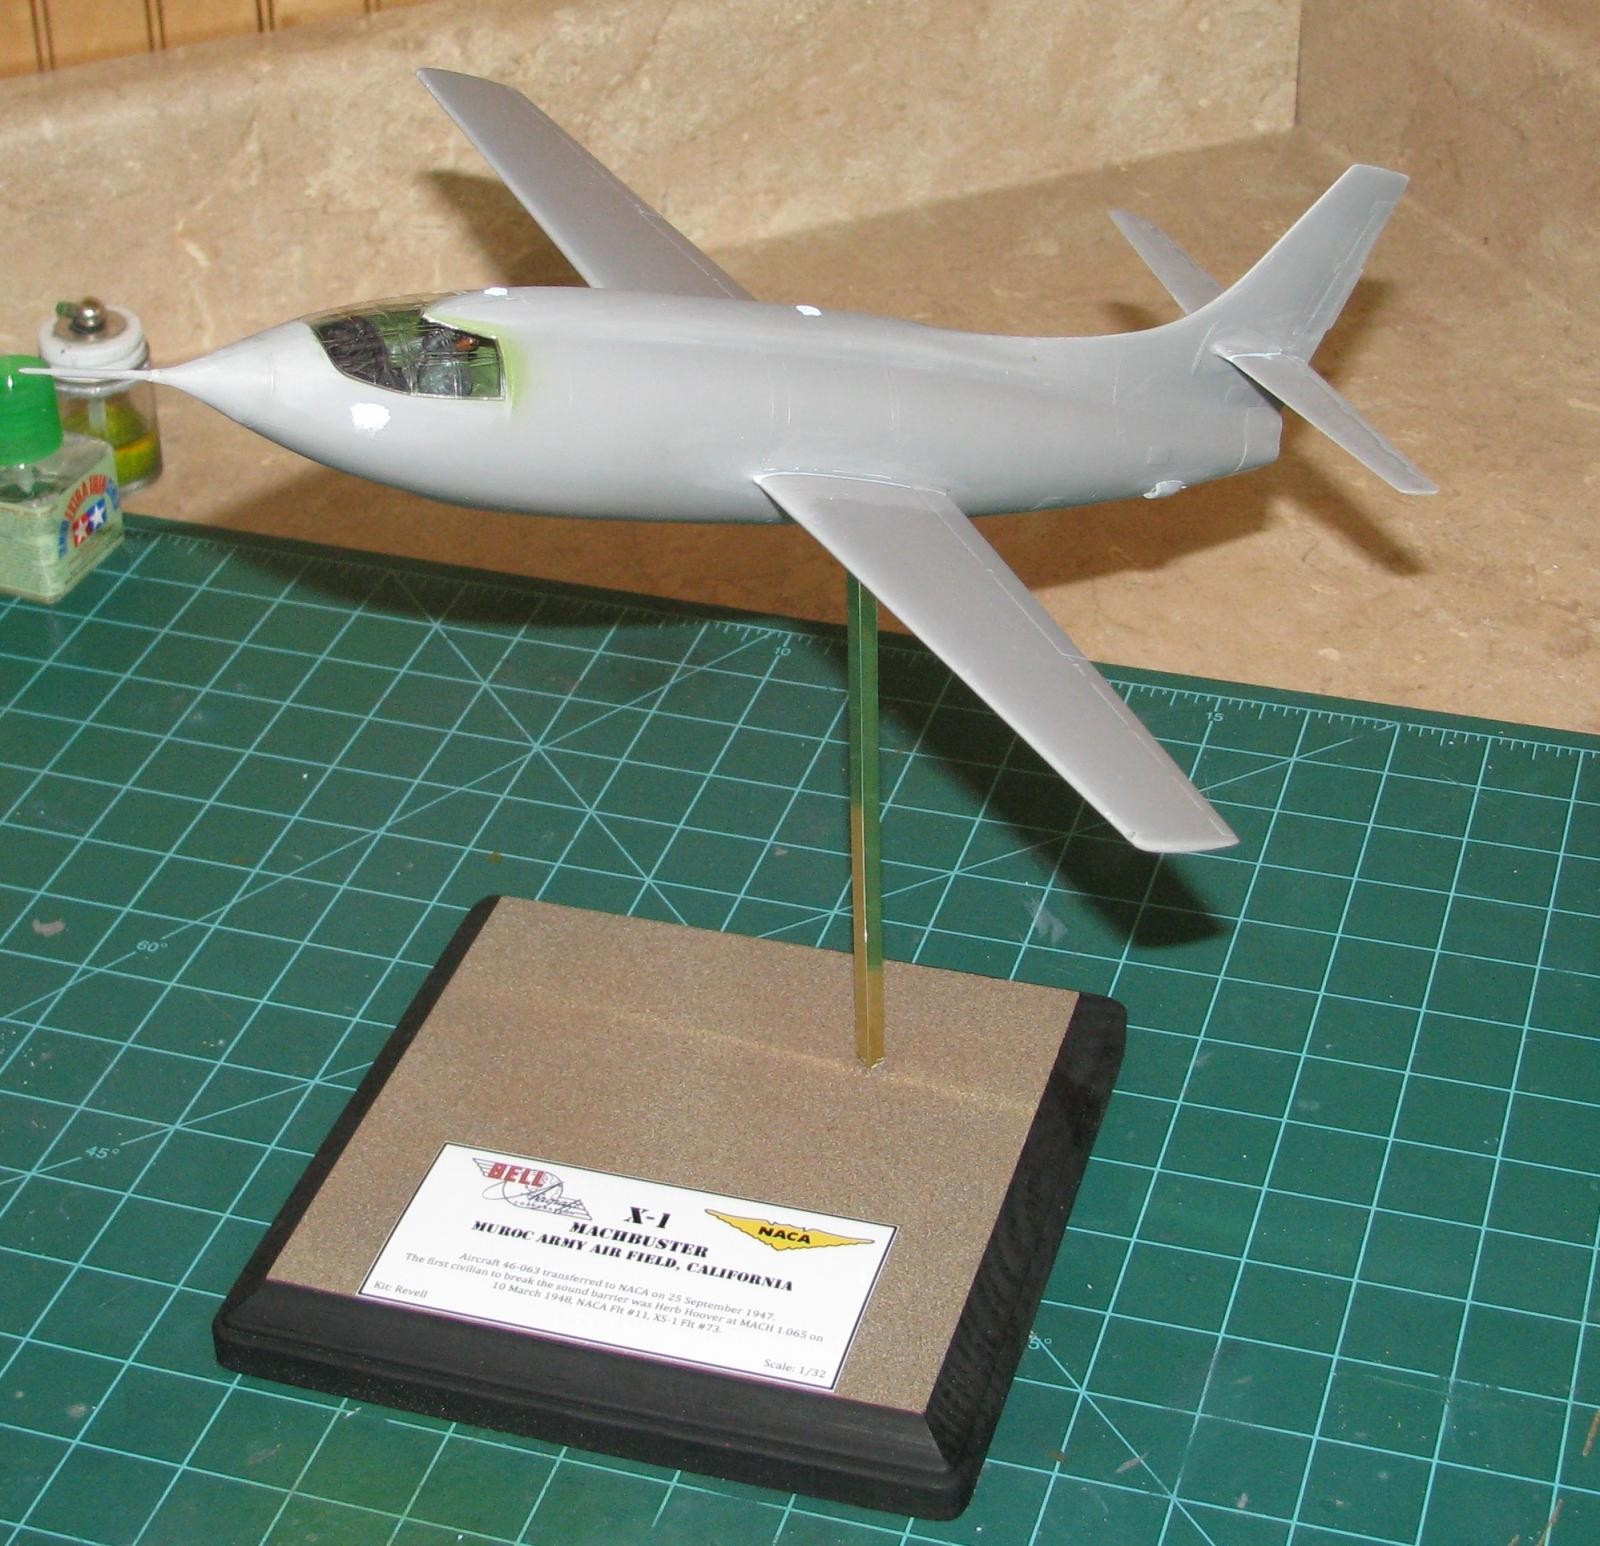
I painted my X-1 using the Model Master Two Part Lacquer System out of the spray can. What I like about this paint is that it dries FAST! I found the best way to spray ANY paint out of the can is to heat it up. To do so, here is what I do, fill up the kitchen/bathroom sink with very hot water. (DON'T STICK THE PAINT CAN IN THE MICROWAVE TO HEAT IT UP!) I sprayed the first coat and let it cure overnight. The next day I wet sanded the entire model with 2000 grit sand paper. I heated up the can of paint in hot water and applied a second coat of the gloss white lacquer. I let the second coat cure for about six hours.
I then used Turtle Wax Polishing Compound to buff the paint to a high shine! I did this off and on over the course of a day. When I was finished polishing the model, I washed the model to remove any residual compound.
I painted the area around the rocket motor at the aft fuselage Floquil Old Silver. I like using Old Silver because it dries hard and can be masked. It's not shiny silver, but nice dull silver. The instrumentation boom was painted Old Silver as well.
The canopy was painstakingly masked and painted Model Master Flat black.
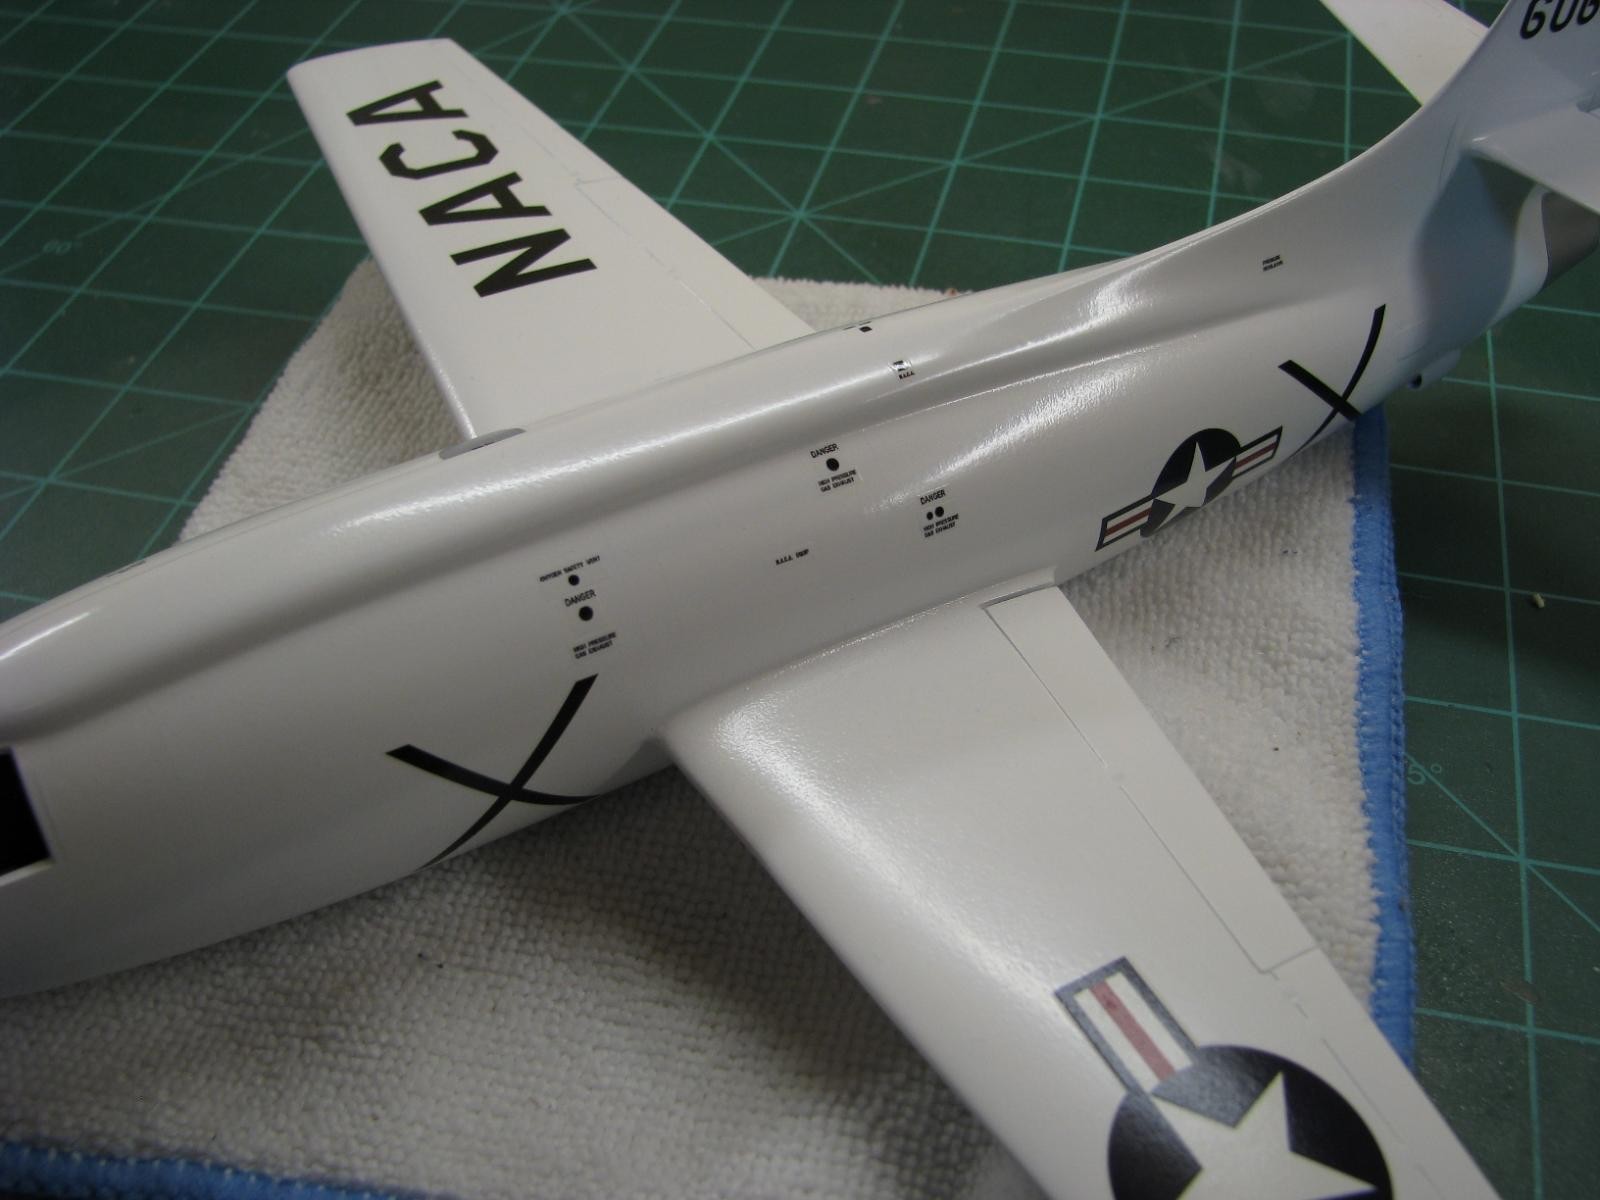
Since I had decided to do my X-1 in a NACA scheme, I had four different markings to choose from. Three out of the four of these can be done with the kit decal sheet. When X-1-2 was turned over to NACA, it carried the NACA shield on the tail instead of the familiar black and yellow tail band. I wanted mine to have as many markings as possible. I went with the Stars and Bars on the wings and fuselage, NACA text on the wings, the photo identification “Xs” on the side of the fuselage and the NACA tail band.
Stencil Data
After the model was complete, the kit didn't looked finished to me. I checked my references and noticed that the X-1 had data stencil located all over the fuselage for access and servicing. I found a great 1/32 X-1 data sheet offered by Ed Bisconti. This decal sheet is printed on clear decal film and the text is well printed and is readable! I contacted Ed and requested his decal sheet. Ed was very generous and sent me a review sample at no cost in exchange for advertising and the use my model to promote his work! This gave the model a truly finished off look! To me, it now looked like an airplane and not a toy of an X-1.
I wanted to do a project like this for some time. I finished it off in the look I was going for, which is a nice clean desk model of an NACA flown Bell X-1. Construction of this kit isn't hard. It does have its little quirks, but what model kit doesn't. I would recommend this kit to anyone interested in building the X-1. It is a good size, construction is very straight forward and there are no surprises. The only con to this kit, is that it was pulled from the mold a little too soon and the vertical was a little warped, other than that, a great kit overall.


Very nice! Now you tell me about not heating spray cans in the microwave.
Now that right there is a really nice lookin' build... (and I really like that pilot figure that came with those kits). Good work..!
Beautifully done, Steve!
Where are the guns?
Oh - never mind. (With honor to the late, great Gilda Radner and her wonderful character, Miss Emily Litella!)
Seriously, you've done a great job and I really enjoyed reading your narrative.
Bravo!
Nice work here.
Interestingly enough, this is the iteration of the X-1 that fully developed the "all-flying tail," the secret that allowed the F-86 and other American fighters to "break the sound barrier" in controlled flight. The exact same screw-jack can be found on all Russian supersonic airplanes, after they got hold of Bud Mahurin's F-86E after he was shot down in 1952.
beautiful in white...gorgeous model
Nicely finished and presented, with a great article to match! I’ve got a 1/72 Tamiya version in the cupboard!
Knew as soon as I saw the pic it was one of yours! Very nice!