XF-88 Voodoo – 1/48 Lindberg

History
The XF-88 was designed to fill a USAF requirement for a "Penetration Fighter", a new class of aircraft for long-range escort of USAF bombers. Two XF-88s were ordered (S/N 46-525, 526) in 1946 and the first flight was on 29 October 1948. The XF-88 was underpowered and the second aircraft was modified to the XF-88A by adding afterburning engines which increased its maximum speed to approximately 700 mph. The XF-88A design was used as the basis for the F-101 Voodoo.
The Kit:
Lindberg's offering of the XF-88 depicts a 1/48th scale replica of the first prototype aircraft, 46-525. This kit is old, and follows the traditional 1950's/1960's model type: build it, play with it, destroy it, and go buy a new one. The kit has raised rivet detail, moveable control surfaces, a hinged “engine compartment” on the top of the fuselage, optional wingtip tanks. The kit has no real cockpit and no nose wheel well.
Kit Construction
I decided early on that I was going to update this kit. The first thing I did was to sand all of the rivet detail off the kit. I glued the engine compartment cover in place. I then cut an opening for the nose wheel well.
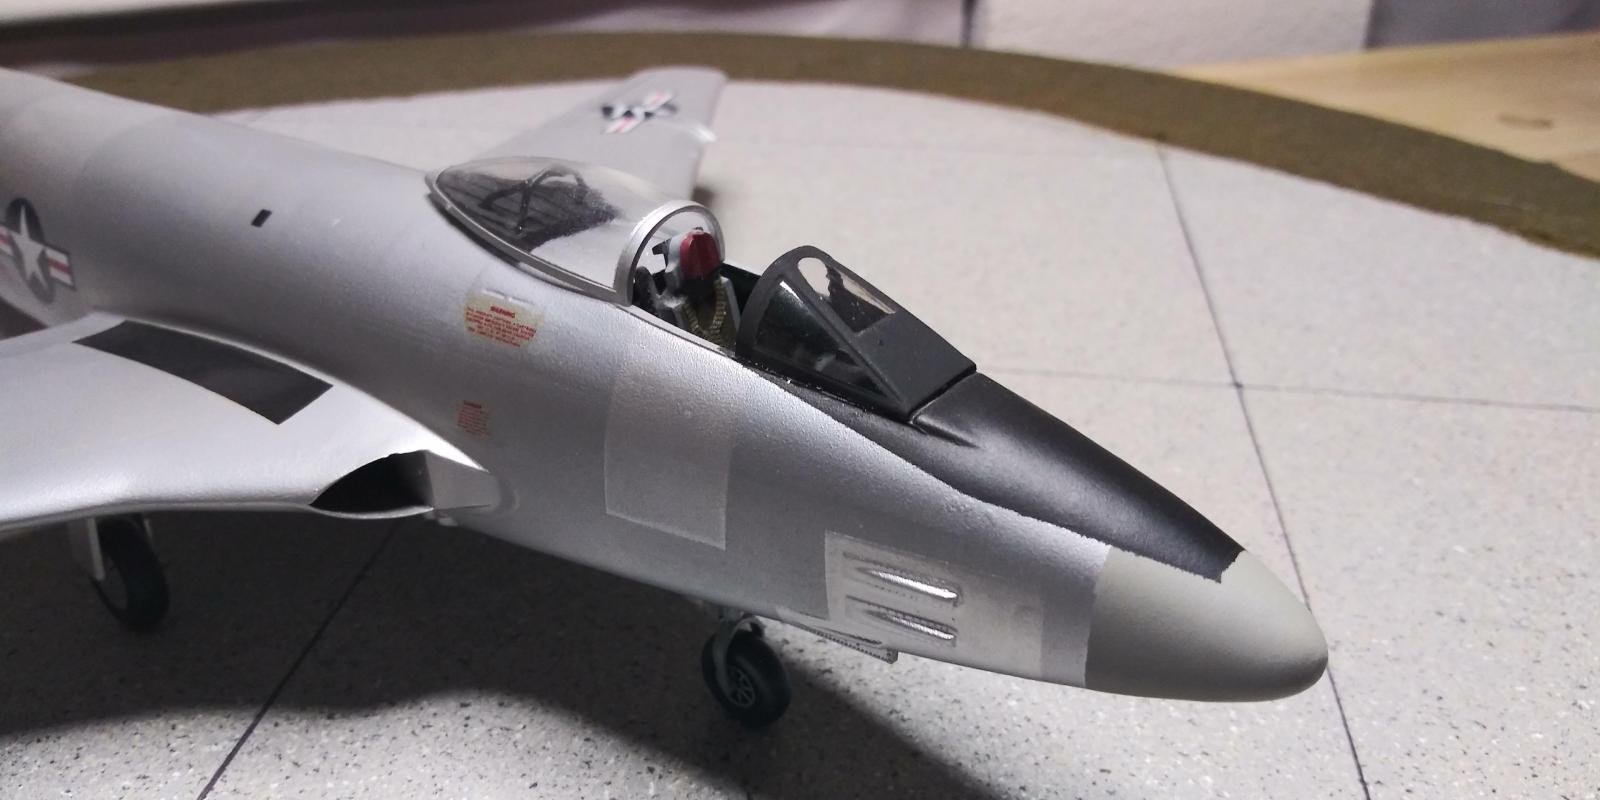
The kit cockpit consisted of a pilot figure and an ejection seat. So, I robbed a 1/48 scale cockpit out of the parts box and proceeded to squeeze it into the XF-88. After some convincing, the cockpit was now a perfect fit inside the fuselage. I used an F-100 seat on this one as it looked to the closest to what the actual seat looked like. I placed styrene strips inside the cockpit to represent structure.
The kit comes with an engine to place inside the fuselage. It is very inaccurate, as a matter of fact, it is the same one that is in their 1/48 X-3 kit. The engine acts as the exhaust nozzles. Instead, I used 3/8” brass tube to make the exhaust nozzles
Using sheet styrene I constructed the sides of the wheel well and placed smaller strips to represent structure inside the well.
Once everything was built and fit tightly together, I added nose weight and glued the fuselage together. Assembly of the wings was pretty straight forward, as well as, the other major components. Nothing was really exciting or problematic with the fit of the parts. This kit does have moving ailerons and rudder, which I just glued into place. I didn't fill them in, they looked just fine to me the way they were.
The overall fit of the kit was actually pretty good. I have no idea as to the exact original release date of this kit, but it's really not that bad. After some filling and sanding, I decided to try my hand at re-scribing. I res-cribed the wings and some of the fuselage. I think it turned out pretty good for a first time, but after I painted the kit, you can hardly see them.
The nose landing gear required an extension, since there was a new wheel well to occupy the gear, it wasn't long enough. This was easily fixed with some round styrene rod. I then cut a square flat piece the same width as the well and drilled a hole the same diameter as my landing gear strut and glued it flat to the top of the gear. This gave the gear a little more surface area to be glued into the well.
On the glare shield, I added some various rectangular bumps, as it had no detail whatsoever.
The clear parts were quite good. The only thing missing was the roll cage that was in the sliding canopy. This was made using .010 styrene, .020 styrene for the ribbing and .020 wire for the roll cage.
Paint and Decals :
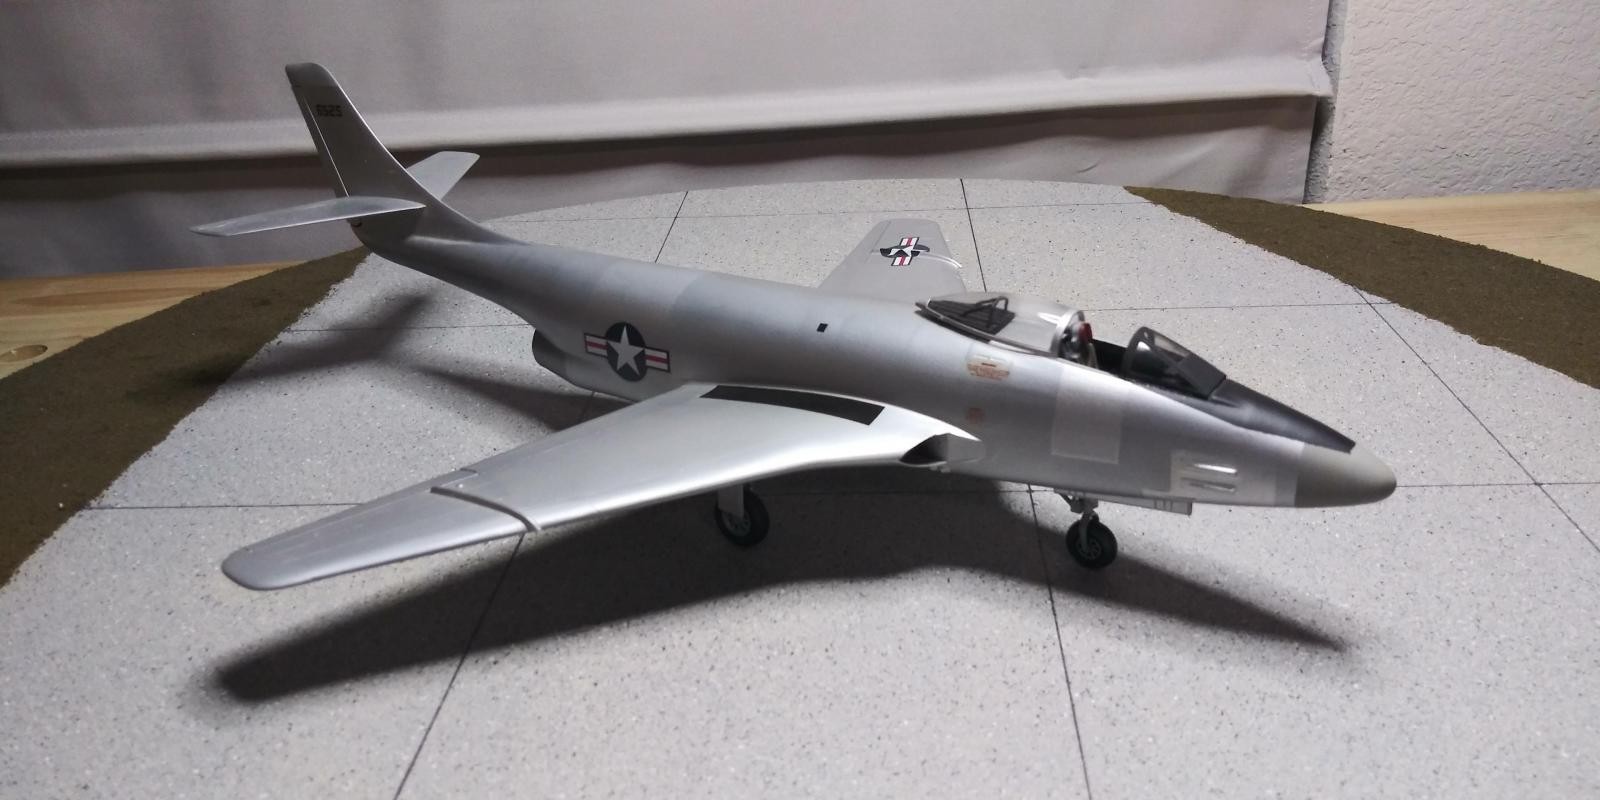
I painted this kit various metalizer colors, aluminum plate and stainless steel and Testors Metallic Silver. I think the end result came out looking like a natural metal aircraft. I am not a real fan of natural metal aircraft. Yes, I like looking at them and I truly admire those people that build scale model aircraft in natural metal, but it's the process of getting it to that point of having the aircraft look like it is real metal. It is very tedious and I have a new respect for those individuals. The nose and the tail band is Light Sea Grey and the anti-glare is Flat Black.
Most of the decals came from spare that I have lying around. The only kit decals I used were the tail number. I wish the decals came with the “McDonnell XF-88” logo that was painted on the side of the aircraft at roll out. Stencil decals were taken off of various decal sheets and placed in there “correct” position.
Final Thoughts:
Overall, I am very happy with the finished product. I really like prototype aircraft. This is the only XF-88 in this scale. I really like taking a kit that is a bad kit and turning it into something presentable.


Outstanding XF-88, Steve E.! I really like what you did. That Lindberg is certainly a "Blast From The Past!"
When you wrote "build it, play with it, destroy it, and go buy a new one" I really got a chuckle. One other thing I like about this is the fact that it's TOTALLY new to me! I know the F-101, but the prototype XF-88? Nope. I LOVE seeing new aircraft, tanks, or other military machinery and your XF-88 fits the bill perfectly.
Bravo!
Thanks. It was a fun build.
Wow, I think this is the only time (that I can remember) ever seeing anyone turn this collection of scrap plastic into an actual model. Congratulations!
FYI, the kit first came out around 1956-57. And yes, those of us who had yet to grow up to be AMS Model Geeks thought it was fine. Build it. Play with it. Destroy it. Buy another one. Indeed!
With a little love, these Lindberg kits can turn out really good. I look at them like a blank canvas. You can do anything with them.
Nice one Steve! You sure have a penchant for the obscure aircraft!
I do like the weird stuff. With that said, Lindberg made models of aircraft that no one else has made in 1/48 scale:
XF-91
X-3
XFY-1 POGO
F-100A with the short tail
F-86A
And until recently the F-86D.
Great job on this ancient kit! I think McDonnell put a turbo prop in one.
Yes they did..the XF-88B. From what I've read, the prop made the ground crew physically ill when standing near it on run-up.