Tamiya 1/48 Spitfire I

No one needs an introduction to the legendary Spitfire. The first prototype flew March 6, 1936. Upon landing, Vickers Chief Test Pilot “Mutt” Summers famously declared, “Don't change a thing!” At that point, 310 Spitfire I fighters were already on order. The airplane began appearing in the first squadrons by August 1938, just before the Munich Crisis.
By the spring of 1940, Spitfires equipped approximately one-third of the squadrons in Fighter Command. Over that summer, the pilots of the Spitfires and their more numerous comrades in the cockpits of Hawker Hurricanes successfully stopped the Luftwaffe offensive in the Battle of Britain.
Among those pilots was Squadron Leader Brian Lane of 19 Squadron, the first unit to equip with the Spitfire. Lane had claimed four victories (two confirmed) over Dunkirk. On September 5, 1940, Squadron Leader Pinkham was killed and Flight Lieutenant Lane was promoted to Squadron Leader and assumed command. On September 7, he shot down a Bf-110 and on September 11 he shot down two more Bf-110s and claimed an He-111. Lane continued to lead 19 Squadron until he turned it over to Squadron Leader Walter Lawson in July 1941. Like too many who fought the Battle of Britain, Lane would not live to see victory, being posted missing on operations in the summer of 1942.
THE KIT
Tamiya released what was the first “acceptable” Spitfire I back in 1993, right after Hasegawa released their Spitfire V in late 1992. I use the term “acceptable” because it turned out later that Tamiya had not done all their homework on that kit, which had some pretty glaring shape discrepancies with the real item. The issue of overall accuracy would plague nearly all of Tamiya's releases in the 1990s as the company went into an overdrive of releases to compete with Hasegawa. Shape issues with their Bf-109E were enough that three years after the first release, a re-release with a corrected fuselage happened (with nothing on the box to distinguish between the two kits). All of the Fw-190 kits suffered from too-short landing gear, and the Fw-190D had the wing of the Fw-190D-13 - Tamiya's faithful rendering of the Dora-9 at the Air Force Museum (which later exchanged wings with the Fw-190D-13 then at the Champlin Museum to correct both). I mention this because over the years modelers have confused Tamiya's legendary “buildability” with “accuracy.” The two are completely separate issues, and the question of overall accuracy is still an issue.
Tamiya's announcement of a new-issue state-of-the-art Spitfire I was met with praise and anticipation from modelers, and sales have been such upon its release earlier this year that the initial production run had to be extended to meet demand.
On opening the box, the legendary Tamiya attention to production quality is immediately apparent. All parts are flash-free, and the surface detail is nice. Tamiya omitted any rivet detail, which is acceptable, but with modern CAD design one it would have been entirely possible to have the raised rivets that are found aft of the cockpit on the Spitfire. Lack of this is not a complaint.
The kit does several things that have not been done before in any kit. Most prominent is a “cockpit open” or “cockpit closed” option, that involves separate side pieces of the fuselage, so that the canopy will look acceptably thin in the open position. This reviewer has to admit that I had previously never worried about this issue with any other recent Spitfire releases from that “other company” over in Eastern Europe, and had never heard any other modeler express such a concern; those who worried excessively about this issue had such worry because they were building an older kit, and the solution was a Falcon vacuform canopy. This system is great, so long as the modeler attaches the relevant part to the fuselage half before doing anything else, to insure that the part is exactly set in position before gluing it; then hold it in position until it sets up. Tamiya's fit is properly legendary, but I've heard from three people who discovered that part had slipped out of position after being glued. The atmosphere over the work bench when that is discovered gets very dark purple with lots of thunderbolts and lightning.
The second new thing Tamiya does with this kit is to mold the landing gear legs as one part, cleverly hiding this with underwing panels and thus guaranteeing that the single most common “failure” of a Spitfire model - incorrectly-aligned landing gear - is solved forever. This is really great, except for one thing: Tamiya modeled the gear for the “sit” of the Spitfire V and later marks, which introduced a heavier engine and needed the gear set forward to avoid tipping in a poor landing. The “sit” of the Spitfire I is three degrees less forward than the later marks, and yes, this is noticeable in the look of the final result. This is not obscure knowledge; this reviewer googled “Spitfire” and the information was there in the first article that came up, the Spitfire Wikipedia page. Most modelers will likely worry about this as much as they worry about the landing gear on Tamiya's Fw-190s, but for those who do sweat these details, foreknowledge of the problem is the solution, since the bar between the legs can be scraped sufficient to allow the part to be installed at the correct angle from the outset; those who discover it later can also successfully bend the gear legs to the correct angle and then reinforce with a drop of cyanoacrylate. I mention this because it's irksome in a kit like this - especially since “those other guys” managed to design separate gear legs that can't be installed at anything other than the proper alignment.
Finally, there is the windscreen design with its separate armor glass panels. Yes indeed, the armor glass was separate from the windscreen on the Spitfire I, II and V until it was installed integral to the windscreen in the mid-production Spitfire V and beyond. It's a good thing the kit has two windscreens and two armor glass parts, because (so far) I know of four other reviewers who went through both to get one without glue up between the two parts. (The solution is to not attach the armor glass until final assembly after painting, and to glue only the base, with a drop of cyanoacrylate so it doesn't ooze up through capillary action) I have yet to have ever heard of any modeler before who complained about “lack of accuracy” with the molded one-piece no-hassle windshield in their kit. Again, this can be filed under “irksome.”
Are any of these deal breakers? No, but discovering them the hard way is a “joy killer”. You've been warned.
The kit provides decals for three aircraft. These are vastly superior to previous Tamiya decals, in that they are thin and conform easily to the model.
For those interested in other markings options, Fundekals has this week released two sheets of decals for the Spitfire I. These are well researched and definitive for each aircraft, with a specific history of that airplane and the pilots associated with it, an extensive painting and markings guide for that specific aircraft, and lots of information many of us may not previously have been aware of. For this reviewer, discovering that the wheel well, gear leg, gear door and wheel hub on airplanes with the black/white underwing marking were the relevant black or white color, and that when those airplanes were later repainted with “Sky” the gear was left alone other than the outer side of the gear door, was New News. The decals are printed by Cartograf and work perfectly.
CONSTRUCTION
As with other Tamiya kits, a modeler cannot go wrong by following instructions and assembling in order. As with all modern kits that are created through CAD, parts fit is very precise and you must take care in getting rid of all sprue nubs when you cut a part off the tree. Doing these two things will insure a stress-free build and a superb result.
The first thing to do is decide if you are going to have a “cockpit open” or “cockpit closed” model, since that involves your choice of major parts. The respective cockpit side parts should be attached to their fuselage half before proceeding further, so that you can get a precise fit. If you do, the separate part will “disappear” on the exterior surface; if you don't get that exact fit, and then hold it awhile after applying glue until it sets, you can set yourself up for a nasty surprise when the part moves a bit from handling before it's set. The result, no matter how small the movement, will be very apparent when you get to the end of the assembly.
Once you have determined which cockpit option you want, it's time to decide if you want the pilot figure in place. Tamiya has done a very accurate figure, and every model I have seen completed with the pilot in place looks good. The pilot figure can be used with either cockpit option.
I painted all the detail parts on the tree before further assembly. Tamiya's color callouts are accurate when compared with photos of accurately-restored Spitfire Is. Everything assembles right and the resulting cockpit assembly looks good enough that only a “resinoholic” will need to replace this with any aftermarket part. The only thing “fiddly” at all is the assembly of the seat belts, and that isn't really fiddly at all to anyone with experience of using photoetch seat belts; in fact, Tamiya has managed to make photoetch belts with metal soft enough it can be molded with your fingers into a very accurate-looking result.
Be sure not to miss attaching the part in the rear fuselage where the tailwheel will fit. I know that sounds funny, but I came very close to missing it after all the work on the cockpit and had already started putting the fuselage halves together when I had to stop and fit that. Fit of the fuselage is so good that if you take care in fitting the halves together, you will need no filler.
Now comes that fakakte windscreen. Choose the proper one, and DO NOT attach the armor glass at this point. Attach the glass in the final assembly of detail parts after painting and decals, and only use a little bit of cyanoacrylate on the edge that attaches directly to the fuselage. You will thus avoid any possibility of wrecking this through capillary action if you use liquid glue, which is guaranteed to get up between these two parts.
The wing sub-assembly goes together without problem and attaches to the fuselage precisely; you will not need filler here if you take care in assembly. With regard to the landing gear, I suggest before you attach it that you scrape down the edges of the bar between the legs, so you can modify the alignment of the gear to get the “less forward” angle of the Spitfire I; Tamiya has this part fitting at the increased forward angle associated with the Spitfire V and later, when the early Merlin engine of the Spitfire I was replaced with the heavier Merlin 45. Look at photos to get your proper alignment. If you're not a “Spit boffin” or “accuracy fanatic” you can assemble the parts as Tamiya intended and it's highly unlikely anyone will ever find fault with your decision.
Surprisingly, Tamiya doesn't provide separate elevators and horizontal stabilizers, as Airfix and “the other guys” do; it's not difficult to separate the elevator from the stabilizer if you want to pose the elevators more dynamically.
COLORS & MARKINGS
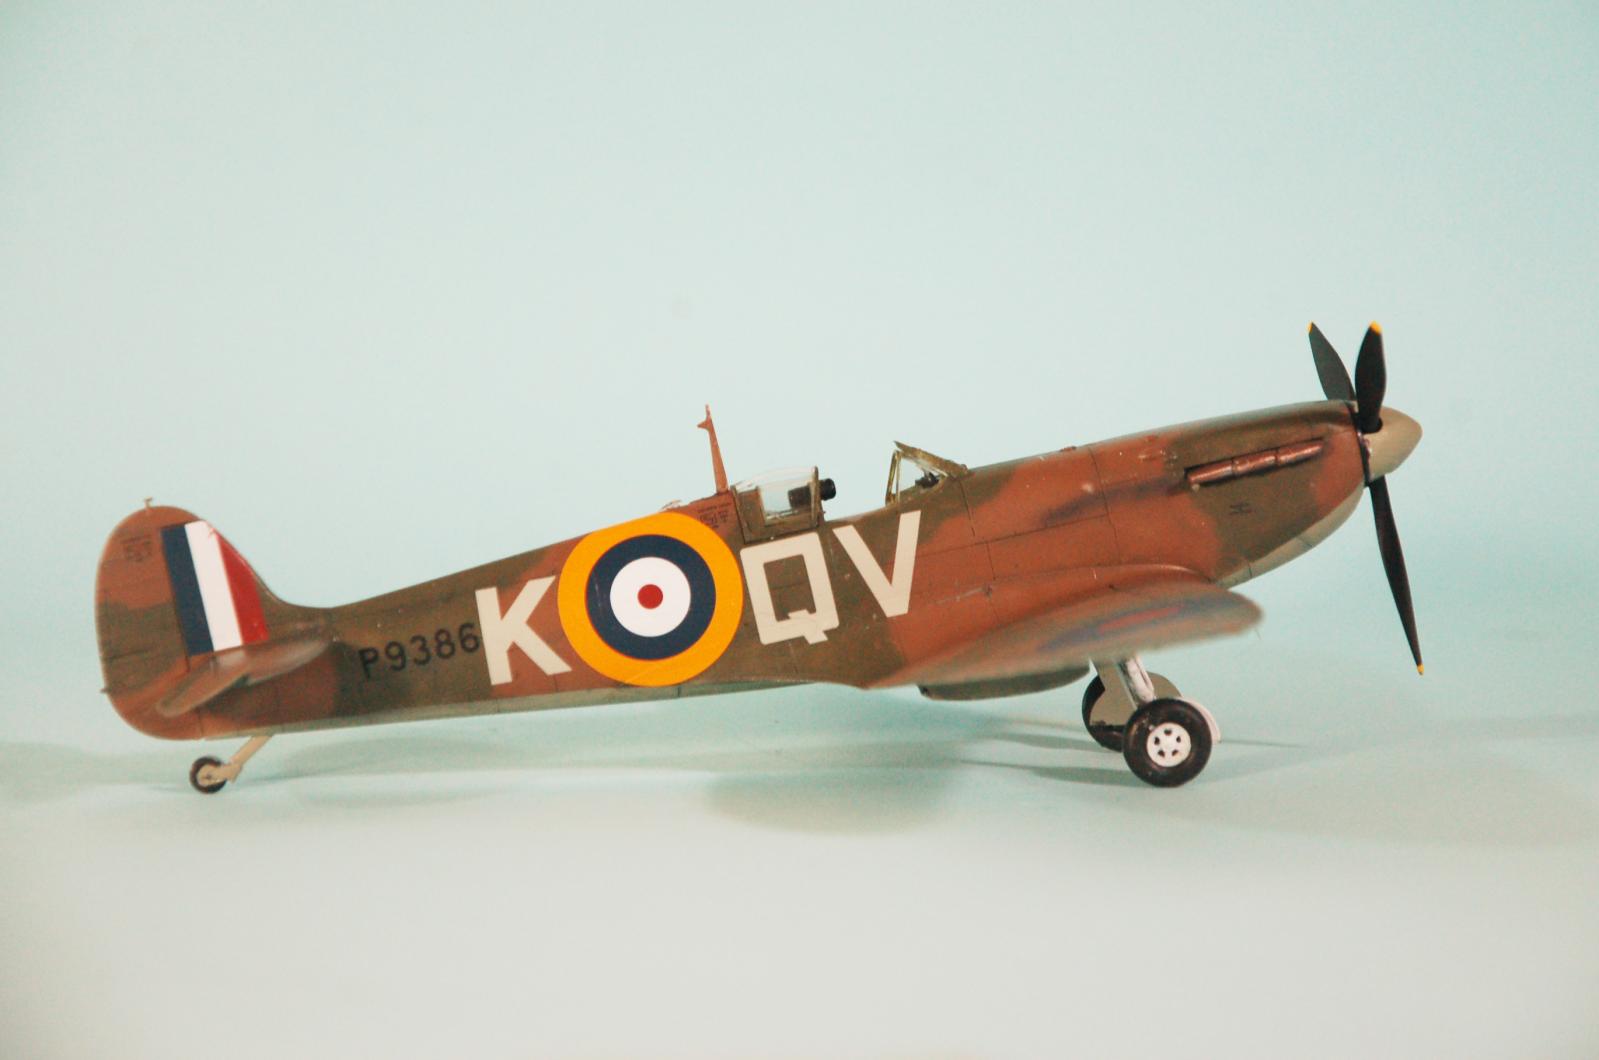
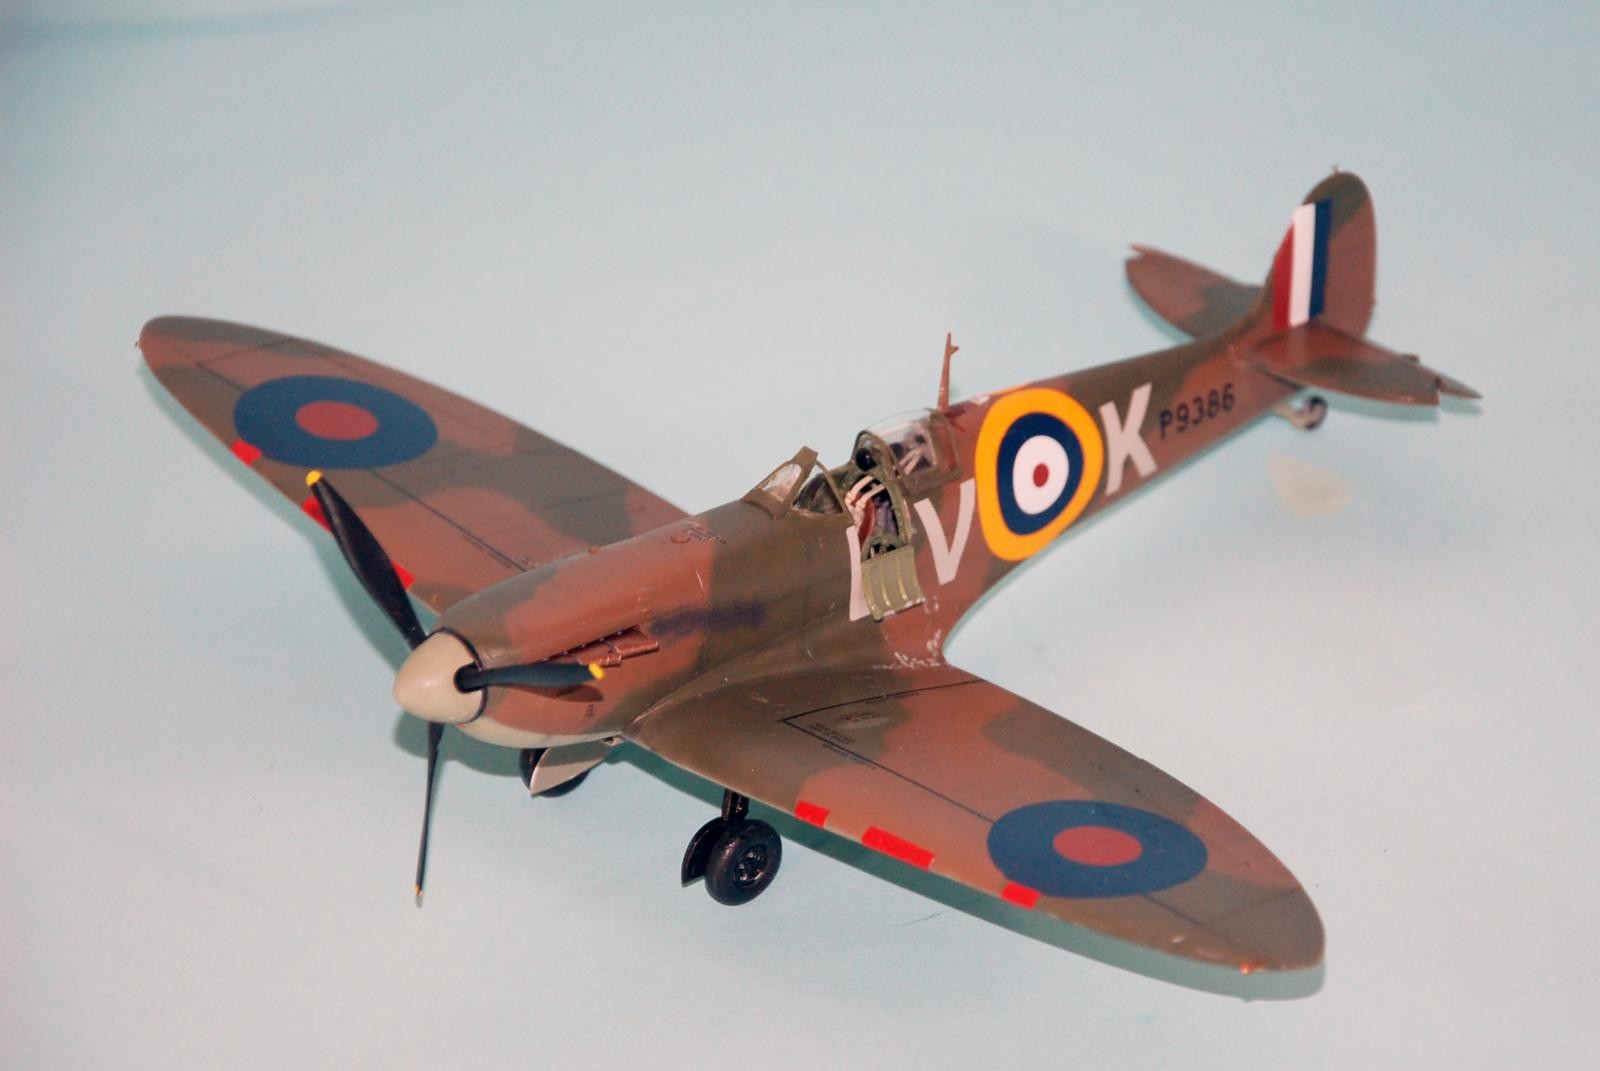
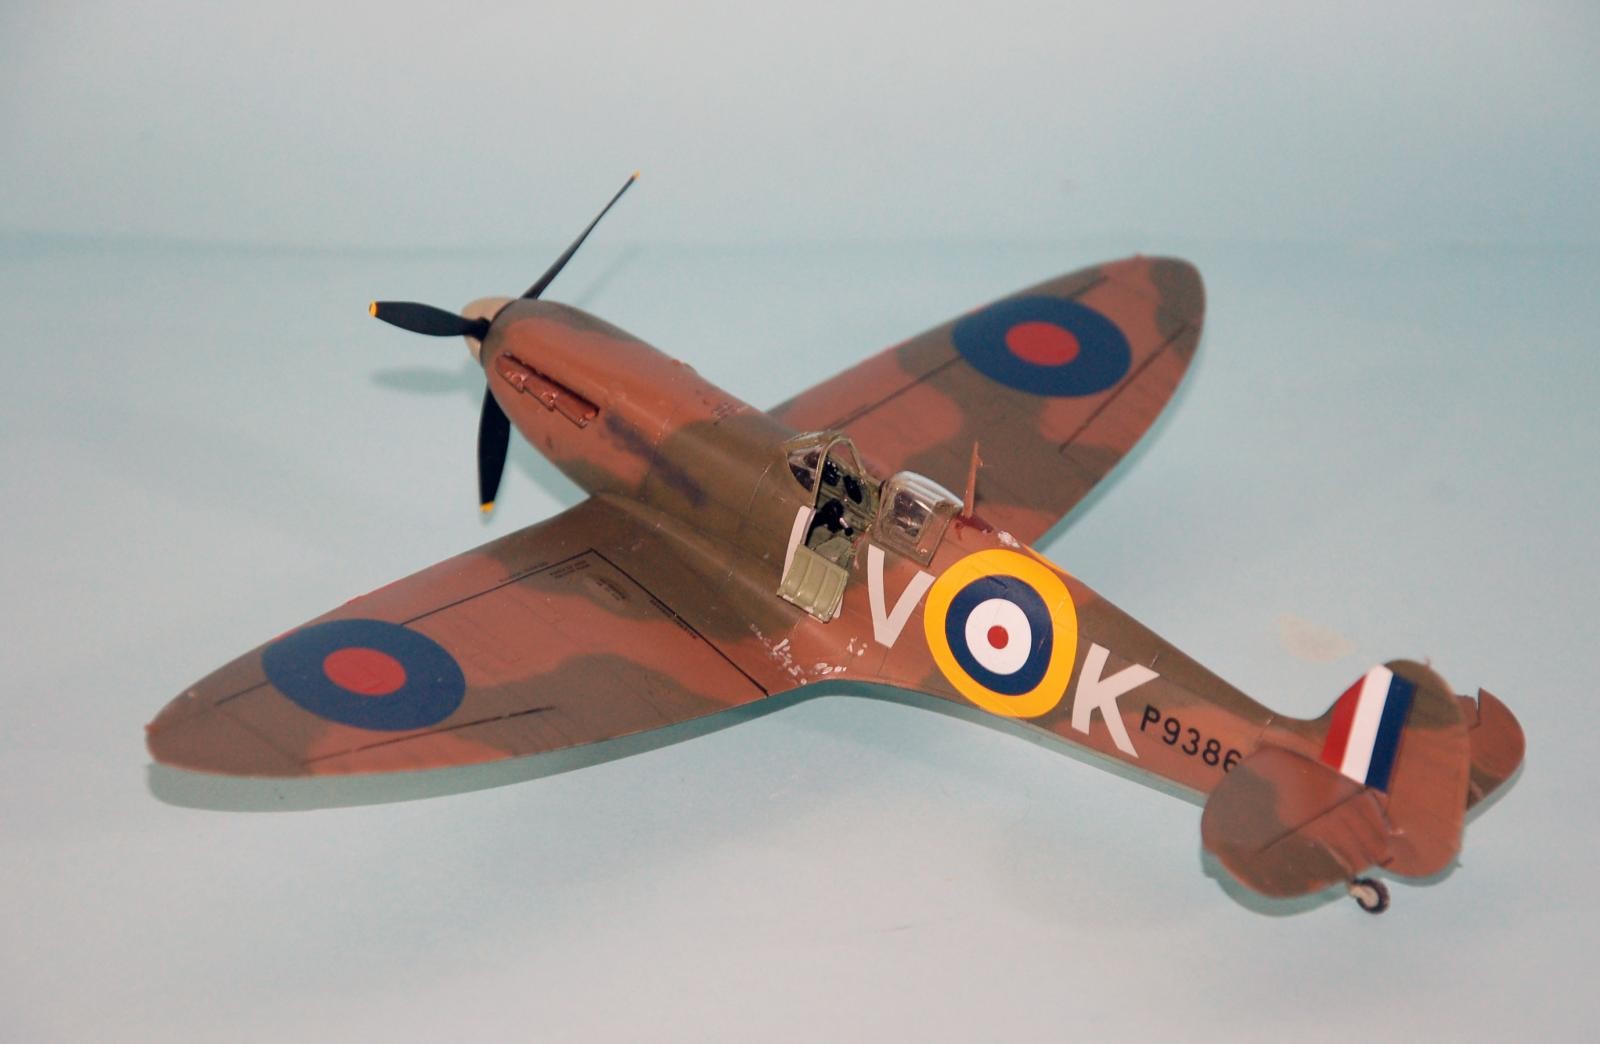
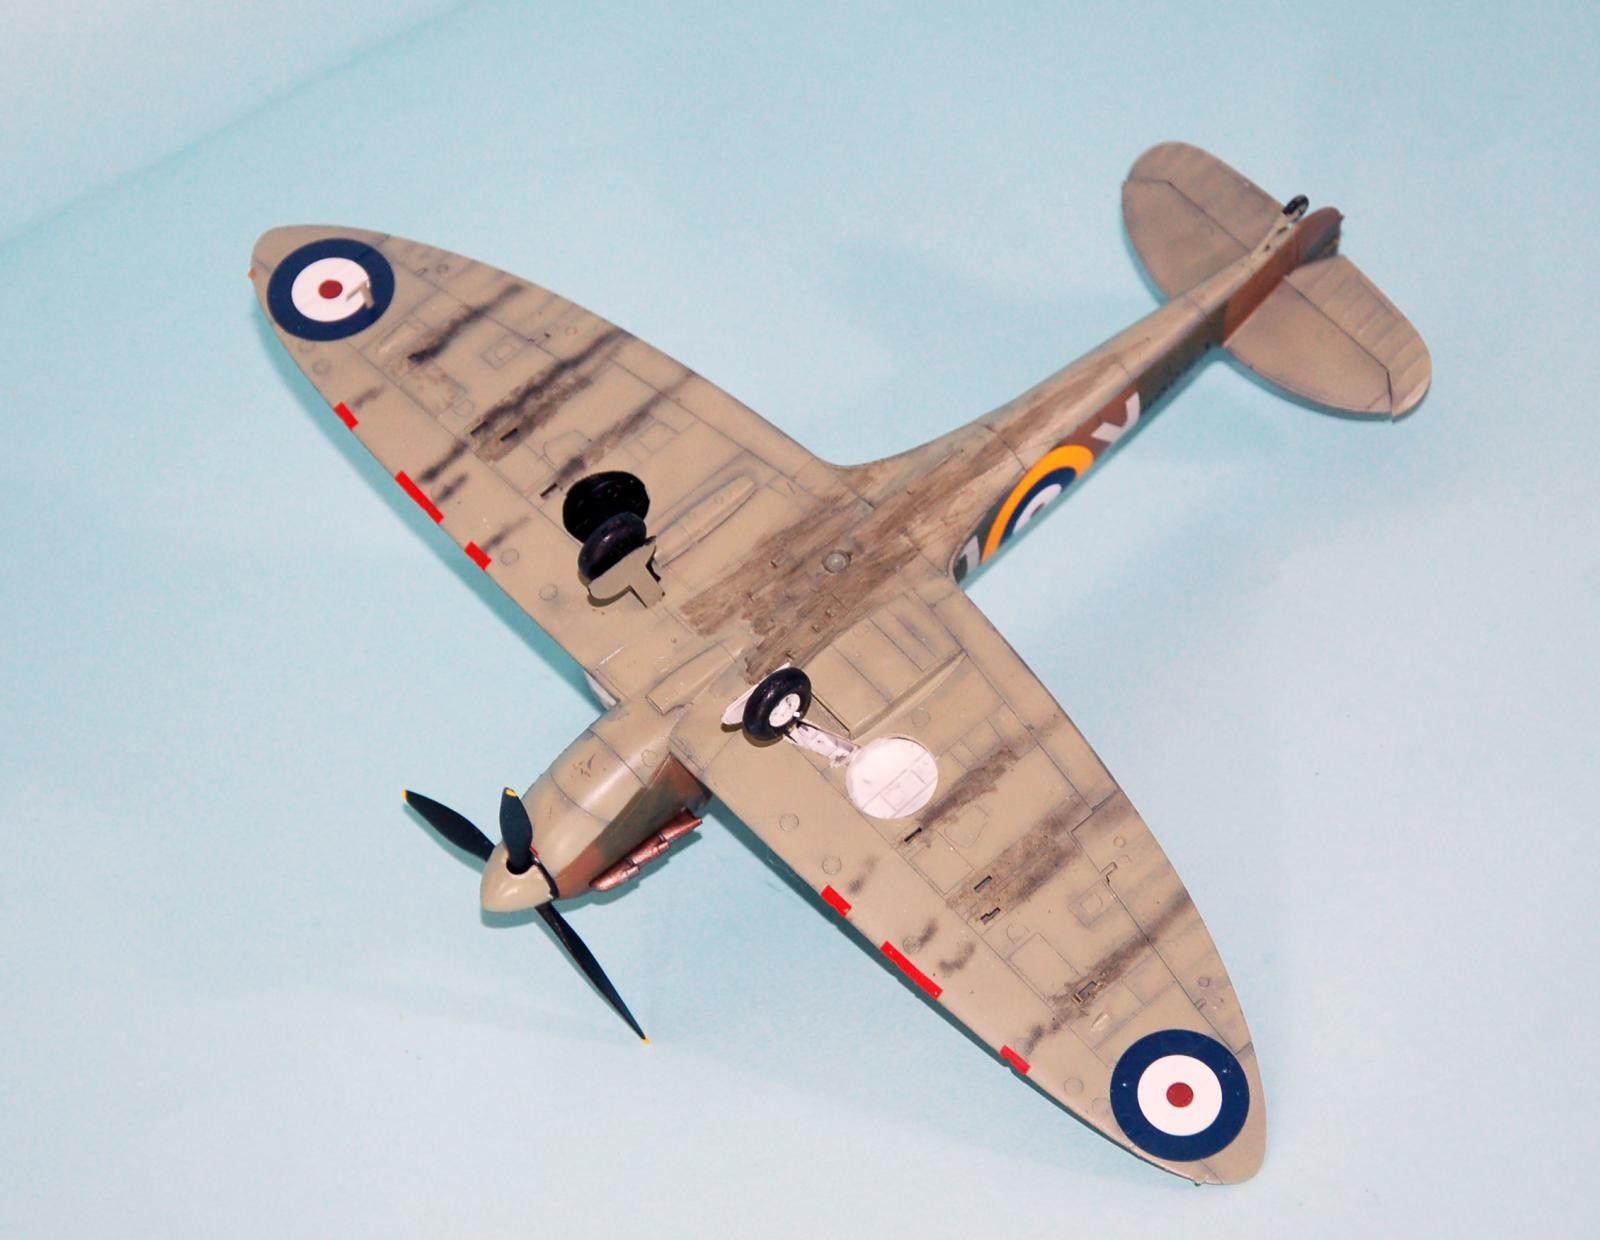
I had chosen to do the Spitfire on the Fundekals sheet flown by Squadron Leader Brian Lane. This is an “A scheme” camouflage pattern. Since the airplane had been delivered in black/white/aluminum underside colors, I “preshaded” the appropriate right wing with a light coat of Tamiya “NATO Black”, with the areas fore and aft of the wing preshaded with “German Grey.” I used Tamiya “JAAF Green” for the “Sky” color. As Fundekals notes, the “correct” shade of Sky was not uniformly applied to in-service aircraft when they were repainted, and the exact colors (there were numerous possibilities) are unknown. The result was a slightly different hue overall from the colors applied first. This is very subtle and only apparent under good light holding the model upside down, but it is a nice touch at least to me.
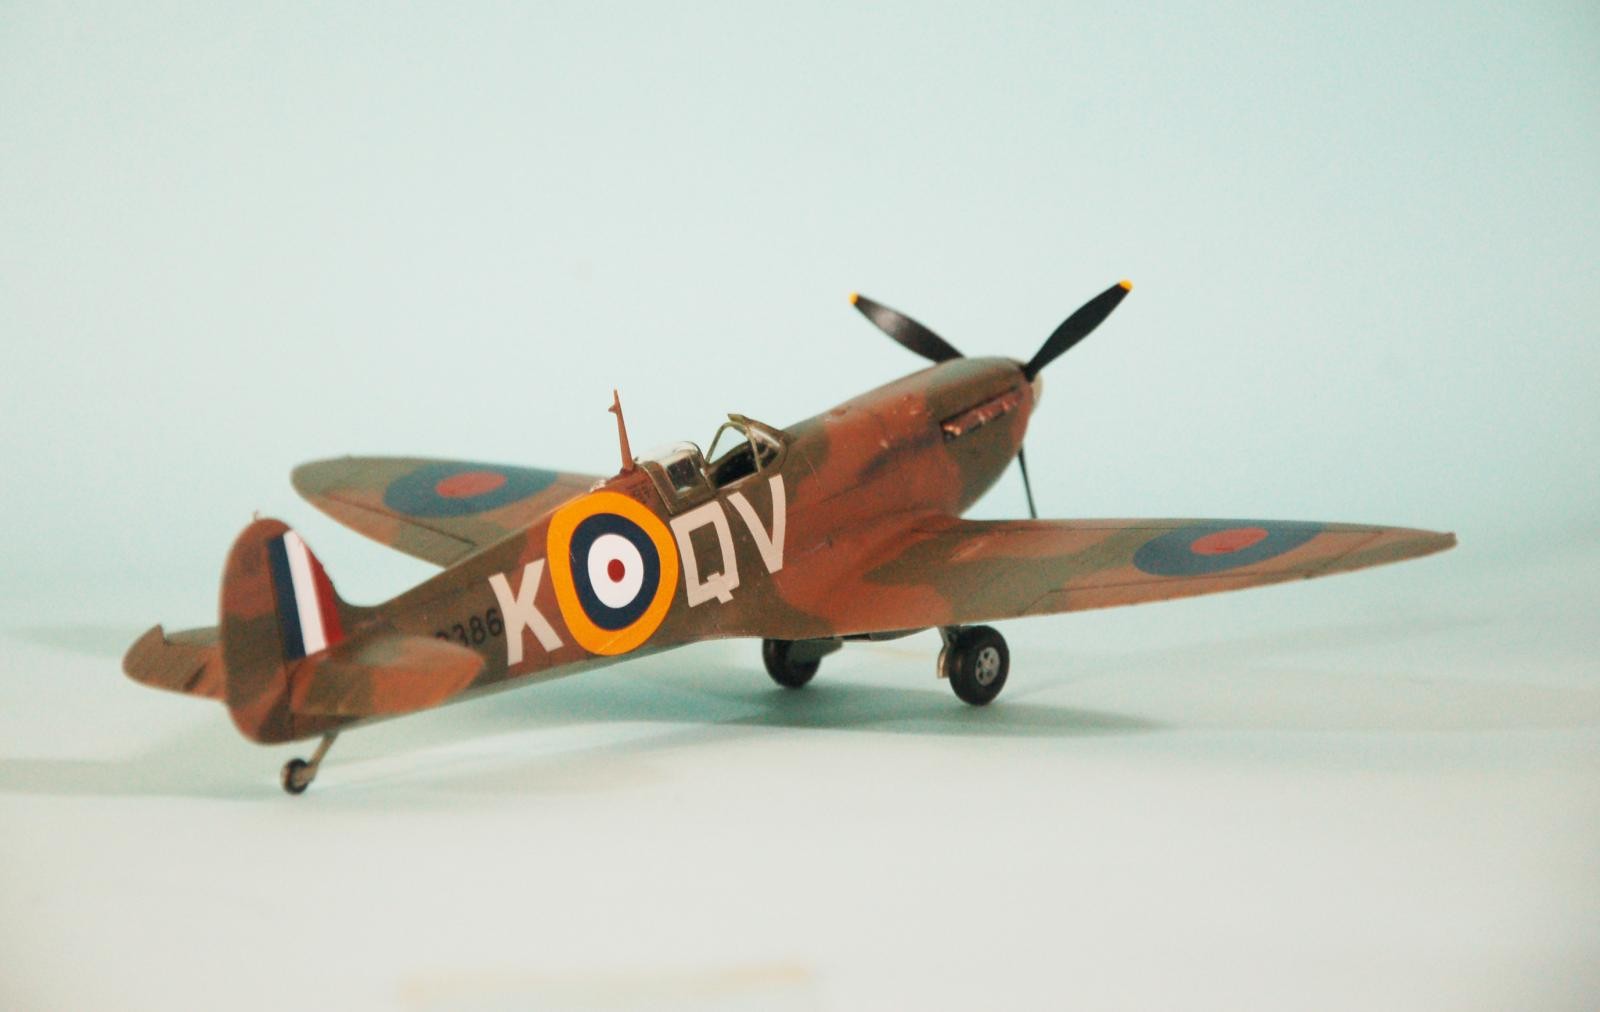
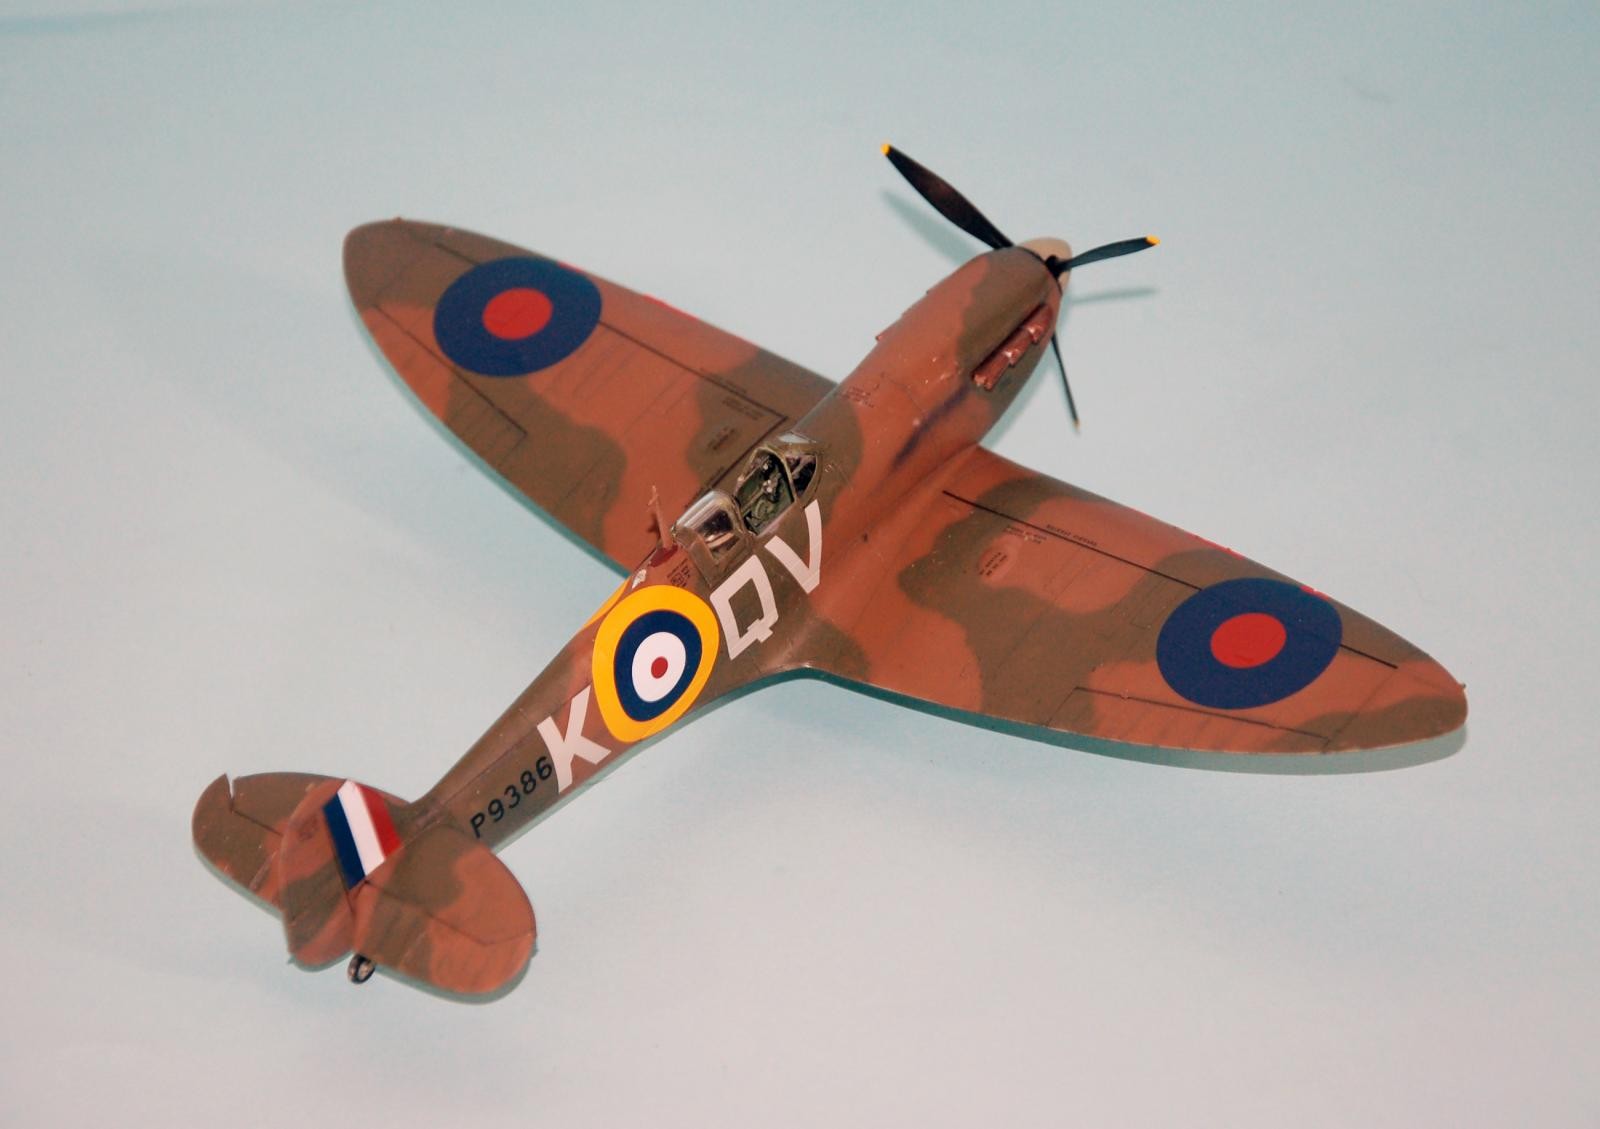
I freehanded the A scheme upper camouflage using Tamiya “Flat Earth” modified to a shade of “Dark Earth” and Tamiya “RAF Dark Green.” As Fundekals points out, the argument that all early Spitfires were painted with mats runs up against the fact that if you compare photos, no two Spitfires have exactly the same camouflage. The pattern was freehanded for outline with the spraygun set tight, then “filled in.” From any distance past a few feet on a real Spitfire, the camouflage appears “hard edge.” I have seen this up close on accurately-restored Spitfires that were painted in this manner. If your airbrush skills don't include being able to thin down the paint and tighten the fine tip nozzle to make a “pencil line” then I suggest using masks. Mal Mayfield makes excellent A and B scheme masks, or you can create your own. If you raise the edge of the mask, you will avoid a “ridge” and can create “scale” overspray. I finished off with a coat of clear gloss overall.
The Fundekals decals went on without problem under a coat of Micro-Sol. They advise that these decals should be freed from their backing with warm, not hot, water, and should be able to slide easily on the sheet before application, and that the surface they are being applied to should be wet to allow them to be moved into final position. They're not kidding. If you do that, then apply decal setting solution, all will be well.
FINAL CONSTRUCTION
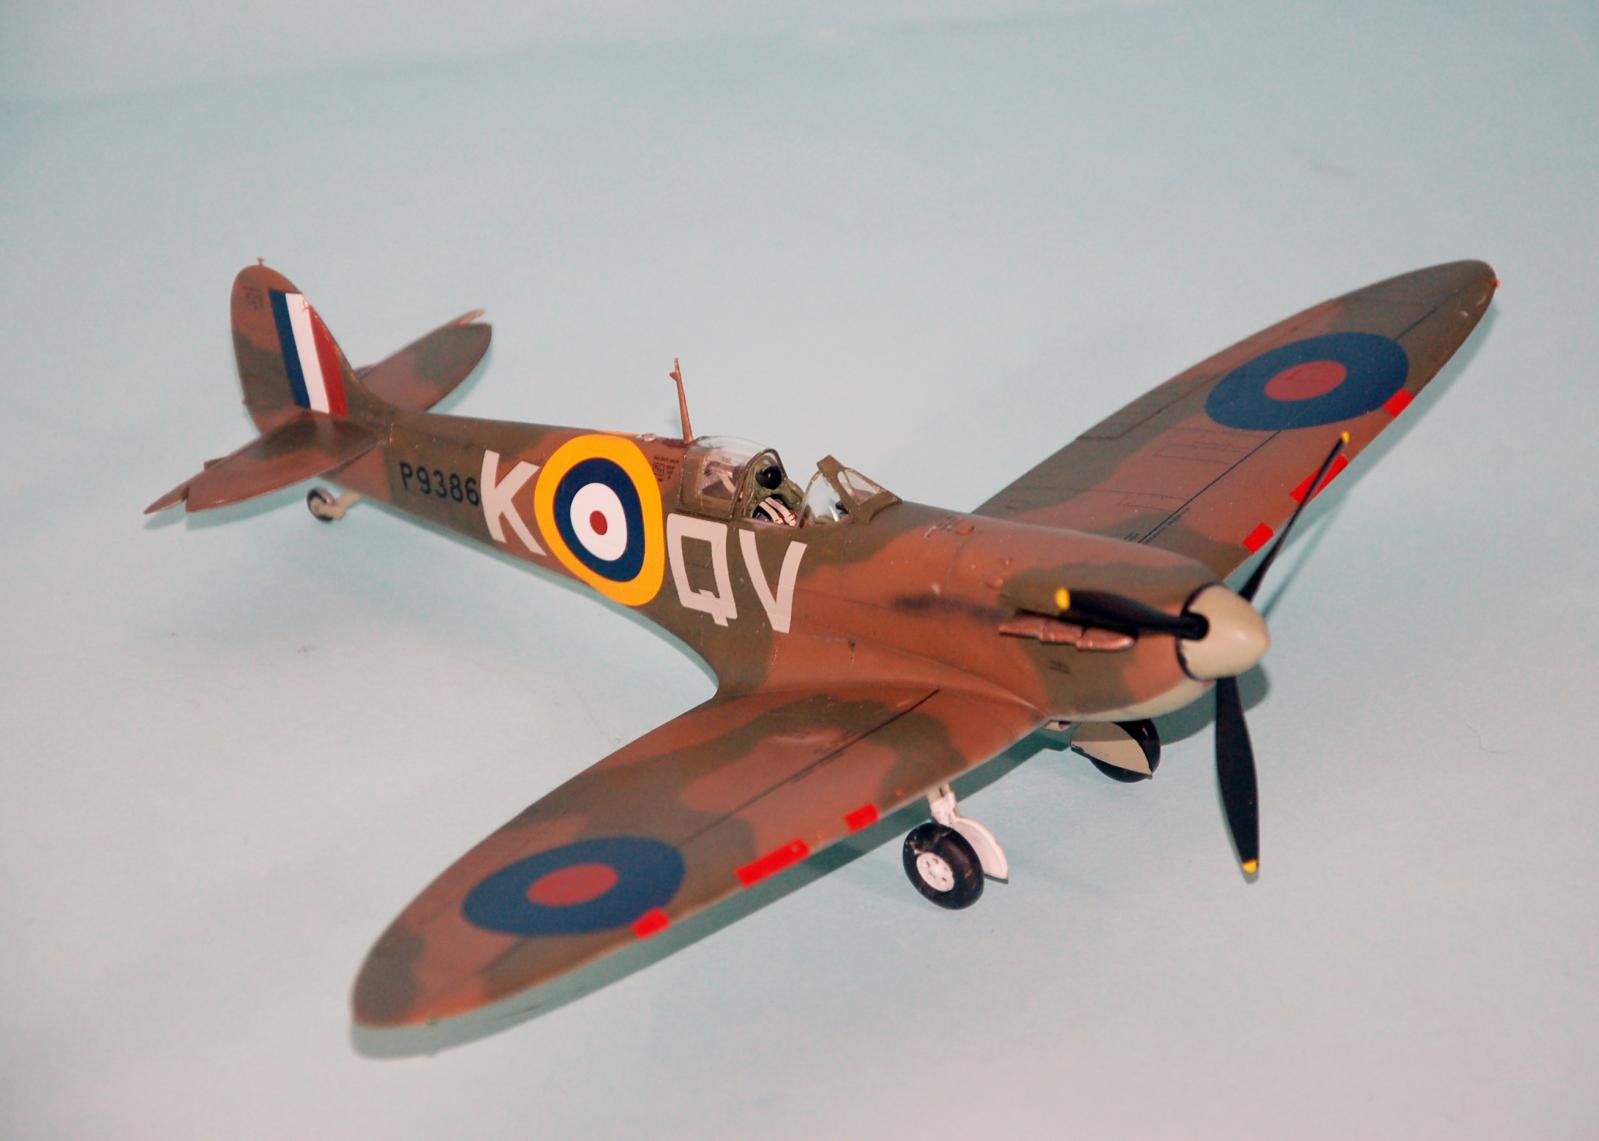
Fundekals points out that Spitfires out of the factory were in a “smooth” non-specular finish with a slight sheen, not a flat finish. Most of the Spitfire Is in the Battle of Britain didn't last long enough to have the finish go flat, or to be extensively “dinged.” I applied a coat of Micro “Satin” which results in a “smooth” flat finish with a slight sheen. I then “dinged” the underside with Tamiya “Smoke” around the gun bay covers to simulate the wear these areas received, per the suggestion in the decal instructions. I used “Smoke” to simulate gun residue, exhaust, and the oil stain one notices under the mid section of Spitfires.
I unmasked the canopy, attached the armor glass and the side flap, then glued on the prop. (Before anyone e-mails me that the spinner is the wrong color, Fundekals points out that a yellow spinner would have been suicide in the summer of 1940, and supports that with a photo of the actual airplane in which one can see the underside color and spinner color are the same shade.) I attached the exhausts, wheels and gear doors and called it done.
CONCLUSIONS
It's an excellent Tamiya kit that goes together easily and results in a good-looking model. It's not perfect but few things in life are, and if you approach the kit's glitches forewarned, you'll have no problems. The Fundekals sheets are the best, most accurate Spitfire I decals ever produced and are worth every penny. Any modeler with a bit of experience who is willing to follow the instructions and take care in their work is assured of a small masterpiece. Highly recommended.
PS: After this review was posted at M2, I received several queries as to whether this kit is appreciably superior to the Airfix Spitfire I. My answer is: I just built another Airfix kit to do some more of the Fundekals options. From a distance of 3 feet, both models painted and decaled, you would not be able to tell the difference unless I told you which markings were used on which kit; you might notice a difference with the canopies but you have to look for it. Just a thought for your consideration.


A very nice build indeed Tom, nothing more beautiful than the Spitfire, and the sound of the Merlin...
Very nice model. Well finished and described.
Nice looking Spit and very informative build review.
An in-depth narrative as always...AND a nice lookin' result as well.
That's my expectation too. As I said, most muddlers won't worry.
Tom, that is possibly the best review ever coming from you. Make it happen again.
The Mk V version, any word on it coming soon or do they want to milk as much as possible from the Mk I first?
Tamiya always takes their time.
Remember folks, Eduard is doing a Mark I later this year and a Mark V next year. Eduard's now the company Tamiya's afraid of.
If the landing gear is 3 degrees off wouldn't the gear wells be off to to accommodate the gear? Which would mean that the wing is closer to a Mk V?
Knowing Eduards past business model they will be creating separate molds for the Mk I wings and Mk Vs. More than ever with this information. Fiddly accurate wings vs easy buildable wings.
As far as rivet heads or the lack of...Tamiya did produce a model in there line up that being the Wildcat. The current aes·thet·ic in modeling requires dimples. Like Shirley Temple, makes you wonder what the devil is really accurate in modeling...
No, the wheel wells were the same throughout. The gear retraction mechanisms were modified to change the move in angle of the leg.
Yes, it's very interesting that Tamiya's Wildcat has the correct raised rivets and flush rivets, demonstrating that if it could be done 25 years ago, it can be done now.
Tom - That's a fantastic "heads-up" for all of us out there who've got one of these kits on the waiting-to-do pile. It's also, predictably for you, a great end result which many of us try and usually fail to emulate. Keep 'em coming. Paul
Good-looking Spit Tom, as always!