An oldie and a goodie, the Tamiya Jagdpanzer IV/70 Lang (1976)
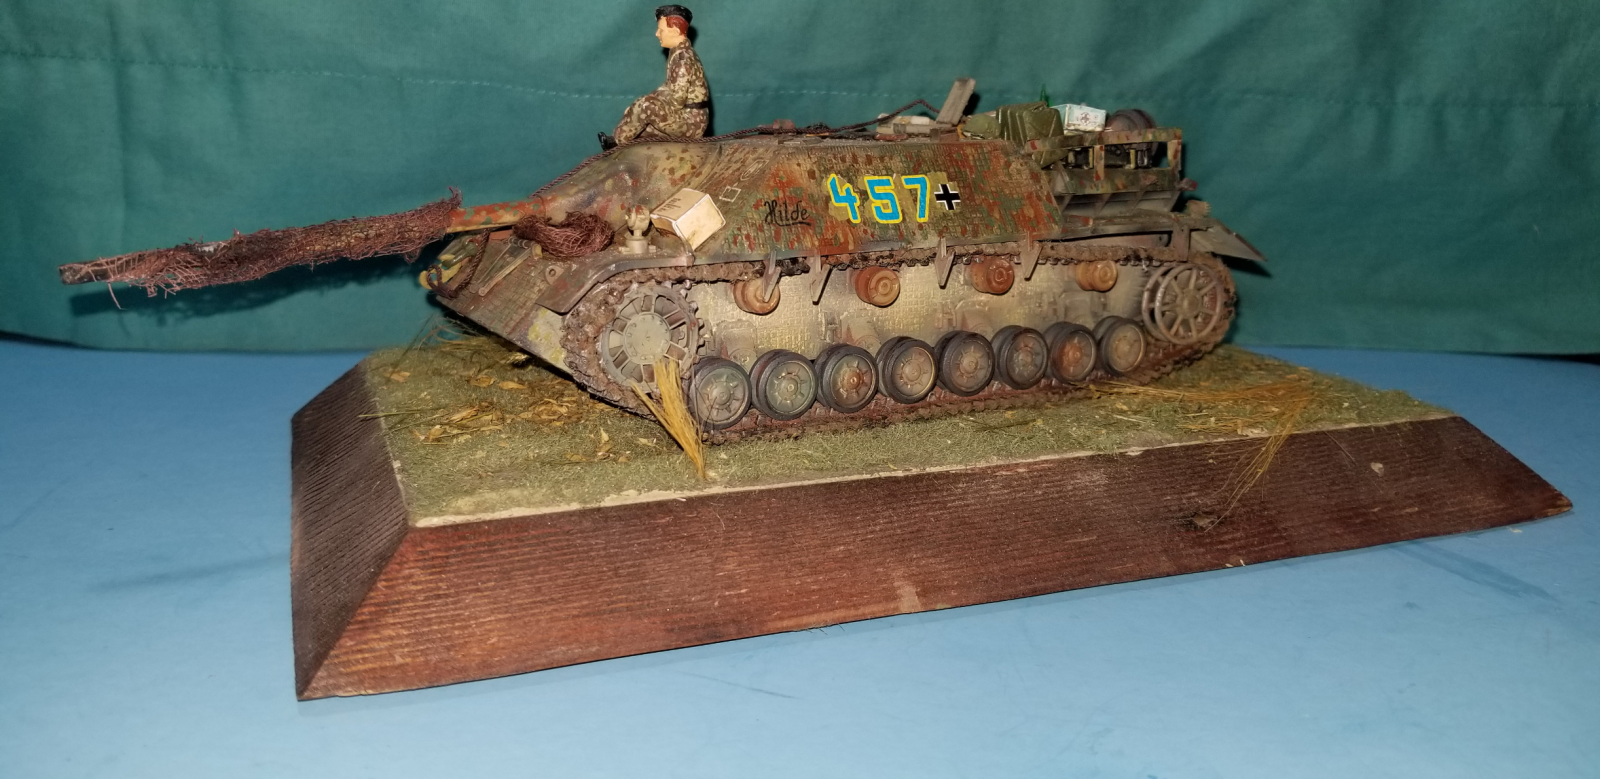
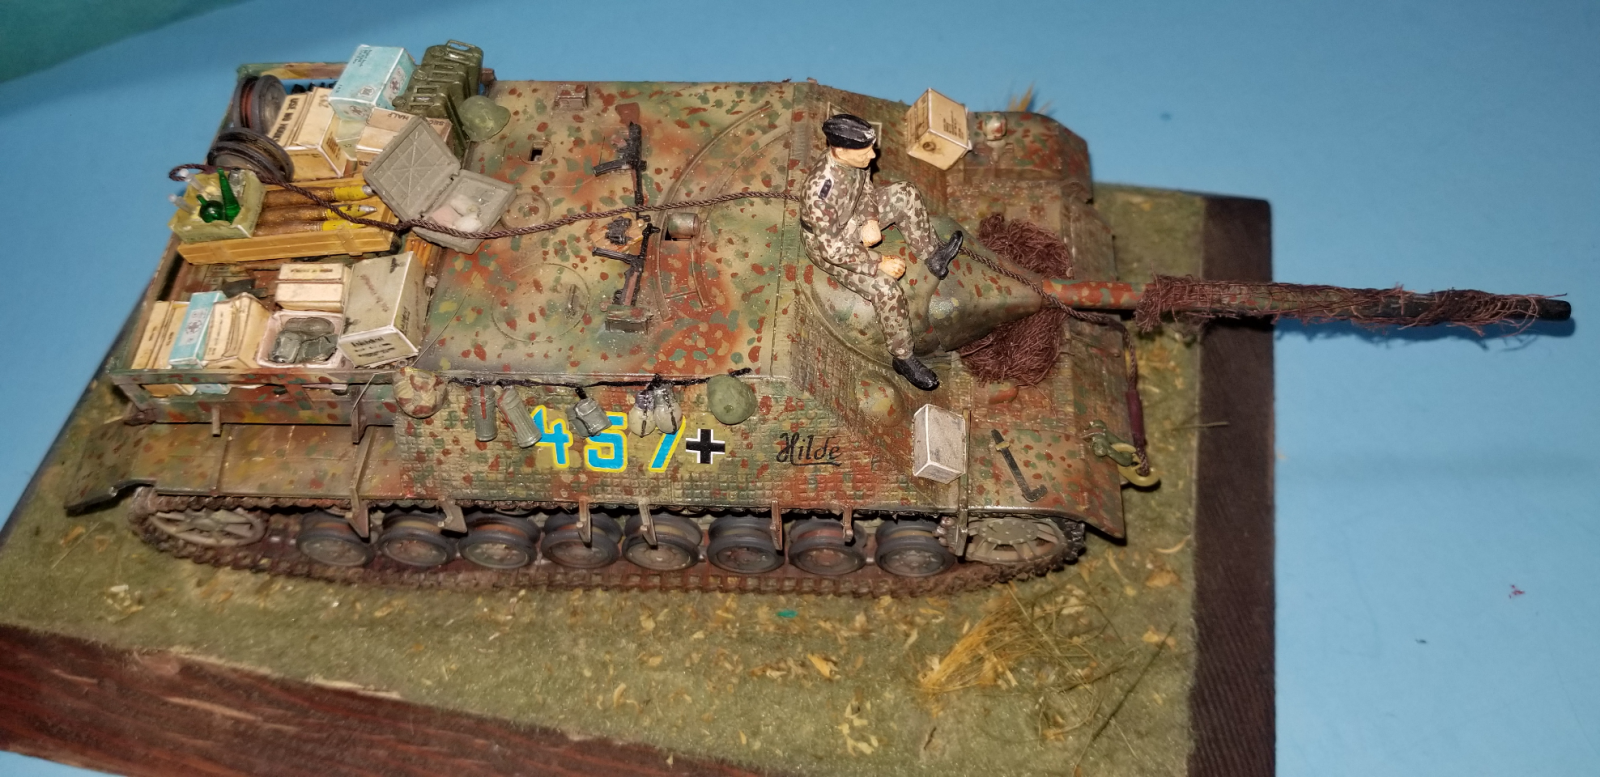
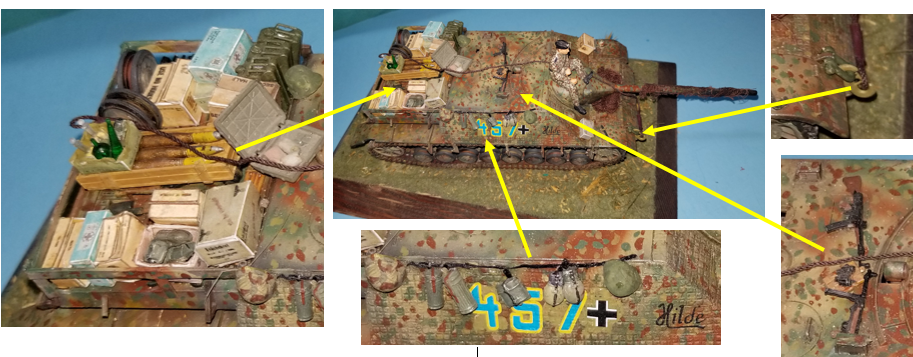
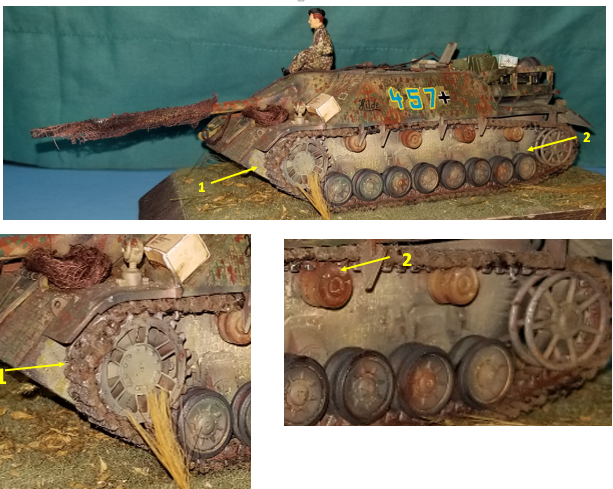
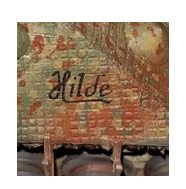
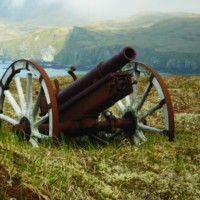
Picture 1 and 2 are general pictures of Hilde. Picture three shows close ups of the on board storage on the engine deck, personal gear with straps hanging from a web tied to holding loops. Also, some personal weapons from the spare parts box and periscopes added to the hull top. The final close up shows the homemade tow cable made from thread and electrical tape. Picture 4 shows close ups of the driver side track with mud and static grass. The second close up shows weathering of a return roller. The final photo shows the vehicle name placed over zimmermit made from napkins which came from a national sandwich chain.
With the prevalence of newer kits with interiors, photo etched parts, resin parts, multiple frets of extra parts and super duper decals, is there room on the modellers work bench for an old classic? I present to you Hilda, Tamiya military miniatures number 88, kit number 35088, circa 1976, The JagdpanzerIV L 70 Lang. When this kit came out I had just finished a three year stint in the army, stationed in Germany with a cavalry squadron patrolling the East-West German, Czechoslovakian border. How many of you have heard of Czechoslovakia?
The kit has the faults of most of the old Tamiya kits, motorization holes, no periscopes and rubber band tracks with little detail. Other than basic pioneer tools, there is very little exterior storage provided with the kit. One large plus for the kit, and kits of this age, is the price. Even I can afford it on my meager budget.
I started with the lower hull, gluing scrape plastic over the access holes and then cutting plastic to fill in the holes. After the glue had dried I then used auto body putty to fill any gaps. After drying I then sanded the putty starting with 400 grit paper and working my way to 1200 grit. I then glued the rear hull plate to the lower hull, then pieces such as mufflers, rear idler adjustments, and the forward drive shaft housings.
While the glue on those dried, I snipped the road wheels, spring assemblies, idler wheels, drive sprockets, etc from the sprues and filed, sanded and scraped any flash and mold lines off the parts. At this point I placed these away and started on the upper hull. Again, using scrap plastic, I cut out forms to use for the periscopes missing from the kit. I also made a wooden storage box for the back of the engine deck. Construction of the upper hull was per the instructions.
With the upper hull completed, I mated it to the lower hull and filled in any gaps with auto putty and after the putty dried, I gave it a quick sanding. Now is where the fun began and the extra detailing started to fall into place. I wanted to coat the Pz IV/70 with zimmerment, using the waffle style pattern. There are stamps available on the aftermarket for this. I choose to use a less complicatd approach. Although 20% oversize, I used napkins from a local fast food chain. I cut out squares of four or five embrossed squares to use for each pattern. The result was quite effective.
I then airbrushed black along the edges, angles, and shadow areas to preshade the model. I followed this with a light coat of red oxide primer, leaving a good amount of the black showing. I followed this with a coat of Panzer dark yellow, leaving the covering rather spotchy. I then sprayed a light coat of green and brown camoflauge over the dark yellow. I followed this up with spotches of color applied with a fine brush to achieve the ambush pattern.
At this point I spray painted the tracks with red oxide primer, followed by two or three shades of brown. The different shades of brown I applied along the width of the tracks forming a pattern of bands of various brown shades. I then mixed wood filler with brown and/or gray acrylic paint. I applied this to the tracks on both surfaces. I then applied green and brown static grass to the “mud”, to replicate grass churned up with the mud as the vehicle moved along.
At this point I applied a gloss coat to where the decals were going and let it dry for 24 hours. I used solveset when applying the decals. After drying the decals silvered. I tried removing the decals but was unsuccessful. I painted over th decals with the base coat of dark yellow and then went through the process again. This time using decals left over from another kit. They ended up giving a much more interesting appearance. I gave the kit a couple coats of clear gloss, then a coat of clear flat. This is when the part I love begins…weathering the vehicle.
I used what I call the rainbow measles method to apply the start of the weathering. I place small dabs of oil paint over a section of the model, using as many colors of the rainbow as I can. I then using a wide brush moistening in thinner to spread out the colors. In particular areas I may use specific colors to achieve a certain effect. Allowing plenty of time for these to dry I then add various colored pastel chalks, particularly along the lower hull and running gear. This is followed by another coat of clear flat acrylic. I am stingy with this coat as I have found that using too much will blend the colors together and lose the multicolor effect.
With the vehicle painting out of the way I applied the return rollers and drive sprocket. I then positioned the tracks around these and glued the rear idler in place using super glue. I also used super glue on the drive sprocket. I have found on the drive sprocket and rear idler will not remain straight if placed on with regular glue, or it can be a fight to get them to stay straight due to the pressure applied by the rubber band tracks. I then glue and place the road wheels onto the running gear, inserting them inside the tracks. This method prevents putting undue pressure on the running gear and sprockets when pulling the rubber tracks over them.
I made a 75mm ammo crate out of scrap plastic, based painted it white, then a light tan followed by burnt sienna oil paint. This became the home of three 75mm ammo shells left over from another kit. I applied decals to the shells prior to gluing them to the box. I made carboard boxes from a couple of aftermarket sets. I also desisgned some boxes from pictures I found on the internet. These were used to populate the rear engine deck. Also used were jerry cans and some this and that's. I played with positioning everthing before deciding where I wanted it, then glued them in place with white glue in case I changed my mind later.
Stowage on the side was a little more complicate. I drilled small holes in the upper hole and ran thin wire loops through them. I then ran a wire along the loops gluing it in place to allow a realistic appearance for the side stowage hanging from the wire. I made then straps for the actual stowage and glued them to the various items and to the wire attached to the side of the vehicle.
I will let you be the judge of whether this has produced a decent looking model. Thank you for taking the time to read my post.
I am working on Tamiya's Panther from the same time frame, Military Miniature's Kit 65, 85065.
What a great first post (welcome, by the way)...attention to detail in this build is awesome.
Fantastic job. Just to show that just because a mould is old, it doesn't mean you should write it off in favour of more expensive and newer versions...
Welcome to iModeler James. Always nice to see older kits getting some attention, and in this case, a lot of attention indeed. I particularly like the tanks name, made from paper (!?). And yes I still remember Czechoslovakia very well 🙂