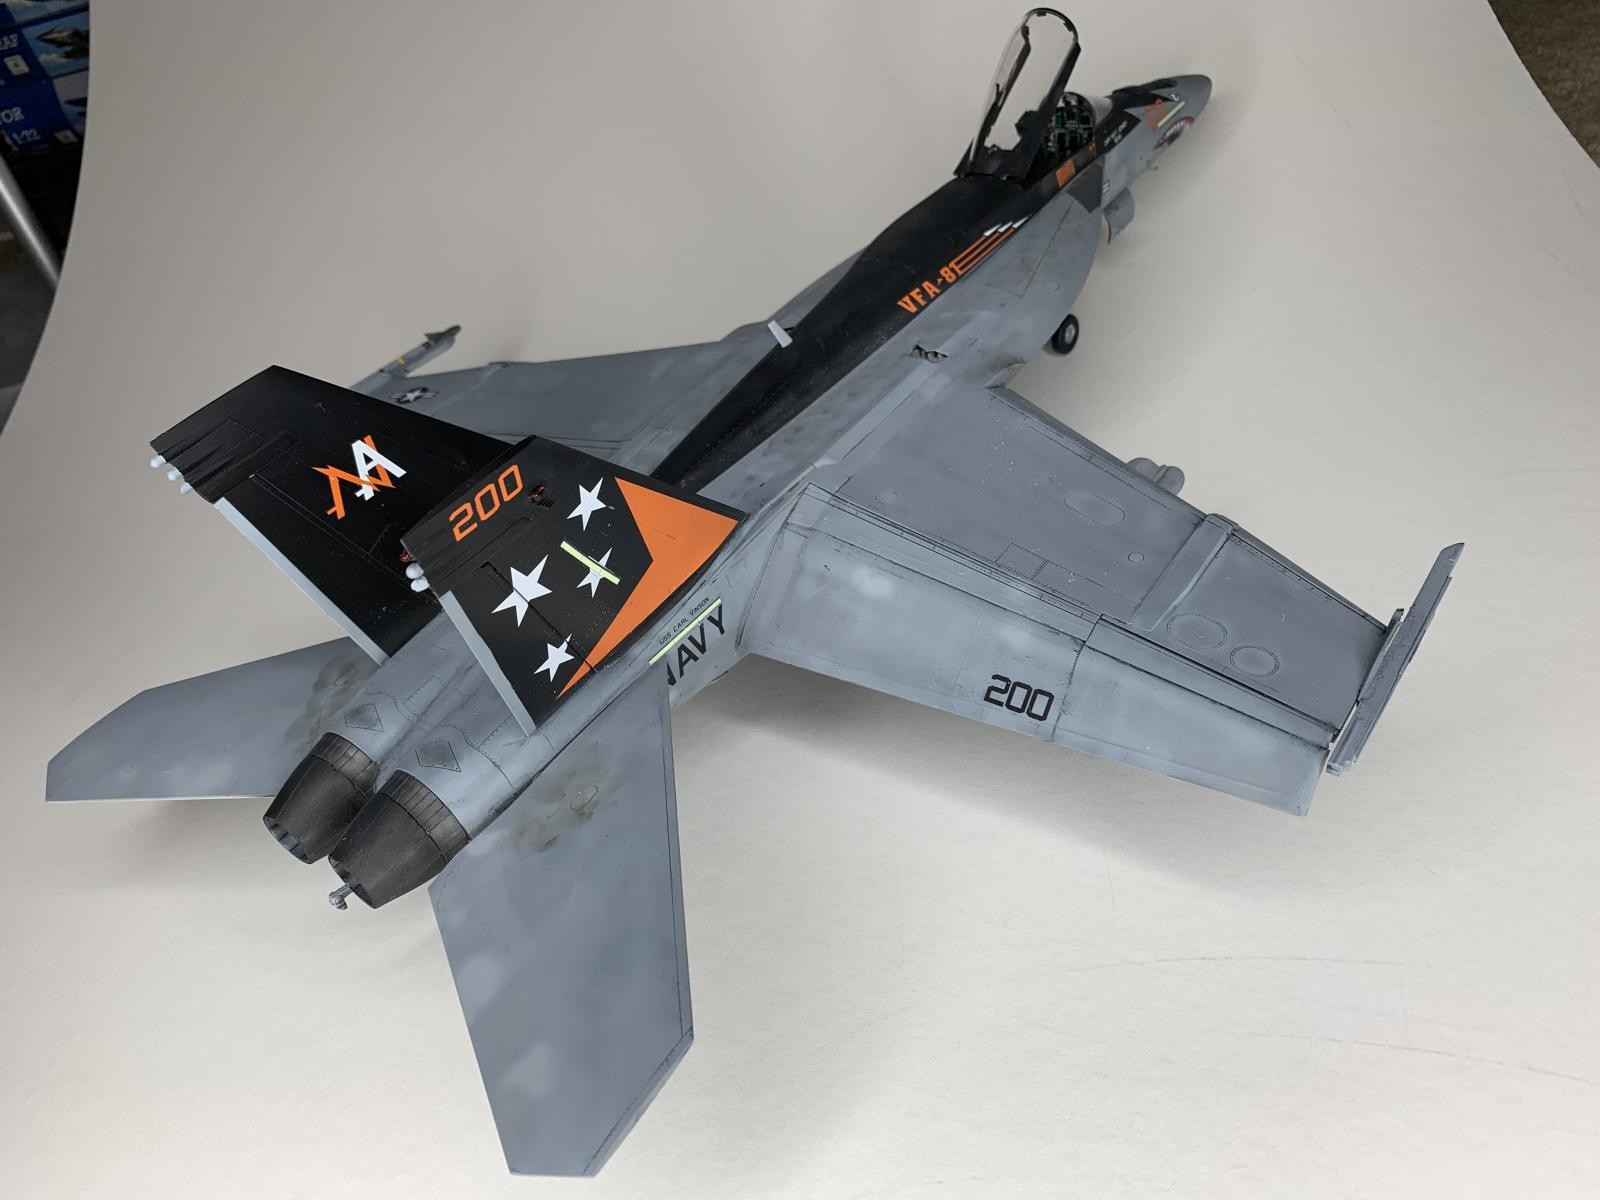
Sunny Sunliner. Revell 1/32 F-18E Super Hornet
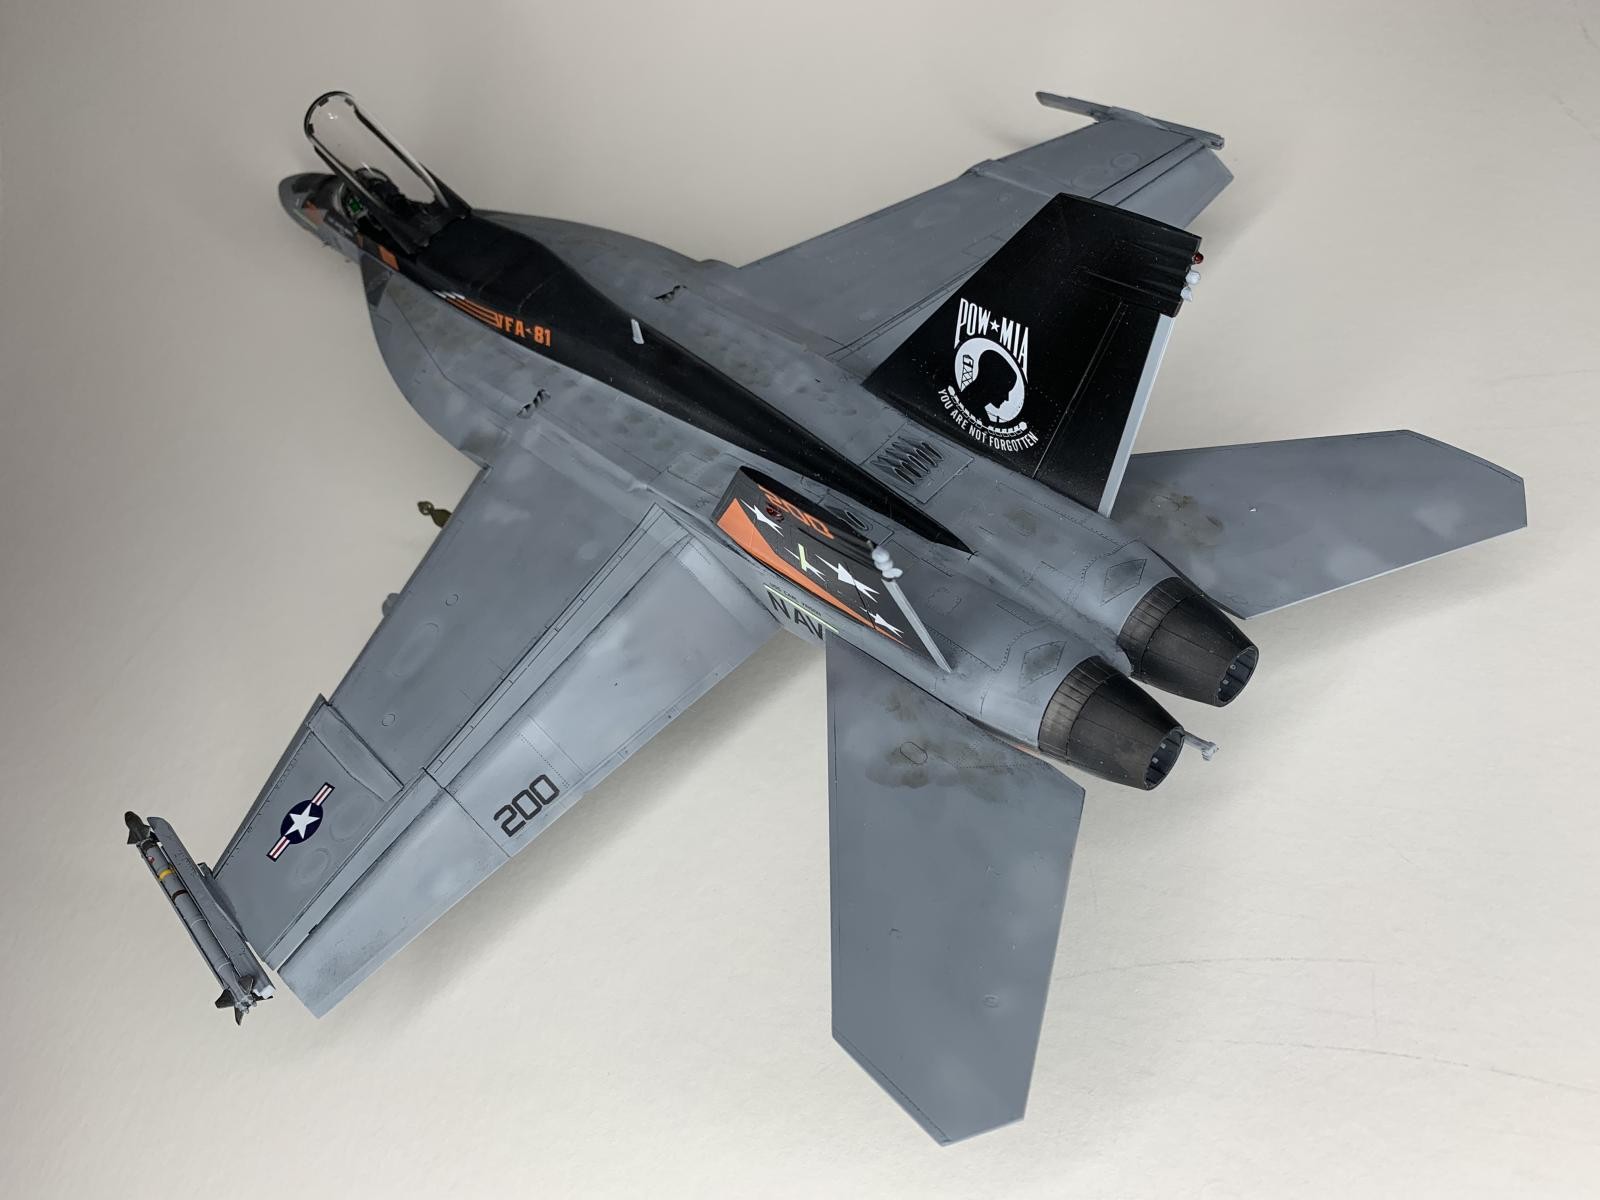
Revell 1:32 F-18E Super Hornet
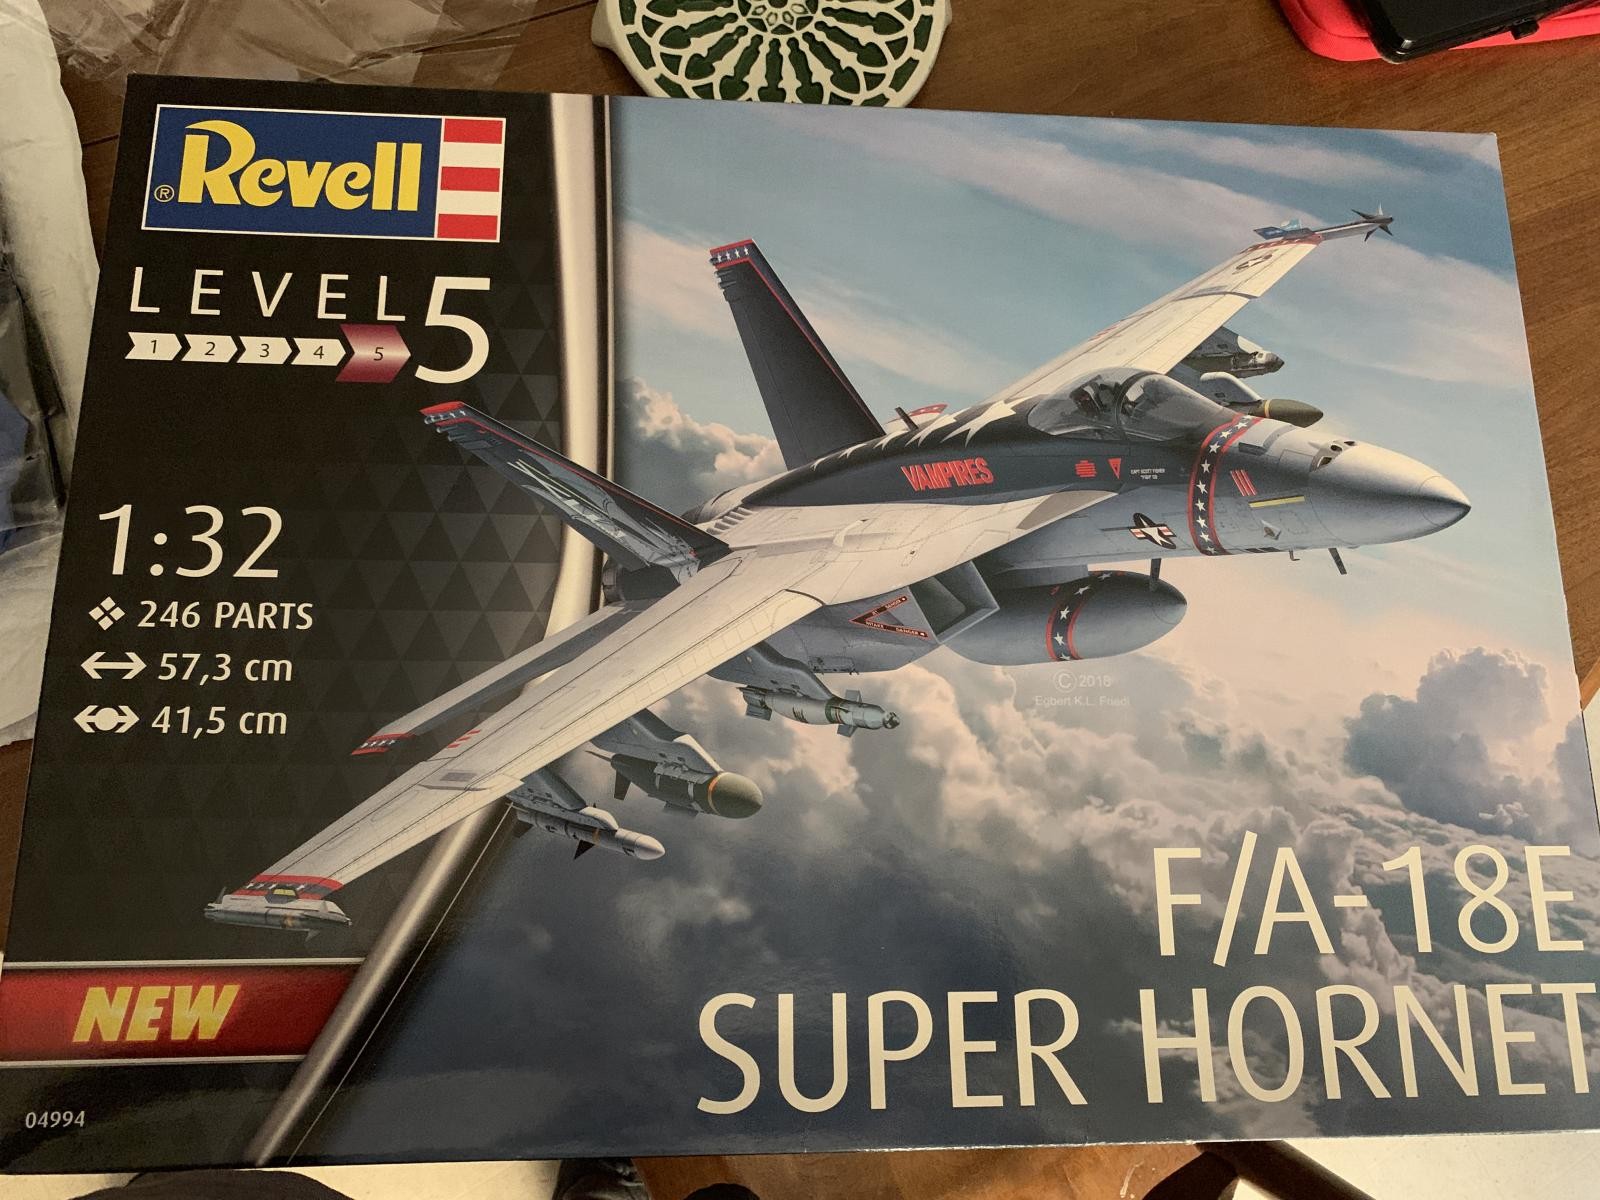
Box
Packaging/Decals/Pubs: 8
The large box is reinforced on the bottom so it supports the 5+lbs of weight. The boxart is atrractive and shows a dynamic and colorful VX-9 bird swooping in. The sheer size of the box lends itself to hangable wall art, and that’s exactly what I’m going to do with it. I cut the box top and leaving it as is. It’s quite good looking. The decals are Revell’s own, which I believe may still be printed by Zanchett in Italy, which aren’t quite Cartograph, but still good. I only used some of them on this build anyway. The instruction sheet is full color, which is Revell’s new standard, and it doesn’t disappoint.
Sprues: 7
And there are many. In the box, you can already tell there will be issues, for one simple reason-FLASH. And there’s lots of it! Too much for a modern kit. So much so, that the instruction sheet itself tells you to remove it. That’s two points off the score alone. That’s almost inexcusable. A modern kit like this should not only not have as much, but certainly not be instructed to remove it. Having said that, the large pieces of the fuselage and wing have beautiful surface detail. Panel lines are recessed well and consistently, and rivet detail is appropriately shallow. Perfect for the scale, and not overdone.
Shape: 9
As far as I can tell, there are no major shape issues. The Super Hornet is a complex shape, and the parts breakdown reflects this, but in comparing to reference pics during the build nothing seemed too untoward or off.
Subject/Cool Factor: 9
Once again, a popular, contemporary subject with plenty of variety. Yet with the Trumpeter kit already available, was it something sorely needed? More on that later. But Super Bugs are still quite popular.
Engineering: 7
Despite the size and complexity, Revell did a fine job of engineering this subject. The parts breakdown lends itself well to not leaving many seams exposed, and that’s a very good thing..more on that shortly.
BOX SCORE: 40
BUILD
Fit: 6
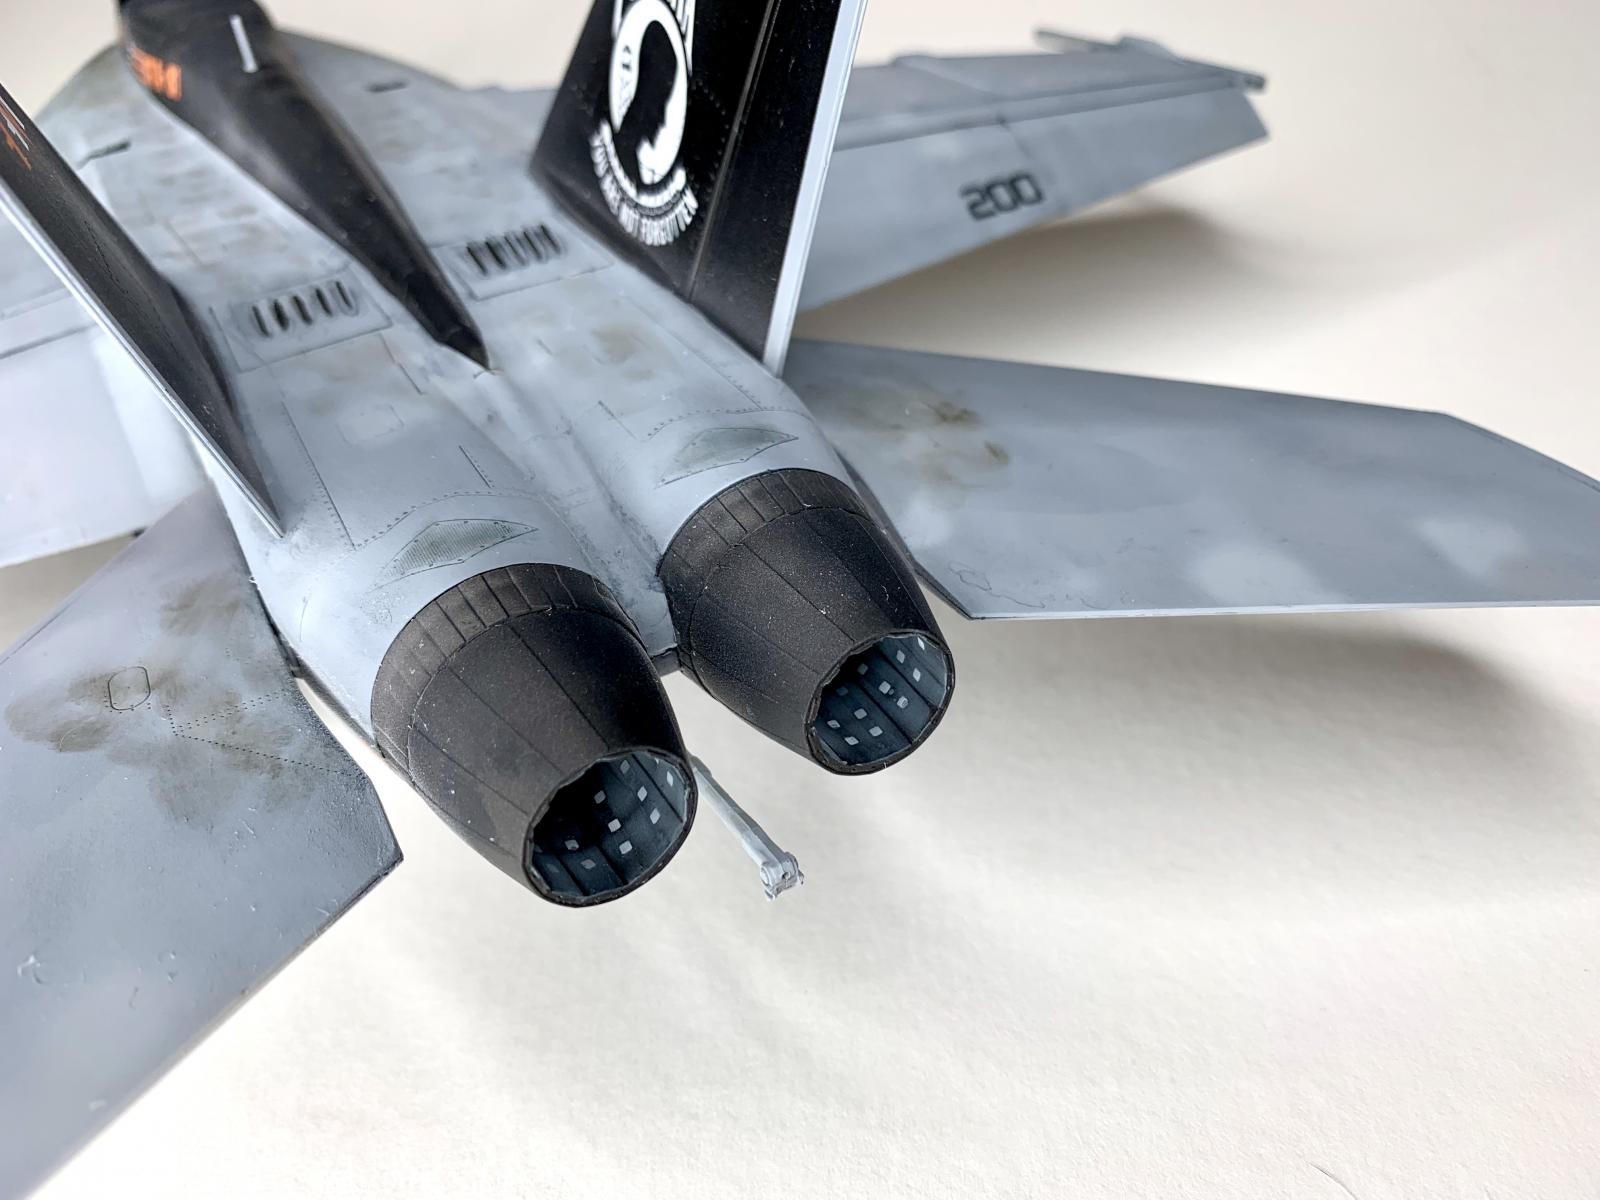
Oy…where do I start? To put it into perspective, realize that this kit is about $90 retail, and available for about $80 from most stockists. See also, my engineering comments. Having said all that…The fit ranged from good to very good, but mostly on the lower end of that spectrum. Fit certainly was NOT excellent in any area of the build. Each subassembly had fit issues one way or another. A lot of shimming was used in places like the vertical stabs, forward fuselage, wing folds, front windscreen, and a few other odd places. The Intakes have canyons that you have to fill and will be a nightmare to do. If in fact you choose to od that. I felt it a waste of time, and didn’t touch the seams in the intakes. Youi actually don’t see much of it. I debated putting a cover on the intakes, but decided that was also a waste of time., Same with the exhausts. The only glaring, visible seams were at the rear quarters of the fuselage, and I did in fact give those some attention. The landing gear, while robust, had seams to fix everywhere. All over them. The nose gear required some piano wire to reinforce it. Here the engineering really let it down on structure. The fit really was more critical here, and they missed the mark. However…they did install well and do hold up the heavy model. The wing folds were also a pain, and ended up just cutting off the hinges. Unless you’re doing folded wings, they’re not critical to install. The other area that were let down was the flaperon hinges. Again, I didn’t even bother with the. They went on, and they hold the flaperons.
Detail: 7
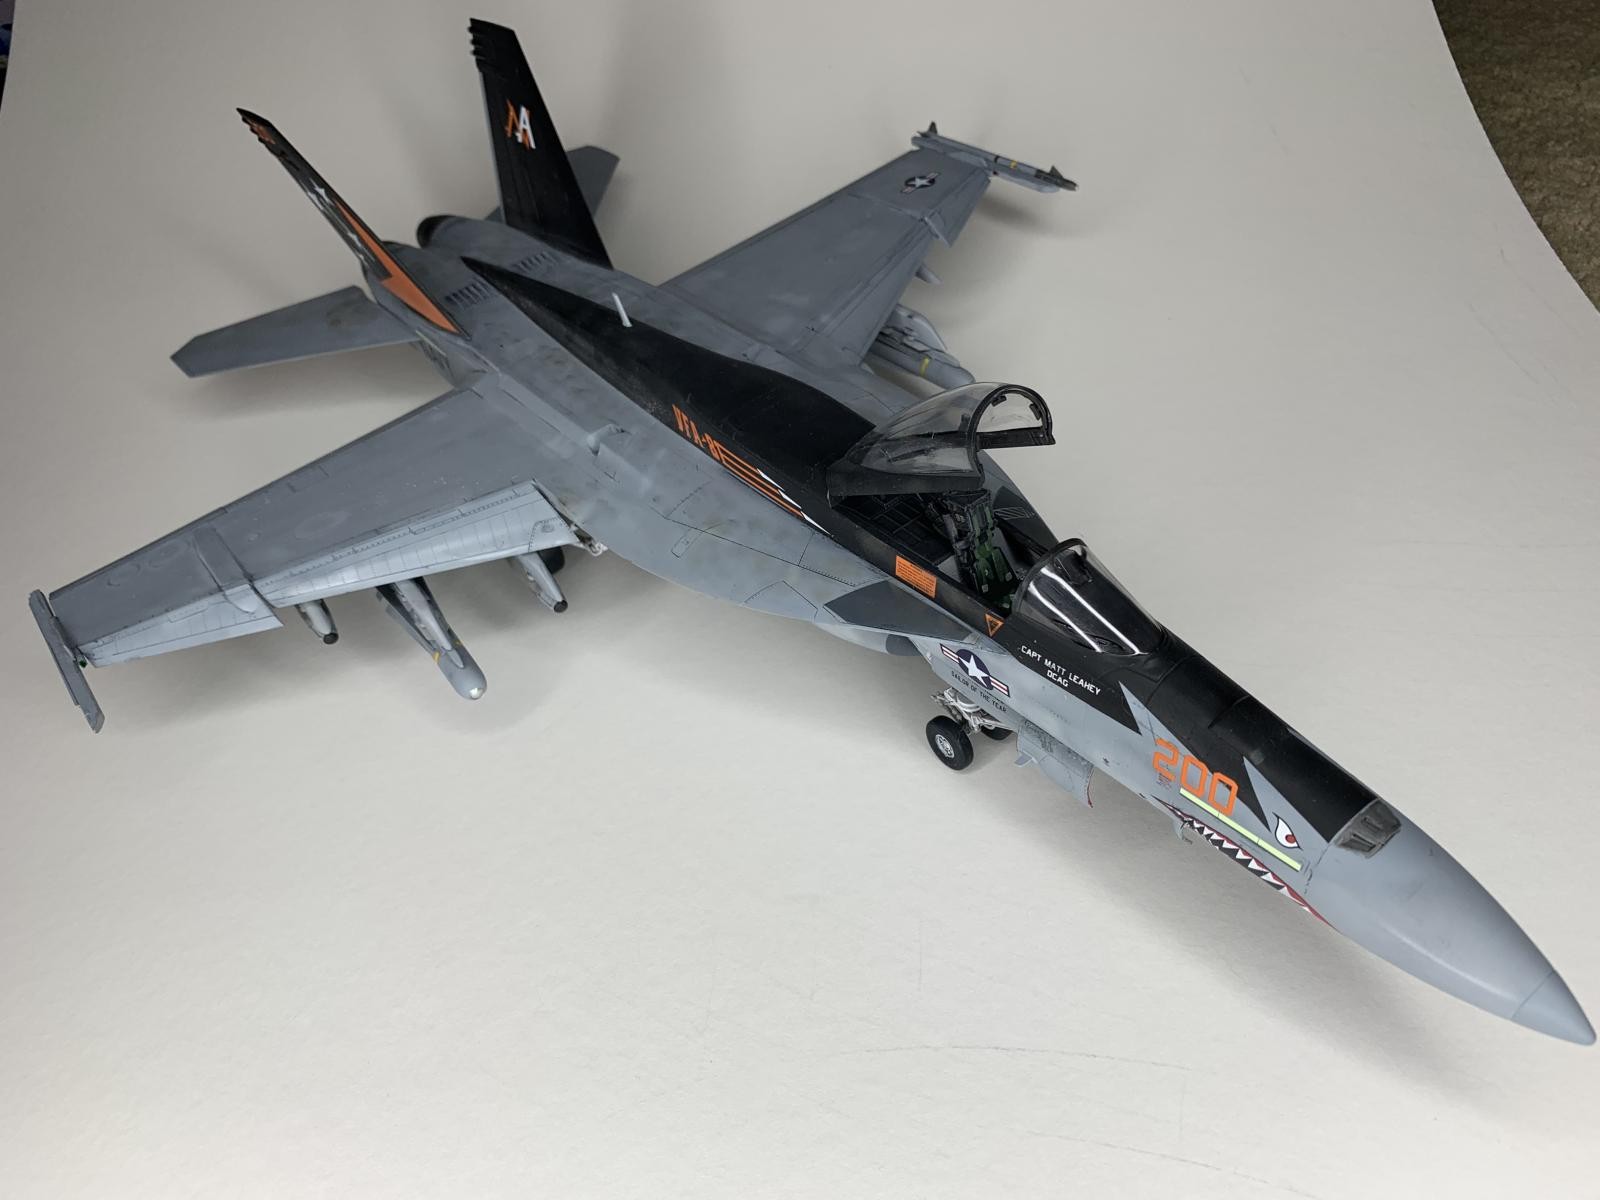
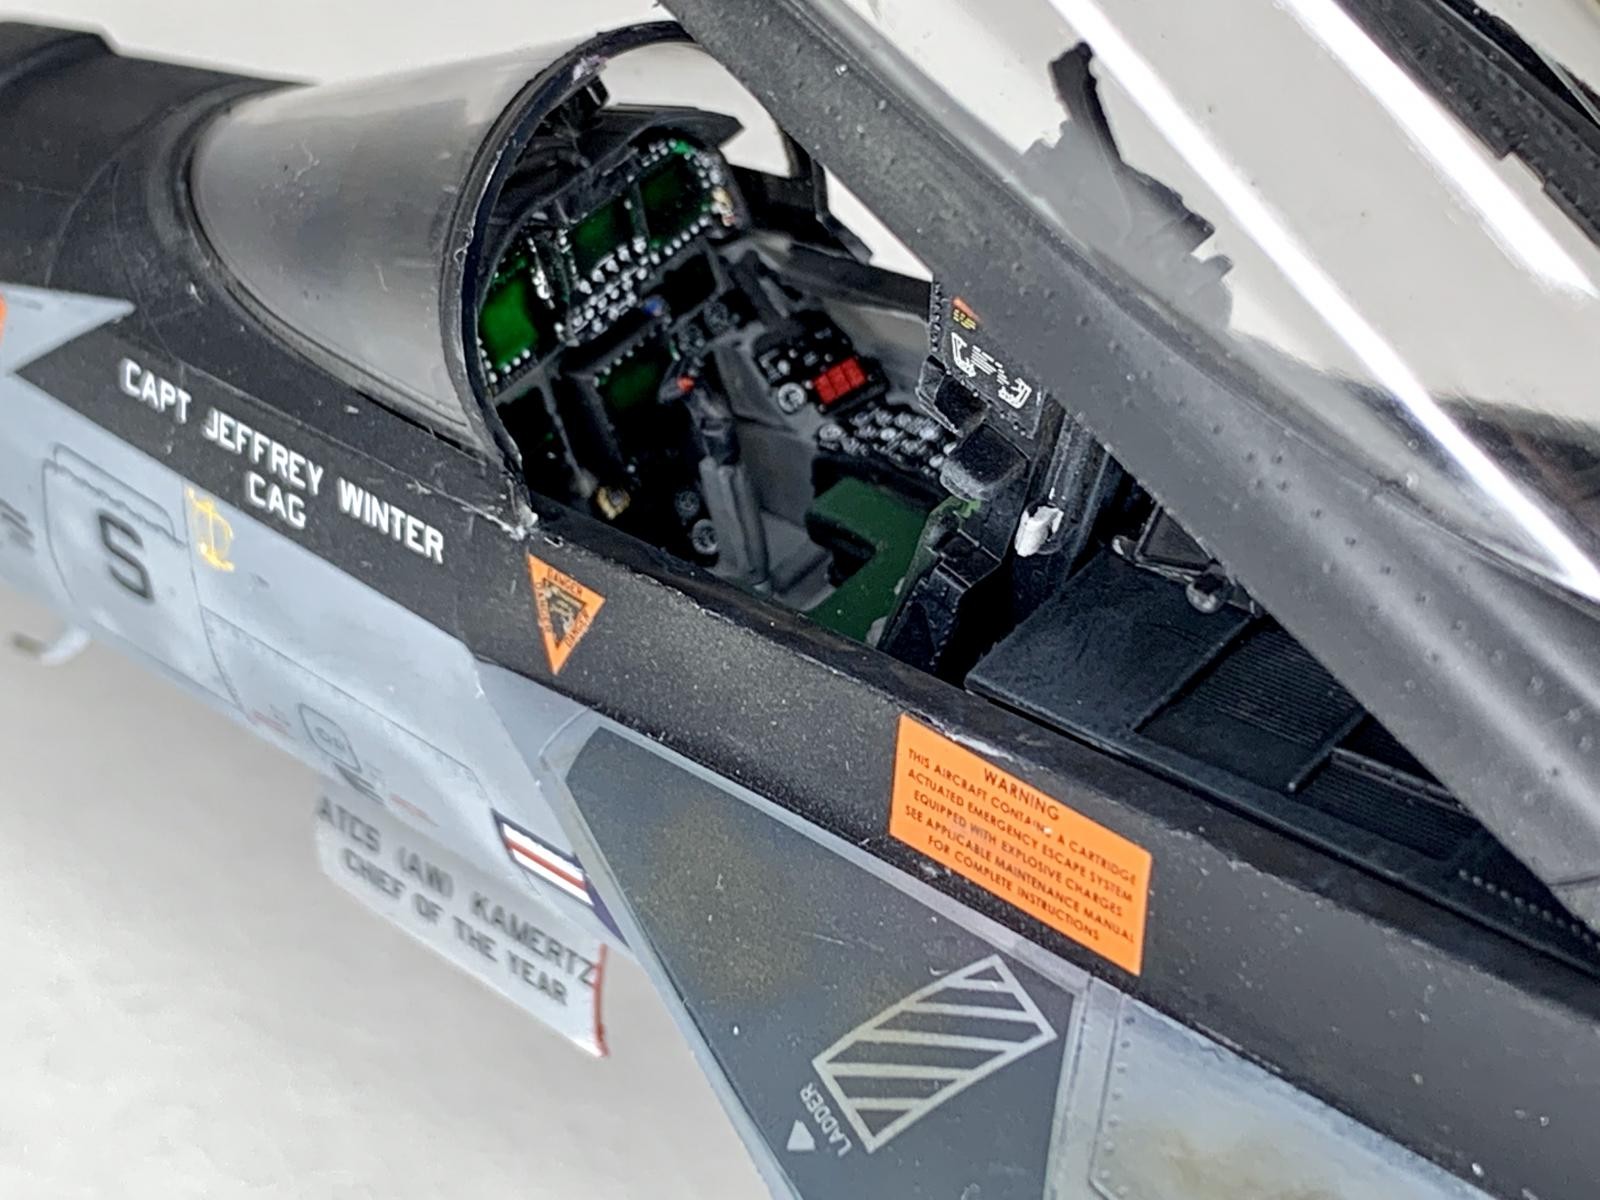
The cockpit detail is a bit soft, but there is a lot of it. And the decals do help bringing it out. It could use some aftermarket for sure, As well as the NACES seat. There’s detail there, but could certainly use more. The surface detail is again, a highlight of this kit. The landing gear, also has some good detail, but again, it still feels let down a bit. Especially since no metal reinforcement is included. This is a heavy 5 lb+ model and really needs some sort of reinforcement in the gear. The plastic gear holds up…but just barely.
Effort: 7
While most of the build went mostly straightforward, almost no subassembly dind’t need some sort of shimming or slight modification to fit right. The effort required was rather discouraging at times. Granted this is a 1/32 scale model of a large fighter, but it does have a frame of reference that it should of a least used as an example of what TO do.
Value: 9
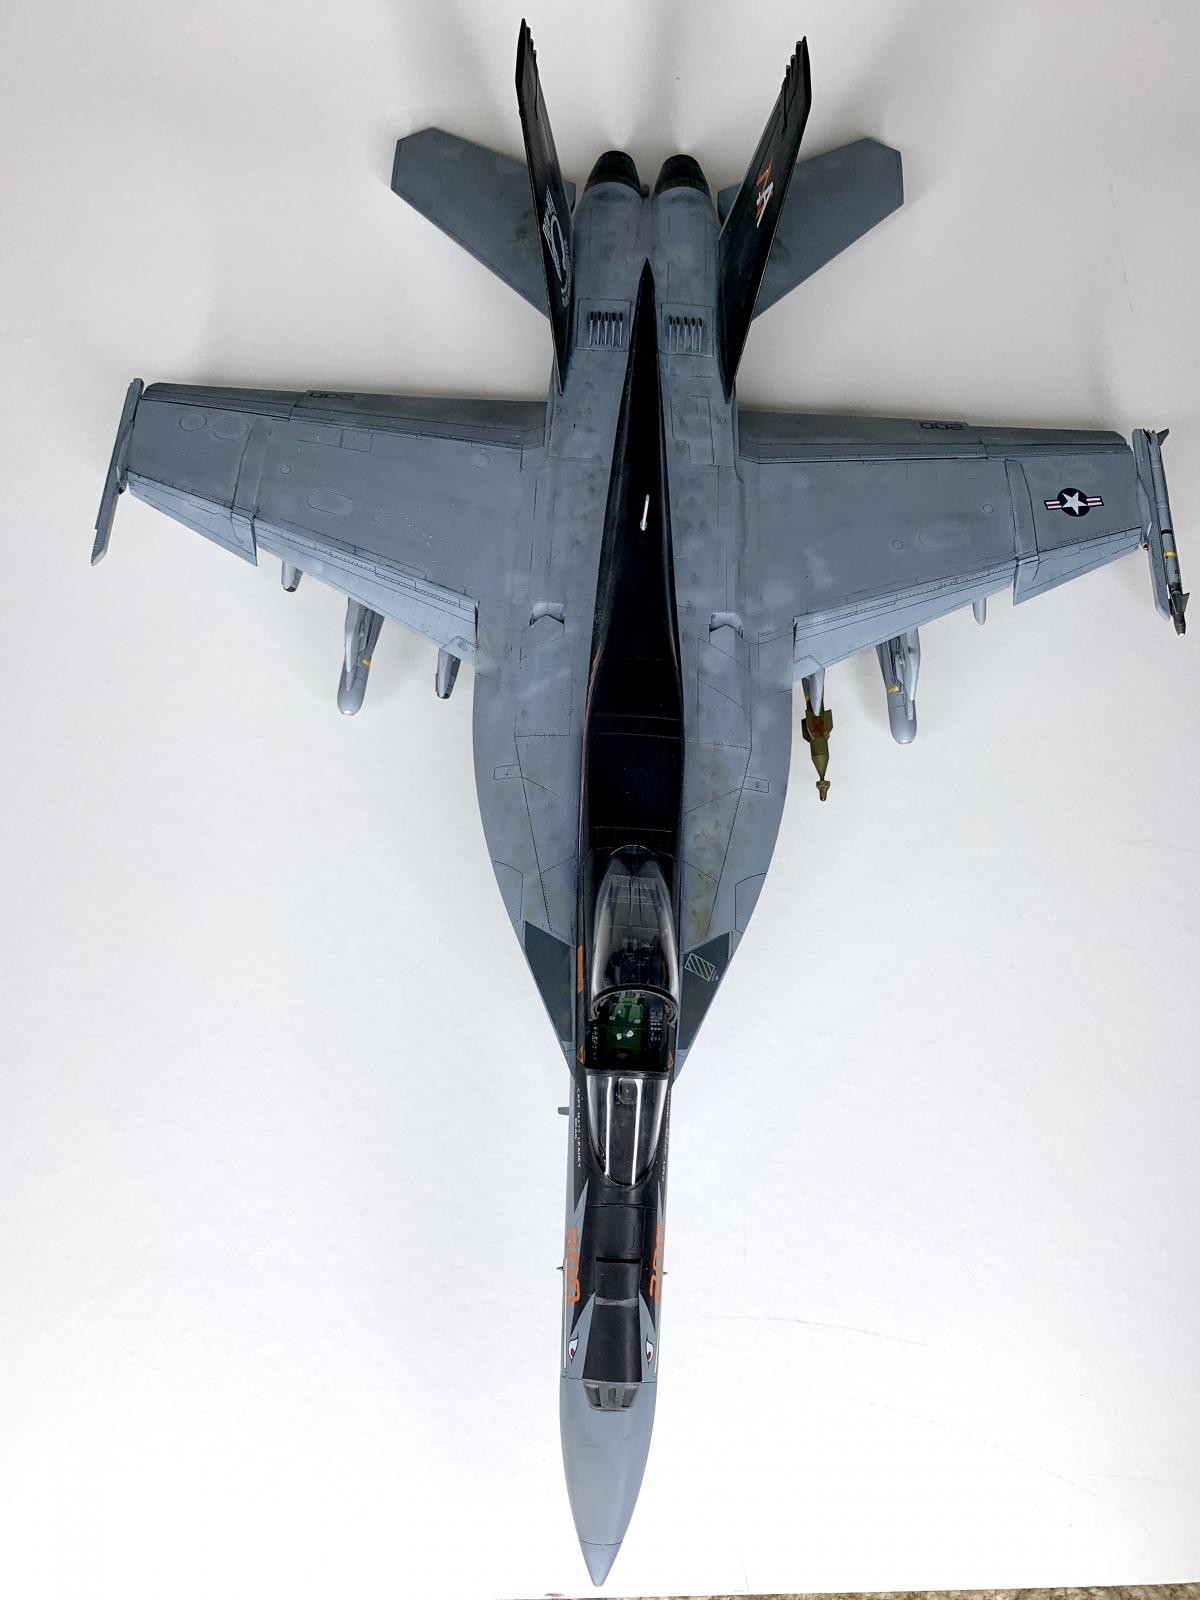
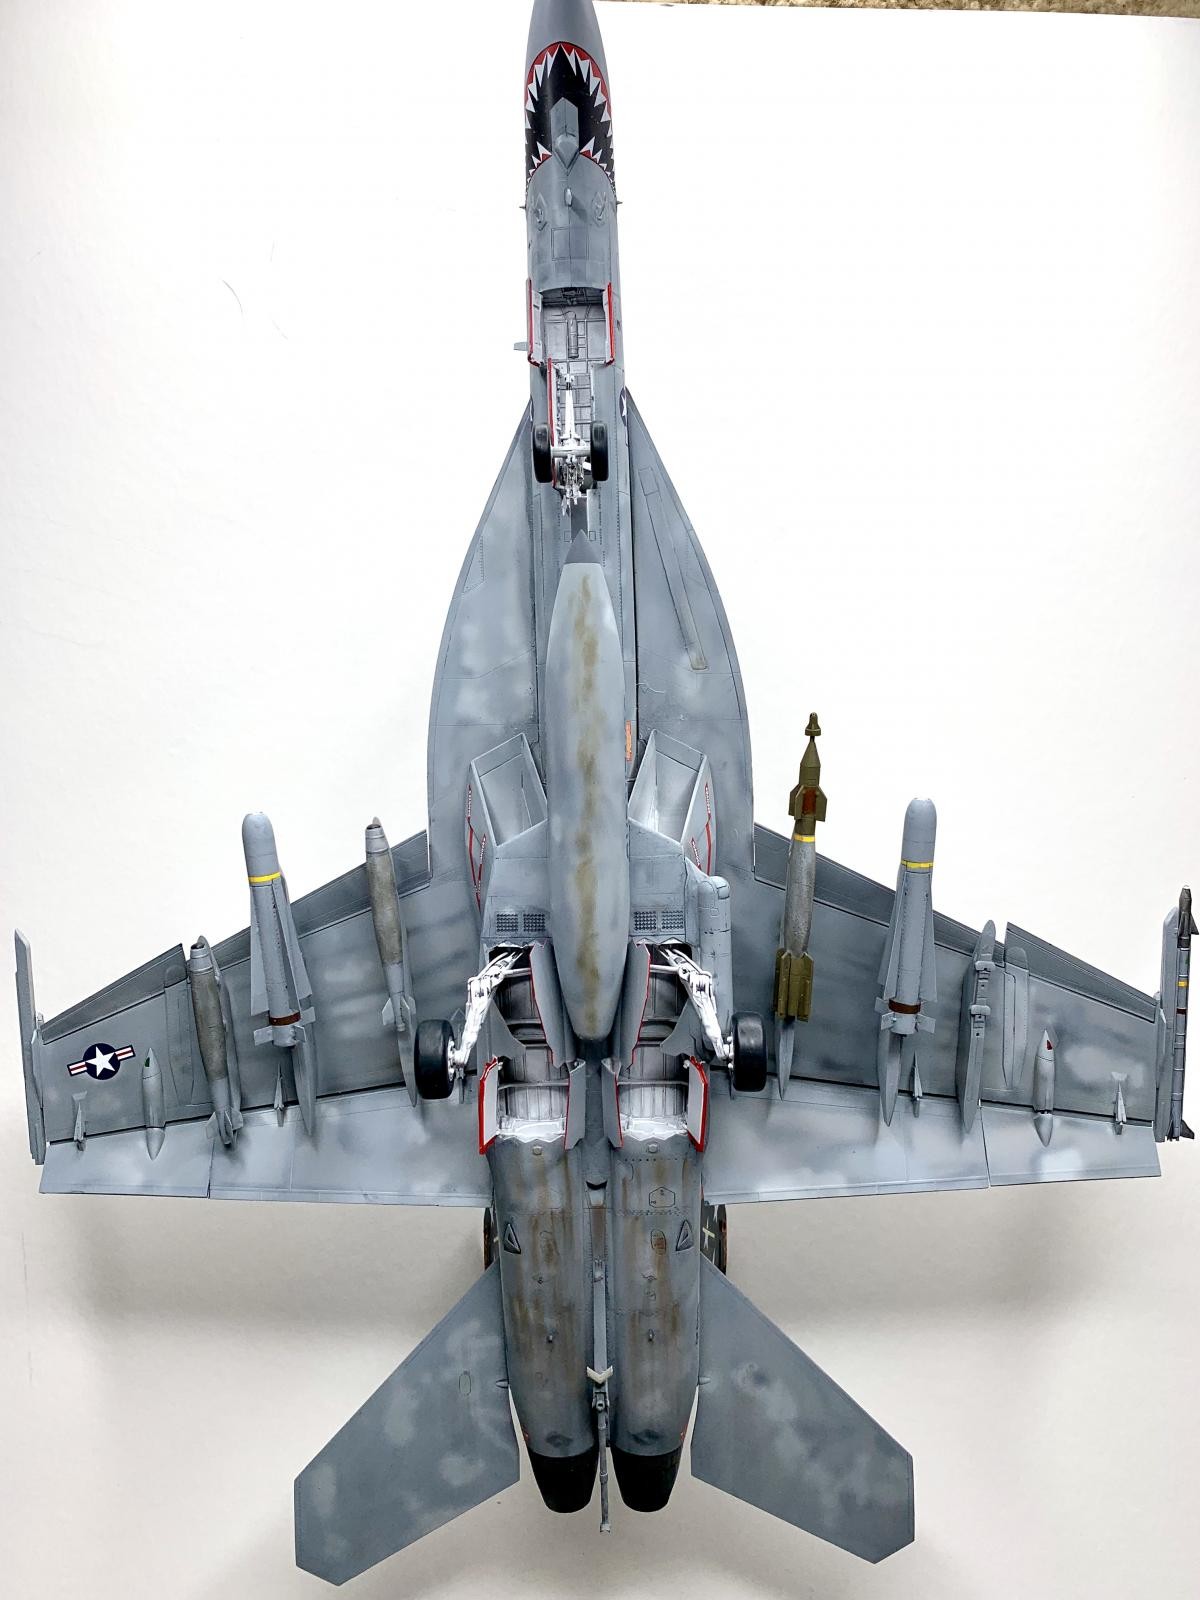
And here we come to the crux of this kit…at roughly half the price of the Trumpeter kit, you can’t go wrong with it. This is exactly the kit you’d want if you just have to have a 1/32 scale Super Bug, but don’t want to play upwards $180 to get it. As a comparison, I did get a Trumpeter F-18F kit somewhat cheaply, so I can build it later and make a more comprehensive comparison. The Revell kit though does come with acomparable ordnance set, that does an admirable job. As for my build I chose to use Maverick missiles, as I saw in a reference pic. Those were aftermarket, but the AIM-9X, GBU-38s, and GBU-12 I used came right out of the box. Their fit was also good, but did need some work, and they have no thermal protection texture on them. For that, I used liquid cement, and a stiff brush to recreate it.
Fun Factor: 8
Despite the issues, it was an enjoyable build, and it took a while to get used to and not marvel at the size of the aircraft in this scale. Now, if you’re a builder that loves to take kits that aren’t of Tamigawa quality and make them better, this is the kit for you. Half the price of the Trumpeter kit, and ripe for improvement. If like me, you don’t want to spend the time to fix everything, and make a presentable build, then you will get what you pay for. And that’s not a bad thing.
BUILD SCORE: 37
Add it all up and the D score is…77 out of 100
A solid C. Again, for the money, the subject is hard to beat. It’s a fun build, but won’t win any contests unless a lot of effort is put into making a winner.


Beautiful work, sir...quite an "eye-catcher" (speaking of which, perhaps you could add another pic of that box art you mentioned)... 🙂
Thanks! Done!
fine job ...the cockpit is enthralling
Excellent work, Daniel!
I don't understand when you talked of weapons (needing) ... "some work, and they have no thermal protection texture on them. For that, I used liquid cement, and a stiff brush to recreate it."
This is new to me. What is "Thermal Protection" and how does liquid cement & a stiff brush make the thermal protection?
Again ... this is VERY well done!
Thanks!
If you look up pics of bombs on carriers, they have this rough texture to the casings. It’s a slurry designed to prolong the time it takes to cook off. Thus preventing a catastrophe like the ones that befell the USS Forrestal or the USS Oriskany.
And I replicate it by painting the bomb casing with my ratty bottle of Tamiya Super Thin cement. While it’s still curing, I use a stiff brush to stipple the casing. This mars the surface and replicated that thermal protection coating.
A good-looking Hornet! Nicely done.