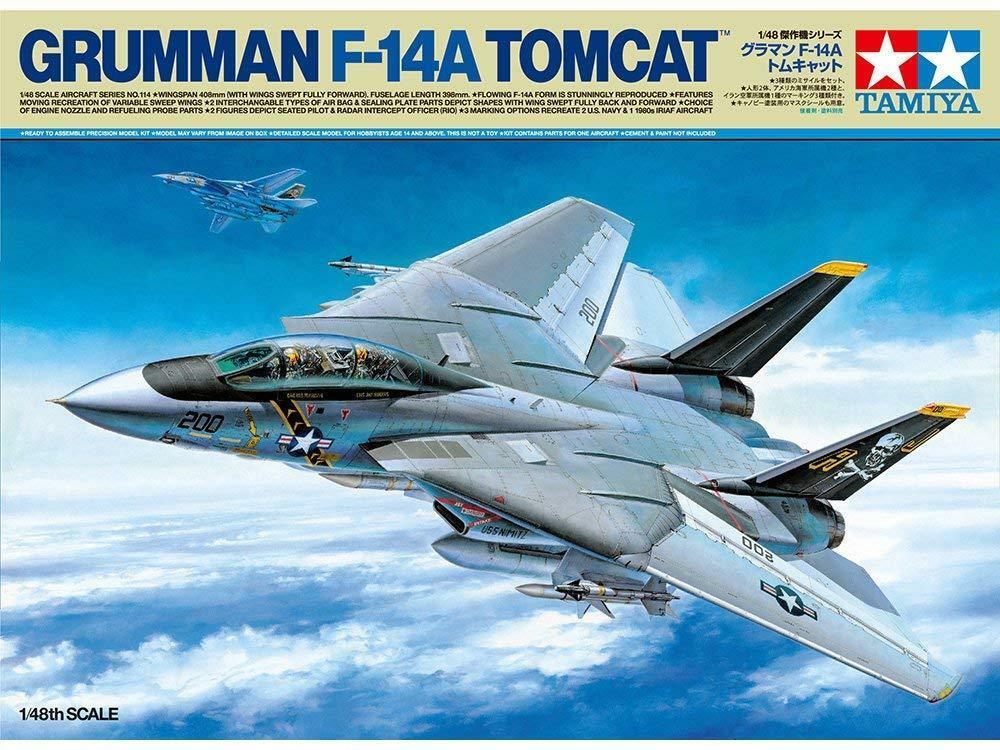
Review: Tamiya 1/48 Grumman F-14A Tomcat
The iconic F-14 has been retired since 2006 from USN service. 13 years ago, doesn't feel that way. Iran still flies the few they have left. And here is the "new " Tamiya F-14A kit, and yet it has been out into our hot little hands since 2016. Already 3 years old. Now there have been a few 48th scale kits of the Tomcat over the years. Fujimi, Monogram/Revell, Academy, Italeri, Hasegawa and Hobby Boss. Avantguard(AMK) and Great Wall have announced a new tool F-14 due to come out this year. AMK's was announced back around 2016 and everyone has been anticipating that kit ever since. In the meantime Tamiya has produced the A and D variants since that time. Great Wall is to release an A variant first. The Eduards "Danger Zone" kit is a rebox of the Hobby Boss F-14A, which personally I have never seen but have read the pros and cons. Then there is the love/hate relationship of the Hasegawa Tomcat. Which I can attest to as I am currently building one at this moment and along with this review will do a minor comparison between the two kits. And to be fair, Hasegawa's kit is good no doubt, though it is not an easy build. It does have it's moments. But it is not like a Kitty Hawk. But the F-14 by nature in reality is a very complicated air frame. At sea it was high maintenance and I can hear the grumbles of many of the AE's, AD's and the AO's working on them. The maintenance chief already on his 7th cup of coffee and it is only 0800. Funny felt the same way on my 7th cup of coffee just building the darn cockpit. It is a labor intensive kit. Any way enough about the Hase kit, lets see what is in the box of the current Tamiya Tom.
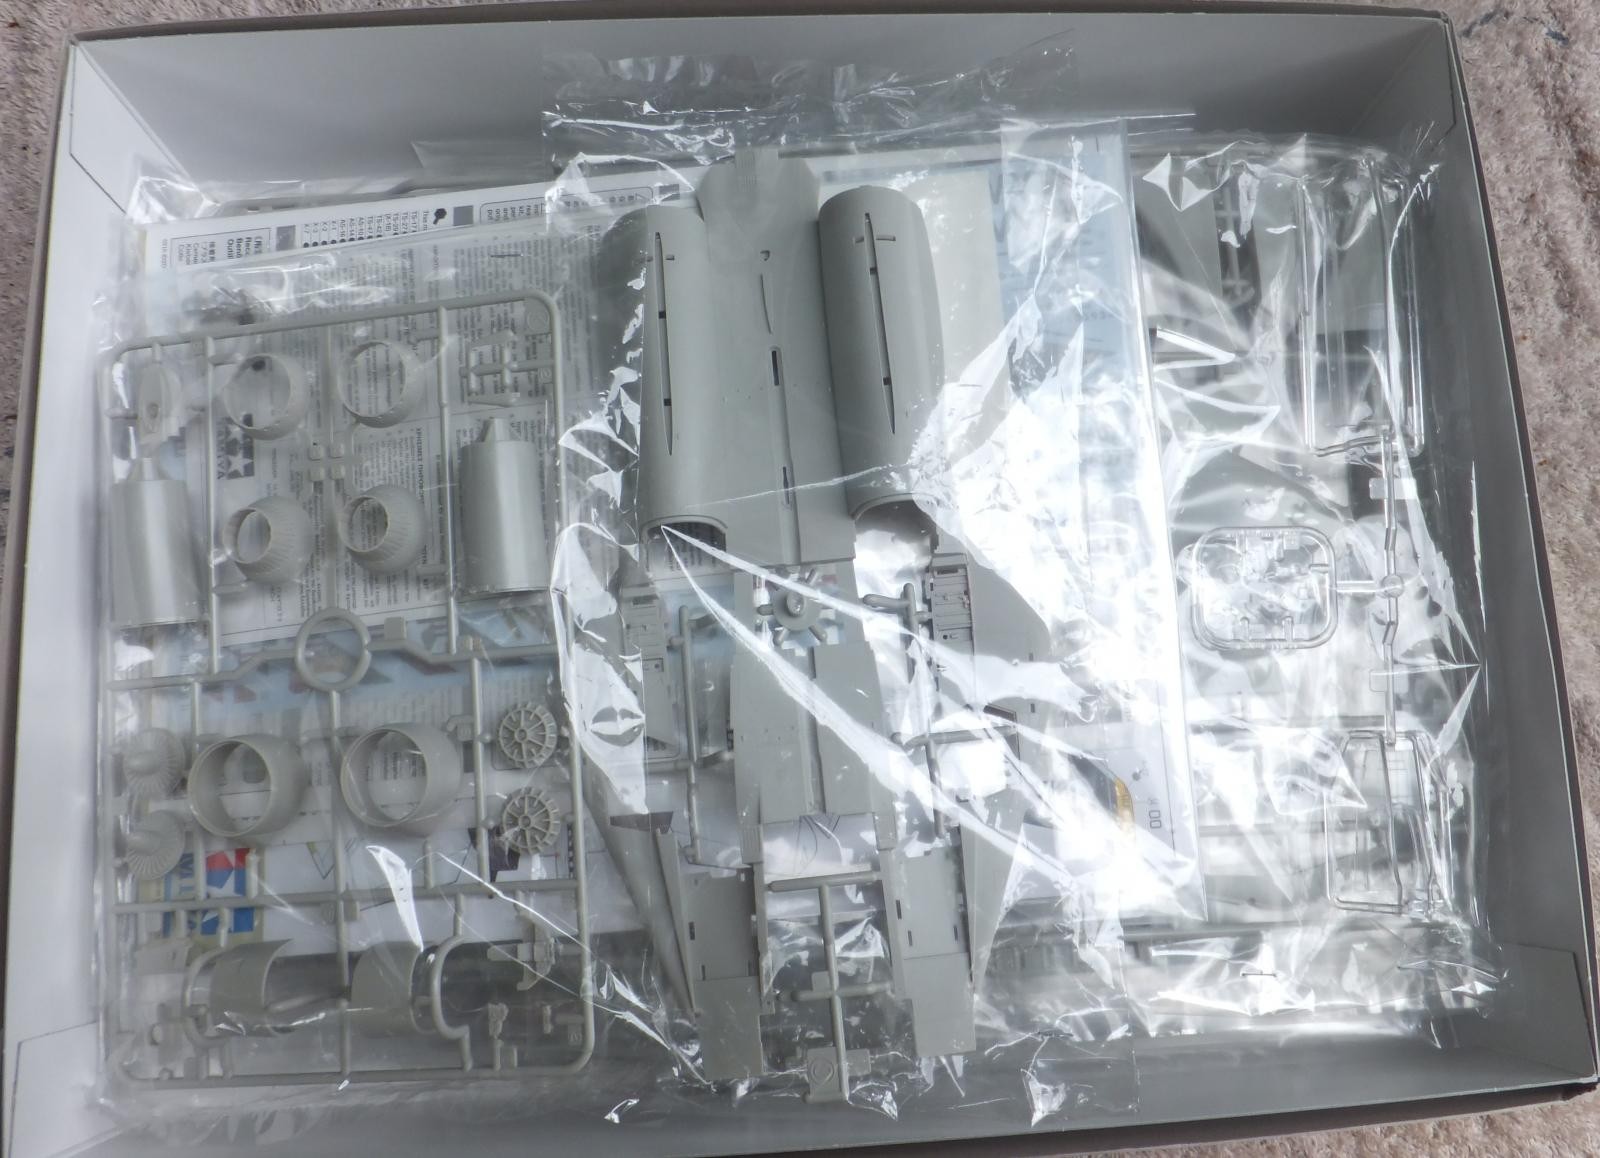
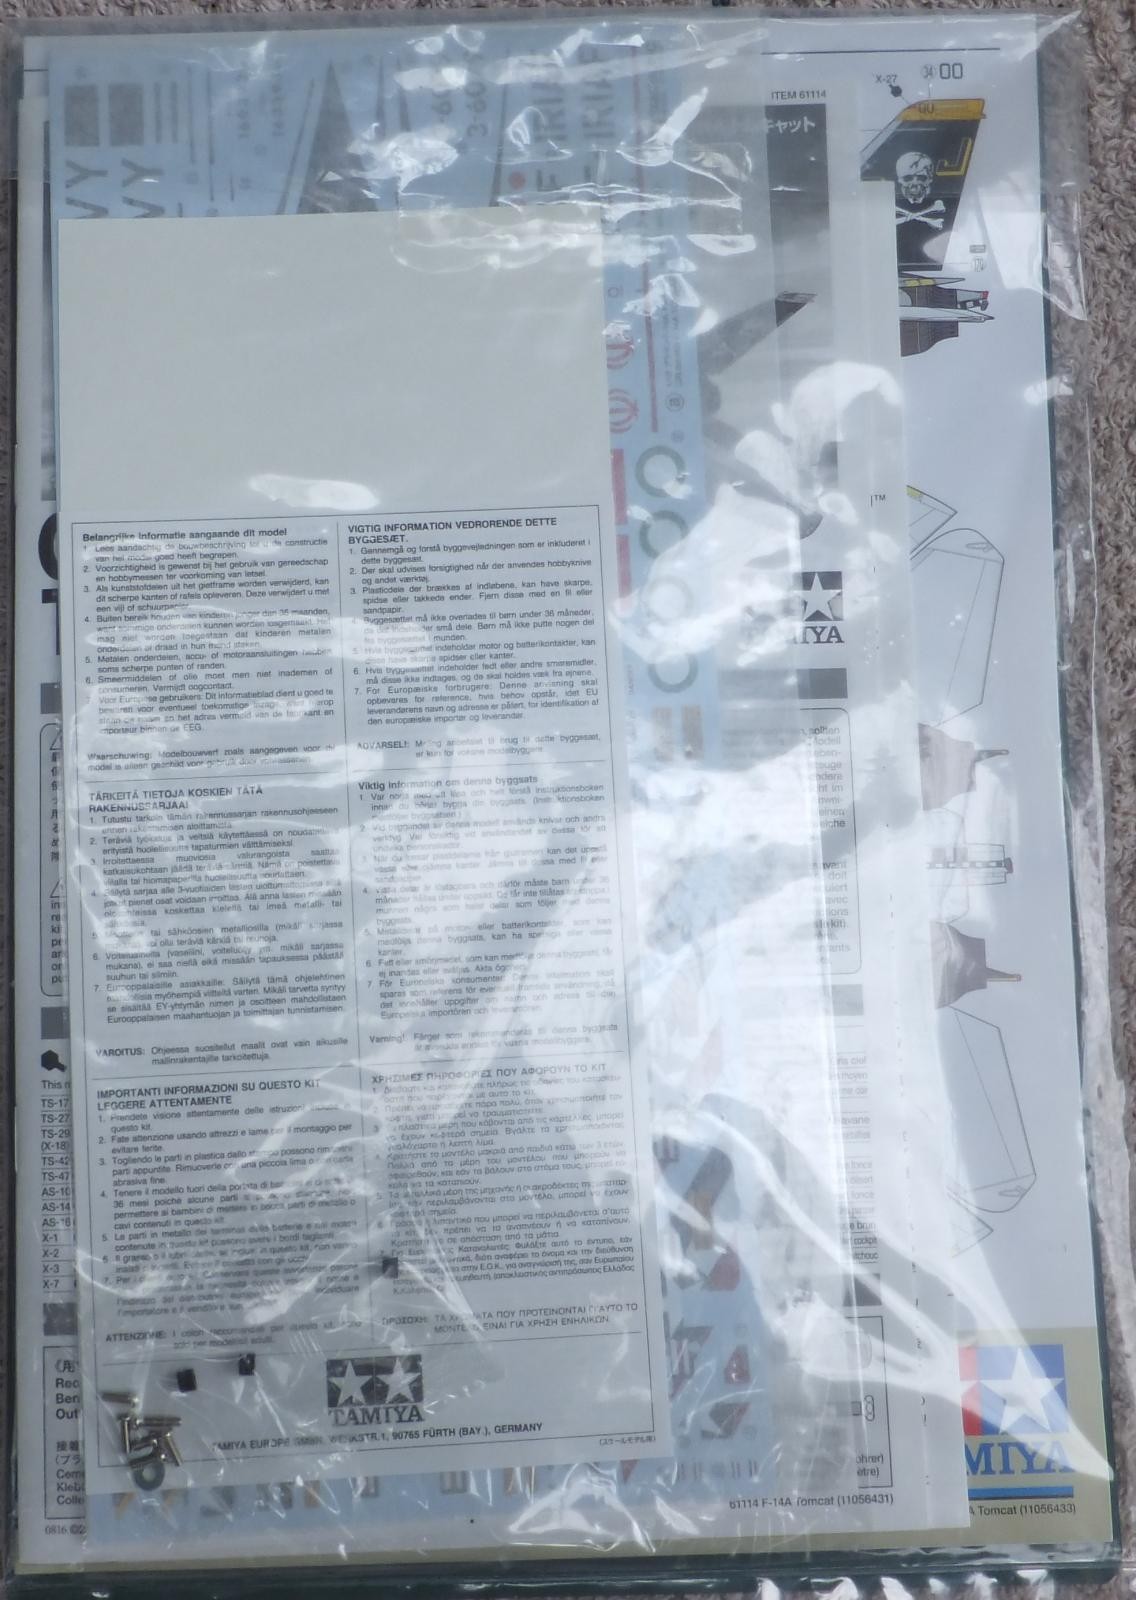
There is a lot into this kit. As most of the newer produced kits have as well. First off Tamiya has all the literature, decals, instruction book, etc. wrapped neatly in a bag to protect them within the box.
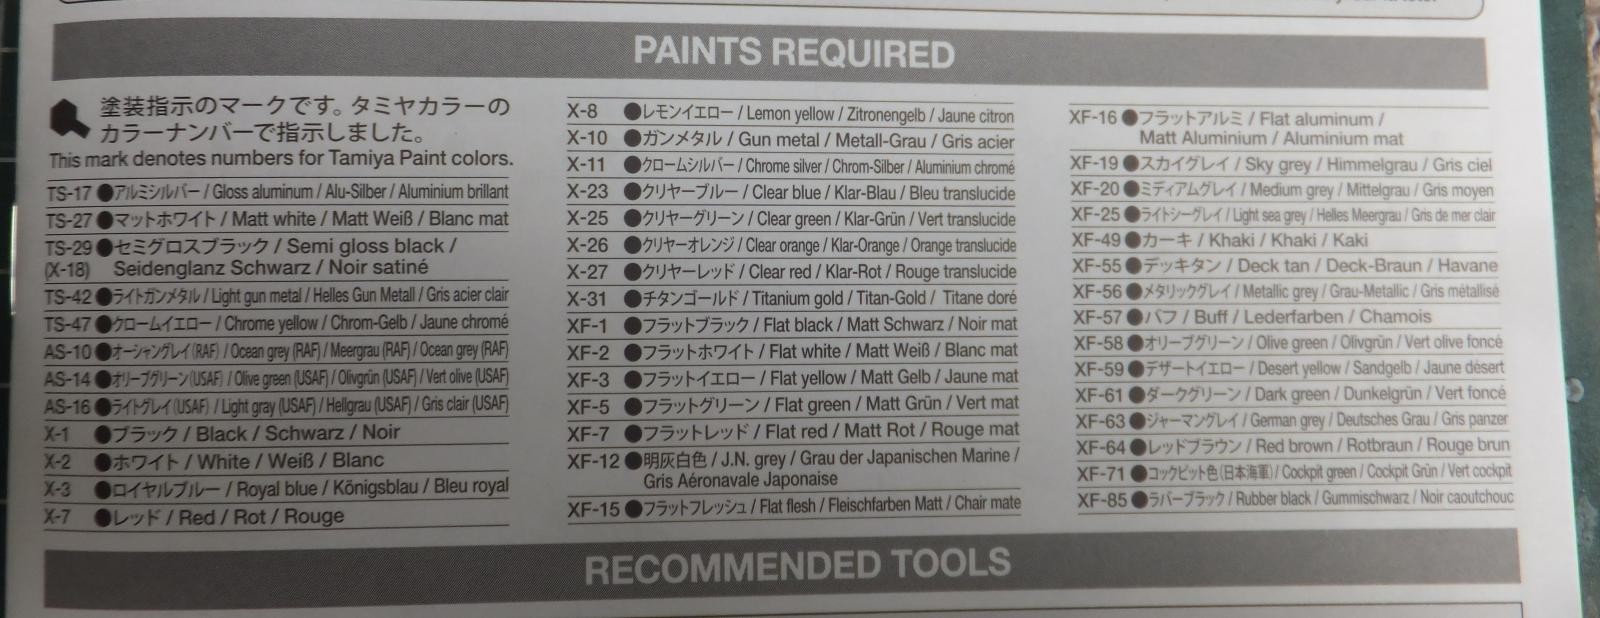
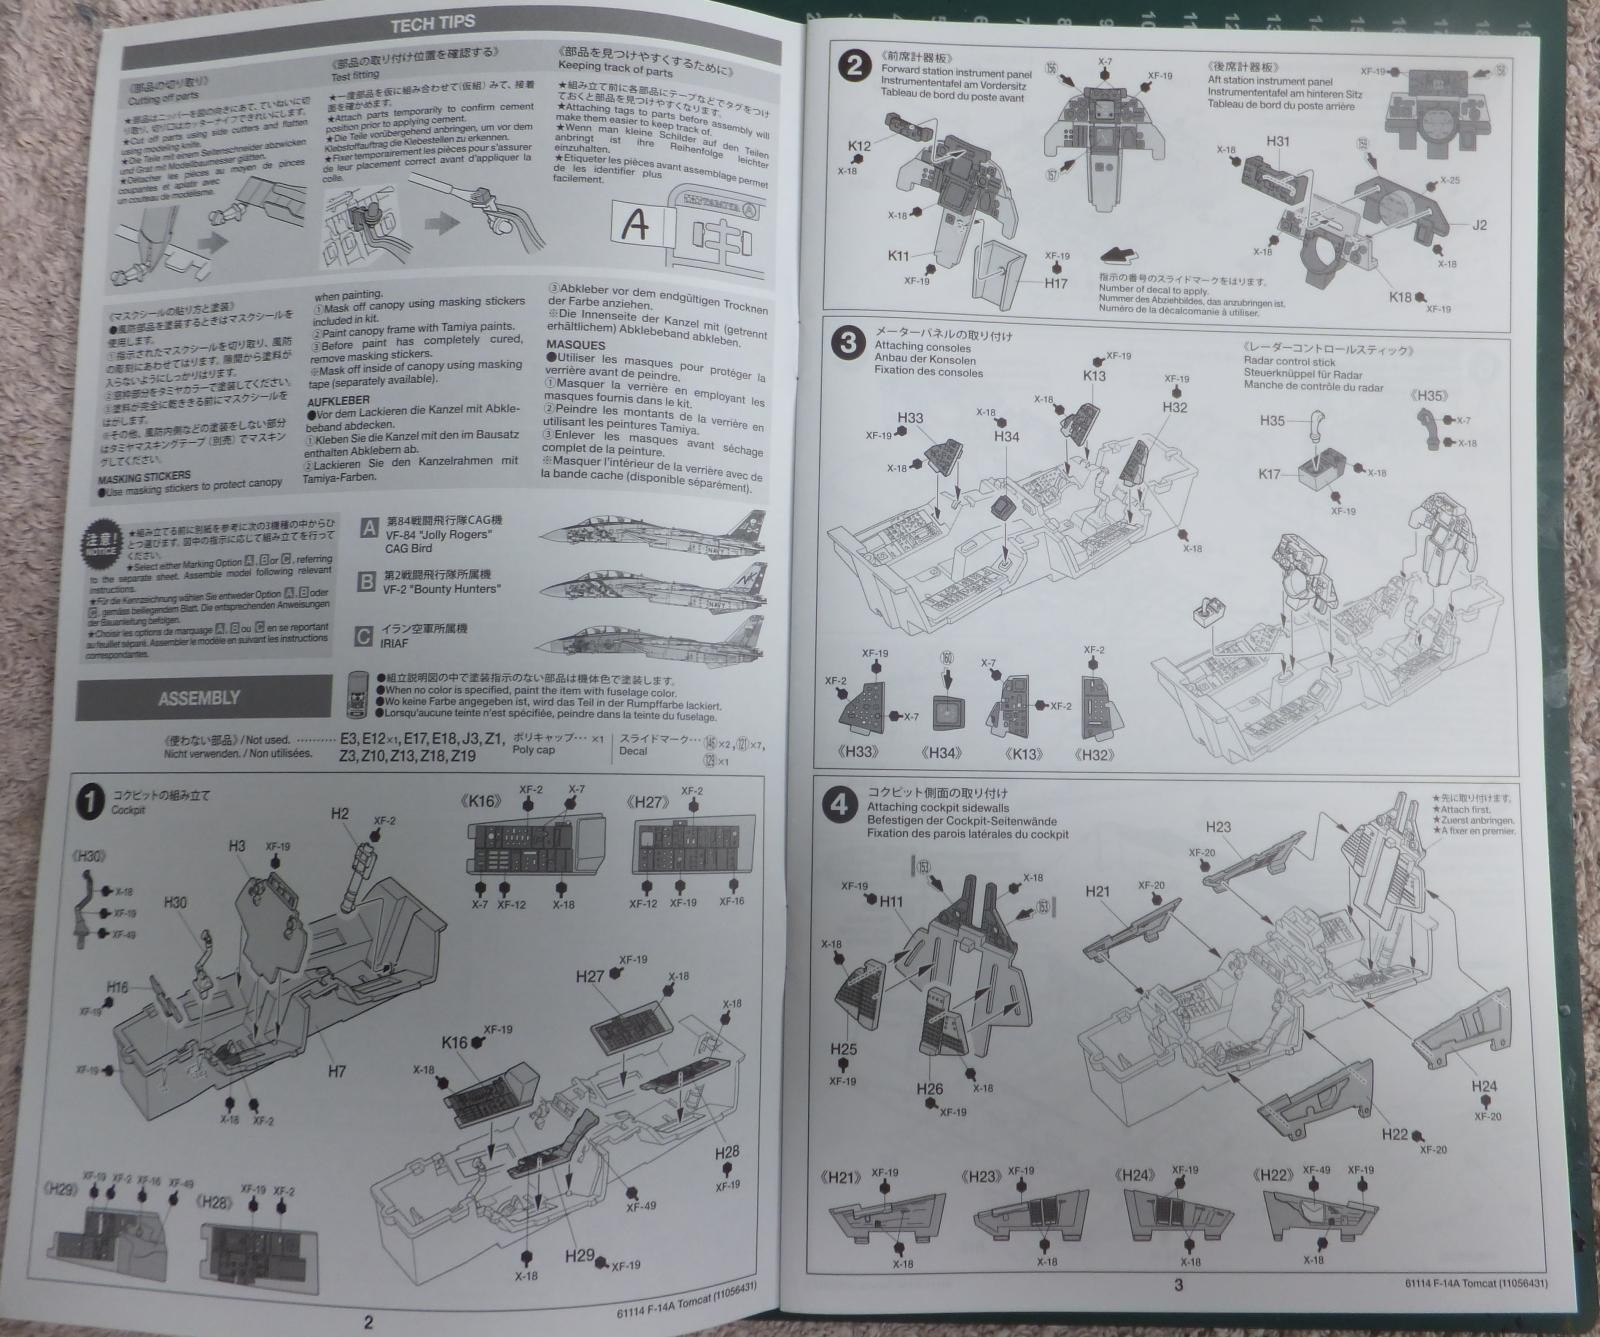
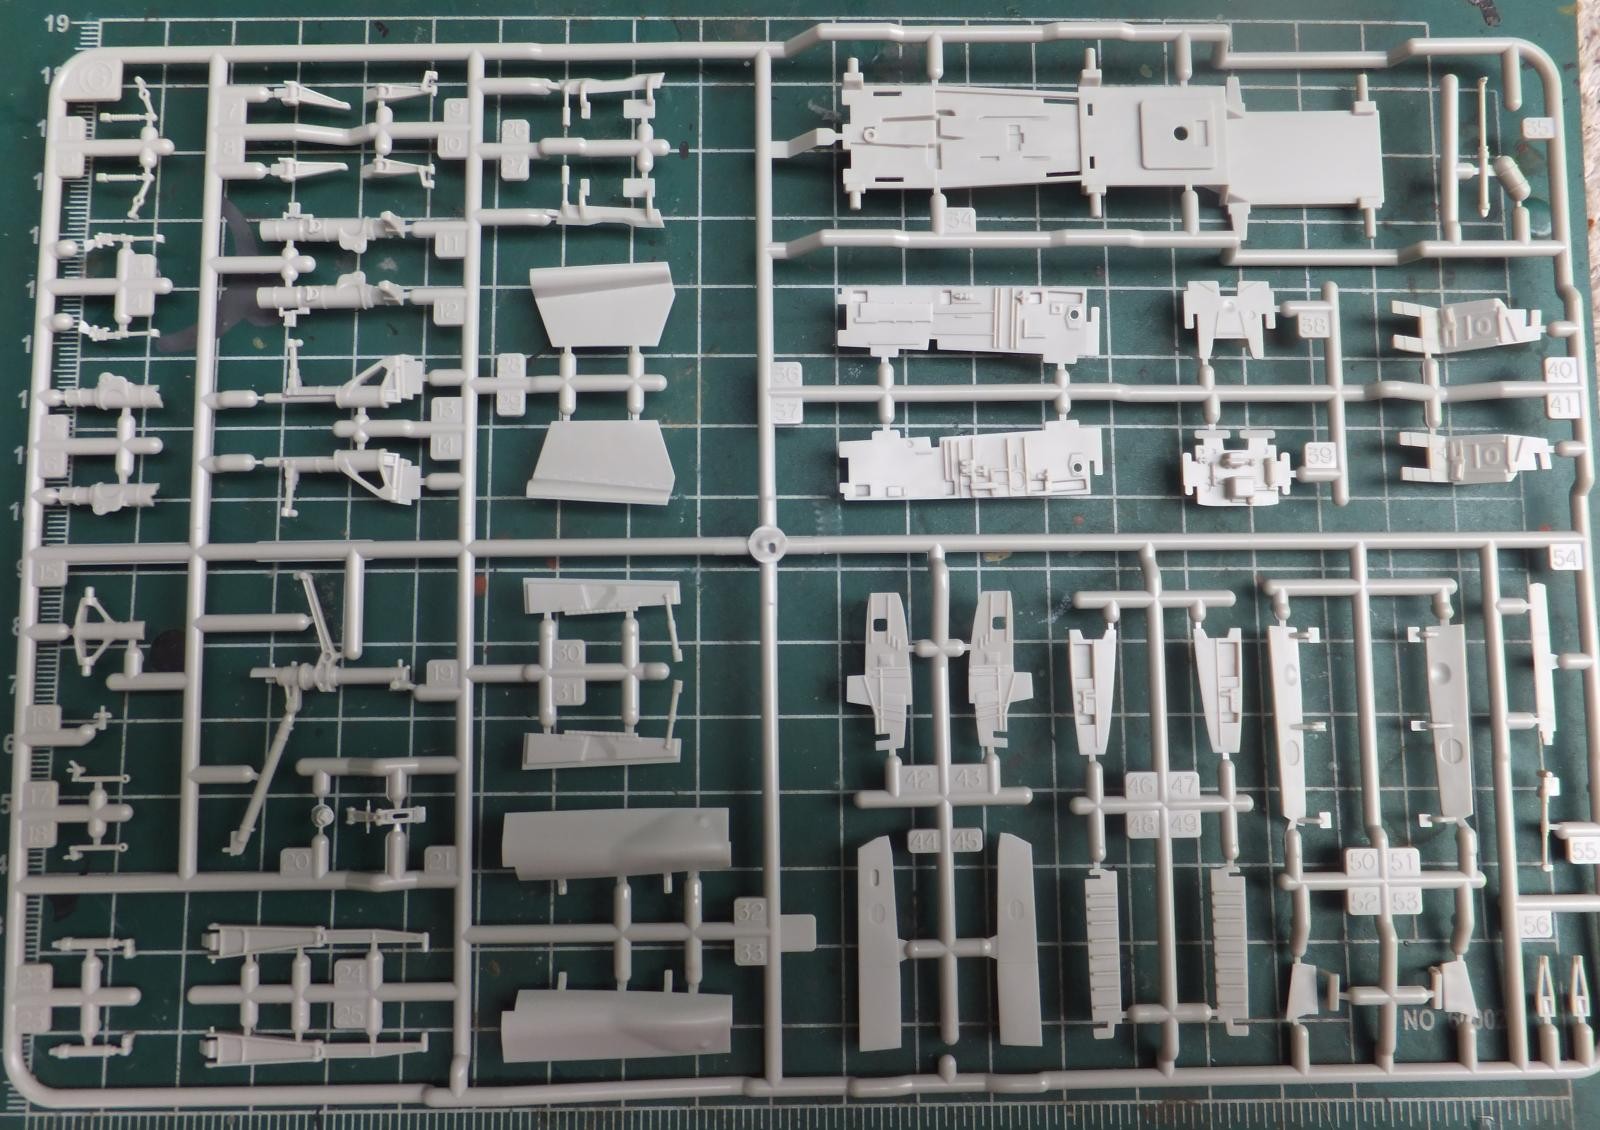
The instruction booklet is 24 pages, with 45 steps to build the model. Color call outs use the Tamiya brand of paints. Typical construction layout easy to follow direction in building the Tom. starting with the cockpit. Ending with 3 pages of stencil placement.

-
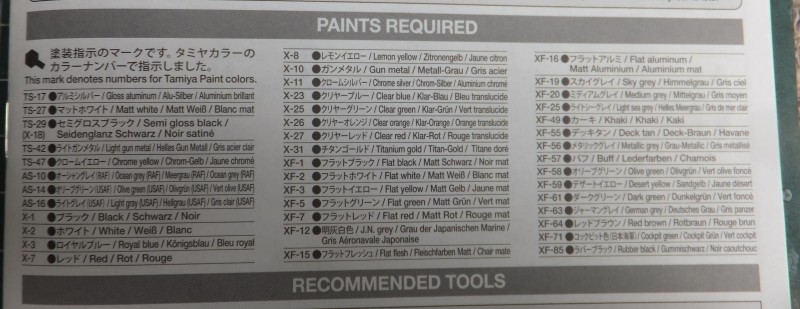
- 1. Tamiya paint brand
-

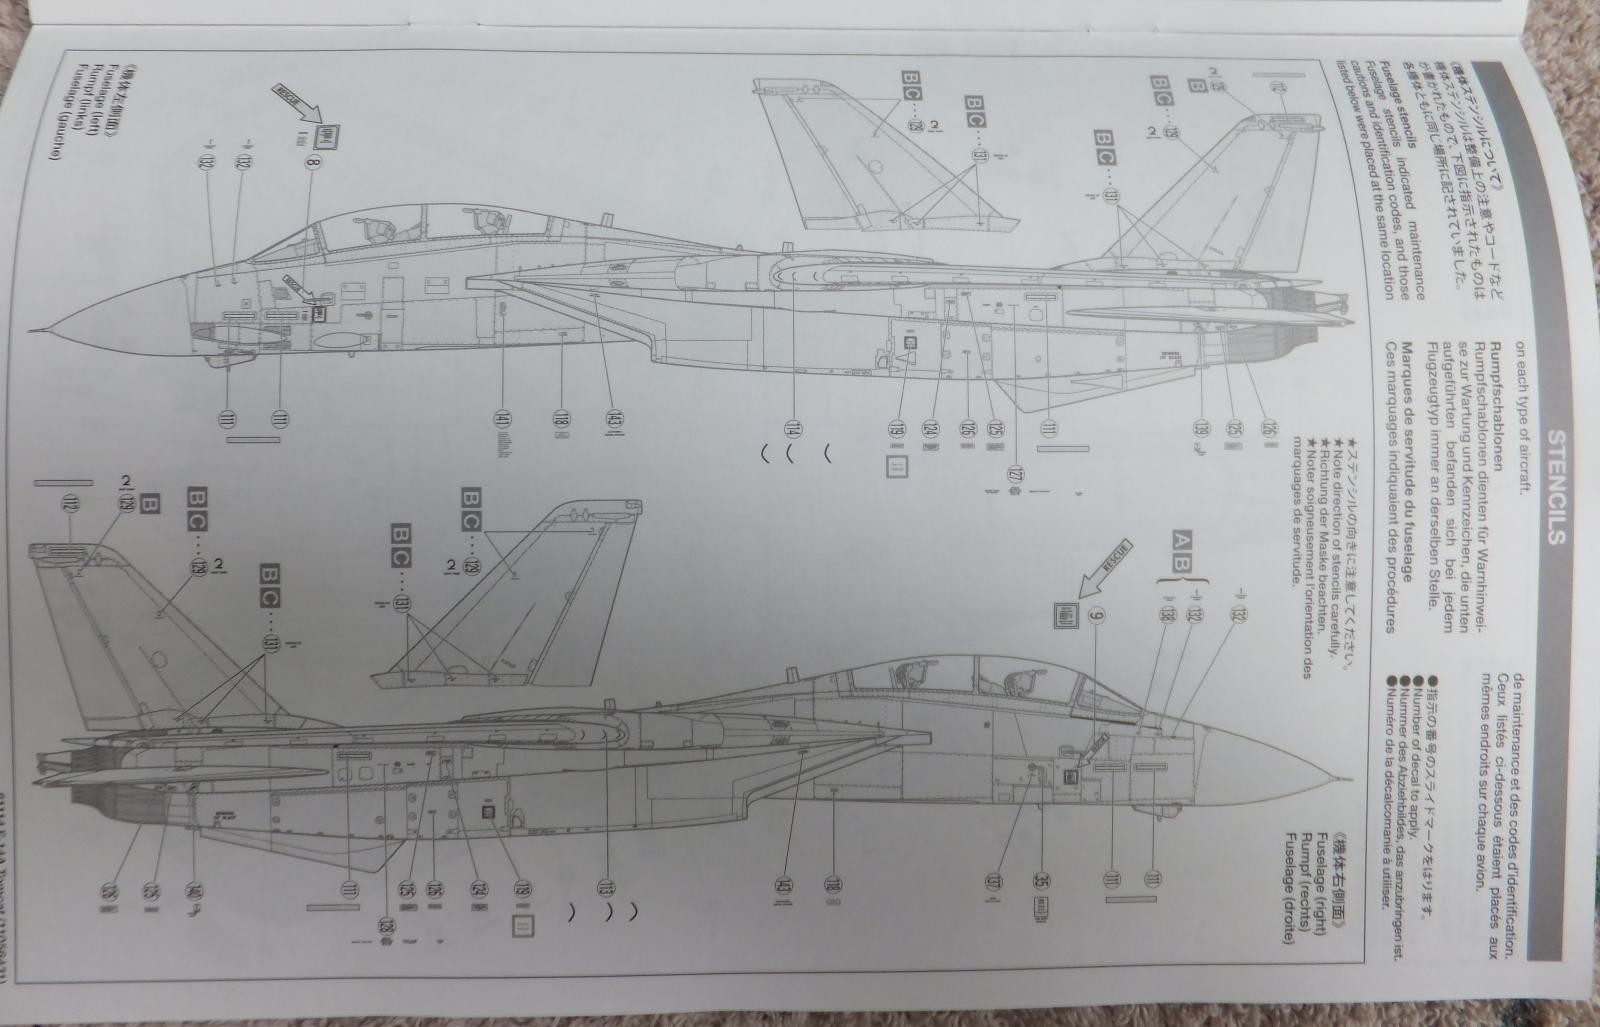
- 1. 1 of 3 pages for stencils
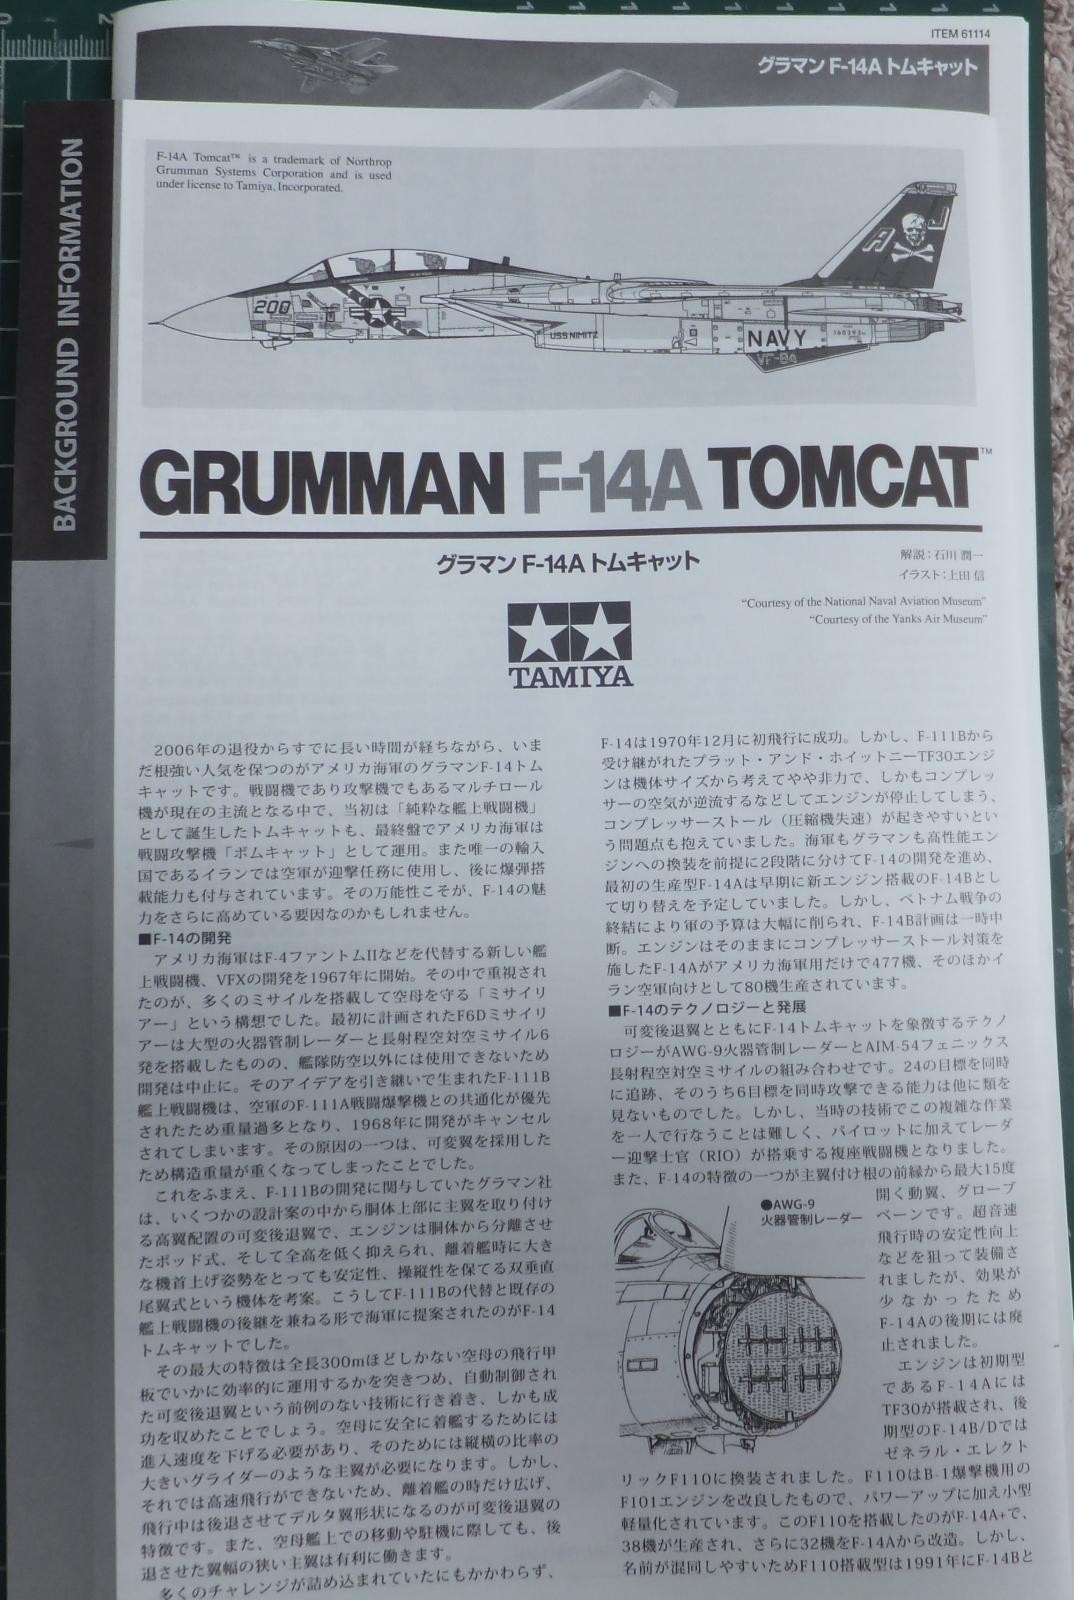
Next is a neat info foldout summarizing the history of the Tomcat and early load out configurations.

Then there is the foldout in color painting and decal guide of all 3 options that are available to build in the kit. Nicely done.
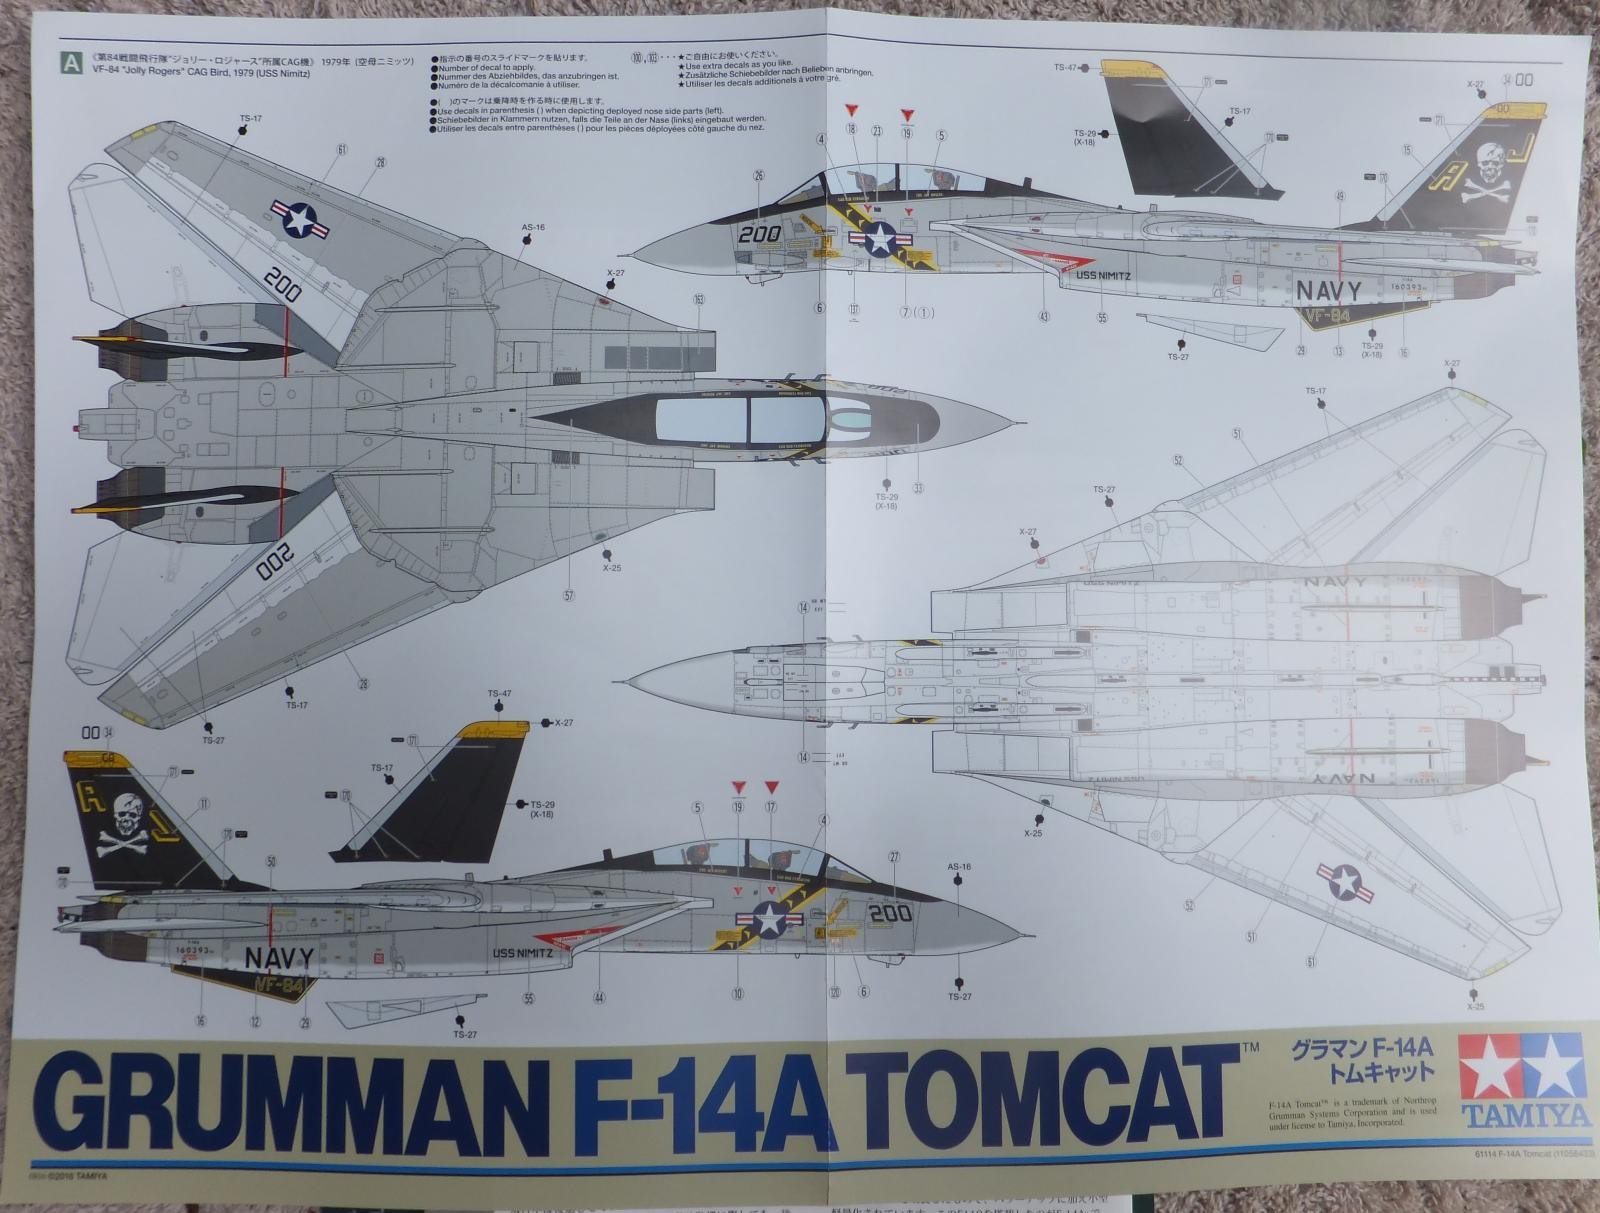

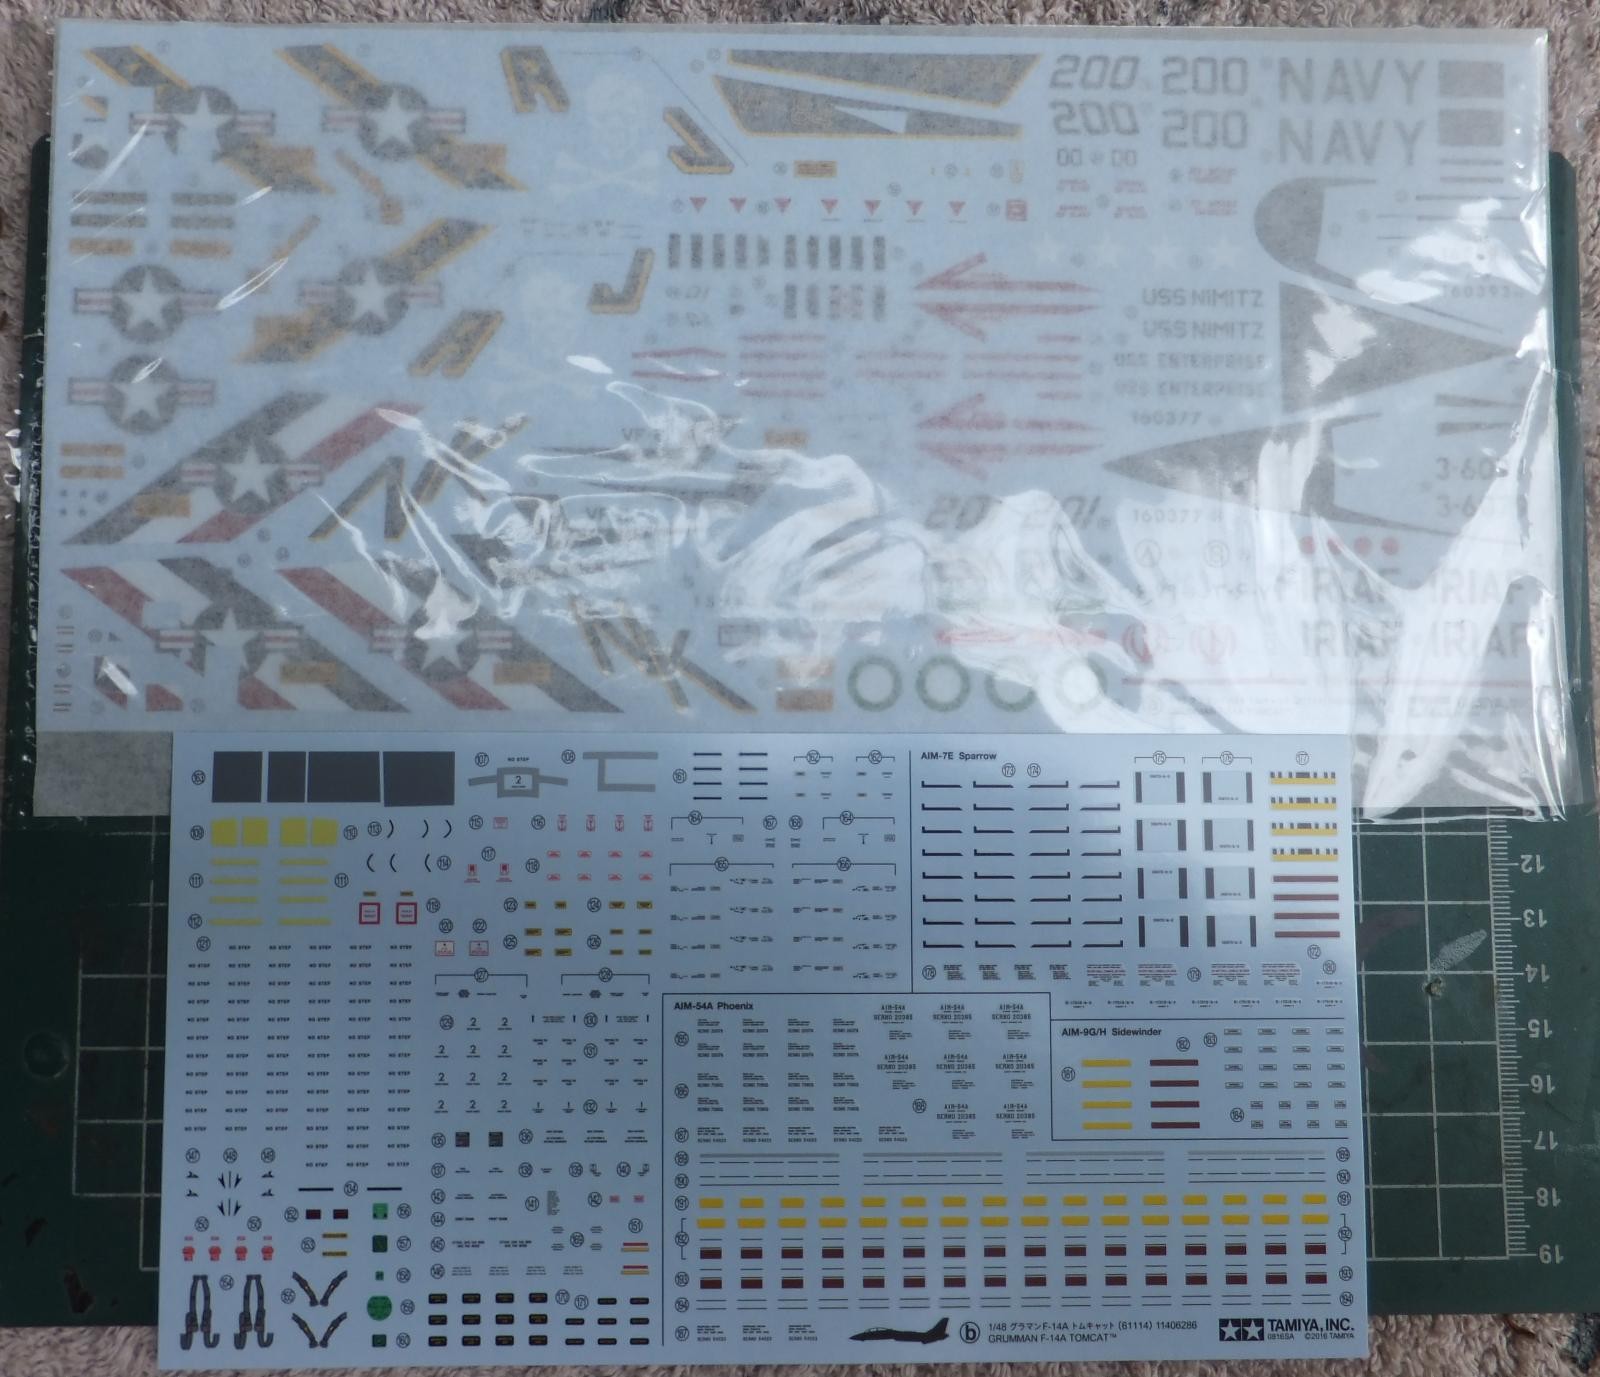
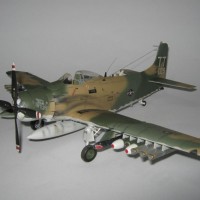
The decals for 3 Tomcats, VF-84 as it appeared in 1979 aboard the USS Nimitz which is about the time when filming the Final Countdown movie. VF-2 as it appeared in 1976 on the USS Enterprise and Iranian F-14A in 1980 in a very cool desert scheme.
-

- 1. stencils
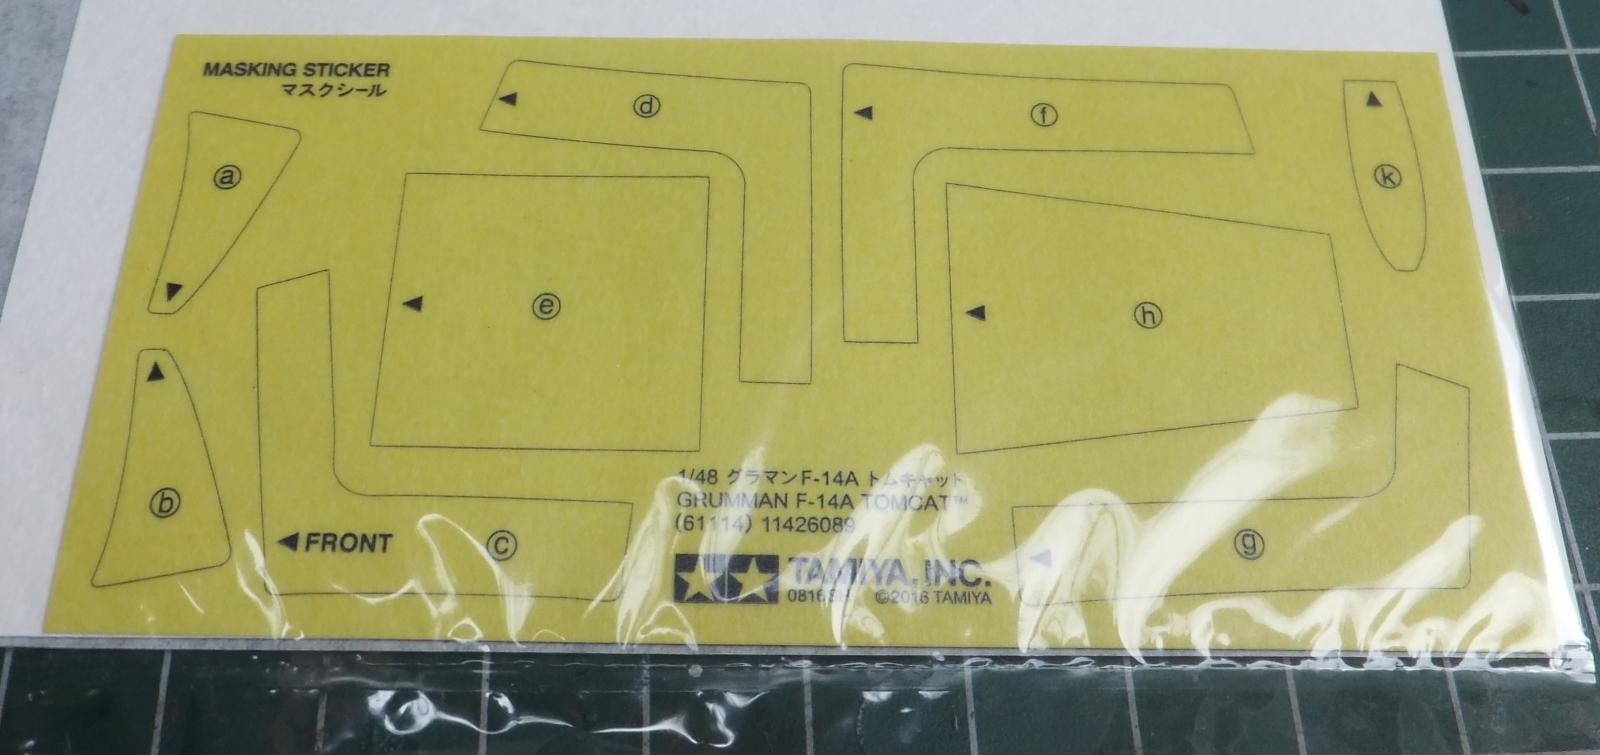
A set of masks for the canopy, nice touch and a bag of hardware, screws, washers and poly caps.

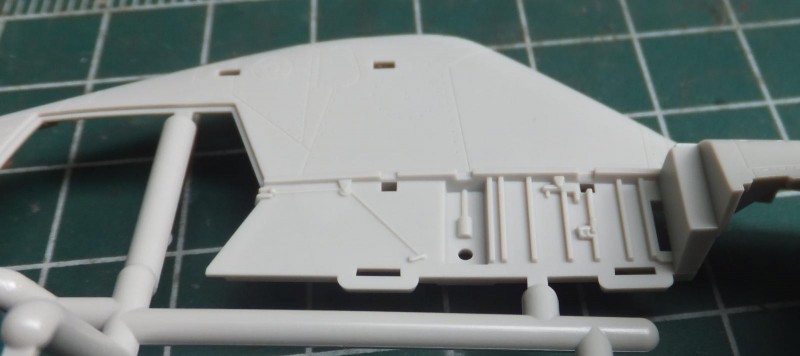
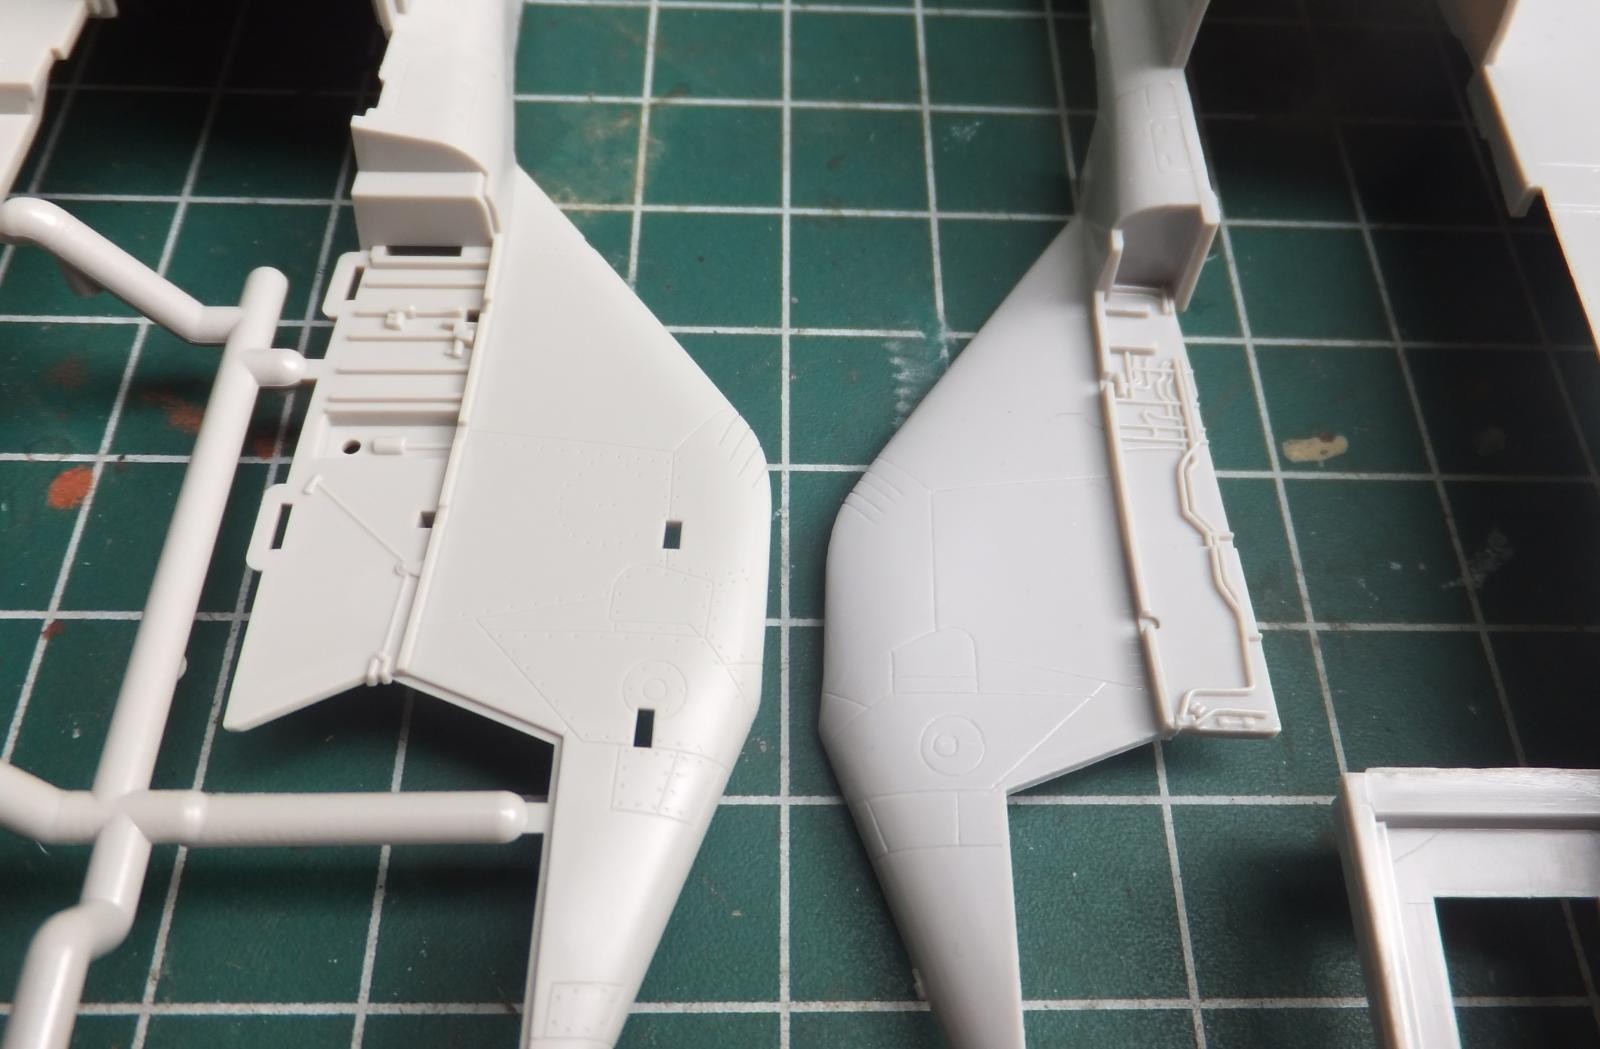
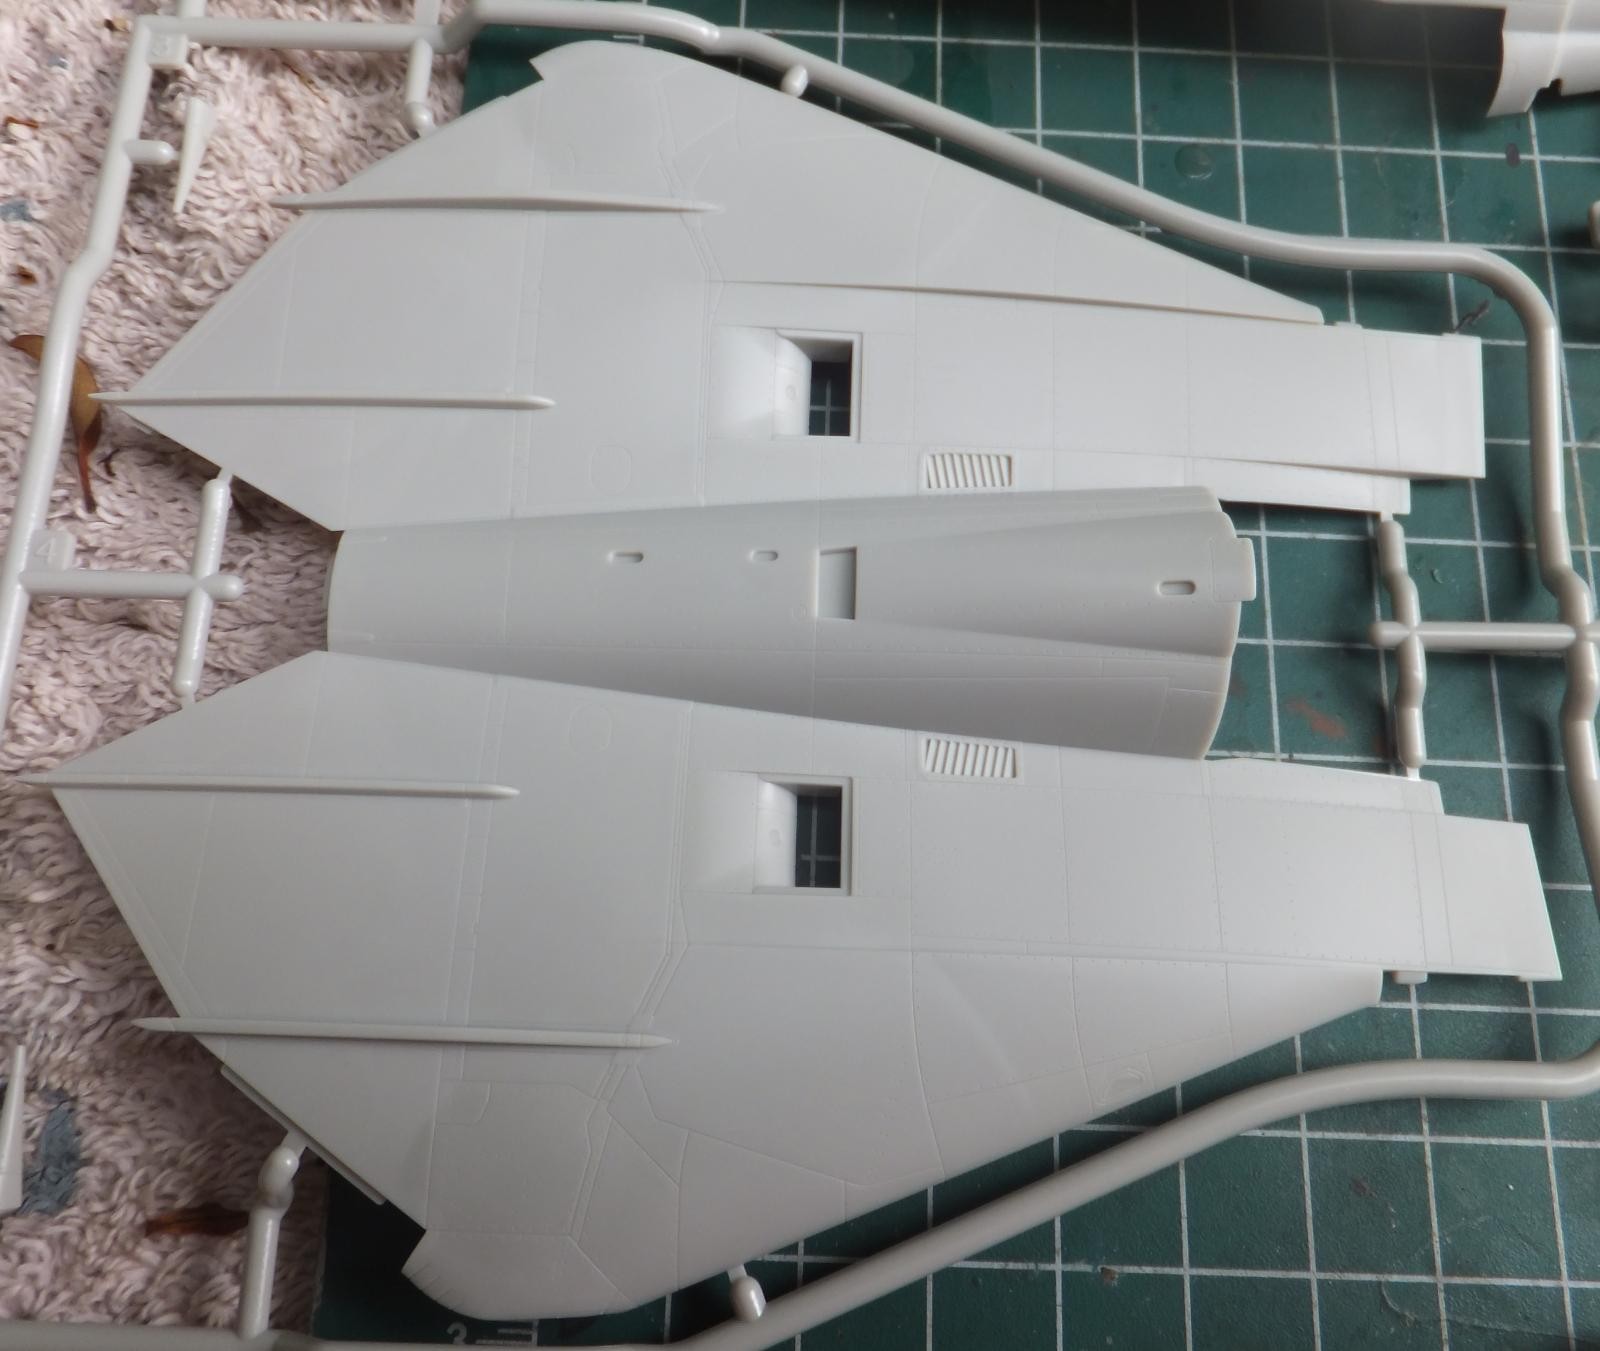
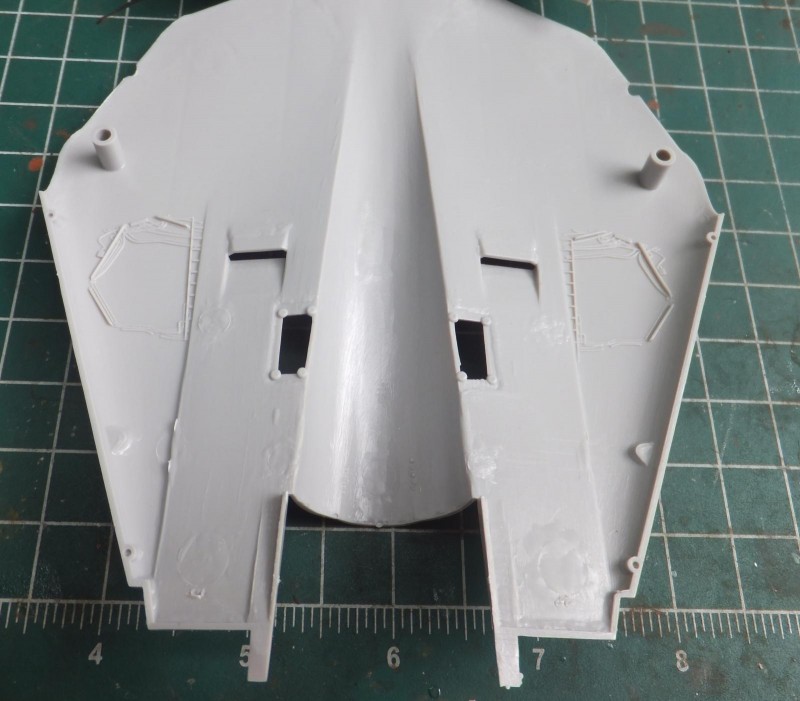
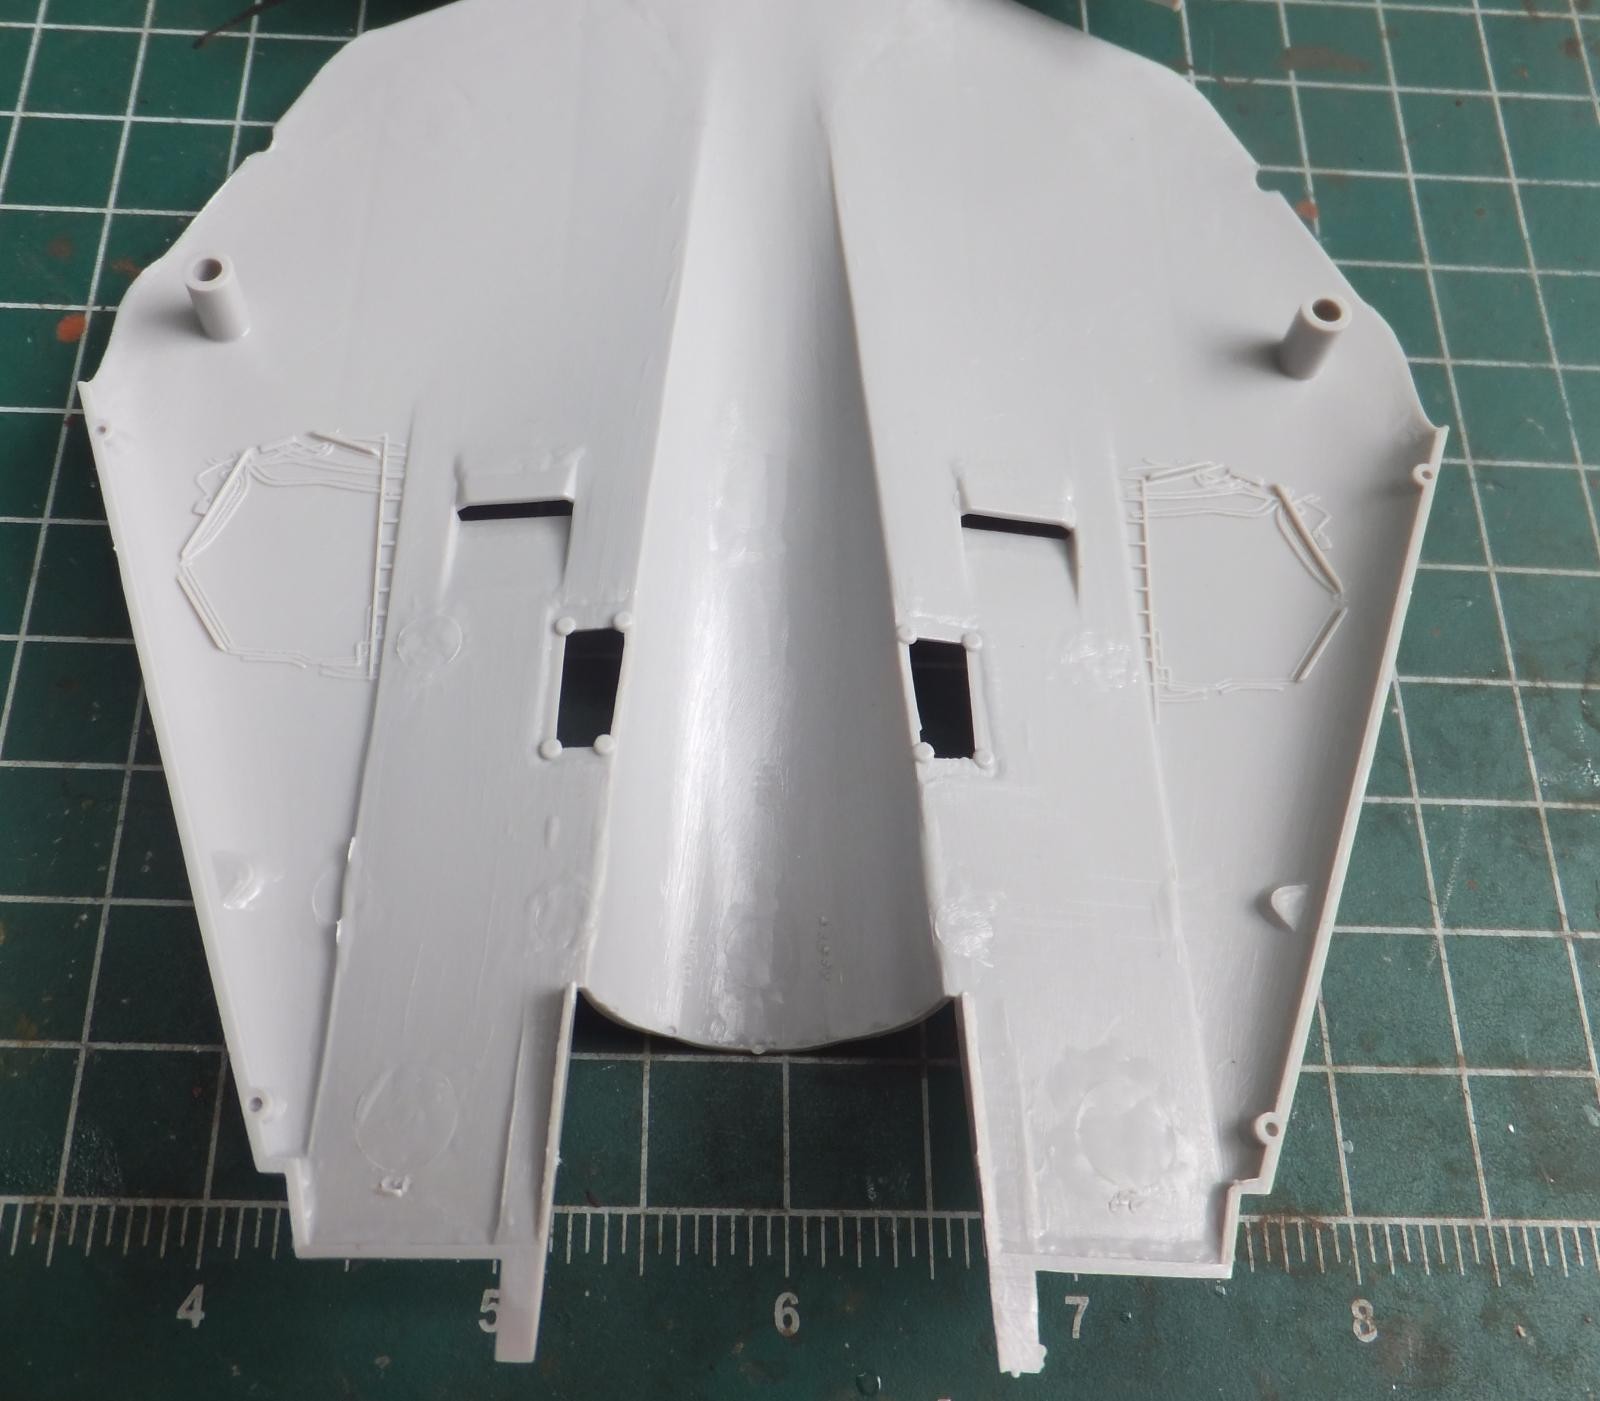
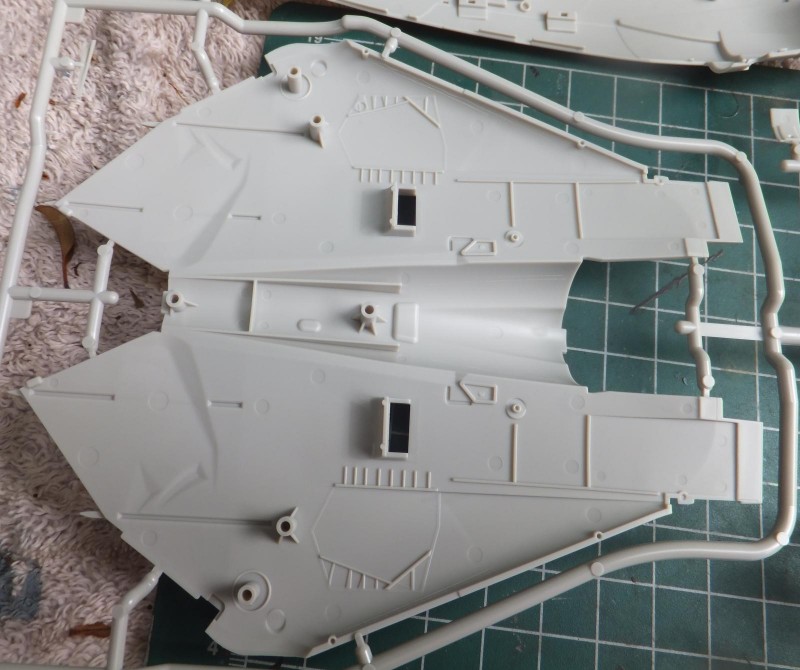
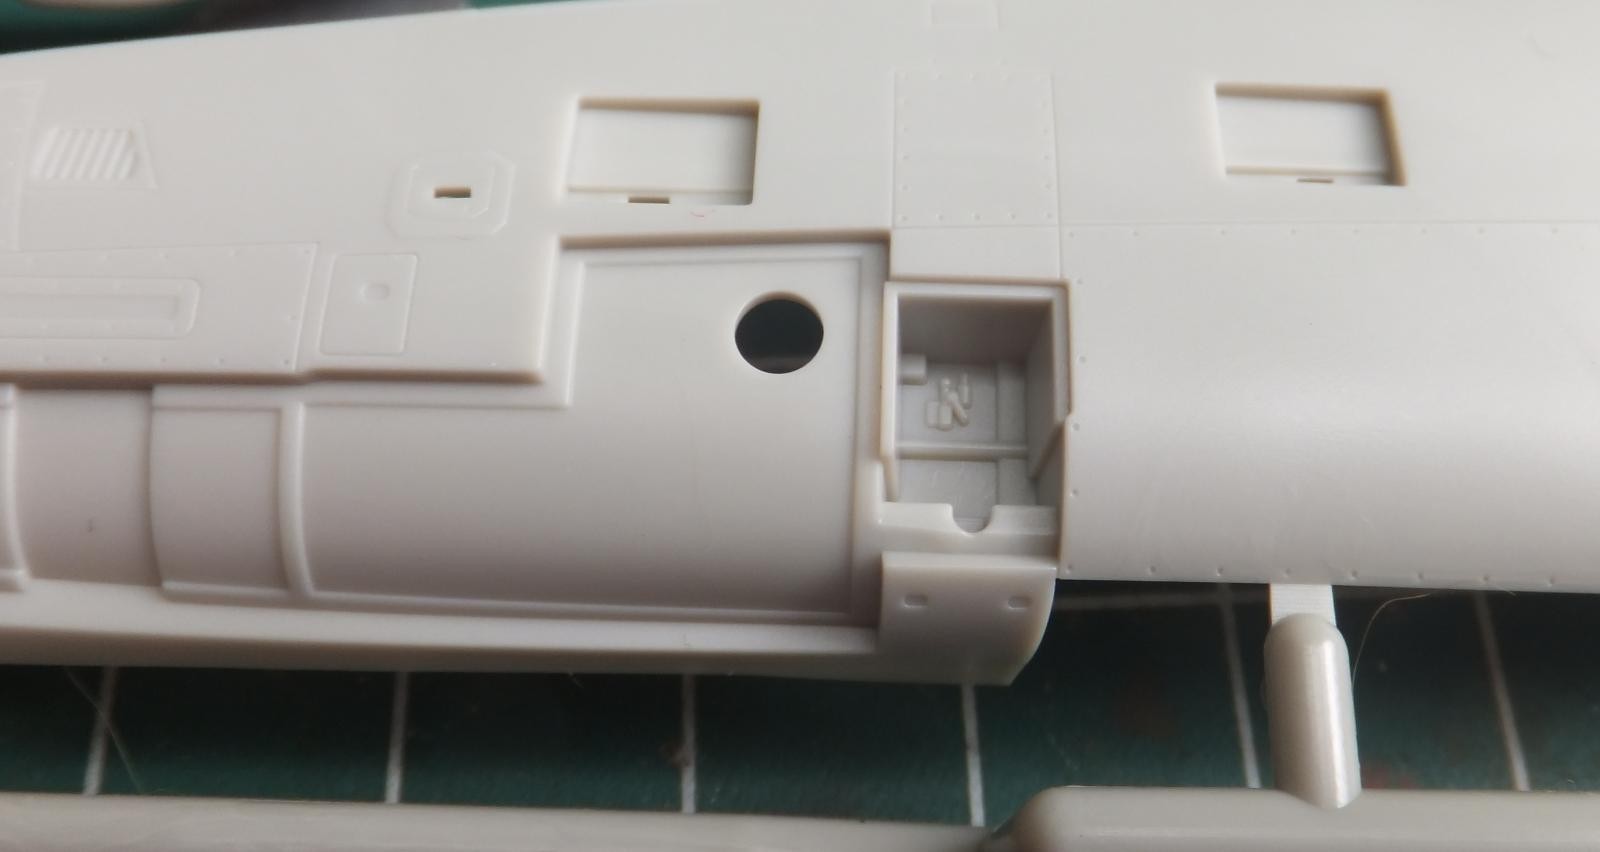
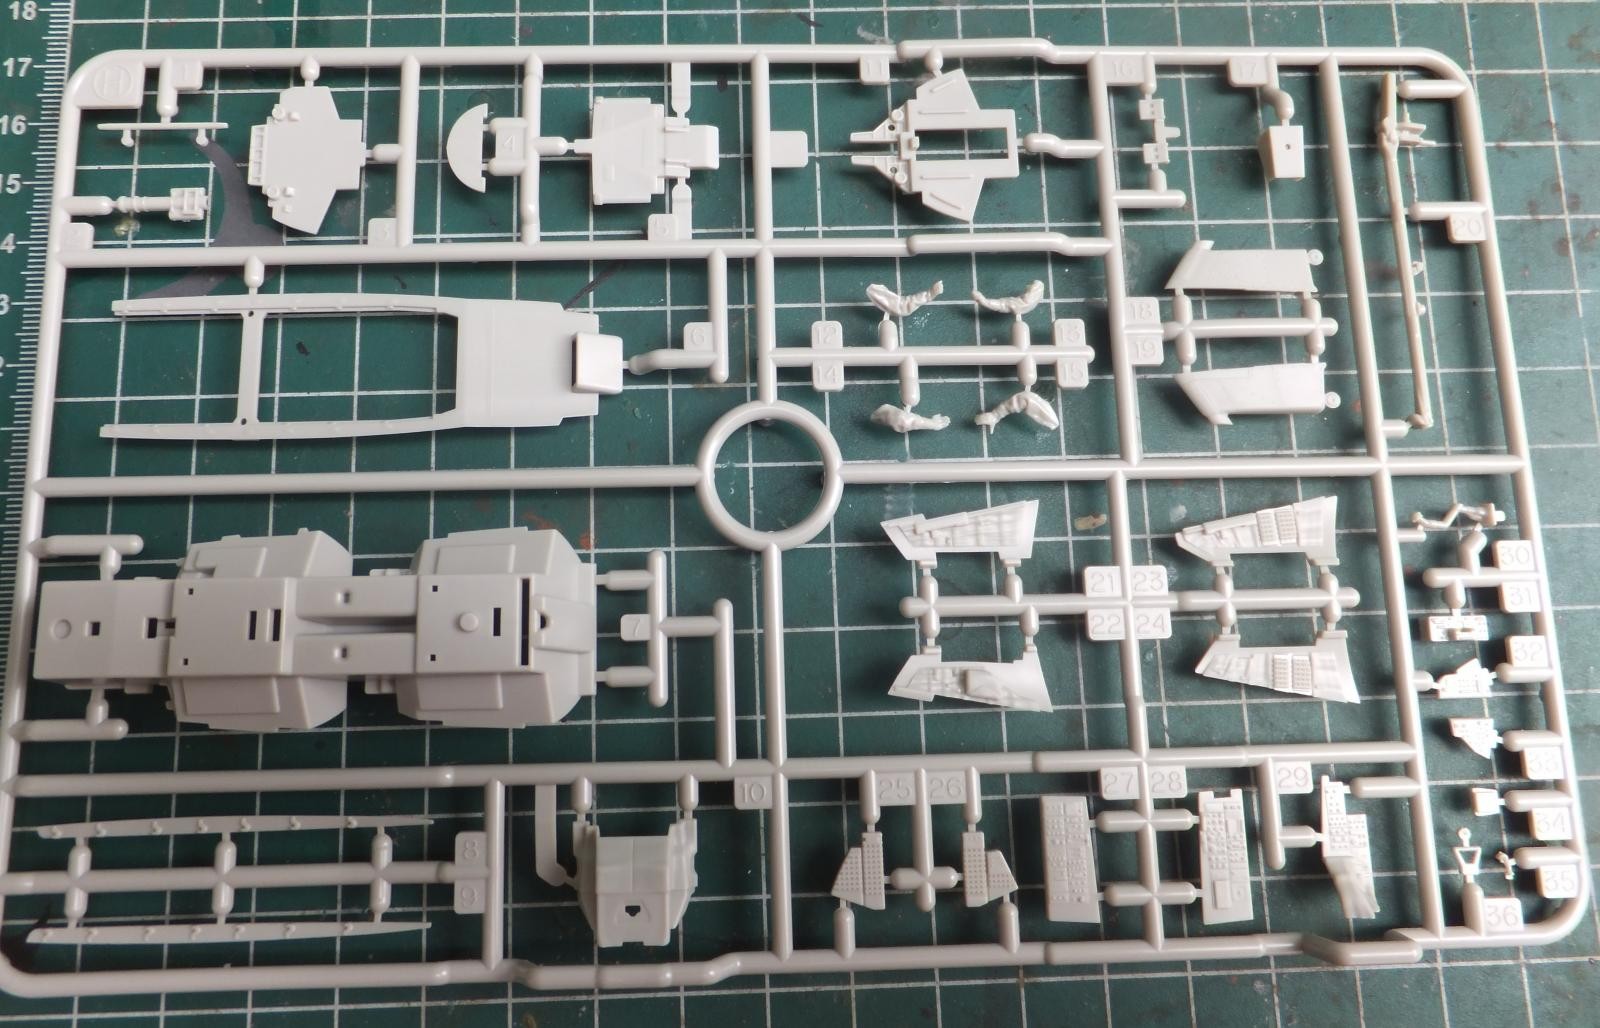
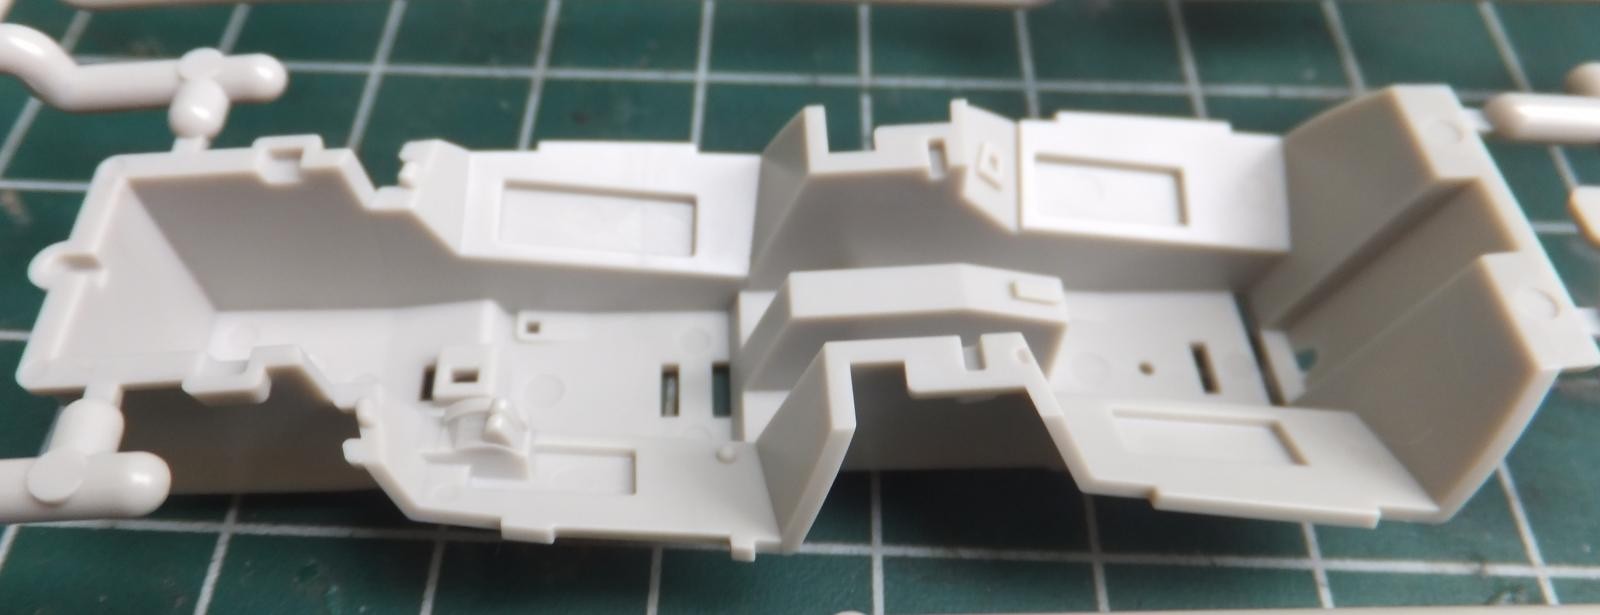
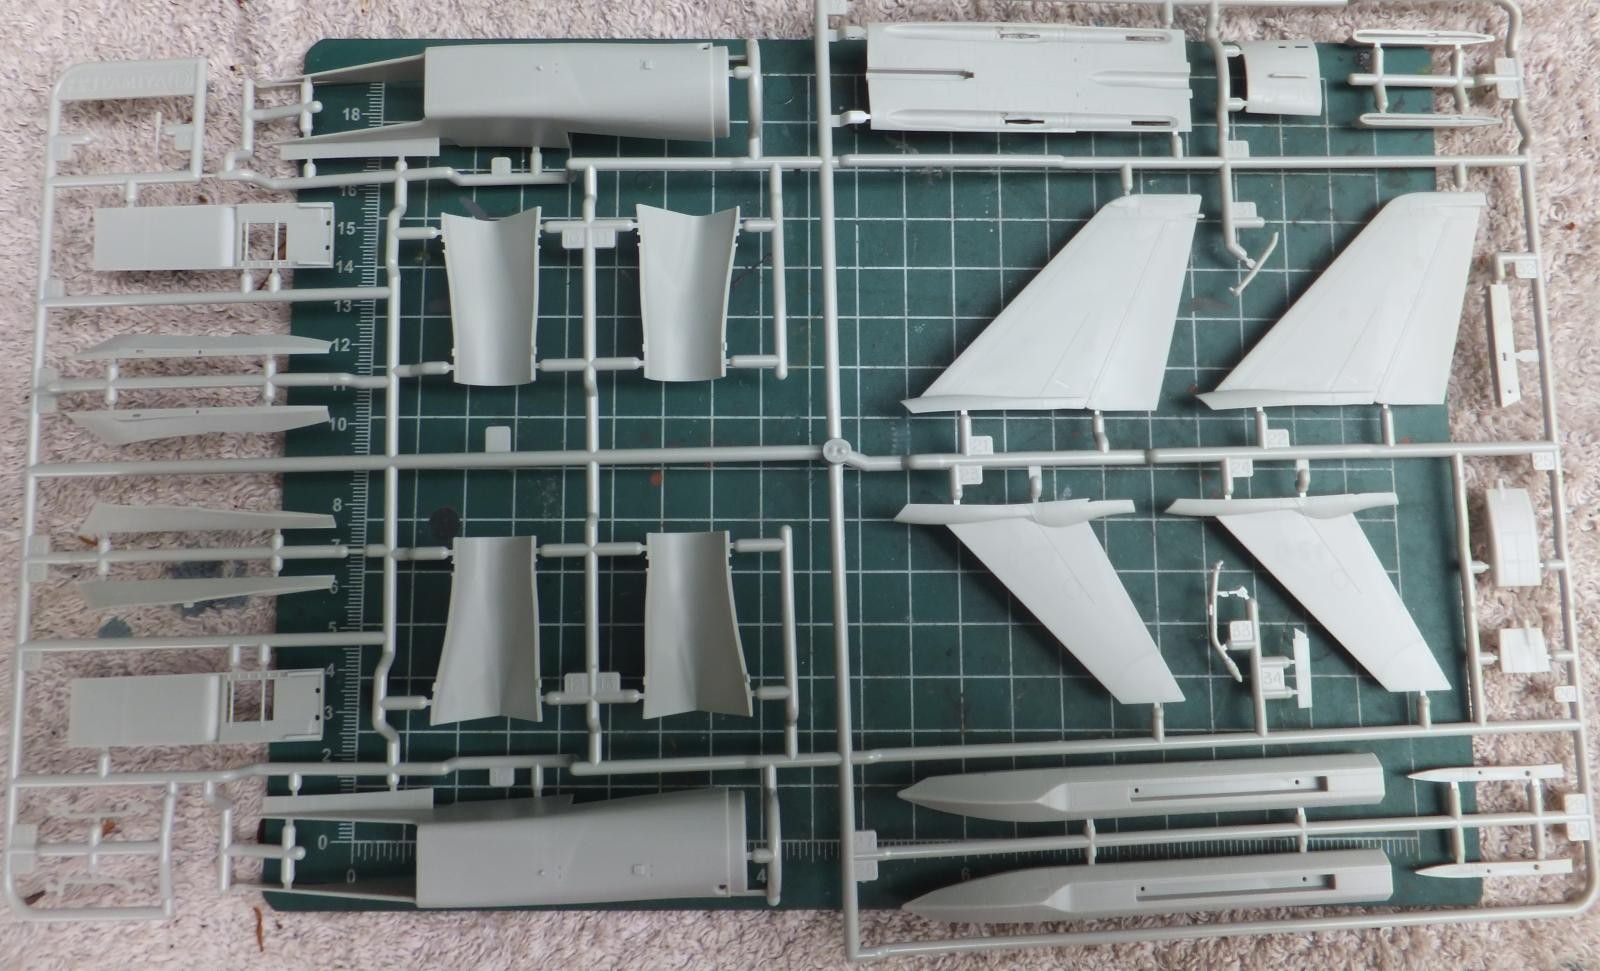
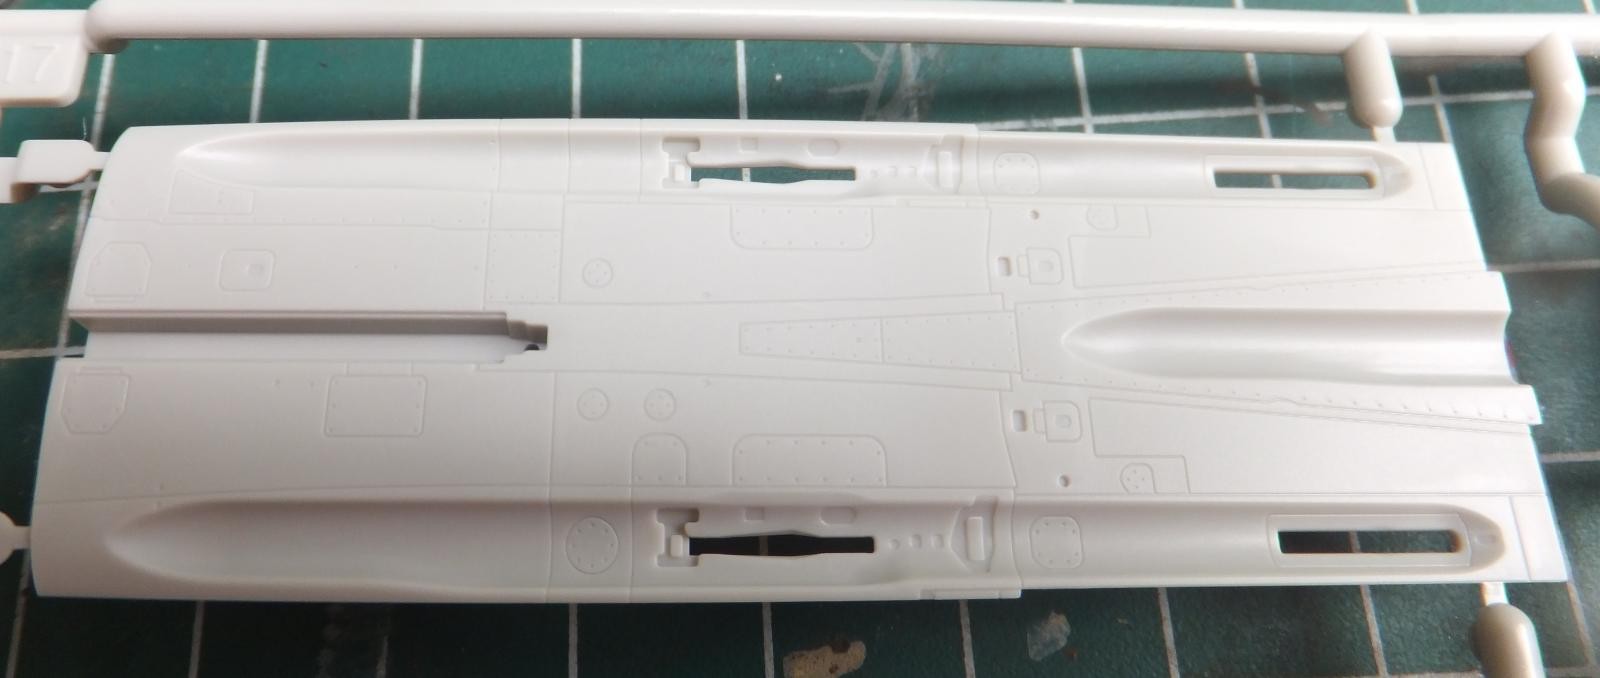
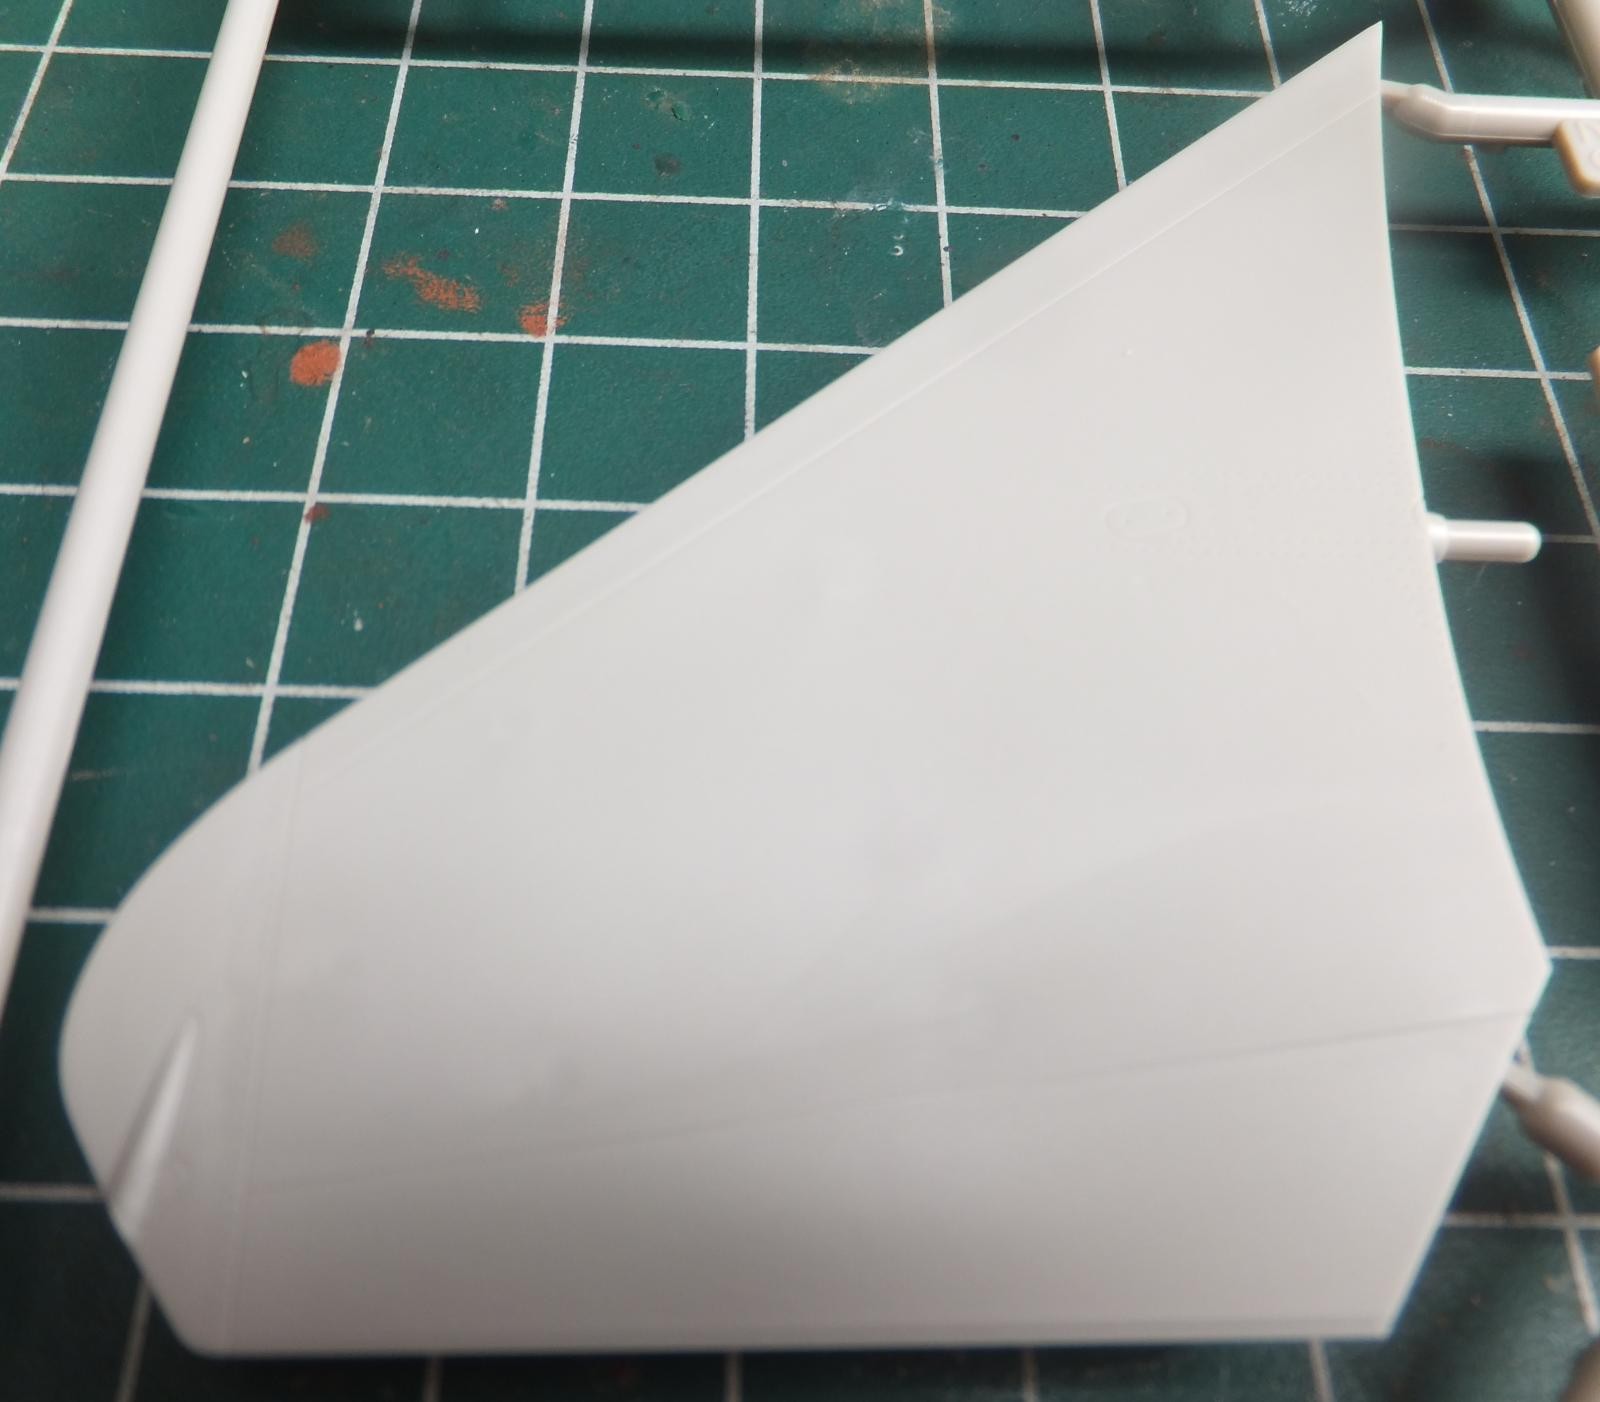
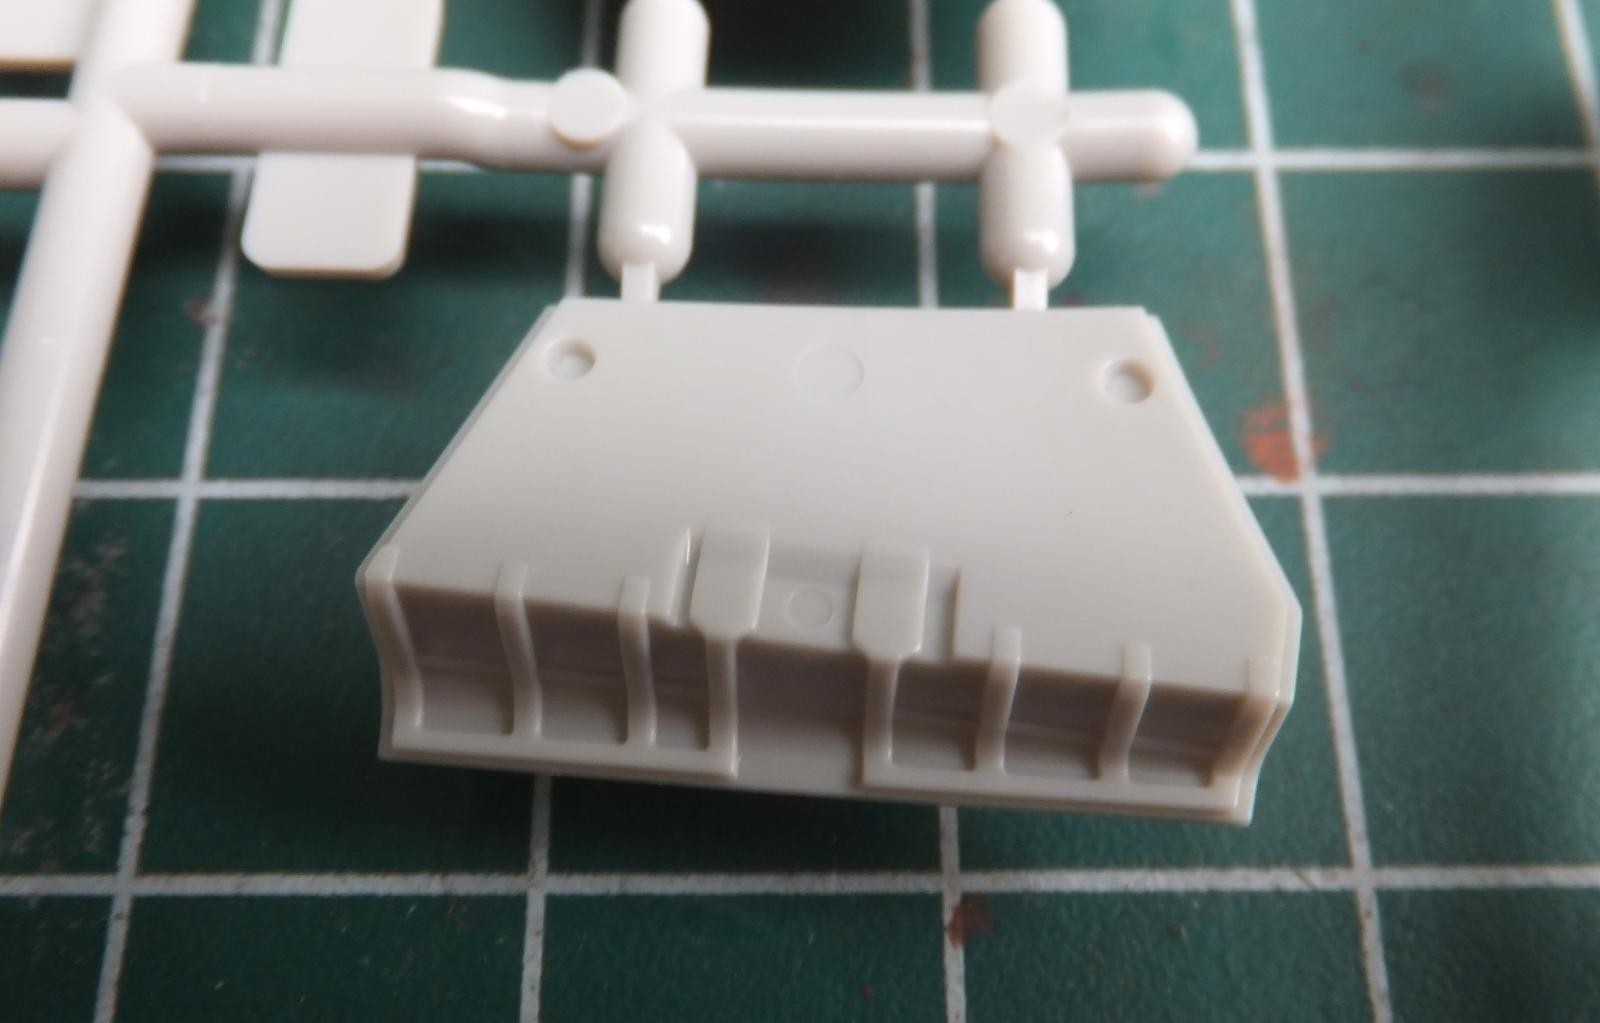
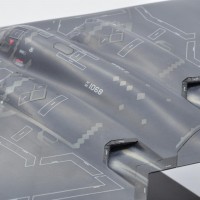
Now for the plastic, finally, there is a lot to this kit. So here we go. 1st up is the lower rear fuselage. Moulded in light grey styrene. Nice moulded crisp engraved panel lines, but wait lets see what is different from the Hase F-14 lower rear. 1st pic is Tam, 2nd one is the Hase.
-
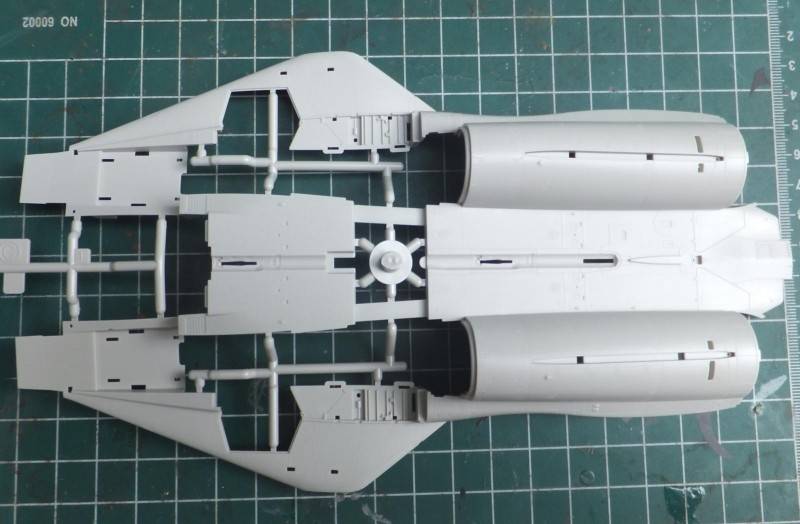
- 1. Deeper in width in main gear bay
- 2. holes predrilled for pylon
- 3. Tamiya

-
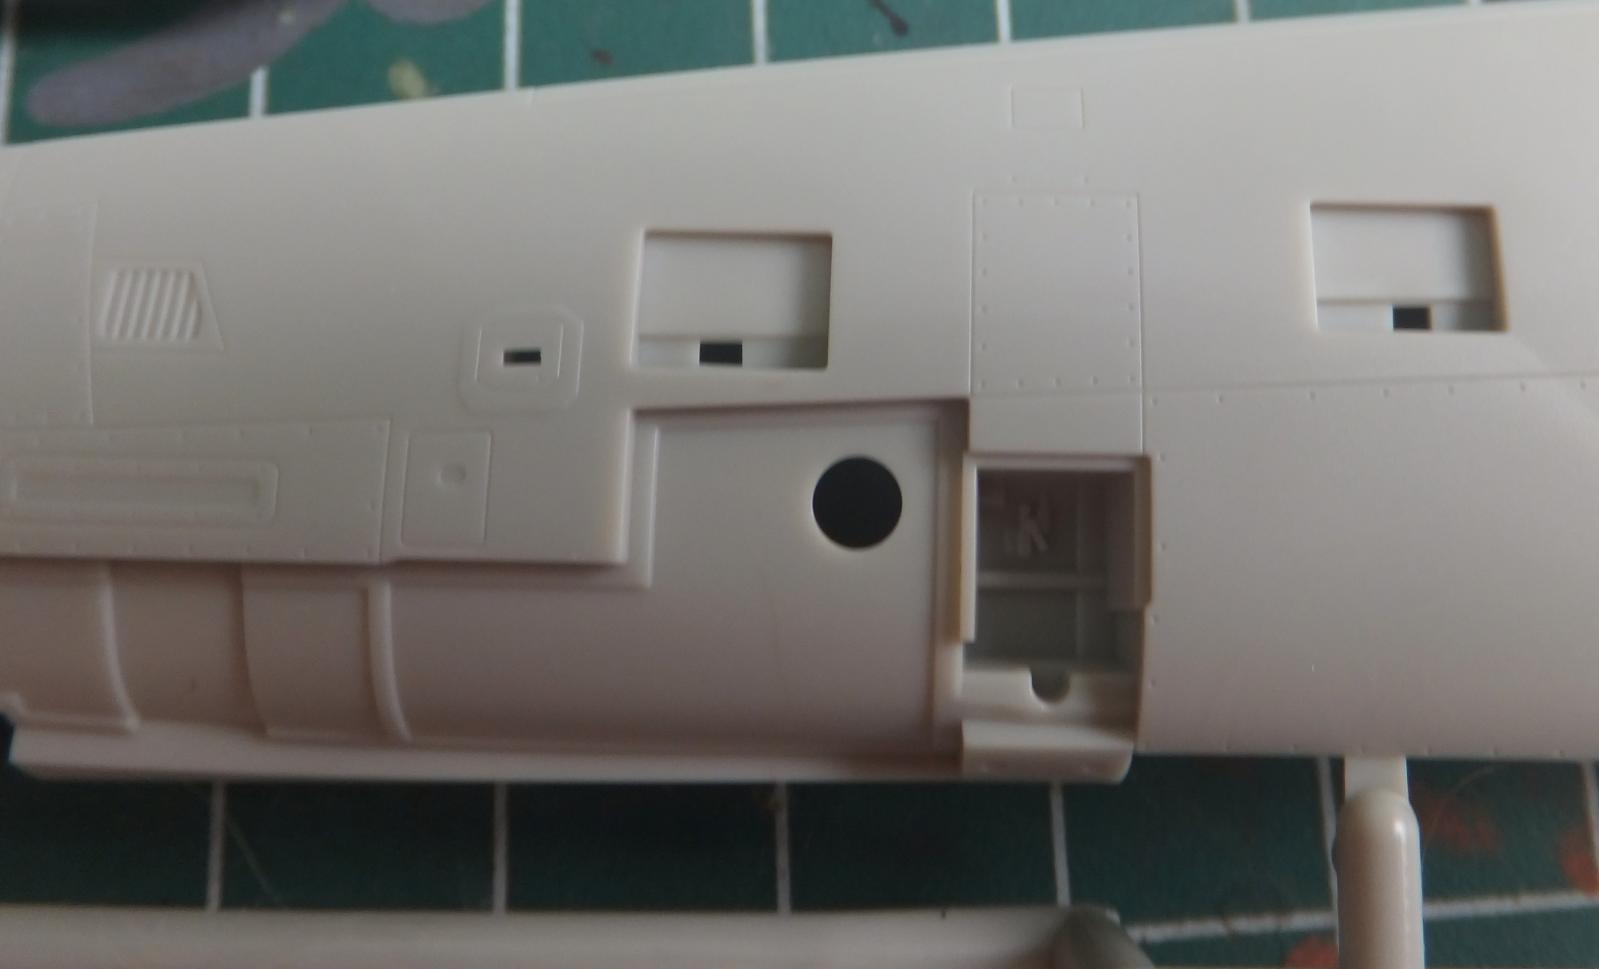
- 1. Hasegawa
- 2. Gear bay a bit narrow
- 3. holes need to be drilled
- 4. holes to be drilled

-

- 1. Tamiya
- 2. Hasegawa
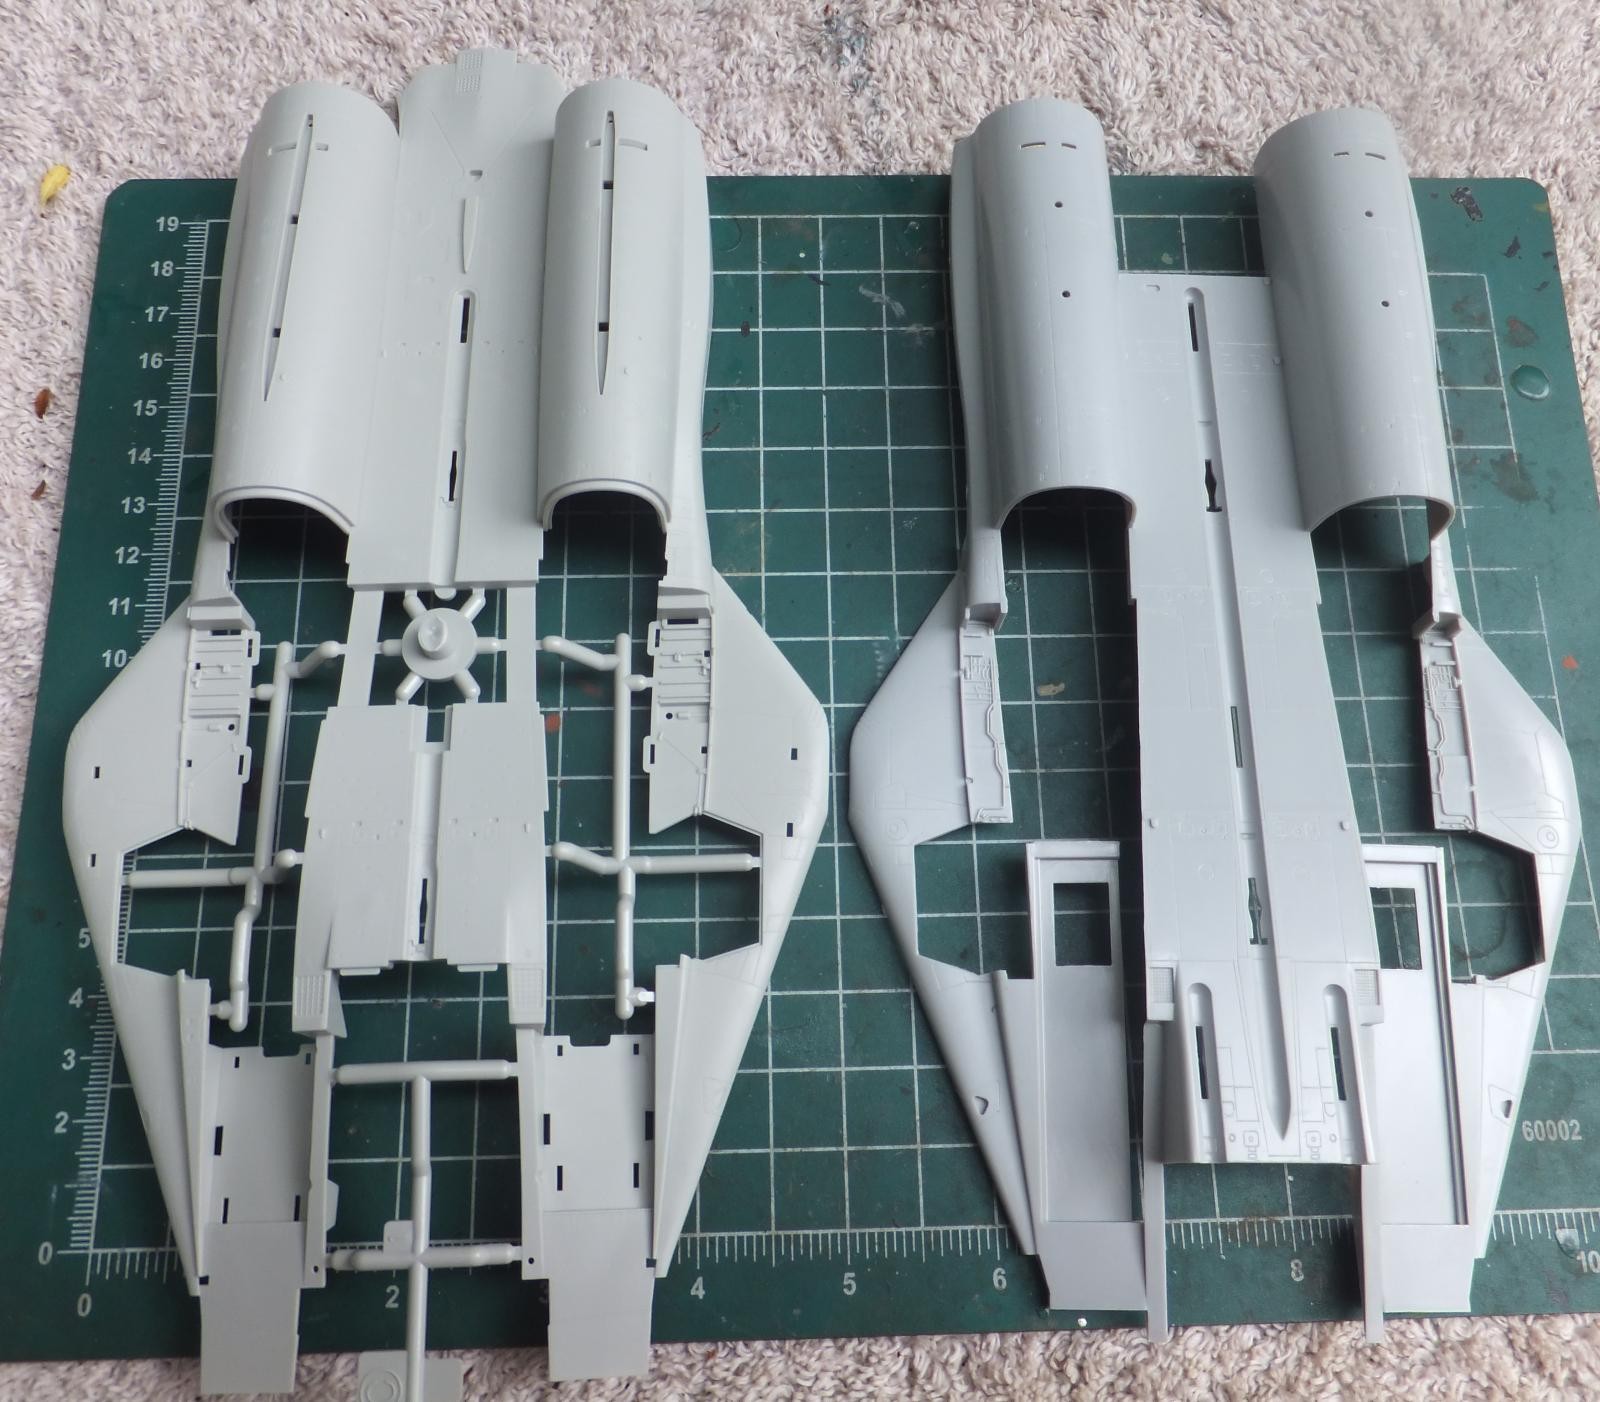
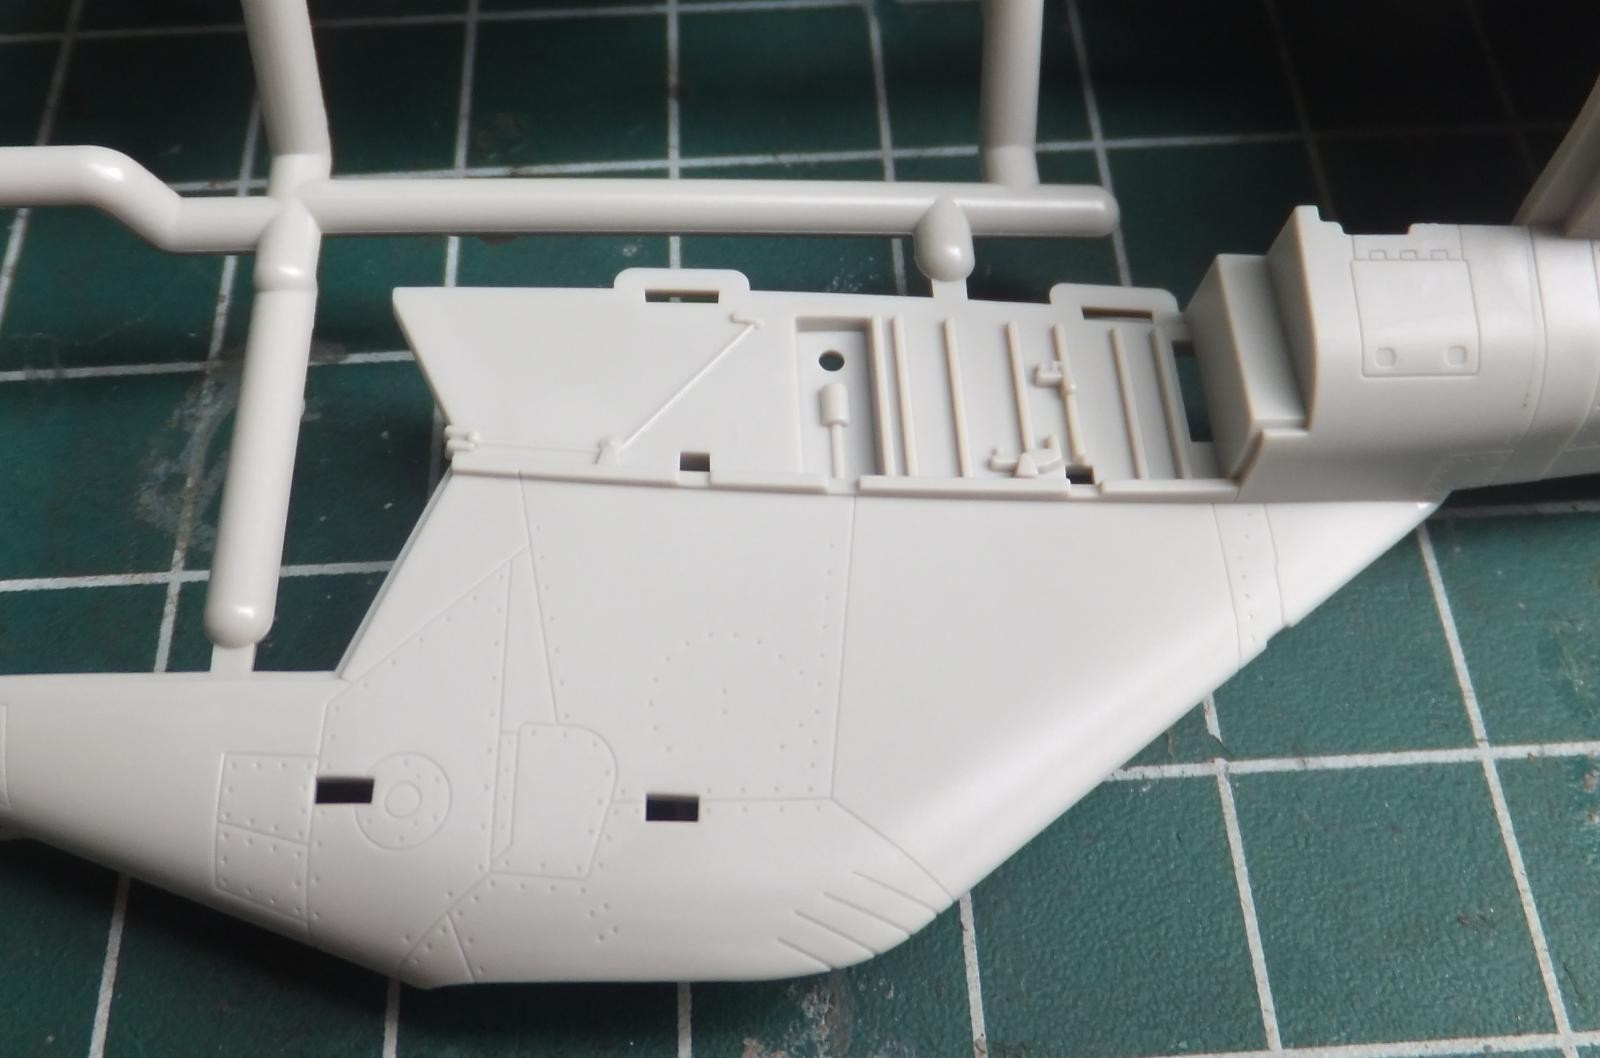
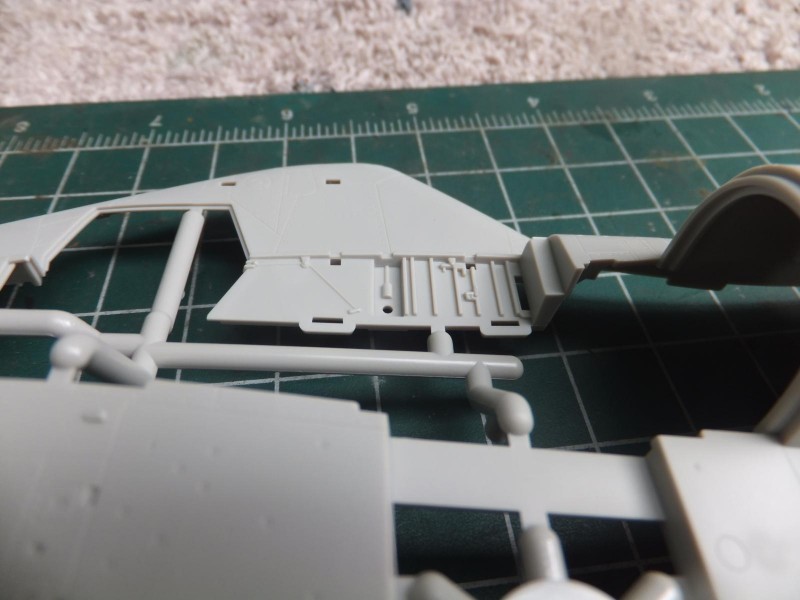
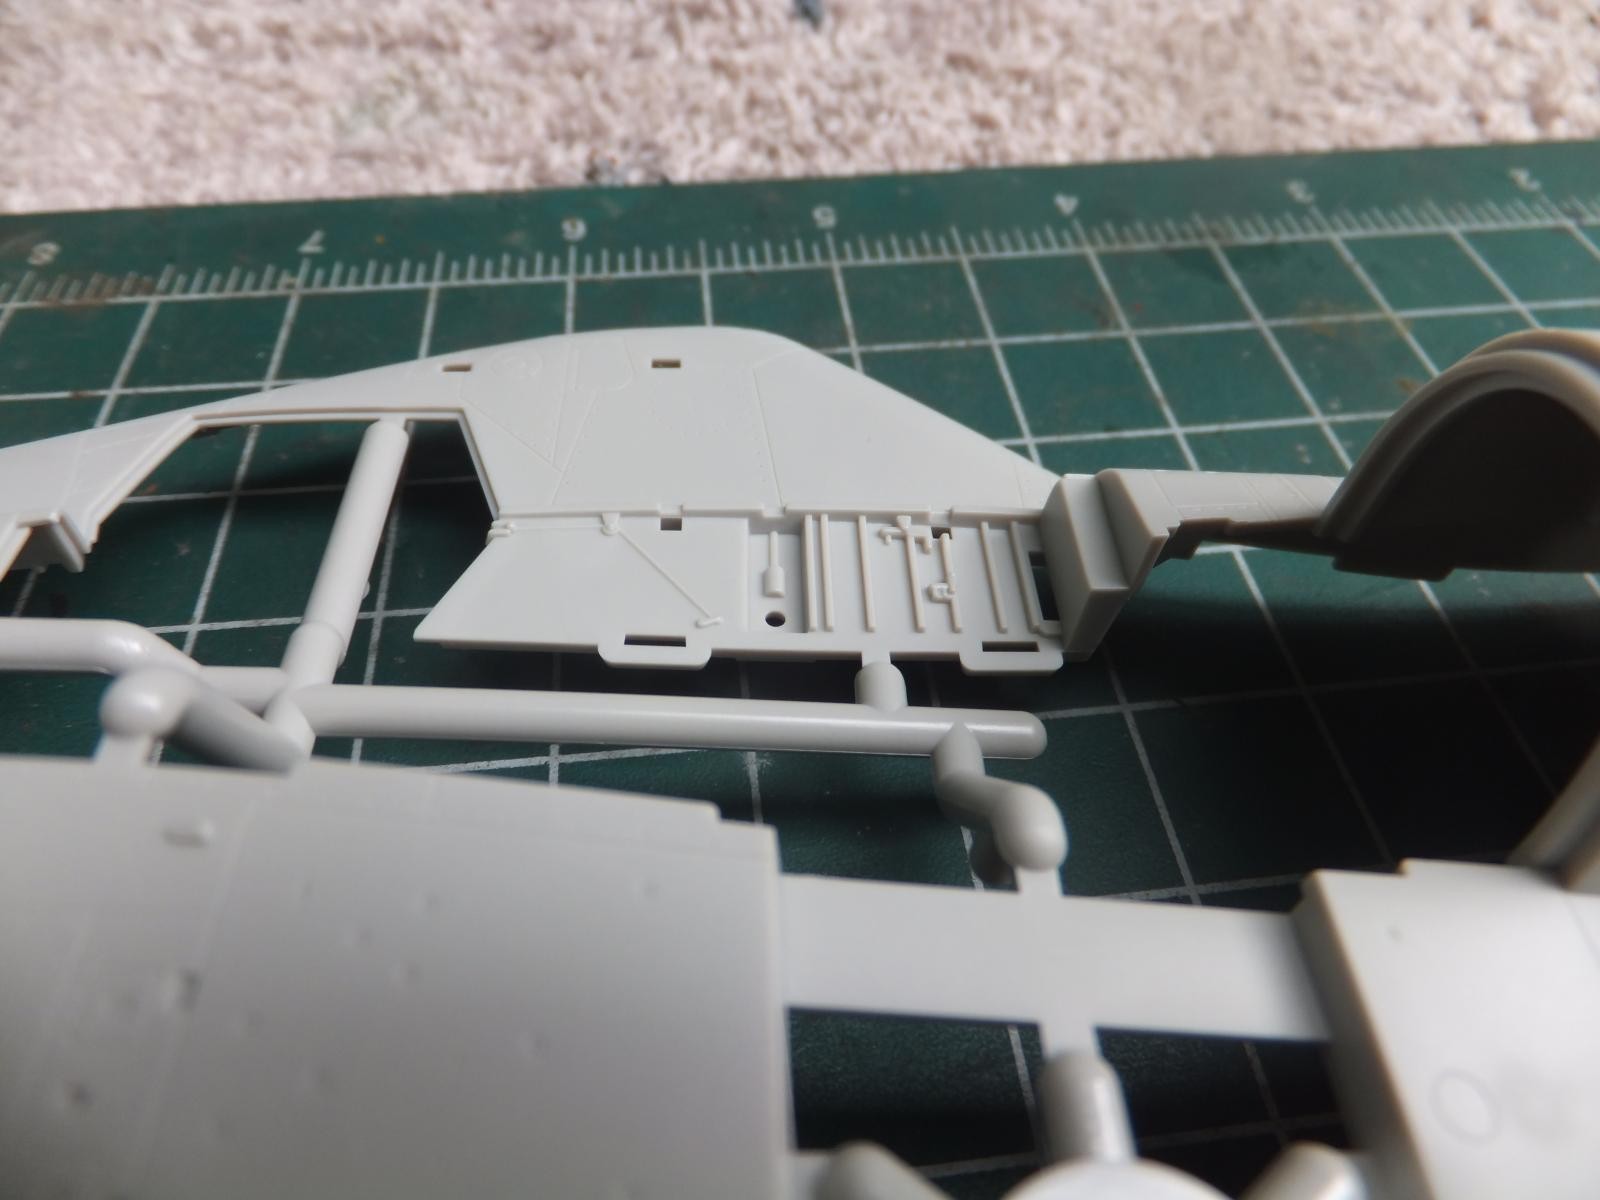
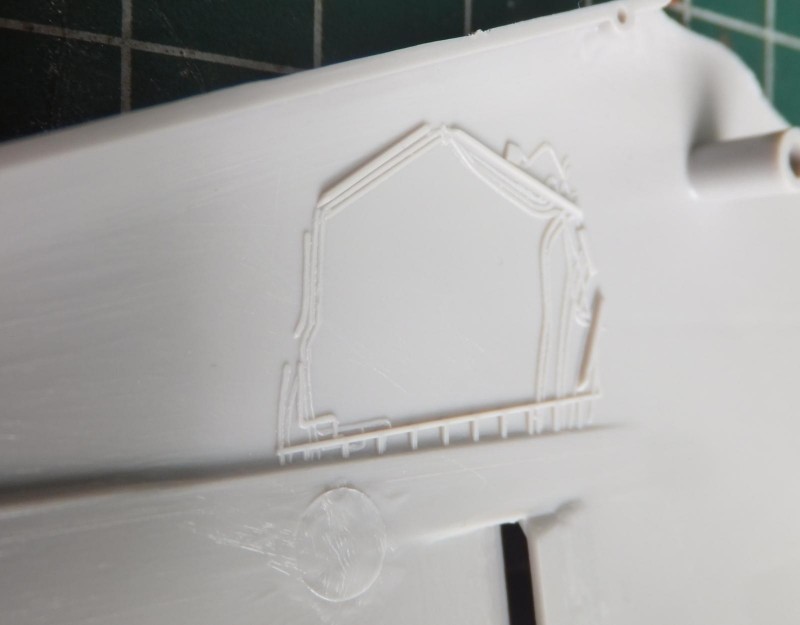
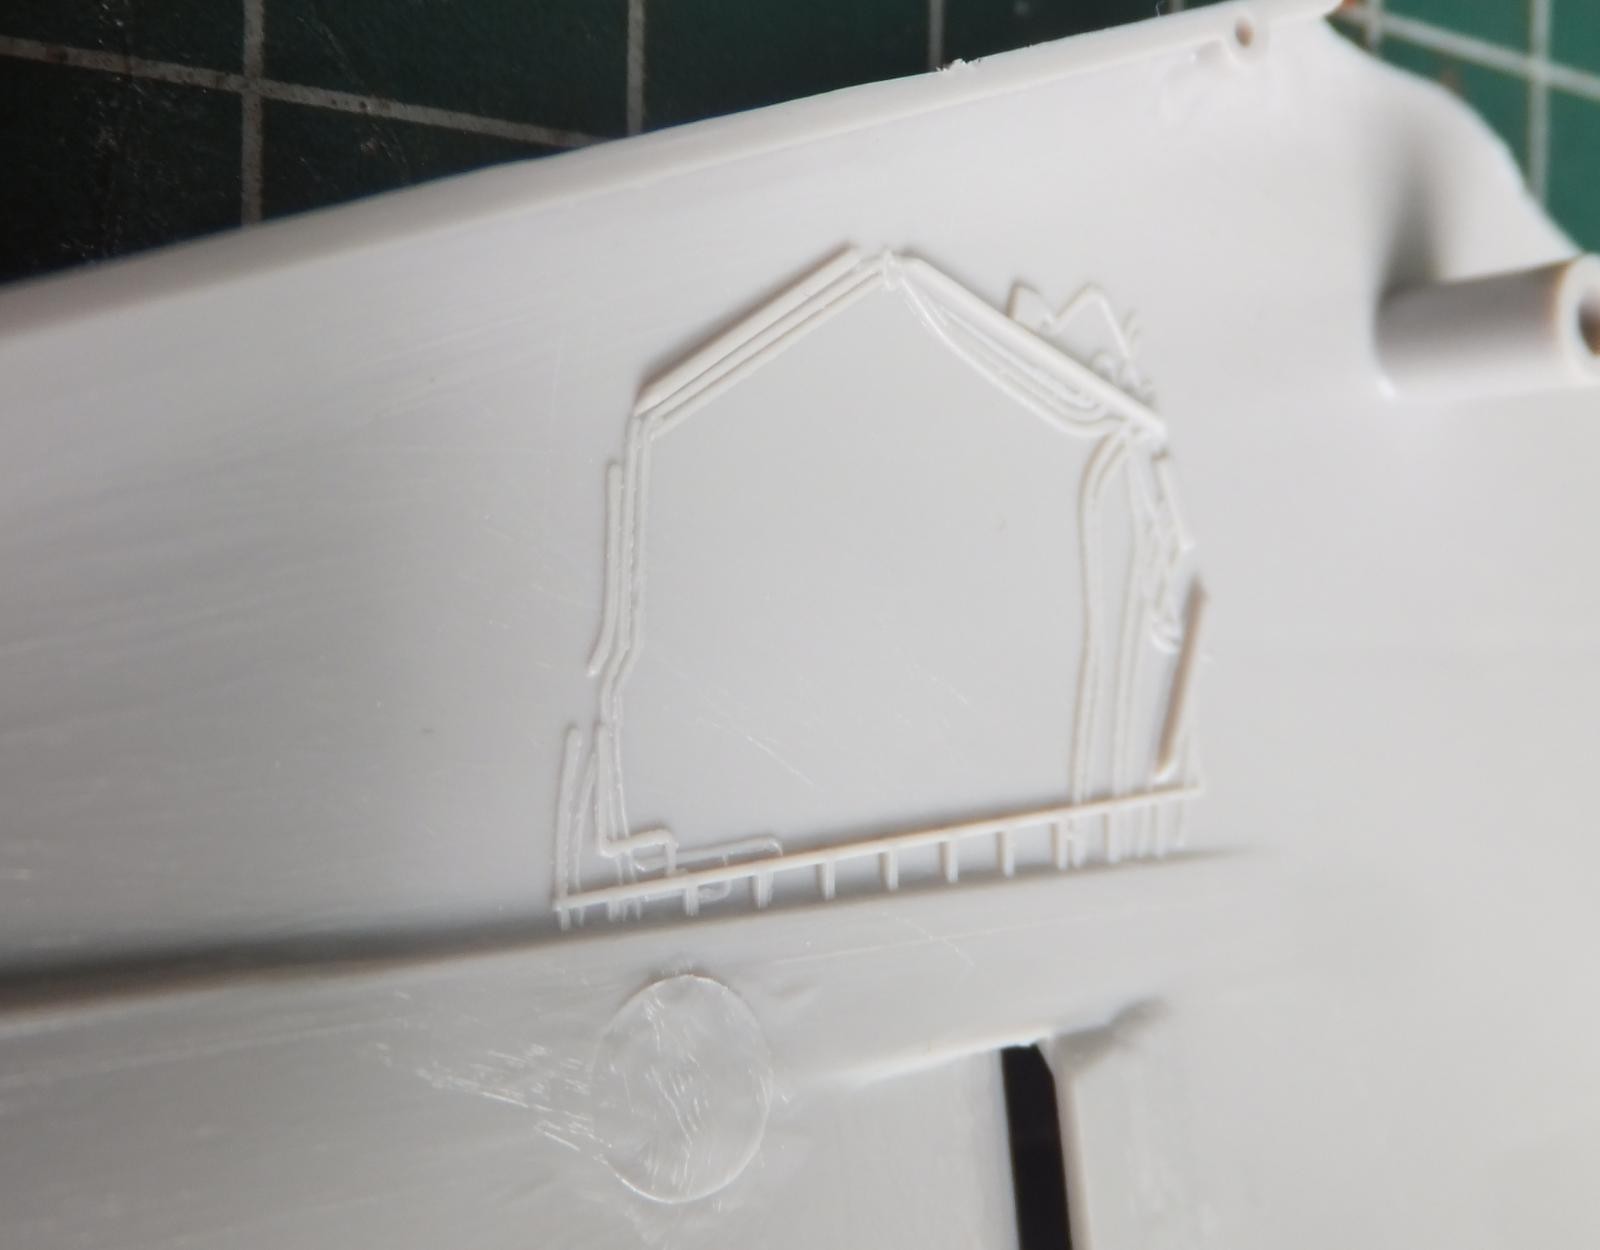
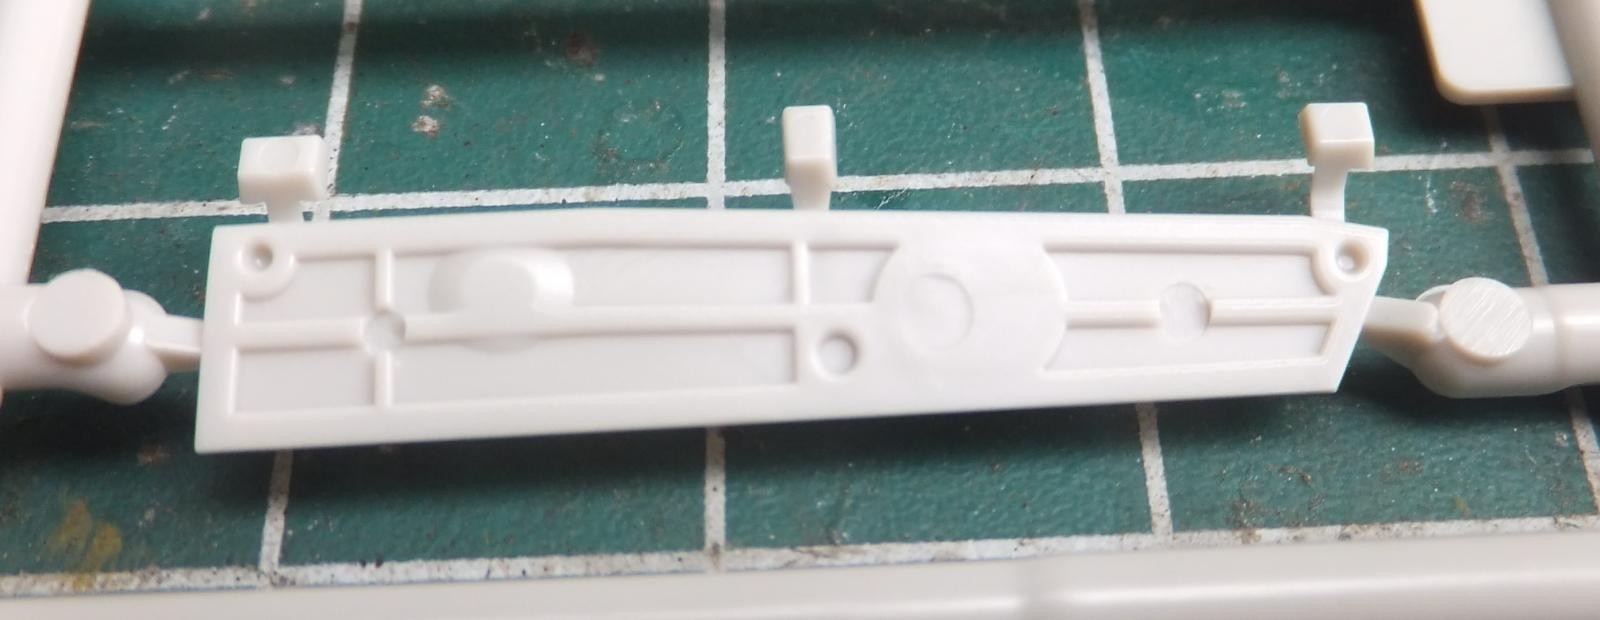
1st you notice that Hasegawa has the beaver tail as a separate piece, where as Tamiya is moulded into the fuselage lower half. The Tam kit has a deeper in width gear bay roof section compared to Hase, and more pronounced detail. The ventral strakes are attached in different ways, Tam uses a slot while the Hase kit will have you attach them directly to the nacelle surface with locating pins. Also you have to drill out the holes for the various weapon pylons on the Hase piece while on the Tamiya only for the Phoenix pallets. Really no advantage to either kit as only maybe a bit crisper detail on the gear bay for Tamiya. Yet Hasegawa has a bit more in the gear bay than Tamiya has..
-

- 1. Tamiya
- 2. for weapons pylon
-

- 1. Tamiya
- 2. Holes to drill for Phoenix pallet
- 3. slot for ventral strake
-
- 1. Hasegawa
- 2. Conduit detail

-
- 1. Tamiya

-
- 1. No conduit detail within the bay
- 2. Tamiya
-

- 1. Tamiya
- 2. Hasegawa
- 3. Little more here
- 4. No conduit here
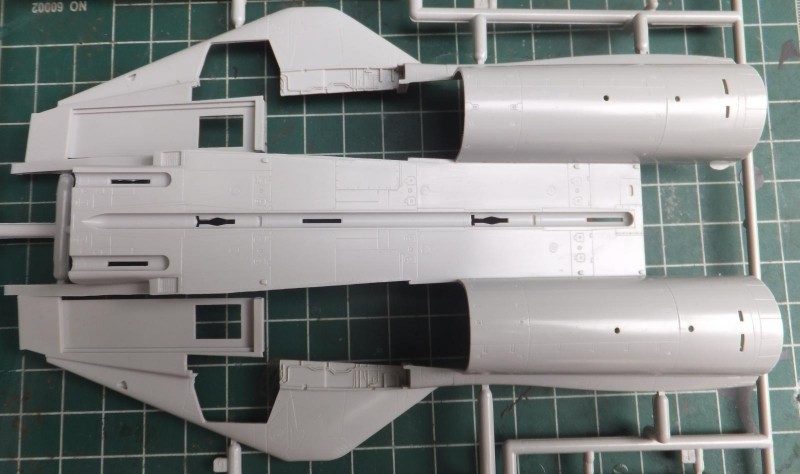
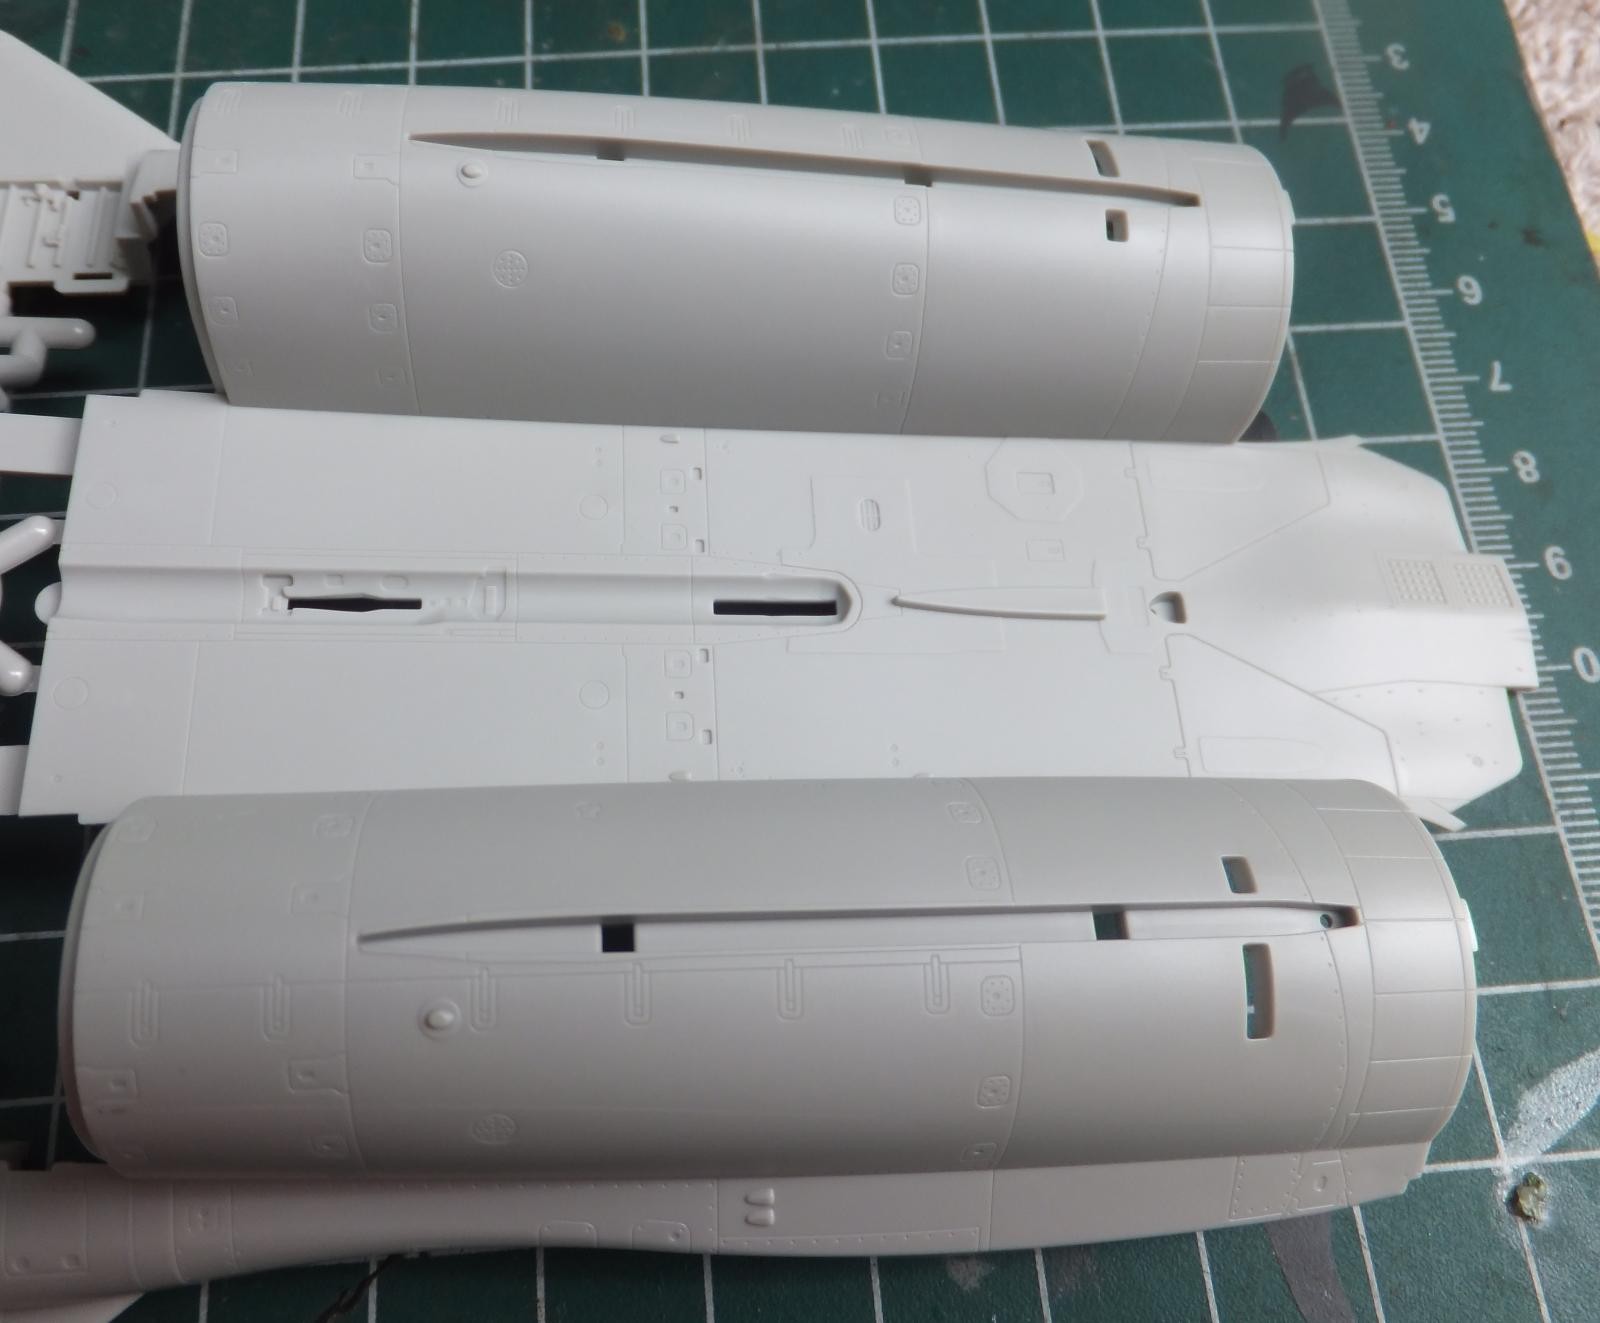
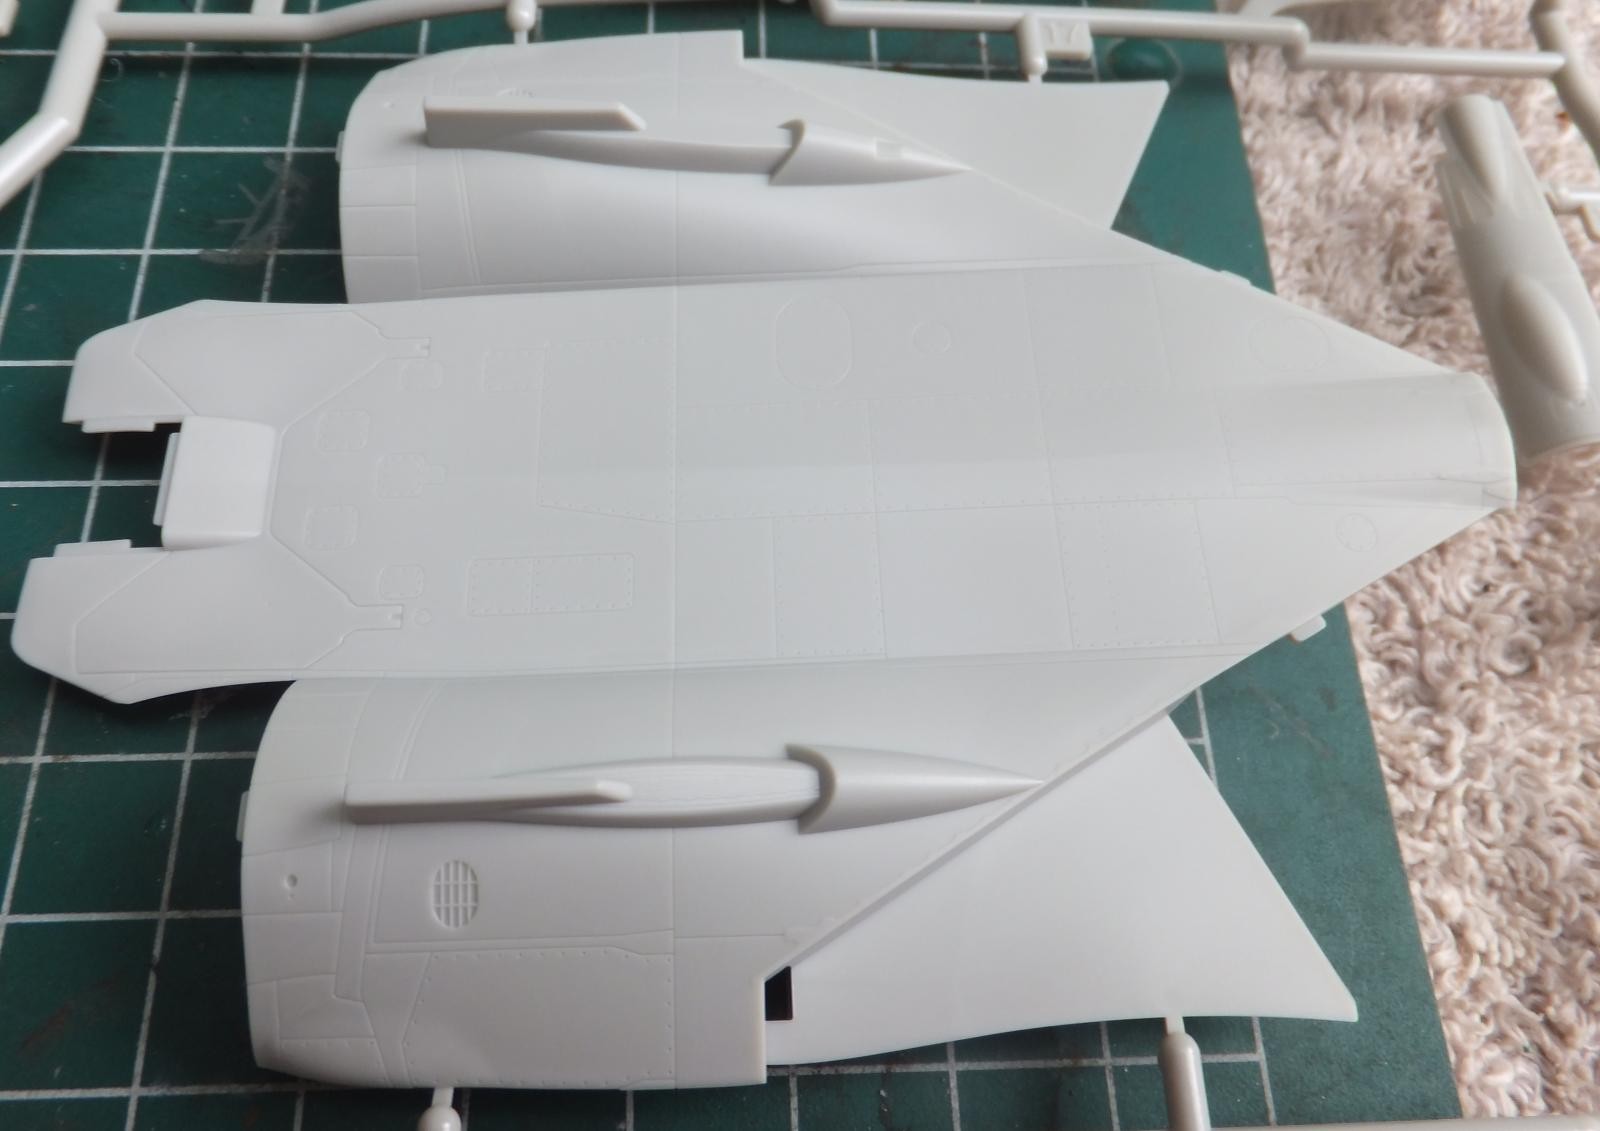
Next sprue contains the upper fuselage half which are in 2 pieces. The forward fuselage halves, wing bladders and sealing plates.

As stated Tamiya has the upper rear half of the fuselage in 2 pieces, while the Hase kit is in one piece.
-

- 1. Tamiya
-

- 1. Tamiya
- 2. Beaver tail
-

- 1. Hasegawa
Tamiya has the upper fuselage split right where the wing sweep bladders meet on a panel line. Hase is one piece with the beaver tail as a separate part as it was with the lower half.
-

- 1. Tamiya
- 2. reinforcement plates
-
- 1. Hasegawa
- 2. fuselage split in Tamiya
- 3. Reinforcement plates
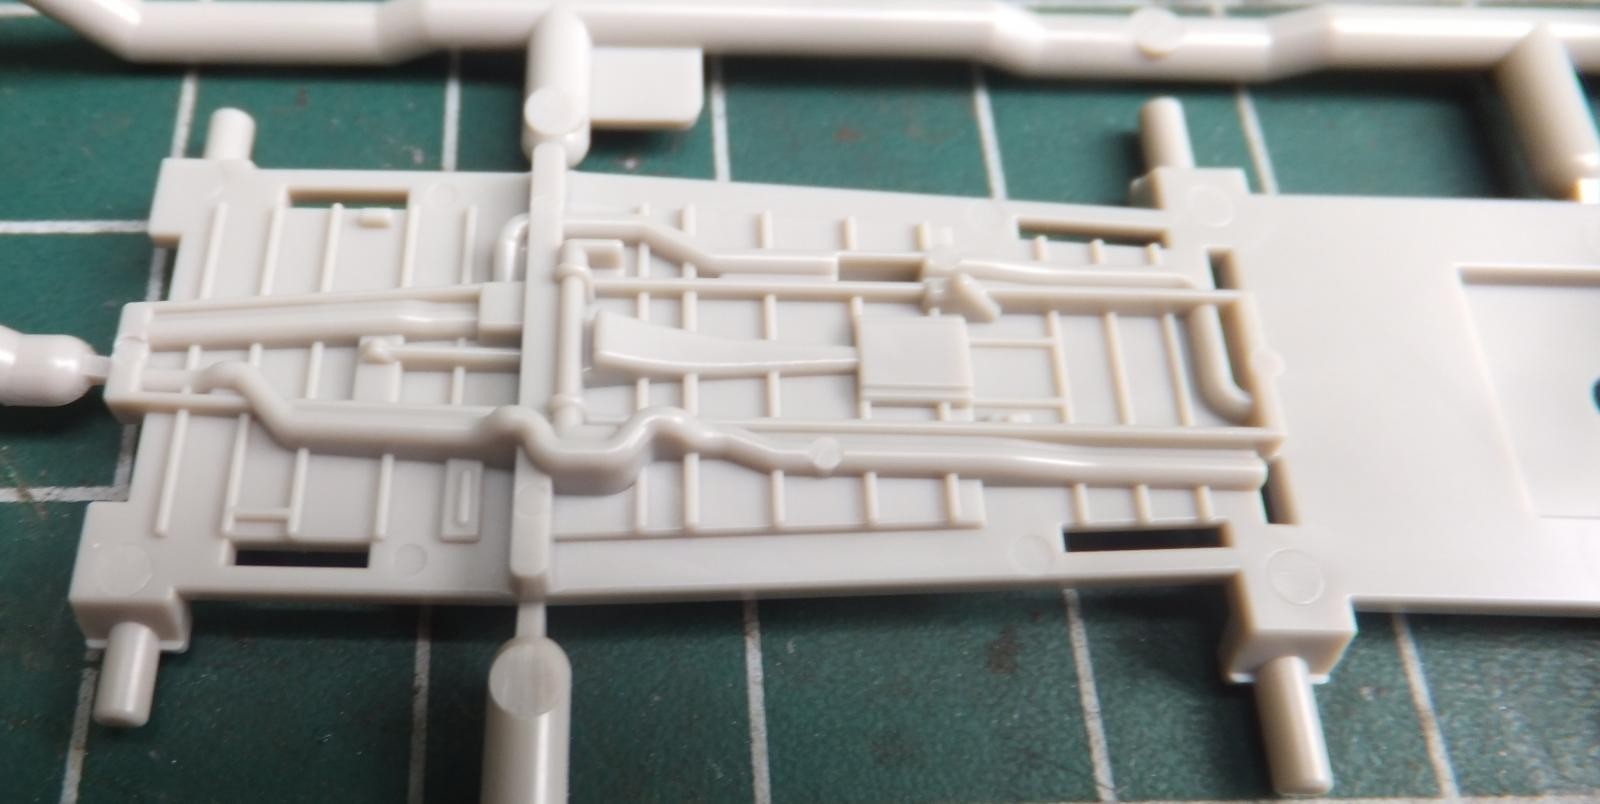
On the inner half, again Hasegawa displays some conduit detail in the main gear bay, Tam does not.
-
- 1. Hasegawa
- 2. Gear bay detail
-
- 1. Tamiya
- 2. not much in gear bay detail

-
- 1. Hasegawa
- 2. conduit detail
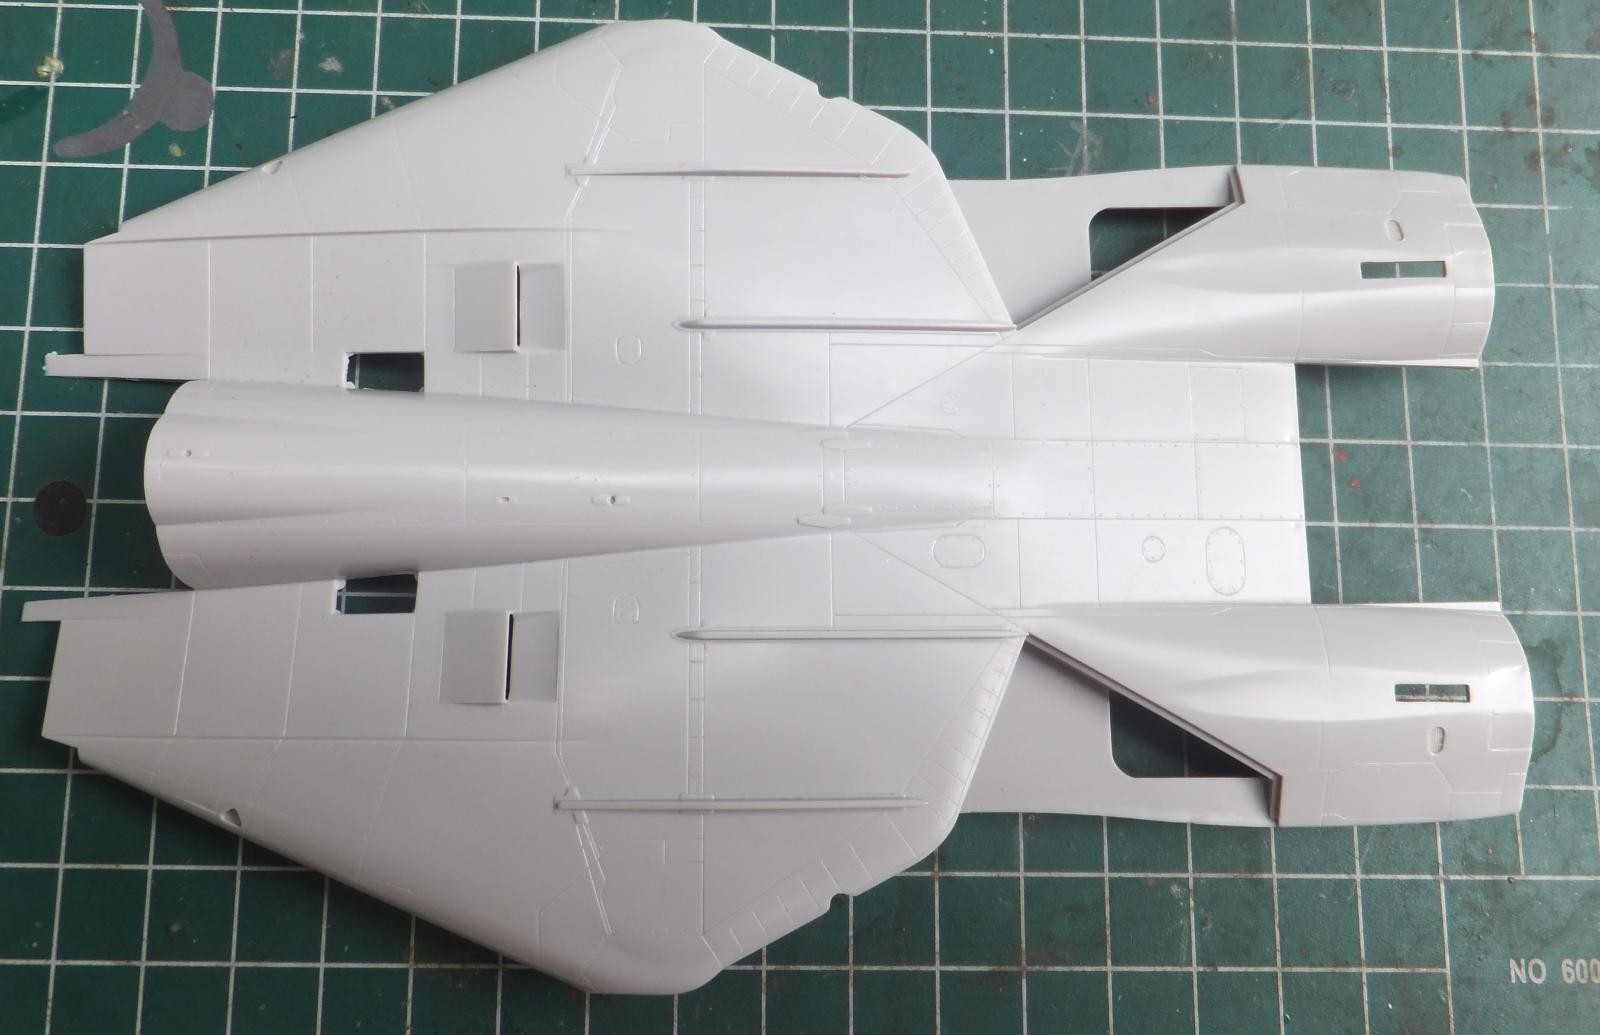
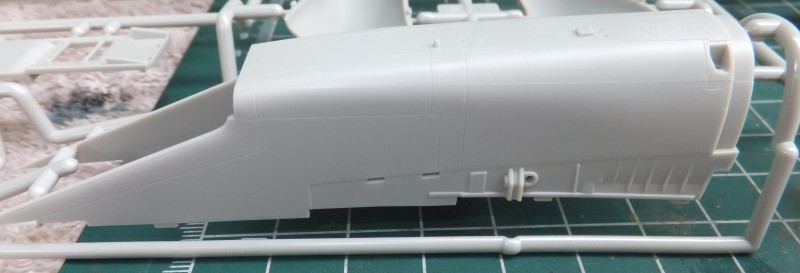
The forward fuselage nose halves, has the nose cone incorporated as part of the fuselage.


Hasegawa has the nose cone as a separate piece compared to Tamiya. Difference in approach of assembly. It could be taken 2 different ways as a modeler. A seam to clean at the center of the nose. Or a natural seam to clean on the nose to fuselage attachment point.
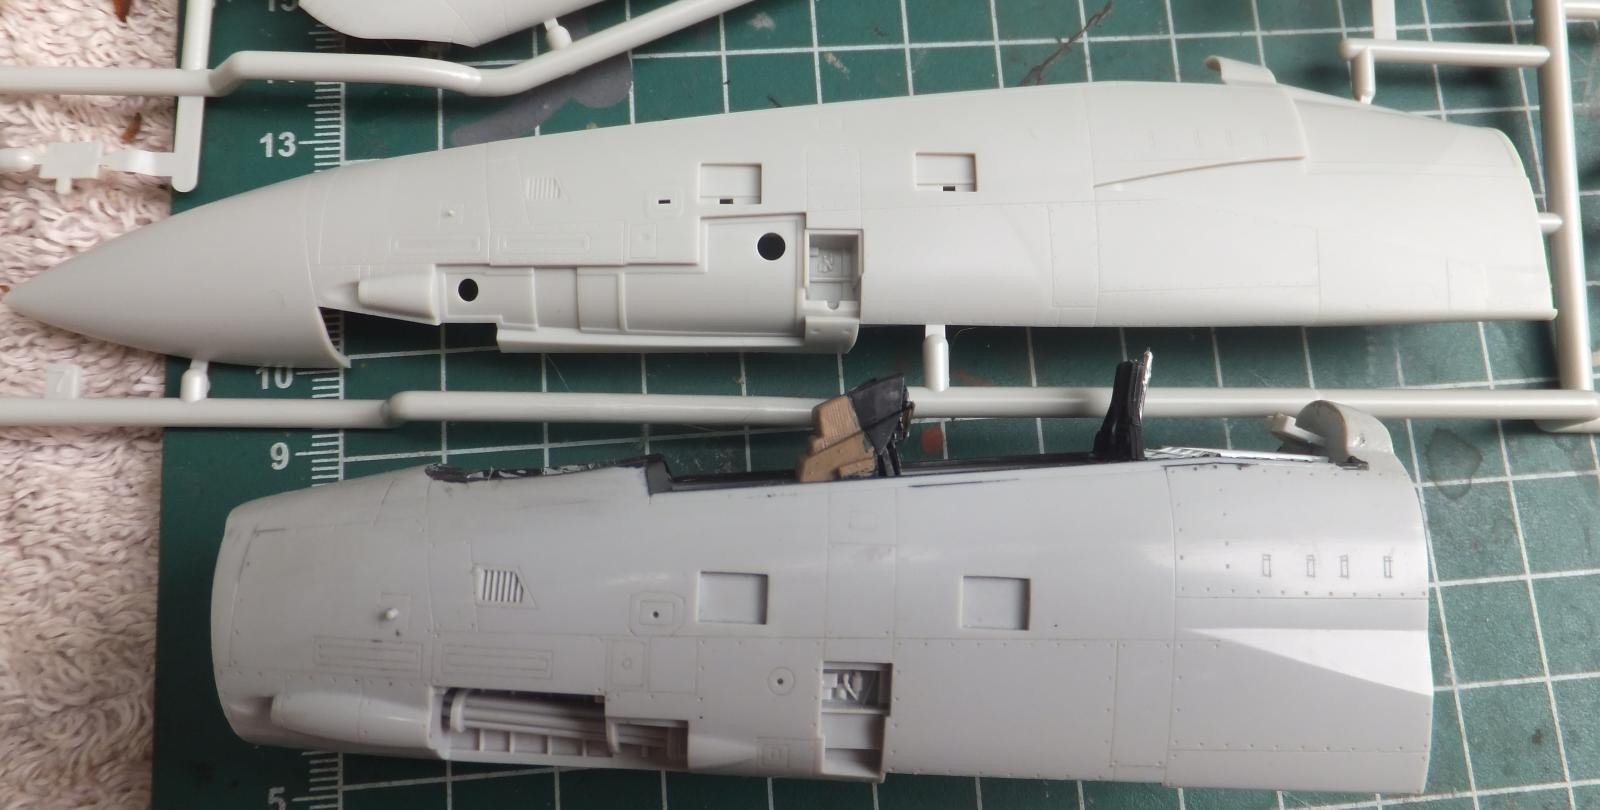
Another point is Hase shows detail on the Vulcan cannon, open doors for the ladder and steps. Tamiya has the ladder and step opened as well. But I will point out that Tamiya has them set a bit deeper. No detail for the cannon on the Tamiya kit.
-

- 1. Hasegawa
- 2. Vulcan cannon
- 3. Ladder bay not as deep

-

- 1. Tamiya
- 2. Deeper ladder bay
- 3. No Vulcan cannon
-

- 1. Tamiya
The rest of the sprue has both full swept or deployed wing bladders and seals. A nice touch has these bladders removable so you can display the wings fully swept or full forward. Another nice feature Tamiya has etched into the backside of the bladders to use for either display.
-

- 1. seals
-

- 1. Bladders
-

- 1. Bladder type etched into the plastic, nice touch
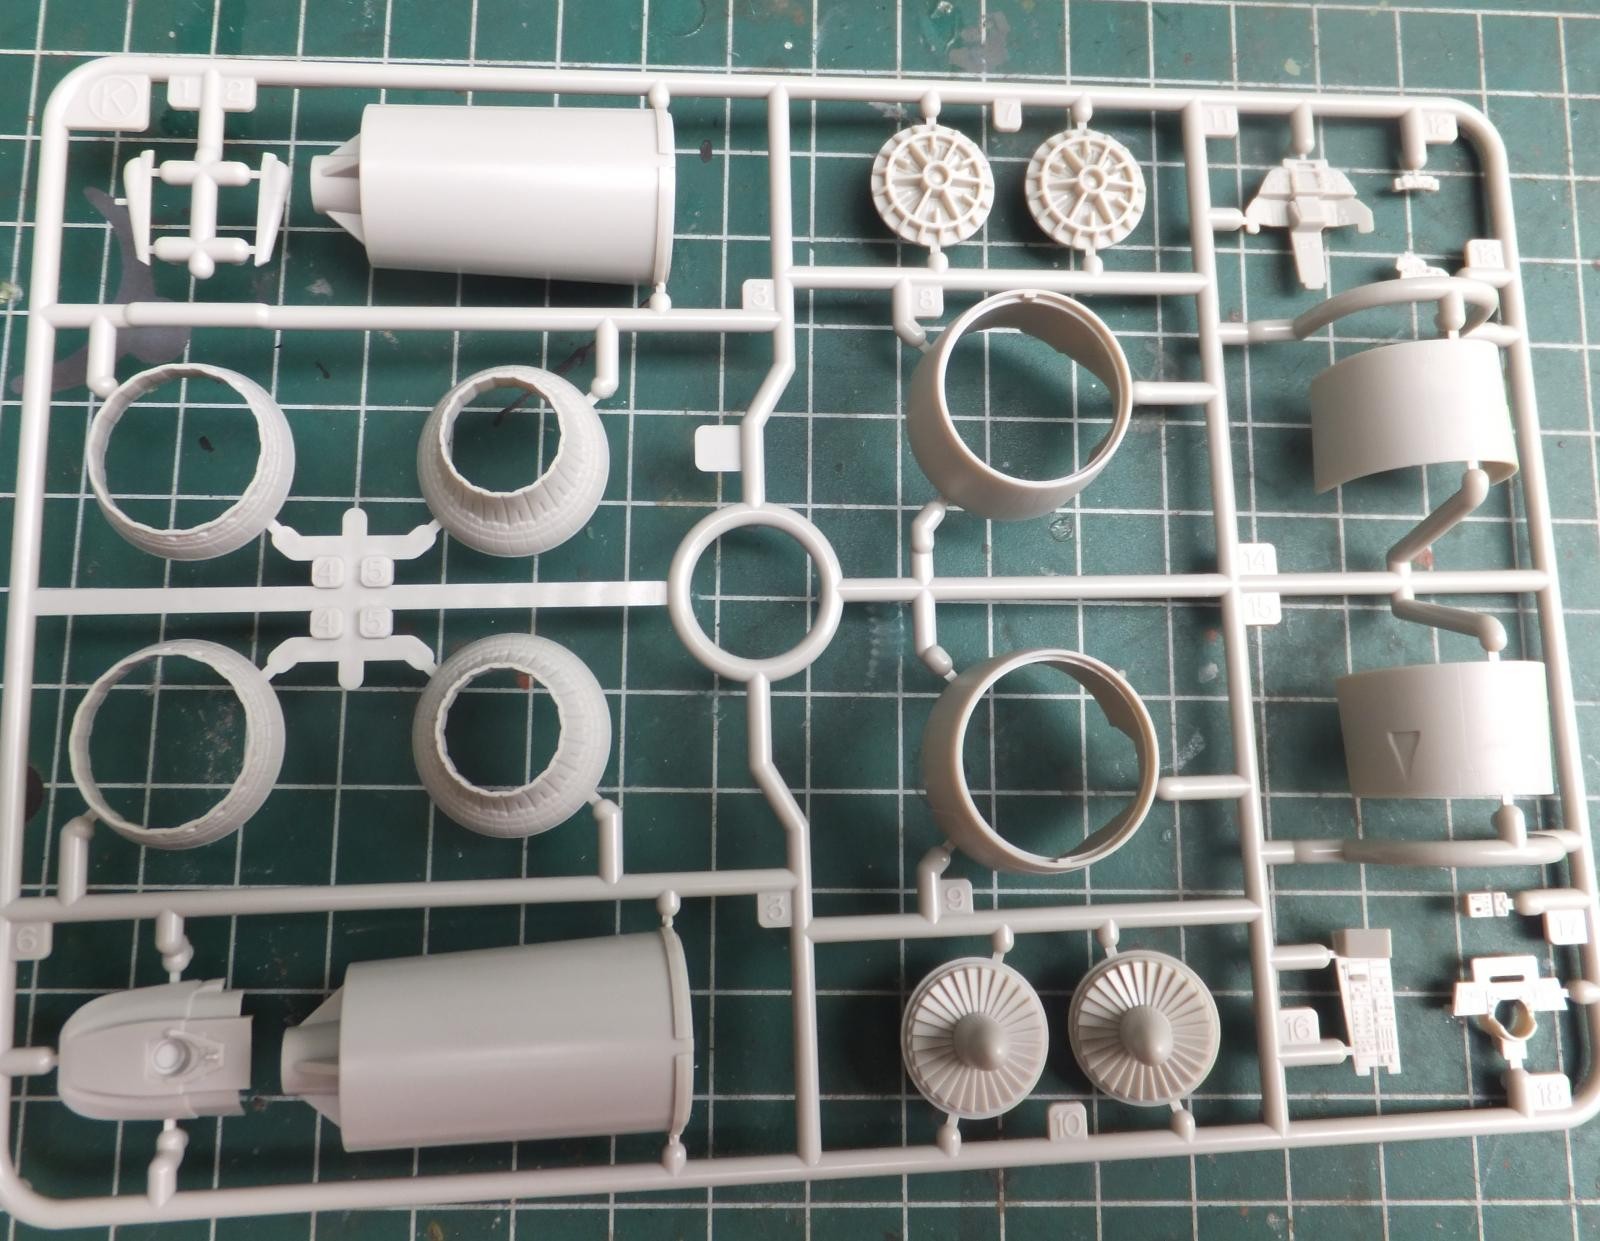
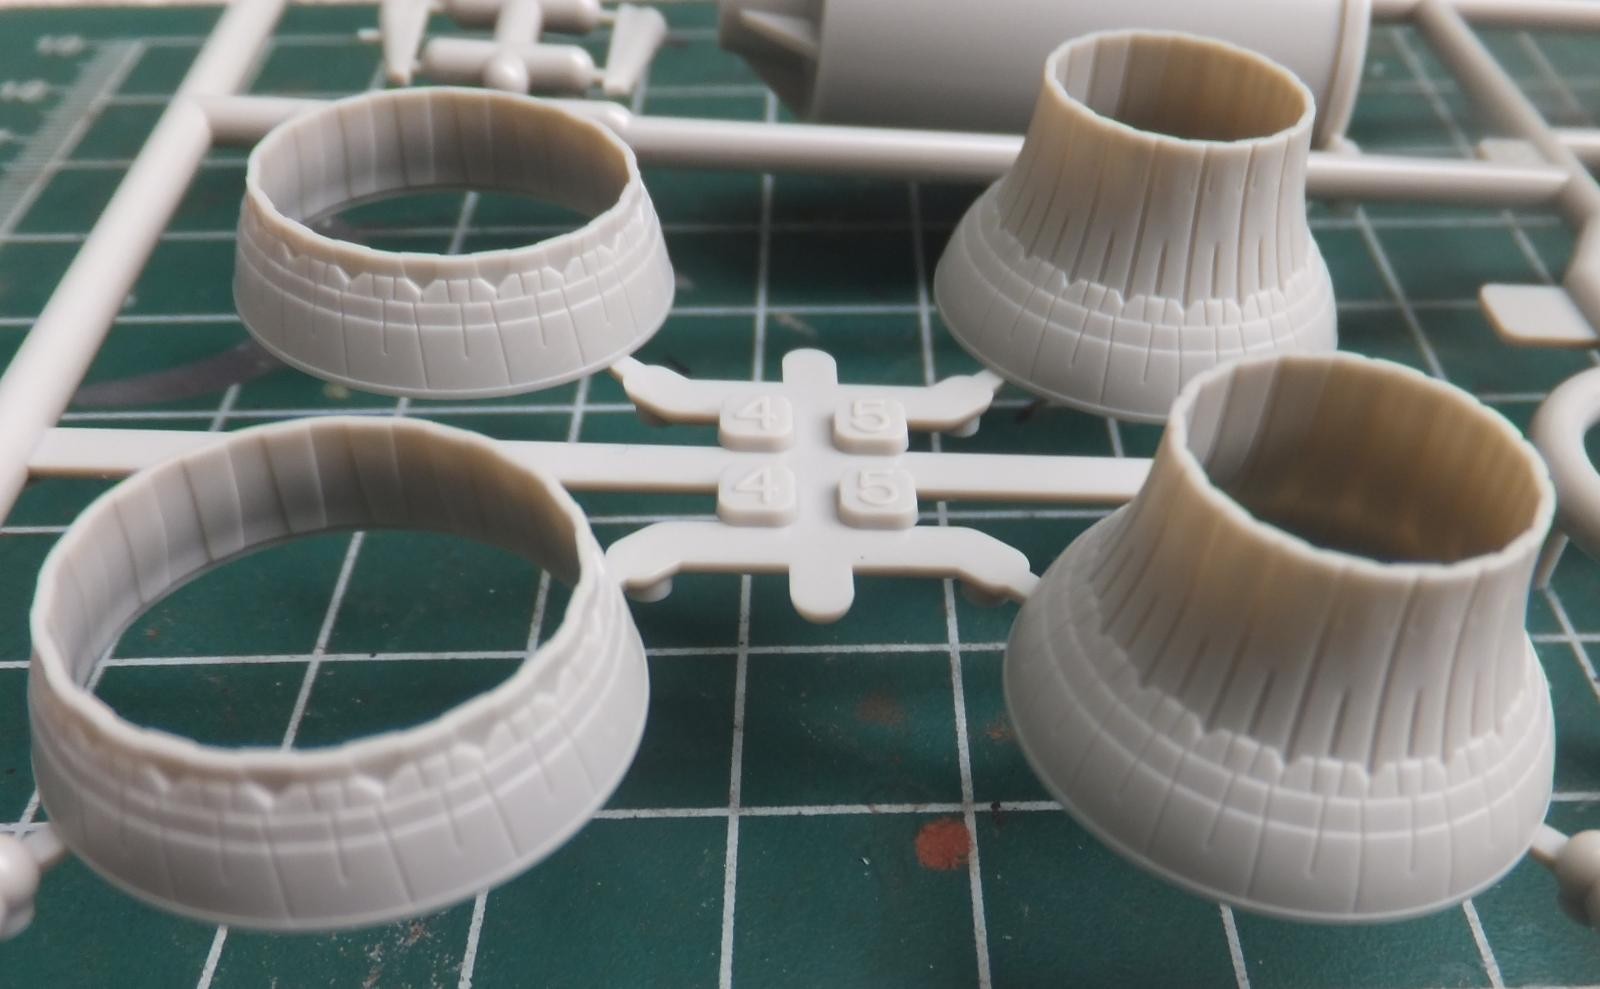
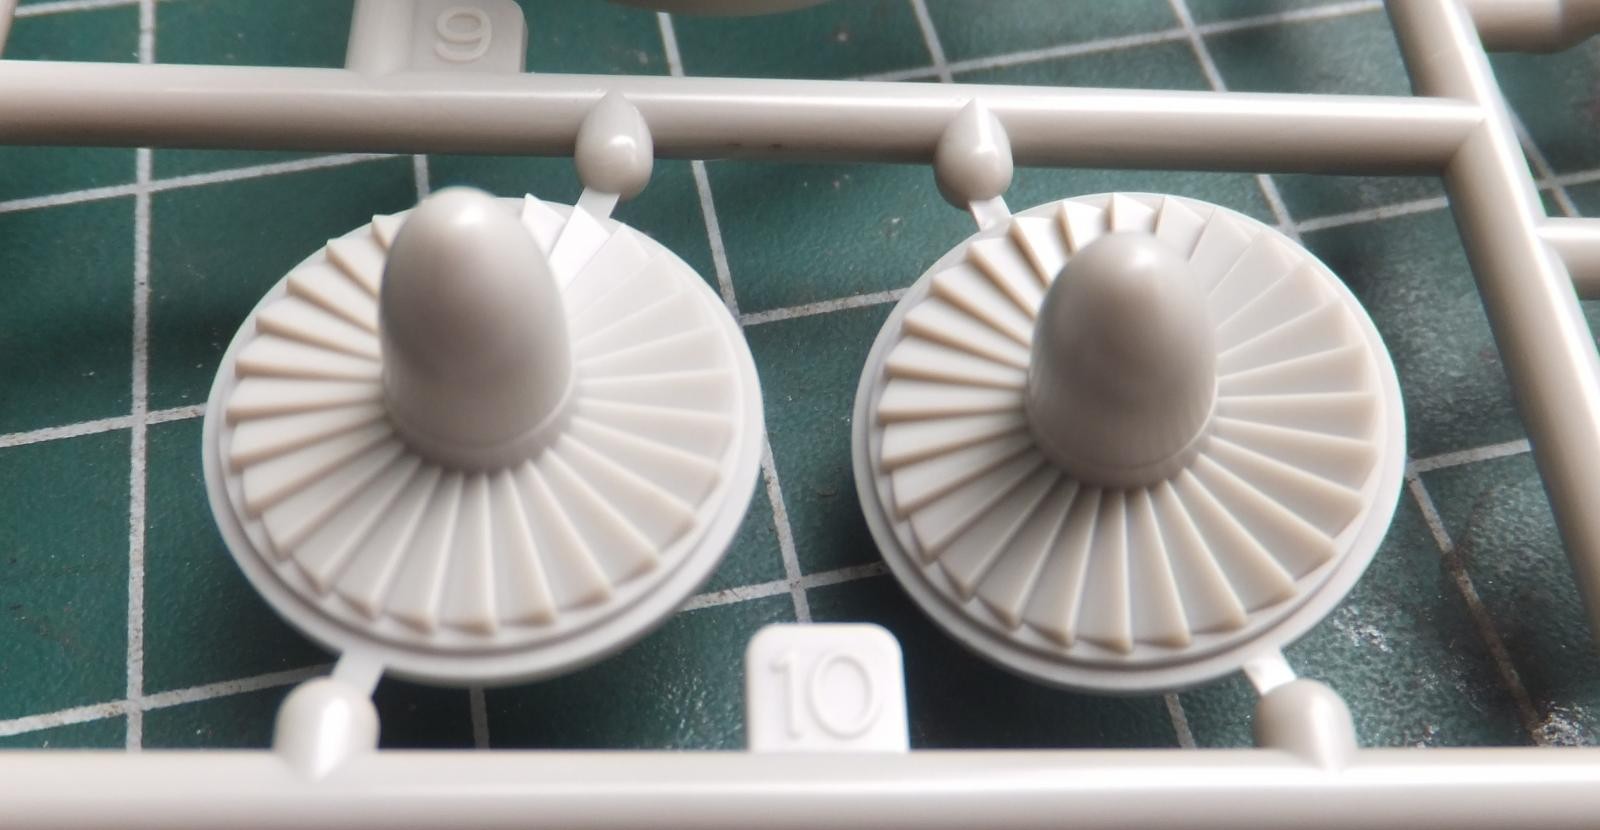
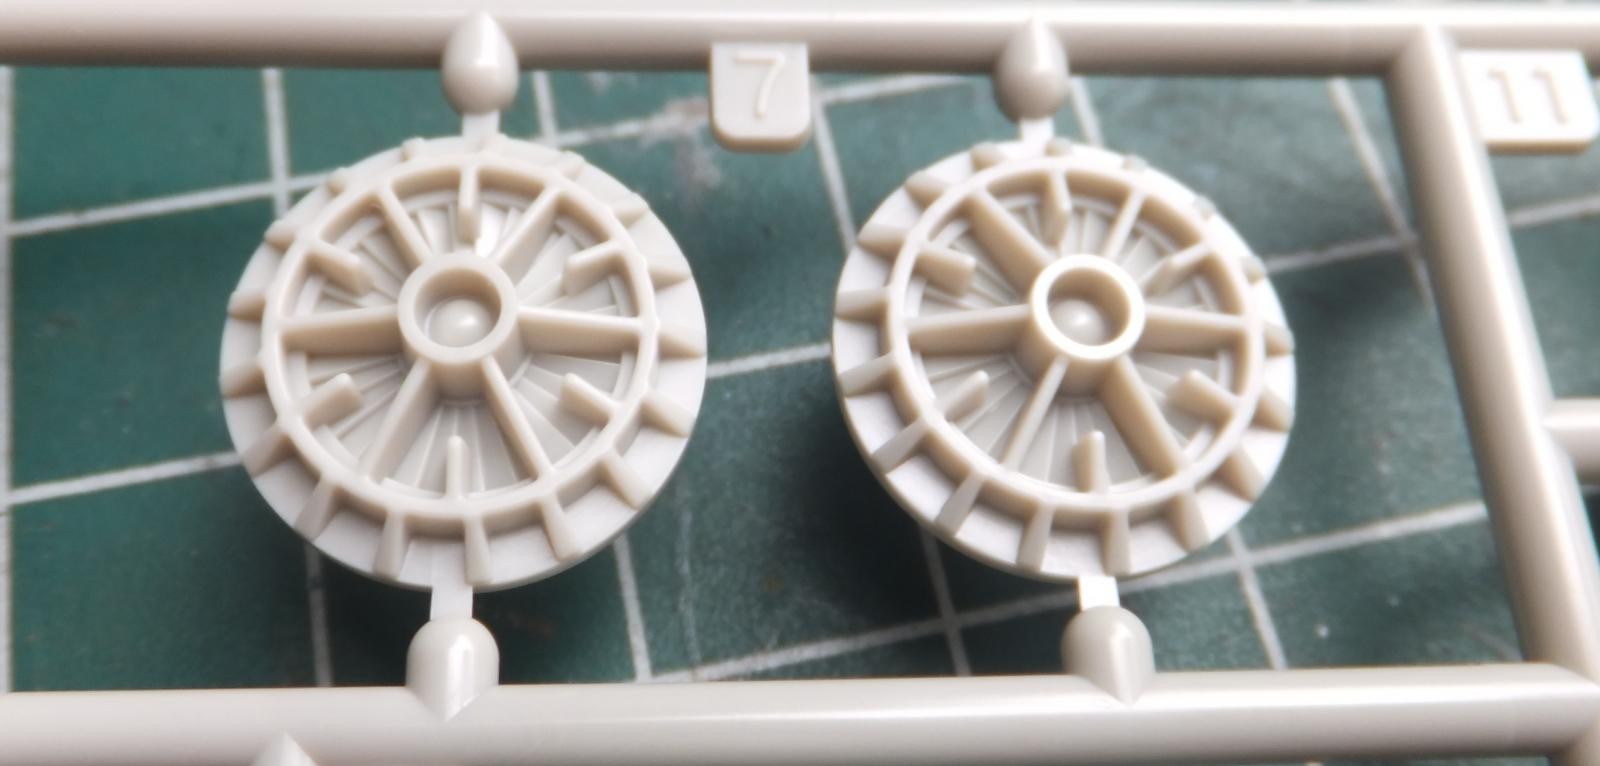
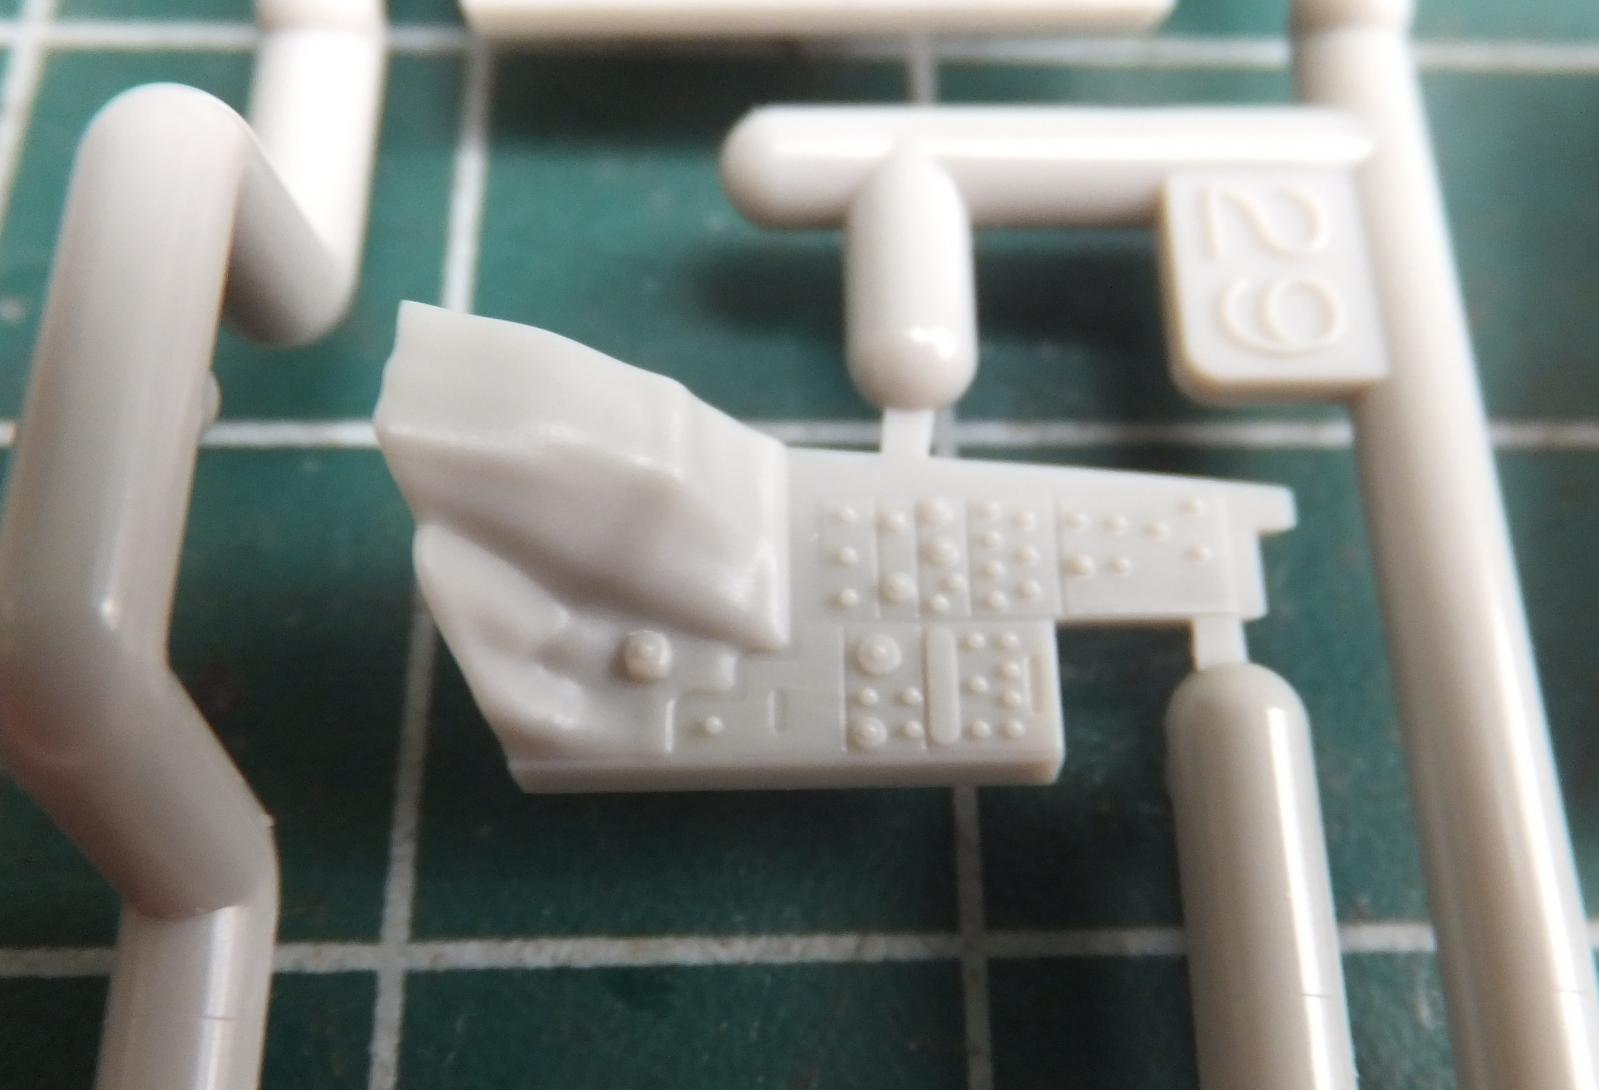
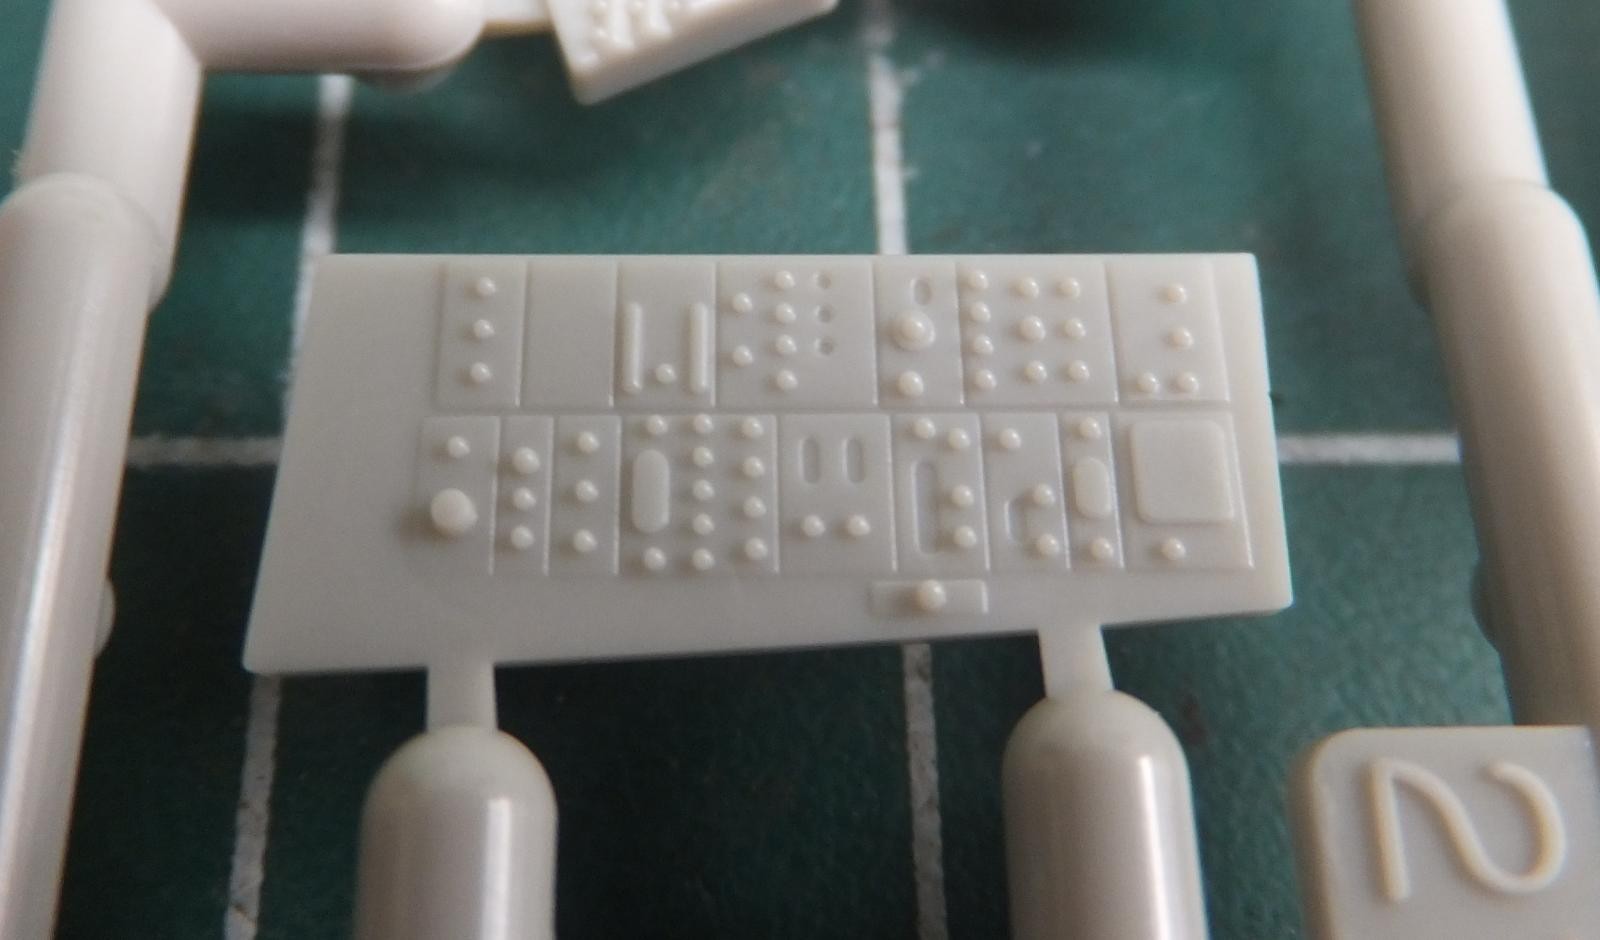
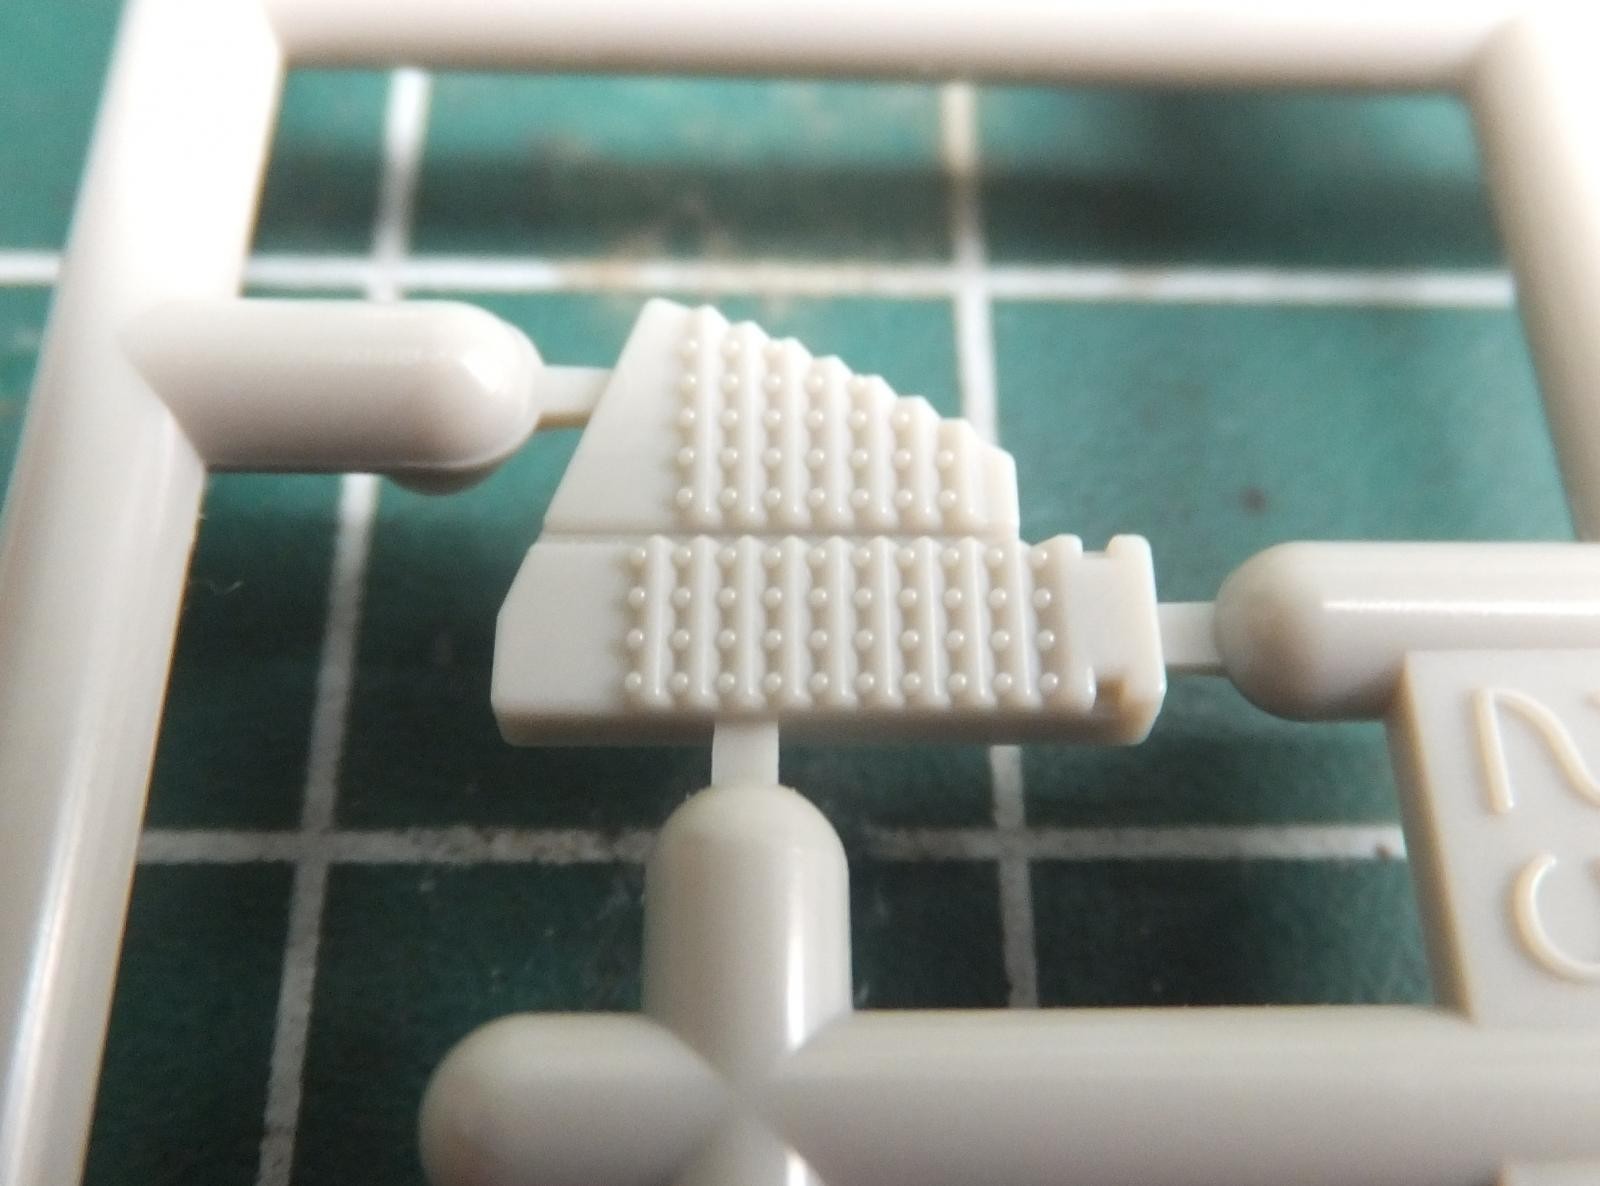
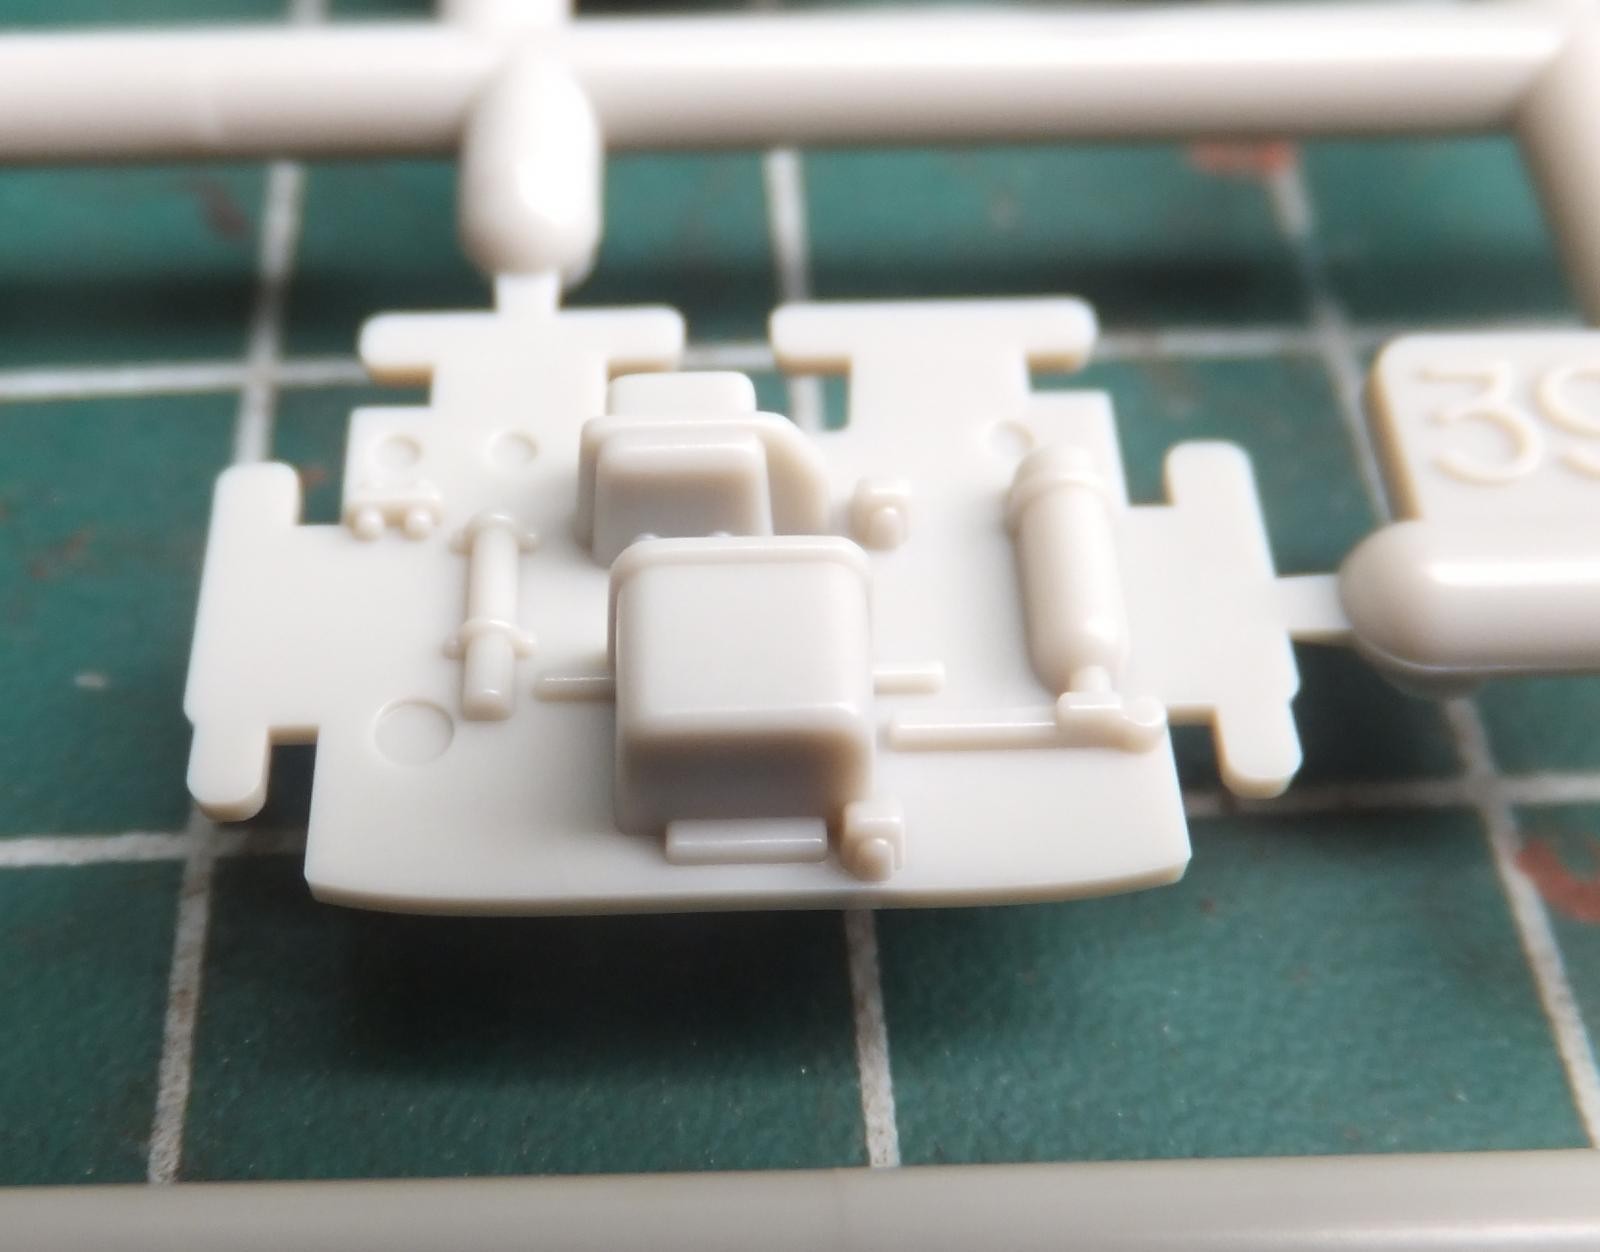
The next sprue are the engine exhaust nozzles, instrument panels and some consoles . Tamiya provides both full open or close afterburner cans. Nice detail here as well. This will also allow you to display one closed and one open when the the Tom is parked with is normal with the TF-30 engine, when shut down one of the afterburner cans would remain open.
-
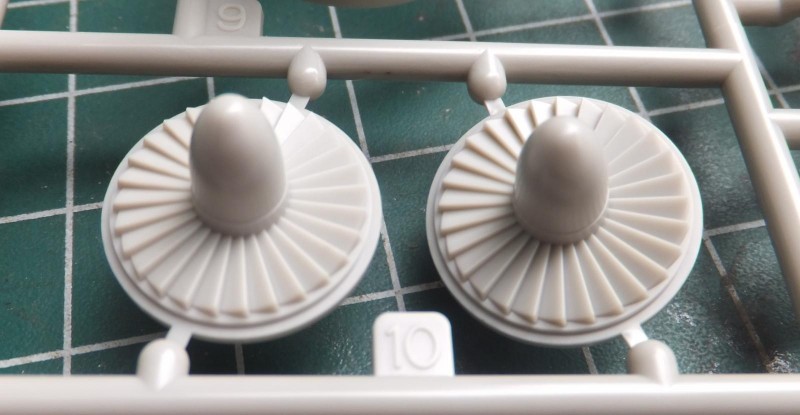
- 1. intake turbine
-

- 1. exhaust outlets
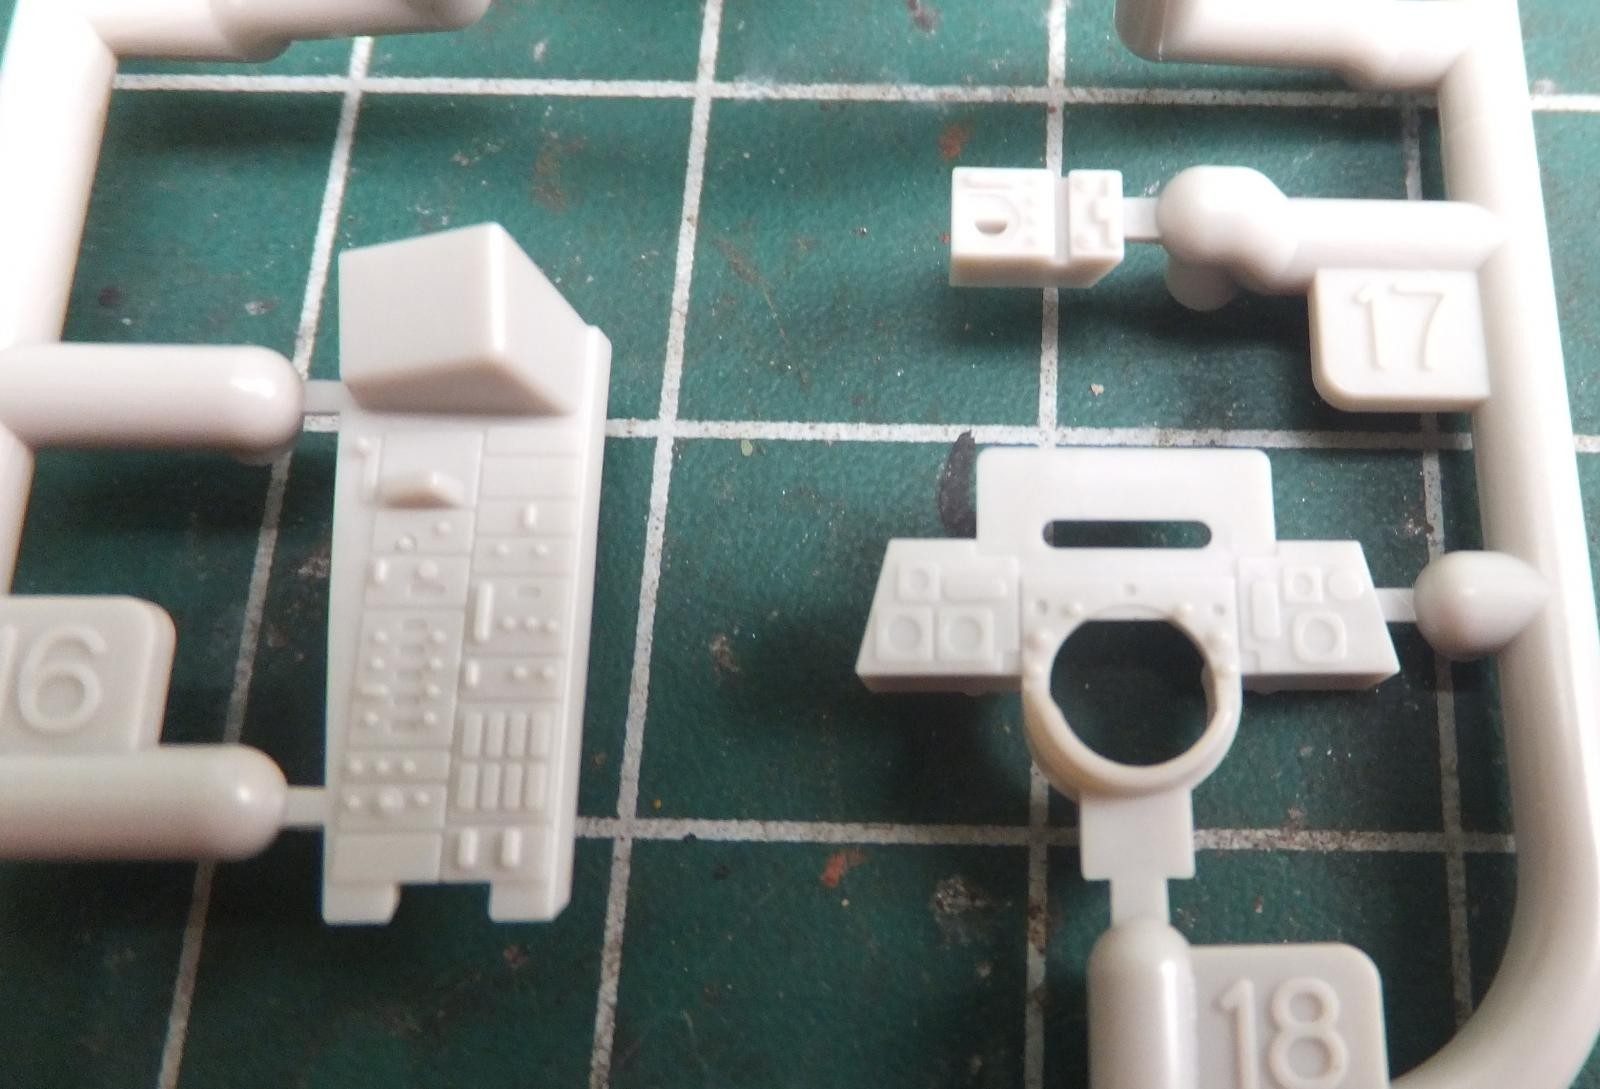
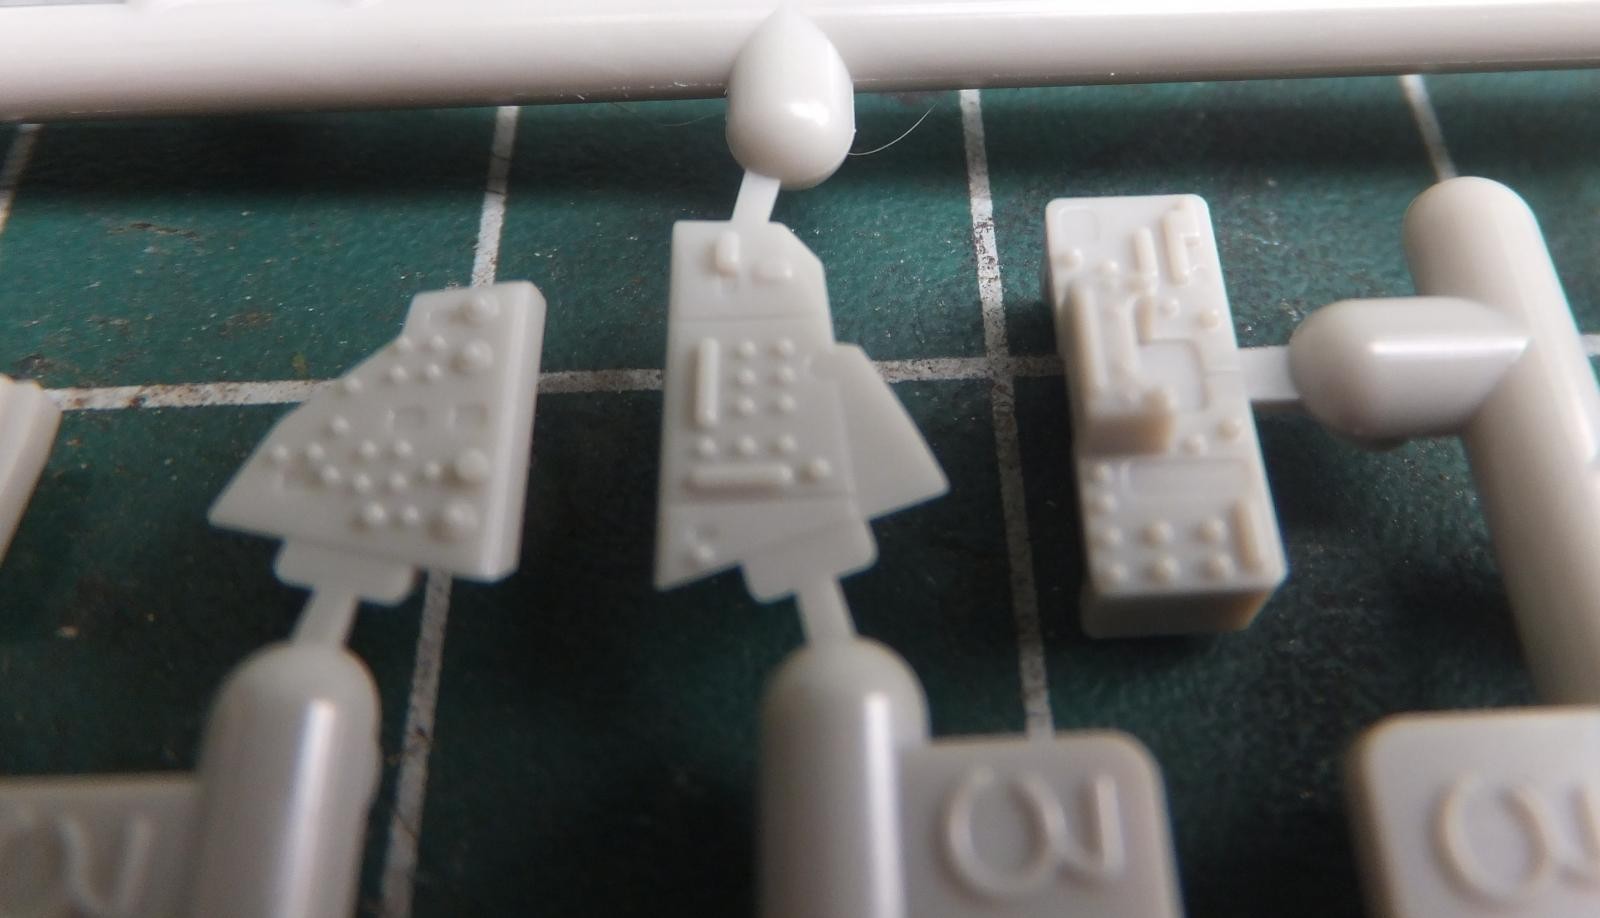
The 2 instrument panels and side consoles have good details and can be with a steady hand brought out nicely with paint.
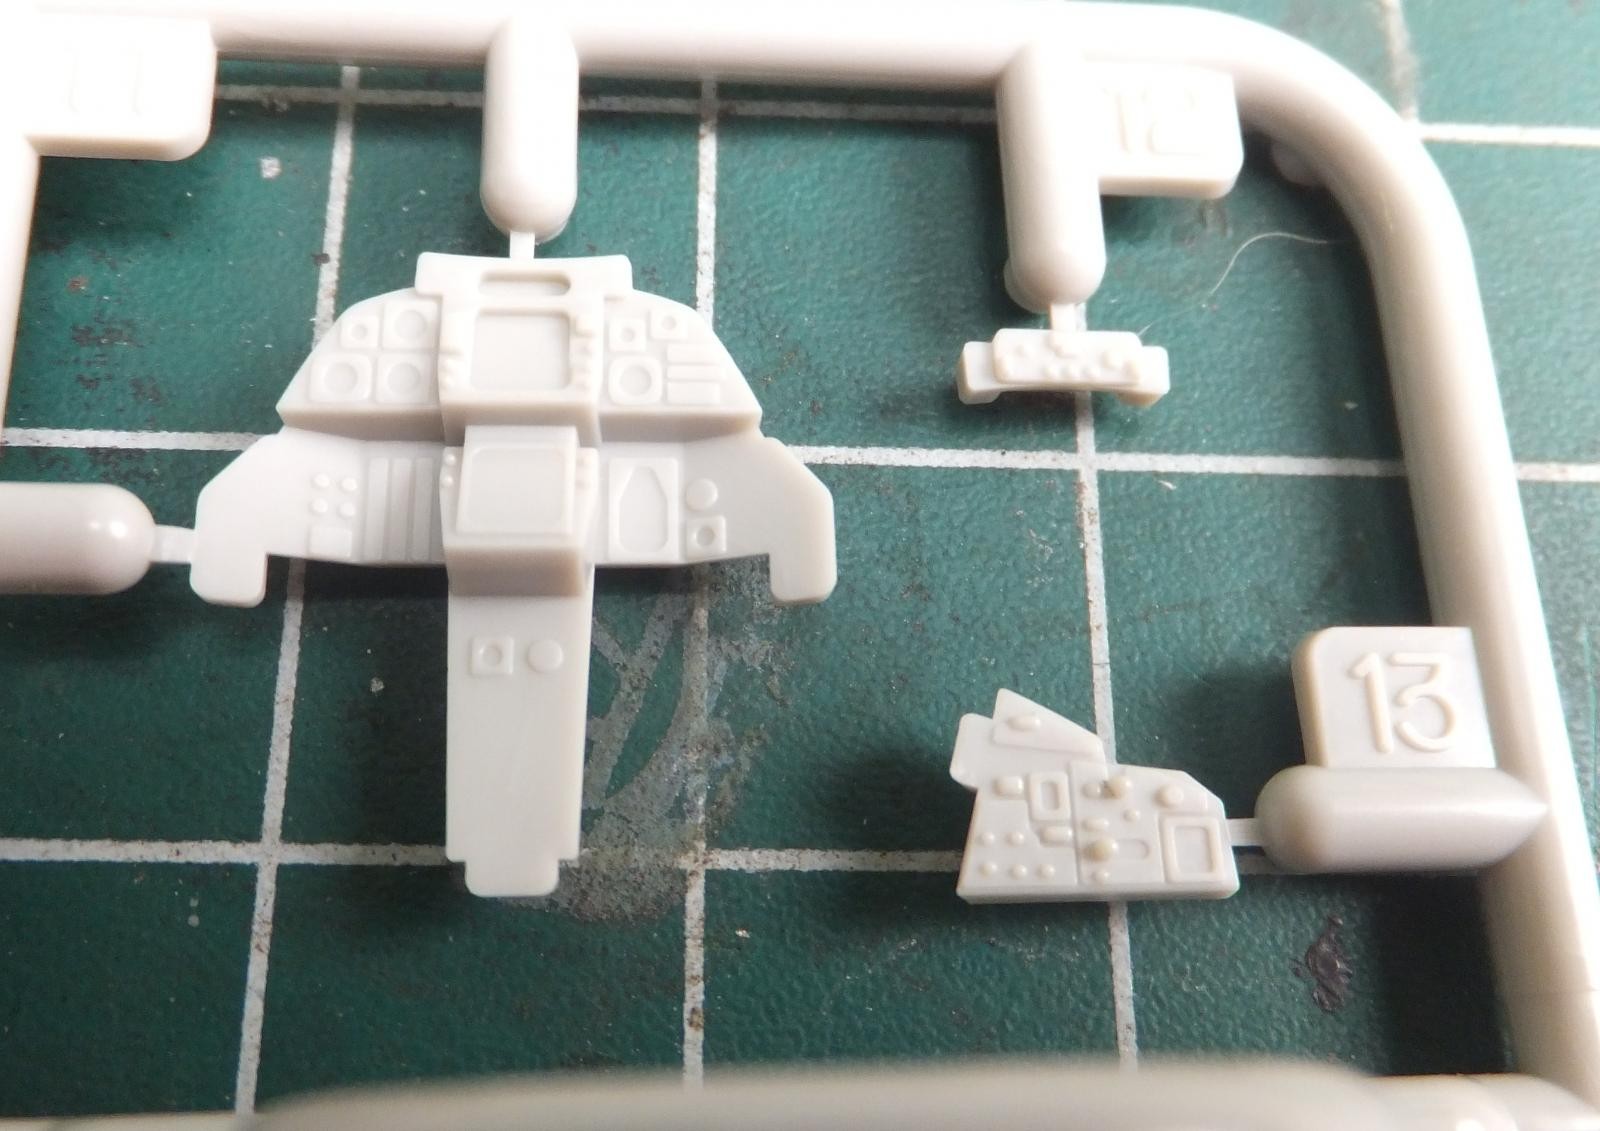
The next sprue contains most of the cockpit components, side consoles and cockpit rails and canopy frame. Other detail bits like the tail hook.
Something Tamiya provides that the Hase kit does not have and not even the Eduard's Pe set have them are the side panels within the fuselage sides.
-
- 1. Interior side panels

-
- 1. Side panels

Like Hasegawa nice separate side consoles that mount into the cockpit tub. Easier to detail before attaching them into the cockpit. The 1 piece cockpit tub devoid of any details.
The canopy rails and lower canopy frame are nicely rendered, the rails having the lock hook mechanism detail on each of them. The canopy frame lacks some detail that the Hasegawa frame has. Seems to be a pattern here on some pieces.
-
- 1. Hood latch mechanisms

-

- 1. Hasegawa has a bit more details here compared to Tamiya

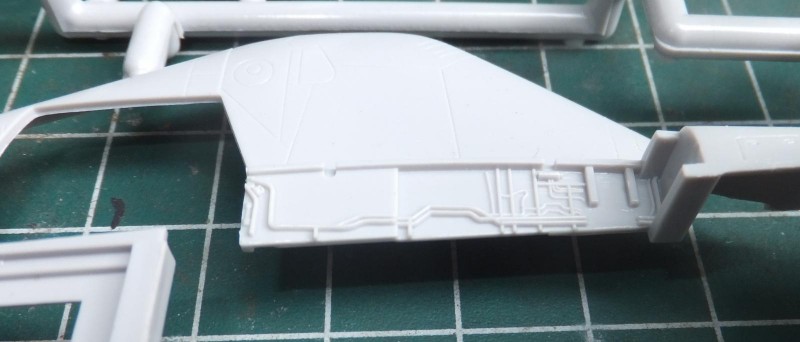
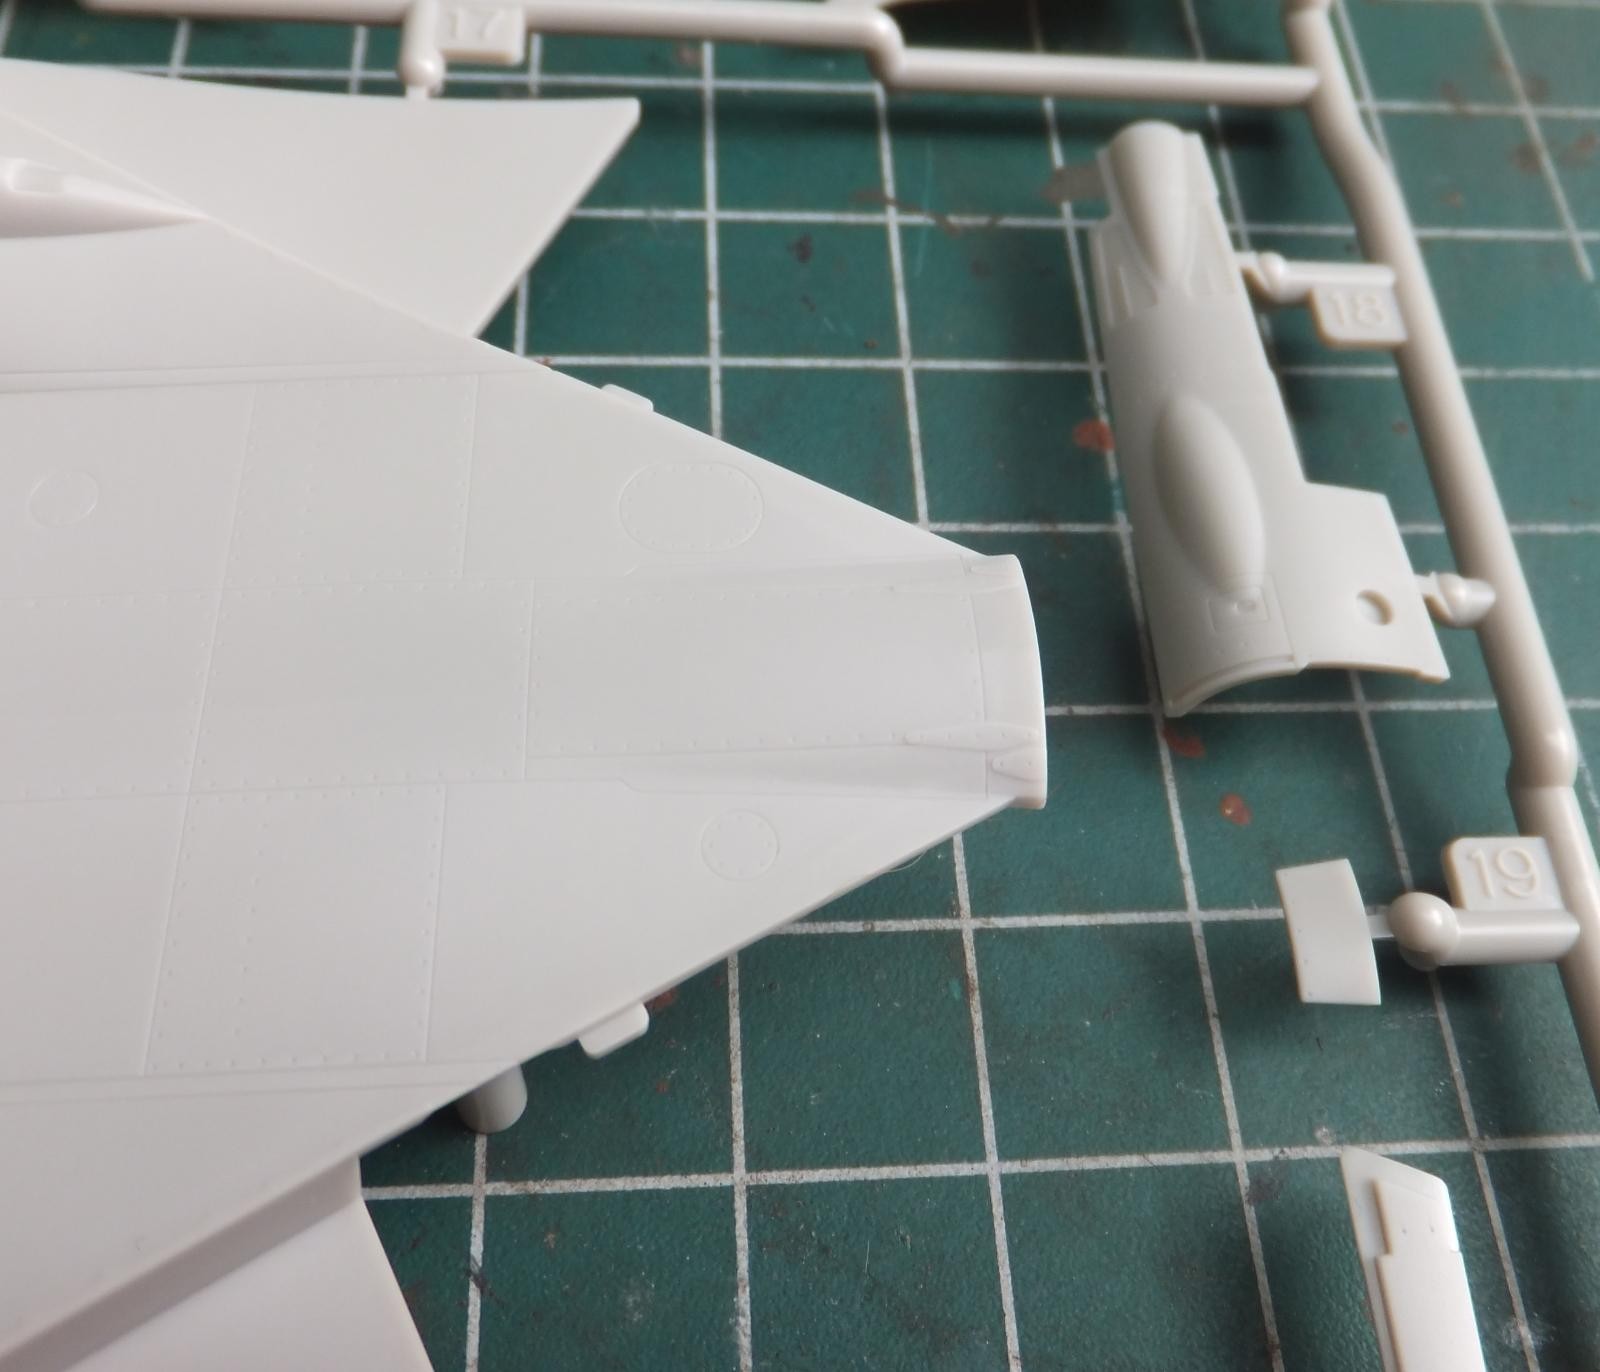
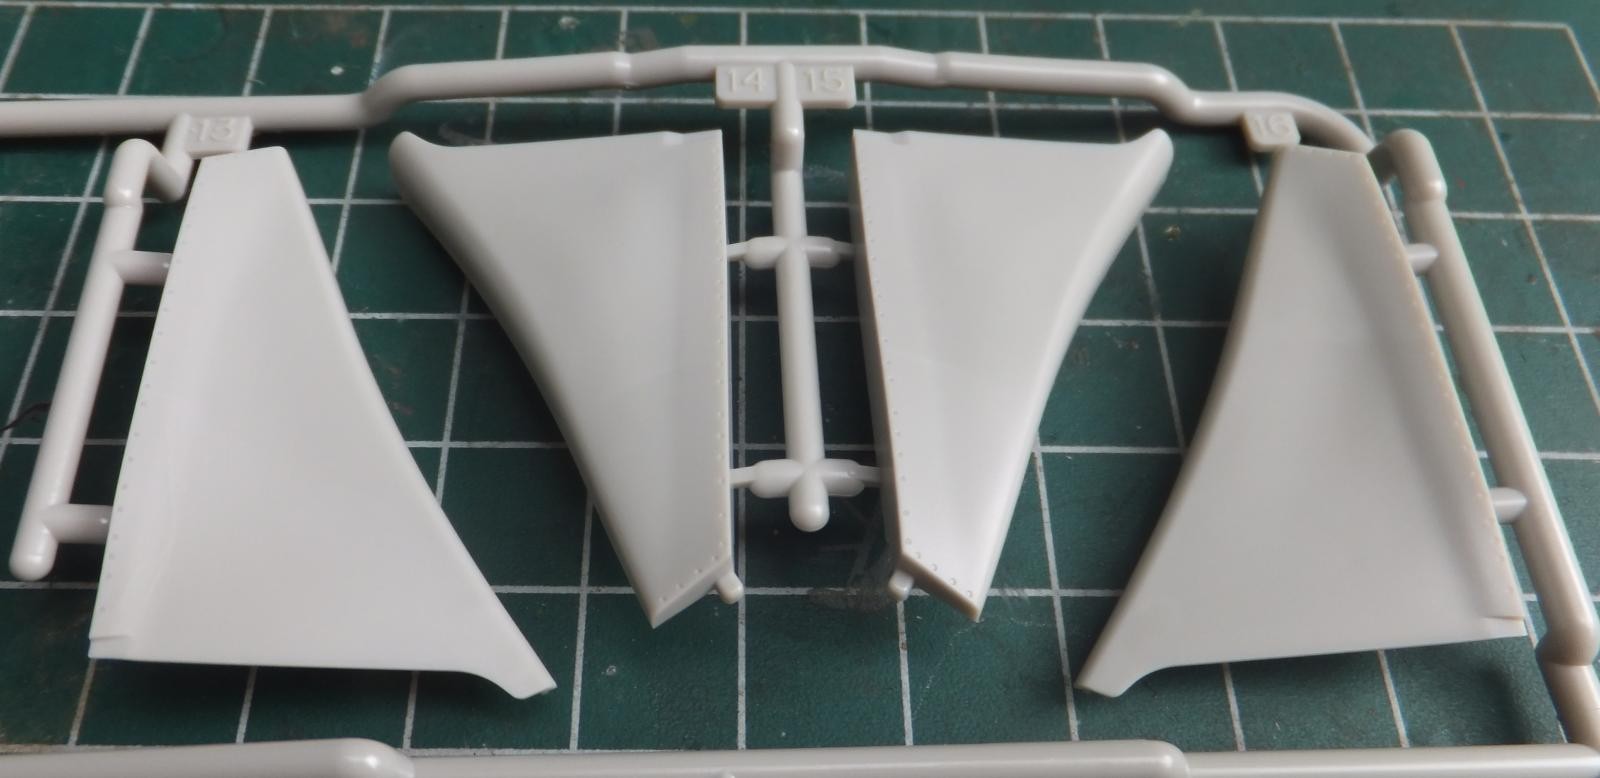
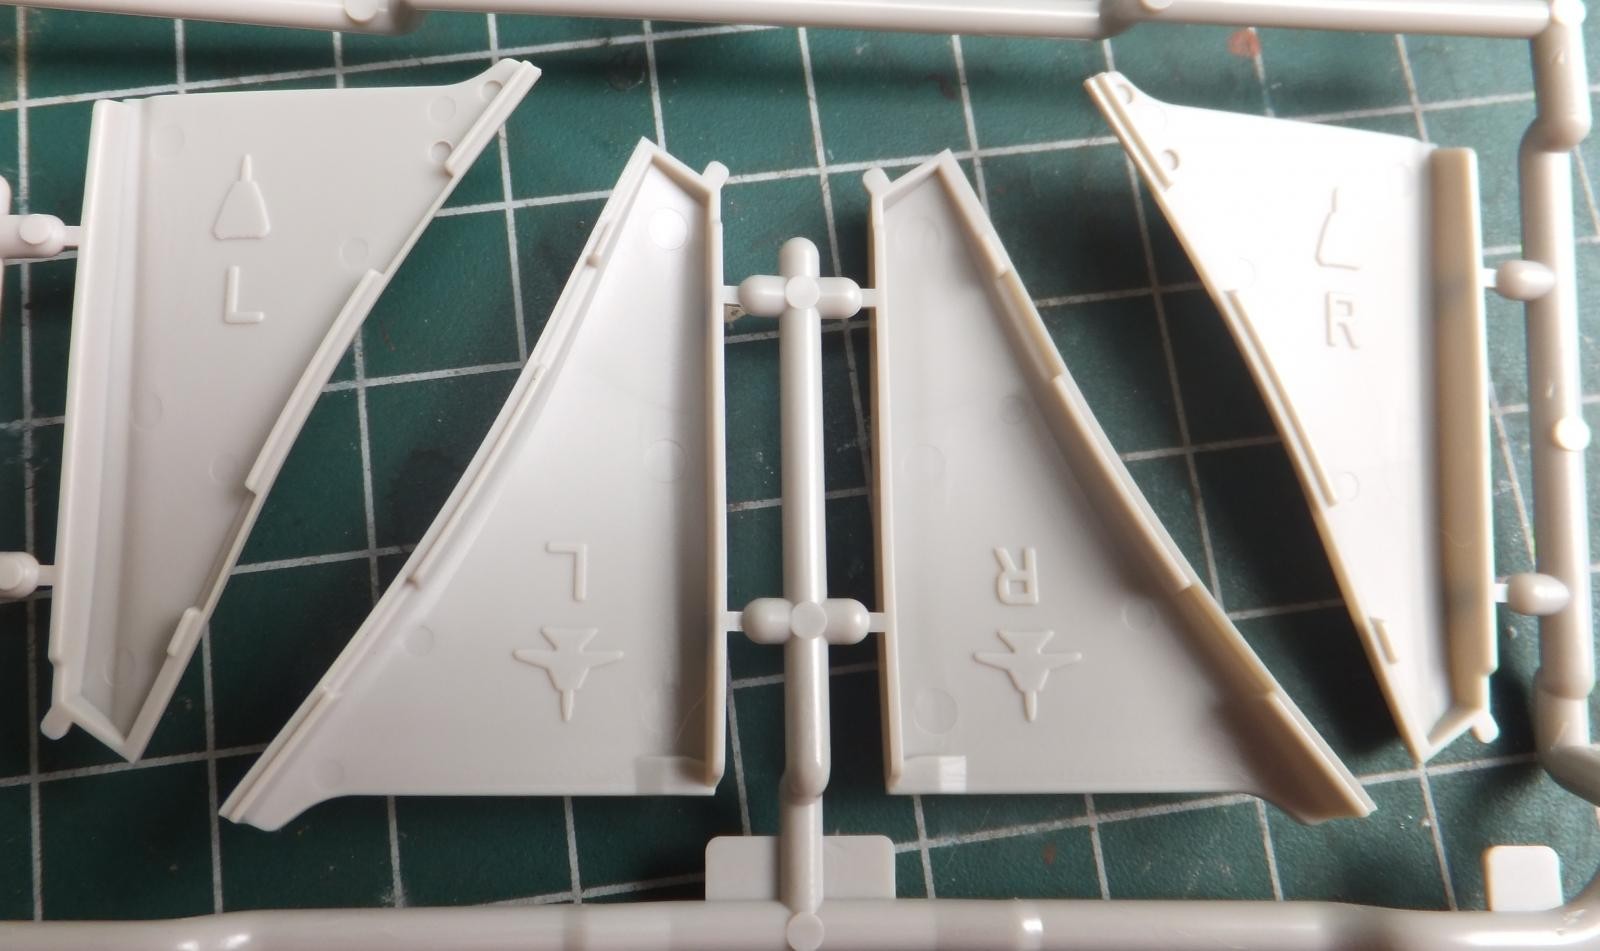
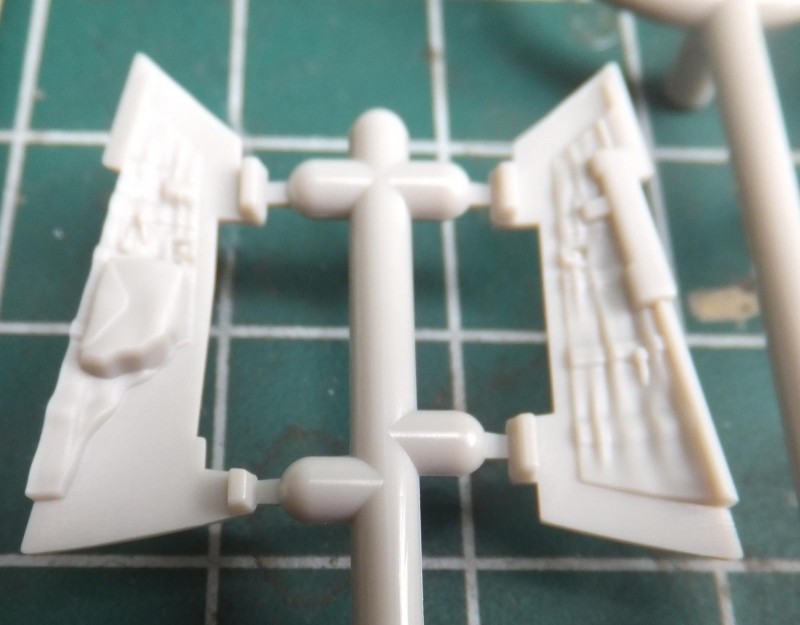
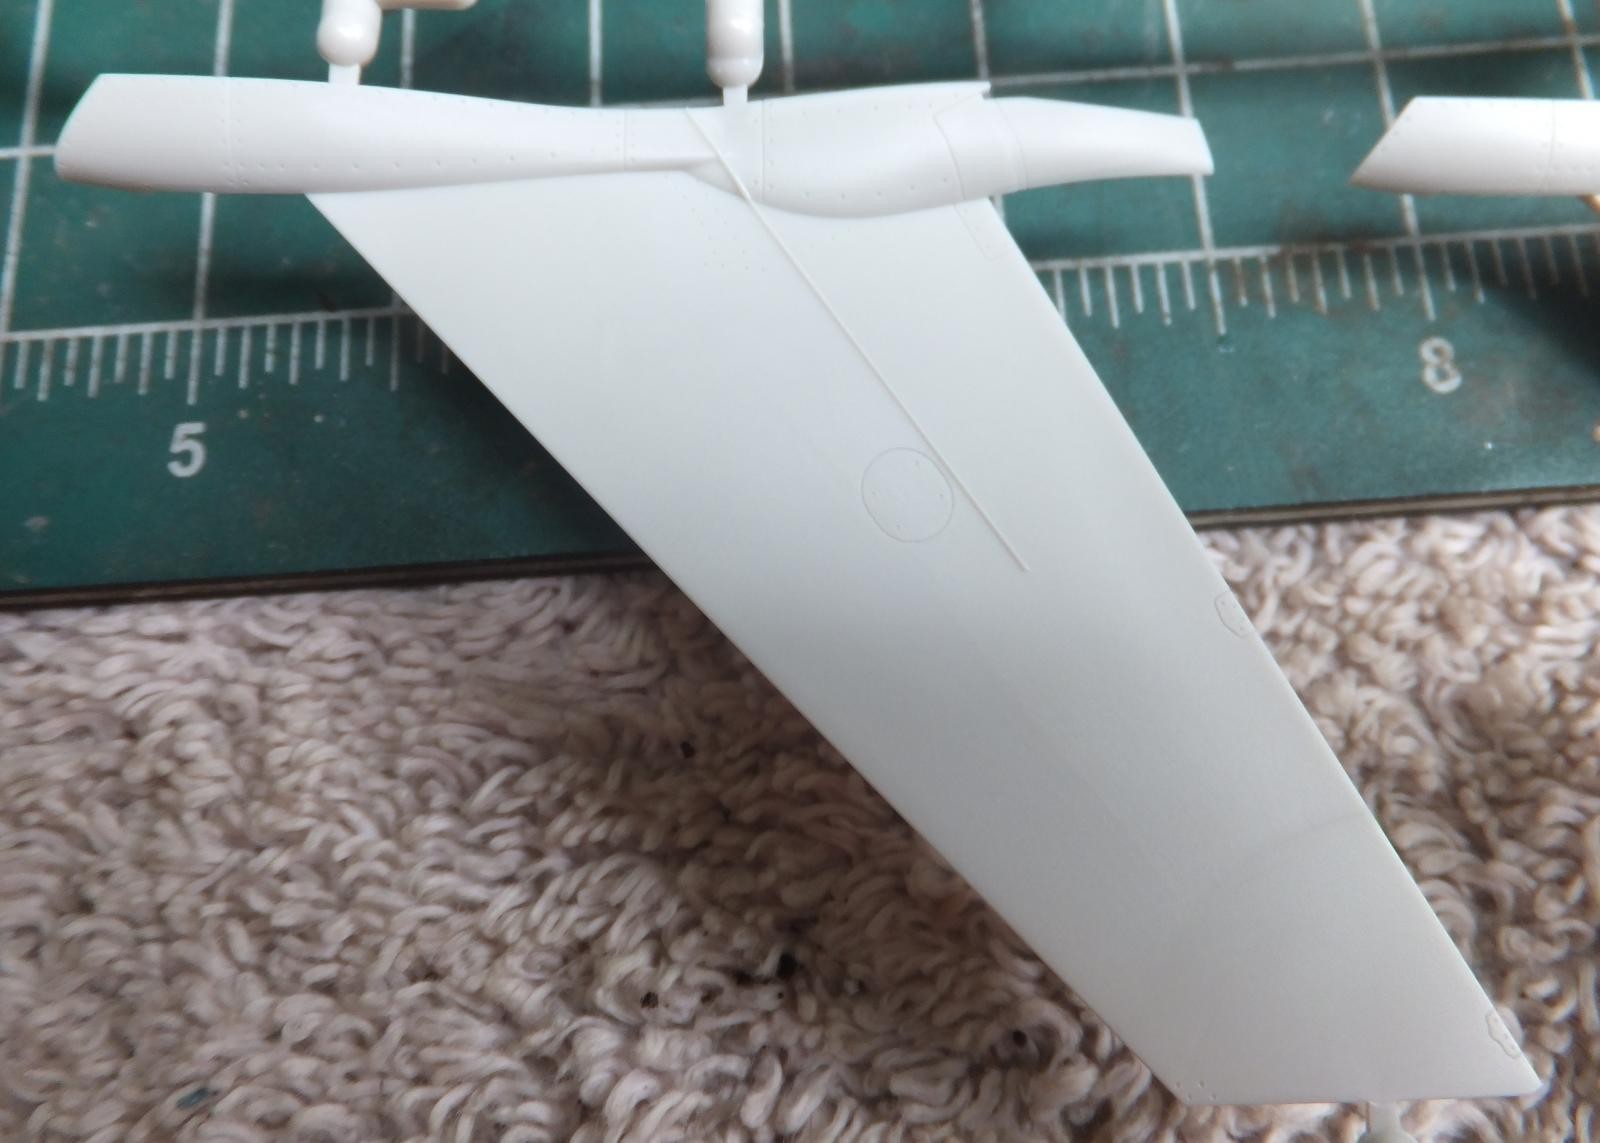
The next sprue contains those famous twin tails, the forward missile bay insert, intake ramps, intake trunks and forward Phoenix missile pallets.
The forward missile bay insert is a much better approach to attaching it on the Tam kit. The Hase kit has a similar part but it is split in half which involves cleaning a hard to reach seam to fill within the well if you wish to display your Tomcat unarmed. Not a deal killer if you have a Sparrow in the well.
The tail rudder assemblies are of an inner insert into the outer tail panel. Fortunately the part follows a natural seam on the tail when attached so careful assembling here will avoid any issue here.
-

- 1. Inner tail panel follows natural seam where it attaches to
-
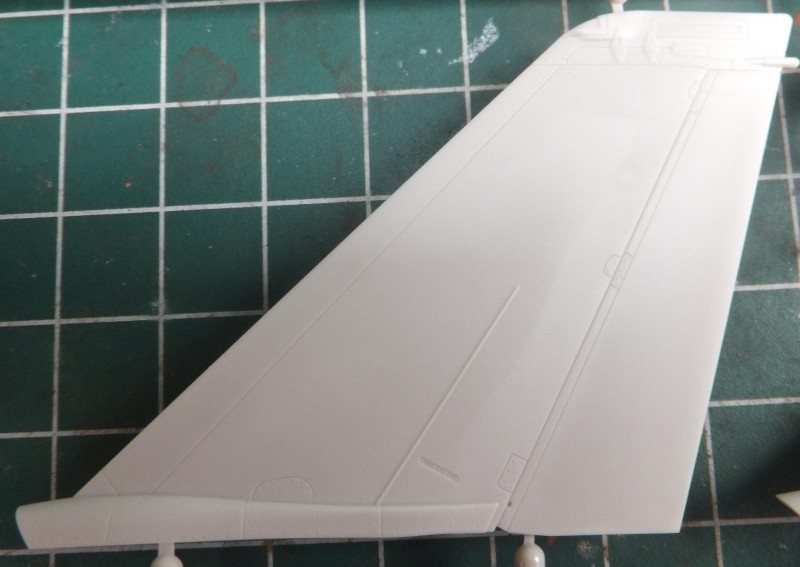
- 1. These do not flutter at all in flight on the real Tom.

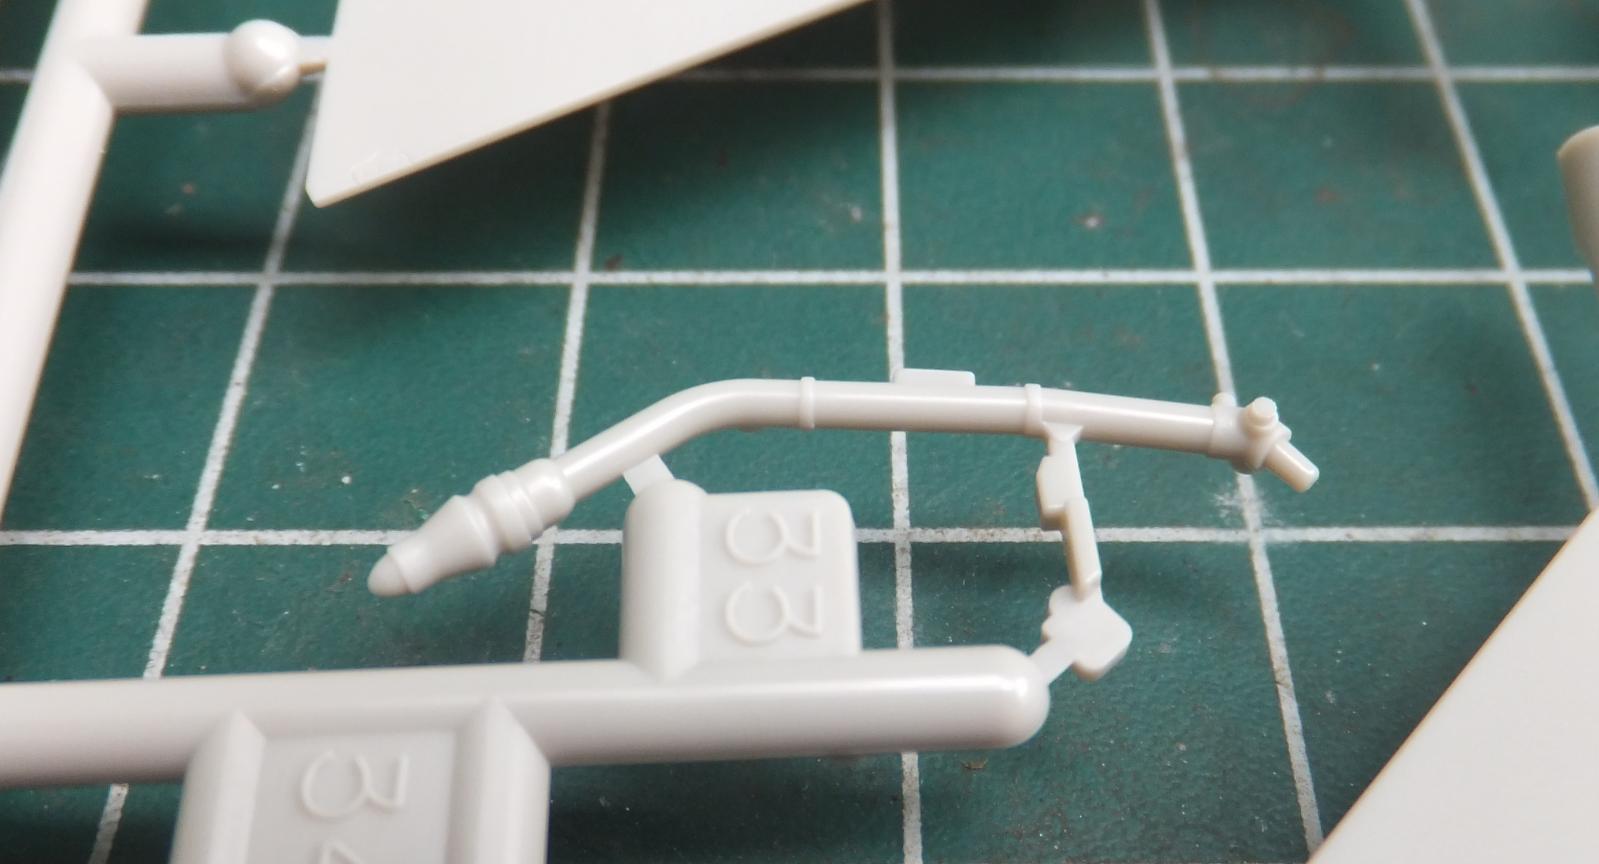
The forward Phoenix missile rail pallets are nicely rendered. What is really nice is Tam incorporated part of the main gear bay into the side of the Intake trunking. It is a separate piece on the Hase kit and it is a bear to get it to fit right. And still it doesn't look right. Tam provides a fuel probe. Nice for an option.
-

- 1. Forward Phoenix pallet missile rails

-
- 1. Nice to see this part as 1 piece on the Tam kit. It is a bear on the Hase kit to get it to fit correctly. Grrrrrrrr!!!!

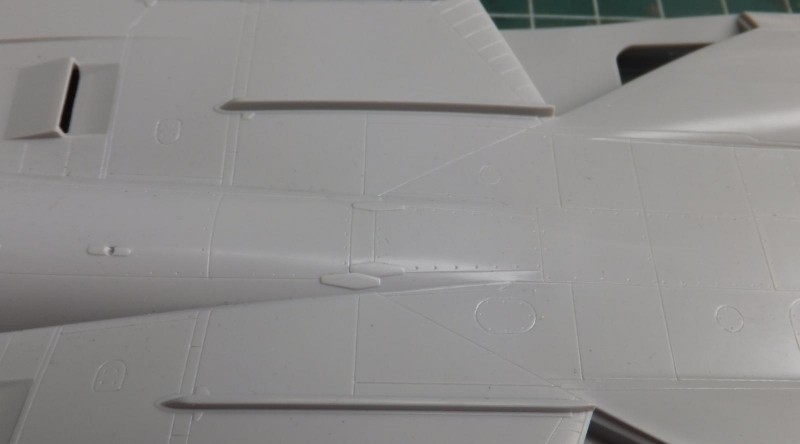
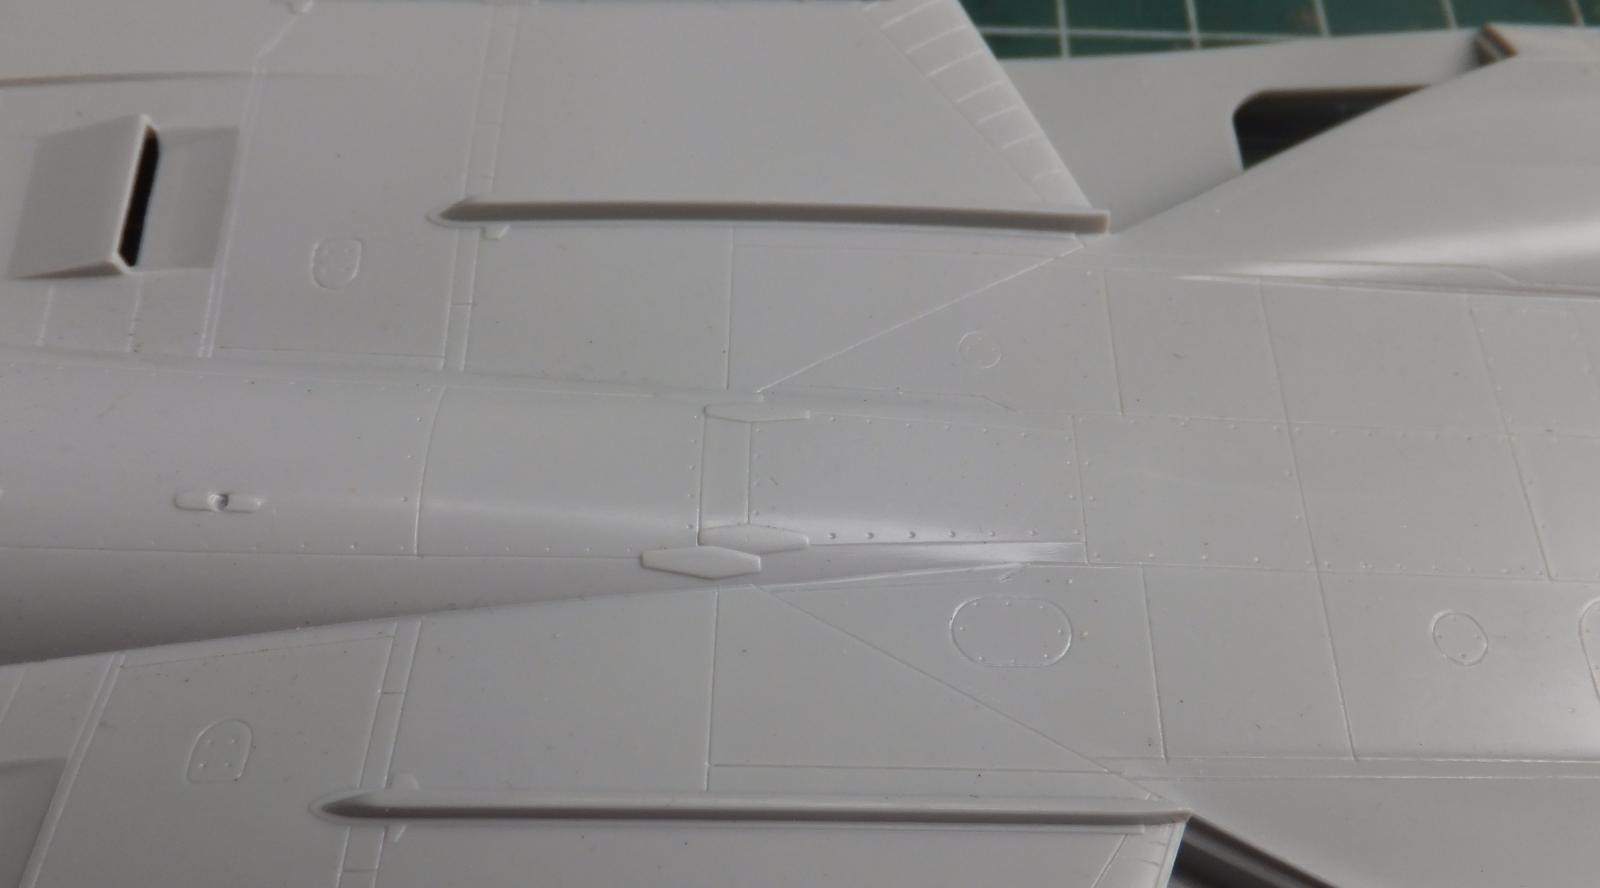
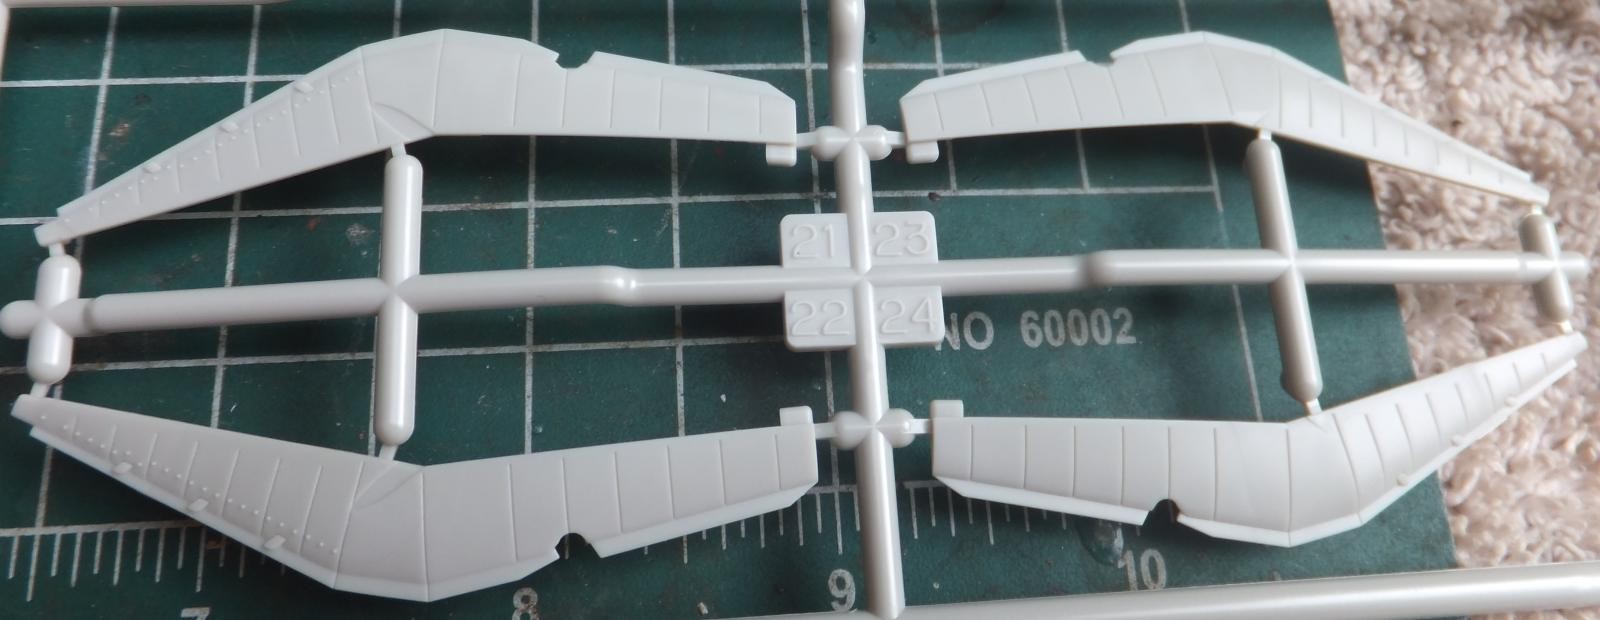
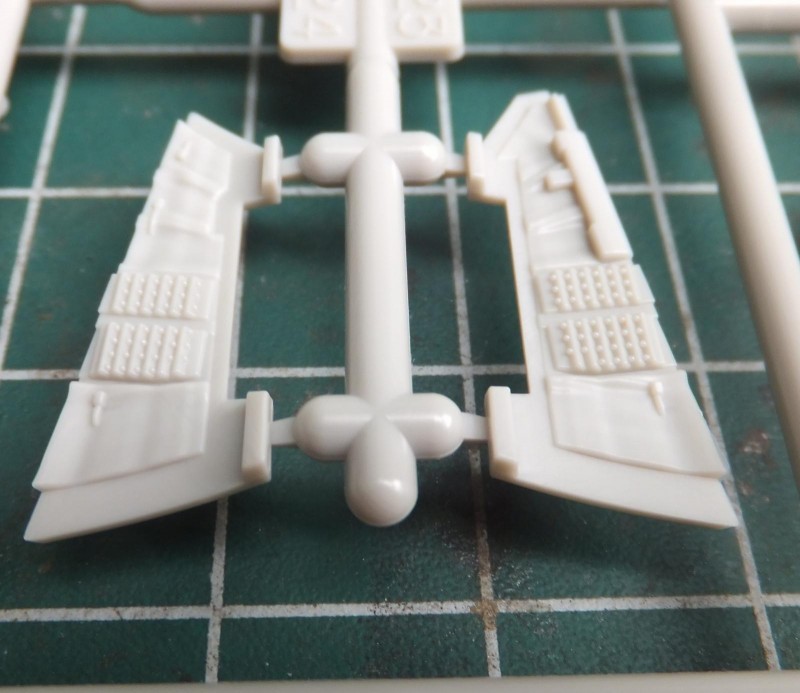
The wing sprue. This what sets the Tomcat apart from jets in it's generation. Like it's twin tailed F-15 brother that is still in service.

The most unique feature is the swing wing mechanism that Tamiya has decided to use for their A and D kit. But going in this direction comes a compromise. The inability or option to drop the flaps, slats and display the Tom in this configuration. A big advantage to Hasegawa.
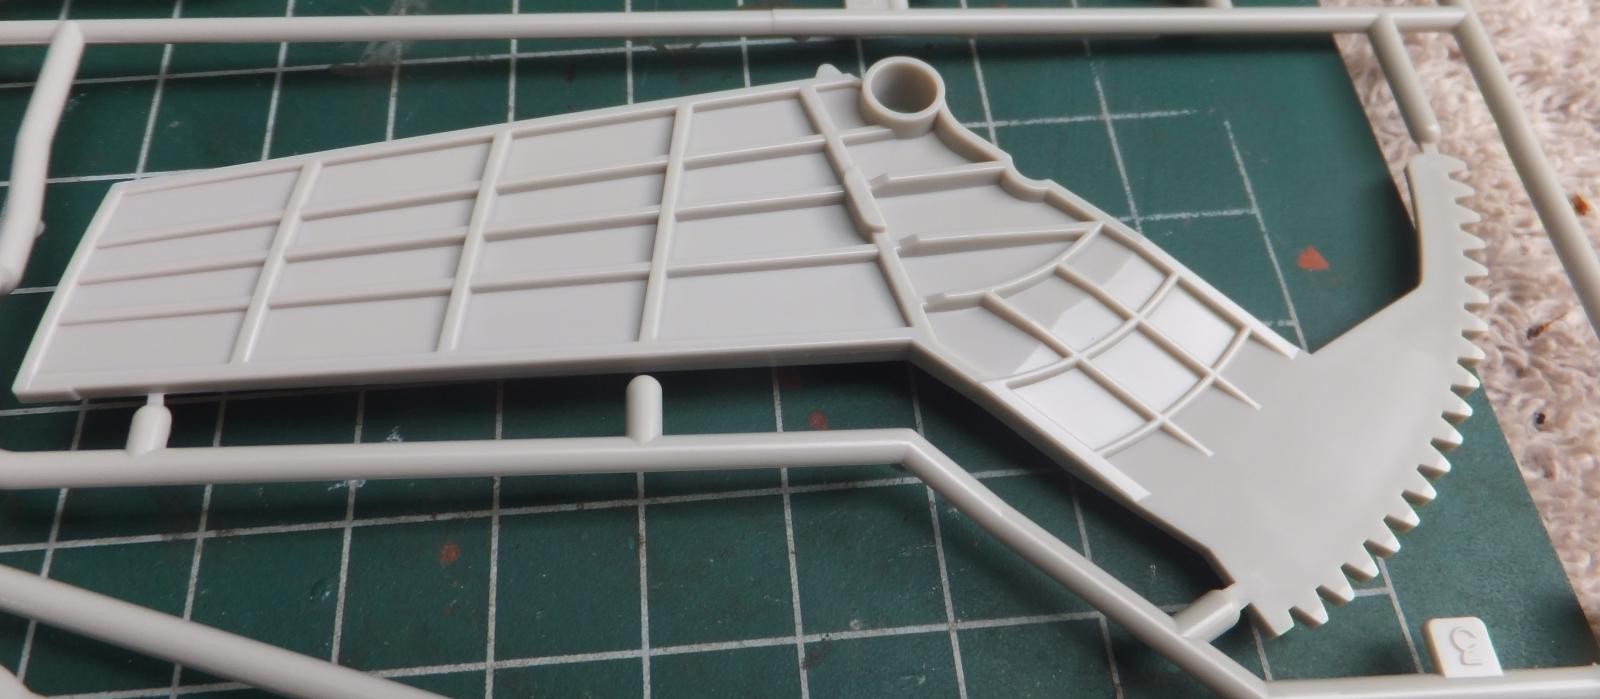
The details on the wings upper and lower surfaces are very nice and are much more than what Hasegawa has provided. Now is it possible to graft a Hase wing to a Tam kit? Or would you rather try to remove the slats and flaps on the Tam kit if you wish to display them fully opened and dropped. there is a lot to that. As the aftermarket gang are probably working on that solution hopefully.
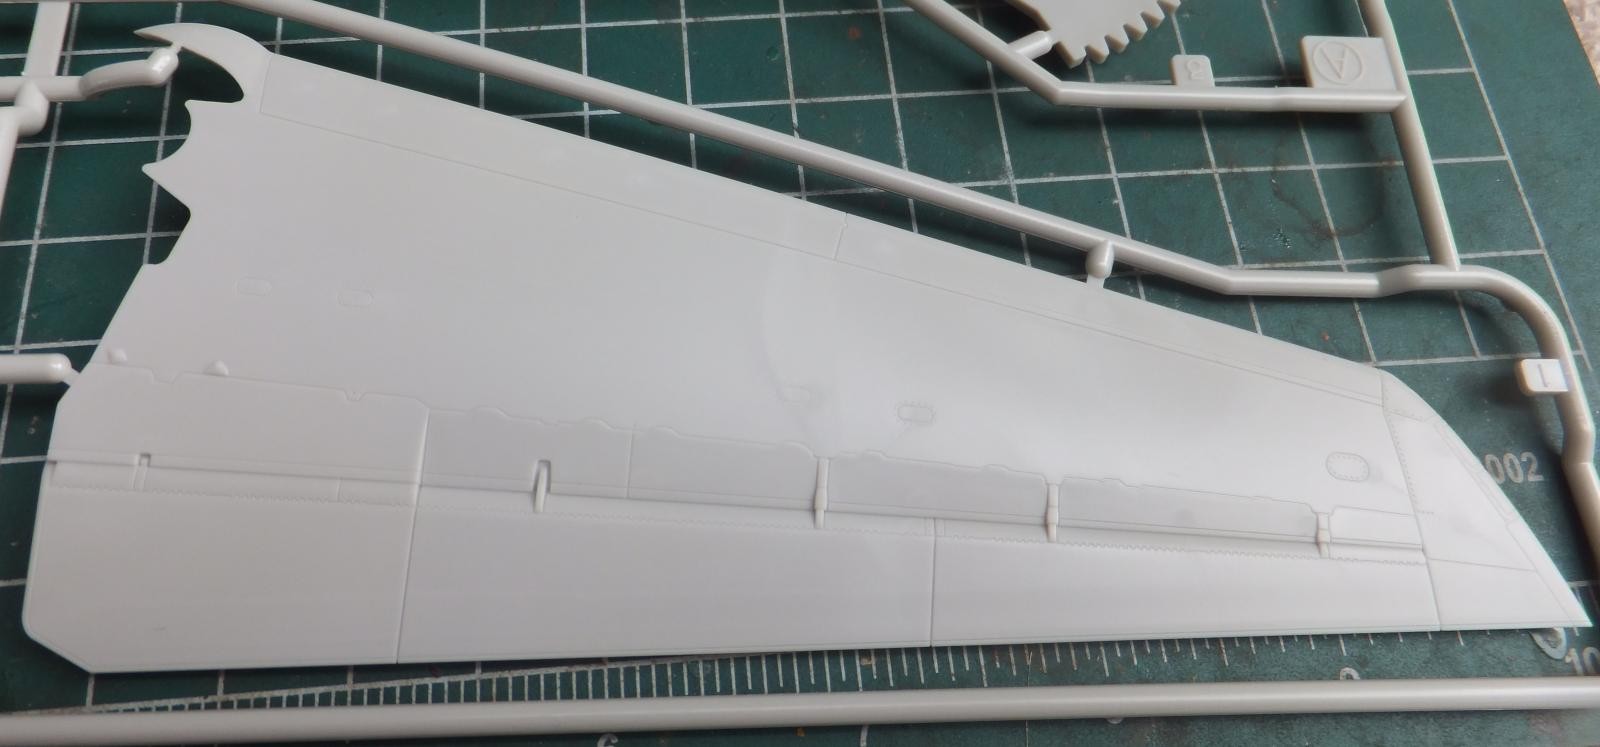
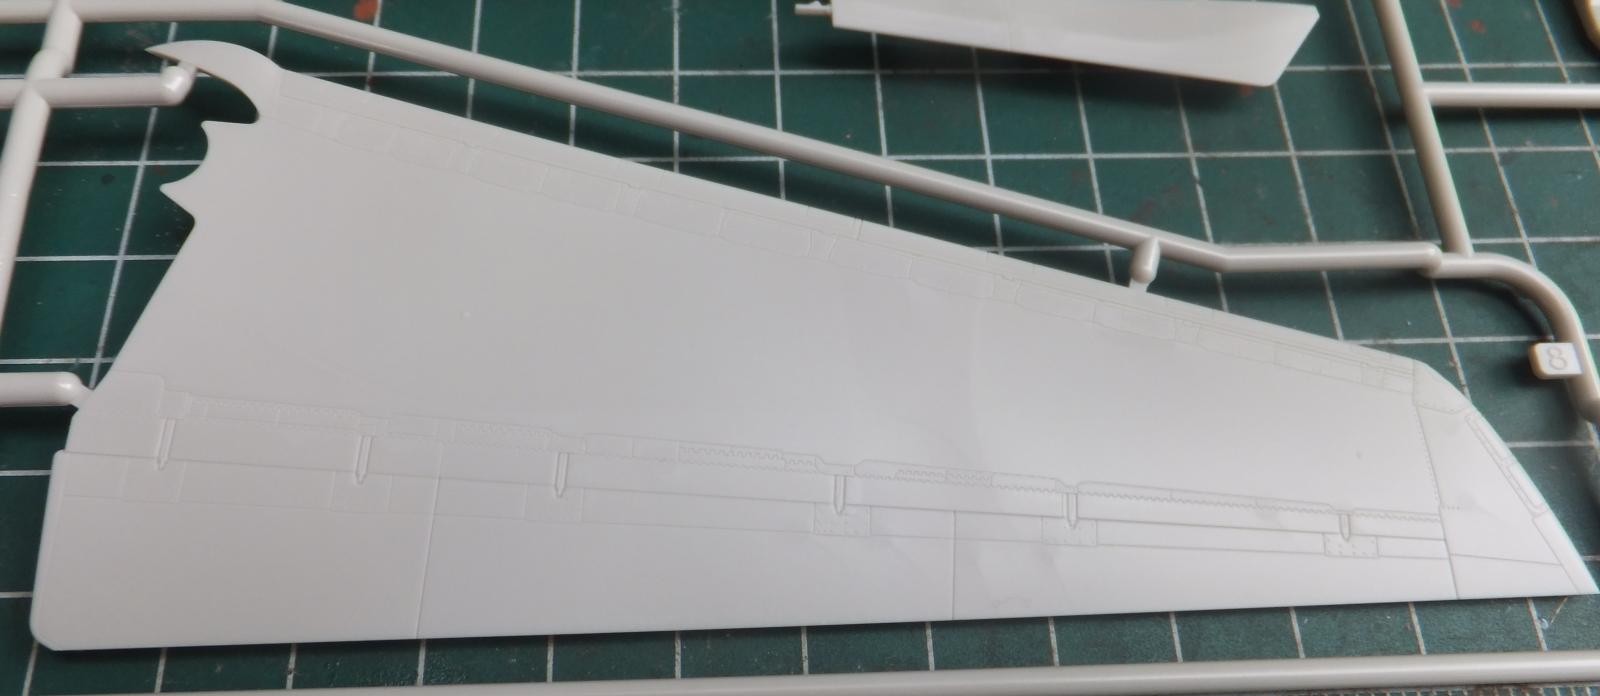
Here overlaying a Hase wing next to the Tam wing, you can see the difference in detail on the Tam wing. Much more pronounced. But the fact that you have the option to drop the slats and flaps already provided by Hasegawa is a pretty good option. No choice on the Tam kit. When it comes time to build this I do have a spare Hasegawa kit for parts, and the complete wings are there so at least I have the option to see if it all possible to do some experimenting, one which is not use the swing mechanism which would not work with the Hase wings. I digress back to the review.
-
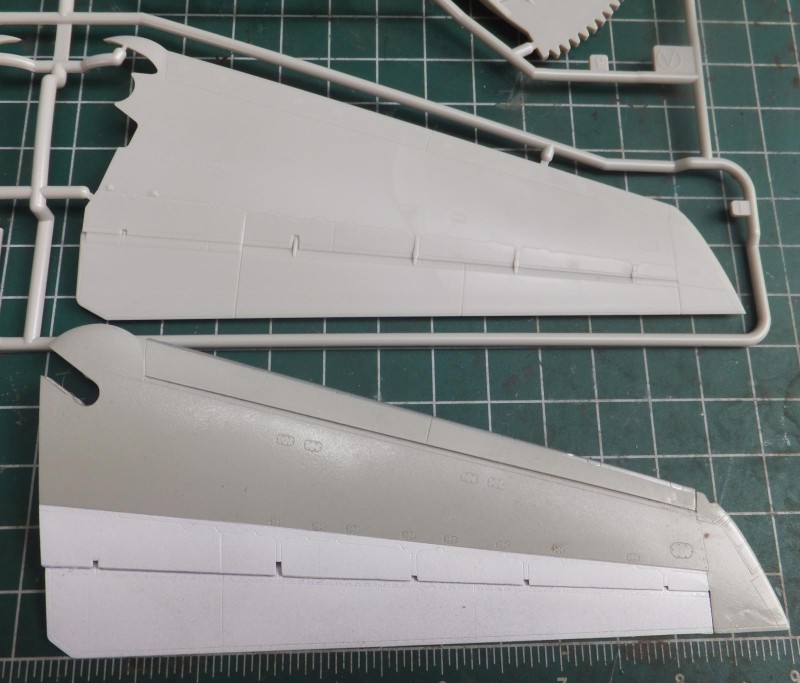
- 1. You can see the actuators
- 2. more pronounced dip right before the flaps

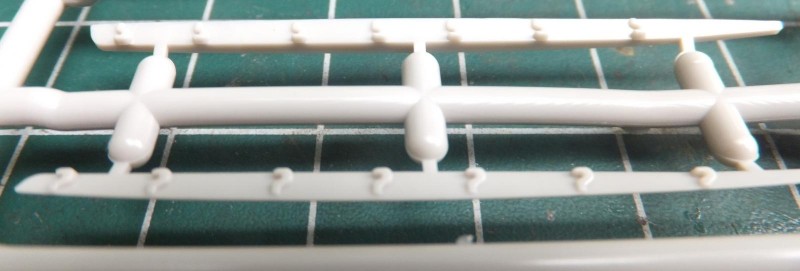
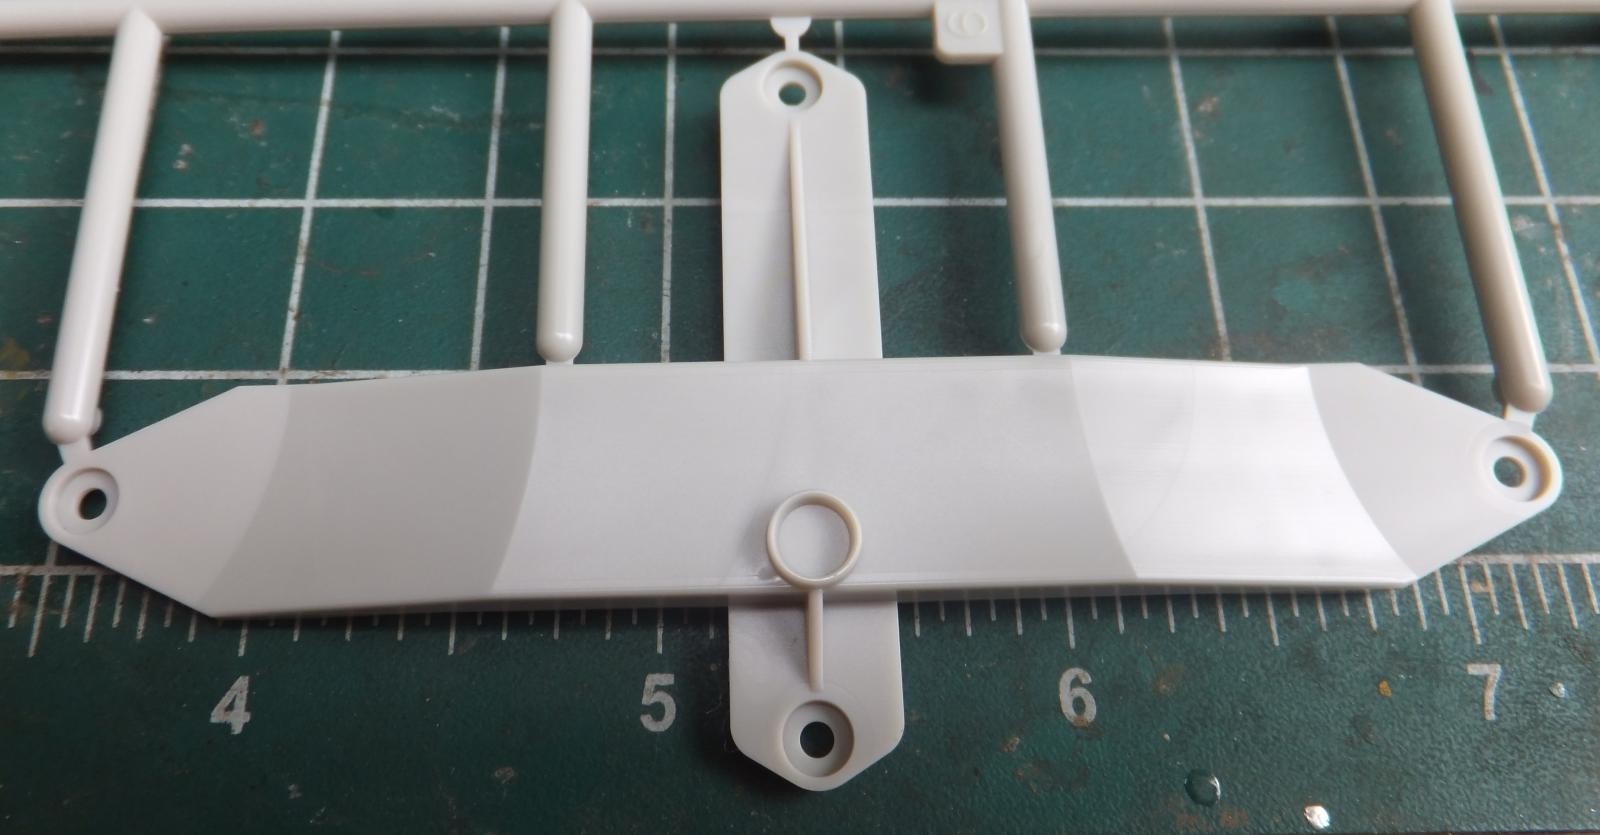
Rear ventral strakes with what looks like a probe or fuel dump at the end,
-

- 1. this probe does not appear on any other Tomcat kit that I know of

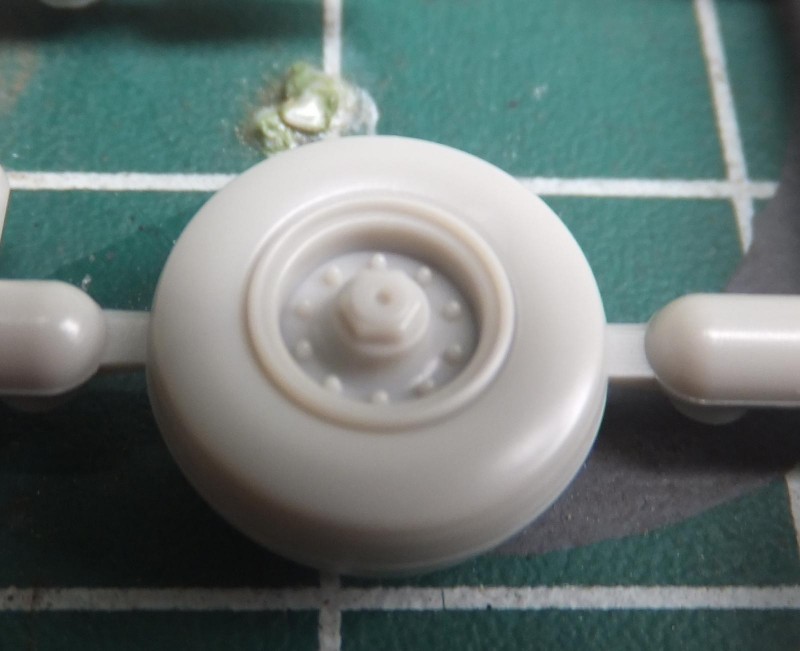
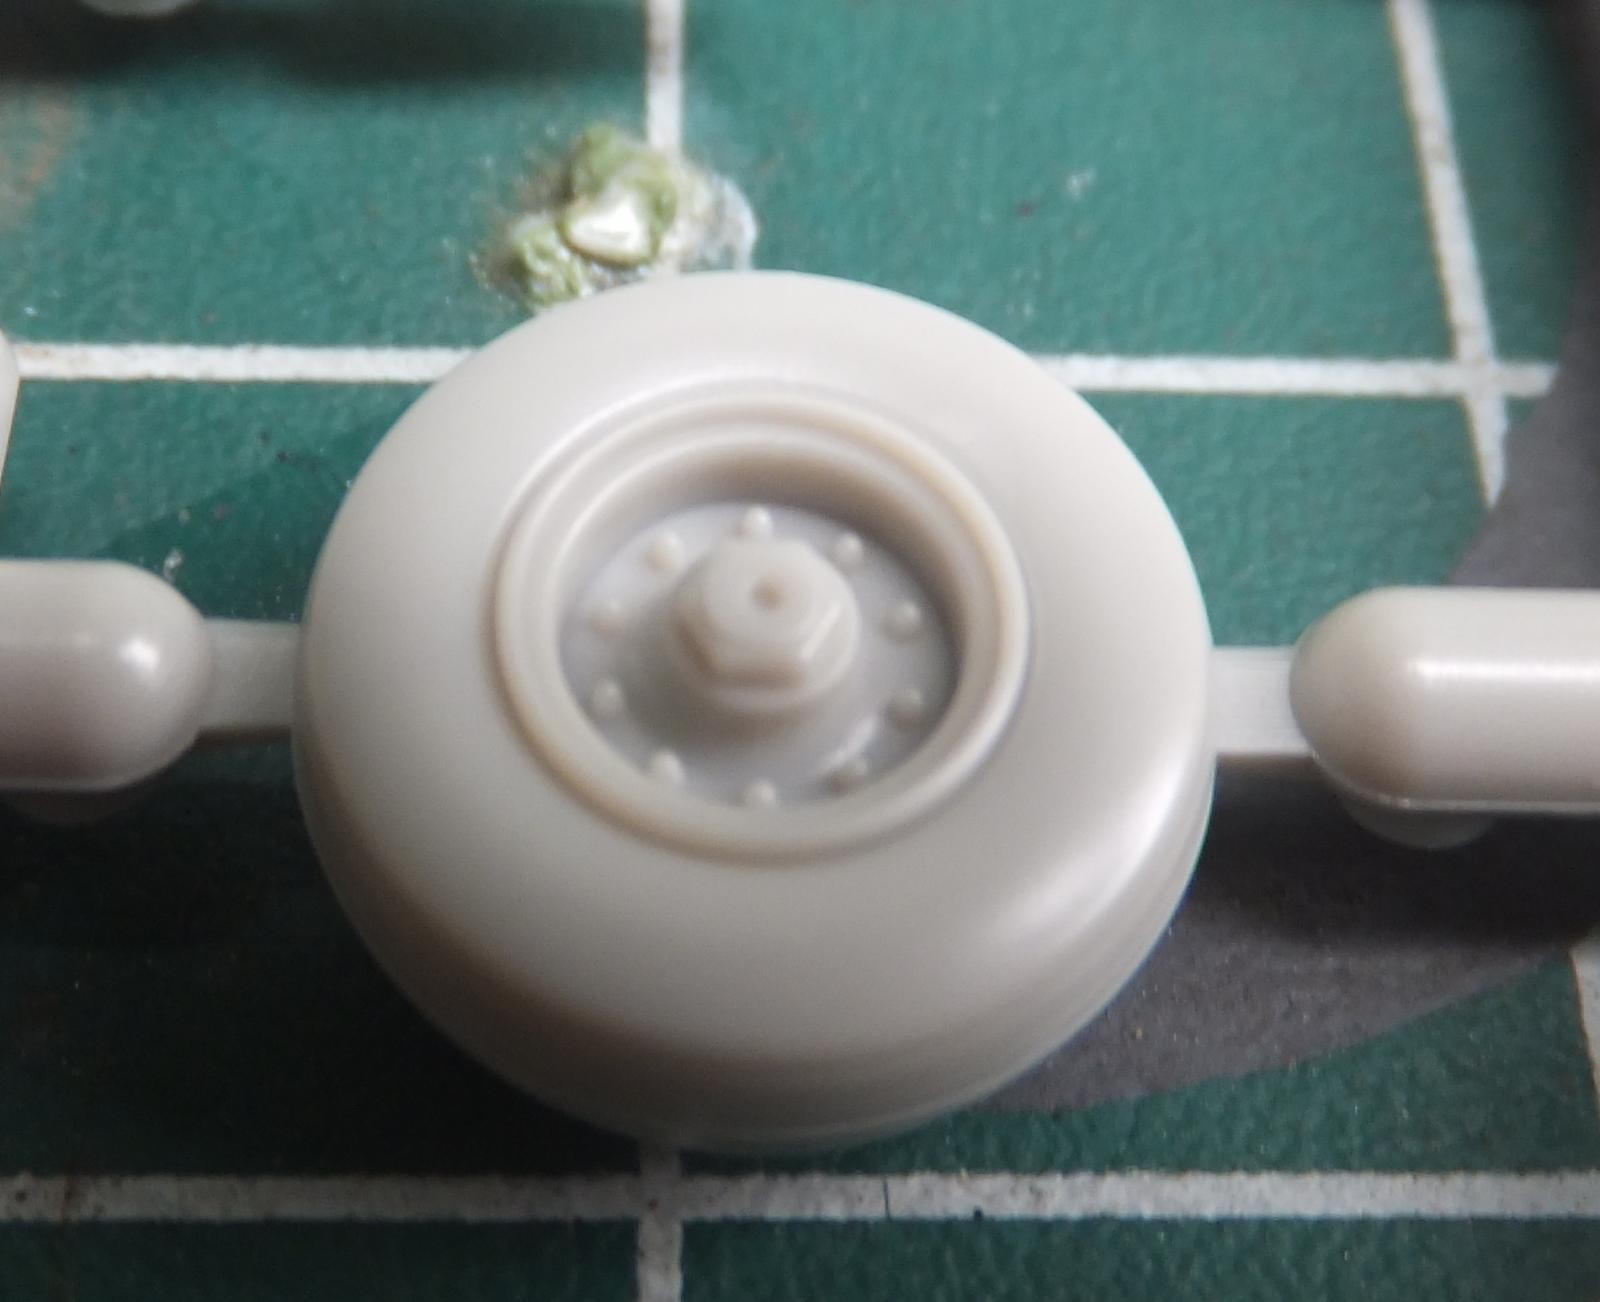
The next sprue contains the horizontal stab, missile pylons and rails, seats, wheels and drop tanks.
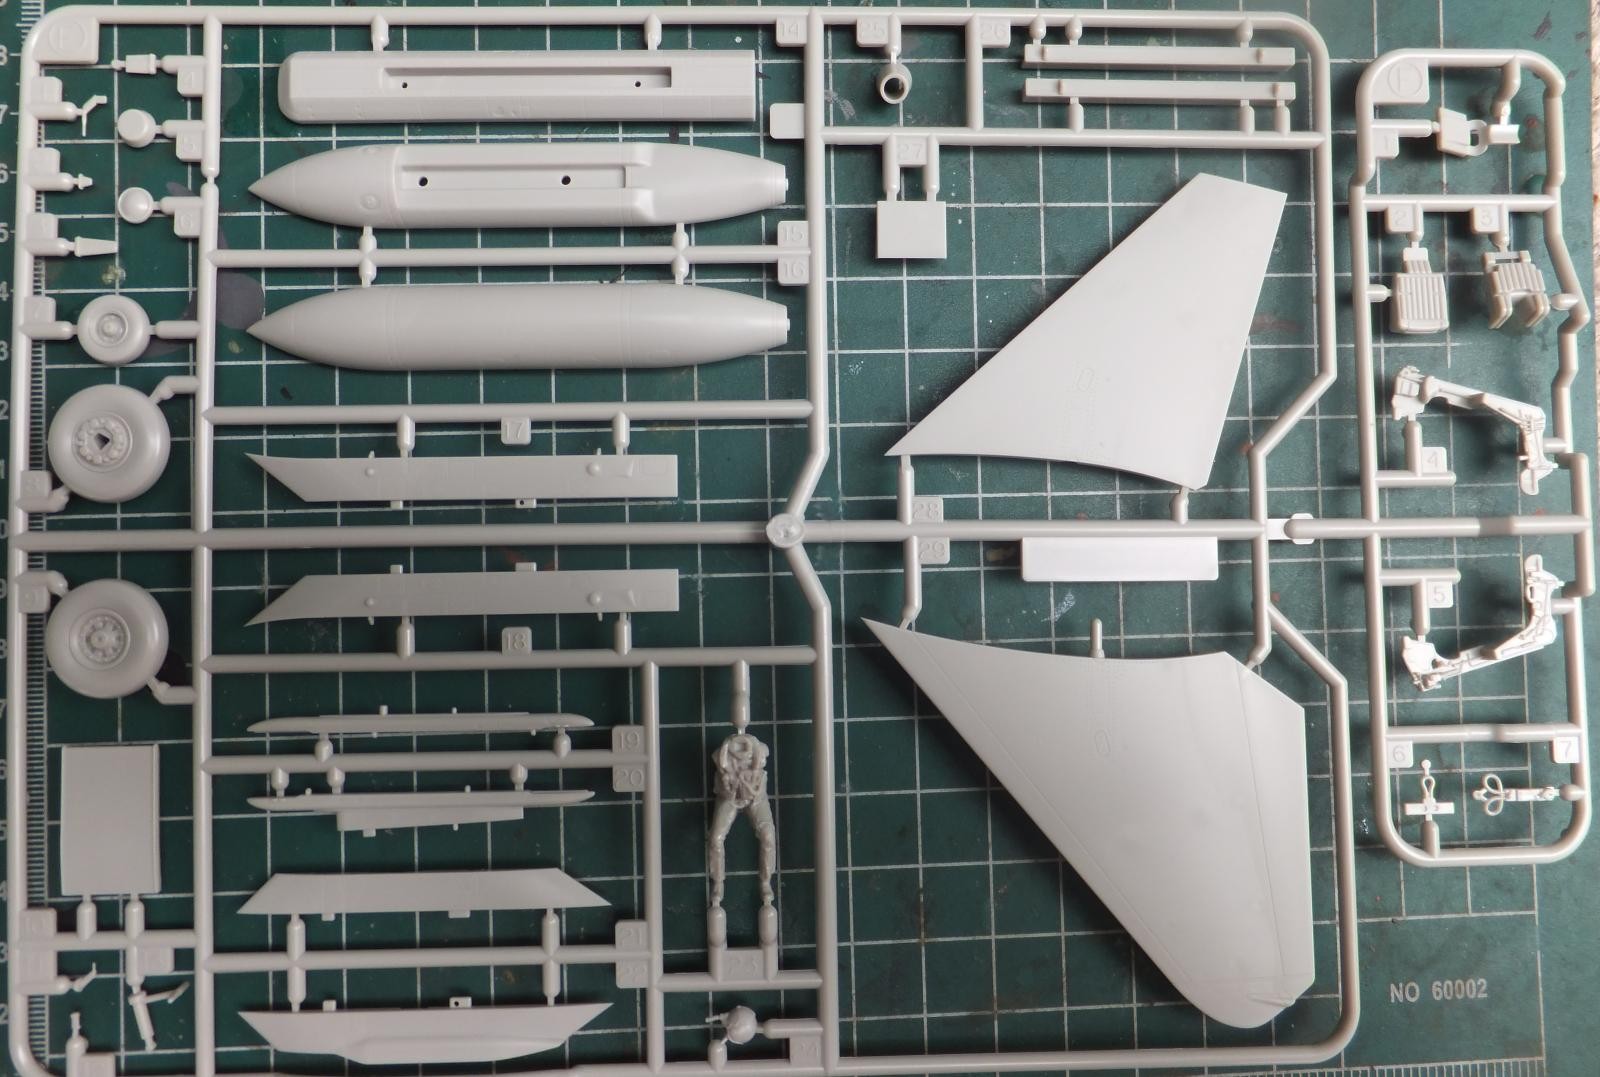
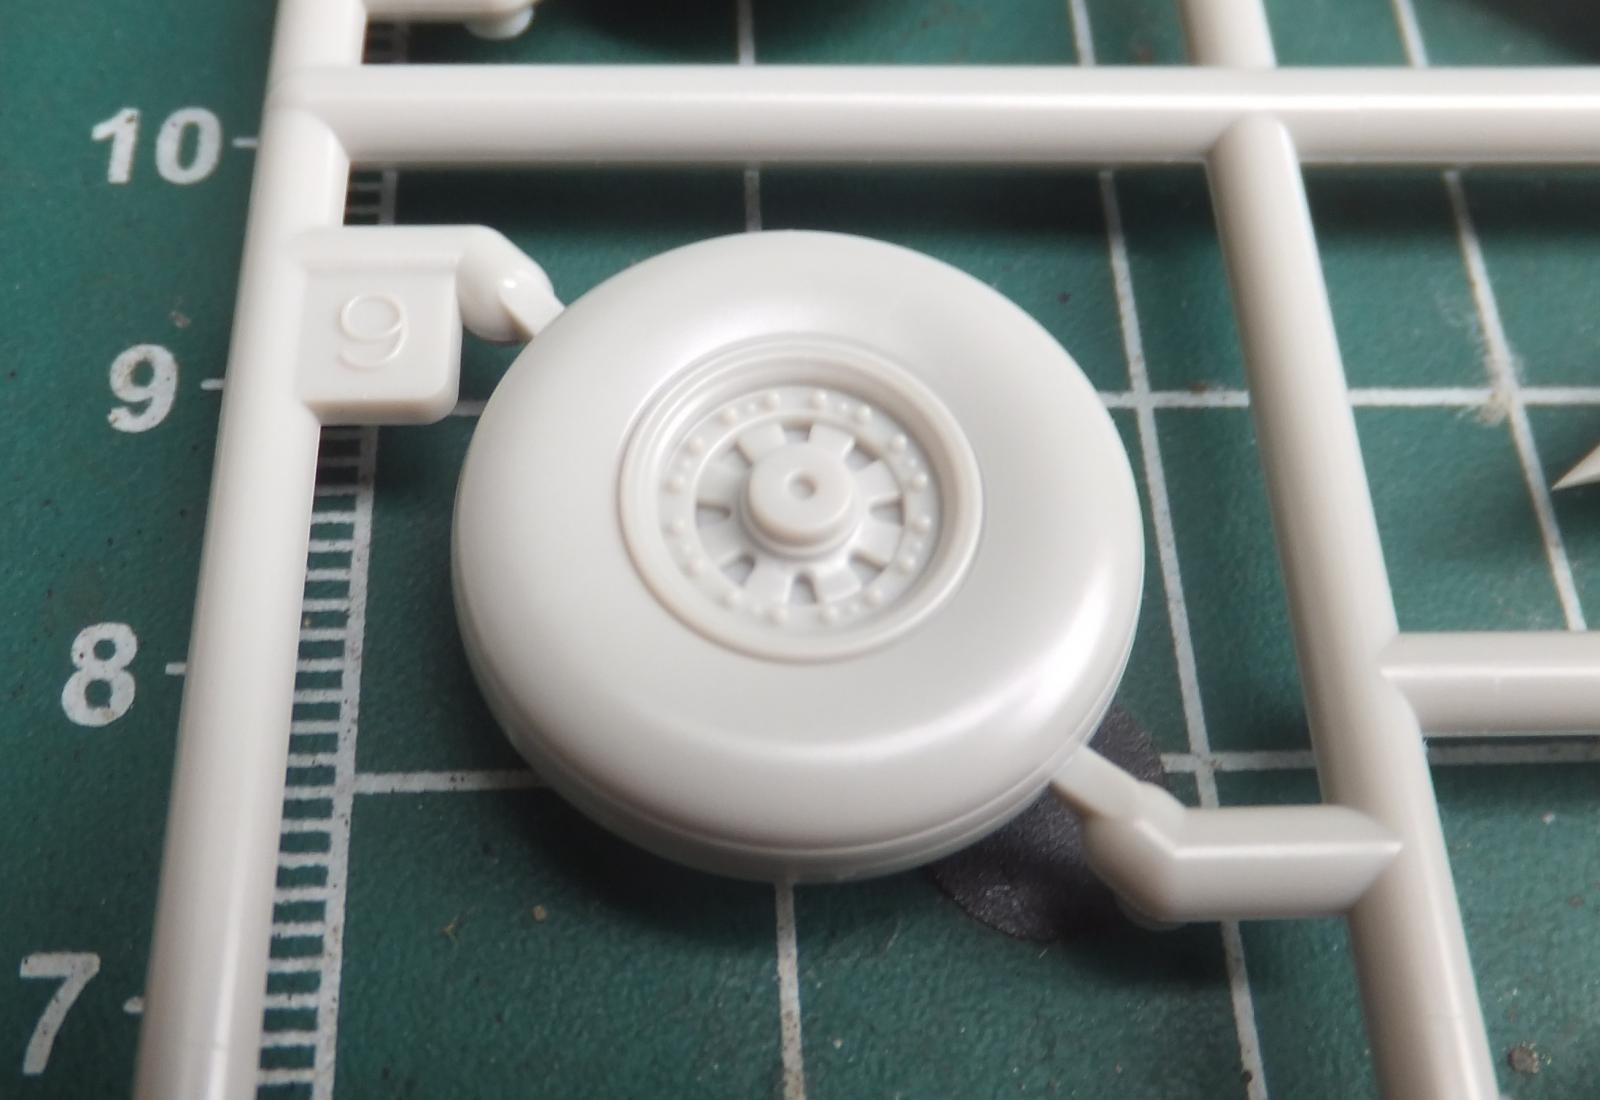
The wheels out of the kit are plastic and are well done. Really a matter of choice if you wish to go resin but not really necessary. Really the only advantage of resin wheels that they will show the name of the tire (Michelin for example) and tire size. Flattened tires on a Navy jet even fully loaded don't really show a bulge as they are under extreme hi pressure.
-

- 1. Nice detail on the main mounts
-
- 1. Brake calipers nicely detailed
-
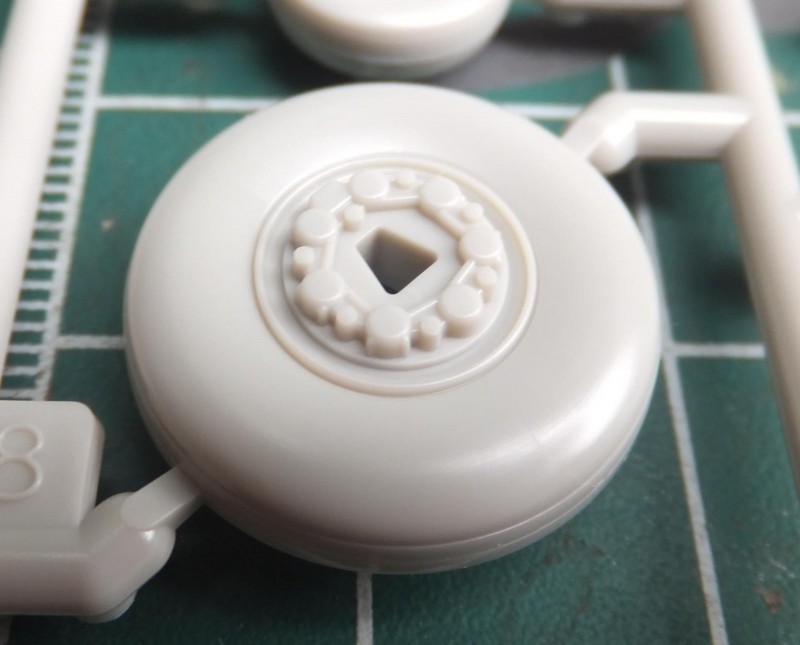
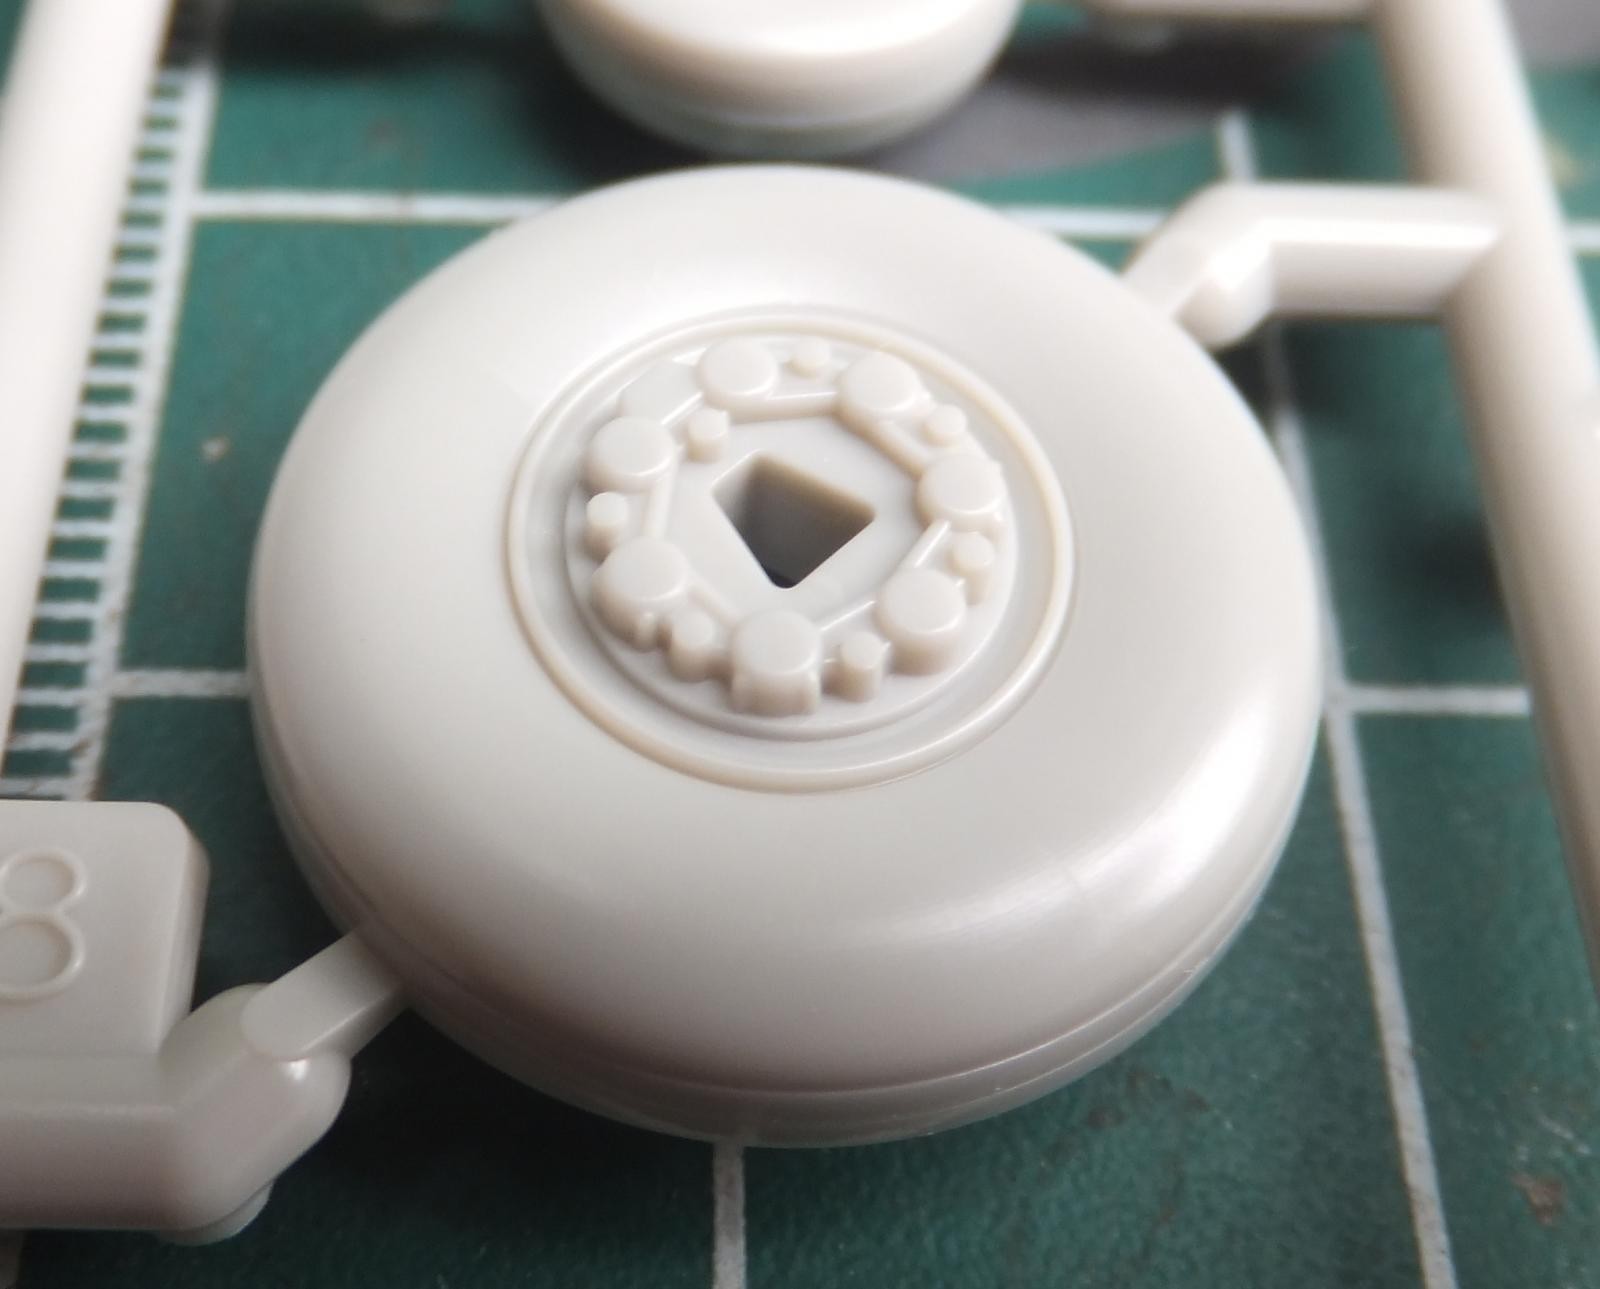
- 1. 1 piece nose wheel
Tamiya is well known in producing good figures in plastic, as shown with an aircrew member in this example.
-
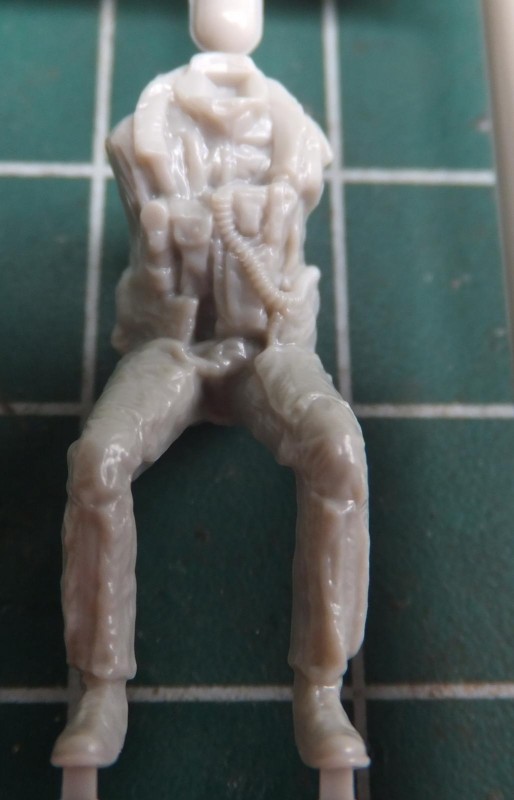
- 1. good detail on one of the aircrew members

The seats provided are really pretty nice for kit seats. The F-14A uses the Martin Baker GRU-7(A) seats and are correct for the time period for each of the versions offered in the kit. The pleated cushions are correct for this as well. These seats were used on the F-14A. A+ and the F-14B. Also nicely molded are the ejection handles. The F-14D started using the SJU-17A NACES seats. Though I remember climbing into a VF-111 Tomcat in 1988 for a quick flight and remember the cushions were pleated as I crawled and strapped in. Rob Anderson is currently building an F-14A circa 1977/78 and mentions the cushions had no pleats in them.
-

- 1. MB GRU-7A seats

-
- 1. pleated cushions are correct for the 3 versions in the kit

-

- 1. Well done ejection handles

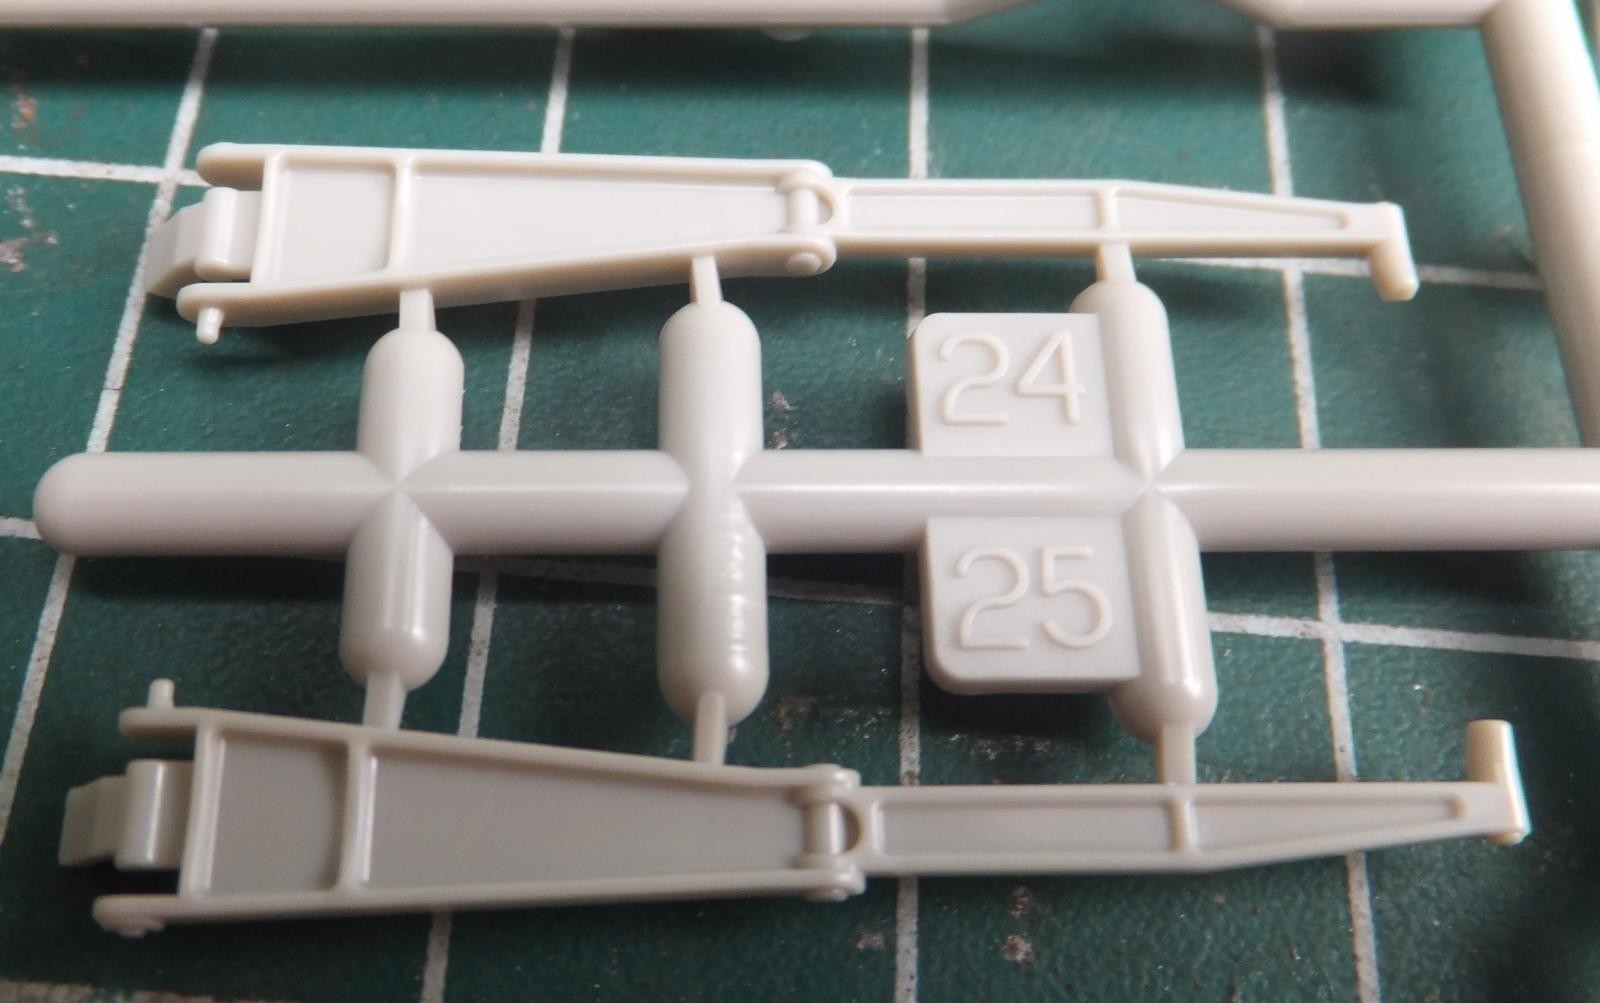
The horizontal stabilizer are in 2 pieces and are poseable in either full up or down deflection or neutal position. In short they are poseable.
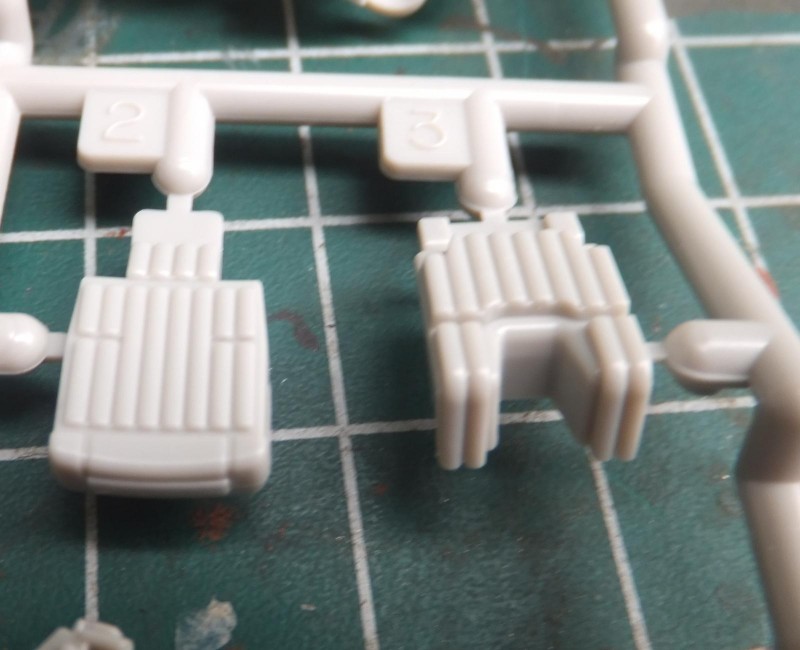
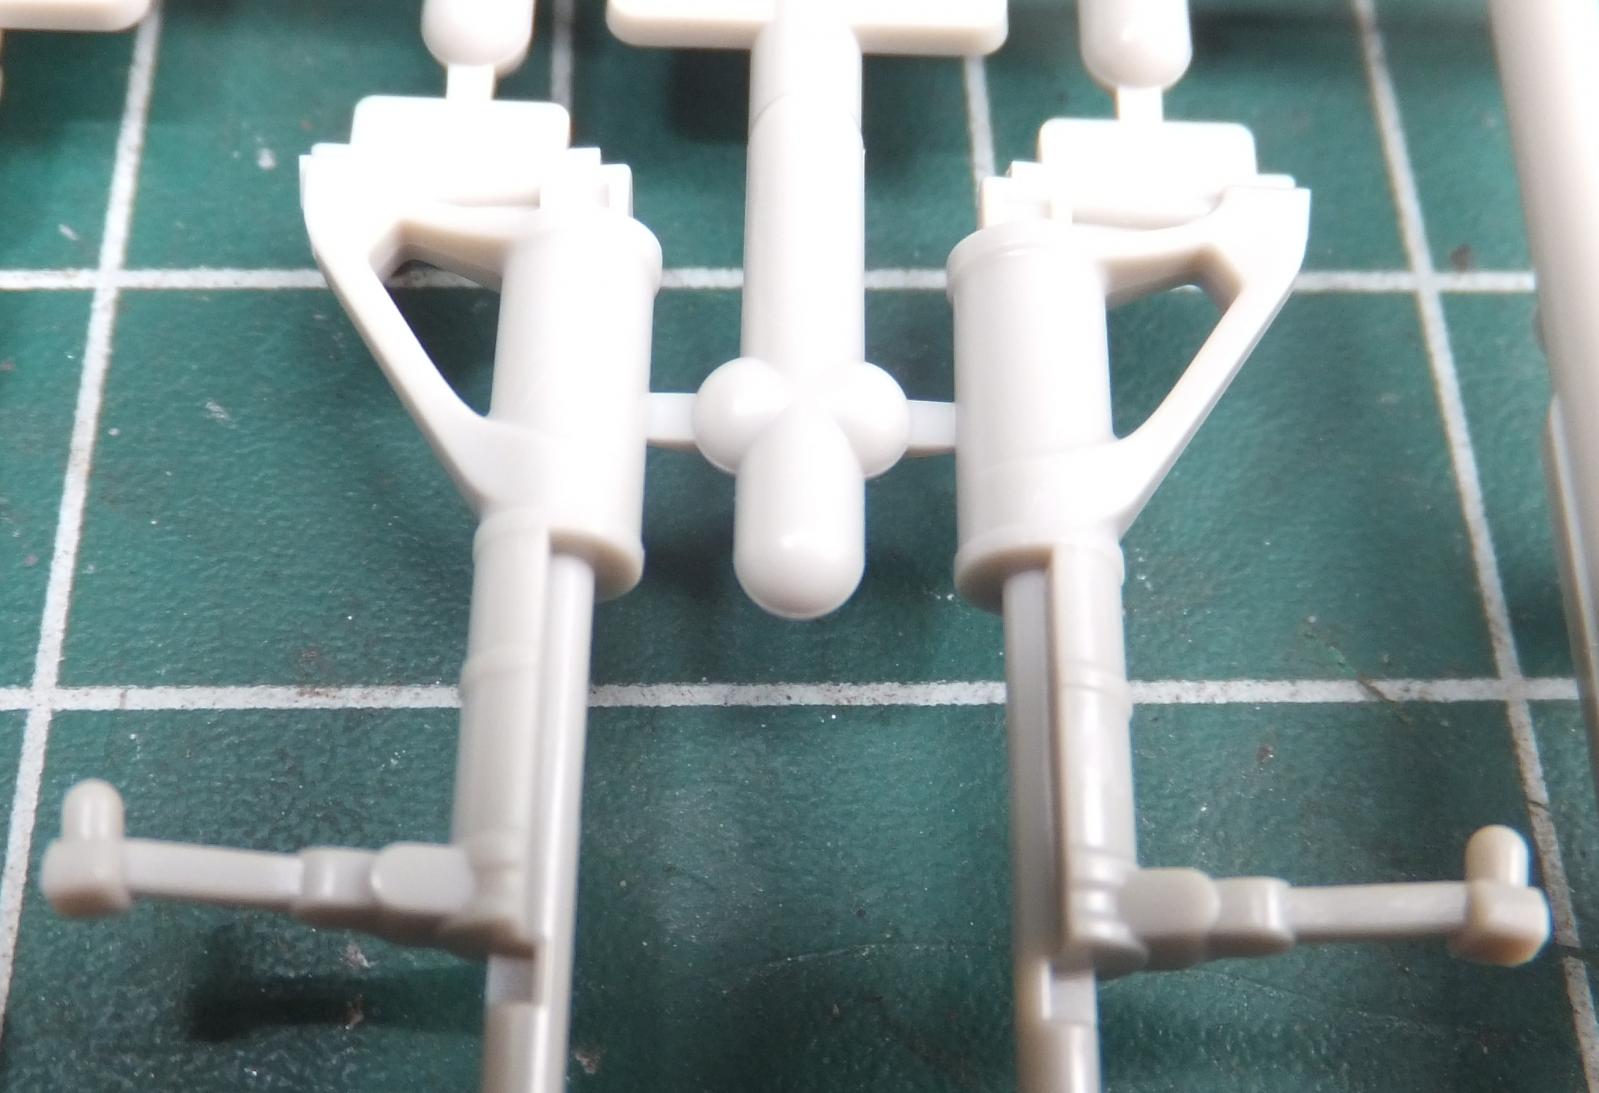
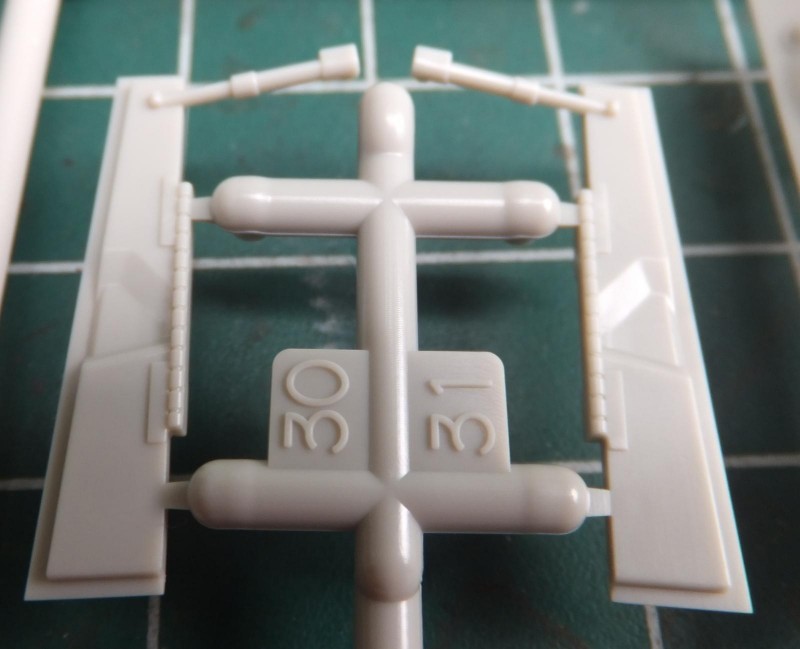
The next sprue contains the landing gear struts, main and nose wheel bays, doors and actuators.
-

- 1. 4 pieces make up the main gear bay
The nose wheel bay is made up of all 4 walls of the bay. Nice detail here with the various piping on the roof of the wheel bay.

The nose wheel strut is also very well executed except you have only one choice available to pose the Tomcat in it's natural stance, no option to have it "kneel" at the catapult which requires the wings fully deployed with flaps and slats extended and the horizontal stab in full deflection as she prepares to launch.
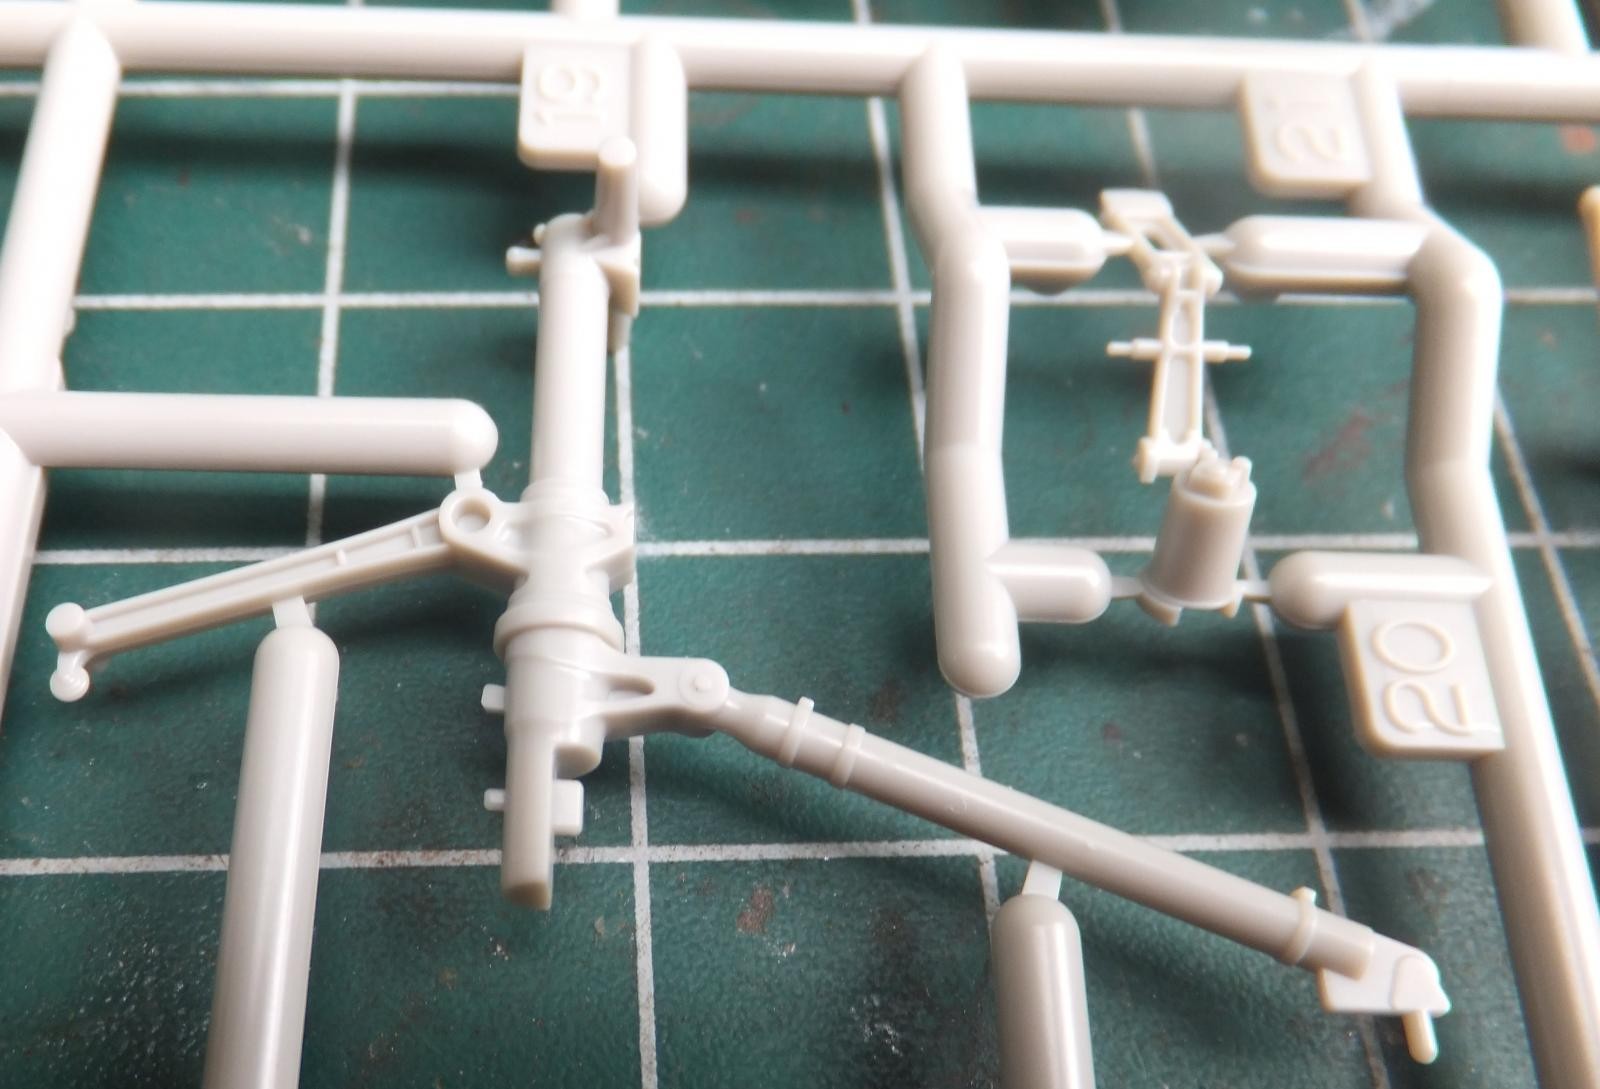
The main gear struts look sturdy, nicely detailed and have positive locating pins to help keep this Tom steady for years to come. As she will be quite heavy when finished.
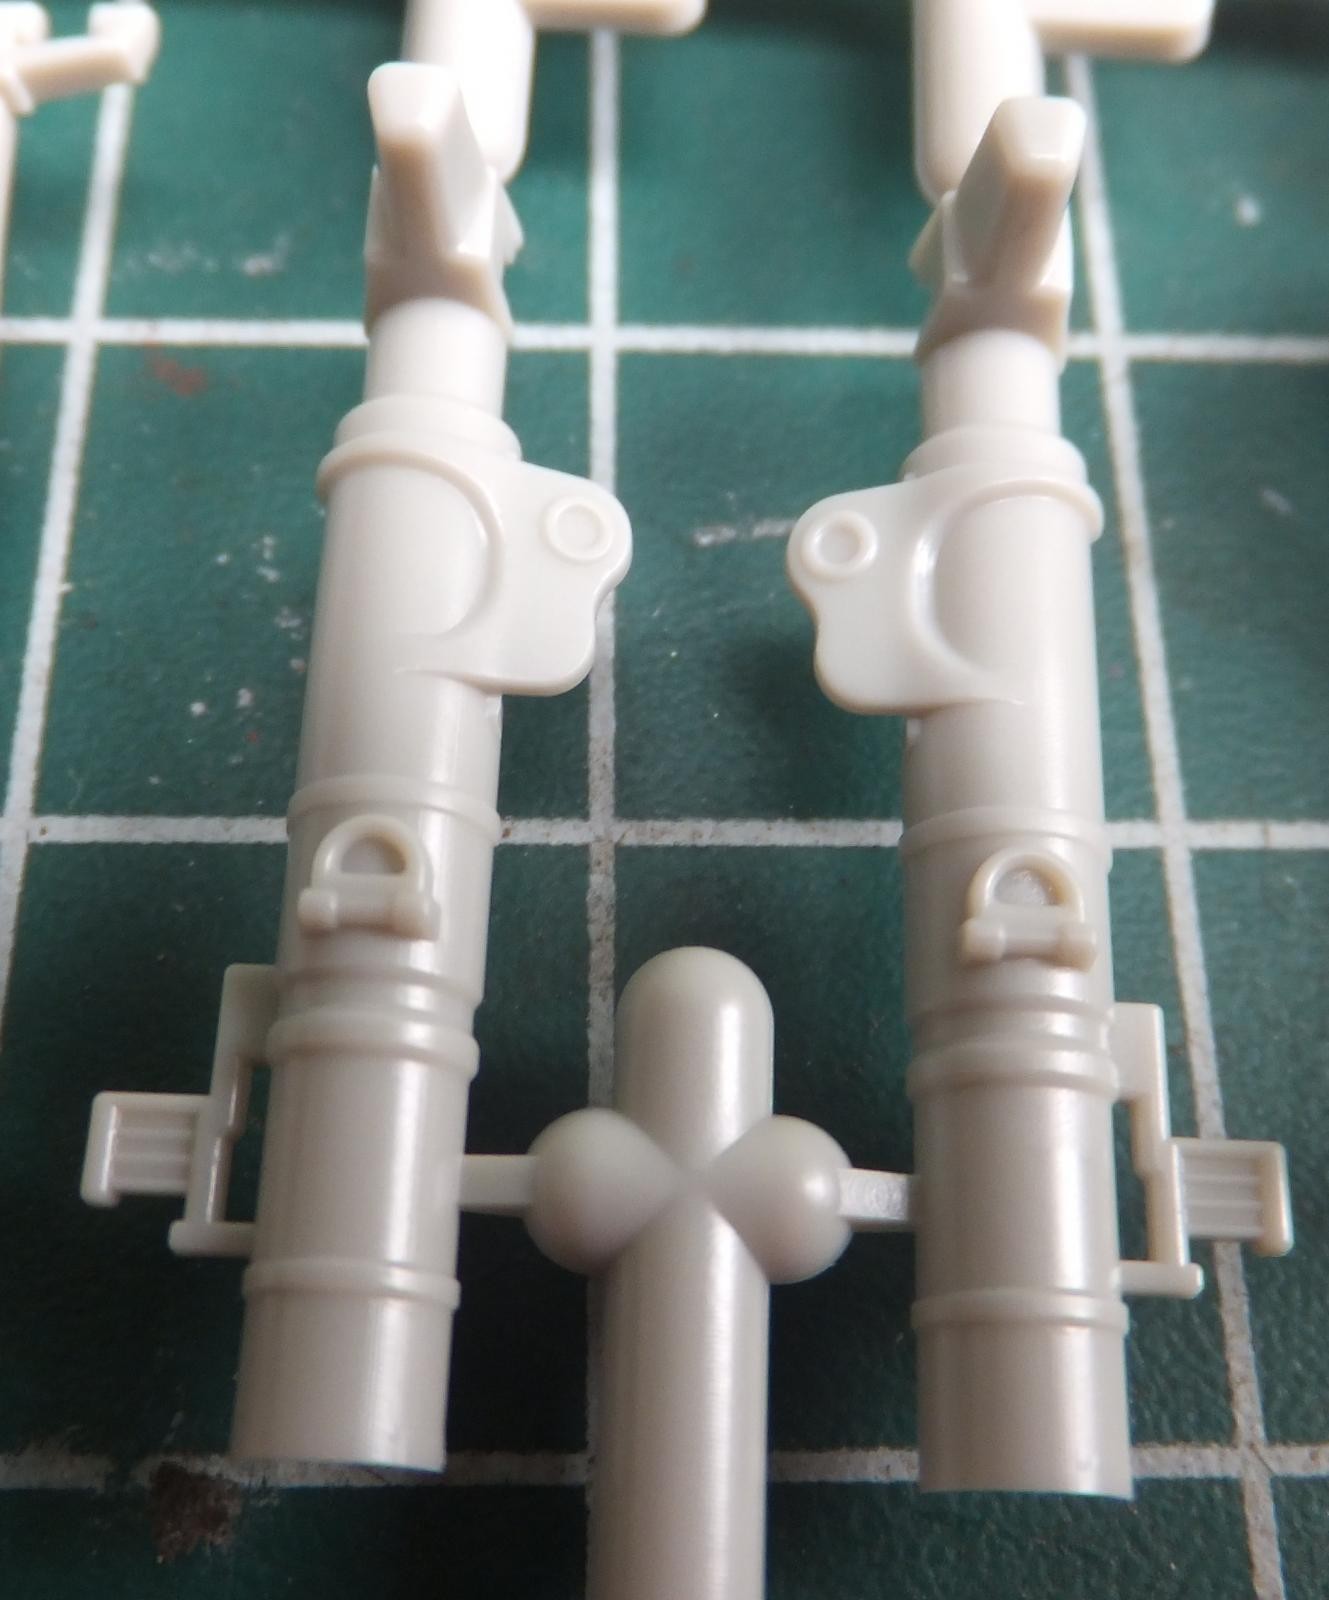
The gear doors look really good. Some hinge detail are well executed in plastic. Though some may use any resin doors for sharper details. Still not really necessary. A wash will make these details pop.
-
- 1. nice hinge detail
- 2. Door actuator

-

- 1. nice structure detail

Finally the weapons sprue, and though it is nice to spend a ton of money for a kit that has ordinance, I just wonder why Tamiya decided to make these so Kitty Hawkish, multi part sidewinders and Phoenix missiles? The Sparrows are ok. Why make the Sidewinders into 2 parts?
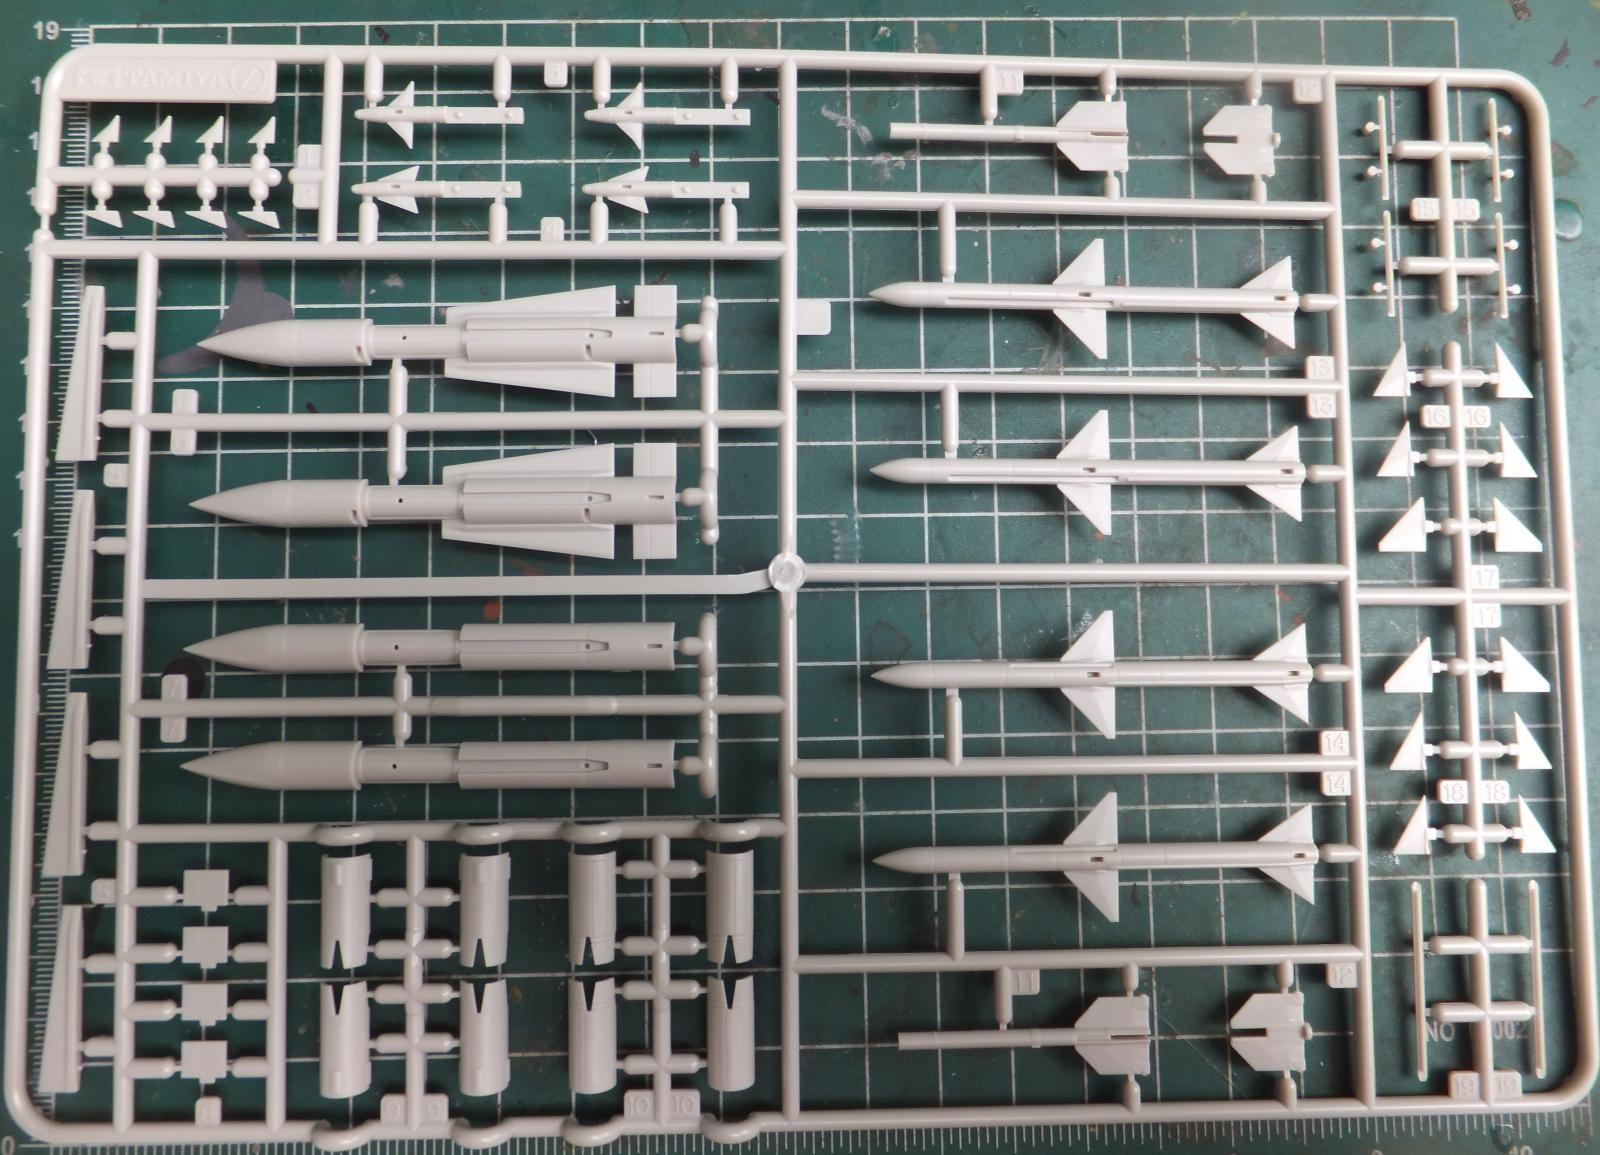
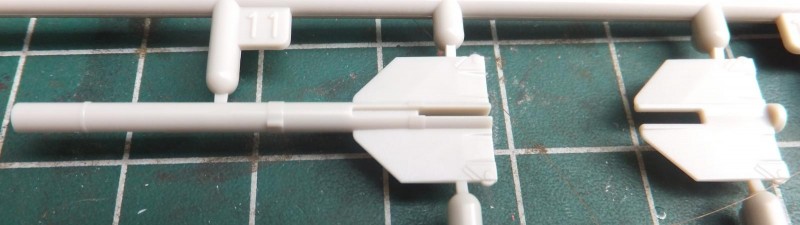
In 1979 the Tomcat is carrying the AIM-54A Phoenix missiles which are represented here in several parts. I have saved at least a dozen Phoenix missiles over the years I may use them.
-
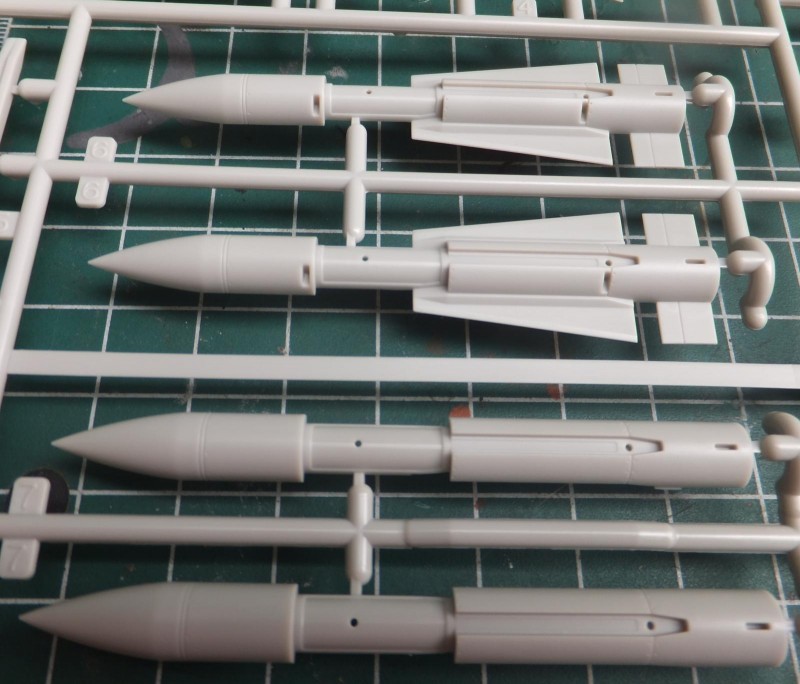
- 1. AIM 54A Phoenix

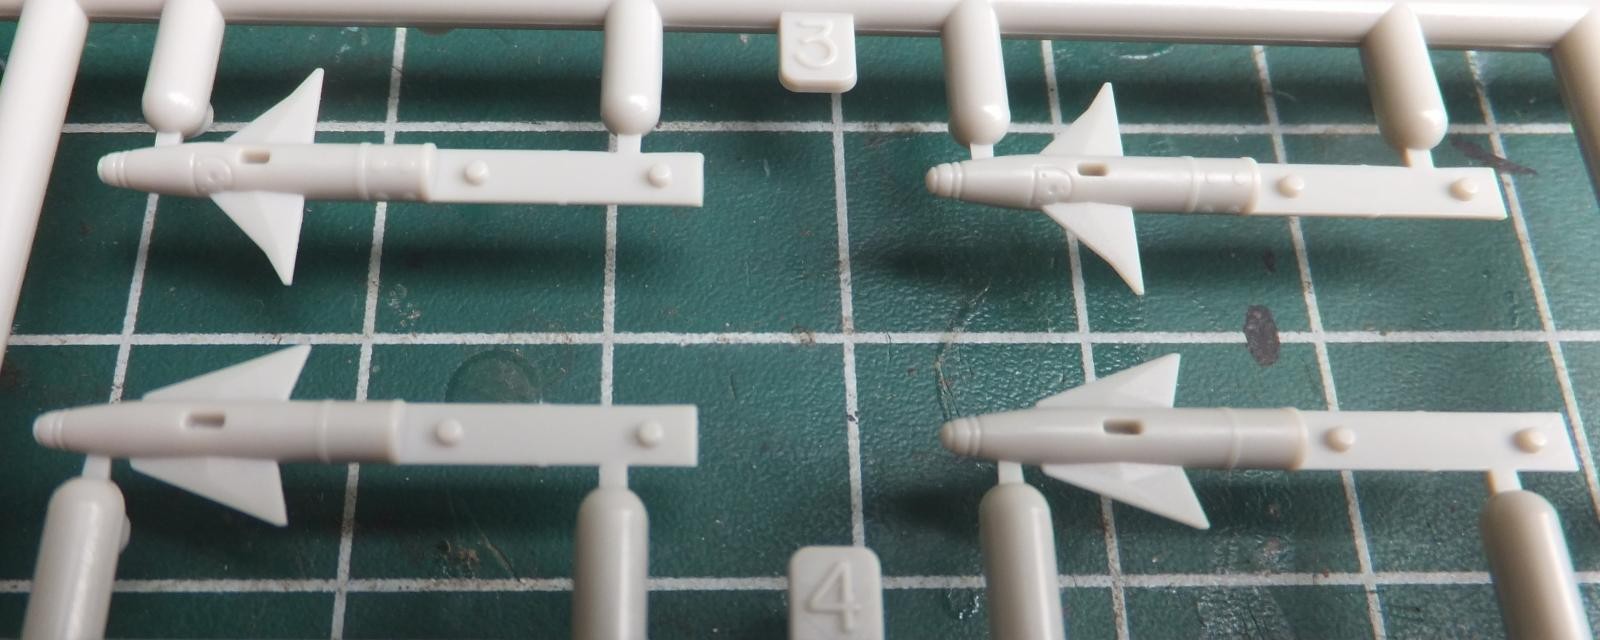
Next the AIM-7F Sparrow medium range missile. These are normal builds in just adding the winglets. and then paint them glossy white.
-
- 1. AIM-7F Sparrow missiles
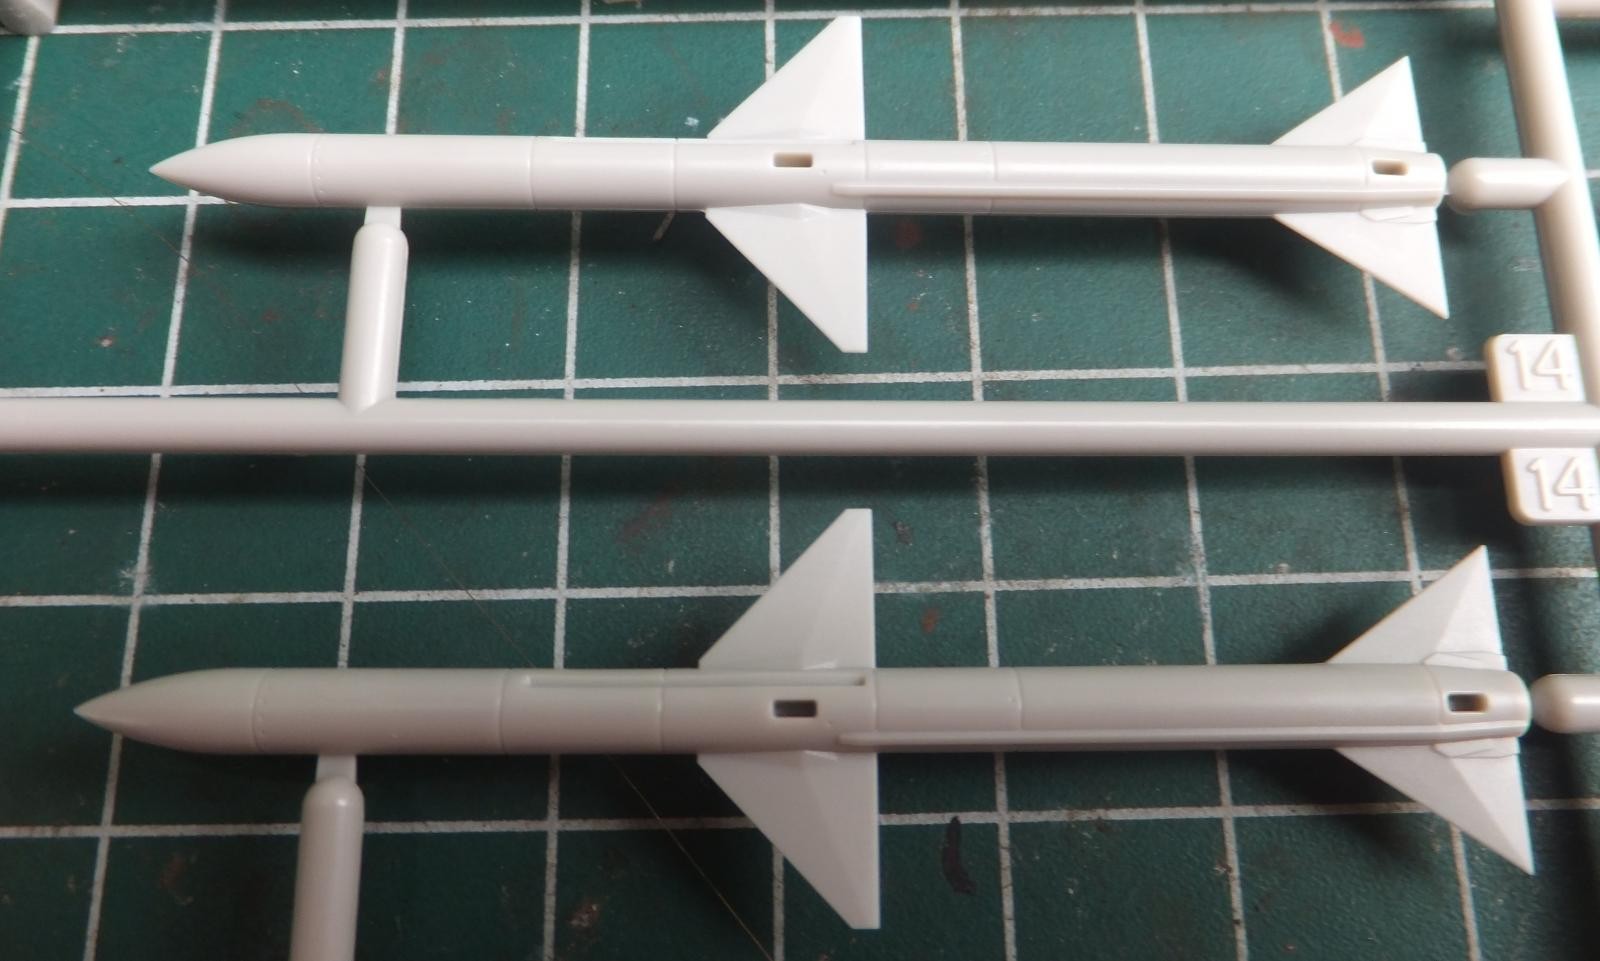
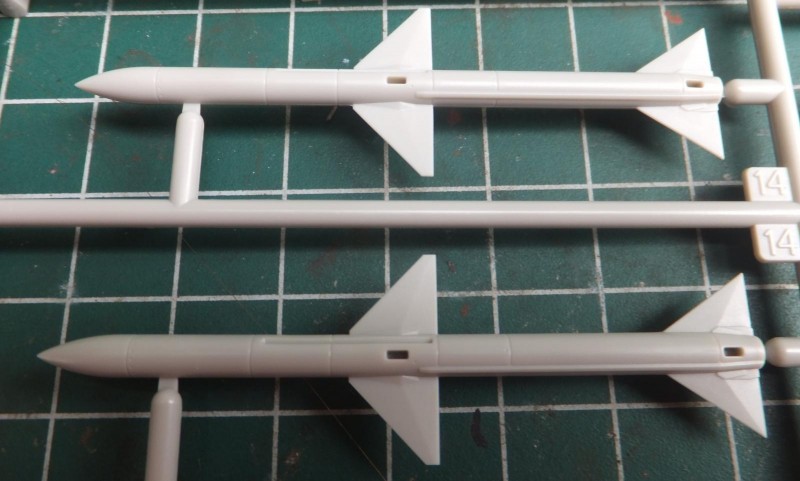
Finally the AIM-9L Sidewinder short range missile. Made in front and rear halves and attach the tail fins.
-

- 1. AIM-9L Sidewinders
-
- 1. Sidewinder rear missile body

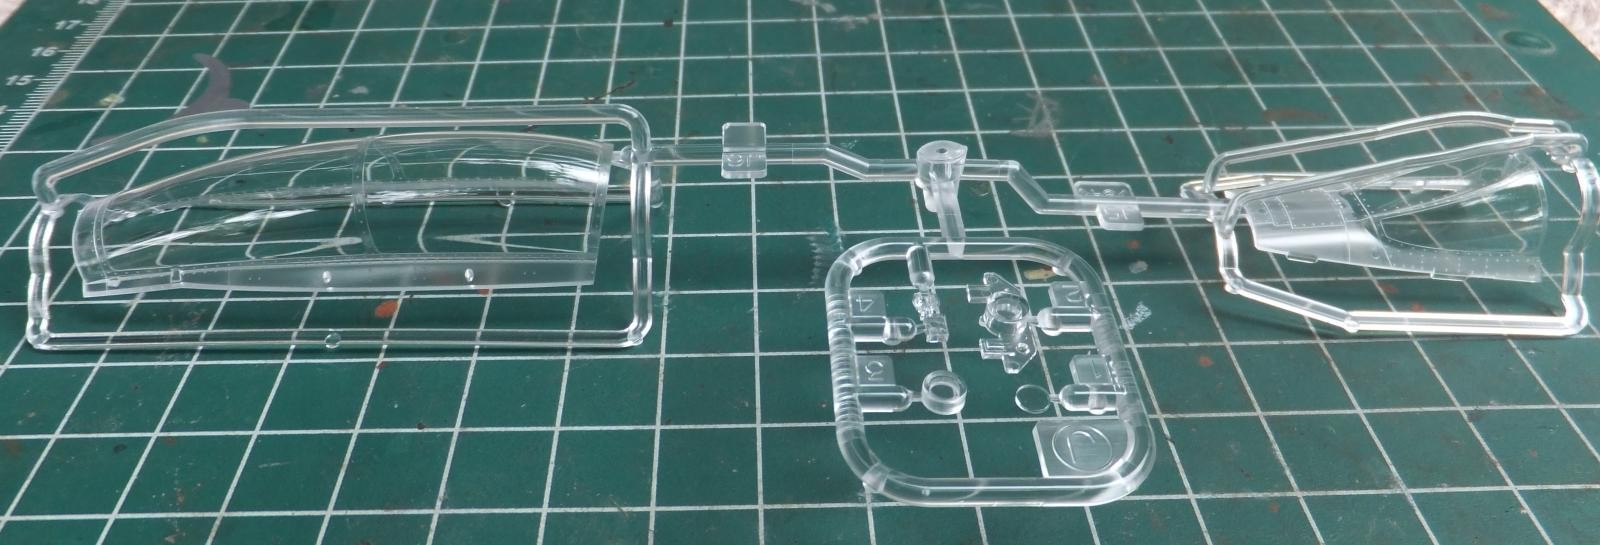
The clear sprue which is excellent. The windscreen has a nice unique feature Tamiya in which part of the nose panel is incorporated, which makes for easier attachment to the nose and also masking it off for painting. Nice touch. The canopy is flawless, very little if any distortion while viewing through it.
And there you have it. The Tam F-14A is it better than Hasegawa? According to Rob Anderson and several who have started it or finished it is goes together very well. In that aspect kudos to Tamiya for finally creating an amazing kit of a complicated aircraft like the F-14. But despite that, Hasegawa still has an edge in giving the option of fully deployed wings, dropped flaps and slats. Two nose strut options if you wish to display a Tom about to launch off the cat. Edge to Tamiya for weapons and ease of assembly. One of the big complaints of Hasegawa and a pricey kit was no weapons in the box. The labor intensity in building it, as I know first hand finally building it for the first time. Tamiya has an edge over the Hase kit in that it offers a very good model that though quite pricey in it's own right that builds to a nice model. You don't have to buy any aftermarket goodies for it. They supply you with a mask for the canopies. The cockpit is good. Hasegawa has a slight edge in some wheel well details. Nice wheels in white metal. But in the end you won't go crazy building it. Hasegawa also allows you the option to display the dive brakes open. The Tamiya kit they are molded closed. Yet Tamiya does give you the option to display the refueling probe. A minor detail yes but you have that option. So there are differences. But you still have to build it. And I used Hasegawa as an example and not to bash their F-14 which is still a great kit but it is not for beginners. But then neither is the Monogram kit. This kit may be easier to start with but at retail pushing a C-note it may not be a viable option. So back to Monogram/Revell kit. Now let see if whenever Avantguard produces their kit and how the Great Wall kit will bring to the table. Thanks for viewing.
Chuck
Fly Navy

Nice review. I have not built the Hasegawa kit, but so far The Tamiya kit falls together, almost shake the box and a Tomcat falls out good!
Excellent article Chuck. You have definitely taken some time to compose this and take the pictures.
I’m more of a Korean War era and earlier type builder, but this one just might be in the stash one of these days.
It looks like a great kit. Previous experiences with Tamiya kits have all been very good. Like Rob mentioned... almost a “shake n bake”.
I have a feeling that you will have this one on your work bench fairly soon. I would !
“Liked”
Thanks Rob, I am still finishing up the review and re-posting it after the editing. I did mention you happen to be building this kit at the moment. Towards the end.
Great point about how much work it took to keep Tomcats flying. I seem to remember when I was in it was something like 120 man hours for every hour of flight for the F-14? I know the E-2C was very labor intensive, as was the C-2. Must be a Grumman thing!
Actually I find cockpit details pretty lame and below par - Finemolds in 1:72 has by far better cockpit details out of the box and not simplified as Tamiya, for example.
Thanks Sebastijan, though I have a few 72nd scale Tomcats in the stash which are Fujimi and Hasegawa kits, and read up on your excellent build recently. I wasn't really aware of the Fine molds kit until you presented yours. And with the few Fine Mold kits I've had they are very good. So I have no doubt that the detail with in the box even in 72nd scale is very good as well. Not everyone has expectations as you and I. Though I will admit mine are not high at all. I don't expect "perfect" in a model kit even the high end kits. It is what is. I leave it up to the builder and let them make their decision if what is "lame" or "perfect" to them. In my opinion the details are good enough not perfect but not lame. The kit is there to put together, and when the time comes I will decide to either deal with what is in the box, or add a zoom set. Just try to keep it simple. But I do appreciate your input. And look forward to more of your builds in the future. And after seeing your nice rendition I may have to pick up a couple of Fine Molds F-14's.
Excellent comparison! Nice to see an actually easily buildable F-14 in any scale - an obvious choice for who hasn't much time to building and want a decent Cat. My only complaint si that in this price range the fully mechanized optional wing would have been a compulsory addition. I bought a Hase when Tamiya announced their F-14 because people sell theirs in a hurry for reasonable money. An aftermarket resin wing set for the Tam kit - if ever will have been making - will cost a fortune I guess. Again, thanks for the infos!
Thanks Gabor, I hope it inspires you to build one. I may be lucky in saving some coin by grafting a Hasegawa wing into the Tam kit if I wish to display it parked or about to launch which also means adding the compressed nose gear strut, A project down the road a ways.
After this article, I'm going to take my Revell F14 and catch it on fire...
Very good job with this two modells.
S.Cubas, thanks but don't do that with the Revell which I assume is the F-14D, I have built that, it is not an easy build, as most Tomcats kits are not easy, until the Tam kit showed up. It is ok, just need some TLC and I have seen some really nice builds on that kit. The issue some have with it, is that it does have raised panel lines. So what but it is up to the builder to decide.
Chuck, its a very good review, pretty much checking all of the boxes that i would. Also you tried your best to not be too hard on the infamous Hasegawa F-14, which in fairness was a product of the 1980s, from the days before CAD and advances in slide molding technology. When evaluating the Tamiya F-14, it helps to have a working understanding of the 48th scale kits which came before.
Thanks Dave, true on the technology. But in many ways the Hase does holds it's own on a few different ways, the option on the wings, the ability to open the dive brakes. Tamiya's ease of assembly and providing weapons though I don't care much in assembling sidewinders which are quite simple missiles. Every company has their way of doing things. Tamiya chose of having the wings to swing. I guess to keep cost down on an already expensive kit, just went with that option. Instead of maybe providing a second set of wings to deploy opened up with flaps and slats. I really want to add a bit more in regard to the Academy and Fujimi kits, and why the Tam kit is much a great deal in the end as it is at the top end when comes to retail. With 2 more soon to be available will see who is top dog.
Great review. Im building the Tamiya kit right now. No doubt it is a superb kit but not without its faults. After assembling the front fuselage I was left with a step in the joint just in front of the windscreen. I was very surprised to see this given the shake and bake nature of recent Tamiya kits. After fixaing this problem I paid more attention to fit in other areas and I found that there were a few problems where there was an alignment tab - the tabs causing fit issues. I removed the offending tabs and the fit in these areas improved. Still though, given the complexity of the airframe, this kit goes together exceptionally well, so far 🙂
Hey Richard, thanks for your update. Will be looking forward to seeing it soon. I appreciate the issues you ran across as something to keep in mind when I get around to start working on this kit. Like the real Tomcat, very complicated air frame. Even the Tam kit you still need to be patient even though it may be the easiest F-14 to build on the market. The new AMK F-14D i have read about despite a long gestation period has shape issues so will see as I will also pick up the Tam D kit first. With several Hasegawa kits already in the stash and just finished. These are not easy quick builds. Which markings are you going to use on your Tom, kit markings of an after market sheet?