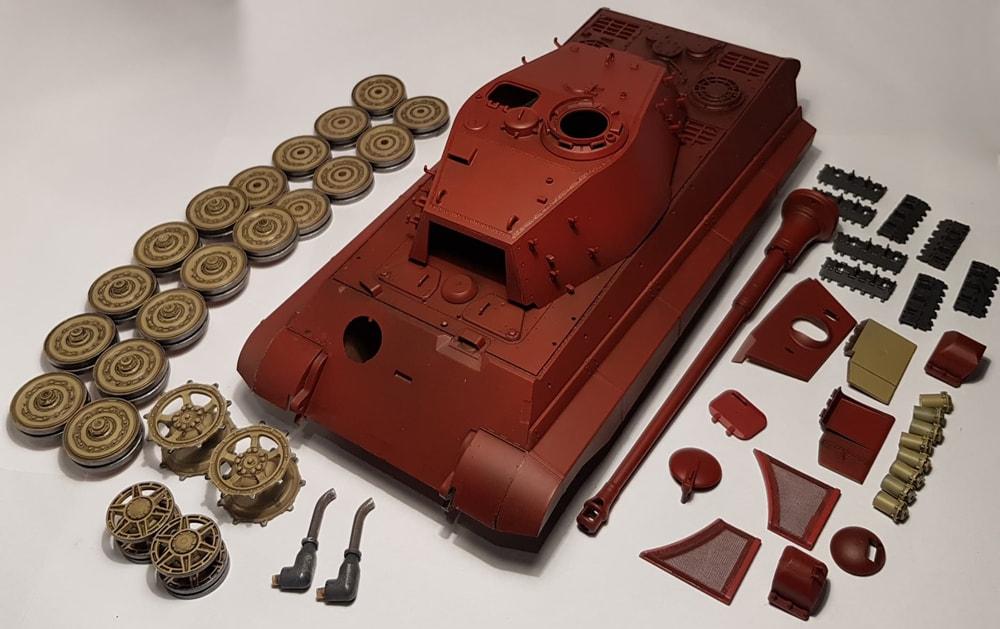
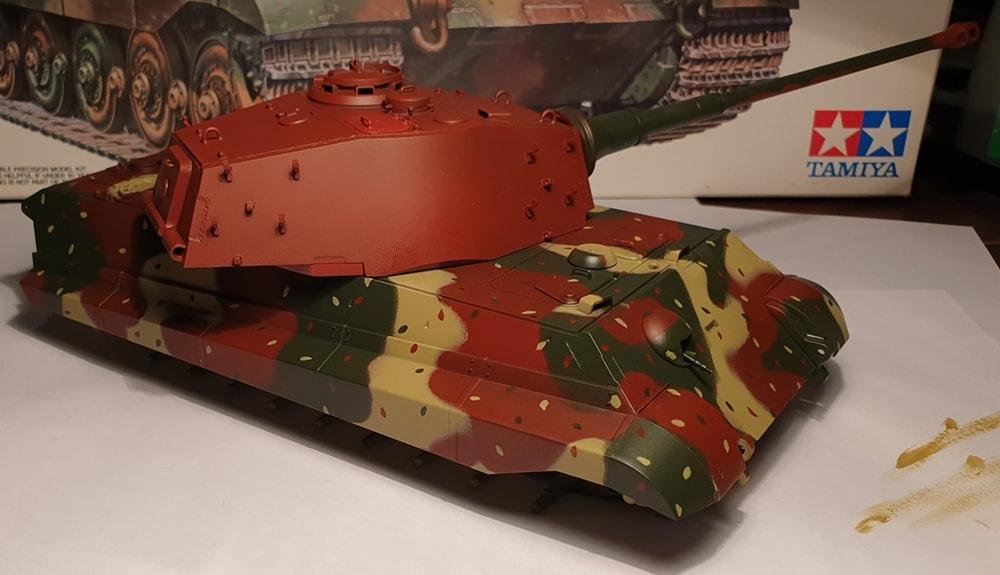
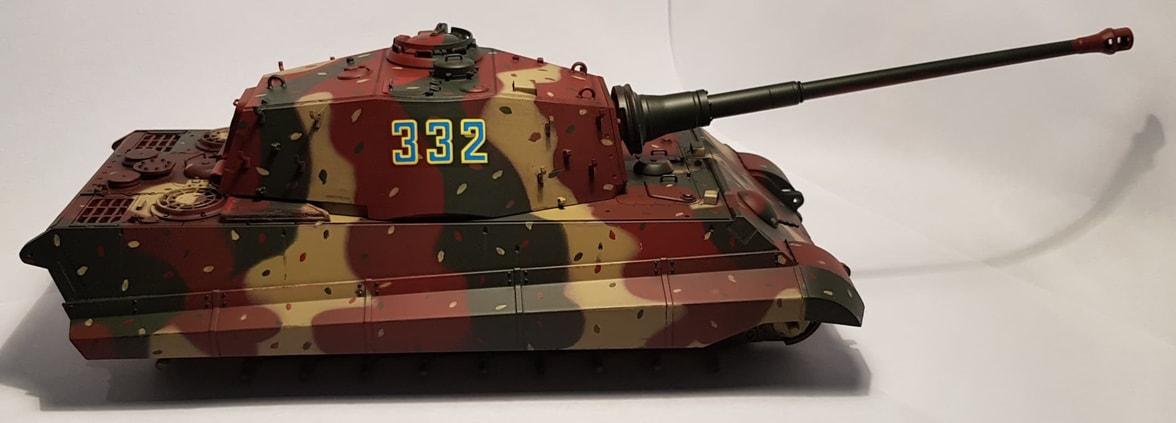
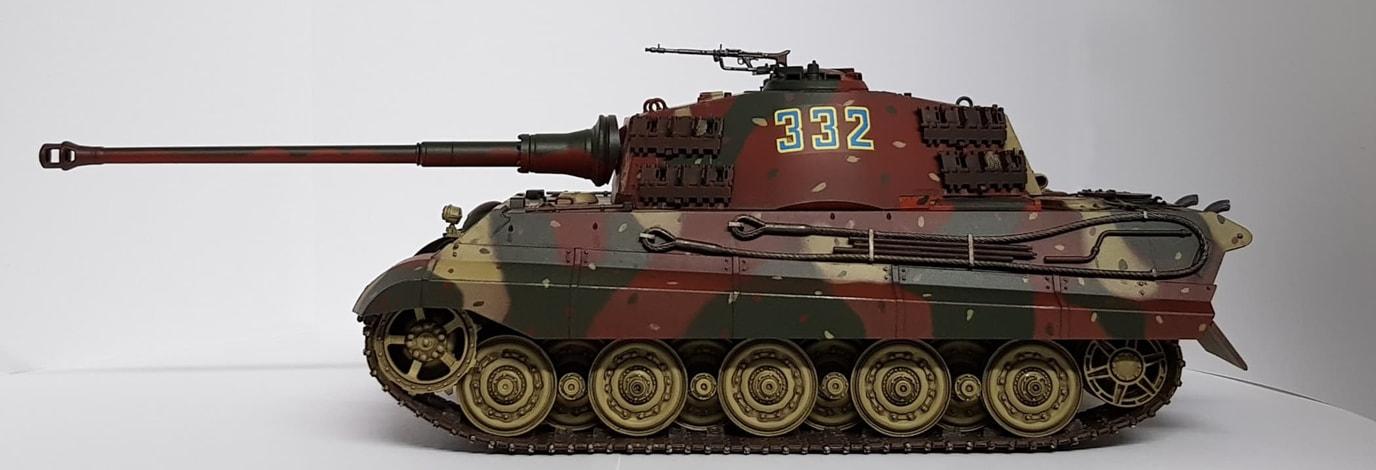
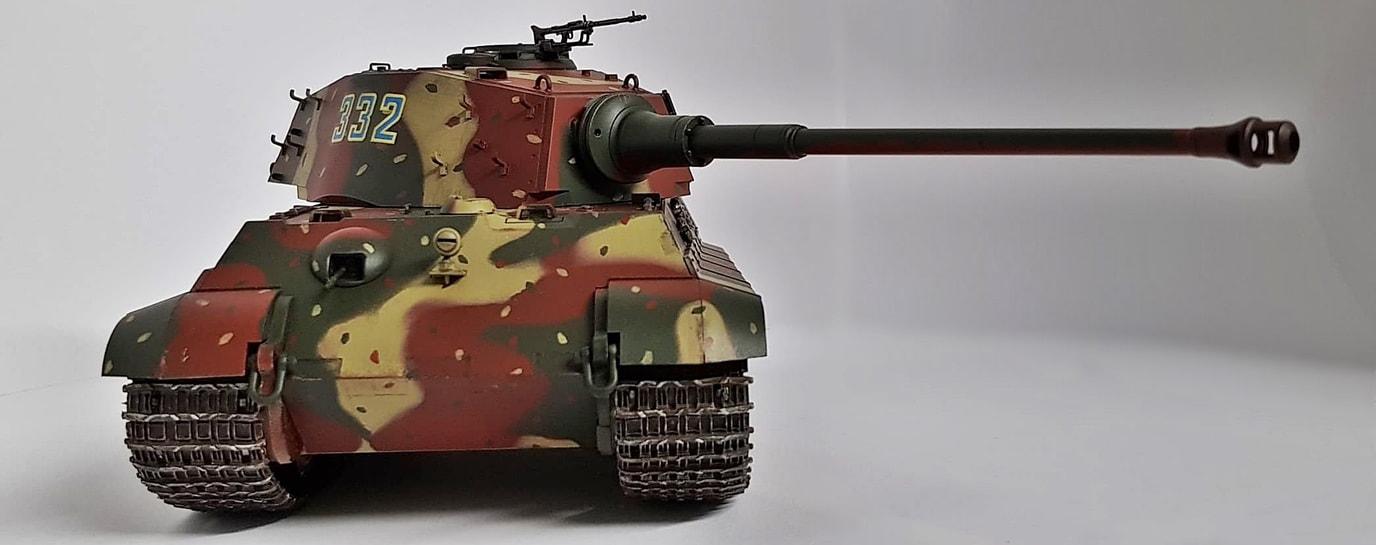
1/35 Tamiya Königstiger (1993 kit)
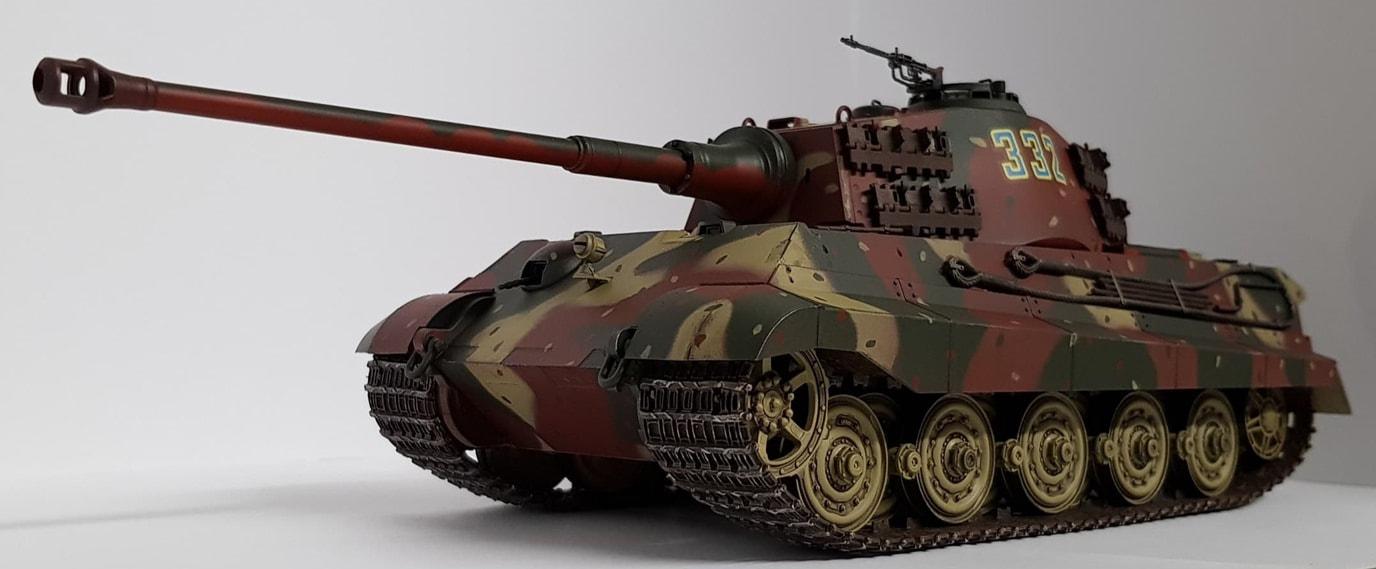
I was three models into this hobby and ready to tackle something more challenging. I had the Tiger II, also known as the King Tiger, Royal Tiger or Königstiger, kit that i had picked up second hand sitting and waiting for me. The kit i had found second hand up was a Tamiya 1993 (new tool) original in the box, so it was 25 years old by the time i got my hands on it! I was excited for this one as it was an impressive looking tank and the ambush camo paint job was particularly cool. I had watched a couple of tutorials regards masking, oil and acrylic washes and decal application so i was all geared up and ready to dive in. Down to the model store for some paint. I was still using Tamiya spray cans at this stage so a tin of dark green, dark yellow and a red primer. I also added some Mark Fit for the decals and the Tamiya cement that comes in a bottle with a brush. I had found the old Revell glue with the needle type applicator nozzle could become a bit cloggy and also a bit prone to running out of the applicator a bit too quickly every so often. Besides being excited i did wonder if i could pull this one off.
The main body of the tank was slightly warped and required clamping (with bricks set on either side and the rear!) to set square as there was rather large gaps all around in a dry test fit. At this stage i had no model clamps so had to resort to the bricks, did the job fine though.
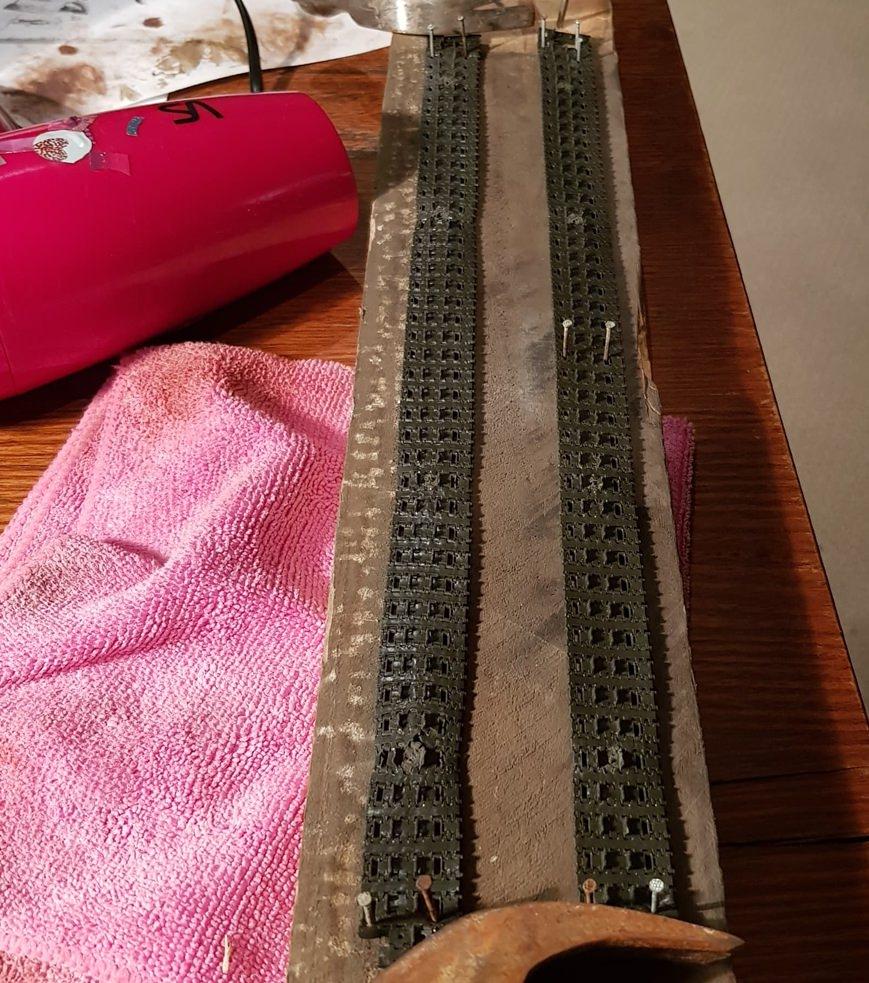
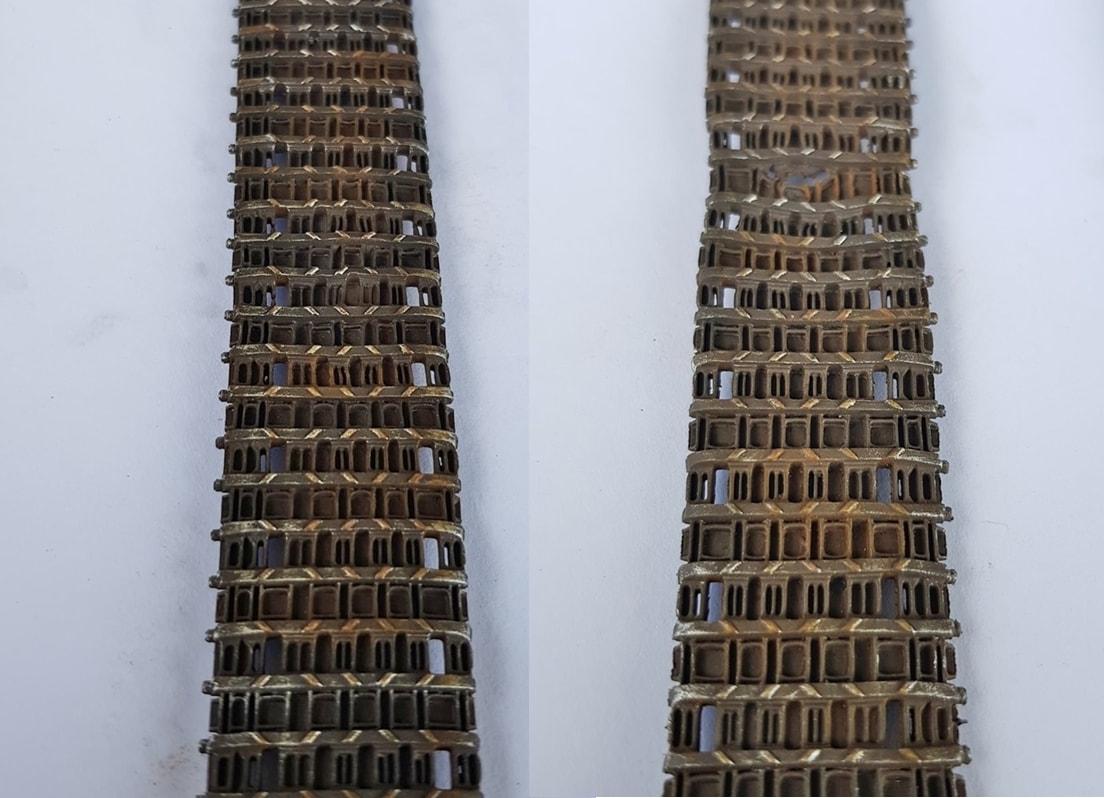
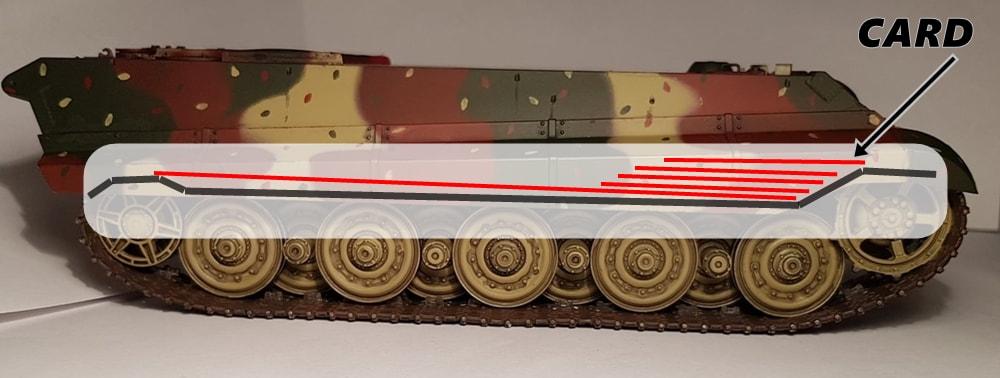
The tracks were near fubar, warped, curved and badly aged with some large melted looking holes. I managed to salvage them by soaking them in hot water and then stretching them out in a very basic home made jig and used a low heat with a hair dryer until they settled. The worst of the holes was hidden up under the guards. I then struggled getting them to sit correctly onto the tops of the wheels as i had already glued on the track guards. This was fixed by removing the rear wheel and sliding pieces of card and cardboard up along the top length of the tracks from behind in below the guards. Worked a treat although it was bit fiddly.
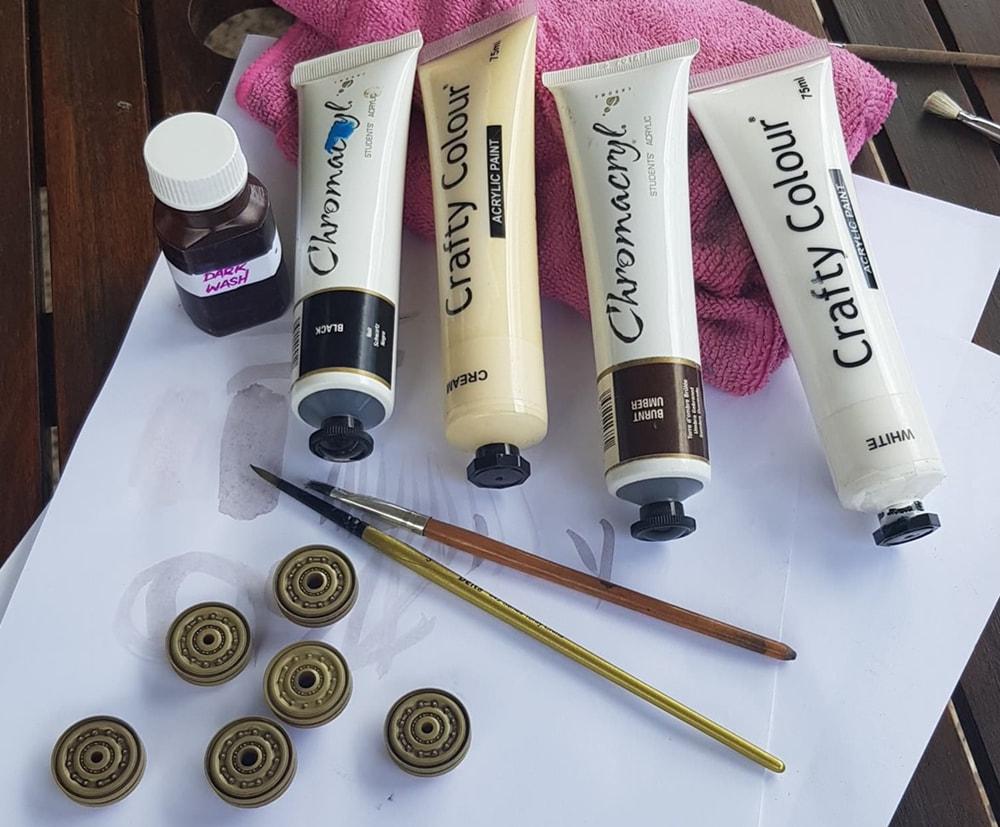
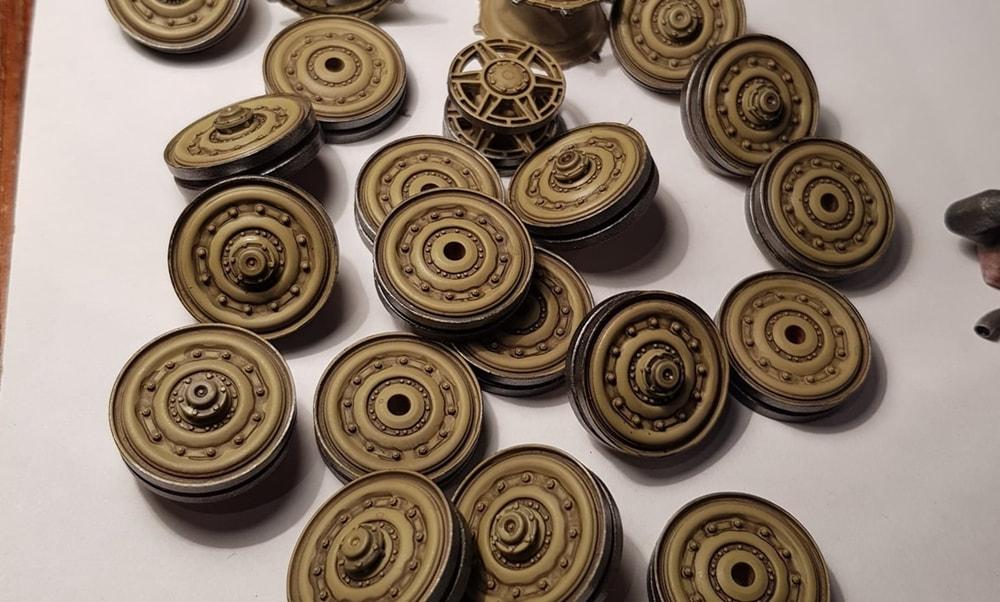
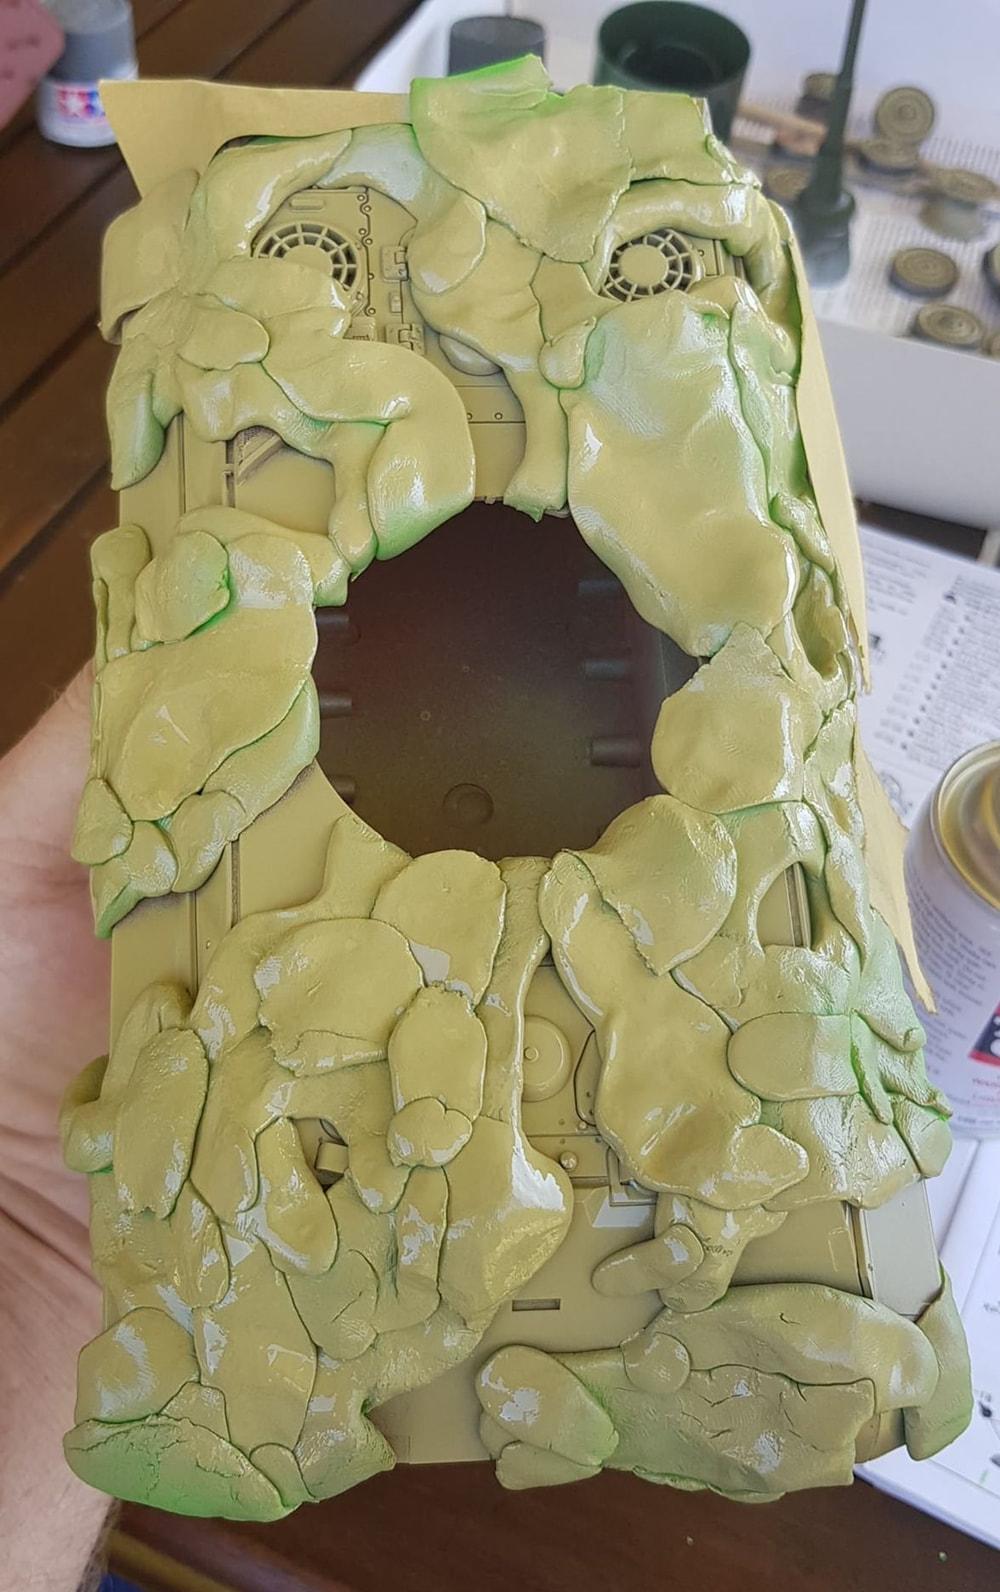
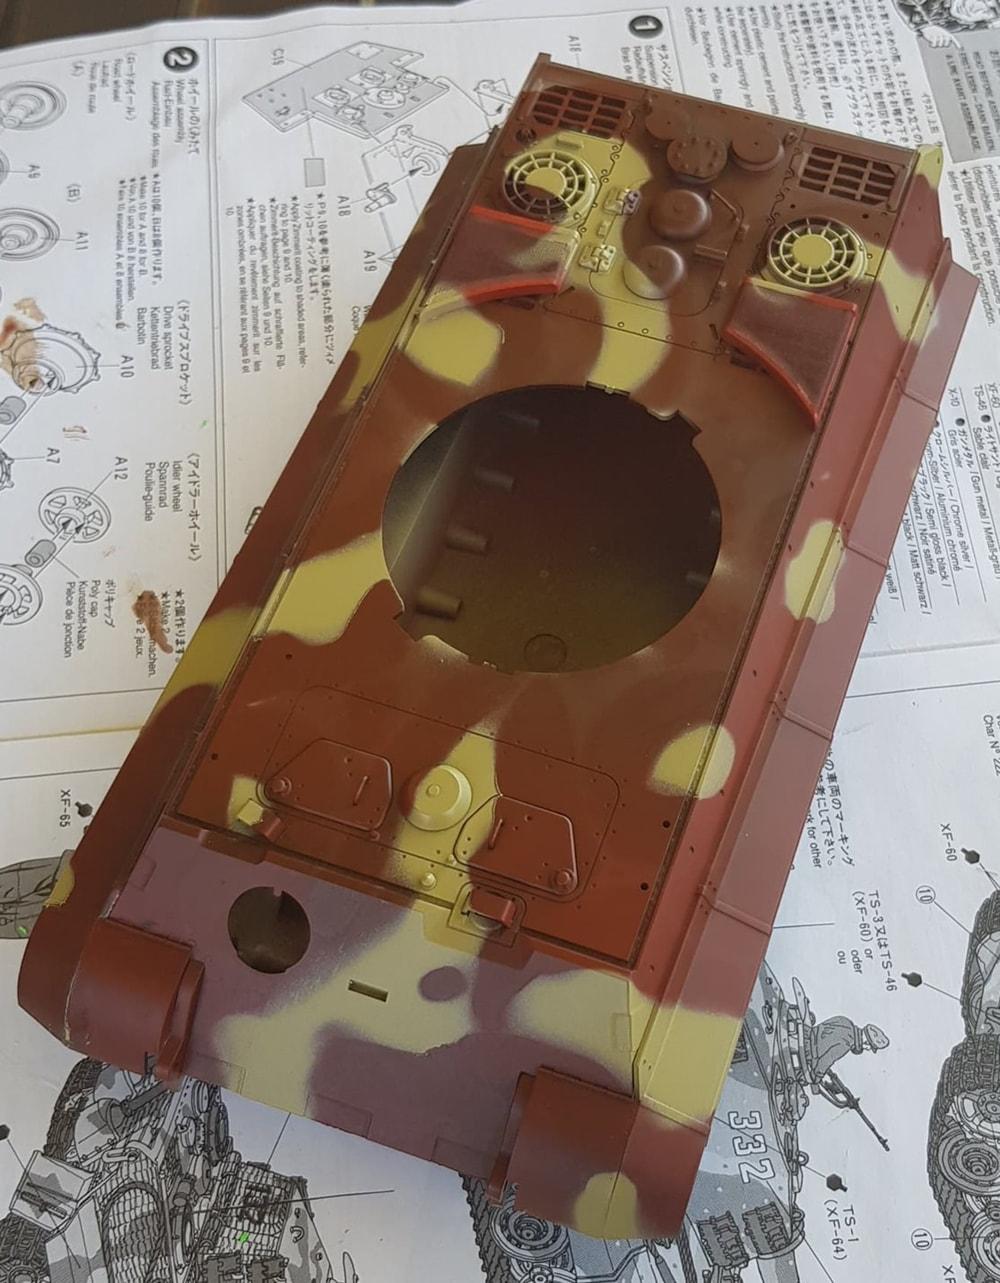
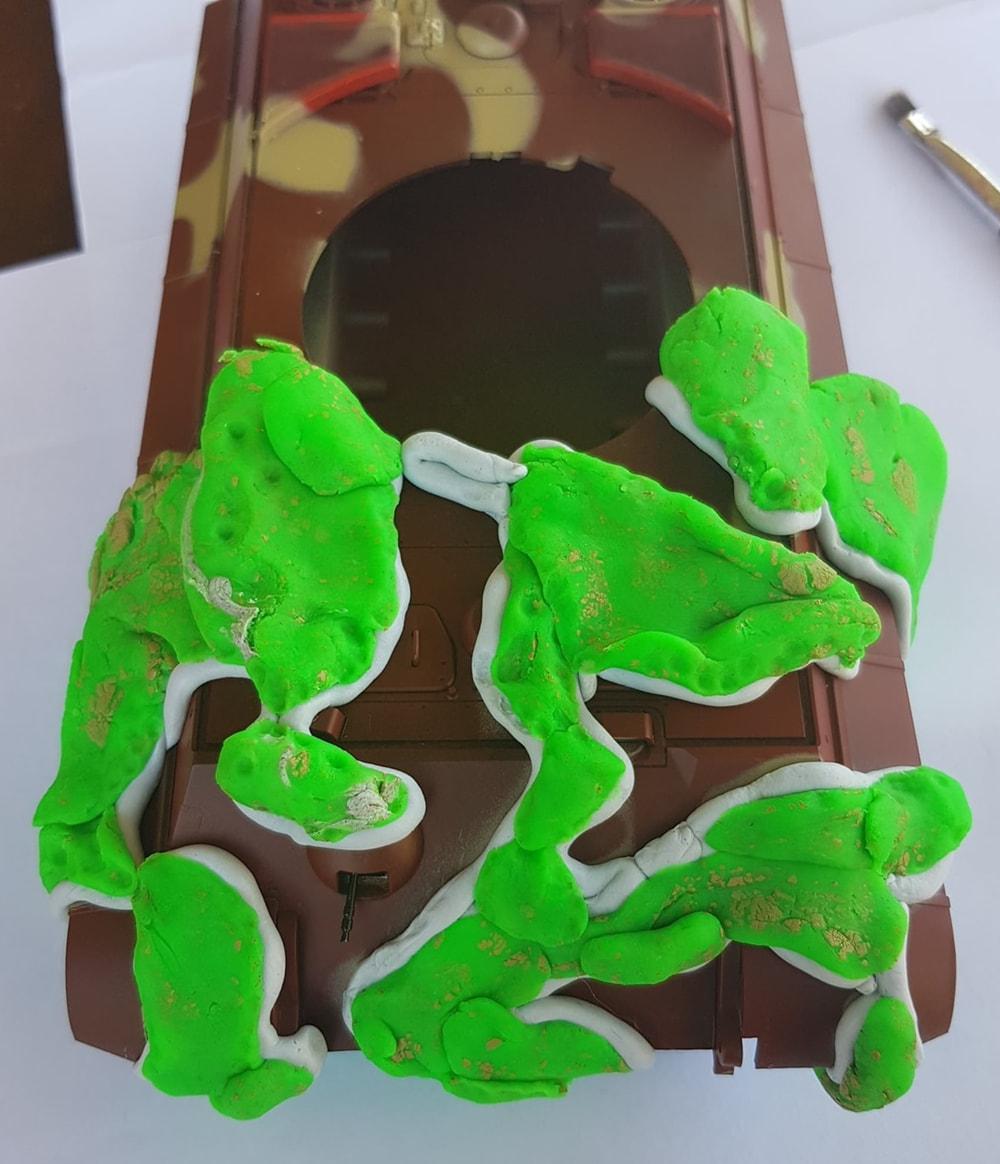
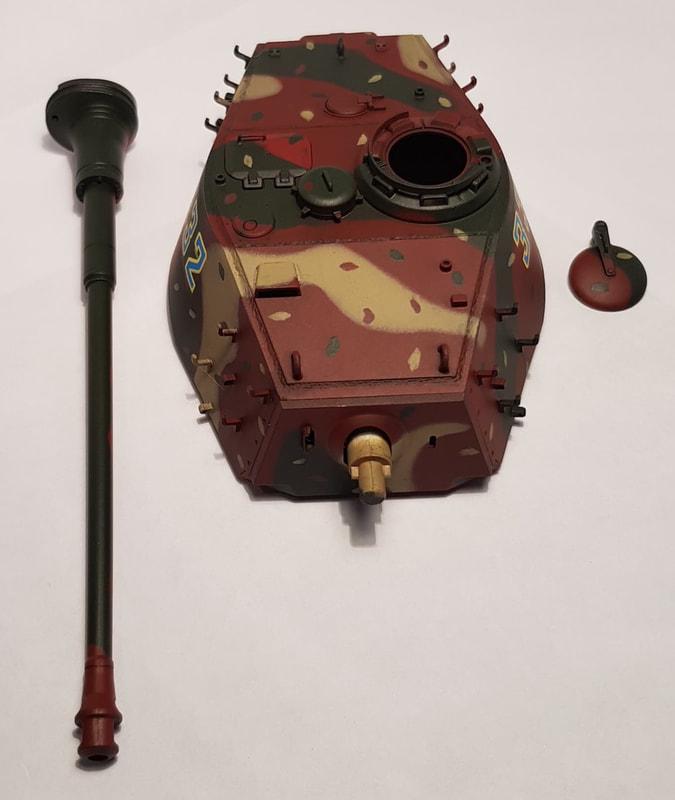
The camo was masked with two dollars worth of play doh and blu tac that i had laying around. To begin with it looked like i was making a terrible mess but as it progressed it all came together. Wheel weathering was a wash i made with a mix of acrylics, water and a few drops of detergent to help it stick. Decals were extremely hard, like thin cardboard but went on fairly well considering their age and condition.
All up it was a fairly challenging build and the old kit had a few issues but she came through in the end.


Very nice build! Best use of Play Doh for adults I think 😀
For sure, cheap and does the job!
Nice one!
I've the 1975 one in my stash, started >30 years ago as I scr3w3d up some tracks. Have to buy new ones and finish it. Yours gave me some will 🙂
Congratulations on your build
M
Get into it Manuel, hopefully she is still salvagable.
Great job...one of the best I've seen. Really nice work!
Thanks, craig, love your cat 😀
splendid work
Thanks Bob.
Well done, Jimmy. Good thinking on the "clamping" to settle the warpage problem.
Everything on a budget if possible:)
Holy cow! This is your third model and you did it with spray cans? Color me Seriously Impressed. Really superb work.
Ha ha! When i started i was too worried to even think about learning airbrush skills, plus it seemed expensive! In the long run the cans were dearer so i bit the bullet on my fifth build and got an Iwata Eclipse. Cans can give you an ok good looking kit though:)
You definitely beat this one into submission! A great looking tank. In my estimation, modeling is all about problem-solving skills! Looks like you've got them in spades.
Are you still using cans and brush in your builds? And in 1/72! Your work is awesome Greg. I’ve still to introduce myself to dot filtering and other weathering techniques yet, i’m always worried that i will make a mess of my build so am hesitant.
Awesome job! My compliments to you for making lemonade out of some real lemons regarding warpage and the tracks! Your hard work and dedication to problem solving has resulted in a great model!