Airfix Meteor NF 11 conversion
Following the conclusion of the Second World War, the RAF's night and all-weather fighter squadrons were equipped with the latest versions of the excellent Mosquito night fighter, which had demonstrated its ability to deal effectively with piston-engine bombers. However, within a few years there was a proliferation of prototypes for jet-powered bombers with performance well in advance of anything used in the war already flying, and it was obvious that the Mosquitos would soon be outperformed by their opponents.
The Air Ministry had already issued Specification F.44/46, calling for a two-sat, twin-jet powered, all-weather fighters. None of the original submissions met the Air Ministry's requirements. Eventually, DeHavilland would develop the D.H.110 that became the Sea Vixen, and Gloster would develop the Javelin, but these aircraft were ten years in the future and there was a need for something immediately to fill the gap. Developments of existing jet aircraft were considered. The trainer versions of the de Havilland Vampire and Venom would be developed into night fighters, as would the trainer version of the Gloster Meteor. The Meteor night fighter was in fact the most important British night and all-weather fighter of the 1950s in terms of numbers produced and operated.
Armstrong Whitworth, which was involved in the production of the Meteor, was entrusted with the development of a night fighter based on the Meteor airframe to specification F.42/48. Tests had already been made with F.3 and F.4 Meteors equipped with radar, which showed the Meteor could be adapted for night fighting.
The aerodynamic configuration of what was designated the Meteor N.F.11 was built onto and flight tested on the fourth production T.7 trainer in September 1949. The first true prototype, WA546, made its first flight on May 31, 1950. The night fighter differed from the T.7 by the use of the original-span wings of the F.1 and F.3, an extended nose for the radar, and an F.8 rear fuselage with a five-foot extension in overall fuselage length. The night fighter used only the two-seat cockpit and forward fuselage of the trainer. The standard armament of four 20mm cannon were removed from the fuselage and located in the wings immediately outboard of the engines.
Production delivery of the N.F.11 began in October 1950 with the first airplane being delivered to 29 Squadron in early 1951. After production of 338 N.F.11s, the last one left the factory in May, 1954. Fourteen RAF squadrons and two OCUs operated the fighter, with the type remaining operational until the early 1960s, while several were delivered to the French, Belgian and Danish air forces. 40 very-similar tropicalized N.F.13s were produced, and these were the only Meteors in the RAF to come close to firing their guns in anger when they were used for the defense of Cyprus during the 1956 Suez intervention in the expectation the Egyptians might attack the island with their new Il-28 jet bombers.
The only combat use of the Meteor night fighter came when the Israelis used one to intercept and shoot down an Il-14 transport flying from Damascus to Cairo in 1956 that it was believed the commander of the Egyptian Air Force was aboard (he wasn't) just at the outbreak of the 1956 war.
Following their departure from first-line service, many N.F.11s were modified as target tugs with the designation T.T.20, and served in this role with both the RAF and FAA, as well as several other air forces, into the late 1970s. At least one came to the United States in the mid-1970s, where I saw it at Mojave Airport in 1976, and was privately operated for a few years.
THE KIT
In the 1990s, Aeroclub released 1/48 vacuform/multi-media kits of the Meteor night fighters, including a NF 11/12 and NF 14. In 2005, classic Airframes released the only injection-molded 1/48 kit of a Meteor night fighter, the NF11. Matchbox released a 1/72 Meteor NF 11 in the 1970s, and Xtrakit released an NF 11 that is essentially a scaled-down Classic Airframes kit (with all that means regarding assembly and fit)as the NF 11/12/14 in 2006, with a rebox in 2007 that has different decals. Xtradecals released 48051 “Meteor Night Fighters,” which included the squadron markings and serial numbers for eight Meteor NF 11s and an NF 13, which is a tropicalized NF 11; this was released at the same time as the Classic Airframes kit and is still available through Hannant's - the modeler is expected to use the national insignia from the kit decal sheet.
This resin conversion is a “garage kit” released by “109ACE” and sold on eBay. It uses the Classic Airframes kit to create the masters of the forward fuselage, canopy and cockpit, for use with the Airfix Meteor F.8 kit. It also includes the extended-span outer wings. At an attractive price of $25.00, it allows a modeler who missed the Classic Airframes kit a chance to build a night fighter Meteor that is far easier to build than the C-A kit, and with the Airfix kit and resin conversion added together, for a price considerably less than the collector's prices one would pay for the earlier kit, assuming you can find it.
“109Ace” also has resin conversions for the NF 11/13, NF 12, NF 14, T7 Trainer, and the F. Mk.4.
CONSTRUCTION
The conversion is fairly simple: one cuts the forward fuselage of the Airfix kit off on a panel line, then attaches the resin forward fuselage parts to the remaining bit of the Airfix kit. I found some warpage in the resin parts, which I was able to cure by dipping the parts in nearly-boiling water and then re-setting. These resin parts are as thin as the original Classic Airframes plastic parts, which makes the whole job quite easy.
The Airfix wing parts are also cut on a panel line, just outboard of the engines. I then assembled the Airfix wing sub-assembly before attaching the resin outer wings. The joint required quite a bit of cyanoacrylate glue, then an application of Mr. Surfacer, to get a good join, but was otherwise simple since the outer wings are each one solid piece.
I found it best to attach the resin parts to the kit fuselage parts before further assembly, which allowed me to work on the fit from inside and out and get it right. Since the join was on a panel line, I only needed a bit of Mr. Surfacer and then rescribed the panel lines. I strengthened the joint with some .020 Evergreen sheet, cut in strips and applied over the joint inside the fuselage. I put fishweights inside the radome before gluing the fuselage together, to insure nose-sitting.
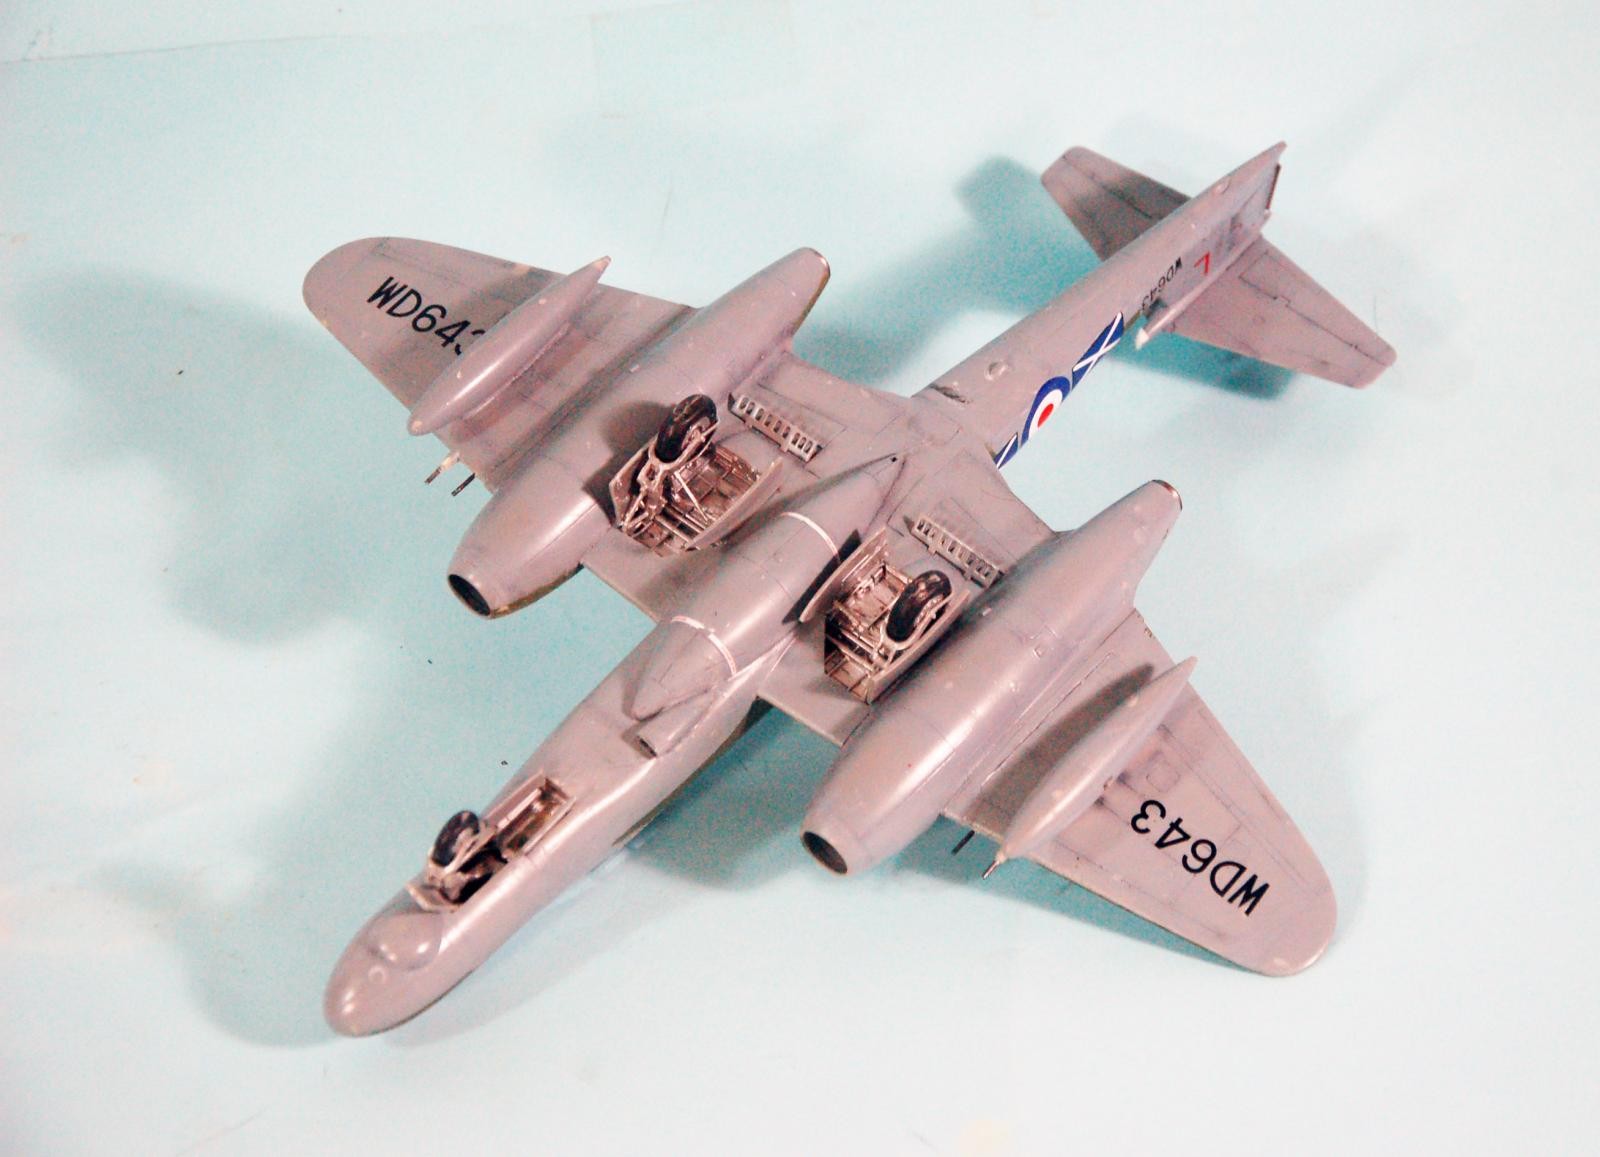
The cockpit parts are a bit messy, because they are cast from resin parts used as the masters. However, this will not be apparent when all is assembled and painted, since the cockpit is overall flat black inside. I used Prismacolor pencils to highlight the various dials and switches and some weathering on the floor from scuffing. The seats were painted with Tamiya Hull Red, and Eduard RAF photoetch seatbelts finished things off. Once the fuselage was together, I had to use Mr. Surfacer on the centerline seam of the resin forward fuselage.
The rest of the kit assembles easily, since it is an Airfix kit. I was using the “Meteor in Korea” kit which is the second run of the Meteor, produced in the UK, and does not suffer from the various problems of the made-in-India first run kits (short shots, warpage, etc.).
Fortunately, the conversion comes with two vacuform canopies, since I botched the first one, due to the fact that the outline is not real clear since the vacuform was not pulled super-tight over the master. A resin master of the canopy is also provided for those modelers who have a vacuform, if they want to try their hand at getting better. I decided to keep the canopy closed, since that preserves the lines of the fighter and hides any problems from the cockpit parts.
COLORS & MARKINGS
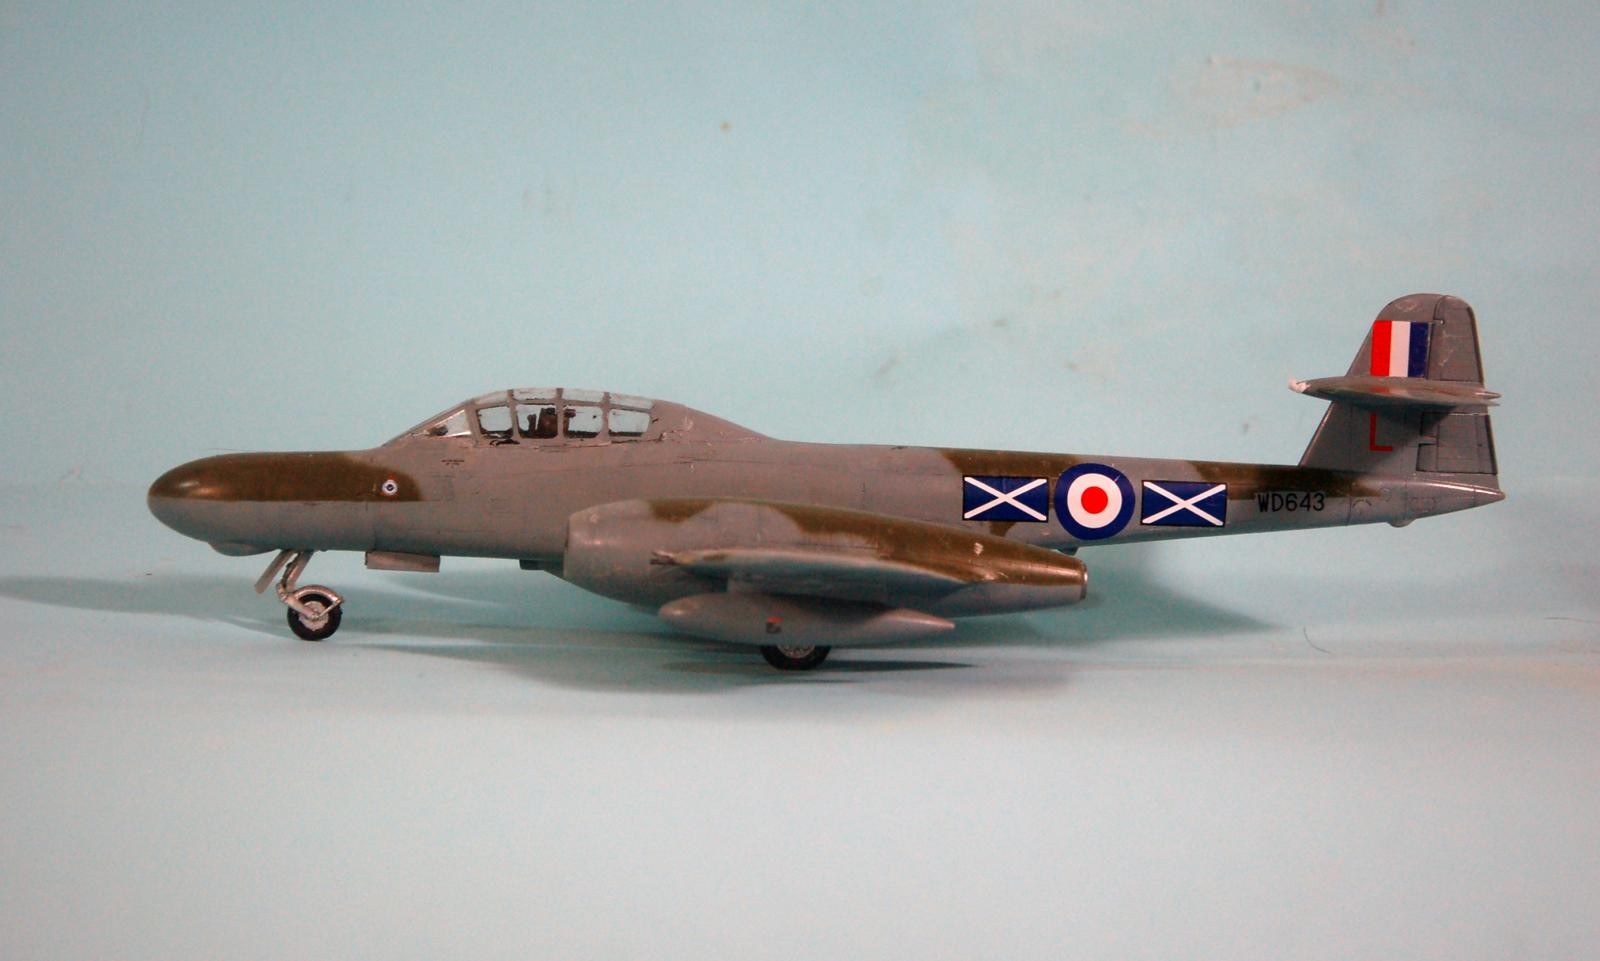
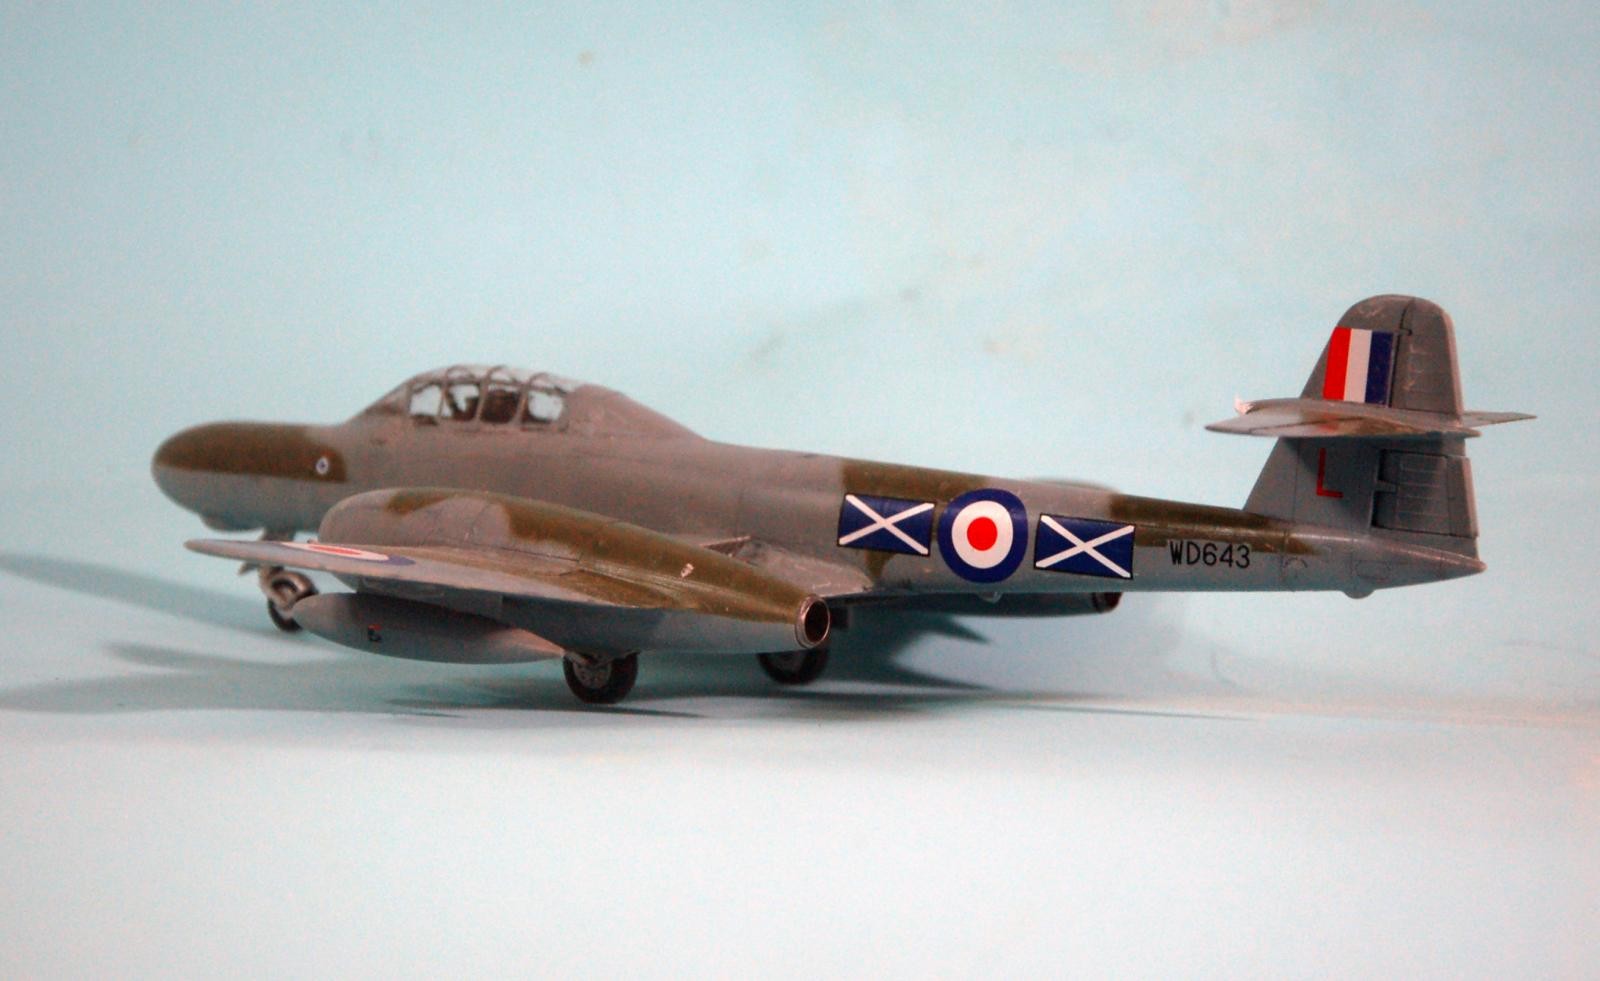
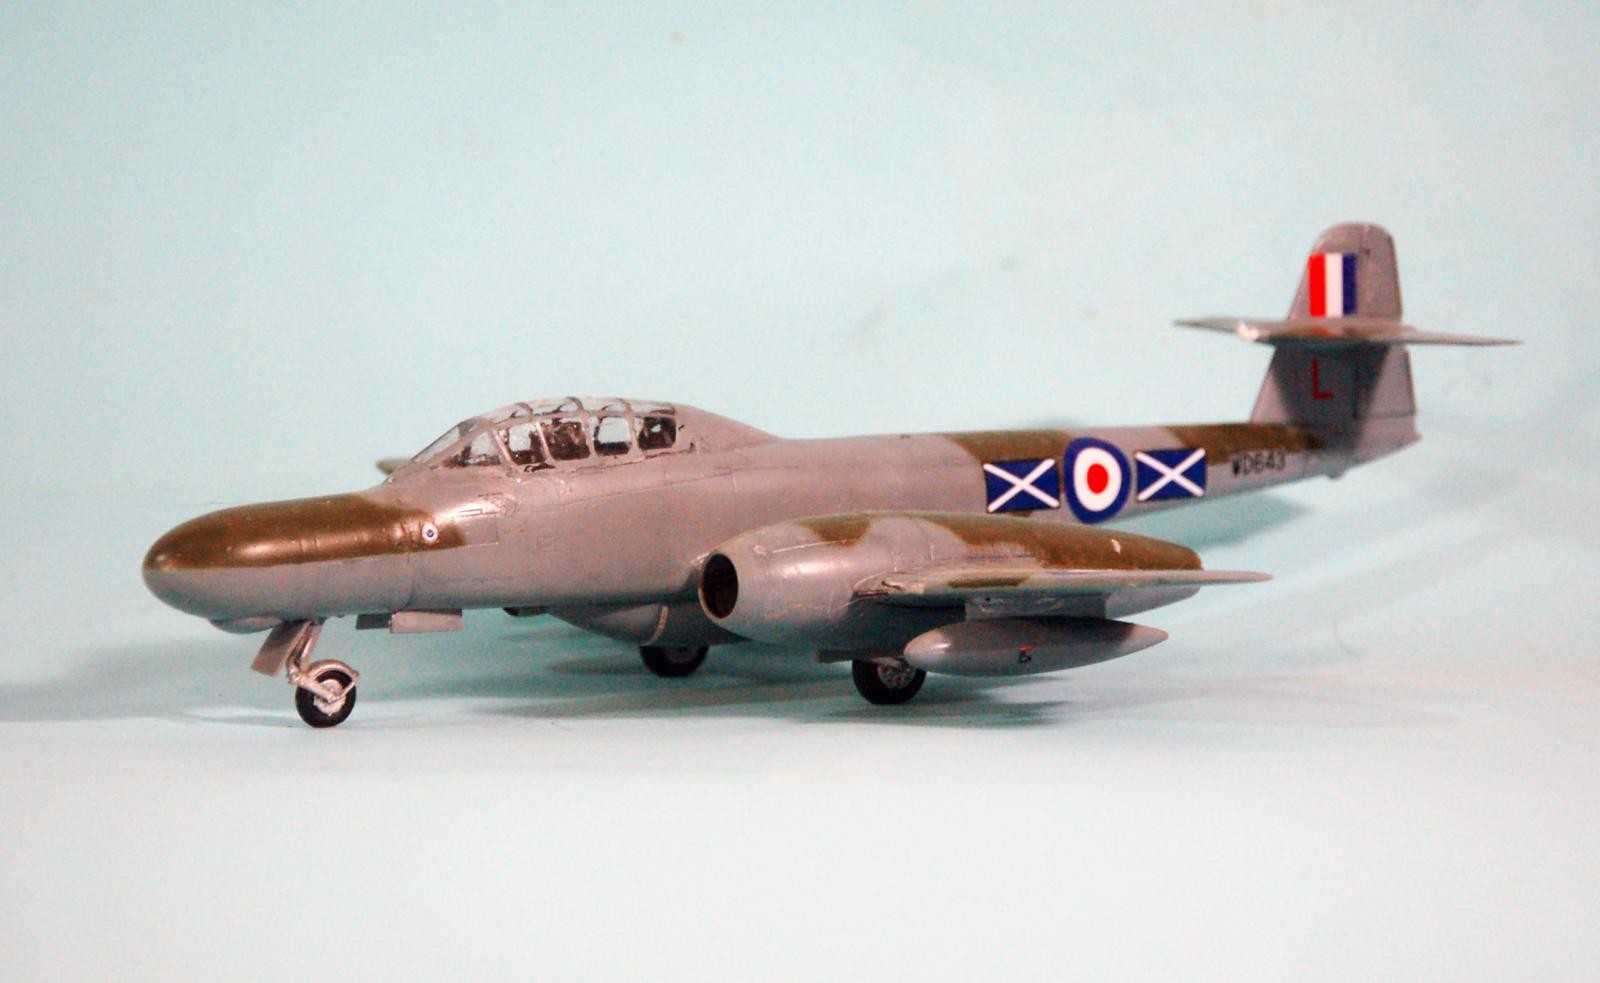
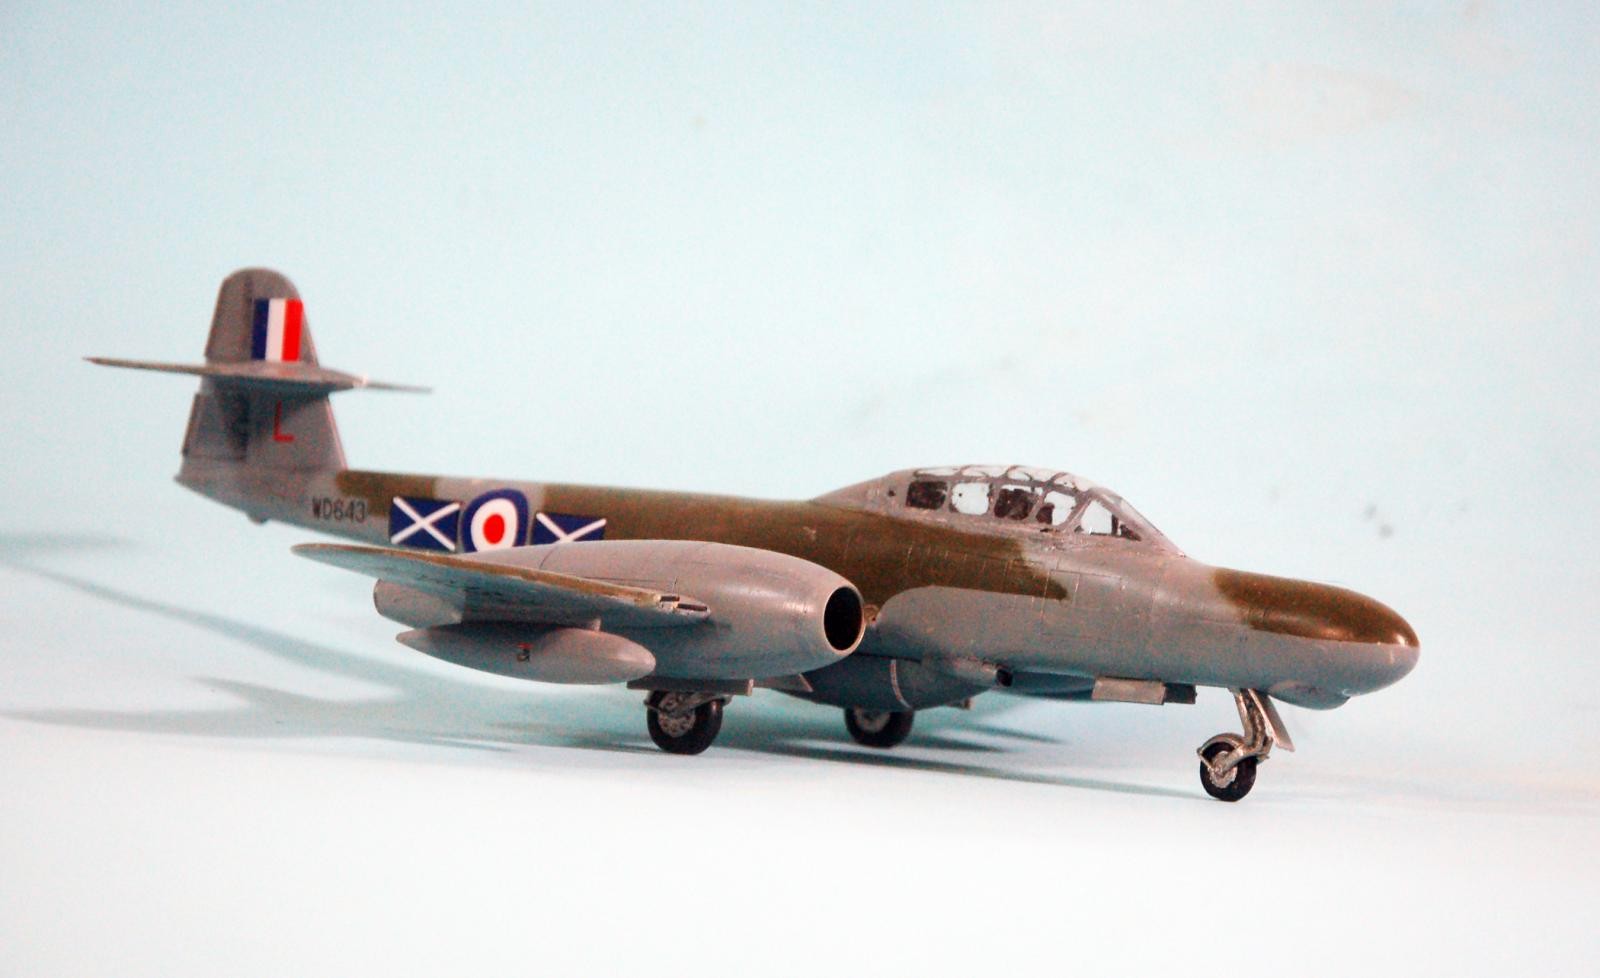
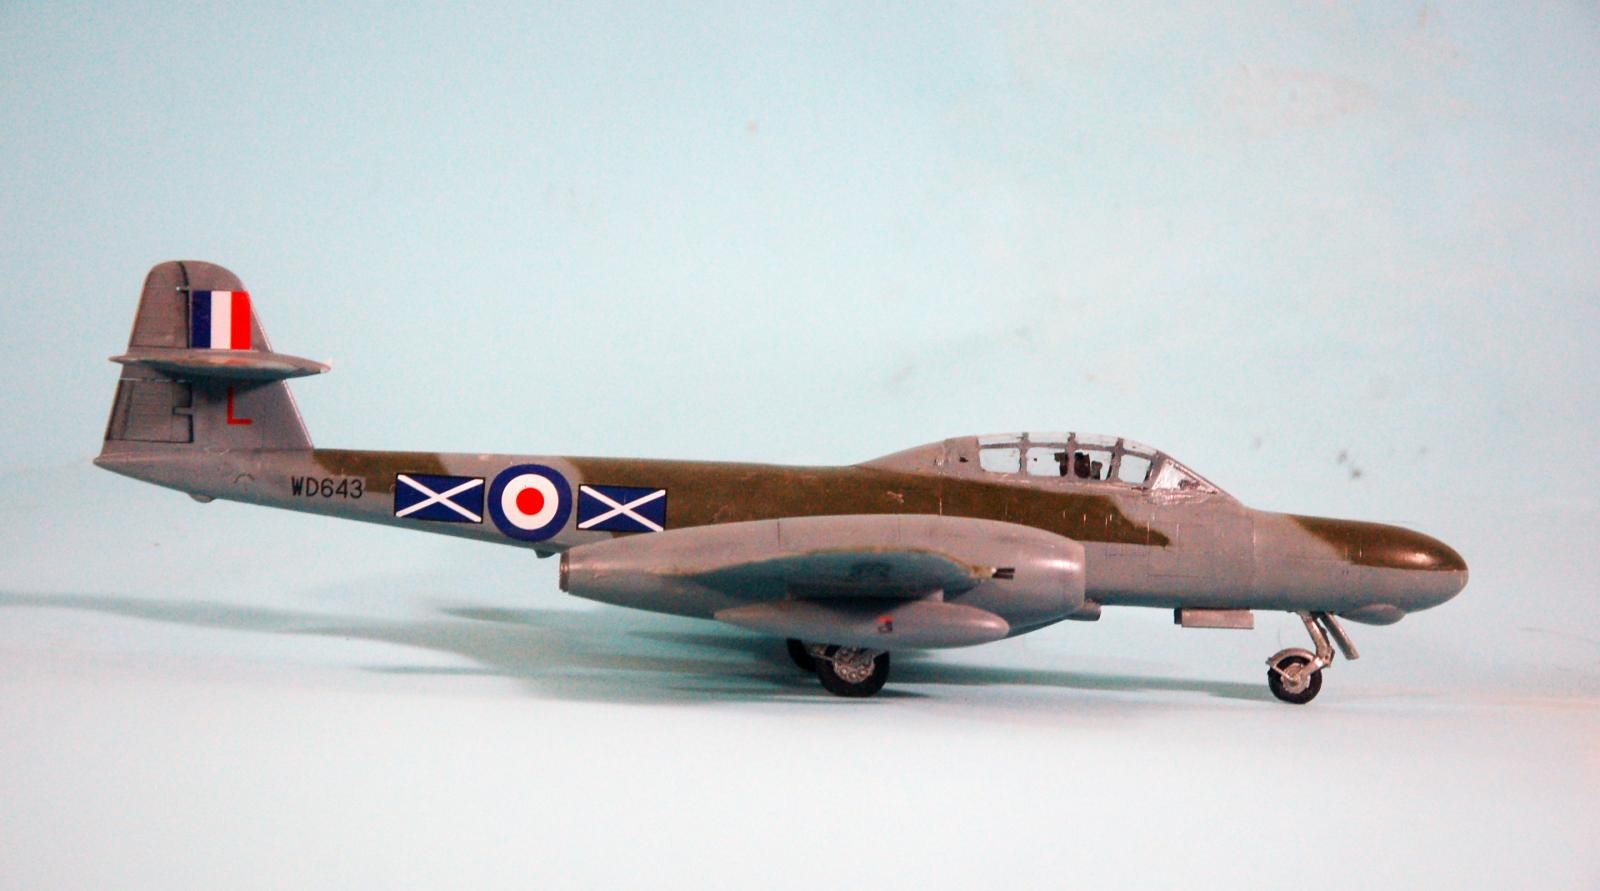
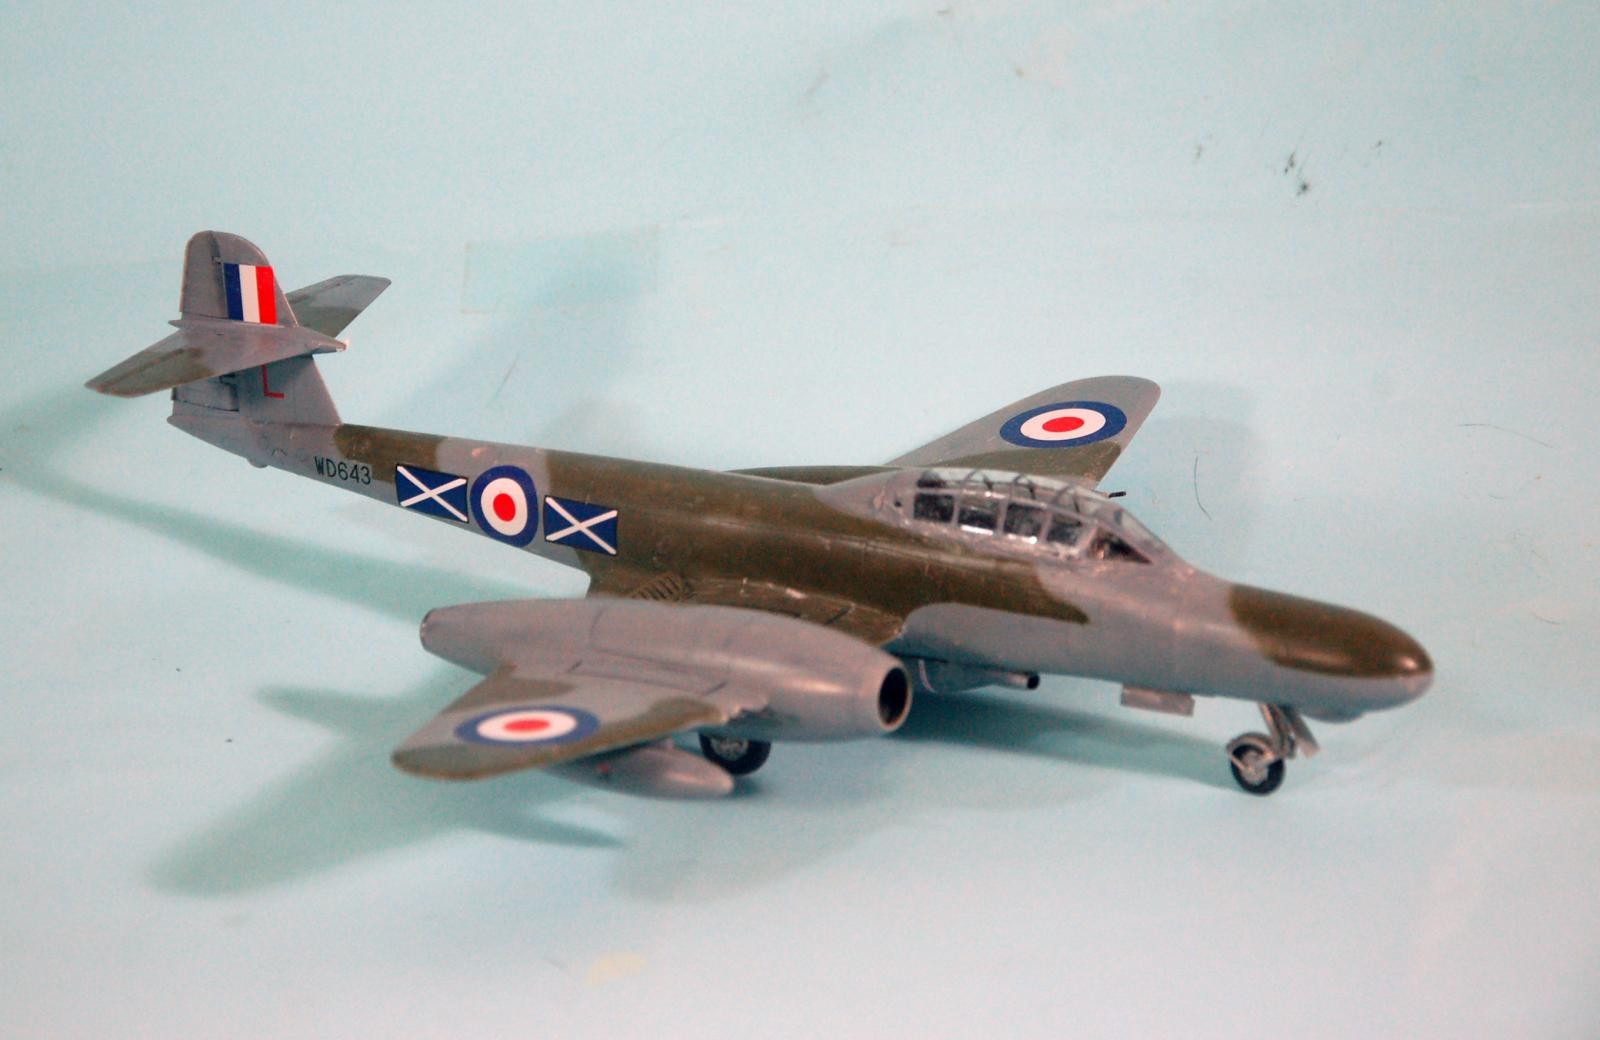
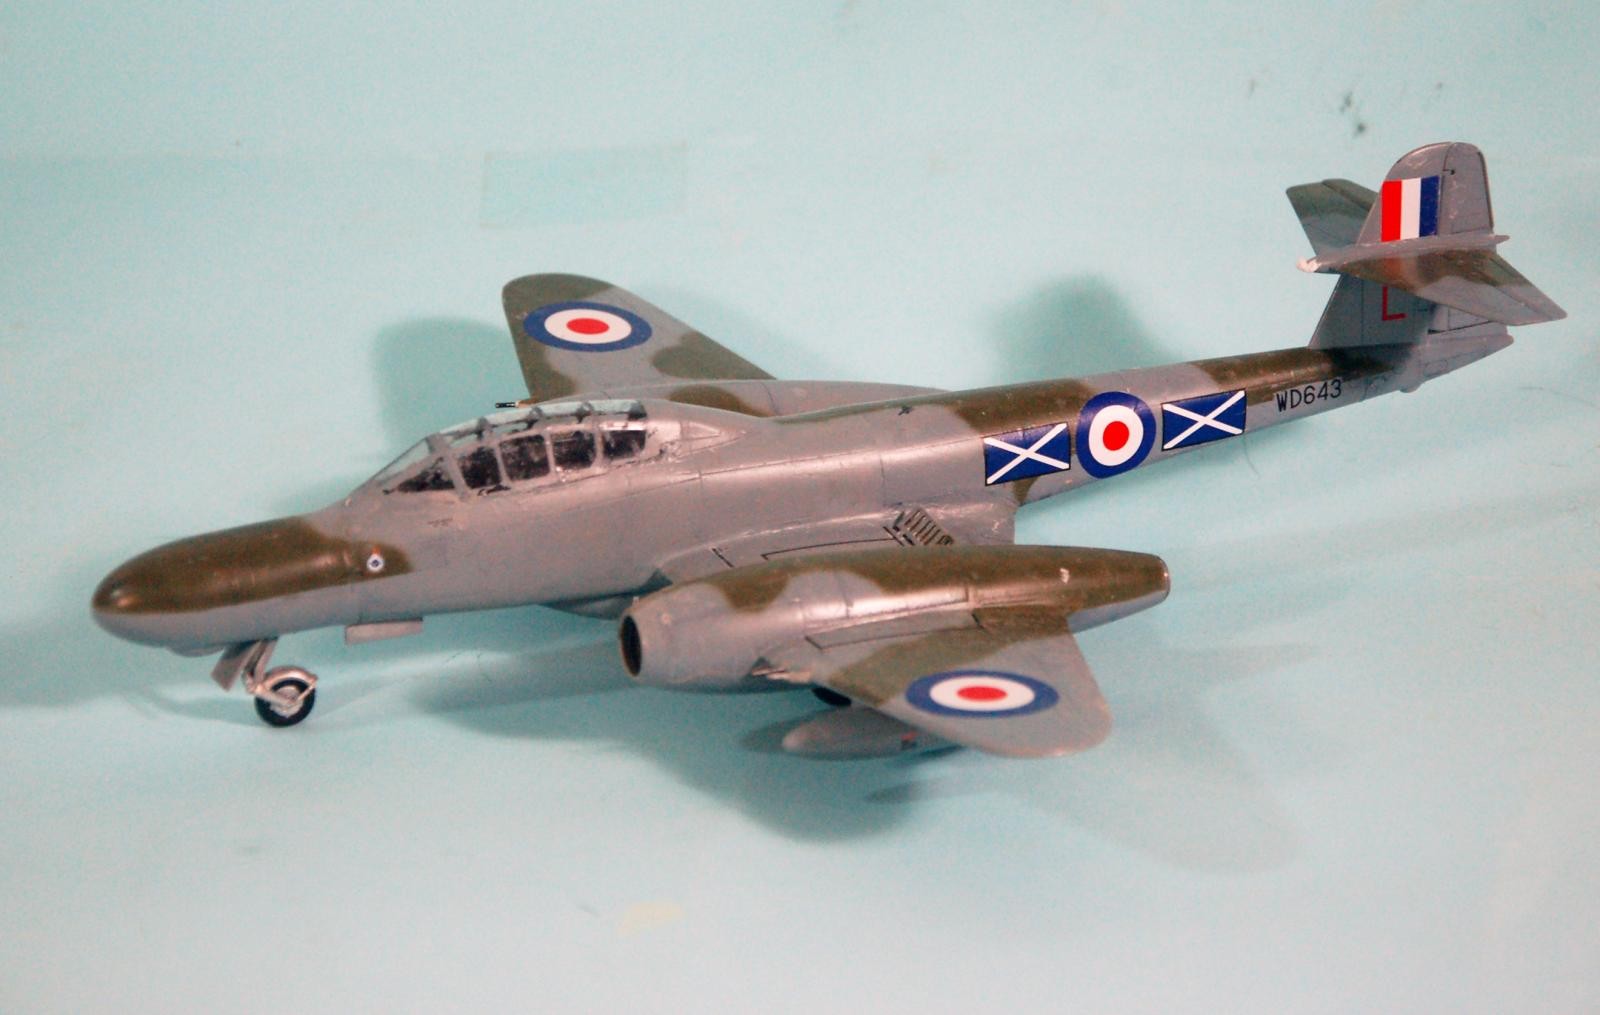
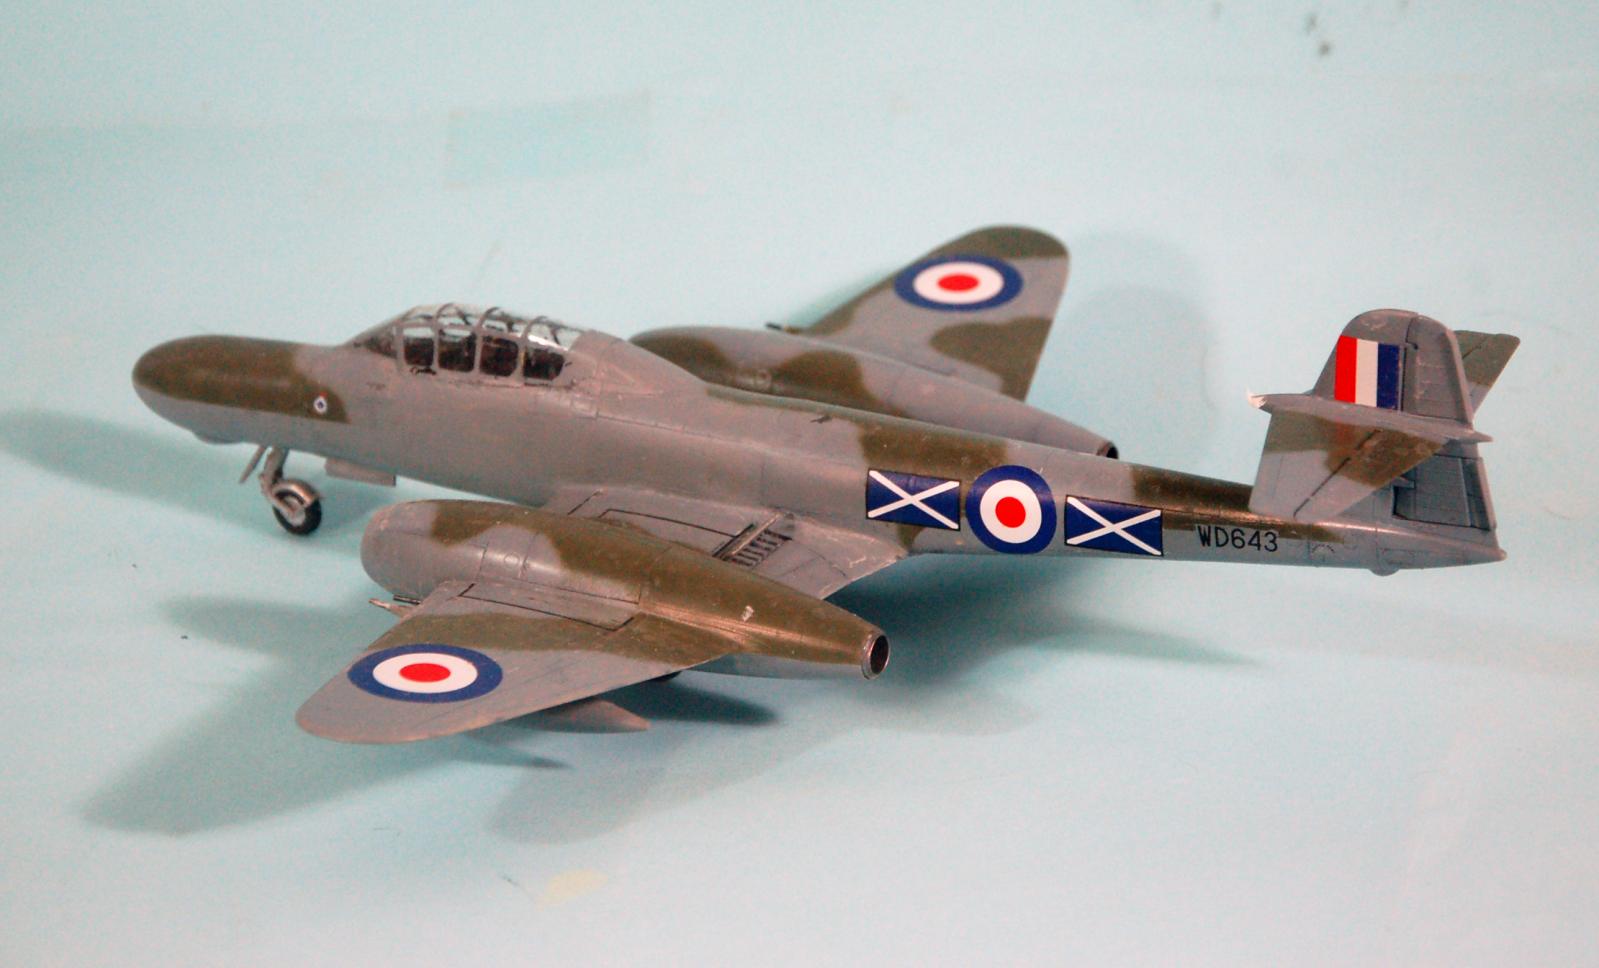
Using the painting guide in the Xtradecal instruction sheet, I did the night fighter camouflage of overall Sea Grey Medium with a distruptive pattern of Dark Green over the upper surfaces, using the Tamiya RAF colors and freehanding the camouflage with my airbrush. I then applied an overall coat of clear gloss for the decals.
I used the markings for NF 11 WD643/L of 151 Squadron at Leuchars in 1954 from the Xtradecals sheet, with the Airfix kit decals for the national insignia and the stenciling. When all was set, I gave the model an overall coat of Clear Satin.
I unmasked the canopy, then attached the landing gear. These airplanes were maintained in good condition, so I did not do any weathering.
CONCLUSIONS
This is a fairly easy conversion for any modeler who has done a few conversions. The parts in the conversion set are good, so long as one remembers this isn't a set from SBS. Once I had the warp fixed, everything went together easily. The work of assembly was far easier than my memory of building the ill-fitting putty monster from Classic Airframes 15 years ago.
The NF 11 is an important airplane for modelers interested in Cold War aircraft, and this conversion allows someone who missed the release of the Classic Airframes kit to do this interesting if ungainly-looking airplane.
Recommended for modelers experienced in resin conversions.

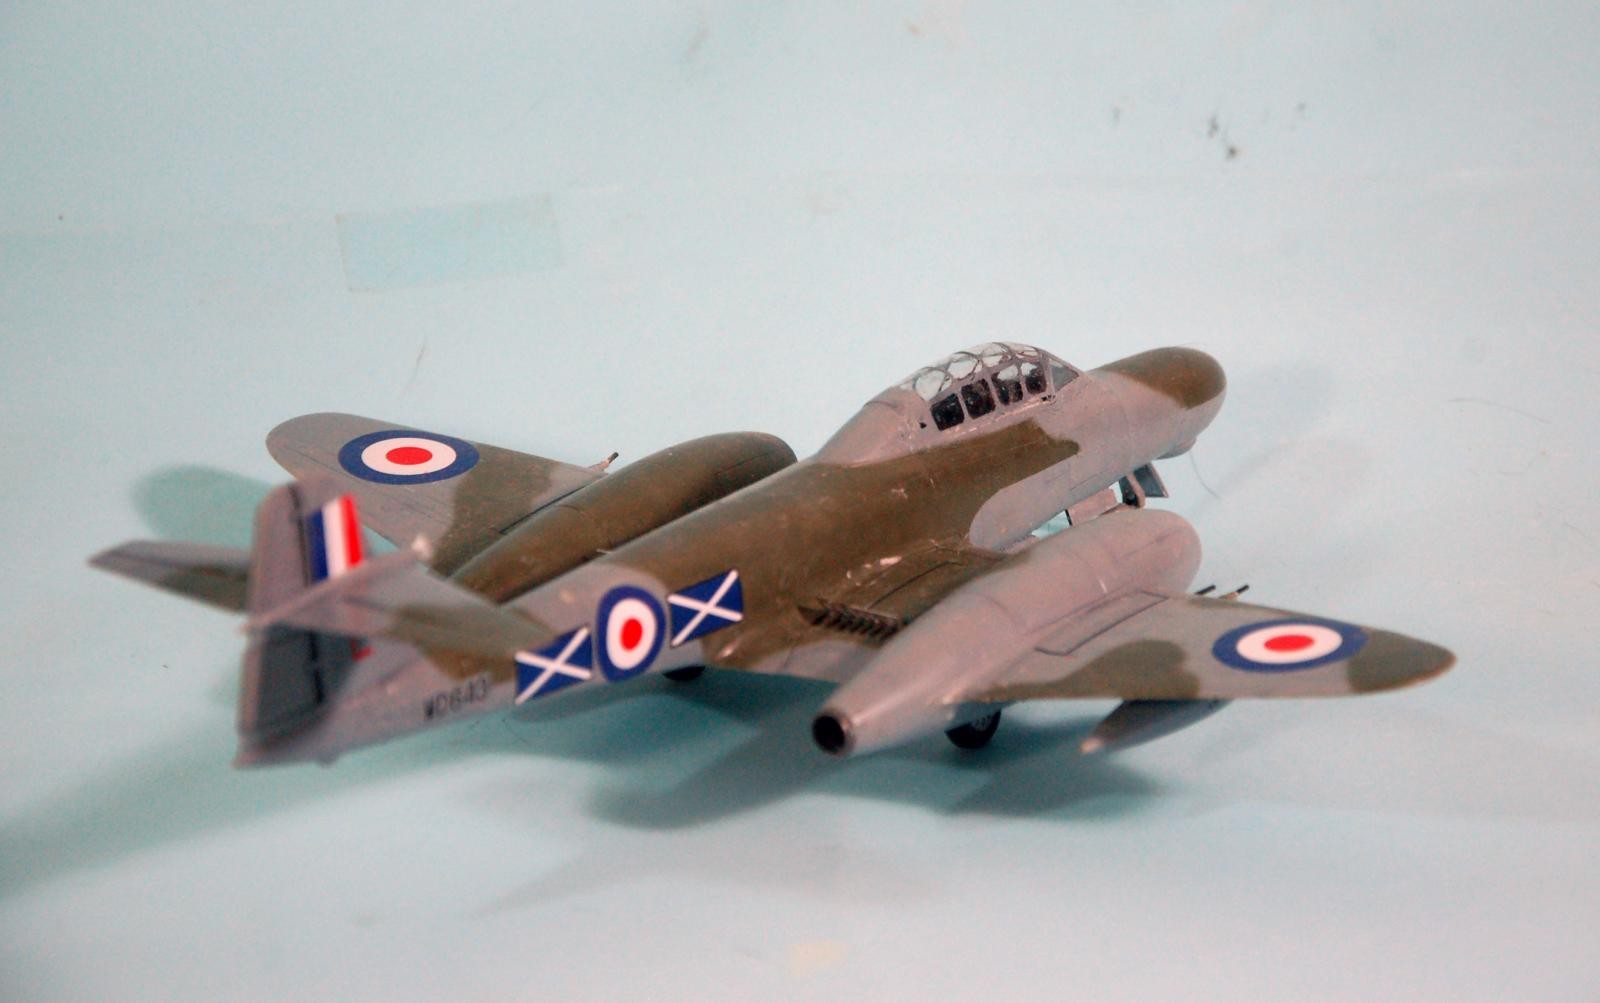
Fantastic! Great write up and history, Tom. I love what looks to me to be the 2 Scottish National flags by the fuselage roundels on each side.
The connection ought to be the basing of the 151 sqn in Leuchars, Scotland. Here are a few more variants of colourful squadron markings https://www.britmodeller.com/forums/index.php?/topic/12807-raf-markings/
Interesting conversion, Tom.
The Swedish target tug operator Svensk Flygtjänst used Danish NF.11 converted to TT.20s training Danish AAA. These were later tried to be smuggled to Biafra during the war in 1969. Interesting article and photos on these aircraft can be found here https://lae.blogg.se/2013/february/malgang-5-2.html
Thanks for the story and buildlog for this one @tcinla. Should I ever get the time, this conversion is now added to my wish-list.
interesting and tight looking "fallen star"
Don't recall ever seeing this version of the Meteor before (modeled or otherwise).
Nice job Tom. I ordered Kevin's set when he released it and the Airfix kit at the same time. Glad to see it worked out well.
A great build and write up.
Not the most elegant of airframes, but an interesting subject nonetheless! Nicely done as usual.