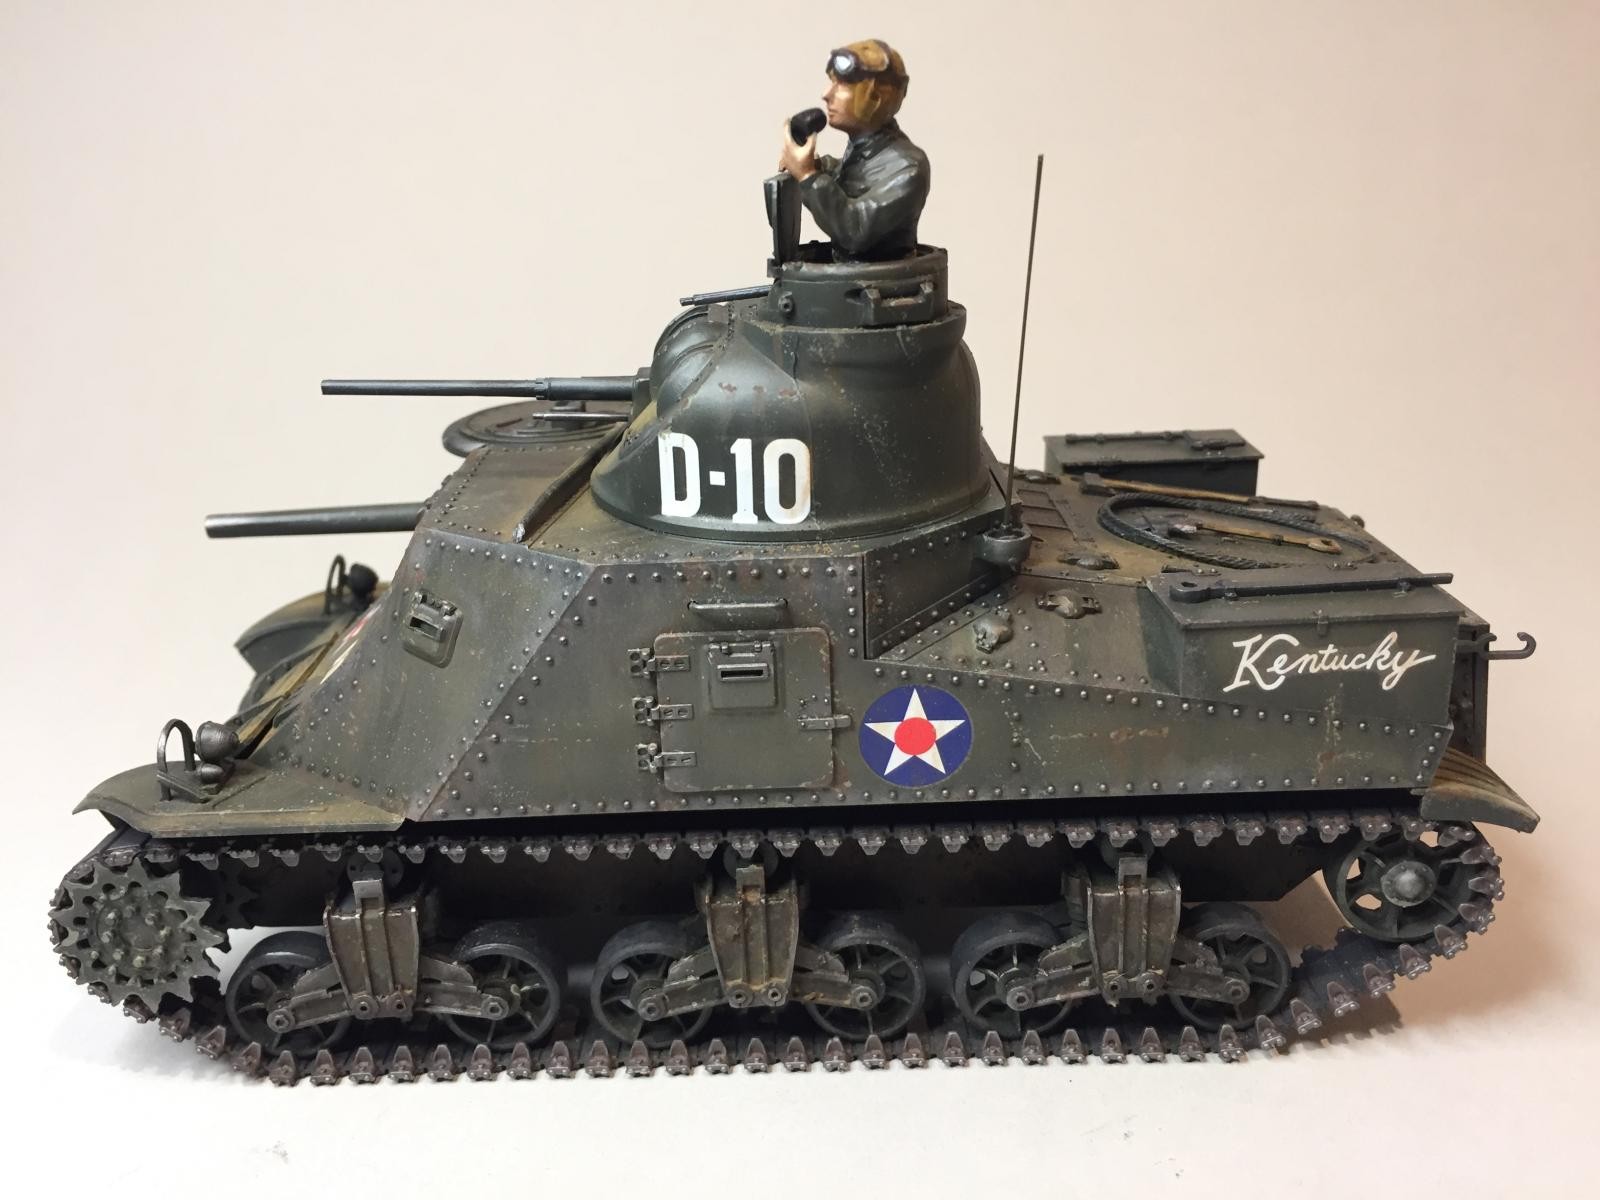
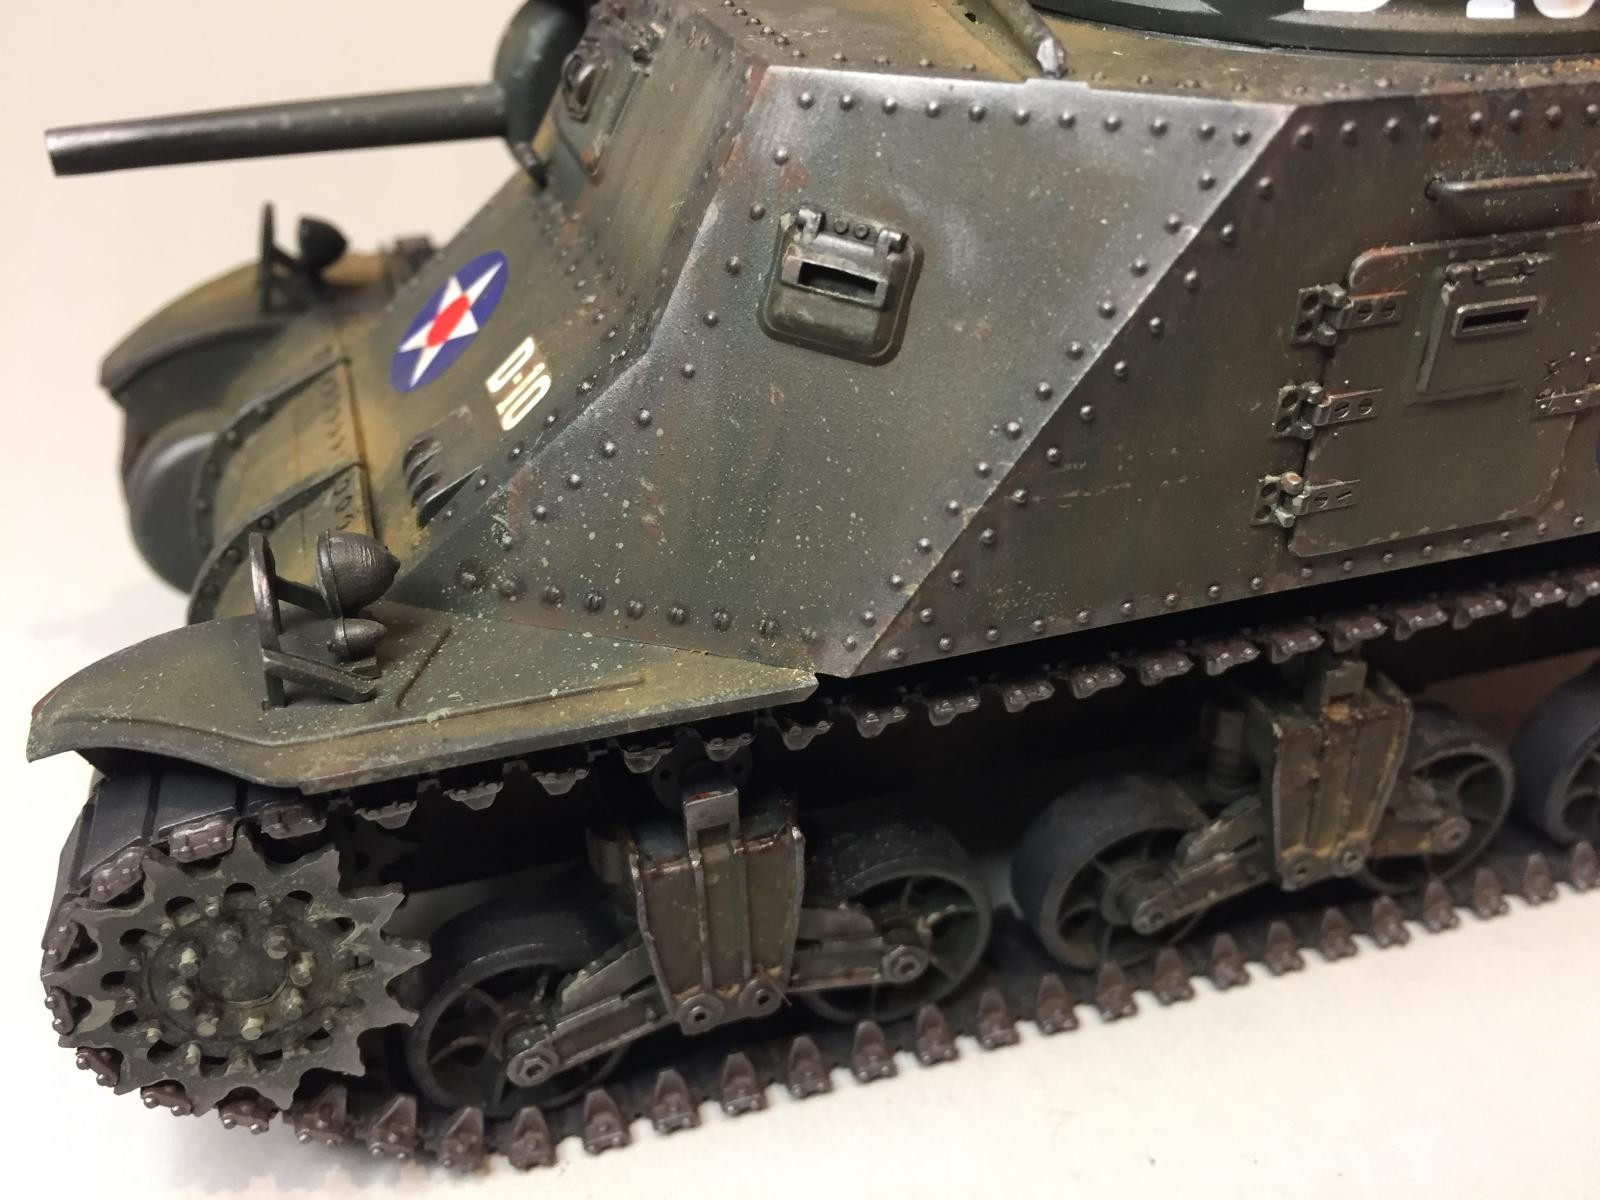
This is my take on the M3LEE.
The kit is from TAMIYA and it comes together very well. That said, I'm not too happy with the result. It might be the wrong weathering or color as it did not come out as good as I hoped it would.
Any ideas?
Geir, I have to agree with the others, it looks really good to me.
It could be the photos making it look a bit glossy, but maybe a light coat of dull clear to smooth out the look.
But if you're not happy with it...a great opportunity to build another one! LOL...
Keep up the good work.
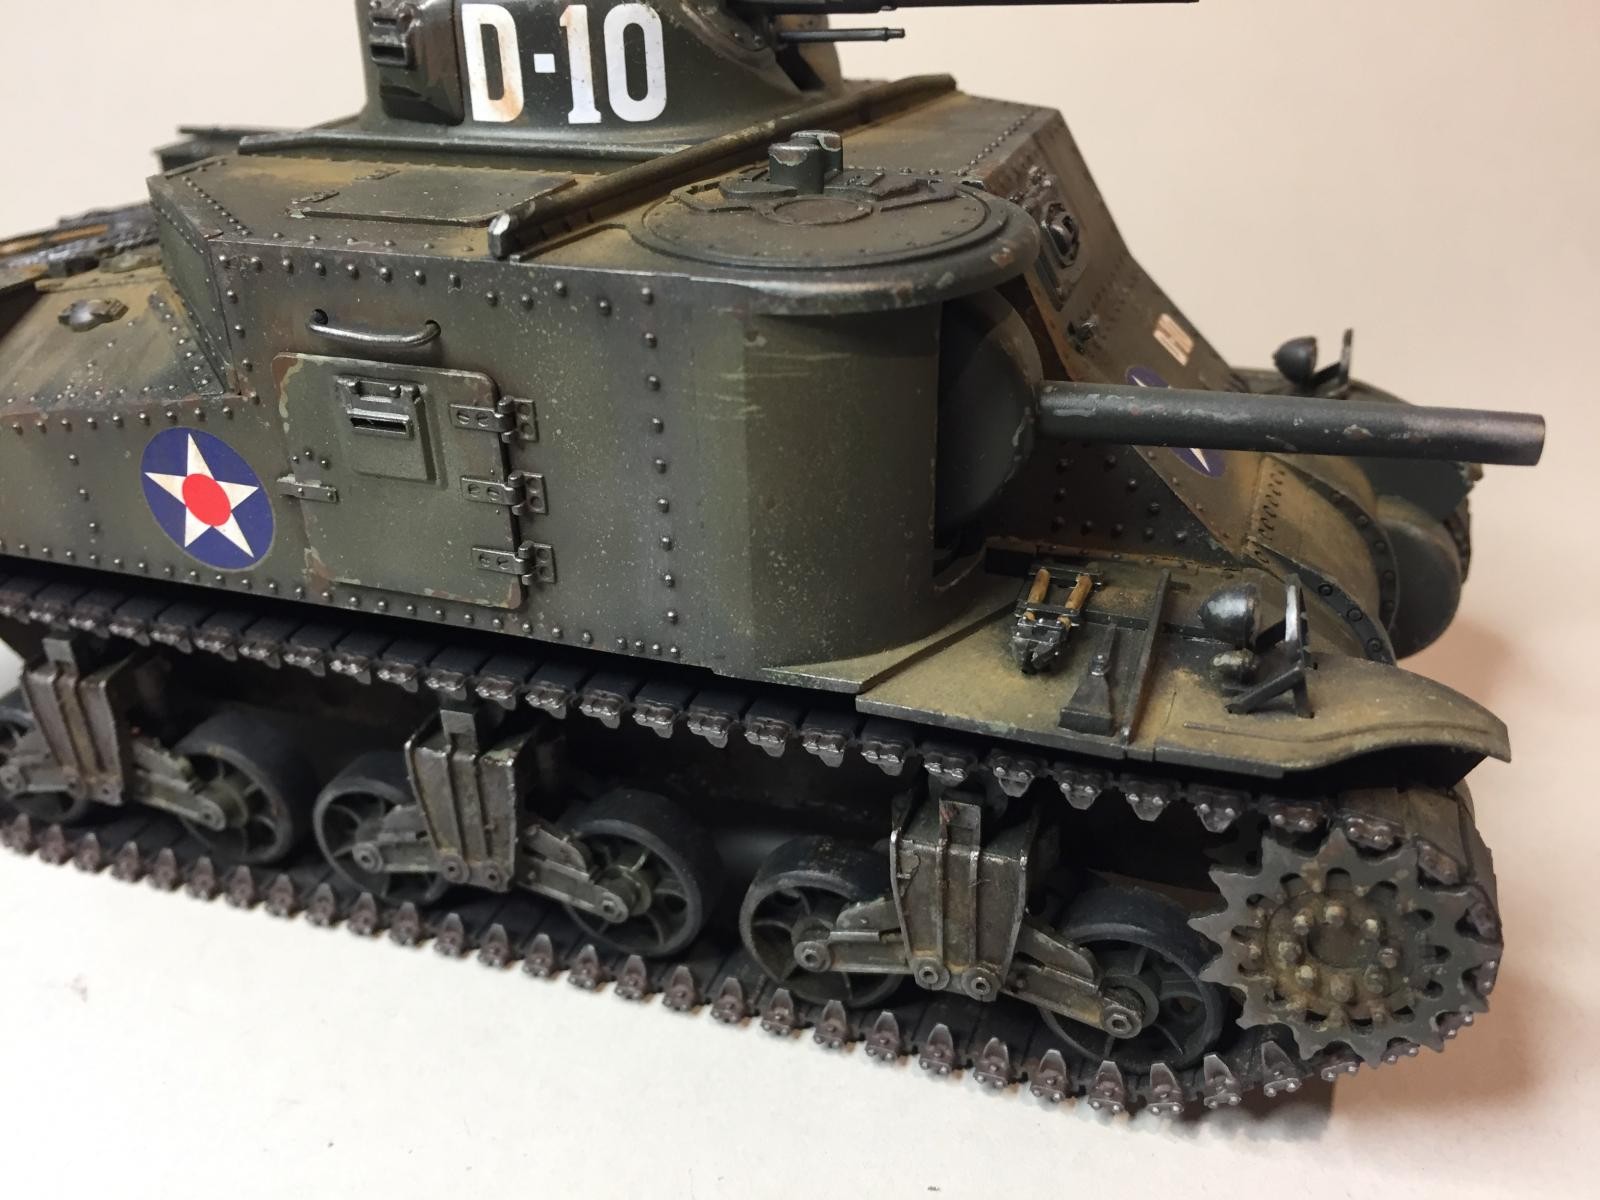
It's a bit too dark. You can see blotches of a more accurate color here and there, but something you did darkened it too much - what did you use for varnish?
Also, you have some decal silvering. That's easy to fix - just slice up the decal with a #11 blade, then slather in decal solvent - it will get rid of the air (which caused the silvering) and will settle down as it should be.
You might also want to use a more "flat" clear flat finish, which will lighten the result.
I've had this problem with a few of my models. I really think it's the too-glossy varnish that's at fault here.
Hi Tom
You are probably right in thinking the tank is too dark. The way I painted it goes like this;
Black AV primer
highlighted panels using white (as a reverse pre-shading)
then the Olive Drab.
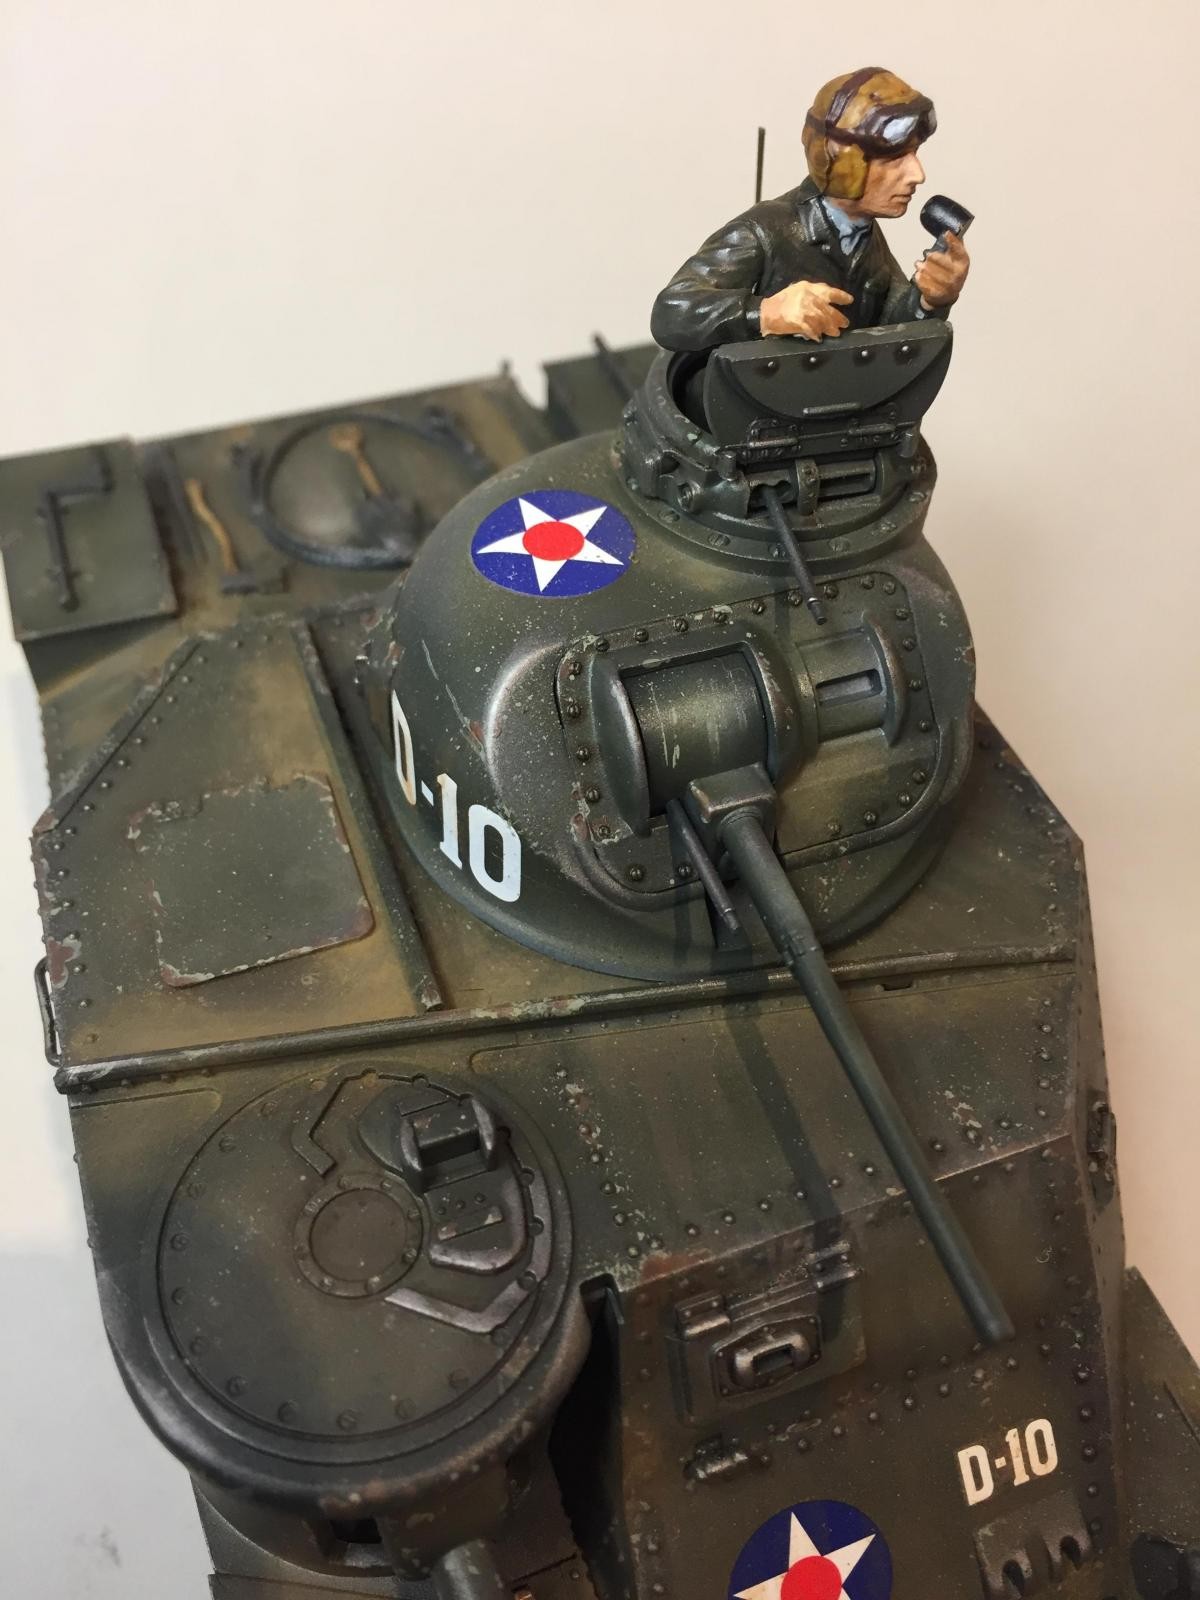
And this might be where I messed up, as I probably had a too thin coat to get the pre-shading to work. So the edges are way to dark and drown out my chipping.
I normally use Satin Varnish from Vallejo but will try some flat varnish for my next model.
Thank you, Tom, for your great input.
All that said, I like it! The Lee was one of those "caught in between" pieces of armor that has a distinct look. And hailing original from the Bluegrass state, I'm partial to your version here! 🙂
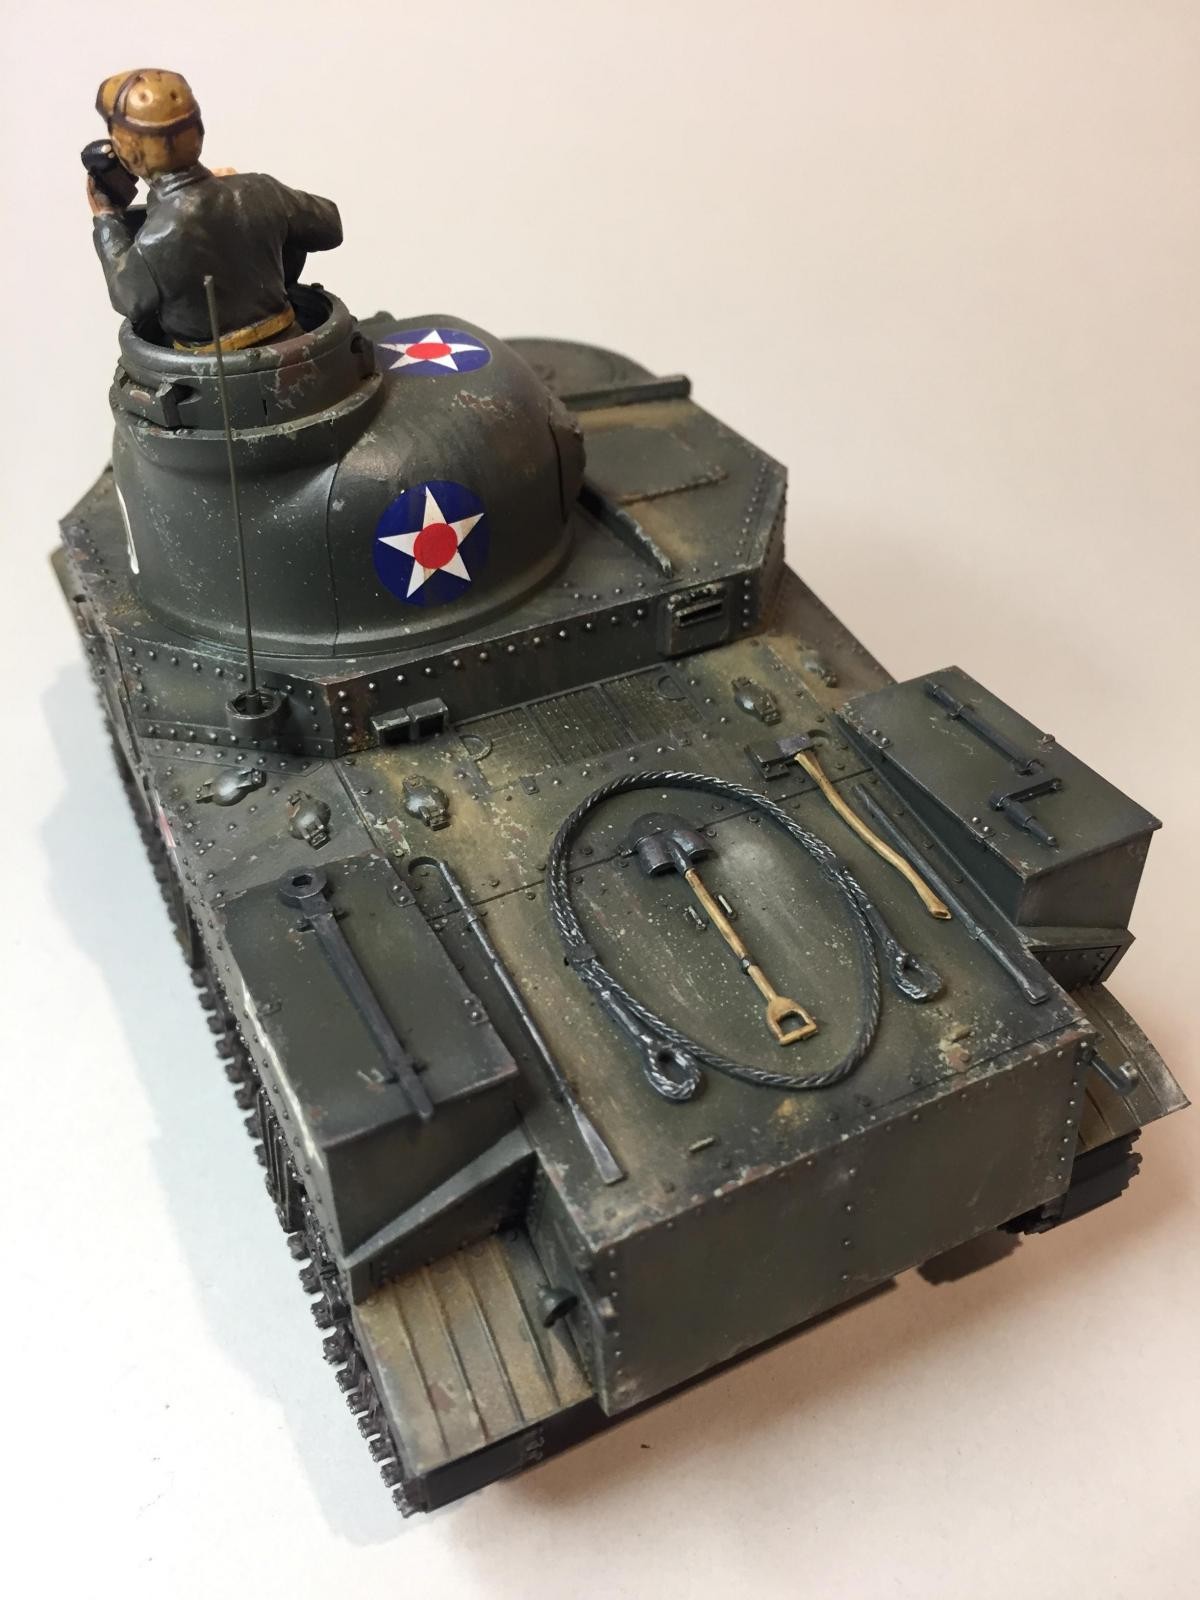
Tanks get doity from the bottom up. They are usually running thru mud or creating dust. The fenders most of them have tend to keep the mud/dirt/dried mud/dust under them. Look at lots of pics, color where you can find them. In dry conditions the dust gets on top too, but not so much the mud. Depends on where your tank is fighting. The US training grounds where I believe this tank of yours was VERY dusty. You can use sprayed on dust or pigments or both for this. Your model is well done, if painted a little dark. But it is a good base for more weathering. I use light earth types of tone for most dusty uses. There's a wide variety of pigments out there to have fun with. BTW that figure is nicely done, one thing I have no luck with.
Great tank, Geir! Mr. Koppos is correct about the way tanks get dirty. This tank of yours looks JUST like a somewhat used, but still new tank that just came off the washrack. That could even account for the slightly glossy darker shade. I guarantee you that when our tanks were parked after we came off an exercise and went to the washrack, our tanks had BETTER have been VERY clean!
By the way, I actually had 3 different M60 series tanks (2 M60A1s and an M60A3) that were pretty much that exact shade of dark green paint. They also had the white stars surrounded by a white circle and all white lettering. That was in 1979-1983 when I was the Tank Section Sergeant at the Engineer Board at Ft. Knox, Kentucky. Our two M151A1 jeeps had the same markings. You won't see THAT in the history books, but I have photos! LoL!
After you've applied your final color coat but before weathering or chipping, apply a coat of gloss, let dry at least overnight, then decal. The decals will be less likely to silver on a gloss coat. As you apply the decals, it also helps to use a wetting solution first, and a softener afterwards. Most decal and paint manufacturers have these two liquids in their lines, often called "sets" and "sols". When you later do the weathering, it will usually go more evenly when done on a gloss surface.
This kit is so old that I don't remember how Tamiya printed the decals, probably pretty thickly, but in general decals have a clear final coat (might be gloss, semi-goss/eggshell, or flat) that tapers a bit to its edge, giving a rounded and thinner edge. These older decals used to come with suggestions to trim the clear coat close to the art, as you've trimmed these decals, but unless it's absolutely necessary, that trimming removes the taper and produces unnatural, straight edges, leaving a definite, harsh edge. You can build up your final clear coat a little around this edge to soften it. Some paint firms make a product specifically for this purpose. Modern decals are printed much thinner and usually are not meant to be trimmed.
As much as possible, do weathering and chipping after the decals are applied and well dried out. The decals should be as weathered and chipped as the painted surface they sit on - clean decals on weathered surfaces look strange and less realistic.
Some modelers like a satin final finish as a more metallic look, but to what's left of my eyes, this is a parade-ground look. Photos of military vehicles in combat seldom if ever show anything but a dead flat finish due to dirt, from dust to mud, WWI to modern times. Unfortunately, there are very few dead flat clear finishes; most flat coats have some shine.
I use a lot of Vallejo products myself, but trying out a variety of clear flats to get the one that best suits how you spray it might be a useful exercise. It's very hard to get a clear finish that is as flat as the original color coat flat finish, which is by now covered with a gloss clear coat! Whatever clear flat you use, be sure the underlying coats are thoroughly dry.


It may help with ideas if you could say what you dont like about it. I think it looks well put together.
As I see it the chipping doesn't 'pop' as I think it should and I'm struggling to get the pigments looking natural. Any pointers will be appreciated 🙂
I don’t know, it looks pretty realistic to me. Maybe a little dark, but the chipping and distressed edges look good to me.
May the day come when I'm "not too happy" with such a result...
Geir, I have to agree with the others, it looks really good to me.
It could be the photos making it look a bit glossy, but maybe a light coat of dull clear to smooth out the look.
But if you're not happy with it...a great opportunity to build another one! LOL...
Keep up the good work.
Looks damn good to me! Nice job!
If there's anything "wrong" with it, you'll have to point it out, 'cause I sure can't find it. 🙂
It's a bit too dark. You can see blotches of a more accurate color here and there, but something you did darkened it too much - what did you use for varnish?
Also, you have some decal silvering. That's easy to fix - just slice up the decal with a #11 blade, then slather in decal solvent - it will get rid of the air (which caused the silvering) and will settle down as it should be.
You might also want to use a more "flat" clear flat finish, which will lighten the result.
I've had this problem with a few of my models. I really think it's the too-glossy varnish that's at fault here.
HTH
Hi Tom
You are probably right in thinking the tank is too dark. The way I painted it goes like this;
And this might be where I messed up, as I probably had a too thin coat to get the pre-shading to work. So the edges are way to dark and drown out my chipping.
I normally use Satin Varnish from Vallejo but will try some flat varnish for my next model.
Thank you, Tom, for your great input.
All that said, I like it! The Lee was one of those "caught in between" pieces of armor that has a distinct look. And hailing original from the Bluegrass state, I'm partial to your version here! 🙂
Good looking early tank, the tank from the movie 'Sahara'
Tanks get doity from the bottom up. They are usually running thru mud or creating dust. The fenders most of them have tend to keep the mud/dirt/dried mud/dust under them. Look at lots of pics, color where you can find them. In dry conditions the dust gets on top too, but not so much the mud. Depends on where your tank is fighting. The US training grounds where I believe this tank of yours was VERY dusty. You can use sprayed on dust or pigments or both for this. Your model is well done, if painted a little dark. But it is a good base for more weathering. I use light earth types of tone for most dusty uses. There's a wide variety of pigments out there to have fun with. BTW that figure is nicely done, one thing I have no luck with.
2 attached images. Click to enlarge.
This makes perfect sense Bill.
I should probably search more for reference photos than just slap the pigments on 🙂
Thank you for your input.
Great tank, Geir! Mr. Koppos is correct about the way tanks get dirty. This tank of yours looks JUST like a somewhat used, but still new tank that just came off the washrack. That could even account for the slightly glossy darker shade. I guarantee you that when our tanks were parked after we came off an exercise and went to the washrack, our tanks had BETTER have been VERY clean!
By the way, I actually had 3 different M60 series tanks (2 M60A1s and an M60A3) that were pretty much that exact shade of dark green paint. They also had the white stars surrounded by a white circle and all white lettering. That was in 1979-1983 when I was the Tank Section Sergeant at the Engineer Board at Ft. Knox, Kentucky. Our two M151A1 jeeps had the same markings. You won't see THAT in the history books, but I have photos! LoL!
@LA5OB
Thank you for your comment, Jeff.
I am probably one of many modelers that actually has never seen a tank in real life and up close 🙂
Geir, concerning the decals and surface finish:
After you've applied your final color coat but before weathering or chipping, apply a coat of gloss, let dry at least overnight, then decal. The decals will be less likely to silver on a gloss coat. As you apply the decals, it also helps to use a wetting solution first, and a softener afterwards. Most decal and paint manufacturers have these two liquids in their lines, often called "sets" and "sols". When you later do the weathering, it will usually go more evenly when done on a gloss surface.
This kit is so old that I don't remember how Tamiya printed the decals, probably pretty thickly, but in general decals have a clear final coat (might be gloss, semi-goss/eggshell, or flat) that tapers a bit to its edge, giving a rounded and thinner edge. These older decals used to come with suggestions to trim the clear coat close to the art, as you've trimmed these decals, but unless it's absolutely necessary, that trimming removes the taper and produces unnatural, straight edges, leaving a definite, harsh edge. You can build up your final clear coat a little around this edge to soften it. Some paint firms make a product specifically for this purpose. Modern decals are printed much thinner and usually are not meant to be trimmed.
As much as possible, do weathering and chipping after the decals are applied and well dried out. The decals should be as weathered and chipped as the painted surface they sit on - clean decals on weathered surfaces look strange and less realistic.
Some modelers like a satin final finish as a more metallic look, but to what's left of my eyes, this is a parade-ground look. Photos of military vehicles in combat seldom if ever show anything but a dead flat finish due to dirt, from dust to mud, WWI to modern times. Unfortunately, there are very few dead flat clear finishes; most flat coats have some shine.
I use a lot of Vallejo products myself, but trying out a variety of clear flats to get the one that best suits how you spray it might be a useful exercise. It's very hard to get a clear finish that is as flat as the original color coat flat finish, which is by now covered with a gloss clear coat! Whatever clear flat you use, be sure the underlying coats are thoroughly dry.