Review: The new Eduard P-51
As it turns out, there is more to the P-51D than many modelers have previously thought. There are minor but important differences between each sub-type, from whether they have a dorsal fin or not, to whether or not they have fabric-covered or metal elevators (which changes the angle of incidence of the horizontal stabilizer), and several other small details. All of these differences have been noted by Eduard and are up on their website in detail with drawings to show what they're talking about. And it appears that Eduard is pretty well committed to producing kits of the P-51D that will take note of those changes. This kit is not a “generic” P-51D as most others before have been.
THE KIT
P-51Ds have been around for about as long as there have been plastic scale model kits. In 1/48, the first to approach accuracy was the old Hawk (now Testors) P-51D released in the early 60s. This was as good as it got until the 1970s, when Otaki and Revell released kits; the earlier Hawk/Testors kit was actually more accurate in overall shape than either of these releases. The first P-51D kit to be really accurate regarding shape was the still-available Hasegawa 1/72 kit, released in the mid-70s, though nowadays it needs a resin cockpit and a vacuformed canopy to really be competitive with releases in that scale like the recent Airfix kit, considered by many to be the best P-51D in 1/72. Hasegawa took another bite of the apple in 1992 with a P-51D in 1/48 that immediately replaced the previous kits regarding accuracy and detail. Tamiya came along in 1994 with what became the “gold standard” for P-51Ds in 1/48, and topped that in 2012 with a 1/32 kit that is universally recognized as the best P-51D in any scale. None of the other 1/32 kits, such as the earlier Revell kit or the still-horrid Dragon release, one of the worst kits ever released by any company, or the Hasegawa kit from the late 70s or the Trumpeter kit from around 10 years ago can really be considered competitive with that kit. In 1/24, the only kit out there is from Airfix, released some 40 years ago, which is at least outline accurate.
Moving on, Airfix released a 1/48 P-51D in 2018 that raised the bar considerably from the Tamiya kit. It was the first in any of the smaller scales to have the wheel well reproduced accurately, and provided the earlier field-applied dorsal fin of the P-51D-5 and the later factory fin that showed up with the P-51D-10. It's relatively easy to build and makes up into an attractive model.
Eduard announced two years ago that they were going to do a P-51D that would rank up with their new-release Bf-109s, Fw-190s and Spitfire kits. Based on their recent record, anticipation has been high about the kit, which has finally been released this month in a Special Edition collector's item timed to coincide with the 2019 IPMS-USA convention held in Chattanooga TN. They have announced an early P-51D-5NA without the dorsal fin will be released in October, and a Royal Class kit in December that will have later versions. 2020 will undoubtedly see more releases by Eduard.
So, what's there?
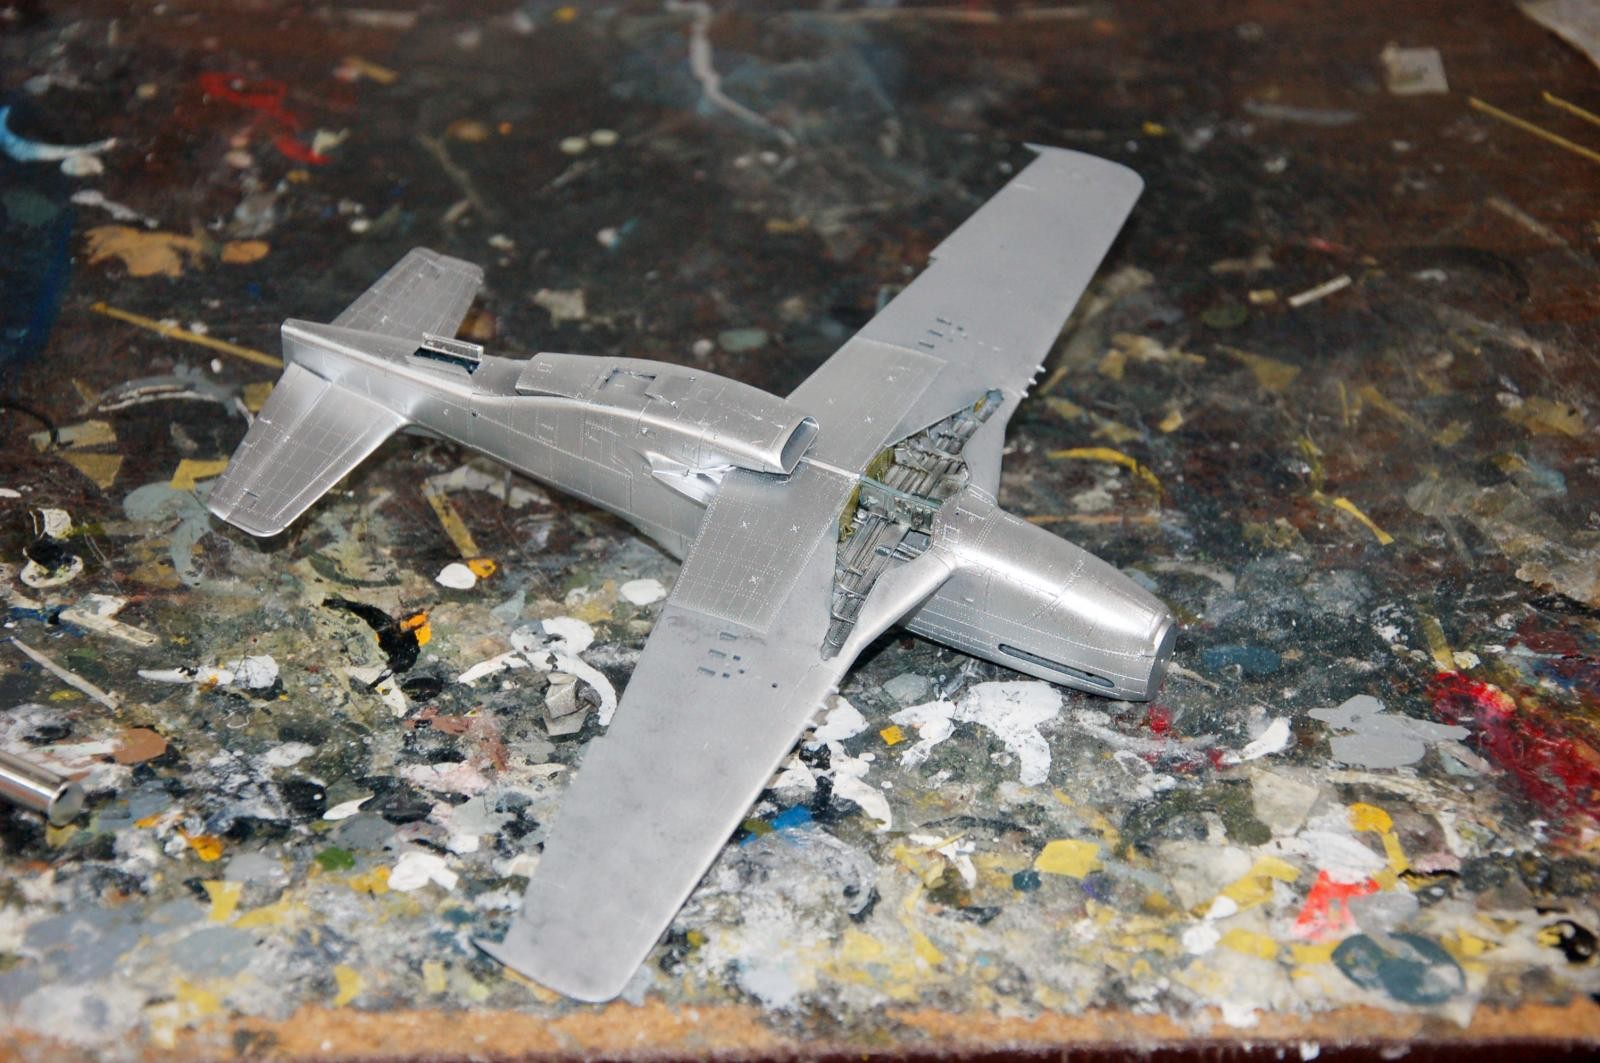
Opening the box and examining the parts, one can see that Eduard has definitely raised the bar very high for P-51Ds in 1/48 scale. The surface detail is stunning, even more petite than what was done in the recent Tempest V release. Many modelers have complained about the addition of rivets, since the P-51D is well-known for being flush-riveted throughout. I can only say as someone who has been around Mustangs since 1972 that this surface detail is not excessive - with the sun at the right angle on a Mustang, it is possible from a distance of 6-8 feet to see the rivets, as they are on this model. It turns out that, once the model has a coat of paint on it, the rivets in the surface detail are only visible from about a foot away or less, and under good light.
Past that, the kit exudes quality in the molding of the parts. The wheel well alone has 13 parts, giving the best detail of this feature in any kit outside the 1/32 Tamiya release. Three different canopies are included: the early North American - Los Angeles “teardrop” canopy, the later NA-Los Angeles release that provided more headroom for the pilot, and the “Dallas canopy.” Three propellers are included: the Hamilton-Standard cuffed and uncuffed props, and the Aeroproducts prop associated with the P-51K. There are two slightly-different-shaped spinners, one for the Hamilton-Standard and one for the Aeroproducts.
A separate sprue includes both the 75-gallon metal drop tanks and the 108-gallon paper tank used in the ETO are supplied. I was surprised that the metal 110-gallon tank used in the MTO and Pacific wasn't included. 250-pound and 500-pound bombs as well as ten 5-inch HVARs on zero-length launchers are also on this sprue.
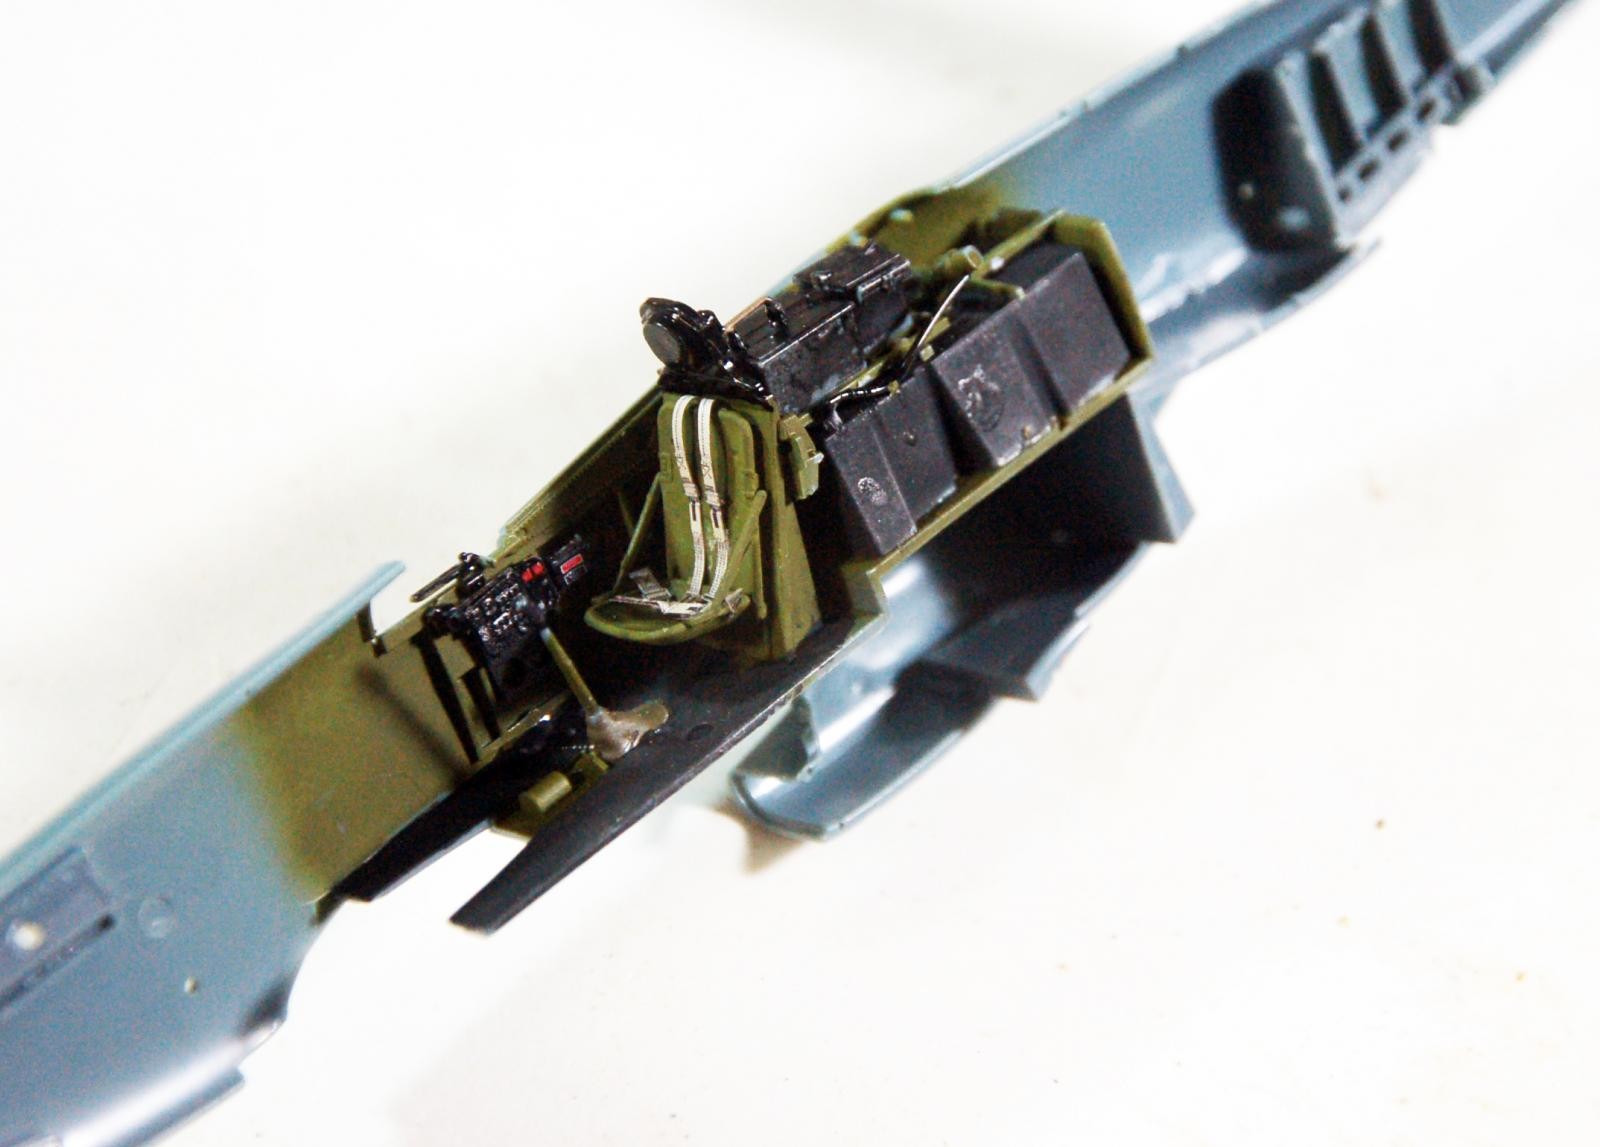
For the cockpit, there are parts for the early and late main instrument panel, and the three different side panels associated with the three major production changes in the cockpit. The early and late seats are also there. The photo-etch panel provided is strictly for the airplane up through the D-15. Both the fabric-covered and later metal-covered elevators are provided. All control surfaces are separately molded, allowing a modeler to pose their model dynamically.
All in all, it's possible with what's in the kit to make every version of the P-51D from the D-5 with fillet through the D-30, and the P-51K and Mustang IV, both Los Angeles and Dallas production, for the modeler who knows what's what regarding details. If you don't know what's what, Eduard has all the information needed on their website. In terms of quality of production, I have to score this as the P-51D kit this Mustang fanatic has been looking for, for as long as I have been building plastic models.
CONSTRUCTION
As with all the recent Eduard releases, this kit demands you bring as much modeling excellence to the project as it does. All parts fit very precisely, and any sloppiness in cleaning up all sprue nubs, or hamfistedness in assembly, will lead to multiple problems down the line. Take care in preparation of parts, take care in assembly, commit to the revolutionary act of following the instructions, and the result will be one of the best models you have ever created. If you do it right, you won't be using any filler anywhere (other than on the wings if you so choose).
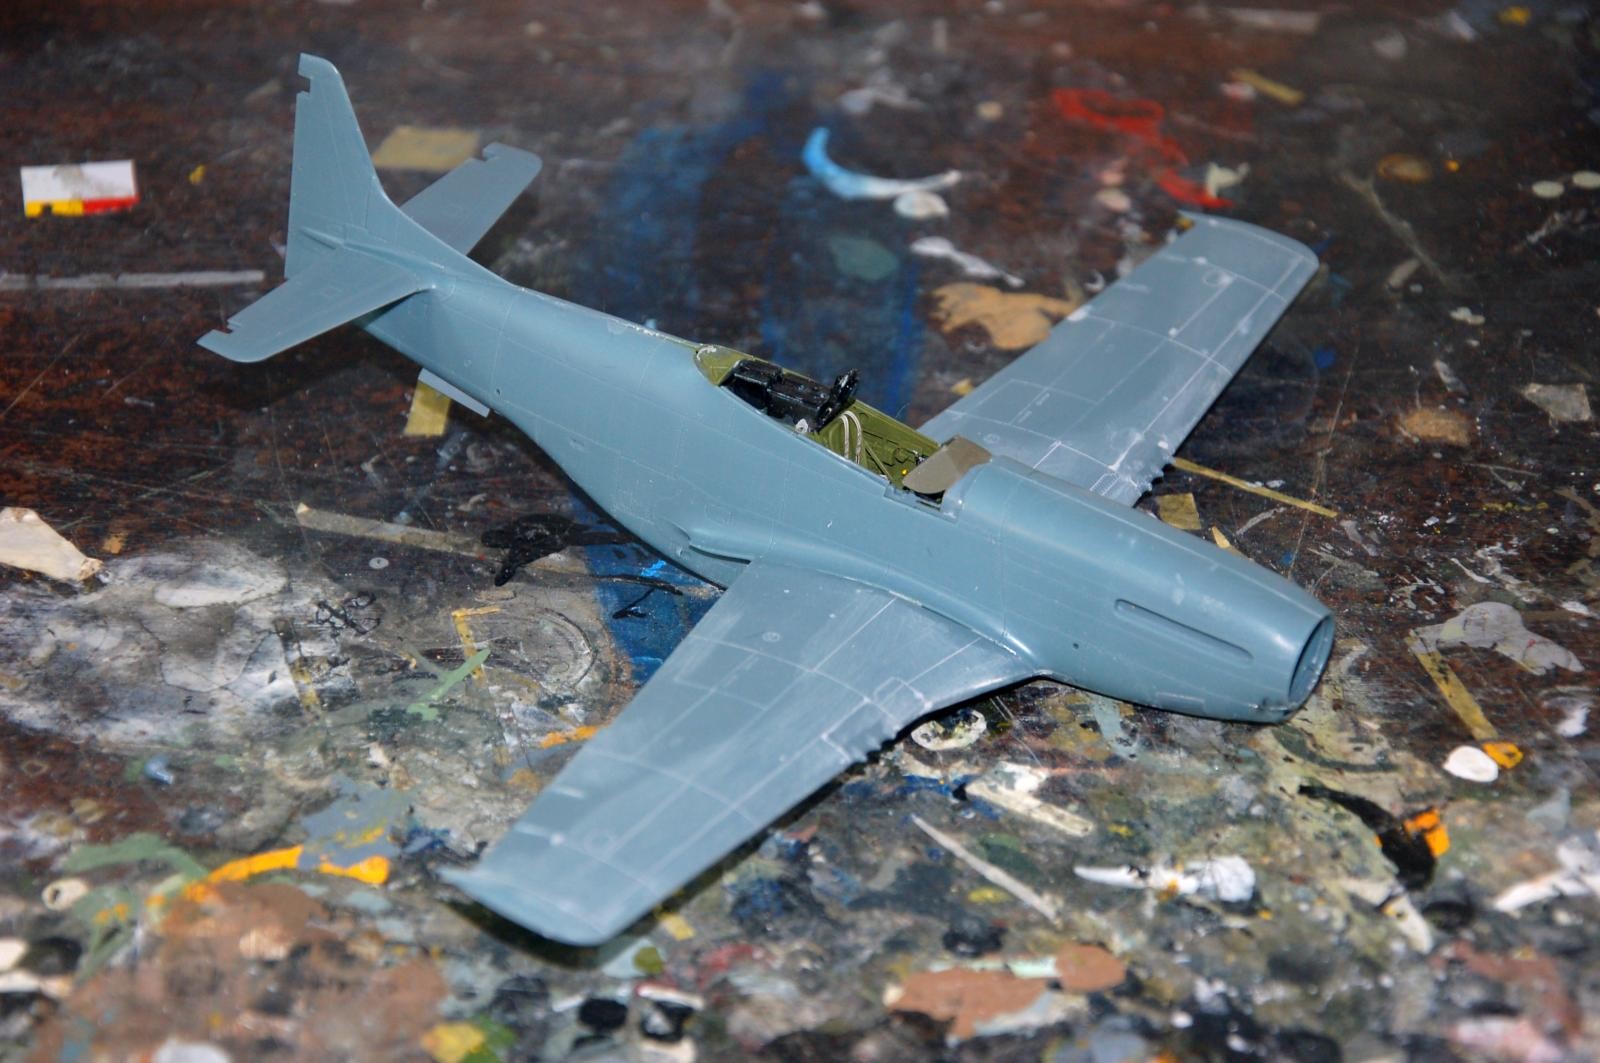
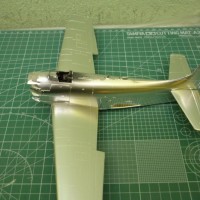
Construction begins with the cockpit. I painted all the parts on the sprue before further assembly, following the kit instructions regarding colors. There are a myriad of small parts, so take care in separating them from the sprue lest you feed the carpet monster or they fly off into the Department of Lost. Fortunately, my new government-supplied eyeballs (with 20/20 vision restored) allowed me to put the optivisor aside, but if you have one (and haven't had the lens-correction operation) you're probably going to need it to get everything done. The result is a very good looking cockpit. I don't think the resin guys are going to beat this. I used the photo-etch instrument panel and most of the other bits (other than those way too small to make out, and there's quite a few of them for the more determined modeler), as well as the very nice seat belts. Since I was doing an updated P-51D-5 that was still around in March 1945, I used the K-14 gyro gunsight.
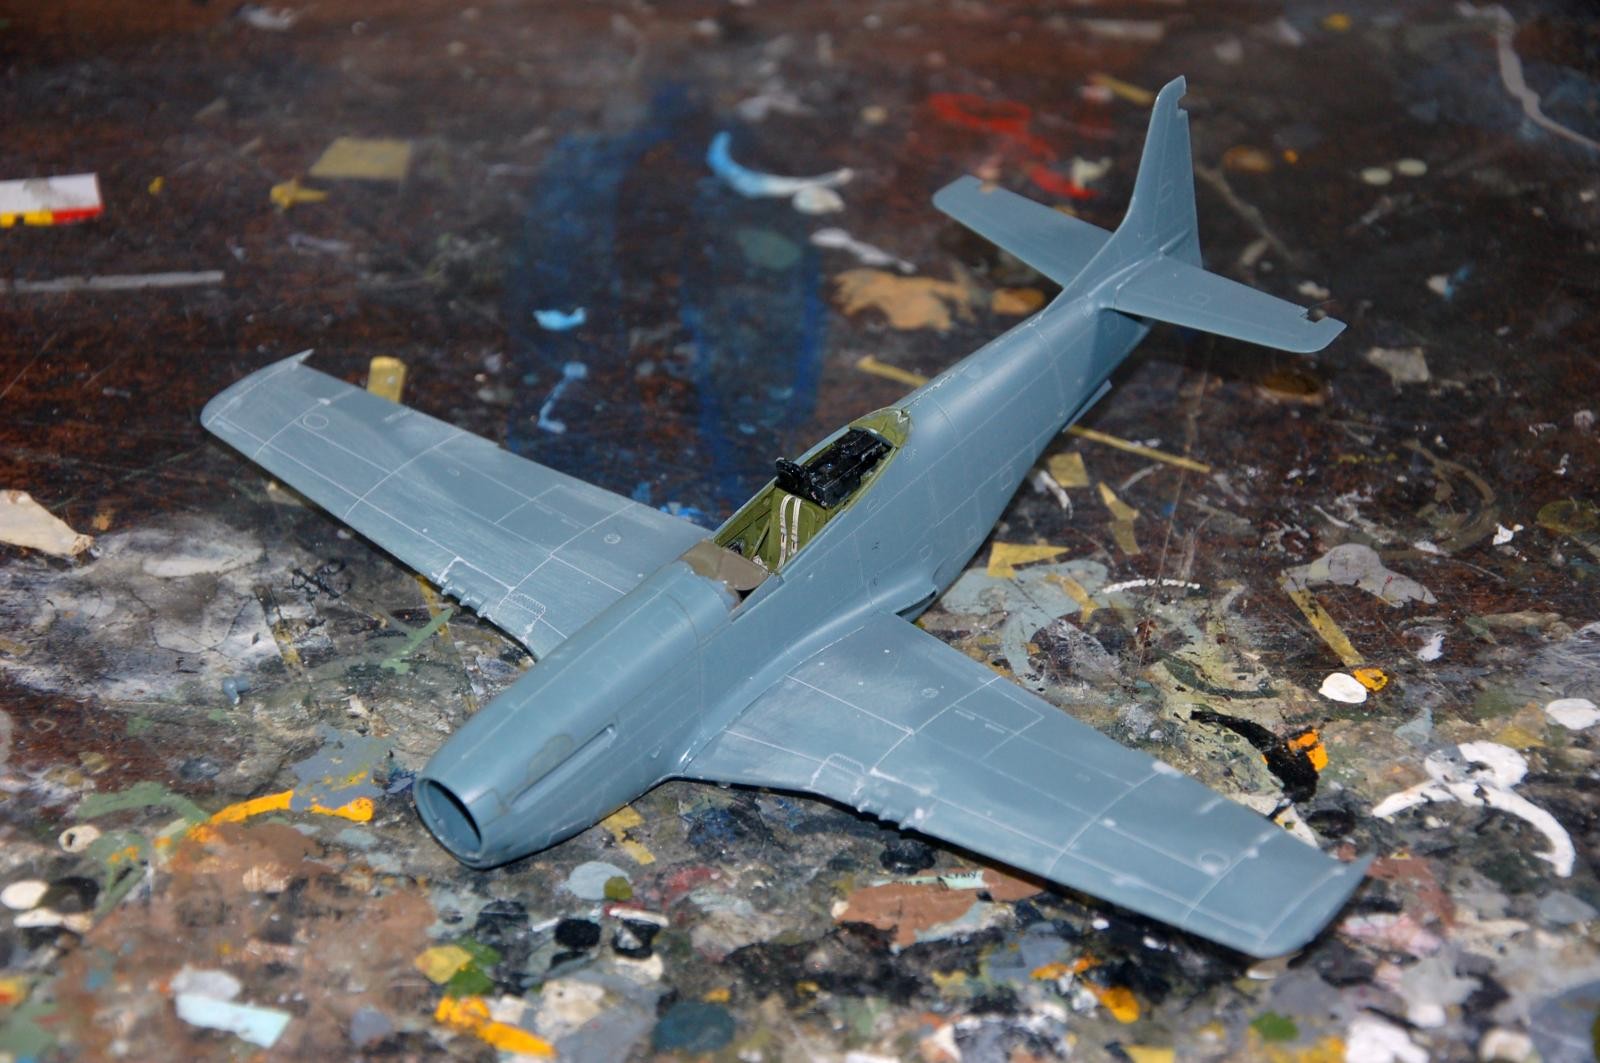
I followed the instructions for attaching all the other fuselage interior parts, and when it came time to bring the fuselage halves together, all was well. I only needed a light scrape down of the centerline top and bottom to get rid of minor glue build-up.
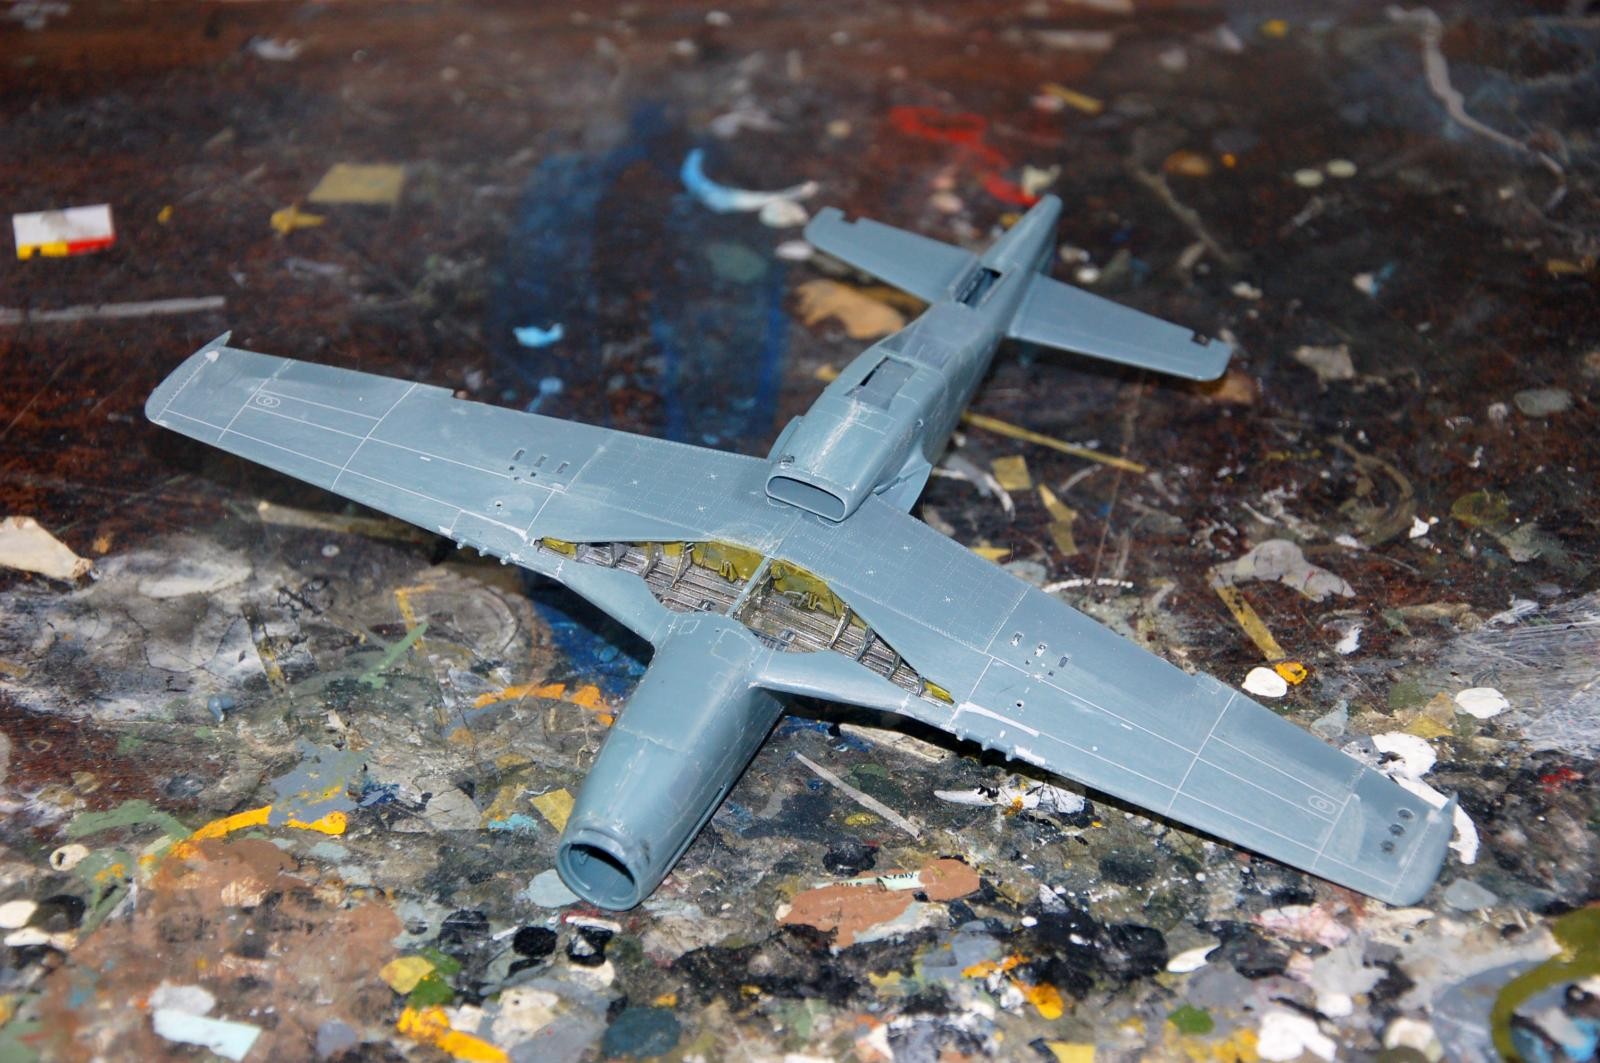
As I noted, the wheel well includes 13 parts. Since I was doing an early P-51D, I painted the main spar yellow zinc-chromate and the rest of the parts with Vallejo White Aluminum to simulate aluminum lacquer. Once it was all assembled, I brushed some Tamiya smoke over everything to simulate oil and dirt and to “pop out” detail.
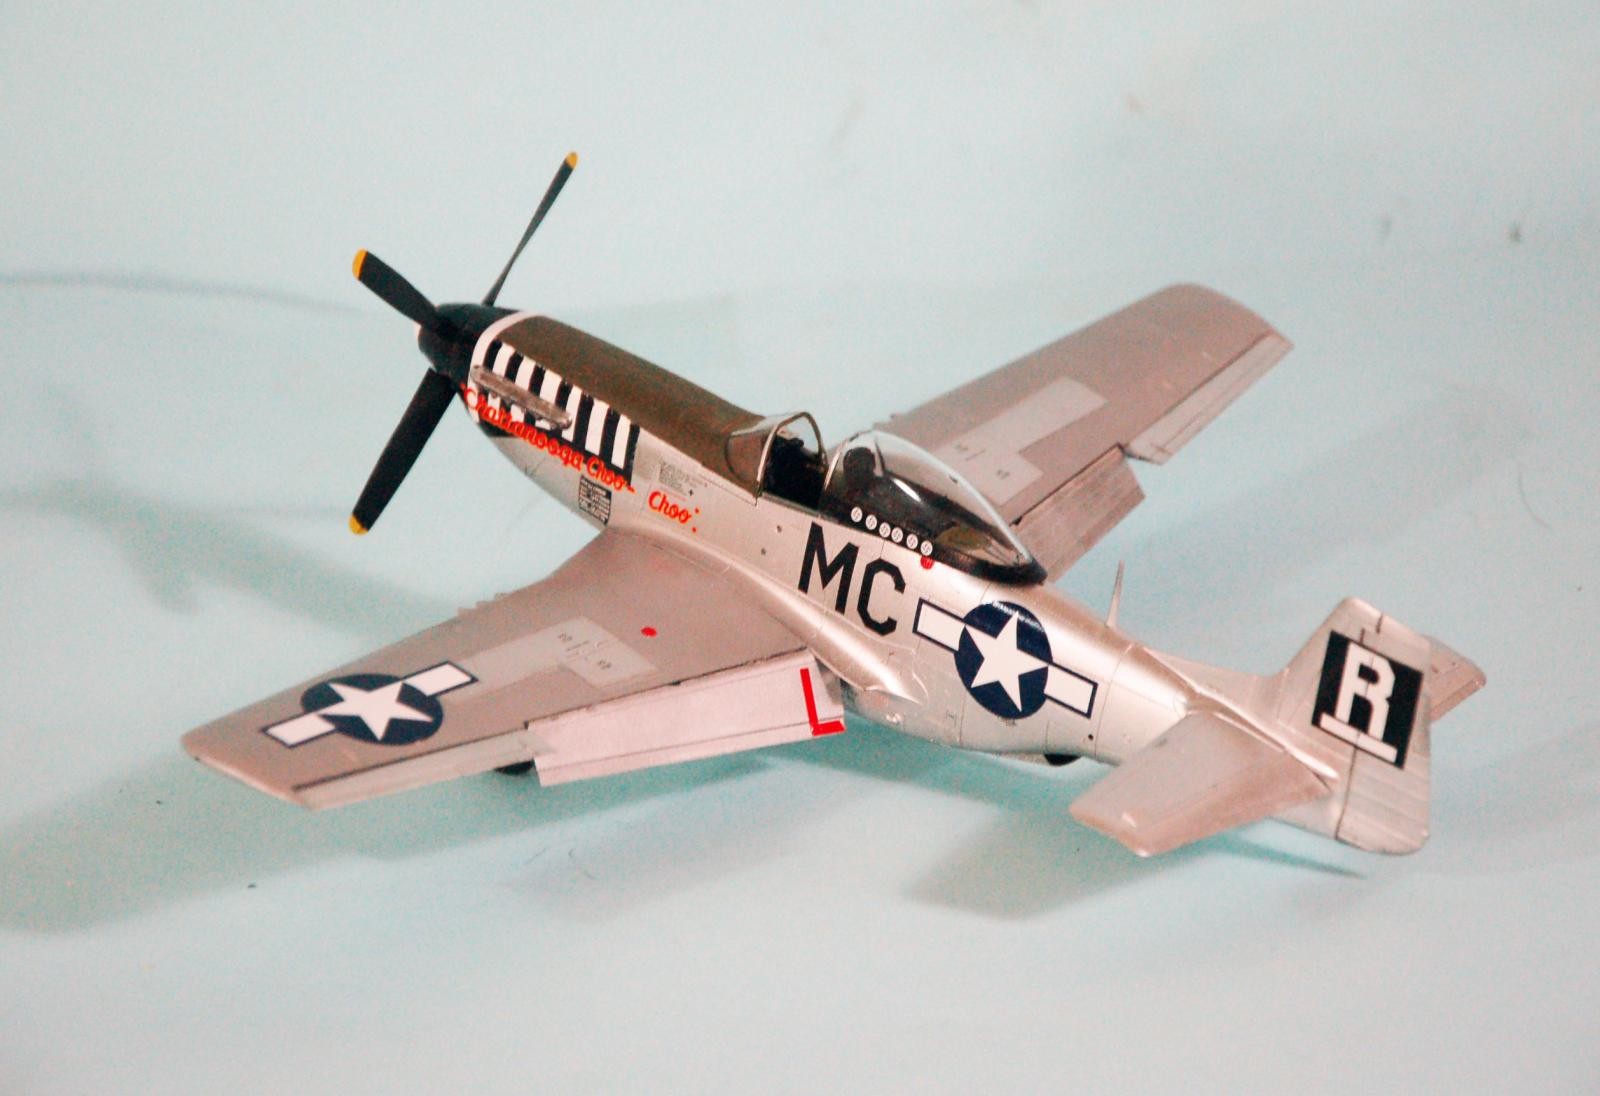
The wing came together without difficulty.. I particularly liked the separate section for the machine guns, which obviated having to clean up a seam through them. I decided to take the effort to do the puttied wing. I used Mr Surfacer over the panel lines, then sanded them down. I had to go over several of them to fully seal the panel lines, and ended up using CA glue for this. On future builds, I will do this with CA glue to begin with. For those who don't want to go to this effort, the panel lines are petite enough you can get away with just painting the wing an “aluminum lacquer” color - I've seen puttied wings on restored P-51s and you can still note panel lines from close up.
Attaching the wing and fuselage sub-assemblies presented no problems, and I finished off with attaching the horizontal stabs and the radiator exhausts. I kept the control surfaces off for the painting. Again, since this model was of a P-51D-5 that had survived into 1945, I used the metal elevators.
COLORS & MARKINGS
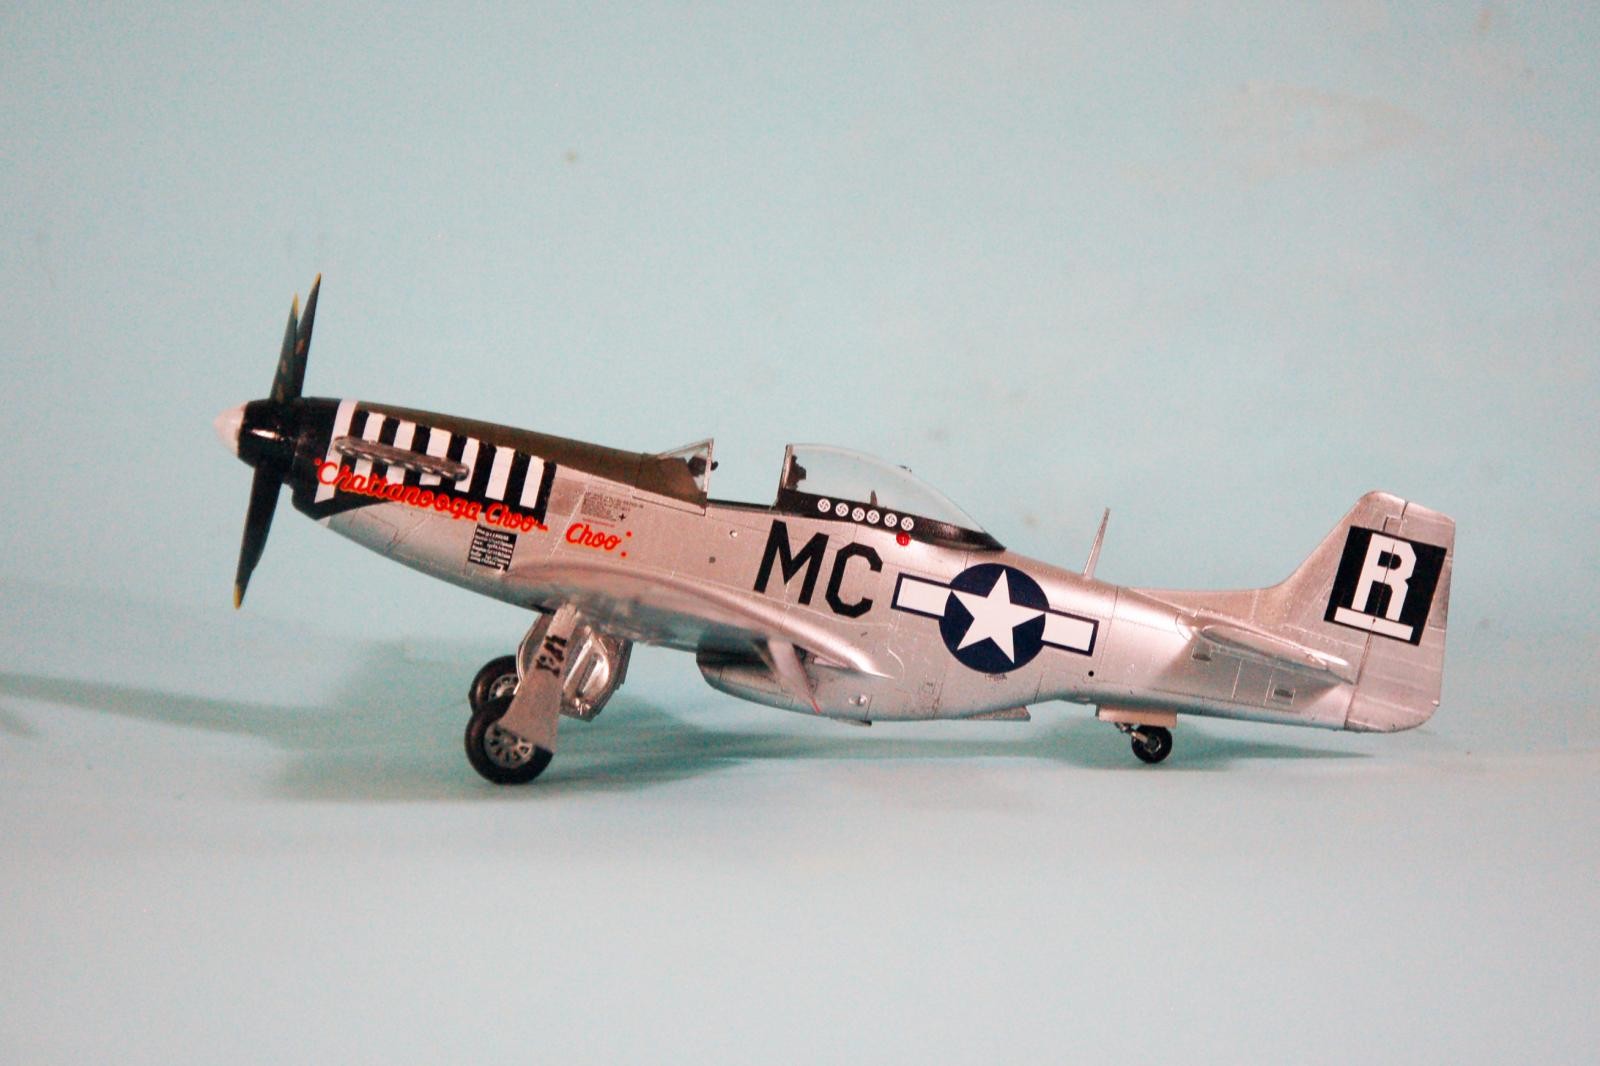
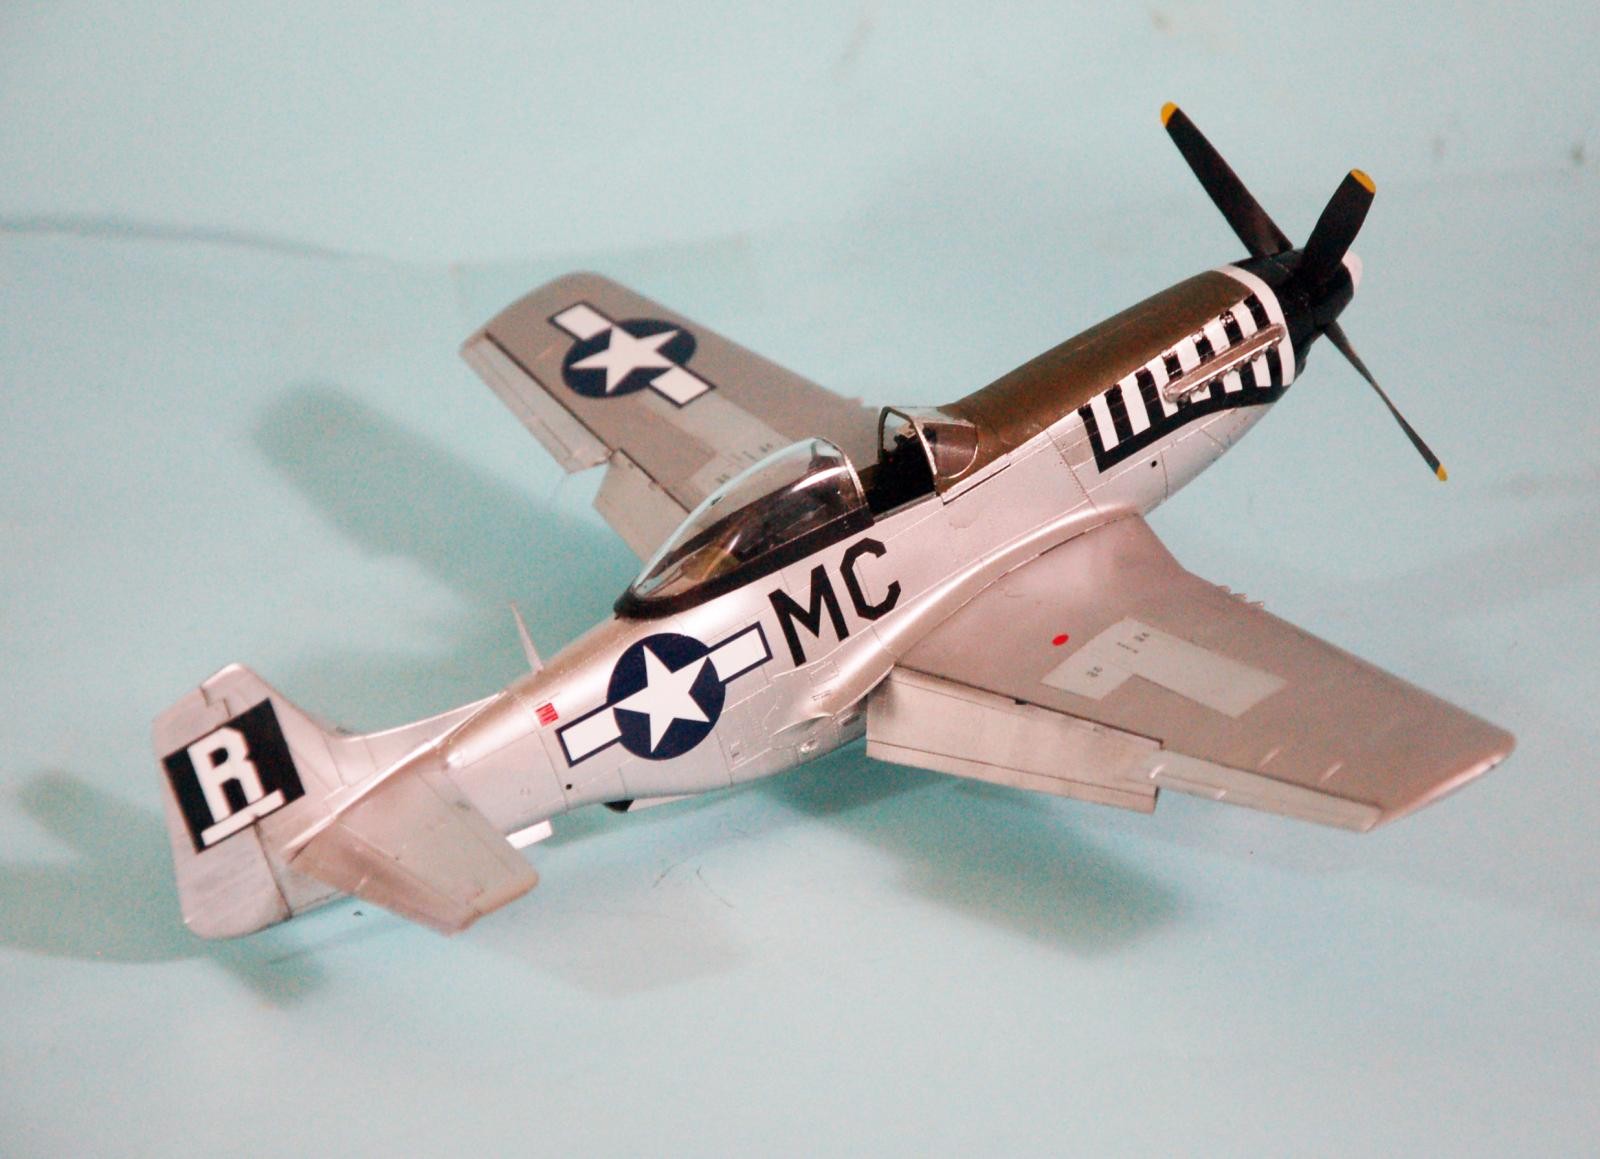
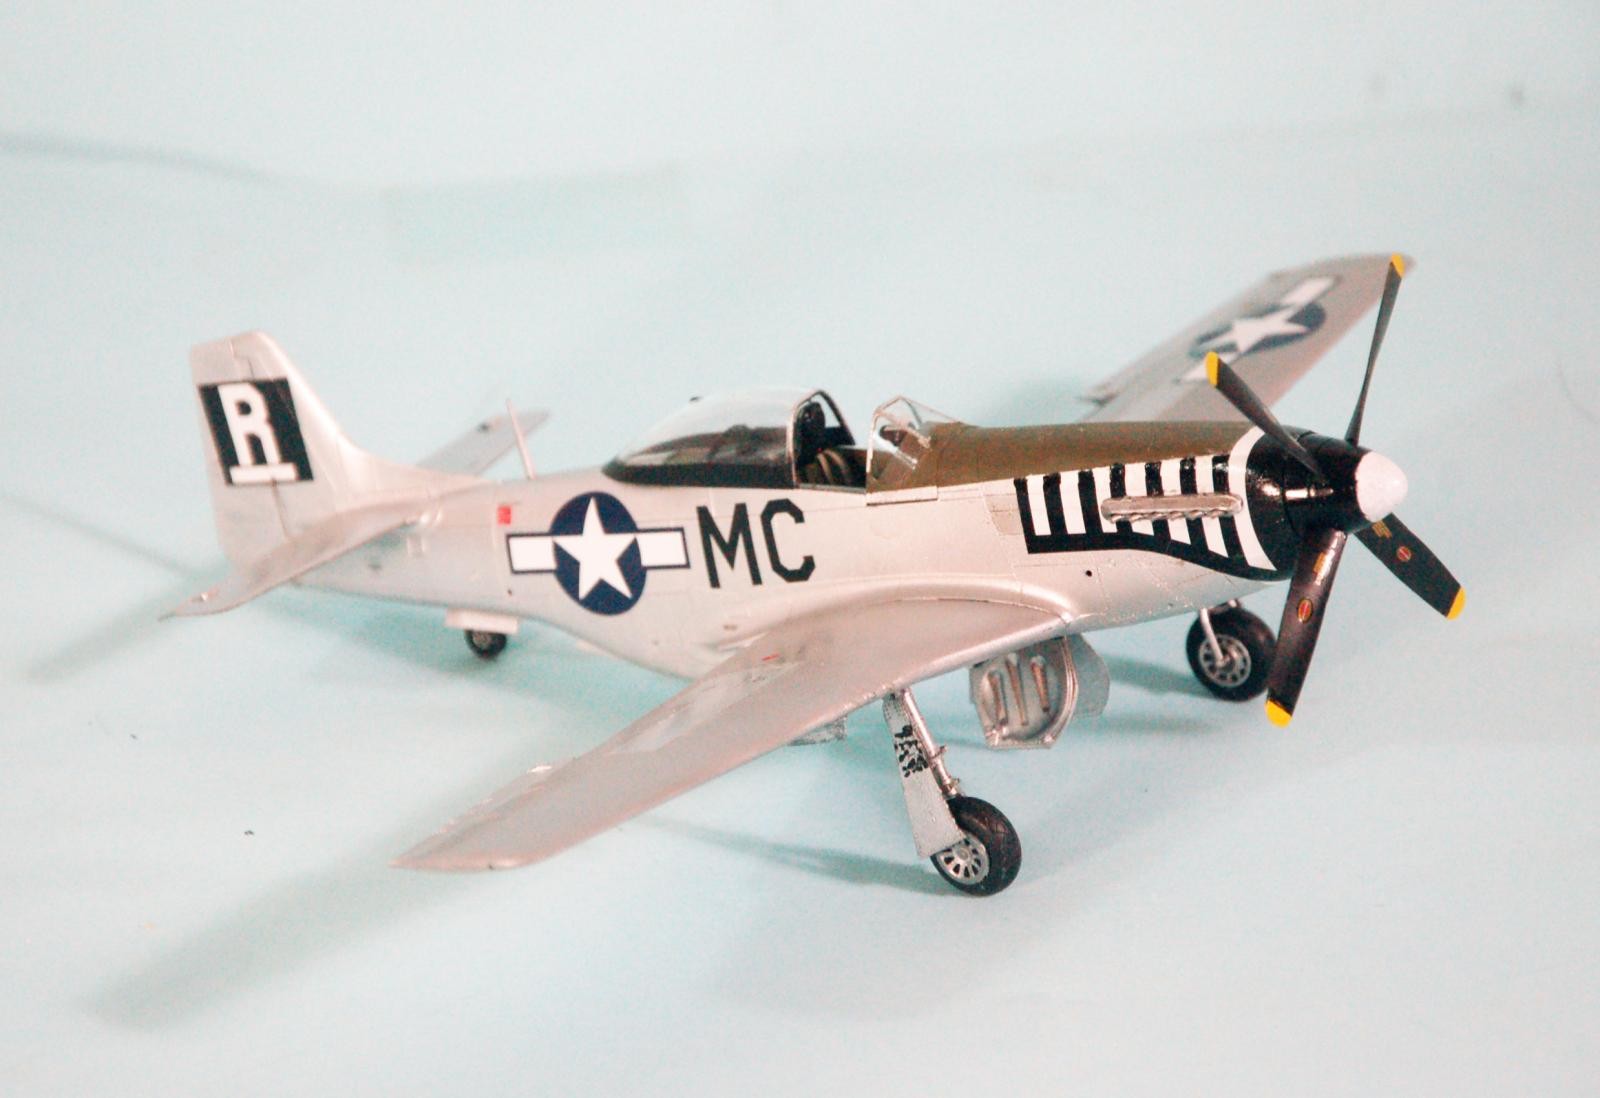
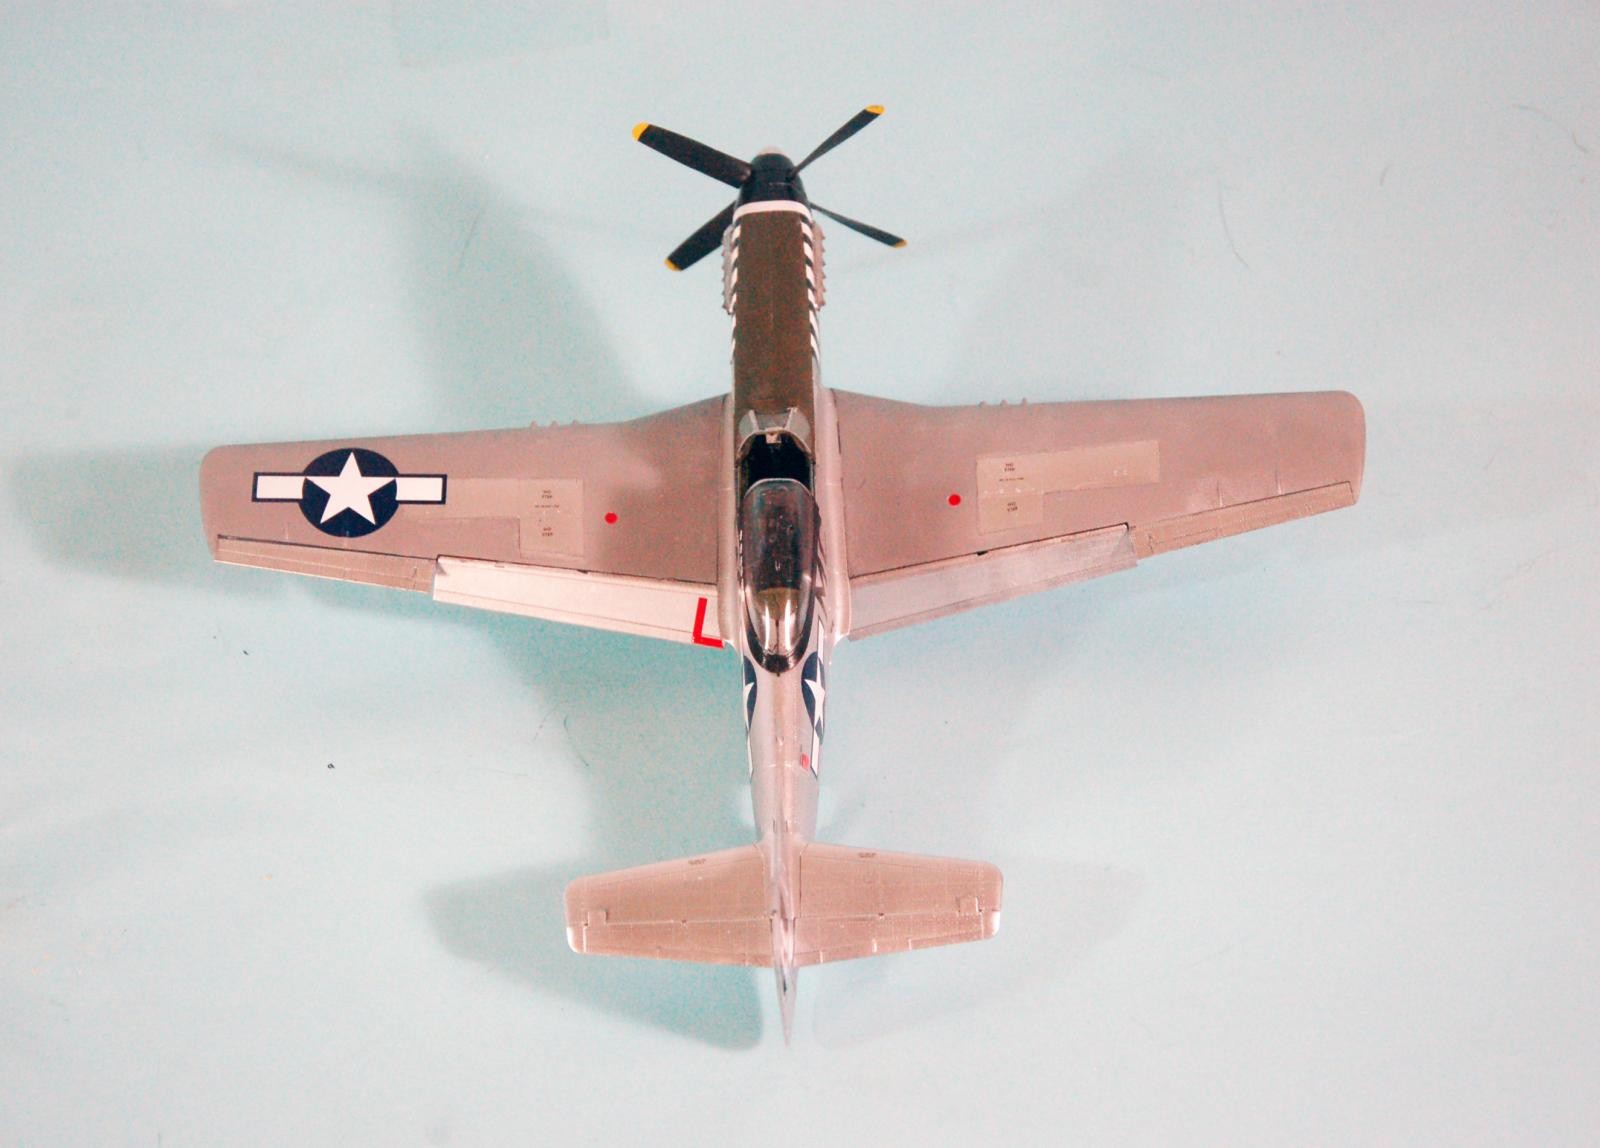
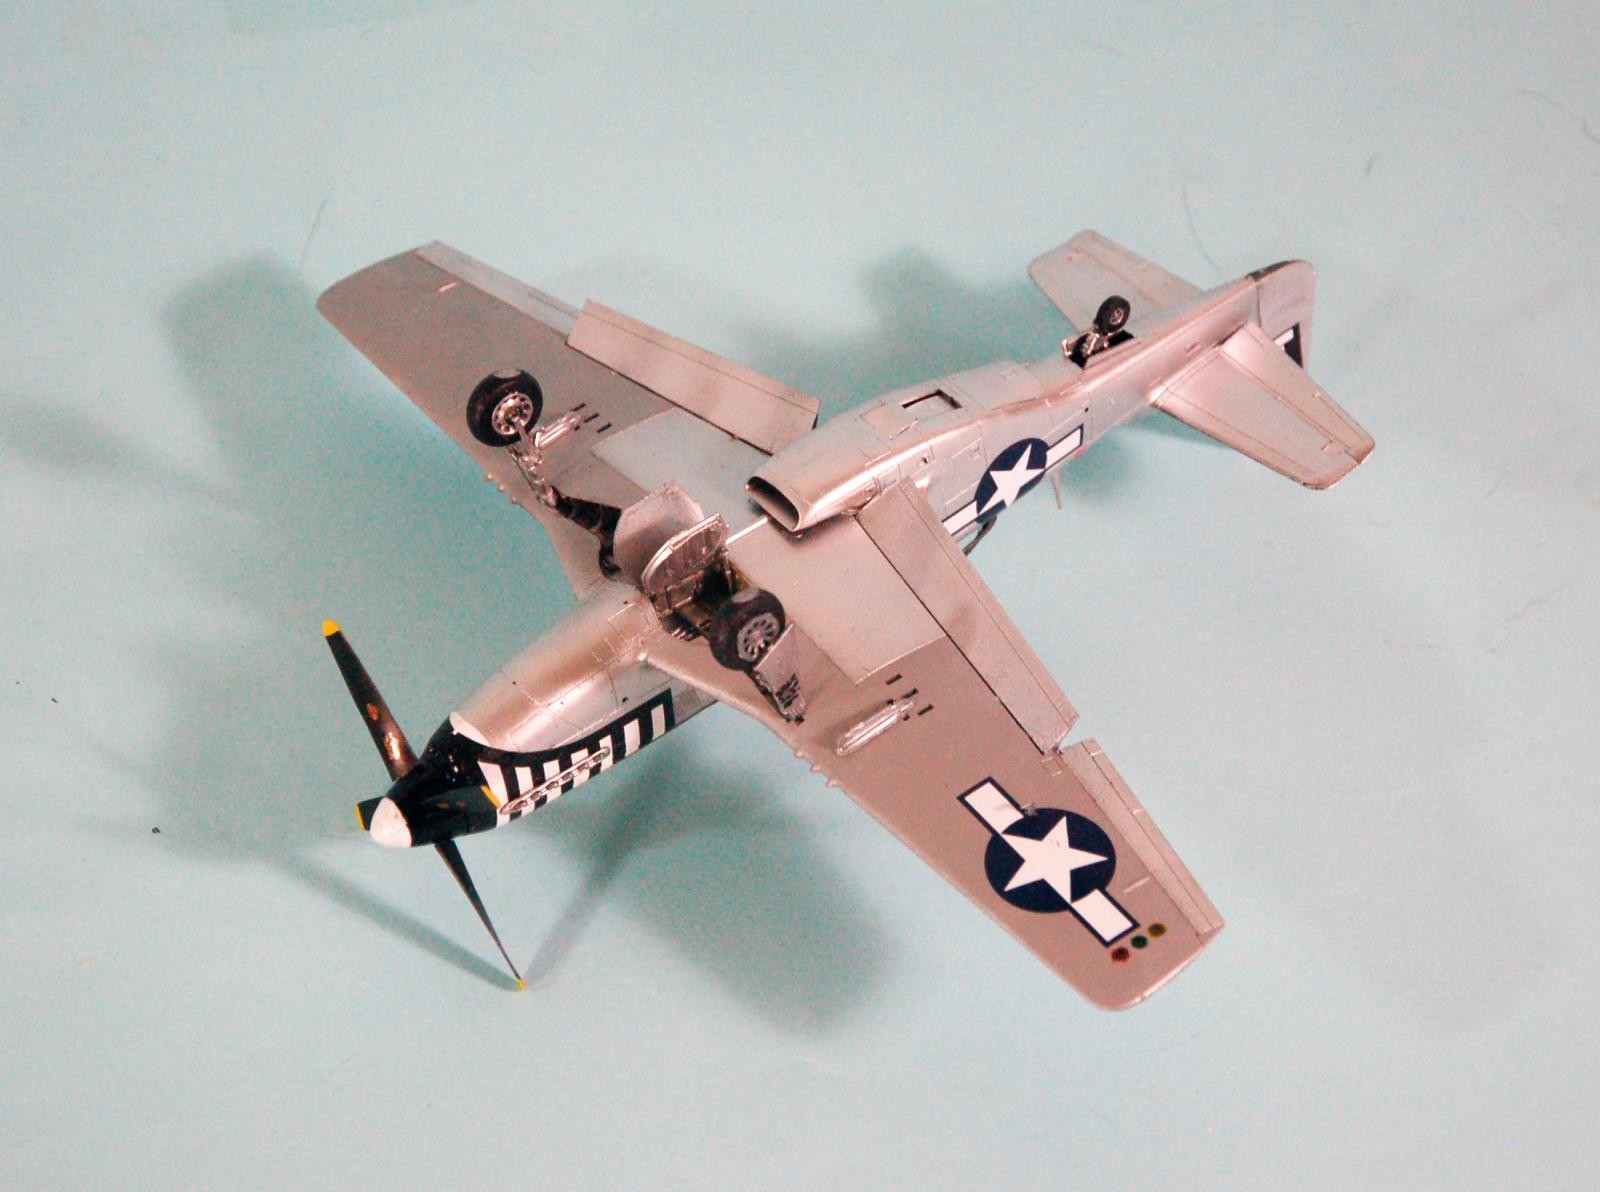
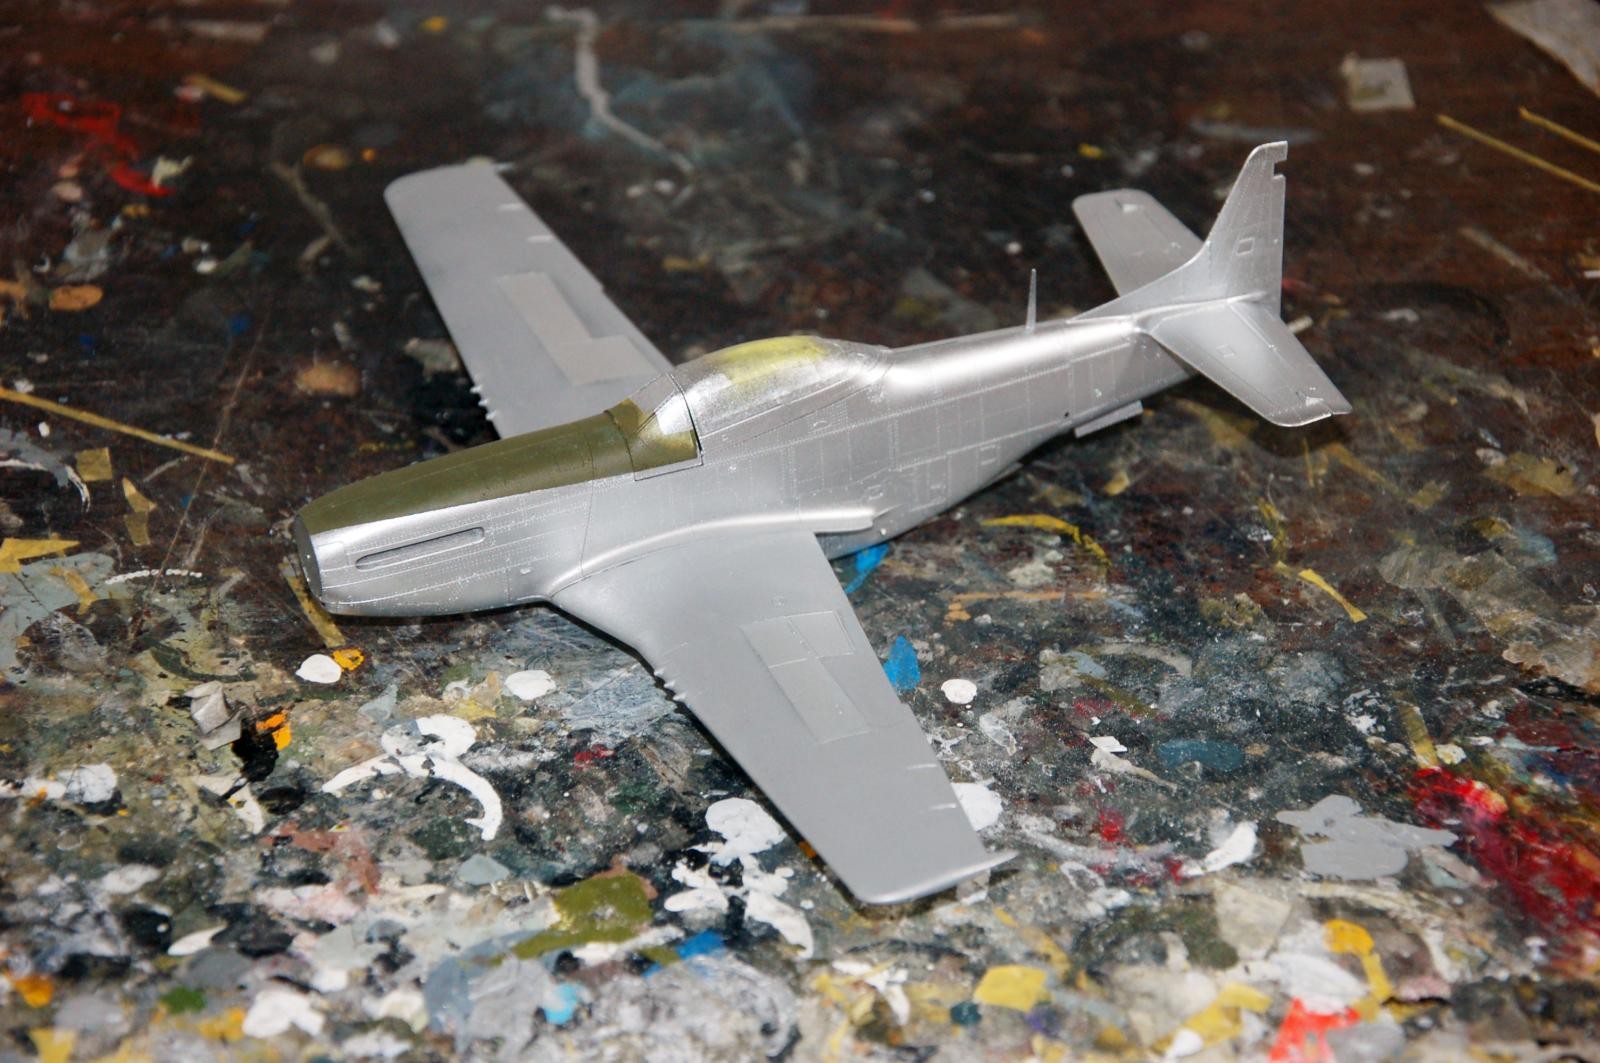
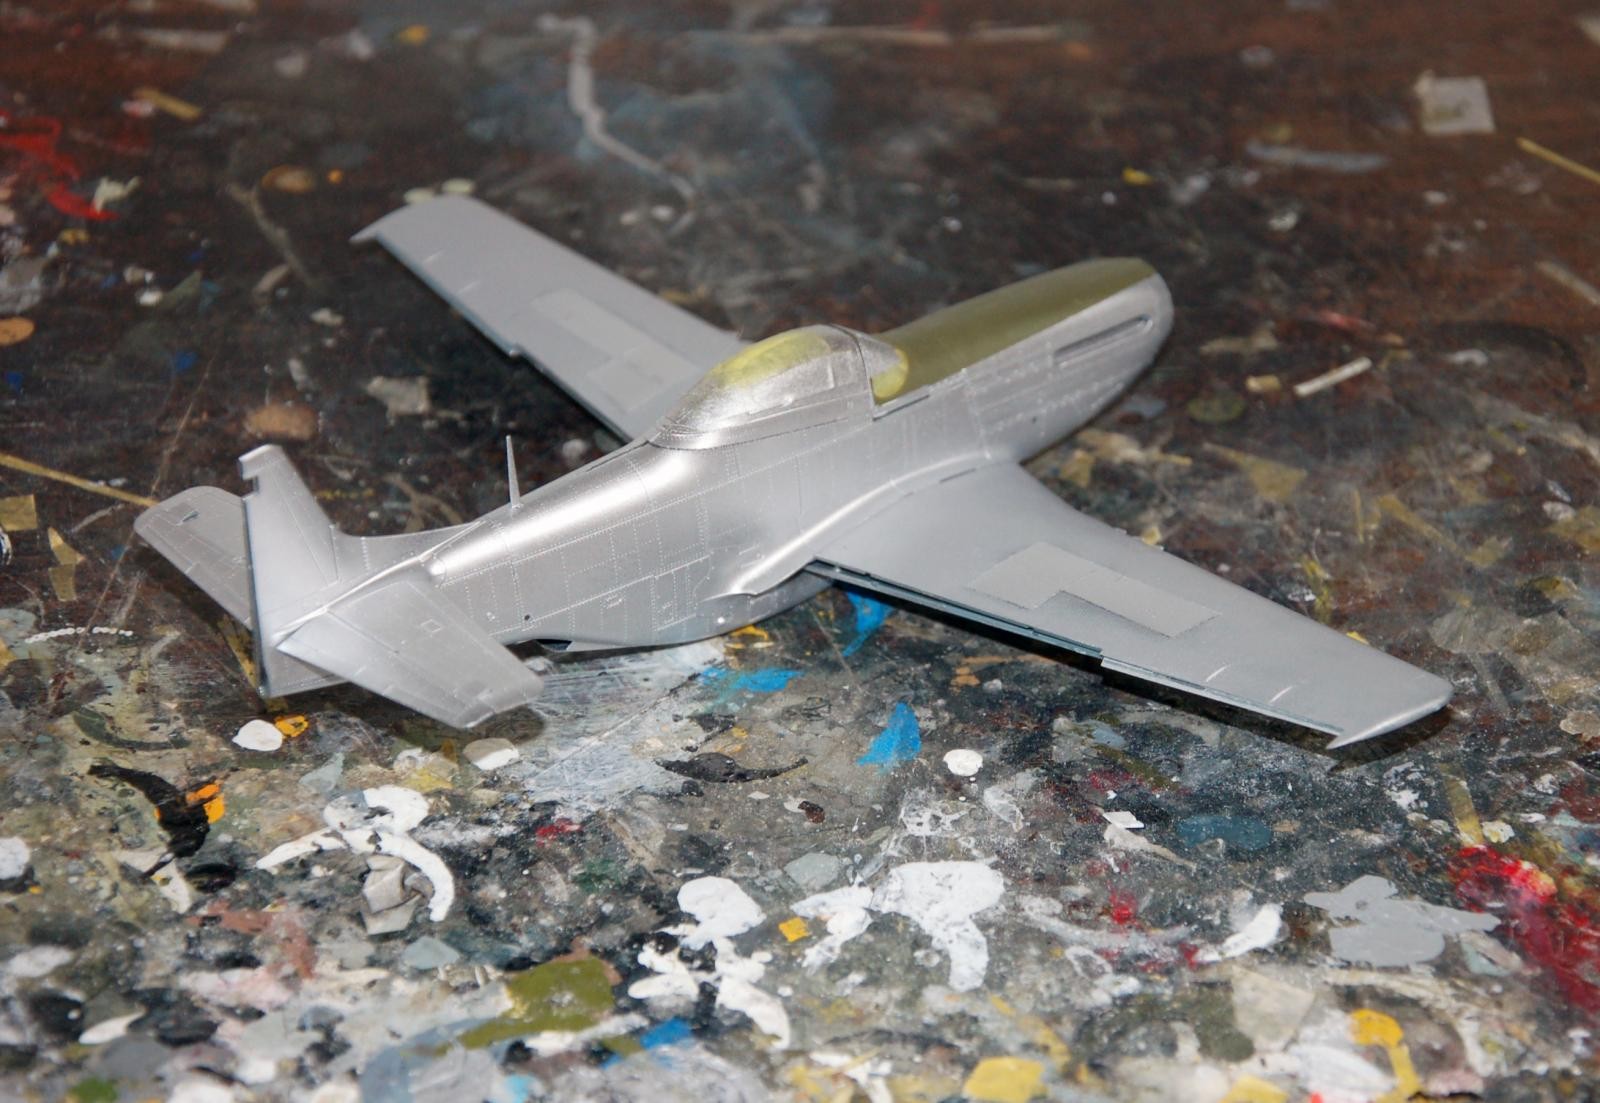
I first painted the anti-glare panel with a “Green-base OD” Tamiya mixture and masked that off, then I used Vallejo metallic paints for the rest. I first applied a thin primer coat of Tamiya Semi-Gloss Black, misted on till it fully covered the model. I then used Dull Aluminum for the aluminum lacquer over the puttied wings, spraying that when dry with a clear satin varnish, which ended up looking very close to a WW2 color photo I have that shows the puttied wing. I then masked that off and shot the rest of the model with Aluminum. I used Duraluminum for the darker panels over the engine exhaust area.
Once this was done, I attached the control surfaces to the model.
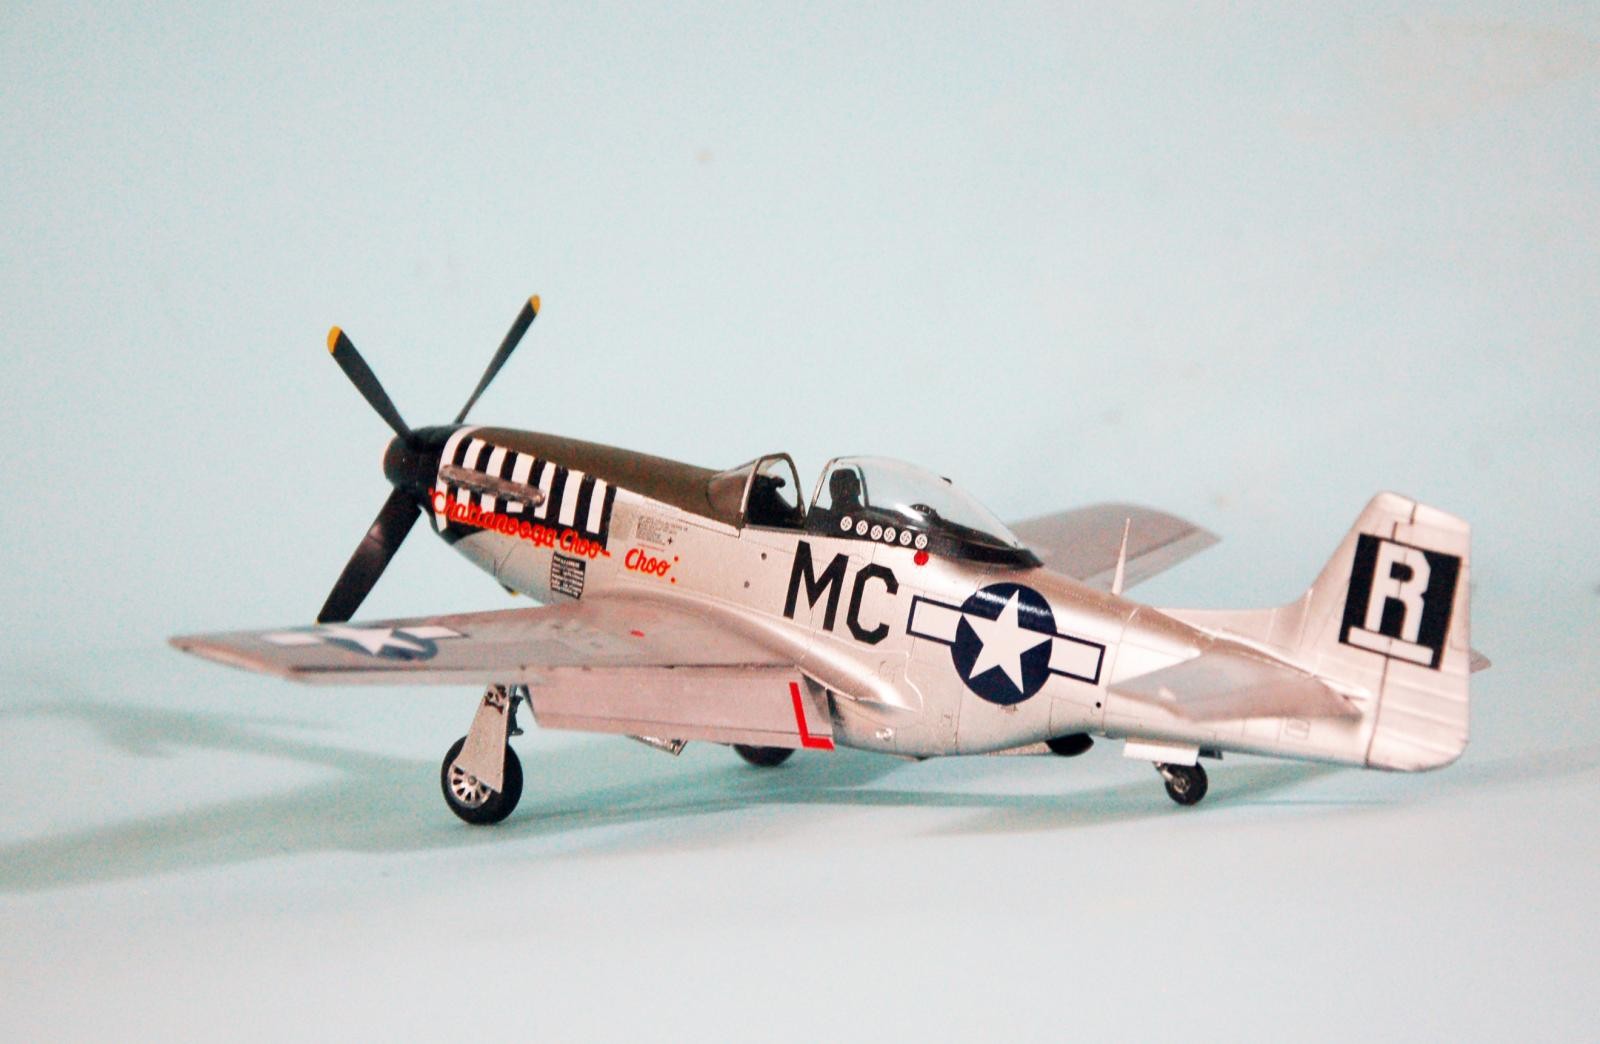
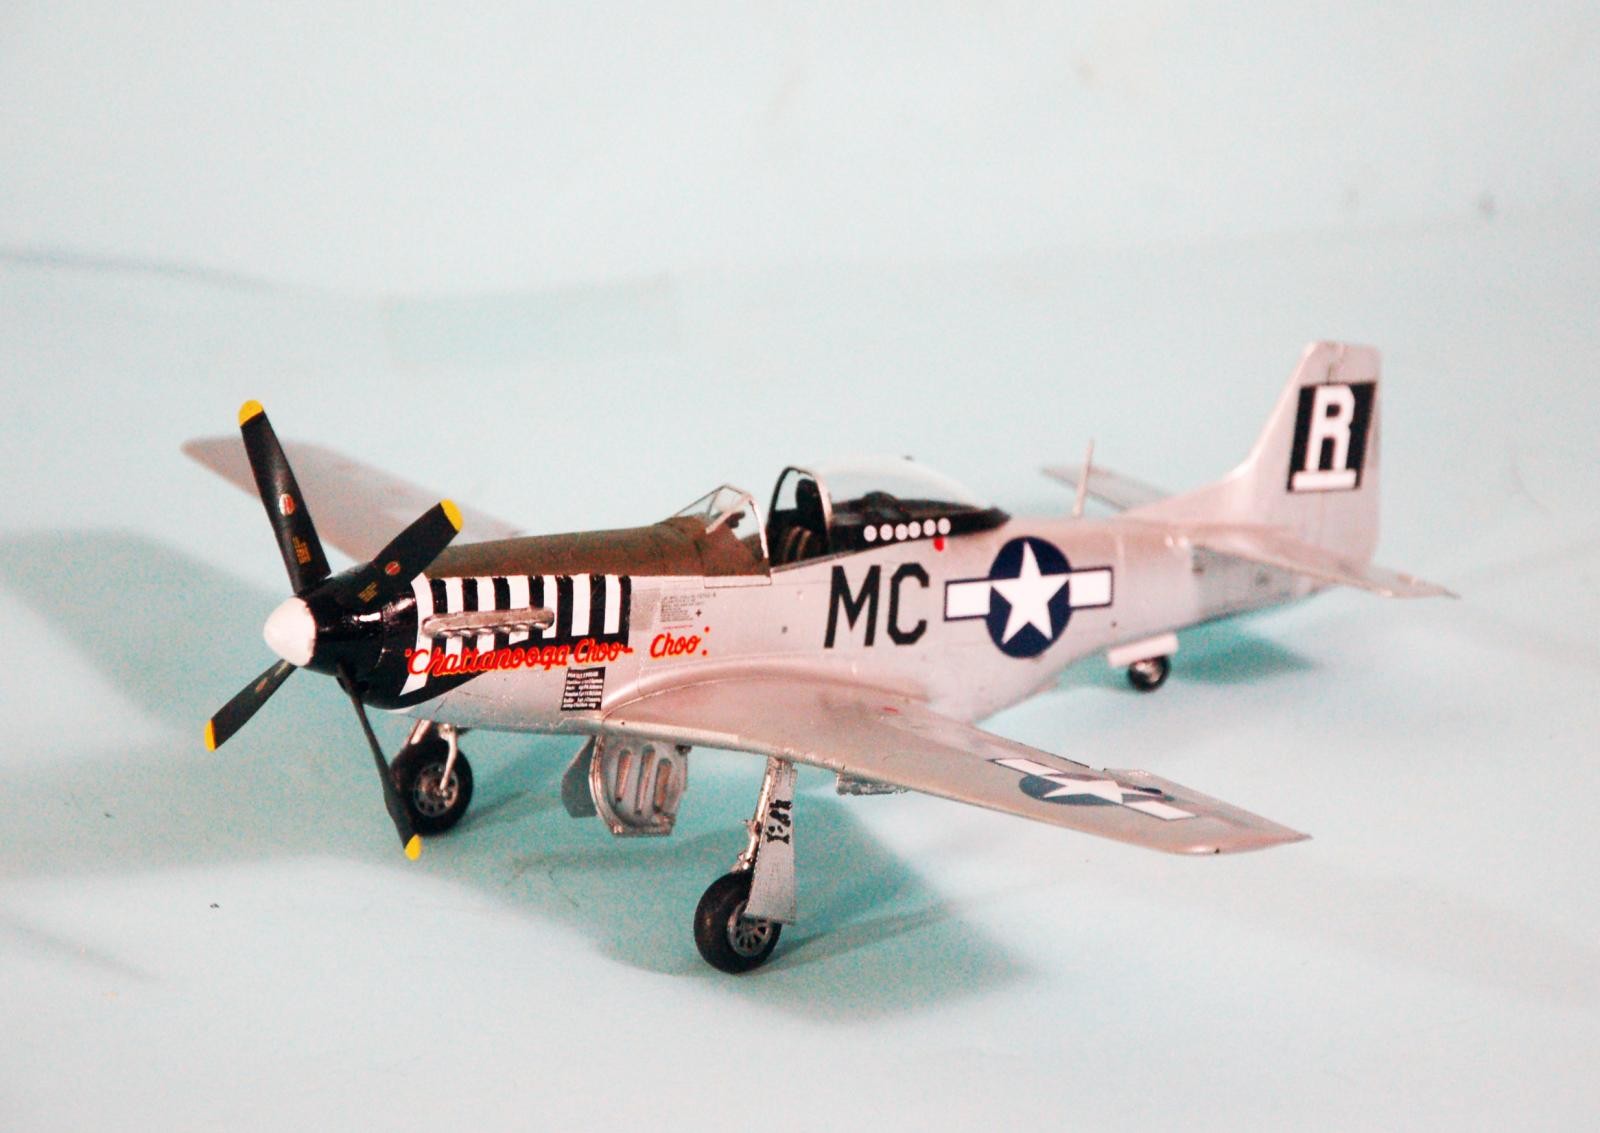
I used the kit decals to do “Chattanooga Choo-Choo.” They went down without any problem under a coat of Micro-Sol. There are a myriad of stencils, all of which are scale size, which means you can't really see most of the smaller ones from further away than 5-6 inches; thus, I didn't apply all of them, not wanting to go blind in the process.
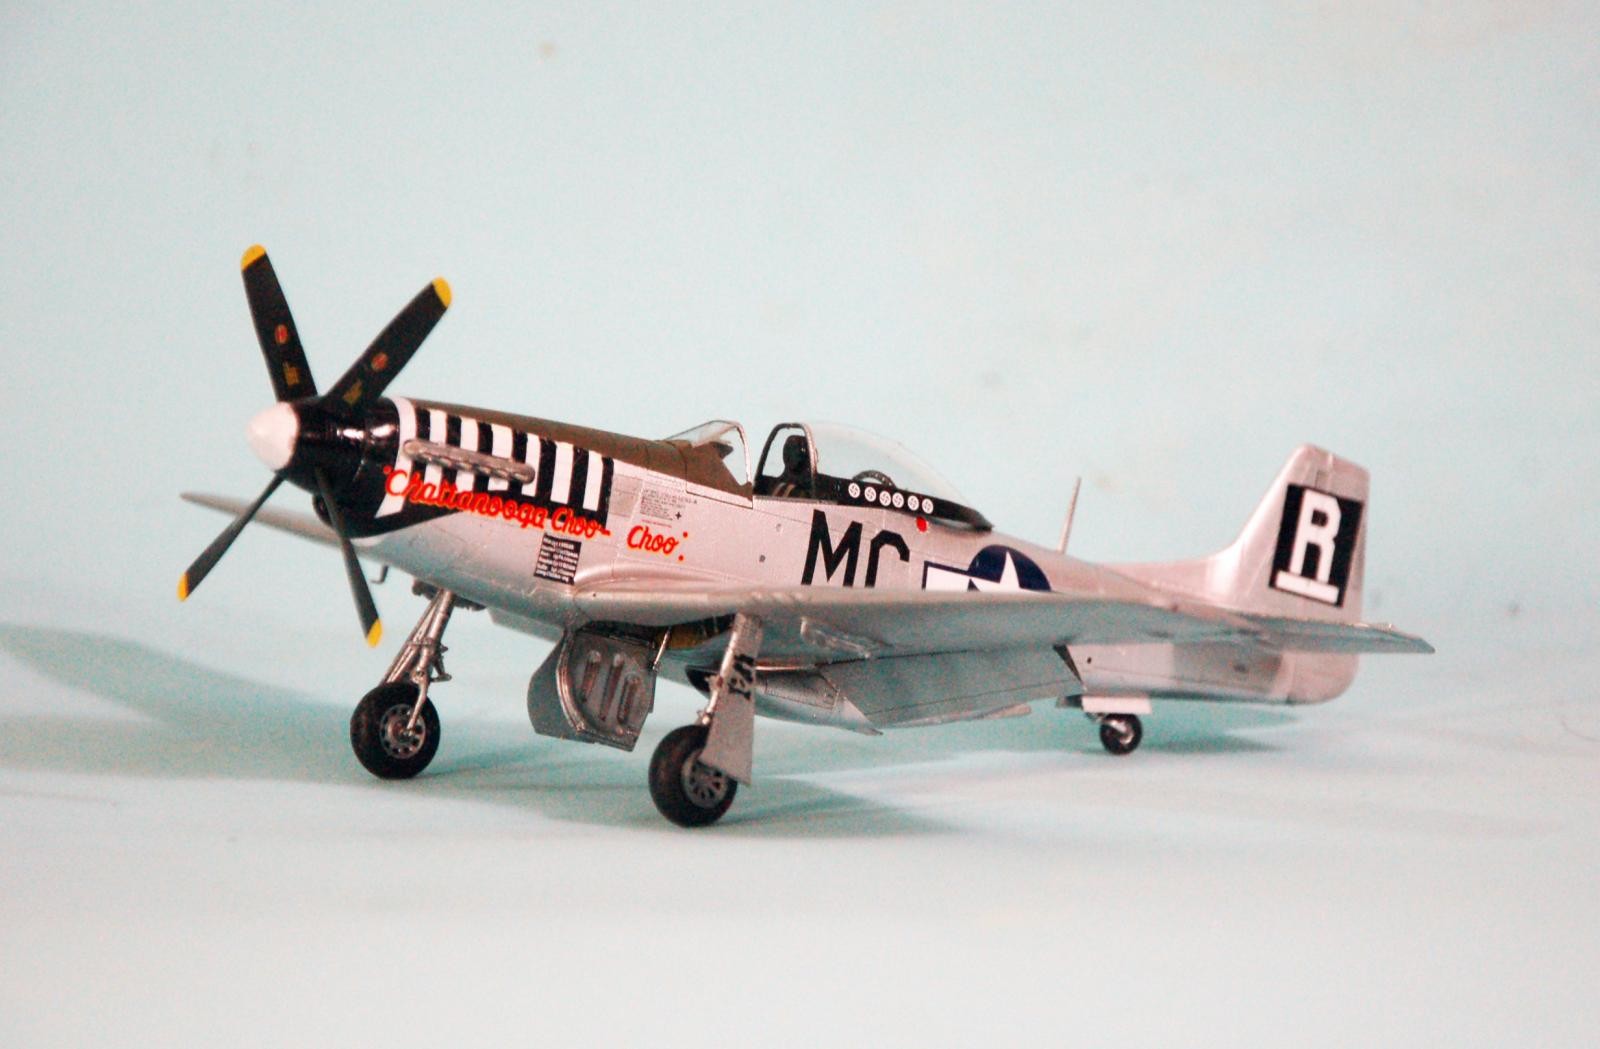
With that done, I attached the underwing pylons. The landing gear is beautifully designed so that it only fits in the proper alignment - slightly forward, with the main axle a bit ahead of the leading edge of the wing when viewed from above. Since the major mistake made with Mustang models is incorrect landing gear alignment, this care in design is definitely appreciated. I unmasked the canopy and attached it in the open position. This is the only Mustang model I have made where I did not need to make any modification to the shape of the fuselage under the very thin canopy in order to allow it to sit in the proper position. I glued the prop in position, since the mounting pin is a bit too short to reach the polycap inside.
CONCLUSIONS
Indeed, this is the Mustang kit this Mustang fanatic has sought for as long as I have known of the existence of the P-51 Mustang. Production design is excellent. Everything fits without problems if you have taken care in cleaning up the parts and take care with assembly, and the result will be spectacular.
Does it make the other kits obsolete? Far from it, though it is superior to the others on all counts. The now 25-year old Tamiya kit definitely suffers in comparison, with its incorrect wheel well and simplified cockpit and difficult-to-fit canopy, but with a True Details resin cockpit and a Falcon canopy all is well. (There's an interesting conspiracy theory going around that Tamiya might take all that information they obtained for their 1/32 kit and scale it down to do an “update” like they recently did for their Spitfire I - you never know.) The Airfix kit is still very nice, and since it is half the price of this kit in the Profipack version, if you want to use your myriad of aftermarket P-51 decals, it's an excellent candidate for doing markings.
Bottom line: if you want a really accurate, highly-detailed P-51D model in 1/48 scale, this Eduard kit is what you want. I can see them doing different releases with different decals every six months for all the various sub-types. They definitely have a “license to print money” with this kit. Highly, highly recommended. I will definitely be building more of these.


A real beauty Tom, this P-51, great paint job on the airplane too. Thanks for your comprehensive review of this build.
Was waiting for your build review to confirm expectations about this new über Mustang kit. I’ll take your words and definitely get this kit on my to purchase list.
Seems this first box is already sold out, and since it was a “limited edition” won’t be available from Eduard any longer at least. But surely a lot of Profipack and weekend editions will come around, starting (from what I read) early Autumn with the D-5 version, and going 2020 completing the whole P-51 family, much like they did to earlier WW2 fighters releases.
I bought the Airfix P-51 kit shortly after it debuted. It IS a great kit and very impressive. So ... if you say this kit is better, then it MUST be really outstanding and very close to this iconic aircraft.
Thanks for sharing your great review and photos, Tom.
Nicely done Tom and excellent review. Between you and the review done by Daniel PerezVetti it appears this a really exceptional kit.
That’s a nice looking kit, Tom. Thanks for sharing it.
Beautiful model and a very comprehensive review, well done!
absolutely stunning...reminds me of the Oakland Raiders...bang up job
Great-looking model, and a nice, enthusiastic review!
Great looking build and very informative review. Can an accurate D-20 be made from this kit? You mentioned in the article the photo etch is for any version up to a D-15. I want to do "Man O' War" with the tiger stripes which I believe is a D-20.
Yes, you can do a D-20 with this kit. Basically use the metal elevators and the lightweight seat. As far as the panel is concerned, I honestly don't think 99.99999% of us could tell the difference between "early" and "late" once it's in the cockpit.
Claiborne Kinnard - least-popular guy to ever be in the Fourth. Was 355FG CO - they were very "GI" and when he was acting CO in September when Blakeslee was in the US on leave, he started alienating people with his negative comments about the way things were done in the 4th. Then when he was appointed CO in November after Blakeslee left, he brought squadron commanders and flight leaders from the 355th and tried to re-make them, with huge opposition. Blakeslee was at 67th Wing then, and he let Doolittle know what was what. The end of the month, Kinnard was gone and Harry Dayhuff, one of the originals from the 78th, took temporary command. Then ex-49er Col Everett Stewart arrived, restored the group and led them to the end of the war. "Man O'War" is a neat-looking scheme, but I've never thought of it as a Debden Eagles airplane (Kinnard had to be forced to change the nose color from white - the 355th - to red, among his other crimes). Myself, I'm going to do Ridgerunner III, my fravorite 4th FG ace's airplane (Mackennon was known to be able to down an entire pint of bitters without spilling a drop, clenching the glass in his teeth, while playing a dynamite "Tiger Rag" on the piano - my kind of guy).
Thanks for the info Tom. Yes, I read somewhere Kinnard was a major PIA but that camo scheme on his Mustang is too attractive not to do it.
Oh yeah, totally right. I have two sheets with those markings and have considered it over the years. I used to see the warbird in those markings all the time out here.
Thanks Tom for the detailed review and this perfect rendition of the kit.
Eduard is now somehow leading the small word of modeling. Interesting knowing they started with PE parts 25 or 30 years ago.
They actually started before then. Vladimir Sulc and Jiri Silhanek were "two wild and crazy guys from Czechoslovakia" who really wanted to have better models than they could get from the USSR and in the 80s they started making really nice vacuform kits (the old Central/Eastern European carving tradition). Very few people on our side of the iron curtain ever saw them, but i did get their 1/48 I-15 and I-16 (trading blue jeans for models with a Czech modeler as my contribution to overthrowing the Stalinists), which were pigs to build but today they sit there with a "look" not that far from their MPM descendants. They had enough success to start MPM, and did such things as the "chocolate plastic" I-15 upgrade, the Bu-131, etc.
Come the Velvet Revolution, after 1989 they worked to get the kits into "limited run" plastic, Vladimir got into P-E stuff, and then he realized there was a whole market for WW1 models no one was filling. So around 1992 they separated. Jiri kept MPM and Vladimir started Eduard. I've always thought, having met both of them personally, that Vlad is more "commercially oriented" than Jiri (look at the different subject matter choices they make - Jiri's not afraid of the lesser-known). Anyway, between the two of them, I think they can lay claim to having changed the hobby in ways no one would have expected "back in the day."
Very nicely done, Tom. Beautiful build and your writeup answered several questions I had about your "process". Hopefully, Eduard will come out with the 110 gallon tanks and later model PE cockpit later this fall with their Royal kit. I've got the cockpit PE for the Airfix kit but it is a bit big and while I could try to cobble it together, I may as well wait and see what they comeuppance with. Like you said, most folks wouldn't know or care, but... Once again, very well done.
Another thorough write up and excellent build. Looks awesome! Glad the eye surgery worked for you!
But,but,but... what happened history wise to the Monogram P-51D in 1/48? To the victor goes the spoils and history is rewritten. No Detroit Miss or Big Beautiful Doll, no mention of the Monogram classic? A minimum of ten grand and counting must have been made. IF you where floating around in the 80's and survived Disco...
Most of us would rather forget but, a lot of kids and adults have cut their teeth on the Monogram Classic. Which is now the poor mans P-51.;)
Another TC classic.
Yeah, I should've mentioned it - with a LOT of work, you could get a nice model. Didn't mention the Meng because I never saw one. Never showed up anywhere I shop.
Wasn't this sitting on your porch like...a week ago? Nice job, TC ! 🙂
that was one quick build Tom. Nice write up. I picked one up at the Nats and am excited to eventually build it. It is nice to know that later models can be built out of this same kit. I'm a s****r for the fillet-less, camouflage versions of the D so will be looking forward to that. For once the kit is coming out BEFORE I do a conversion. I have the fillet-less resin tail and both the Hasegawa and Tamiya kits on the shelf pondering that conversion. Now, no more 🙂 Your build and review have me tempted to move this one up in the build queue. and it is such a long queue of good intentions...
Build this - it will turn your good intentions to accomplishments and renew your modeling mojo.
Tom- You wasted no time getting knocking out your spot on, beautiful build of Eduard's fantastic kit and providing us with all the know-how to make us muddlers' lives easier. I read your article earlier on MM by the way.
I found mine on the doorstep when I returned from out of town and have been drooling over the sprues ever since. However, I think I may leave it intact in the box for now and wait for the fillet-less kit you said will be coming this fall.
Since you have built all the other P-51D kits out there, you owe it to yourself to try the Meng kit. Other than the maybe too many rivets thing, the Meng kit is a real contender and the price is right. I was in Hong Kong this past March and bought a few dirt cheap other kits at Continental Models who ships to the U.S. and maintains a FB presence. I saw a couple of Meng P-51D variants I had never seen before with different box art.
Give Meng a try for comparison. I would love to hear your comments about the kit. I'm sure you have plenty of spare time for another build, right? How do you bang them out so rapidly? What's your secret?
Time, and the fact that frequently an hour of modeling is the "solution" to the current writing problem.
This is a good article Tom.
Thanks for sharing your thoughts. The "in progress" photos answered all of my previous questions I had about the kit. It indeed looks to be a very nice rendition of the Mustang.
Now if Tamiya would shrink their 1/32 scale kit... (and it turned out to be as nice as the new tool Spitfire, P-38 or Bf-109), I'd jump on getting a few of them too.
Nice write up... thanks
That's where the "speculation" is coming about Tamiya "answering" Eduard. All that info they came up with for the 1/32 kit.
Thanks Louis - glad to help.