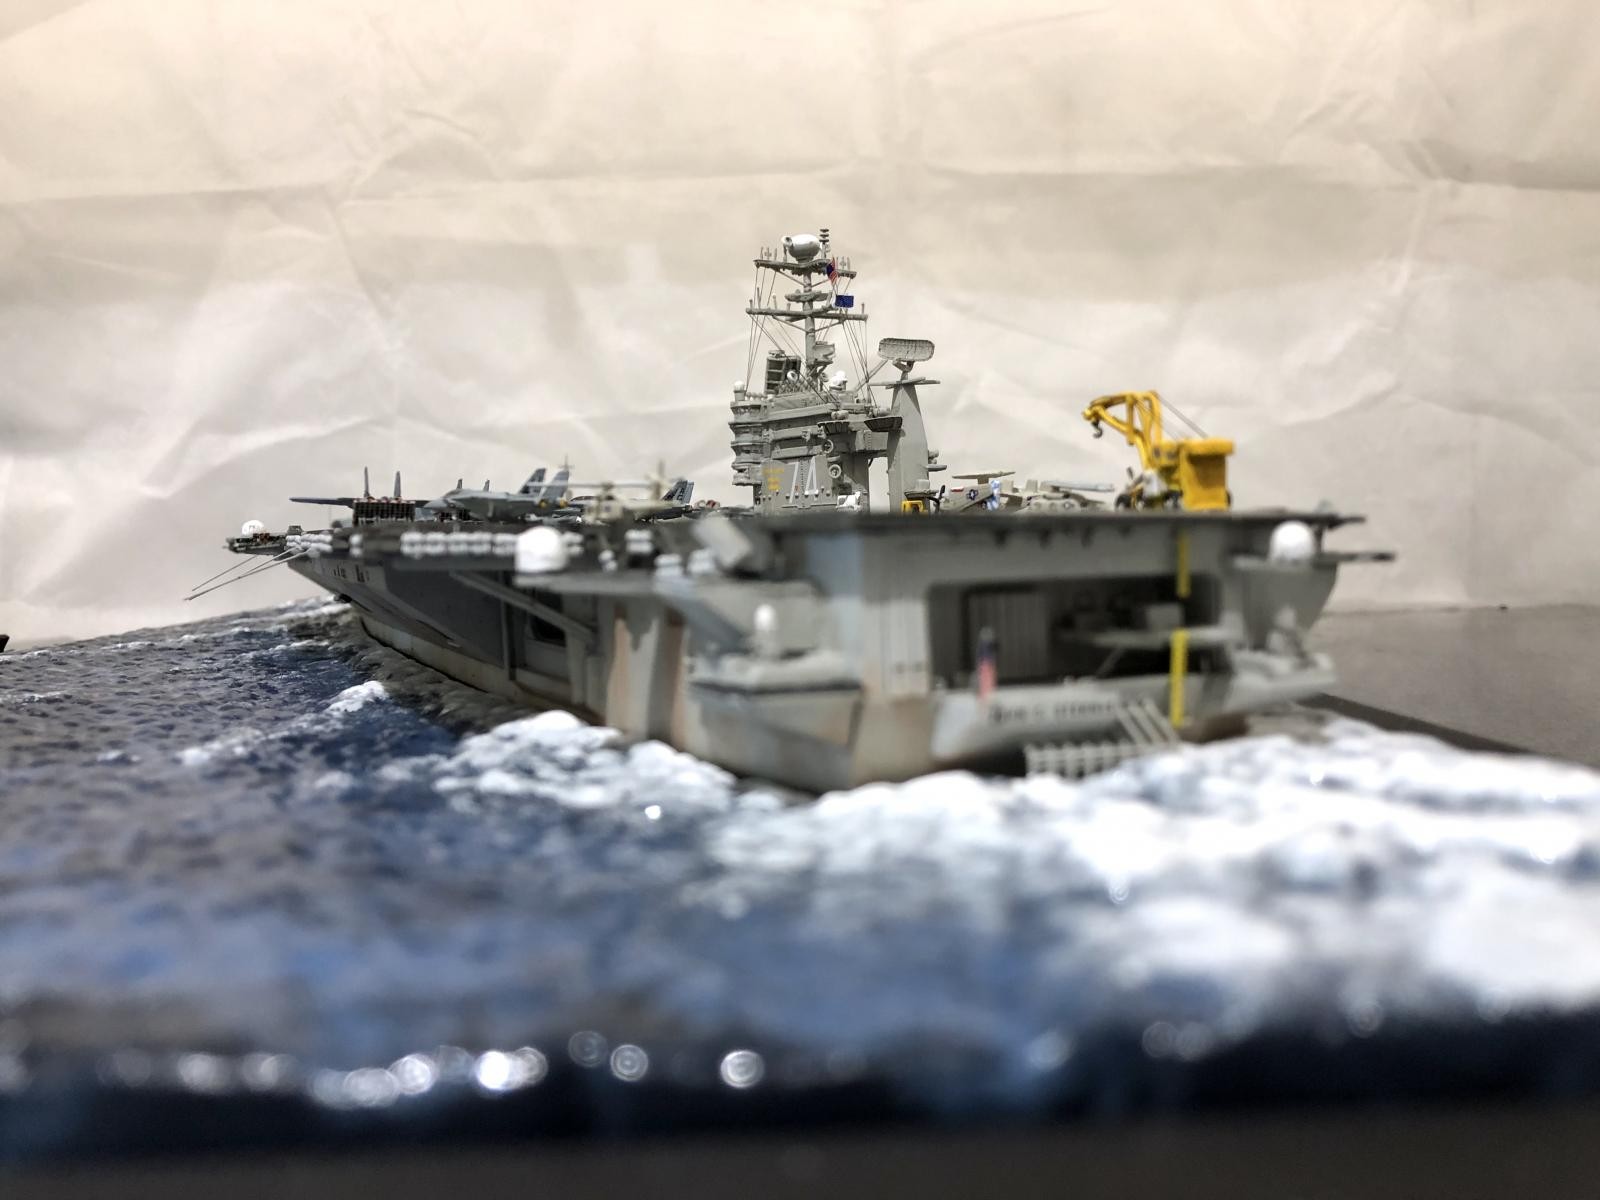
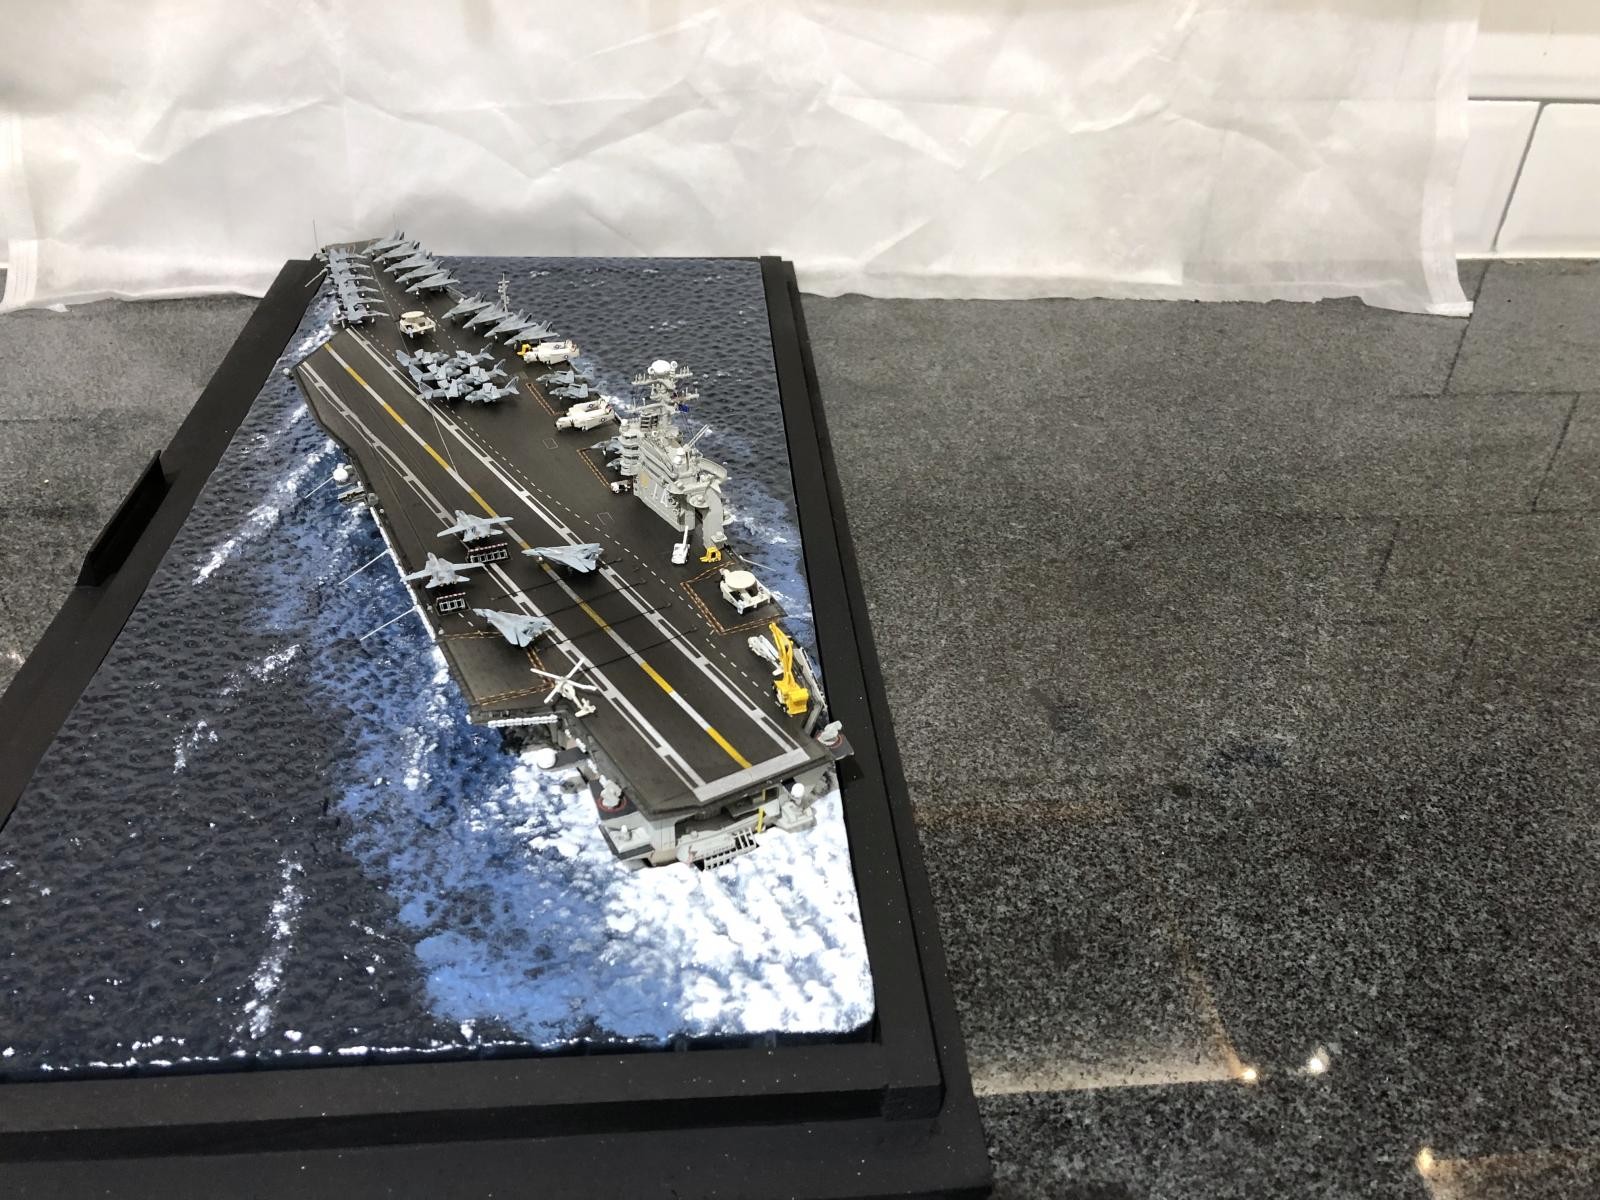
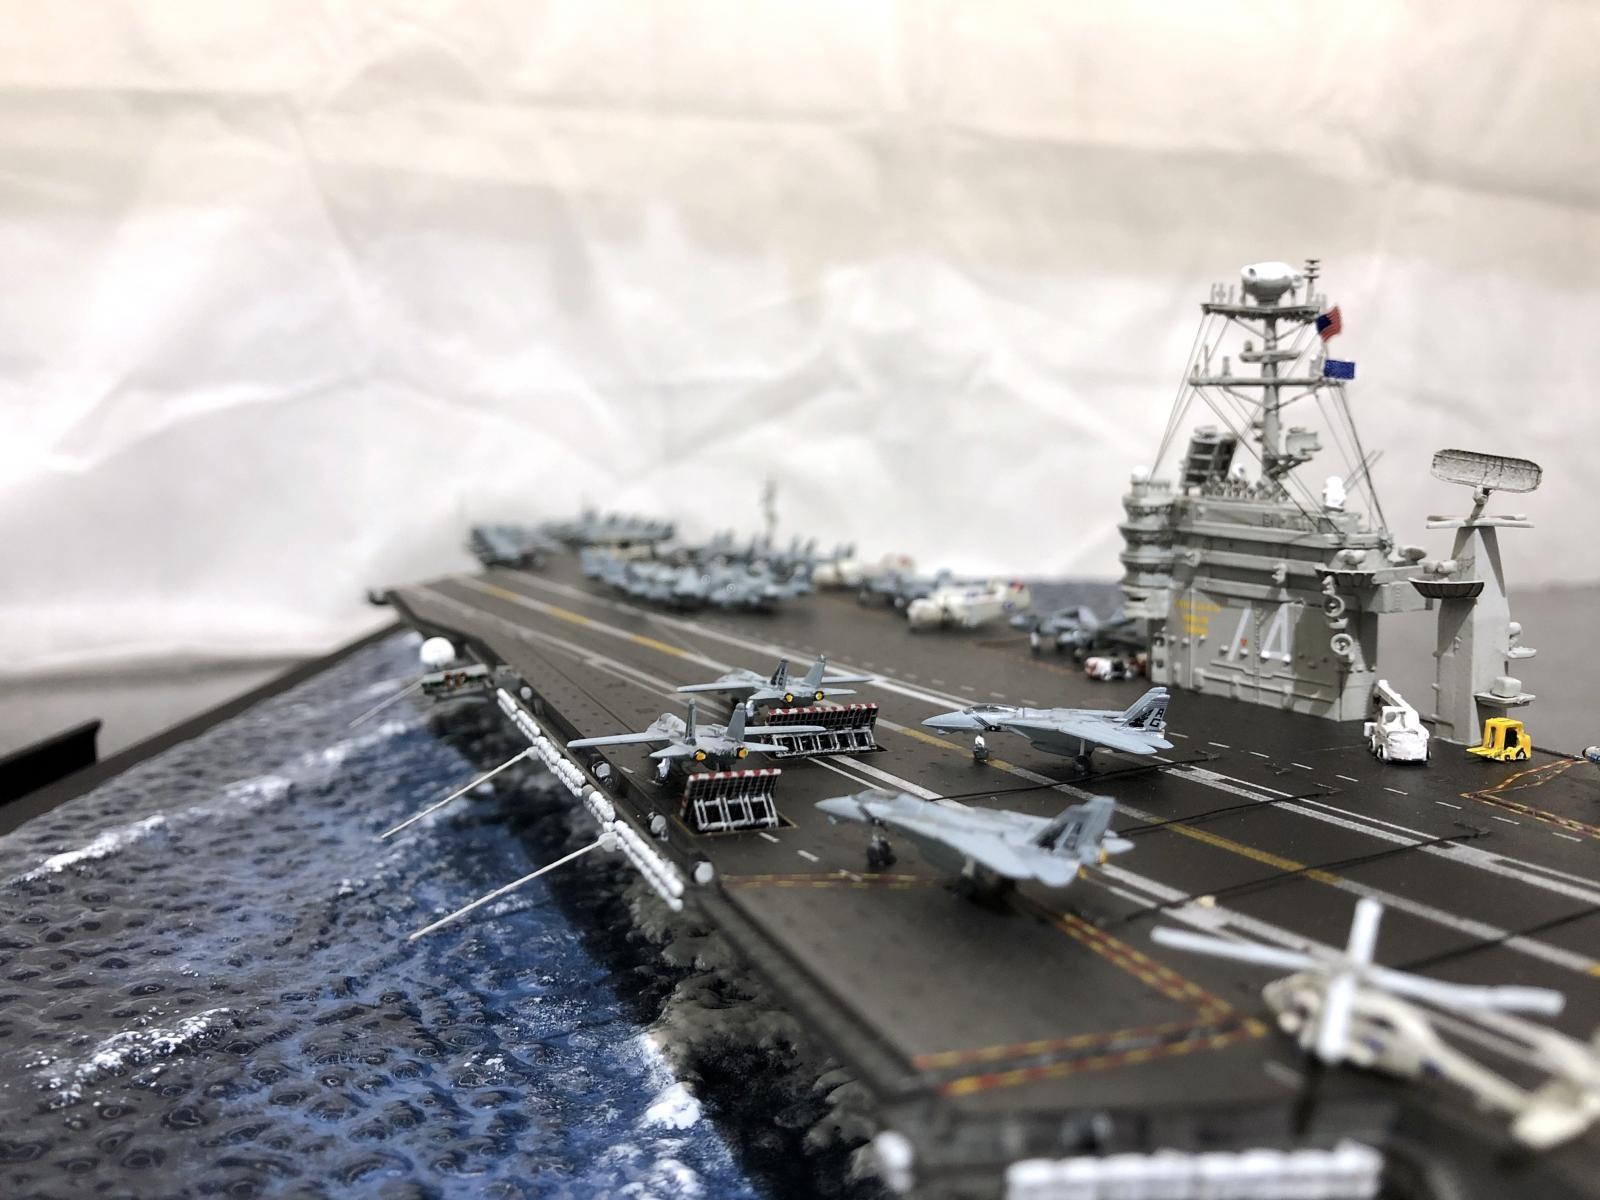
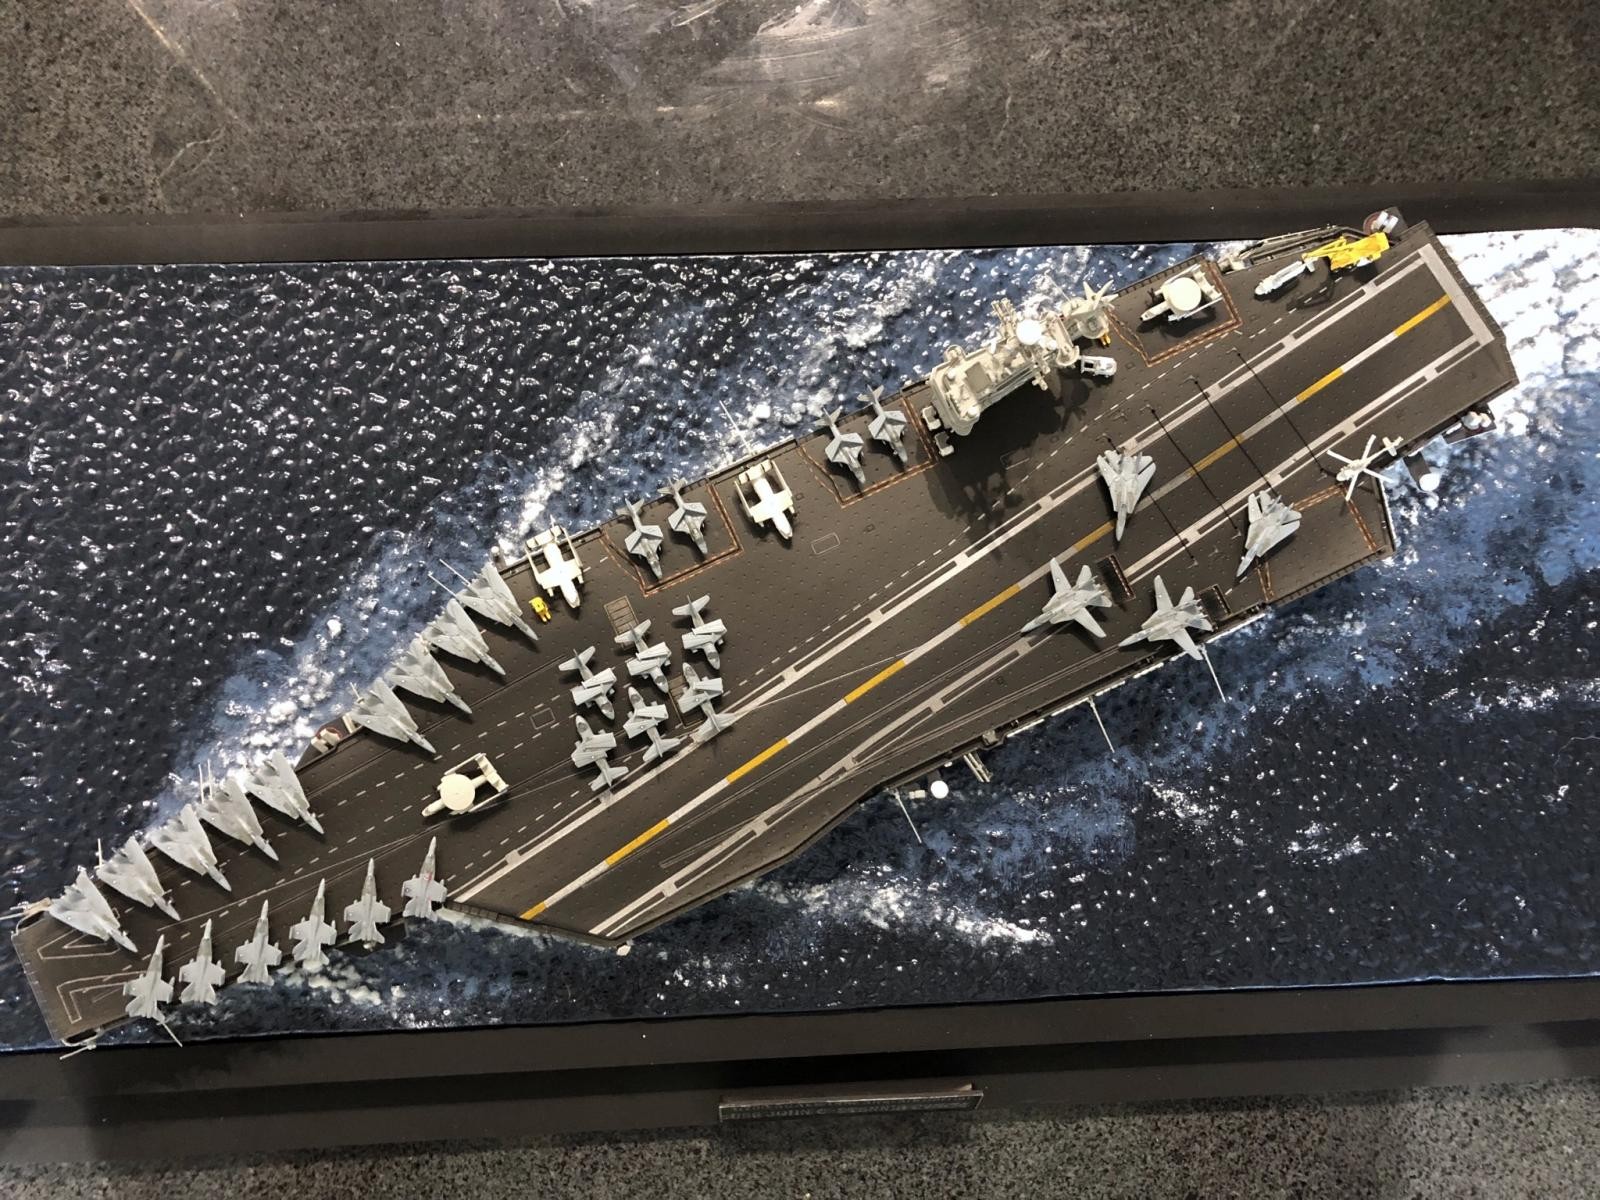
1/700 Trumpeter CVN-74 USS John C Stennis
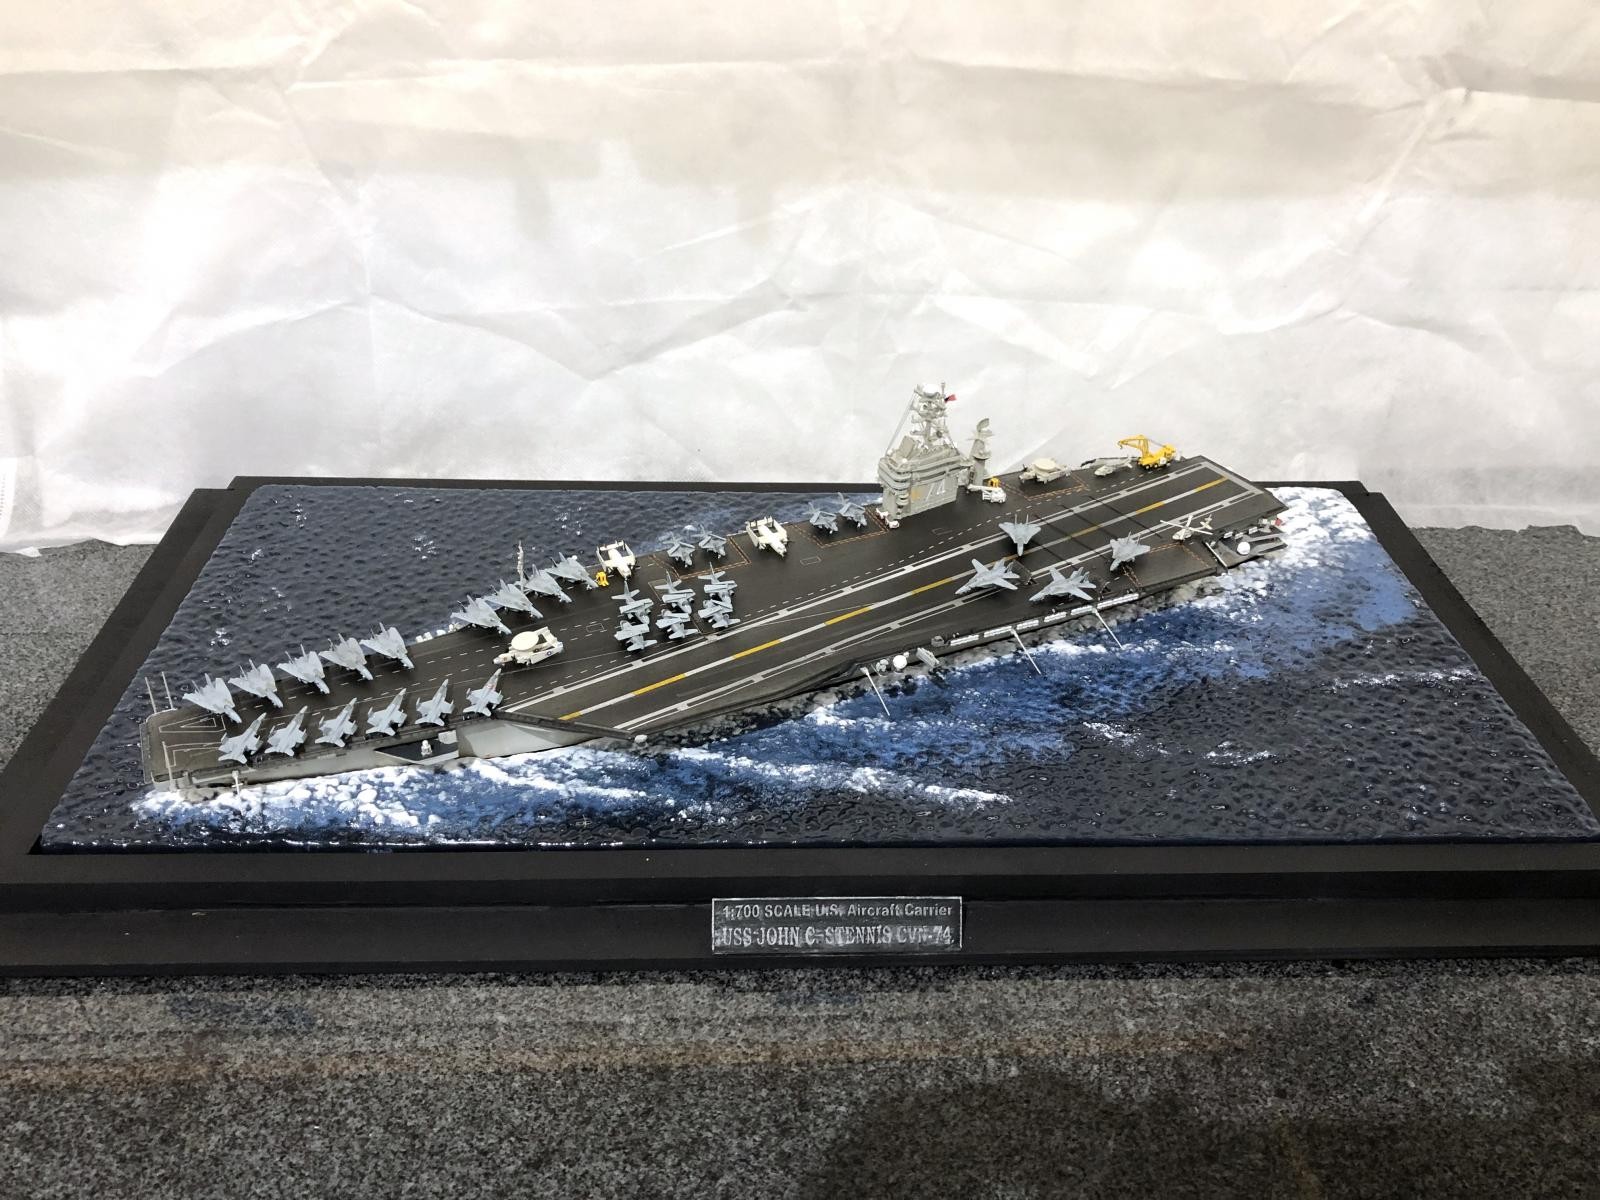
Kit: Trumpeter 1/700 CVN-74 USS John C Stennis.
Intro: This was actually my first ship ever. I usually build aircraft in 1/72 but decided to try something new. I started this in October of last year, and being that it's August, it took me almost a year. I did take a small break to build Tamiya's 1/700 Shimakaze. So technically this is the second ship I've completed, but the first one I started. Overall I really loved this build. The kit had some tiiiiiiny parts and I definitely strained my vision but it was worth it.
The kit: The kit itself is pretty substantial. It comes with an airwing of 6xF-14B, 6xF/A-18C, 2xE-C, 2xC-2, 2xSH-60F, 4xEA-6B, and 6xS-3 all molded in clear plastic as well as the decals for the airwing onboard in 1998. It also includes deck vehicles. The deck vehicles are 1xcrane, 1xtow truck, 2xfork lift, 2xflight deck tractors molded in gray. Also 4 different small cutter boats (the kit uses 3). The kit is molded in gray except for one tree of clear parts for the tower and some other clear parts. It also includes a photoetch tree for the antennae and brass wire for the arresting cables. There is a full hull as well as a waterline version. There's a stand for the full hull version. They also threw in a large plastic water base molded in clear blue to go along with the waterline hull. The kit includes decals for deck markings and tower markings. The instruction manual is pretty detailed and easy to follow. Overall, the molding was really good. Only a small amount of flash and ejector pin marks were strategically thought out to end up on non-visible surfaces for the most part. It's a great kit with ALOT of options for a good price.
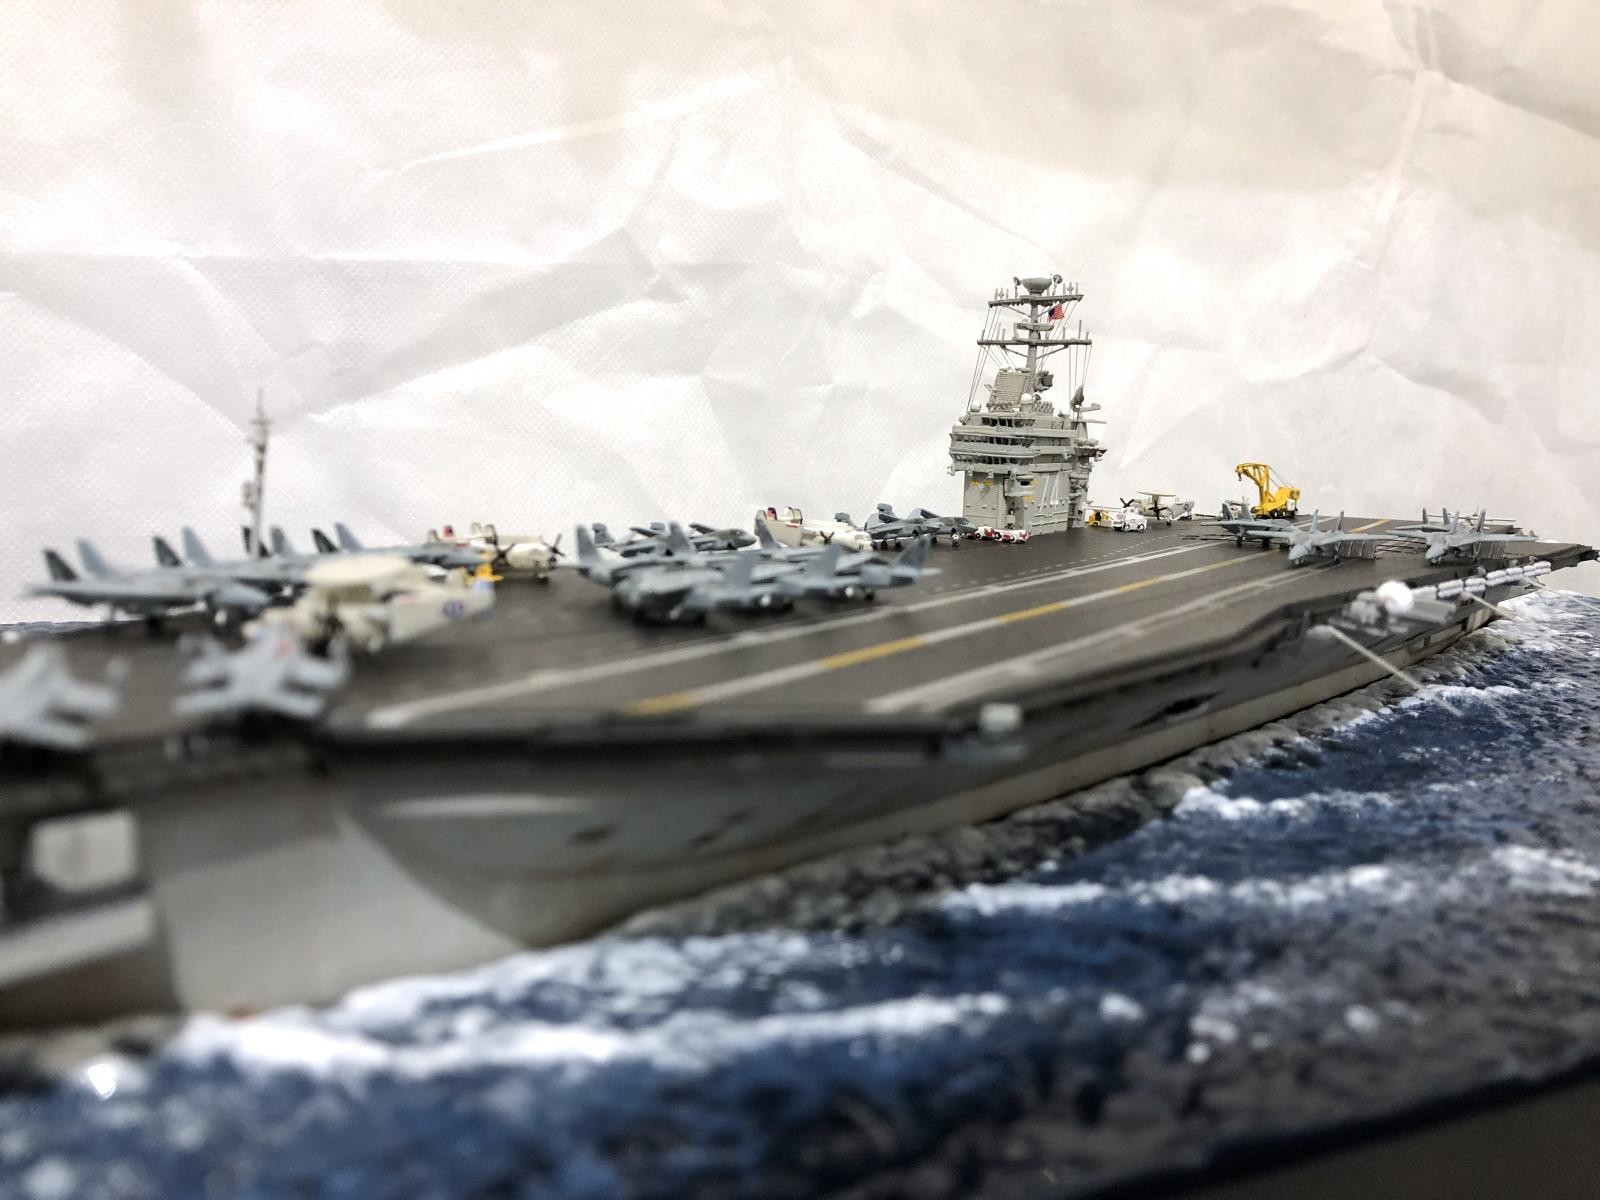
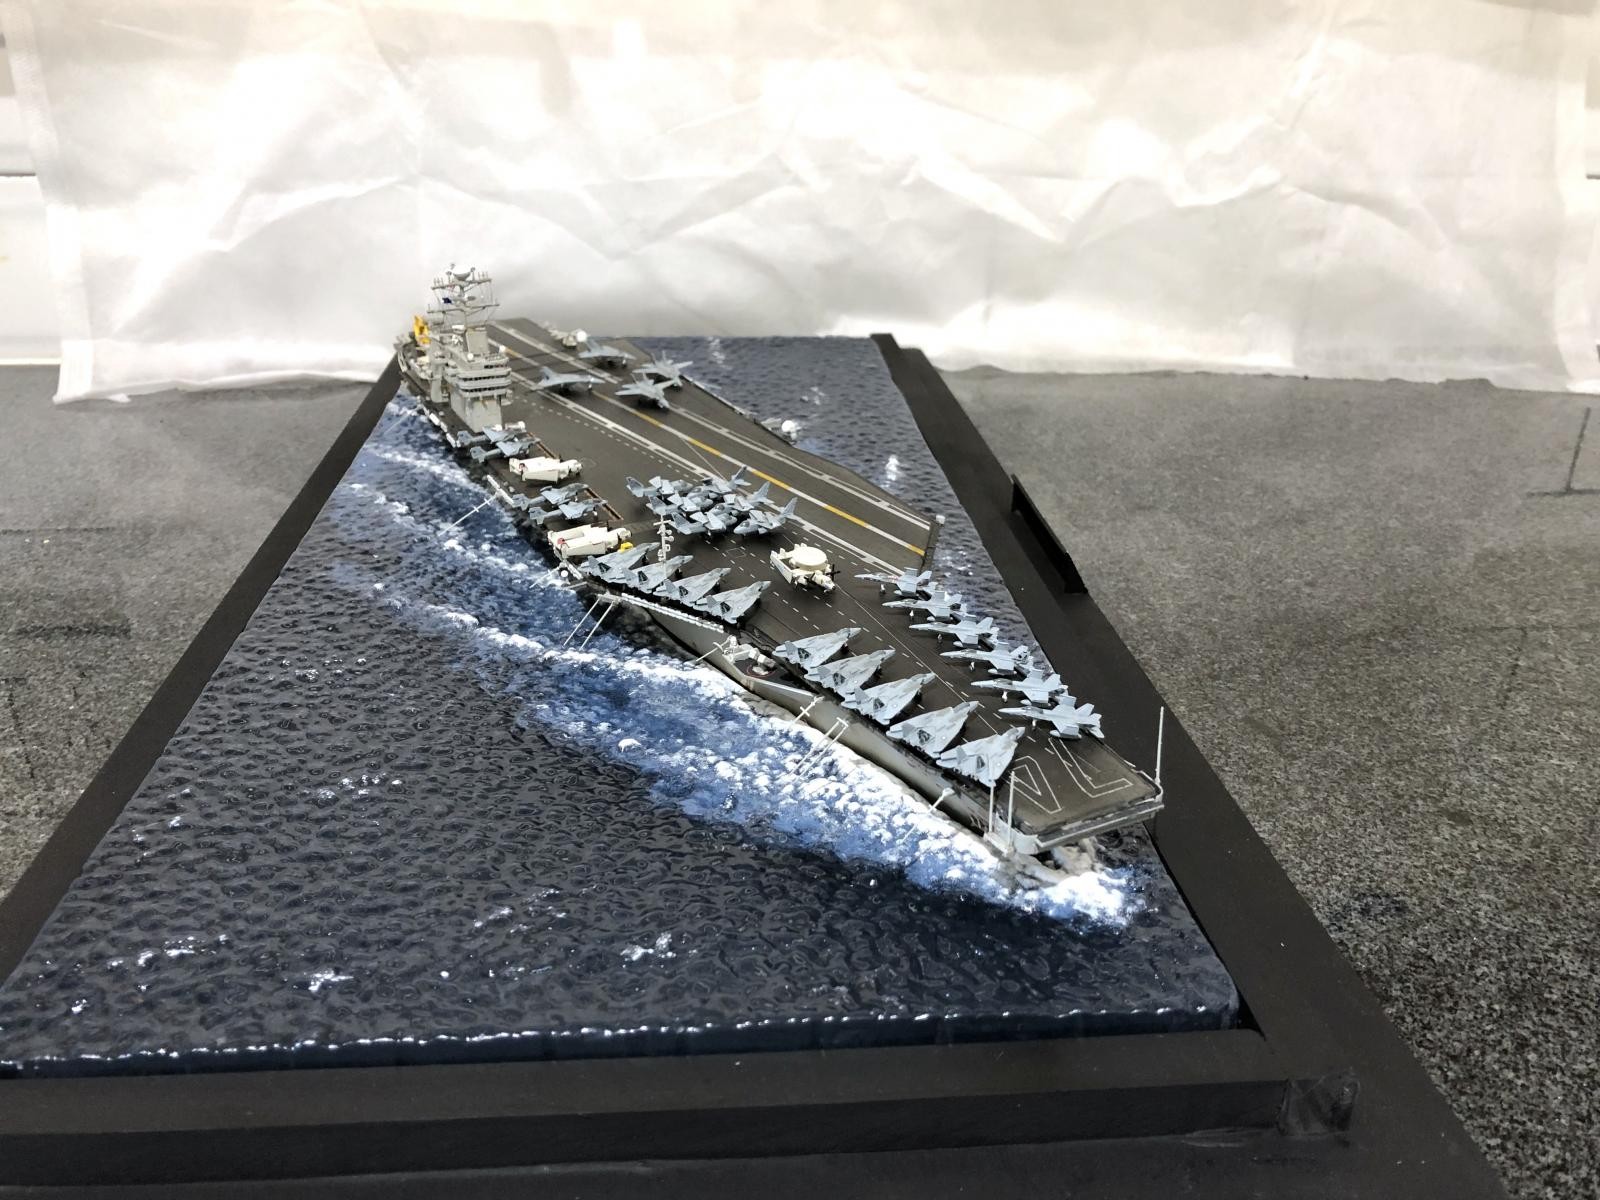
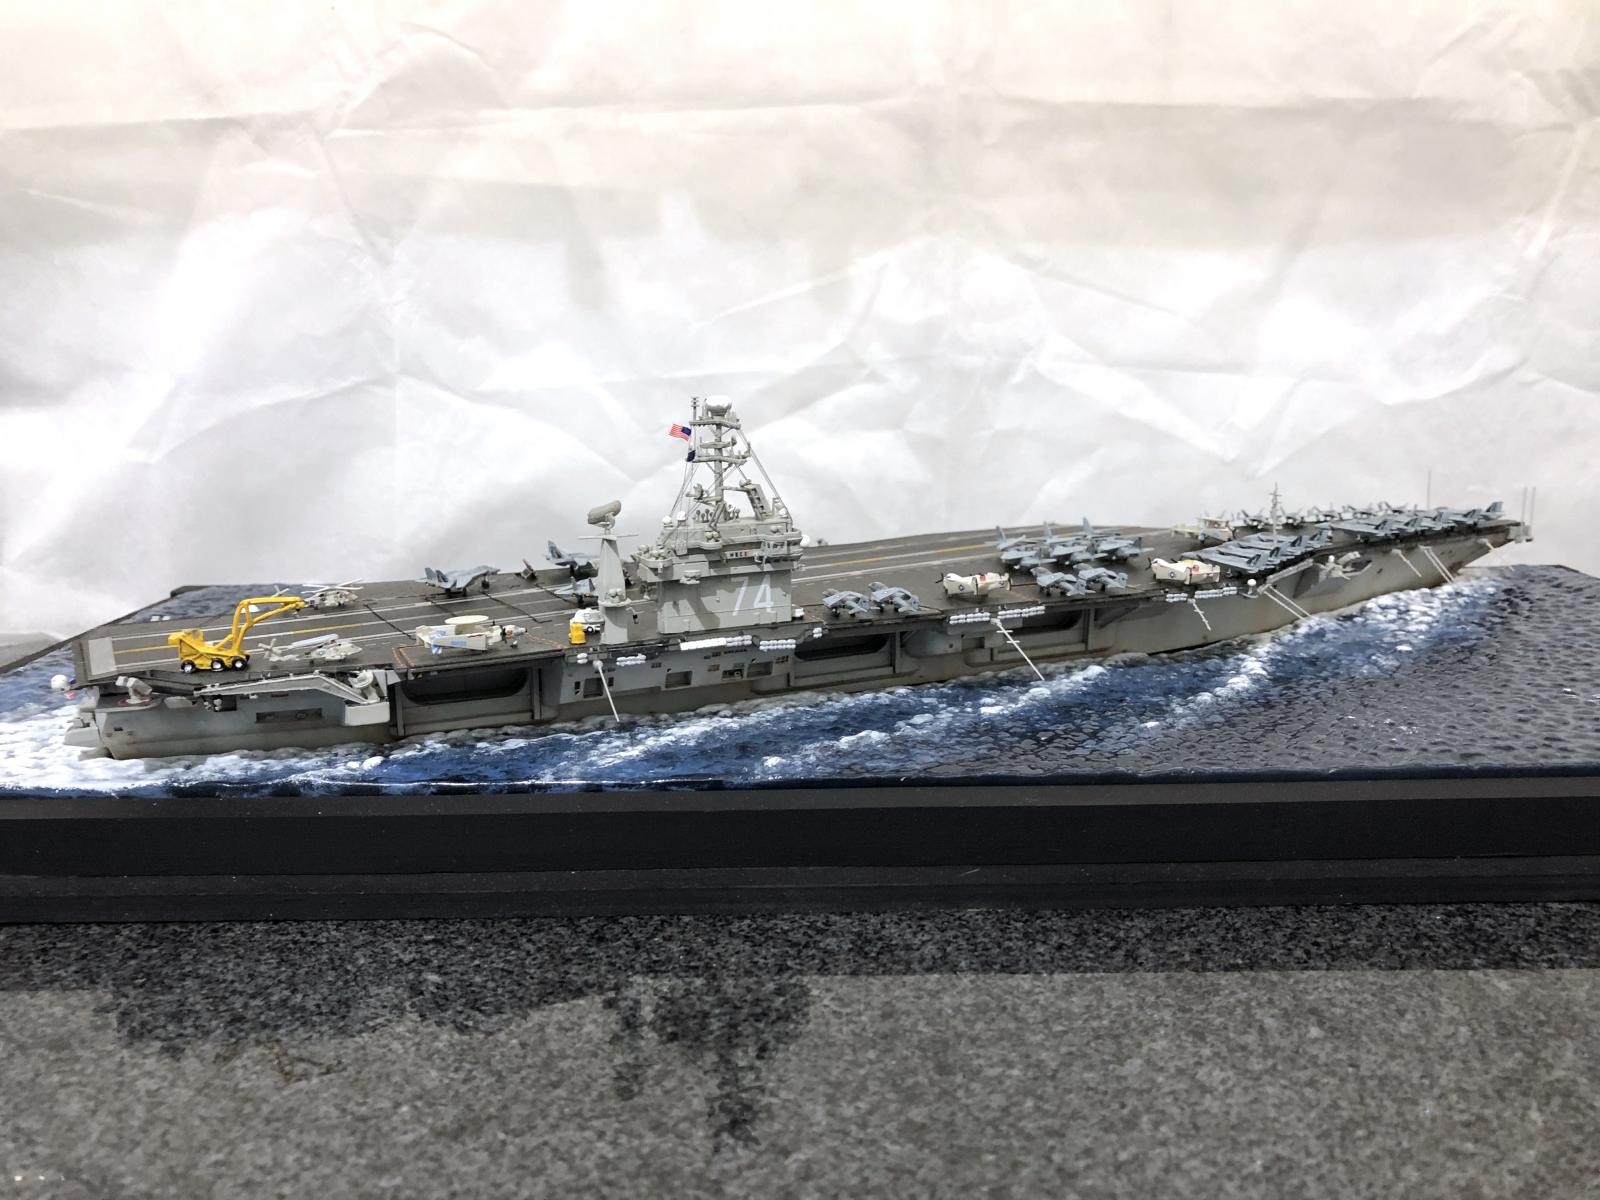
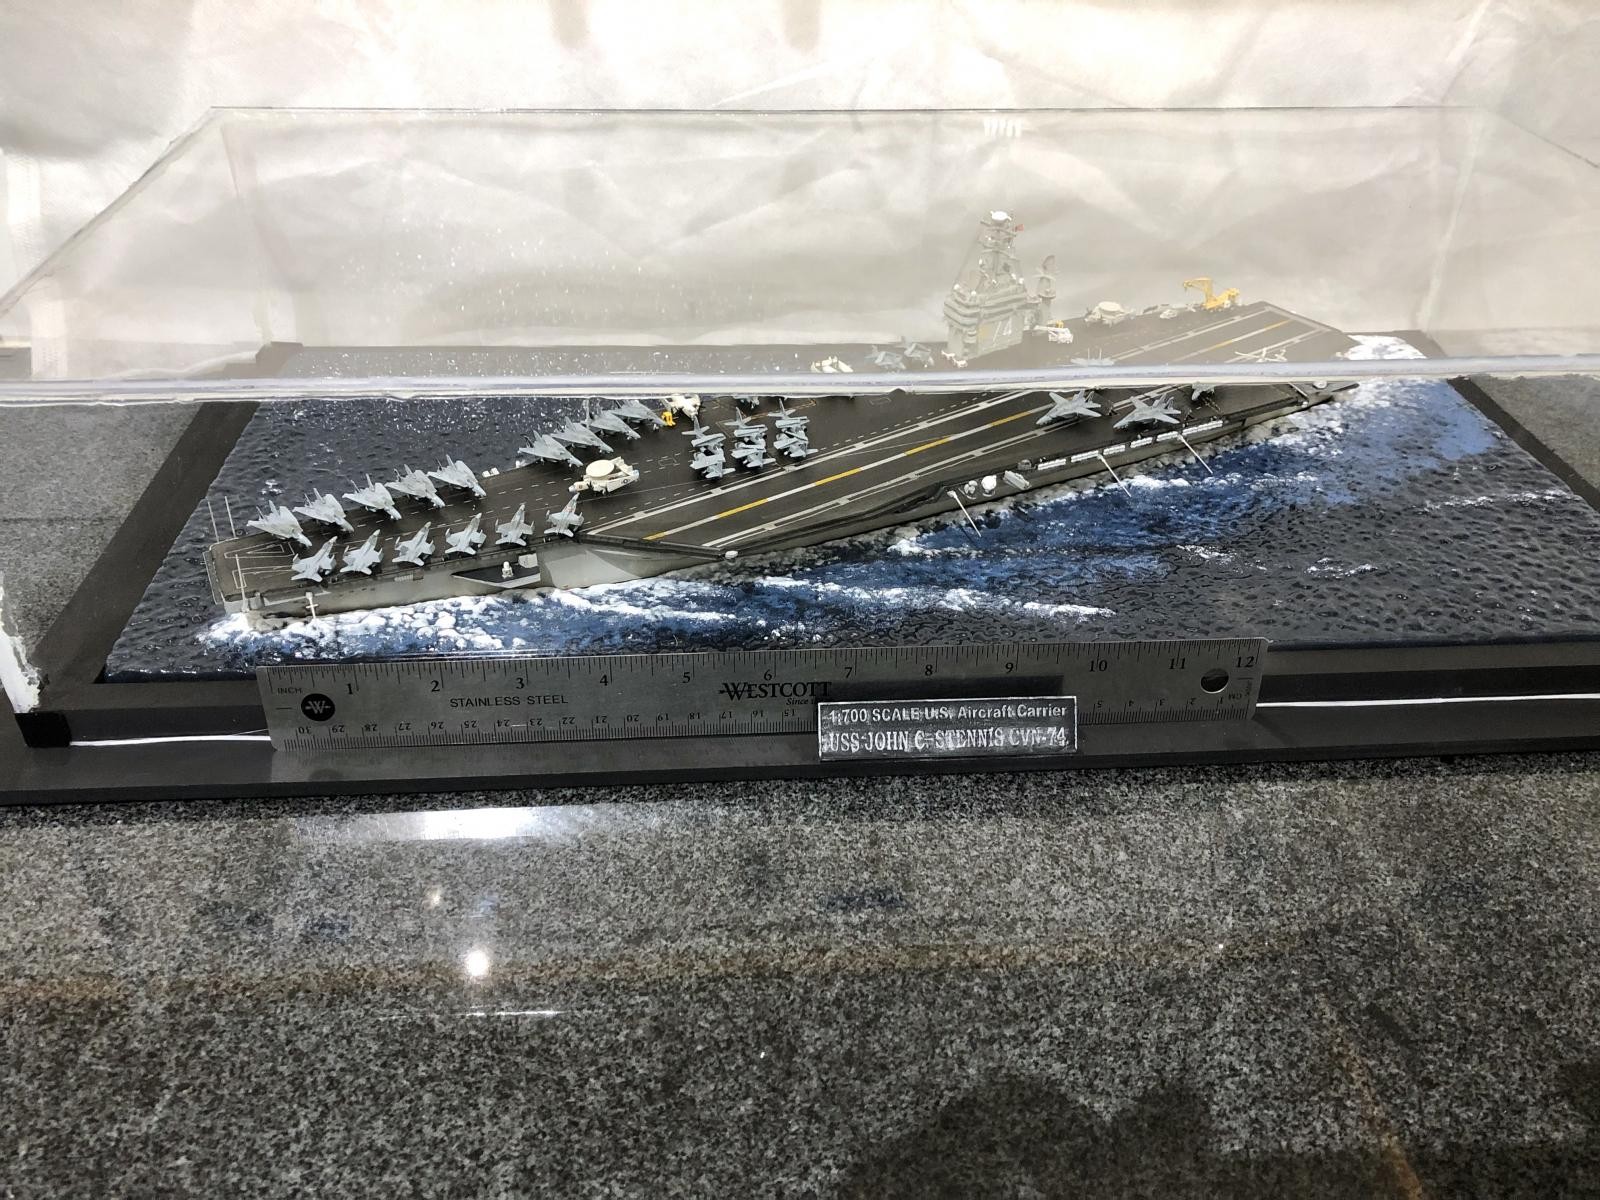
The build: I decided to go with the waterline version to save on vertical space. The shelves I have do better with models that aren't too tall so it's what I went with. Originally I wasn't going to use the water and I wasn't going to have a case. So I decided to build the ship with all doors closed. You can choose open or closed for all and you can position the elevators up or down. I chose closed because I have 3 dogs and knew it would end up with dog fur inside that I wouldn't be able to get out. Had I known that I would later decide to build a case I would have left them open because the inside is pretty detailed, especially for being 1/700. I would encourage leaving them open and buying extra aircraft sets and putting some inside. I detailed the inside even though no one will see it. But I know it's there so that's good enough for me! Once the lower deck is built, the brass wire is tied through the deck and then the flight deck goes on. It goes on snug and is a large part which may have warped a bit so clamps are a must but it's a good fit once you get it on there. On the upper flight deck you can decide to position the jet blast deflectors up or down for all 4 catapults. I chose to go with 2 up, 2 down. The decals for this kit go on really well. They're thin enough to melt into the surface and look painted once some microsol is applied. My one gripe about the decals for the deck markings is that they are so long and thin. Specifically the dotted lines. I would recommend cutting the longer ones in half or 3rds to keep them from breaking while positioning or folding over on themselves. Decaling the flight deck is a TASK but patience is key. The superstructure has alot of clear parts for the windows in the control tower. Masking liquid was my best friend on this kit in order to get the clear window effect as opposed to when people paint windows on by using black, gray, silver, blue, or smoke. There are a ton of really, really, really small parts on the control tower, radar, and masts. I don't think I've ever used my tweezers and cell phone light so much. I would highly suggest using a mat or masking tape to cut onto as these little parts can get lost really easily. The carpet gods always appreciate a good sacrifice but I wasn't about to let them have one. This is where one of my gripes comes in the the photo etch. It's hard to make a plastic radar assembly look realistic, it would be amazing if they included them in the photo etch set. I know one can buy aftermarket photo etch radar for certain ships but I couldn't find one for this kit. If they are already including photo etch... why not radar? Anyway, moving on. I decided to rig some wires. I used extra fine rigging line that I found at my local hobby shop and I think it added a nice little realistic touch. I used the decal flags that came with the kit but ended up kind destroying them because they did NOT want to stay put on the rigging line. I had to keep fussing and fumbling and ended up abusing them a bit but they look ok. Once the tower and mast were complete they both went on excellently into place on the deck. There is a small tower located along the same line as the mast and tower but towards the bow on the actual ship that the model doesn't have. I had to scratch build one using reference photos. You can see it sticking up between a couple of tomcats. I have a pretty decent spares box so I got it to look pretty darn close using what I had. The kit comes with a large aircraft crane which is molded in a raised position with the hooks hanging accordingly. Problem is I wanted it down and flush with the deck as normally seen when not in use. A little bit of surgery on its base and on the hooks to change their angle and it fit flush really well. The deck tractors are molded in a single piece each, the forklifts are 2 pieces each, the tow truck is about 7 or 8 pieces, and the crane is only 3 pieces. Which I though was ridiculous. This is a large vehicle, easily noticed, and they molded the entire crane portion in one solid part. The crane should be moslty see-through as it just a collection lf bars and wires. The kit has many many tiny parts and intricate builds and they couldn't think to make this one of those intricate builds? Instead they throw one giant, solid, clunky part in there. I tried drilling the part but it was THICK. So i just scratch built my crane instead out of wire. I used the rigging line on it to give it a more realistic effect as well. It's the yellow crane. It started becoming more and more apparent that I was going to need to put it in a case as it would be super hard to clean without destroying it. I decided I would use the water base and painted it to actually look like water. The aircraft took me a long time to build. They have to be assembled out of many tiny clear parts so unless your lighting is great and you're using a black mat, you may go blind or crazy. I started by using the liquid mask on their canopies and then went to work with my tweezers. I wanted extra F-14's so I added a set of Trumpeter's 1/700 F-14B/D's. The set comes with 12 but half are supposed to be made with wings extended and half with wings swept. Here's another gripe, probably my biggest one. Why, oh why are aircraft in this scale molded with their wings extended? This goes for all carrier-based aircraft. The only time an aircraft has it's wings in a normal or extended position, is when they are on the catapult. We have to assemble the aircraft already by adding vertical tails, drop tanks, landing gear, etc, so why not mold them with the wing seperate where they fold and give the modeller the option of folding the wings or extending them? The only exception are the tomcats which half come with the wings in oversweep but still, the other half with wings extended. So I had to perform surgery on all of the aircraft that were non-overswept tomcats. I also cut down the front gear on the 2 tomcats on the catapults to put them in the squat position. I had extra F-14's to add so I scanned and printed extra decals. My printer is not good so the decals came out decent but passable at this scale. The kit IS MISSING DECALS for some aircraft! There are 6 S-3's and there are modex number decals for all 6. But as far as tail markings, and national insignia there are only enough for 4. Also, for the C-2's, there are only enough national insignia for one. Luckily the Trumpeter F-14B/D set came with national insignia in both low and high vis so I used some high vis ones on the other C-2. As far as the S-3's, 2 of mine look a little naked but they blend in pretty well with the others so they don't stand out too much. I did need to mix some stuff around as the low vis national insignia that come with the F-14B/D set are a completely different gray than those that come with the kit, though they are both Trumpeter decals for the same Trumpeter aircraft. It was a little annoying hiccup but I just used the ones that were supposed to go under the wings and put them on top of the others, and used the different ones on the underside since they wouldn't be visible. Problem solved. Once I had the aircraft on I knew I HAD to put it in a case. They are way too fragile to brush or wipe down with the little wings folded up. I was originally going to attach all antennae along the sides in the down position but being that it was going to be in a case I had to put the ones at the bow in the up position for fit issues. I looked for a case in the size I needed and found nothing. A custom case would've costed about $200-250 so I decided to build one myself. I spent about $30 on supplies and worked on it for about 2 hours. I had never made one before. I had never worked with, much less cut clear acrylic before but I made it work. It's not pretty but it's serving it's purpose. So don't judge me on the case please! ?
Review: Overall a great kit. It is very well made quality-wise. And although there are some things I think it could use (foldable wings on aircraft, photo etch radar) it doesn't NEED them. The two things it DOES need are enough decals for the aircraft provided, that little tower, and at least a half-way decent and passable crane. Given the price of this kit and the vast amount of options it gives its a steal. I think it retails for somewhere around $60. All of the different options and obviously being able to position the large array of aircraft and vehicles means no two builds will be the same which is amazing. The details stick out well but not so well that they look cartoonish at this scale.
Final thoughts: I LOVED working on this kit. It was a lot of fun and extremely rewarding. I made some mistakes but being that I'm new to ships and this scale I'm extremely proud of it and really happy with it. It took me almost a year to build so it kept me busy and gave me many hours of entertainment. I don't know if I will ever build a ship this size again because of the space it takes to display something like this. I live in a tiny apartment and space is limited. But I may try a smaller carrier like a WW2 one someday. I'm sold on ship building! ?
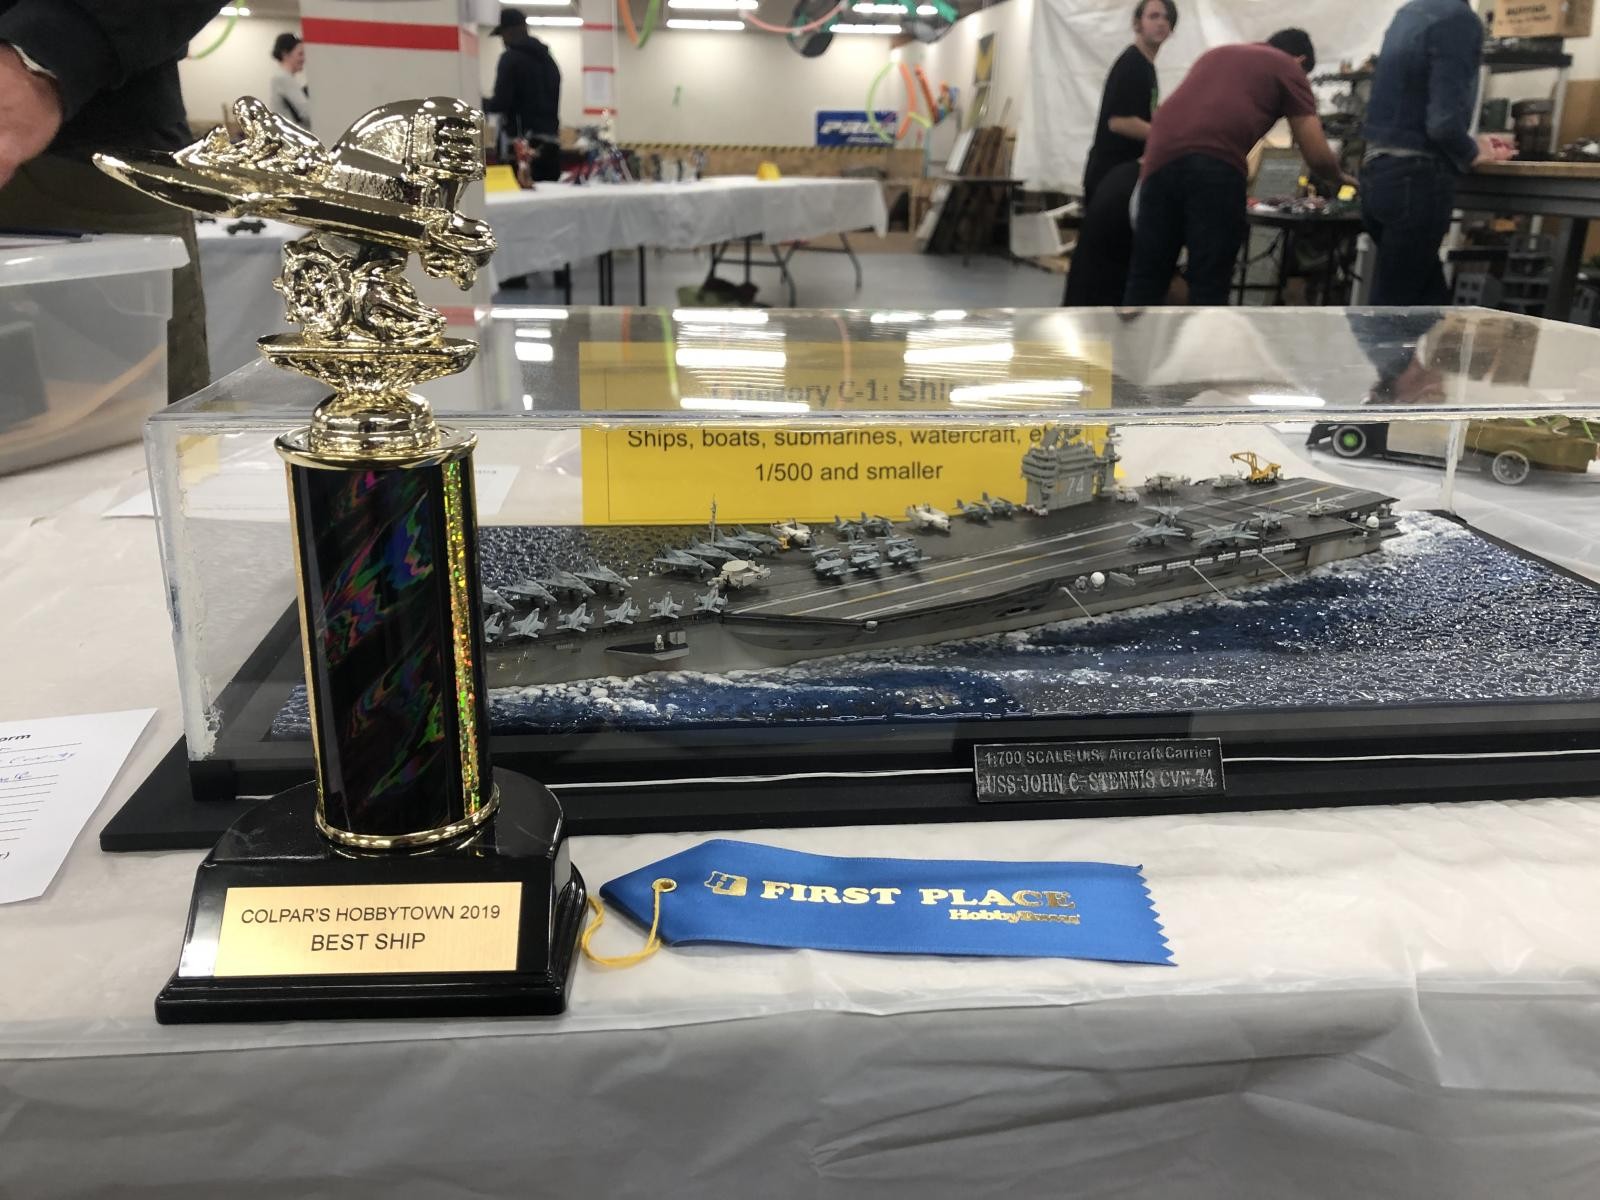
update: It won 1st in "Ships in 1/500 and Smaller" and Best Ship overall in a competition so I'm pretty happy with that!


Congratulations on your place to and beautiful build!:)
Thank you very much!
This is a great looking ship, Jorge. The water and wake of the ship is particularly well done. I haven't seen very many ships on iModeler, so I hope you do some more.
Thanks! I actually just started on CV-6 USS Enterprise as she was during the early summer 1942 in 1/700 scale. It will probably take me about a year but I'm excited about the build!
Looking really great. What my eyes caught first were the little bits of white foam on other places than just from the bow. That is what makes it for me. Congratulations on the 1st prize. You may have to tilt the prize sideways if you are short on vertical space 🙂
Thanks! Yeah I’m a suck*r for detail, sometimes to the point of near insanity but I’m happy with how the water turned out and think it ties it all together. I still have alot to learn and look forward to growing my skills in ships. And yeah the trophy is soooo tall ?.
Beautiful work, I can almost smell the salt air!
Thank you
Congrats on a great build (and a nice trophy to go with it!).
Thanks!
Absolutely awesome work! I love the water!