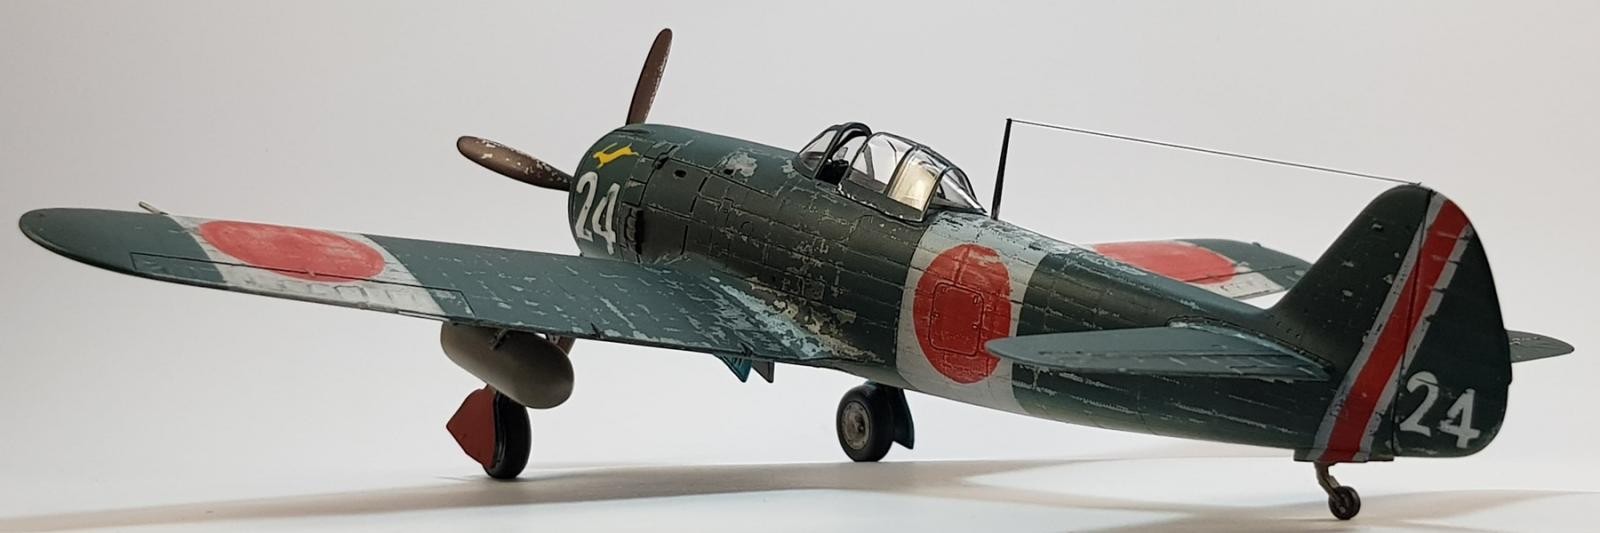
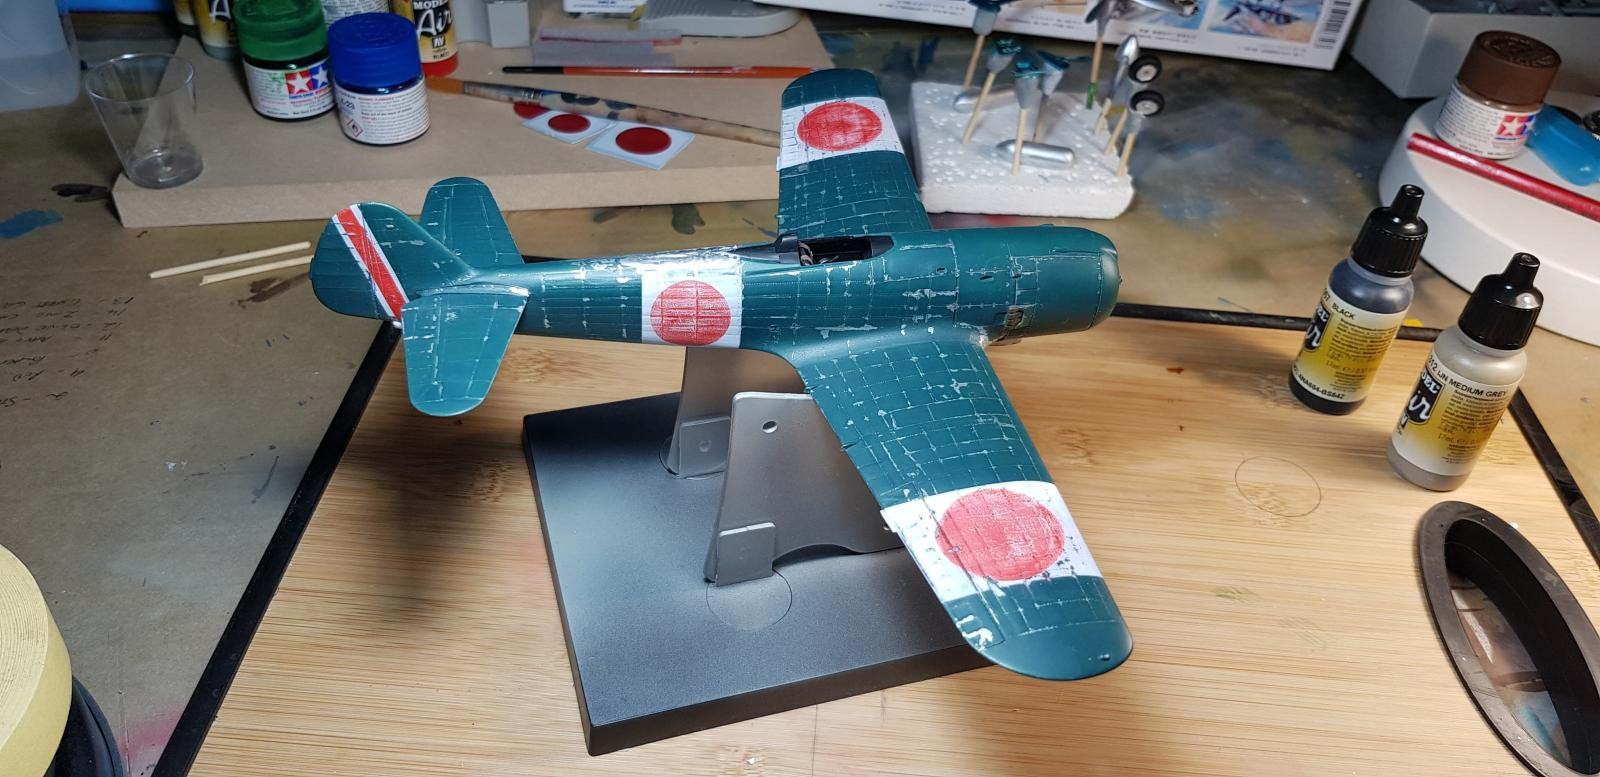
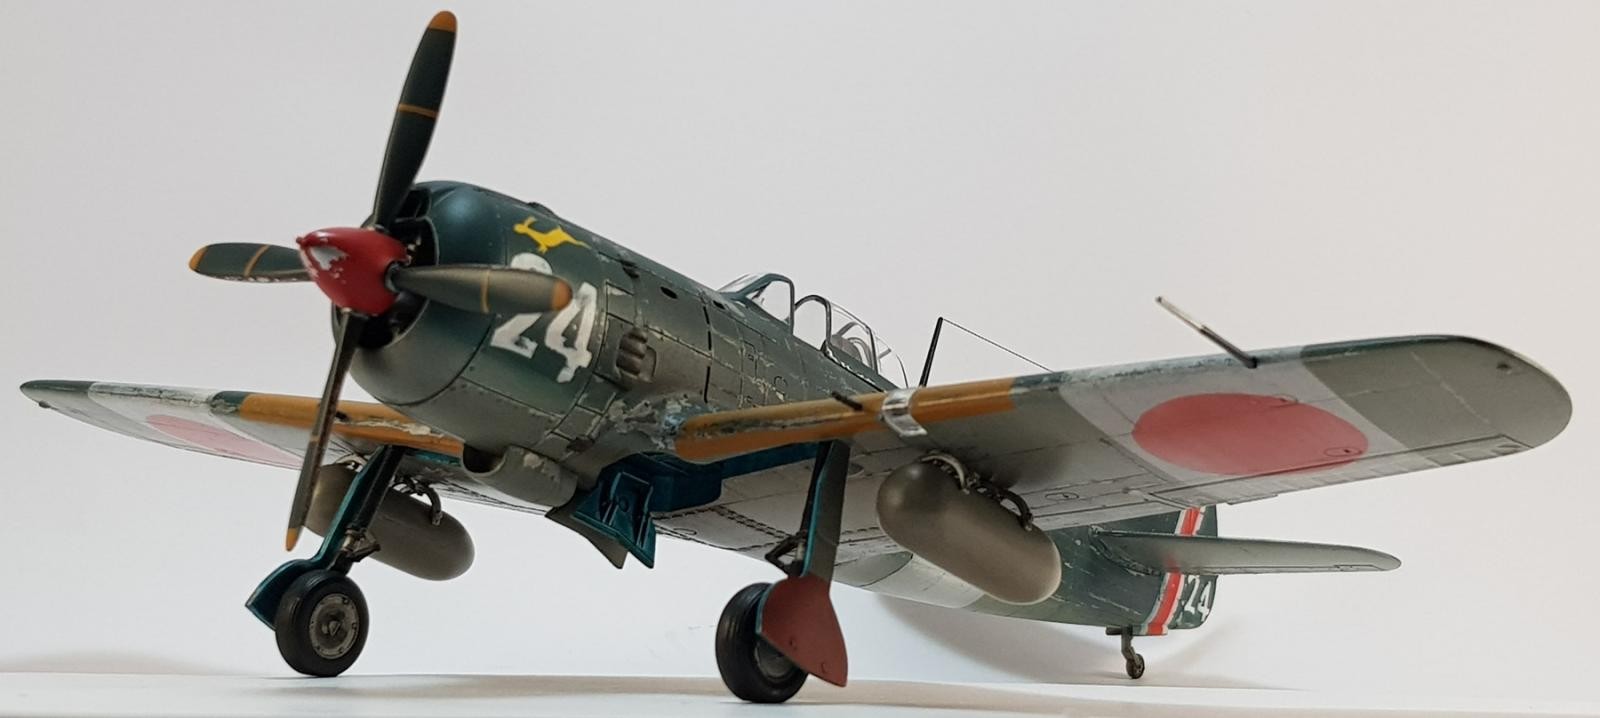
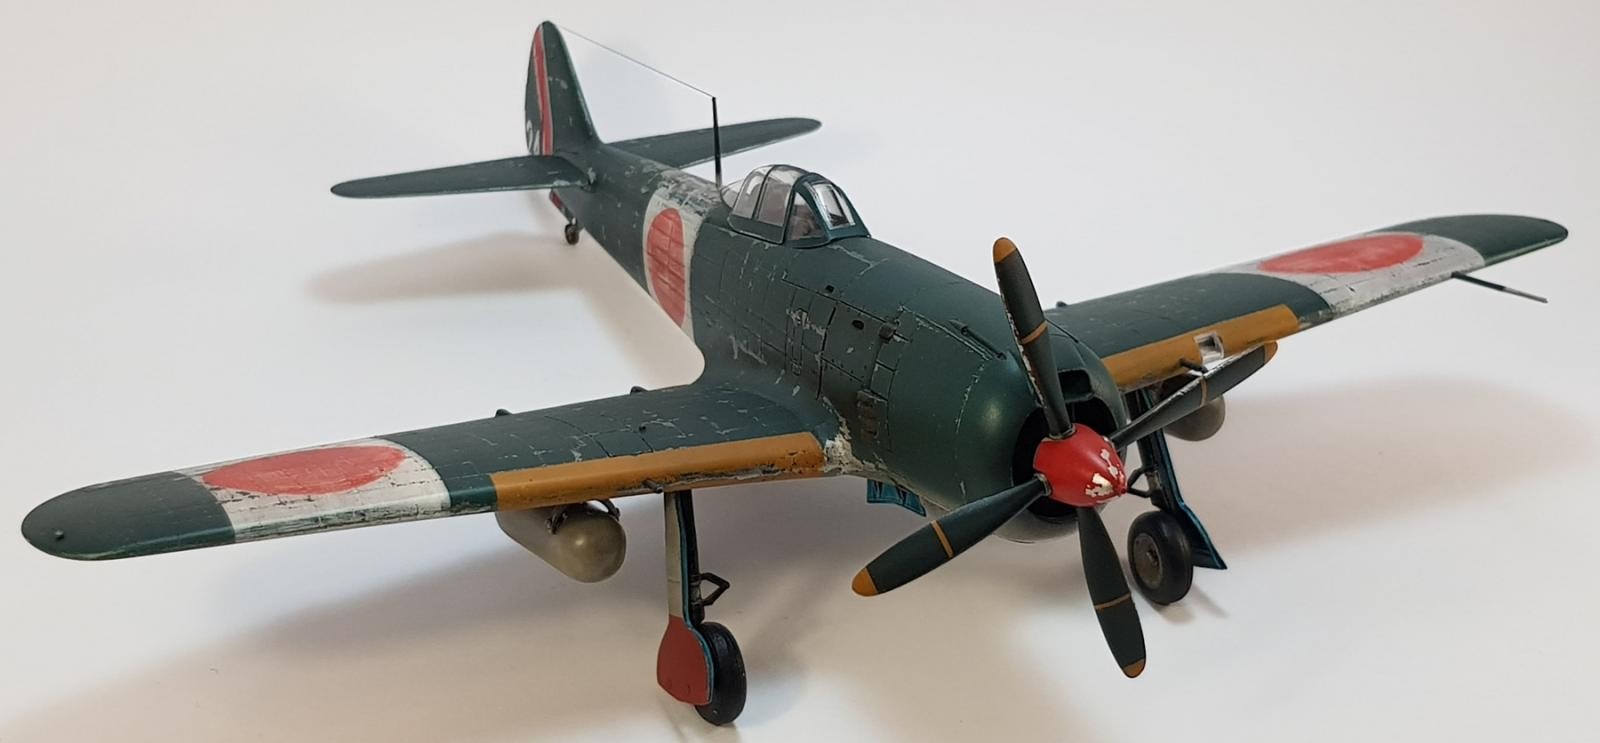
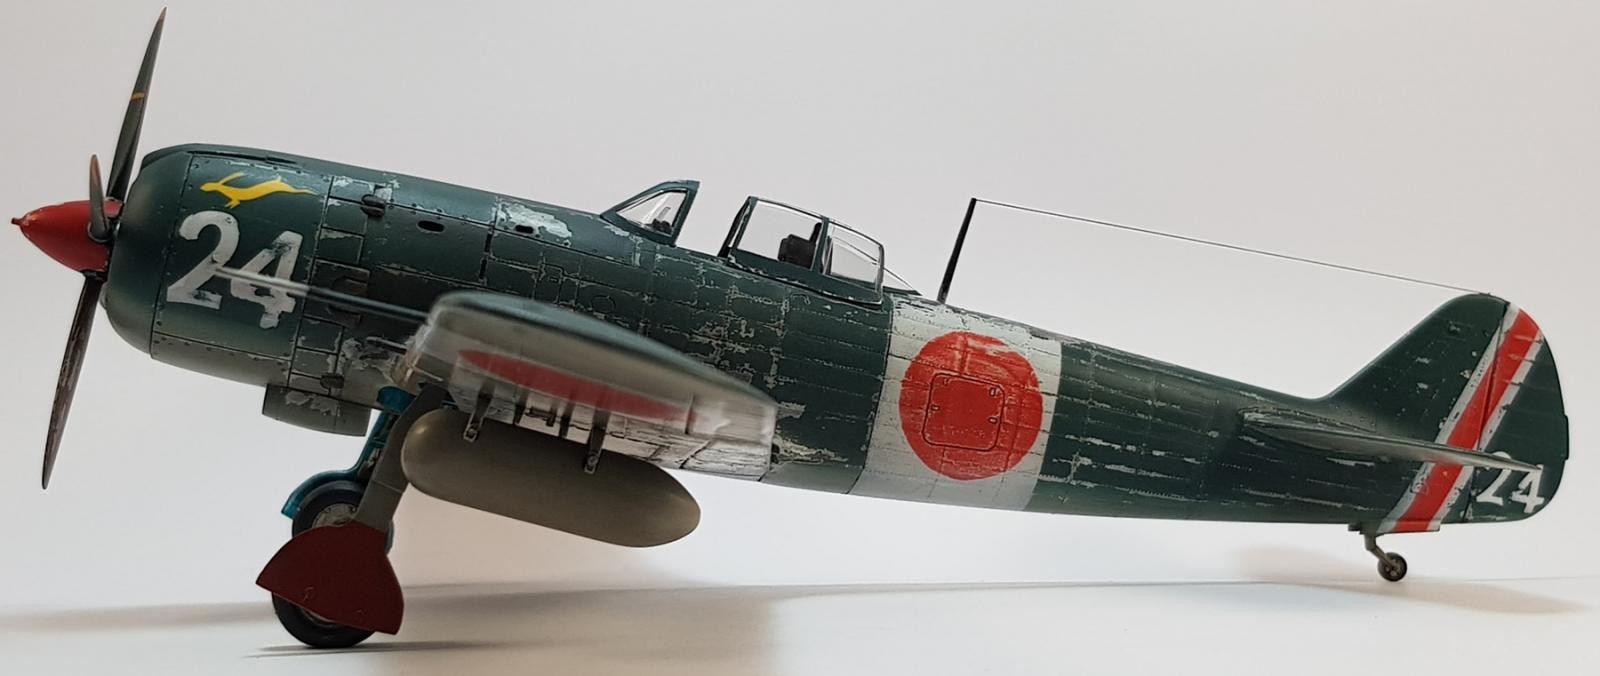
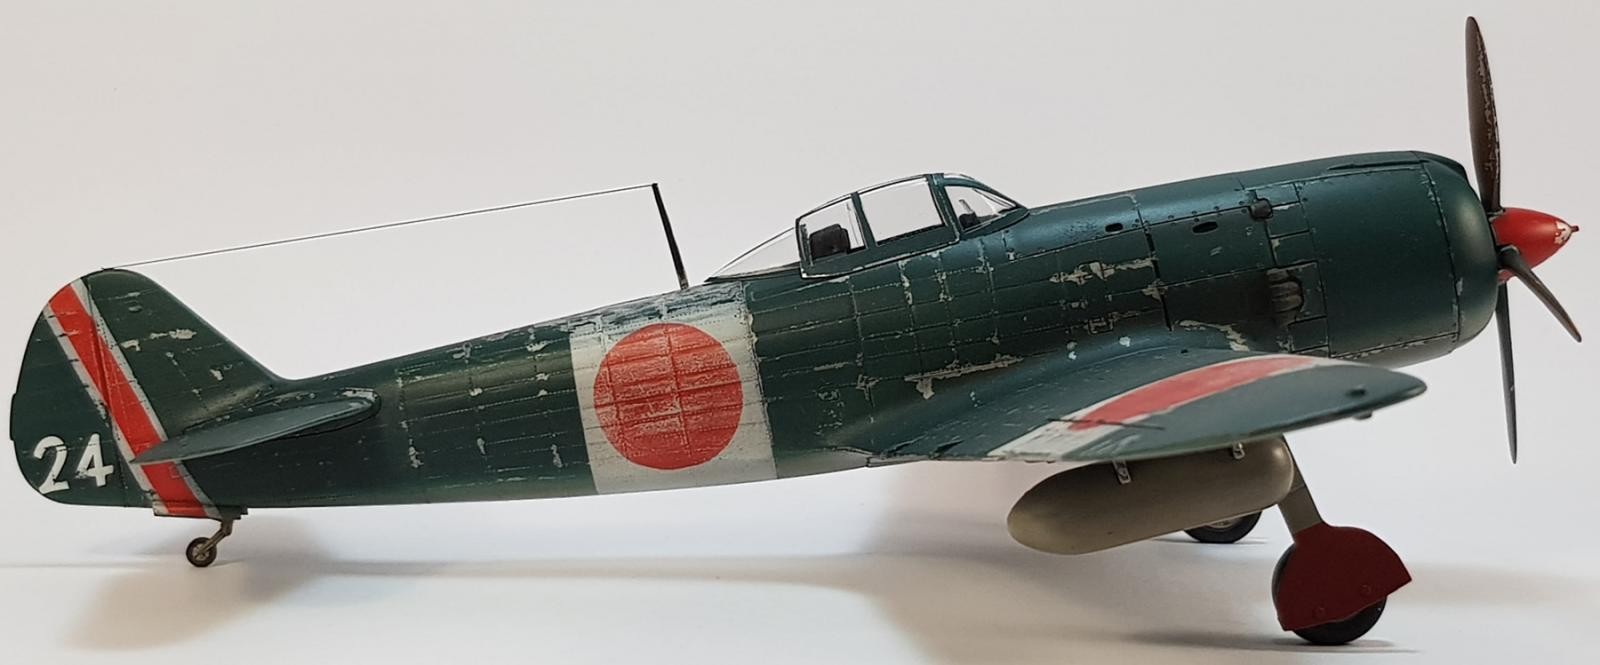
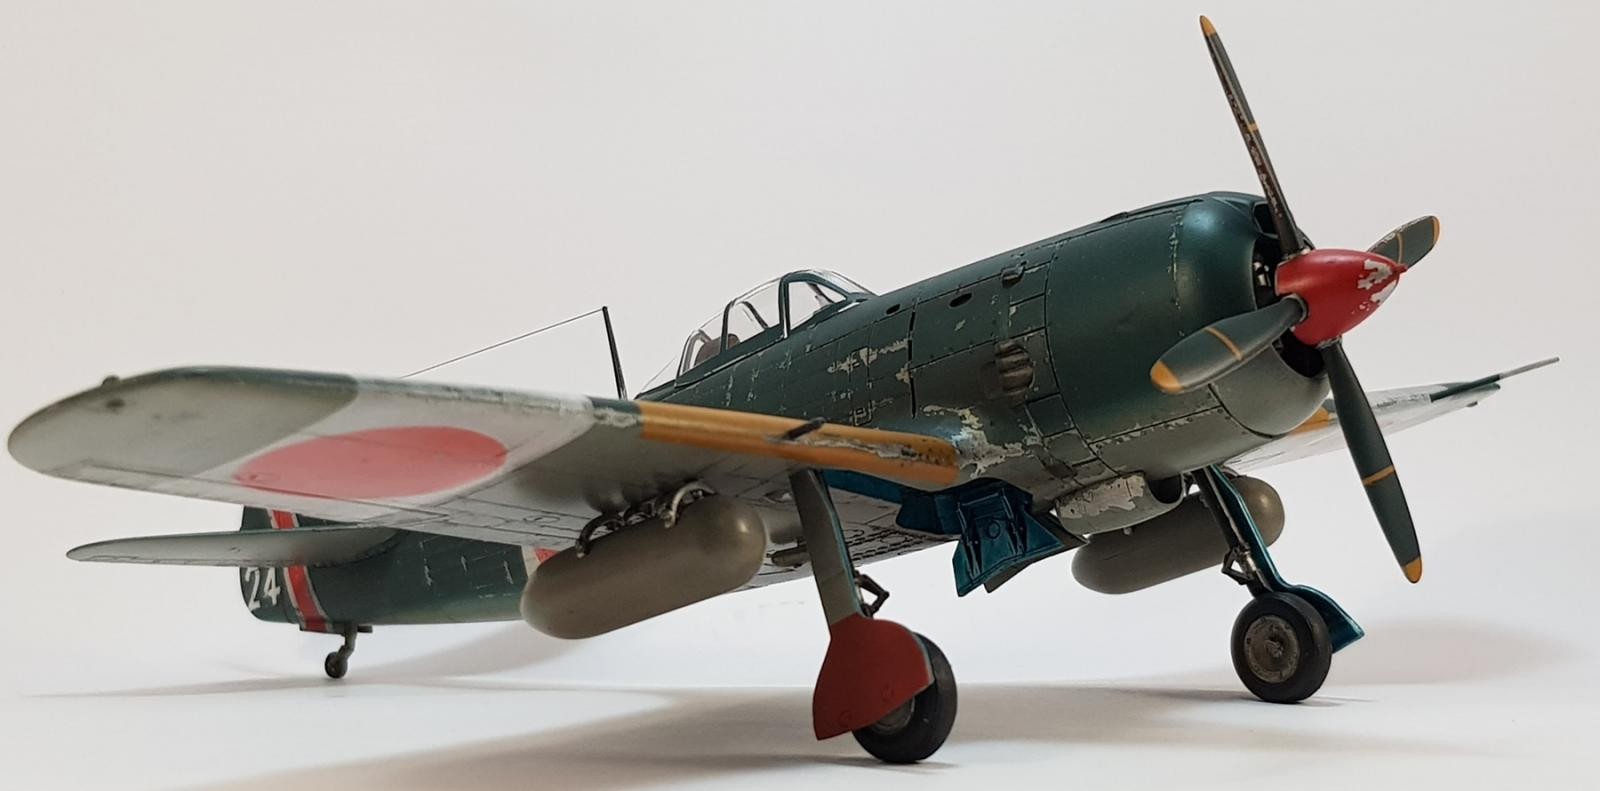
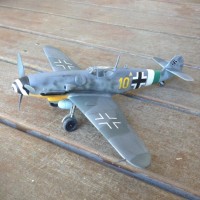
1972 Tamiya 1/48 Ki84. Attempted stressed metal build.
Another cheap as chips kit! I grabbed this when i picked up the previous Tamiya Raiden which was also a '70's vintage kit. Being so cheap i thought i would continue my exploration of techniques and stumbled across the stressed metal look. This i knew would be hard to pull off but you gotta give it a crack hey!
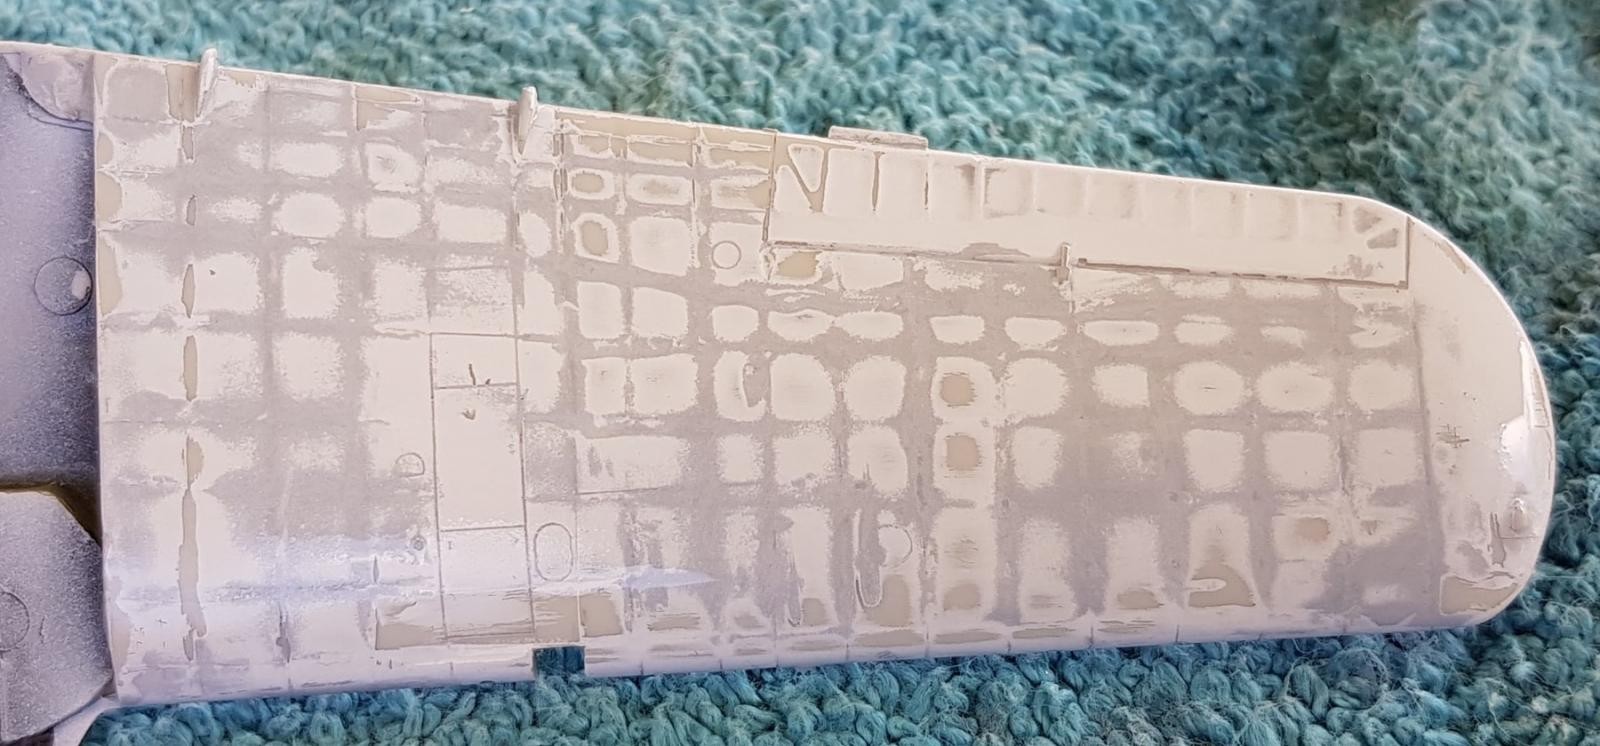
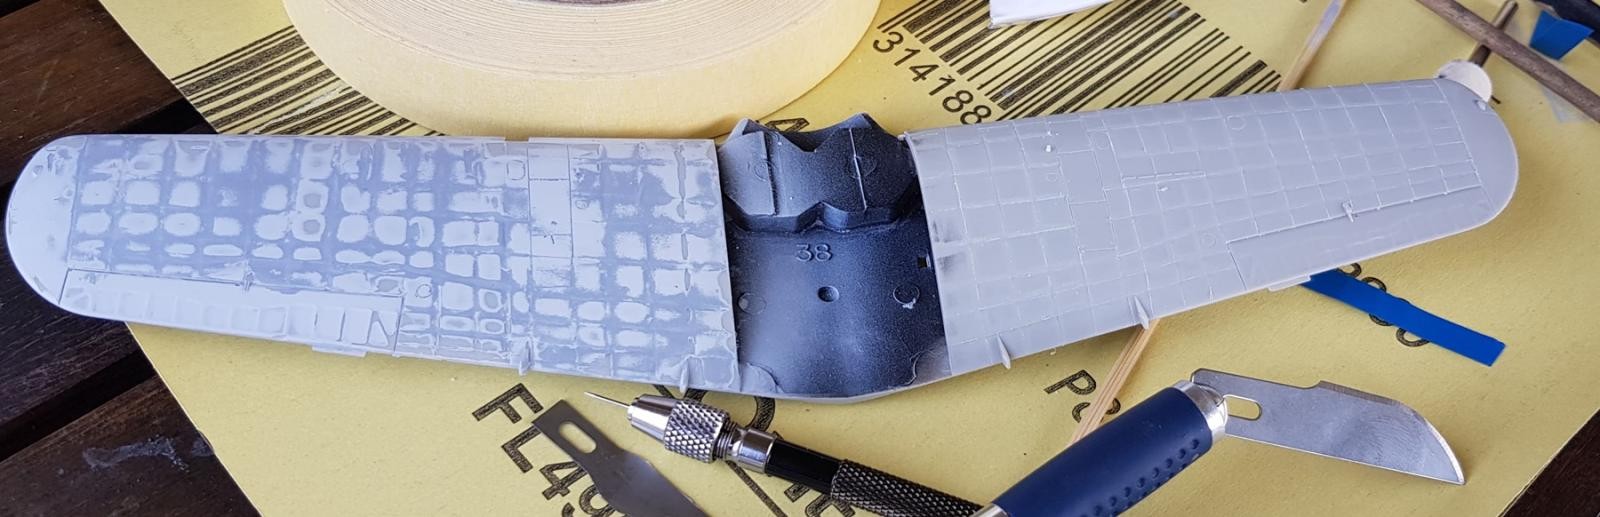
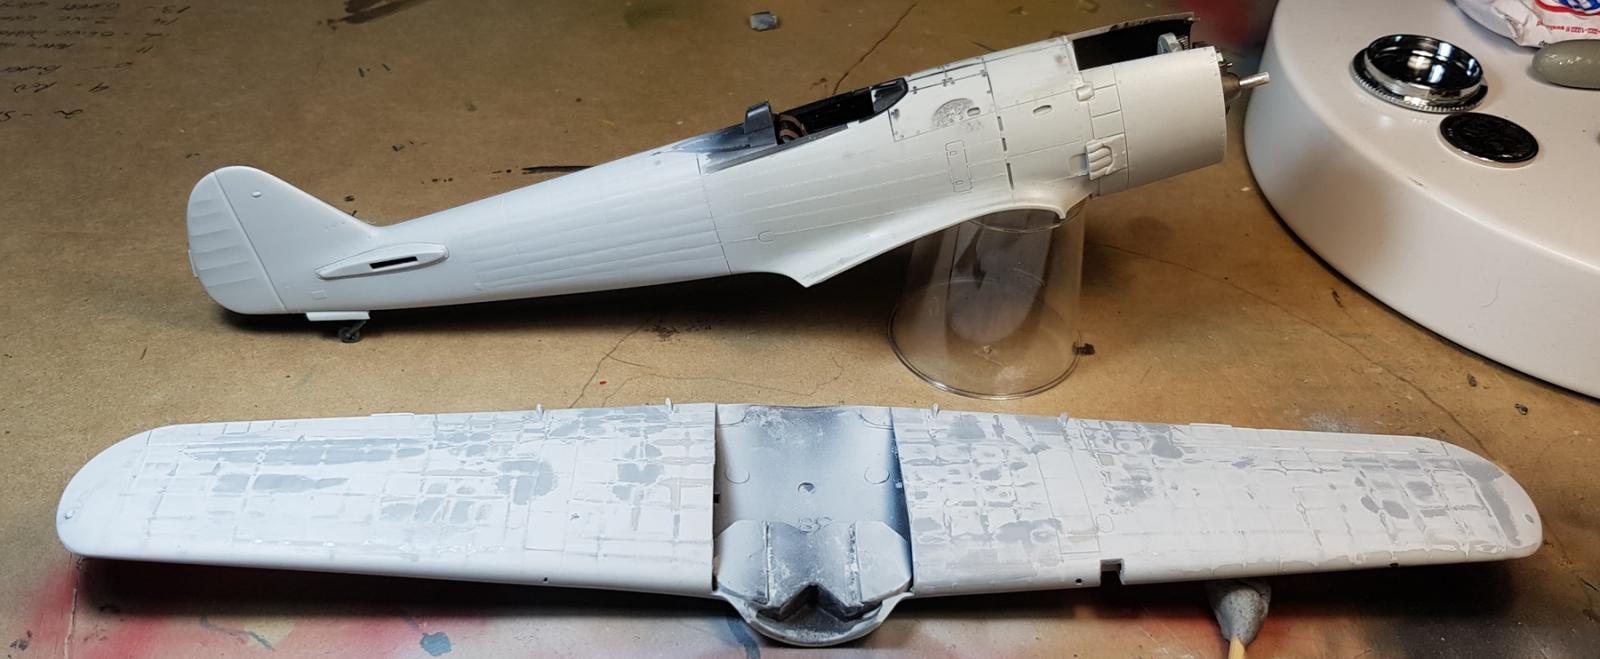
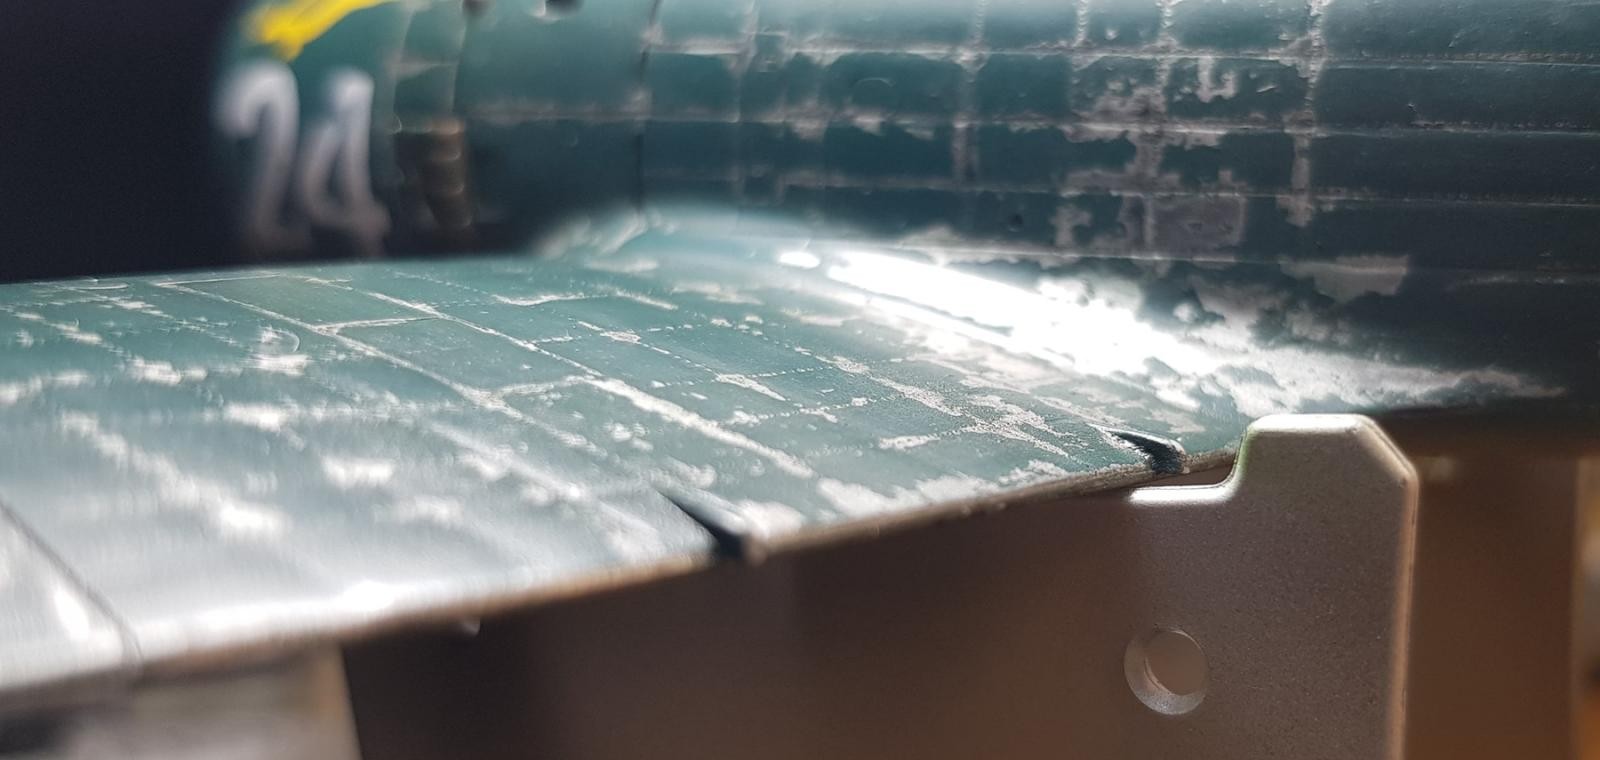
The technique involves removing plastic along panel/seam lines and leaving the surrounding area slightly higher to give the look of panel deformation, akin to making waves along sections of the fuselage or wing. I had a read through Rato Marczaks tutorial and thought, well, you have to start somewhere so let's do it.
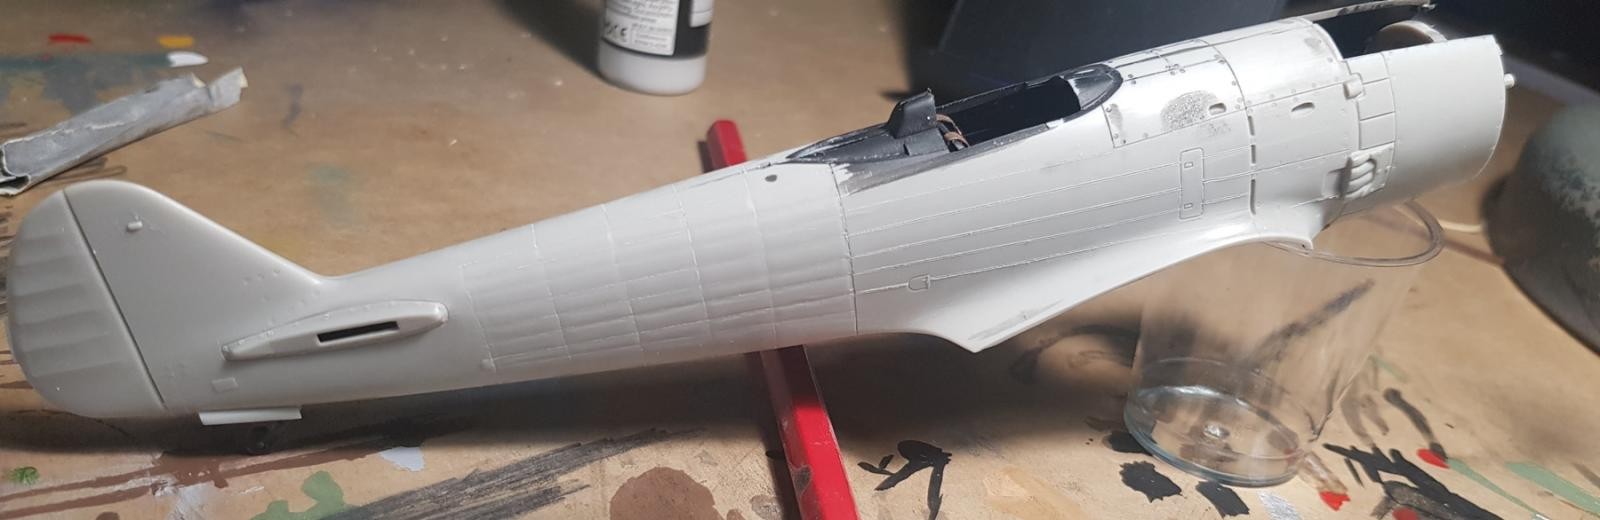
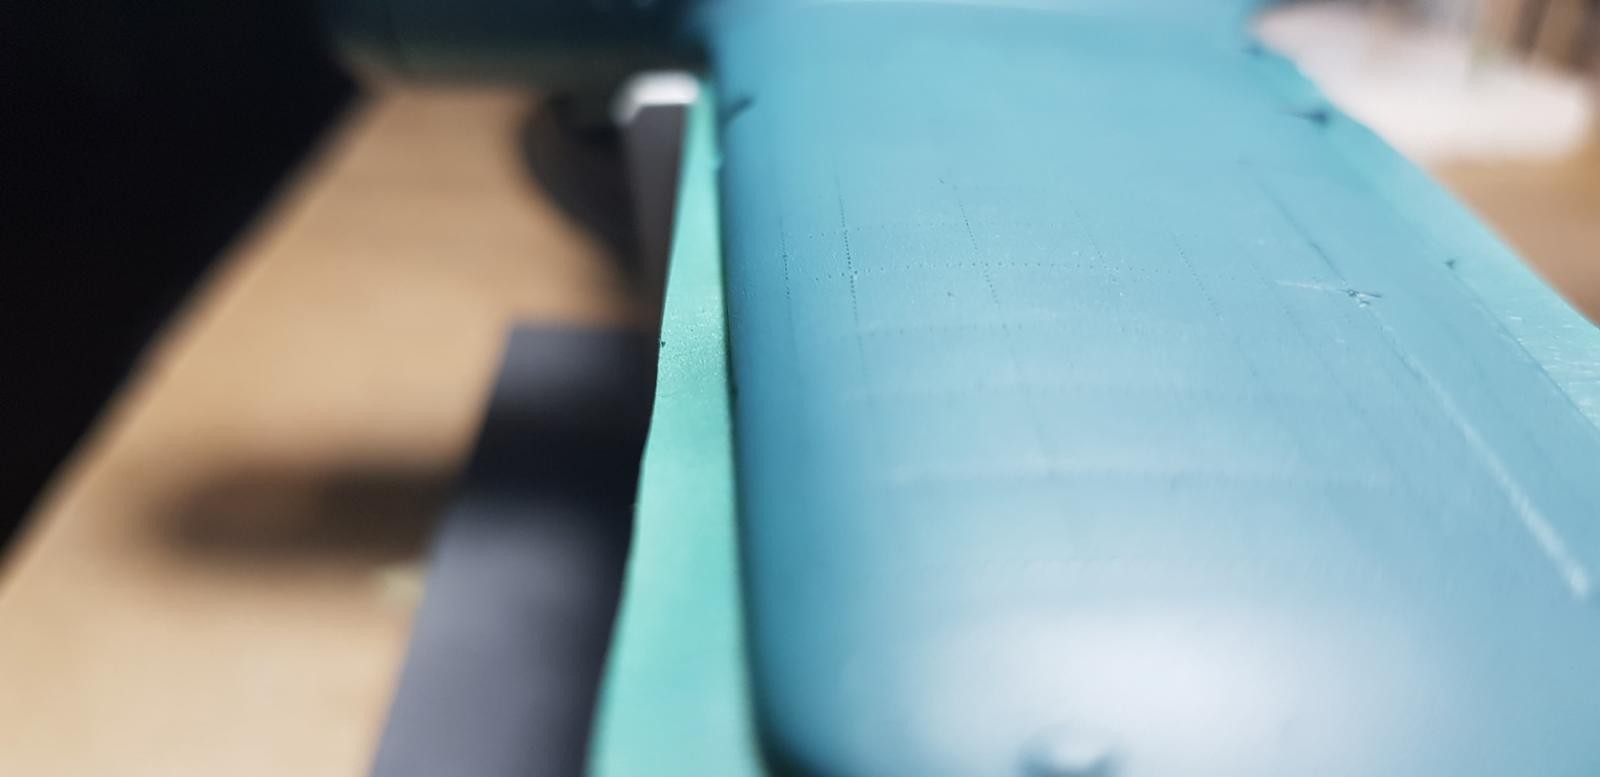
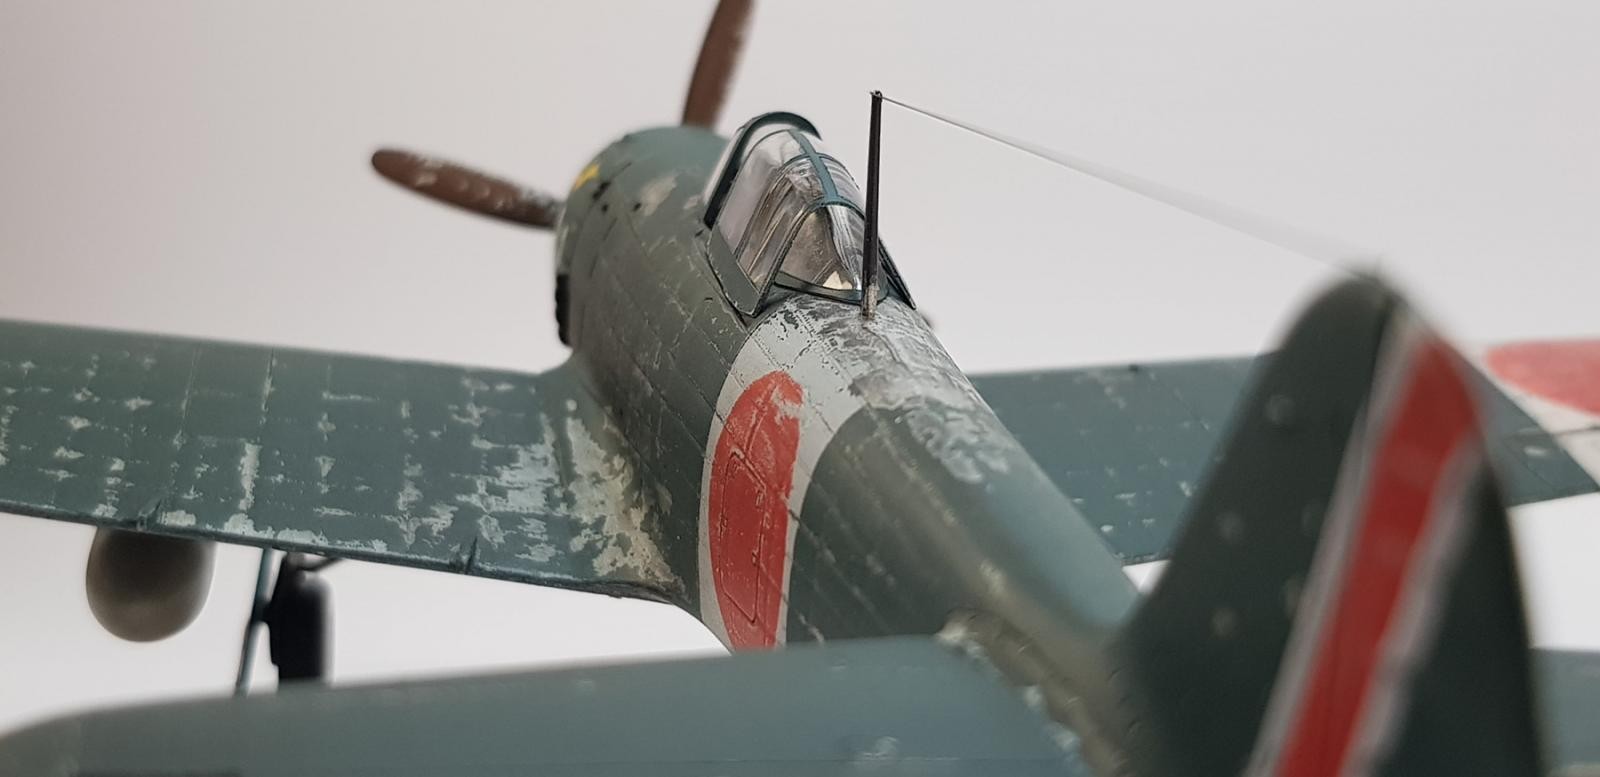
All of the raised panel lines were sanded smooth, the fuselage and wings rescribed and then i began with a blade to slowly cut tiny rounded trenches along all of the panel lines i had created. These were then all sanded with rolled 600 through to 2000 grit paper with some (many) sections requiring putty due to my overzealous carving. It took a few good sessions to get to a point where i could prime to get a feel for how it was all looking, and then more of the same. Sanding, puttying, sanding...sanding. My fingers are too big, and my eyes feel too old... but i was too deep in to not finish what i had started!
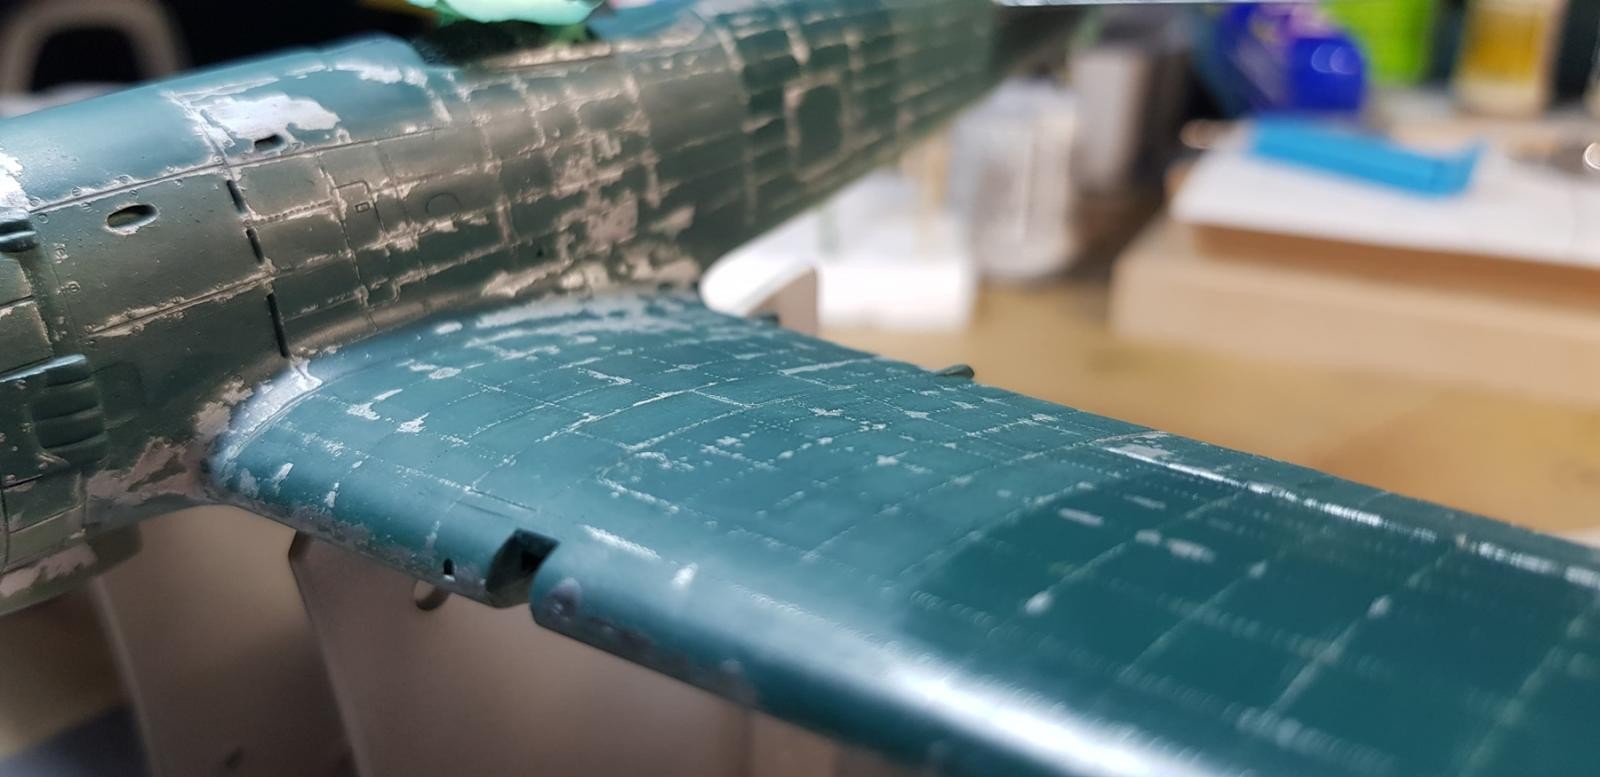
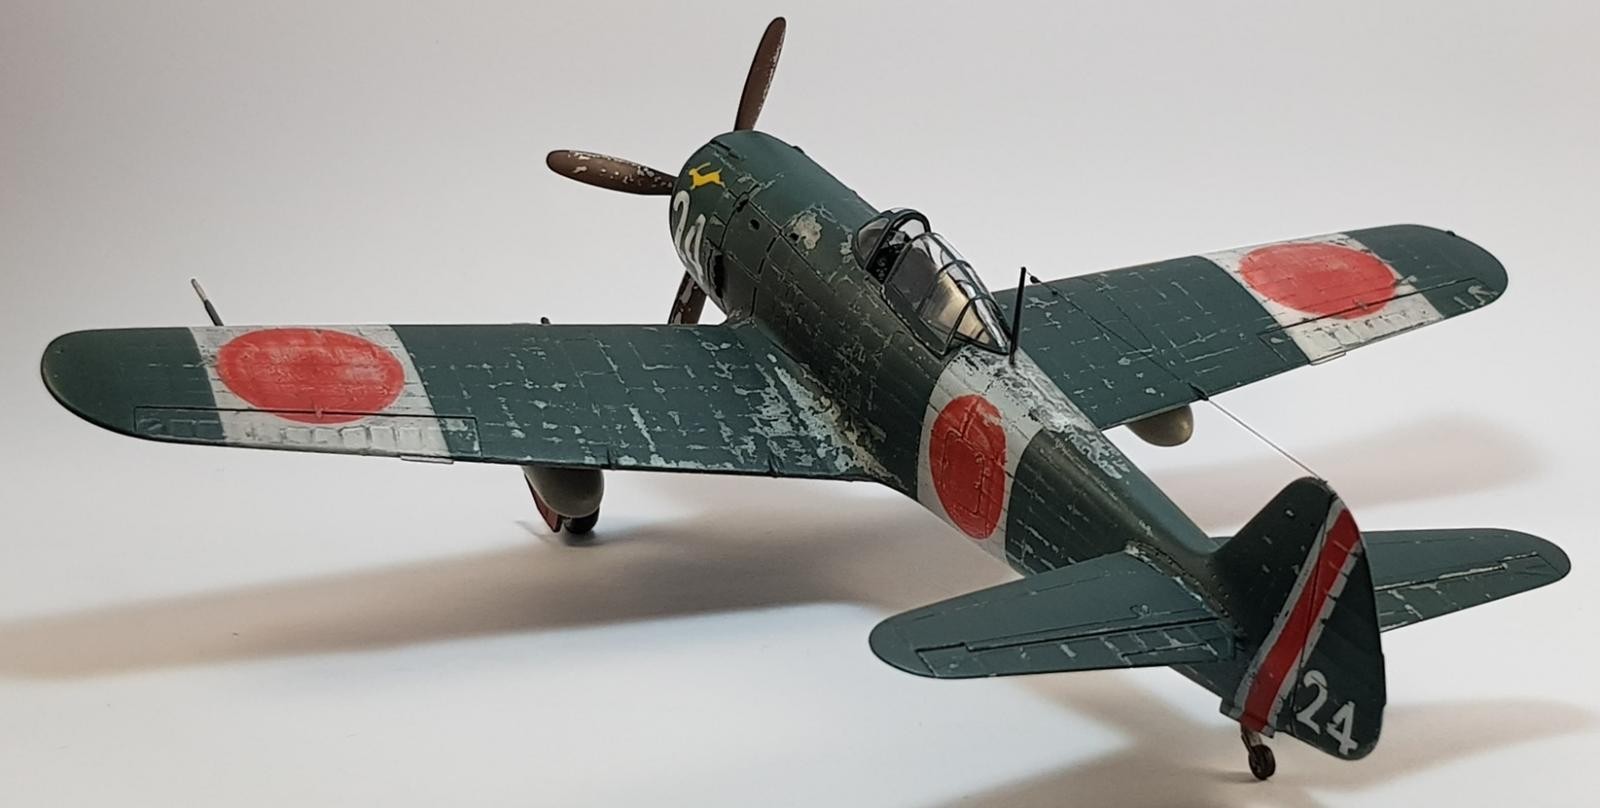
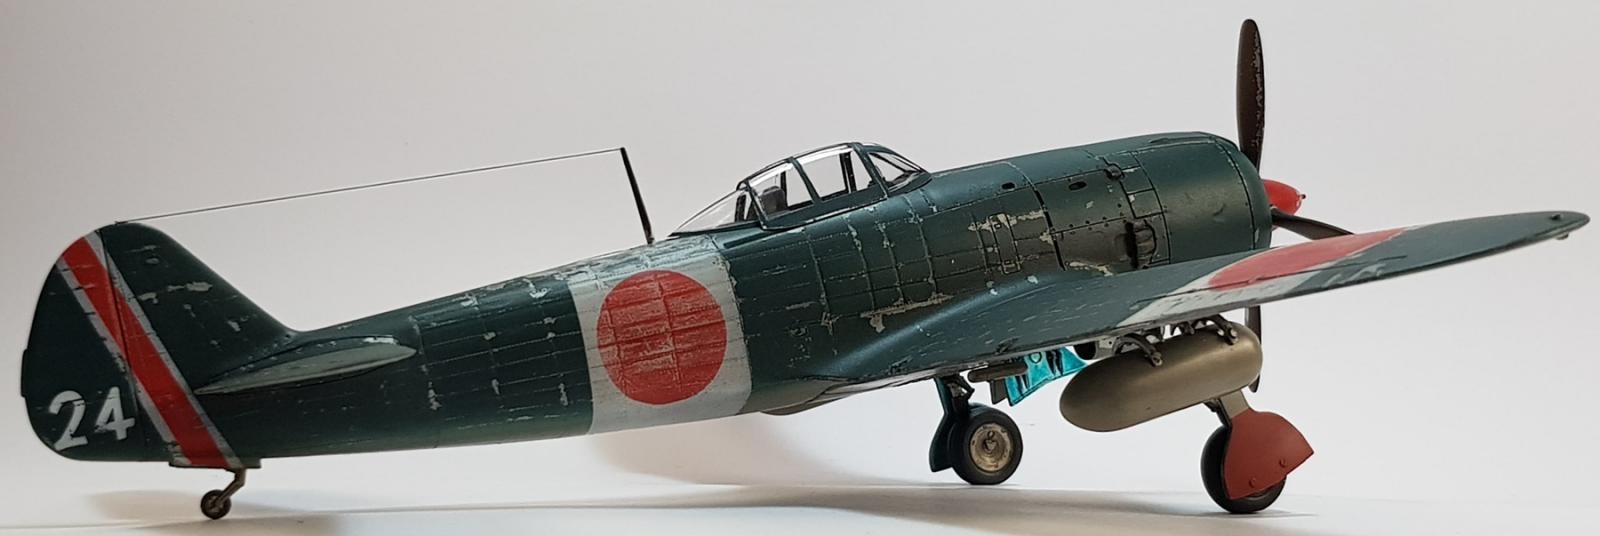
Once i was happy with the effect and realised without better tools or skills this was as good as i could do at this stage i riveted the wings and fuselage and primed her for the last time. Vallejo black base followed by Vallejo aluminium colour and then a hairspray coat in prep for chipping. I had experimented previously with the Raiden but wanted to get even more chip happy with this build. A mix of the standard Vallejo IJN/A colours and some custom mixing for the top coats and i chipped away at it until i was happy with what i was looking at.
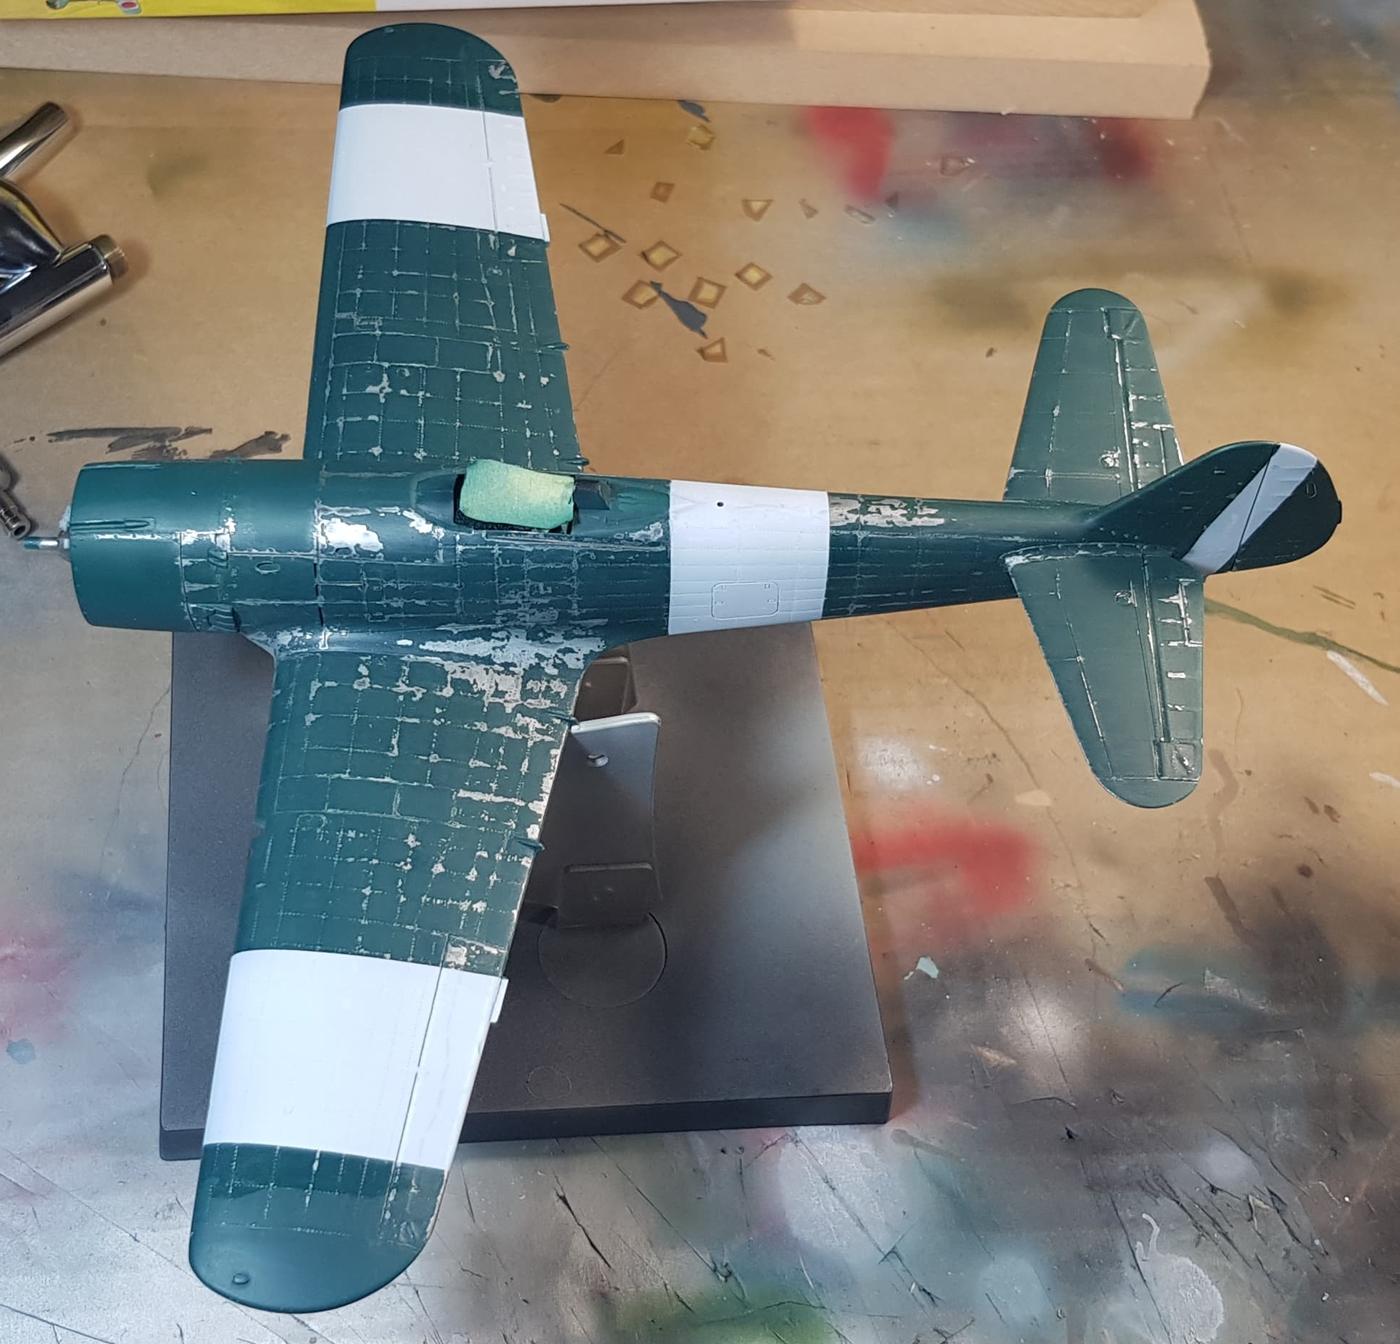
The decals stood out like the proverbial so i whacked up some home made masks out of thin Tamiya tape (never again) and sprayed the Himomarus and tail stripe, the numerals and nose art decals i weathered as much as i dared hoping they wouldn't fall apart. One nose decal did expire dramatically which explains the absence of a 43 on the right side front but I'll take that hit. A light oil wash completed the paint side of it and some uschi line for the wire topped her off.
All up i didn't quite get the result i would have liked but as a first foray into the technique i'm happy with it. In some areas it has worked well, in others i have all but lost the effect while still in other areas it is too glaring. I'm sure it's something that will take quite a few builds to get a good handle on, but, if you have a week to spend on one wing (and don't mind having no fingerprints) then you have to try it out for yourself 😀


Wow that looks like a lot of work, but the result is worth it! Stellar work, Jimmy.
Thanks Robert!
Wow...just plain WOW! Not sure I understand how you did this, but the effect is pretty cool! Well done.
Time, patience and a touch of stupidness should set you right! Cheers James!
Jimmy @hetstaine, I have plenty of that available! LOL I actually followed up on the article and book marked it for future reference. Totally cool stuff. Thanks for bringing this to light for me and others.
love your fearless approach to modelling jimmy...well done
Thanks Bob. I swear my next model is going to be plain, clean and boring:)
Rato Marczaks has a fantastic modeling website doesn't he ? I stumbled across it by accident some years ago when looking for a Corsair that was owned by a man I knew named Harry Doan. In the end I found it on Rato's website, and I (and a few others) helped him solve the mystery on how the F4U-1A in the museum ended up with a "bird cage" canopy. I had pictures of the very plane he was asking about that my father and I took when I was a boy. Rato is a gentleman, and he sent me some pictures of how "our" Corsair looks today...
You have done a fantastic job with your Tamiya Ki-84. The stressed effect is a look that I haven't dared to try... yet. But when I do, I'll keep your build in mind.
Well done my friend ! I like it ... a LOT !
Thanks! and great story! Ratos work is incredible as are the others who use different techniques for the stressed metal look. It really blows me away! I'm leagues away from from achieving it yet but it is a toe in the water.
Cheers.
I think you got the look you were going for! Nice work - love the fearless experimentation, and the courage to display your experiments to the rest of us for inspiration!
Thanks Greg, love your comments mate 🙂
Amazing work, Jimmy!
Cheers Robert, for a very basic two sprue kit it ended up taking longer than my Eduard 109s with all the bells and whistles!
Yeah, "fearless" is the right word. You're doing very interesting work, Jimmy. This is a real stunner.
Thanks Tom, appreciated 🙂
Awesome !
I love stuff like this 😀
Cheers Tommy!
This is one fab attempt to stresset-skin @hestaine missed it in the feed somehow, better late than never! Kudos!