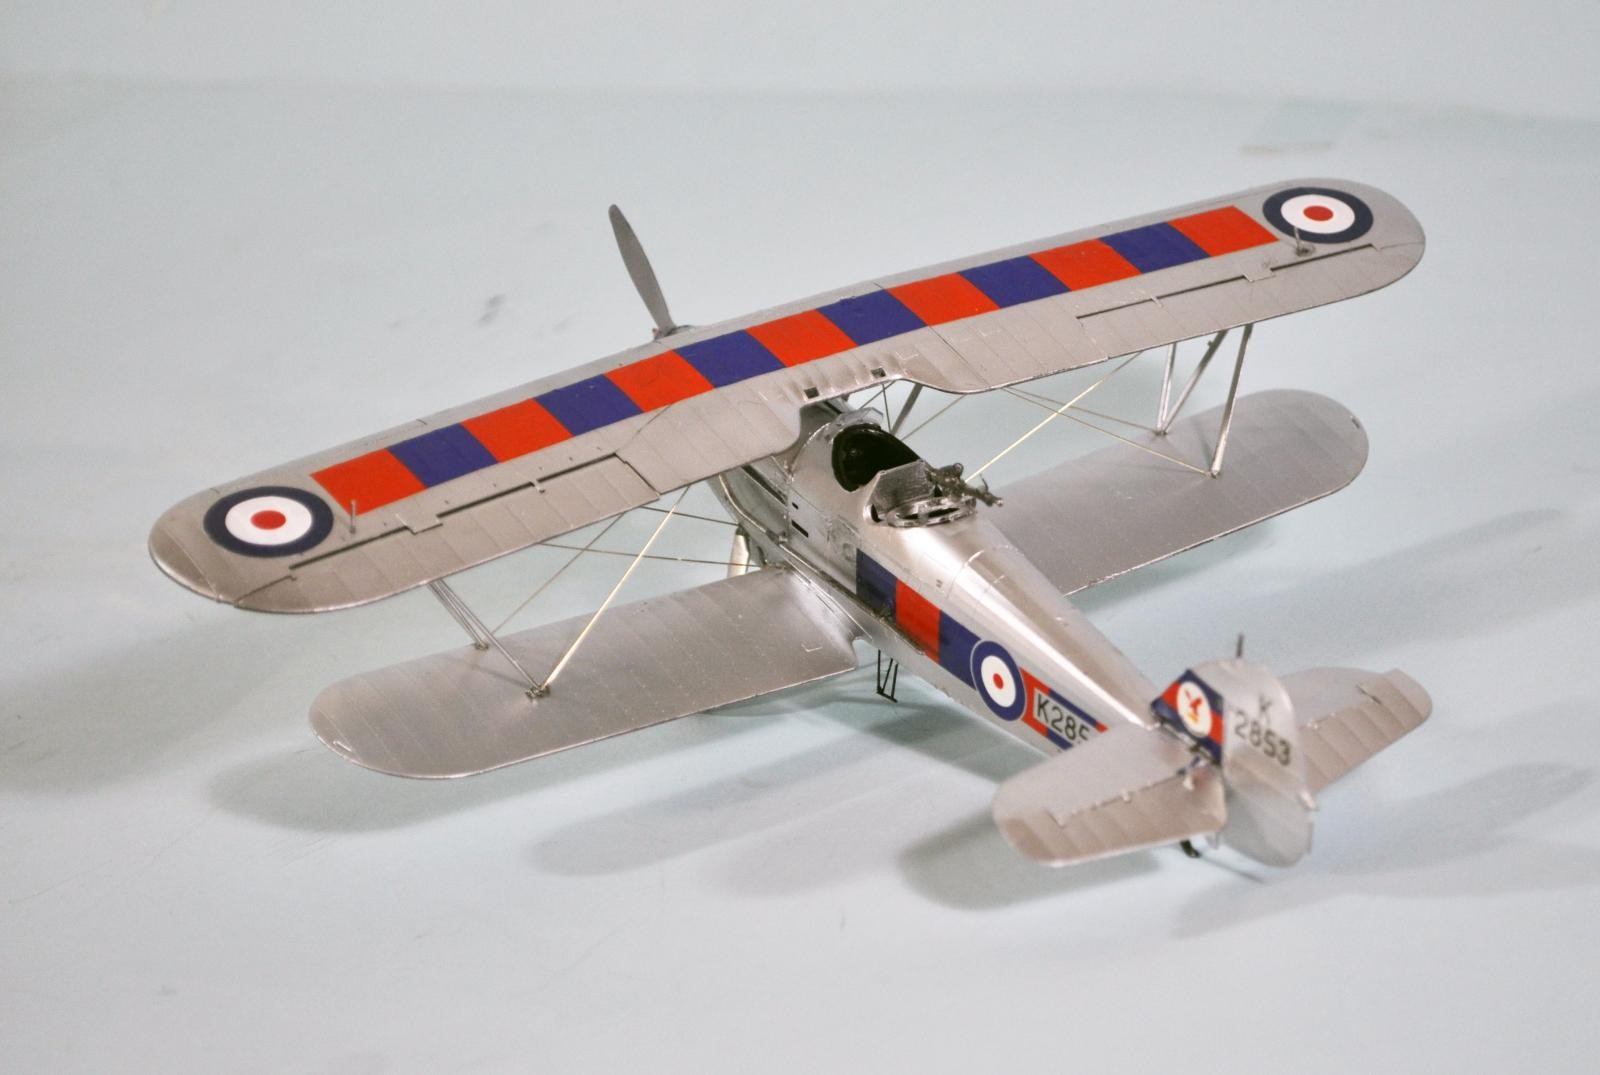
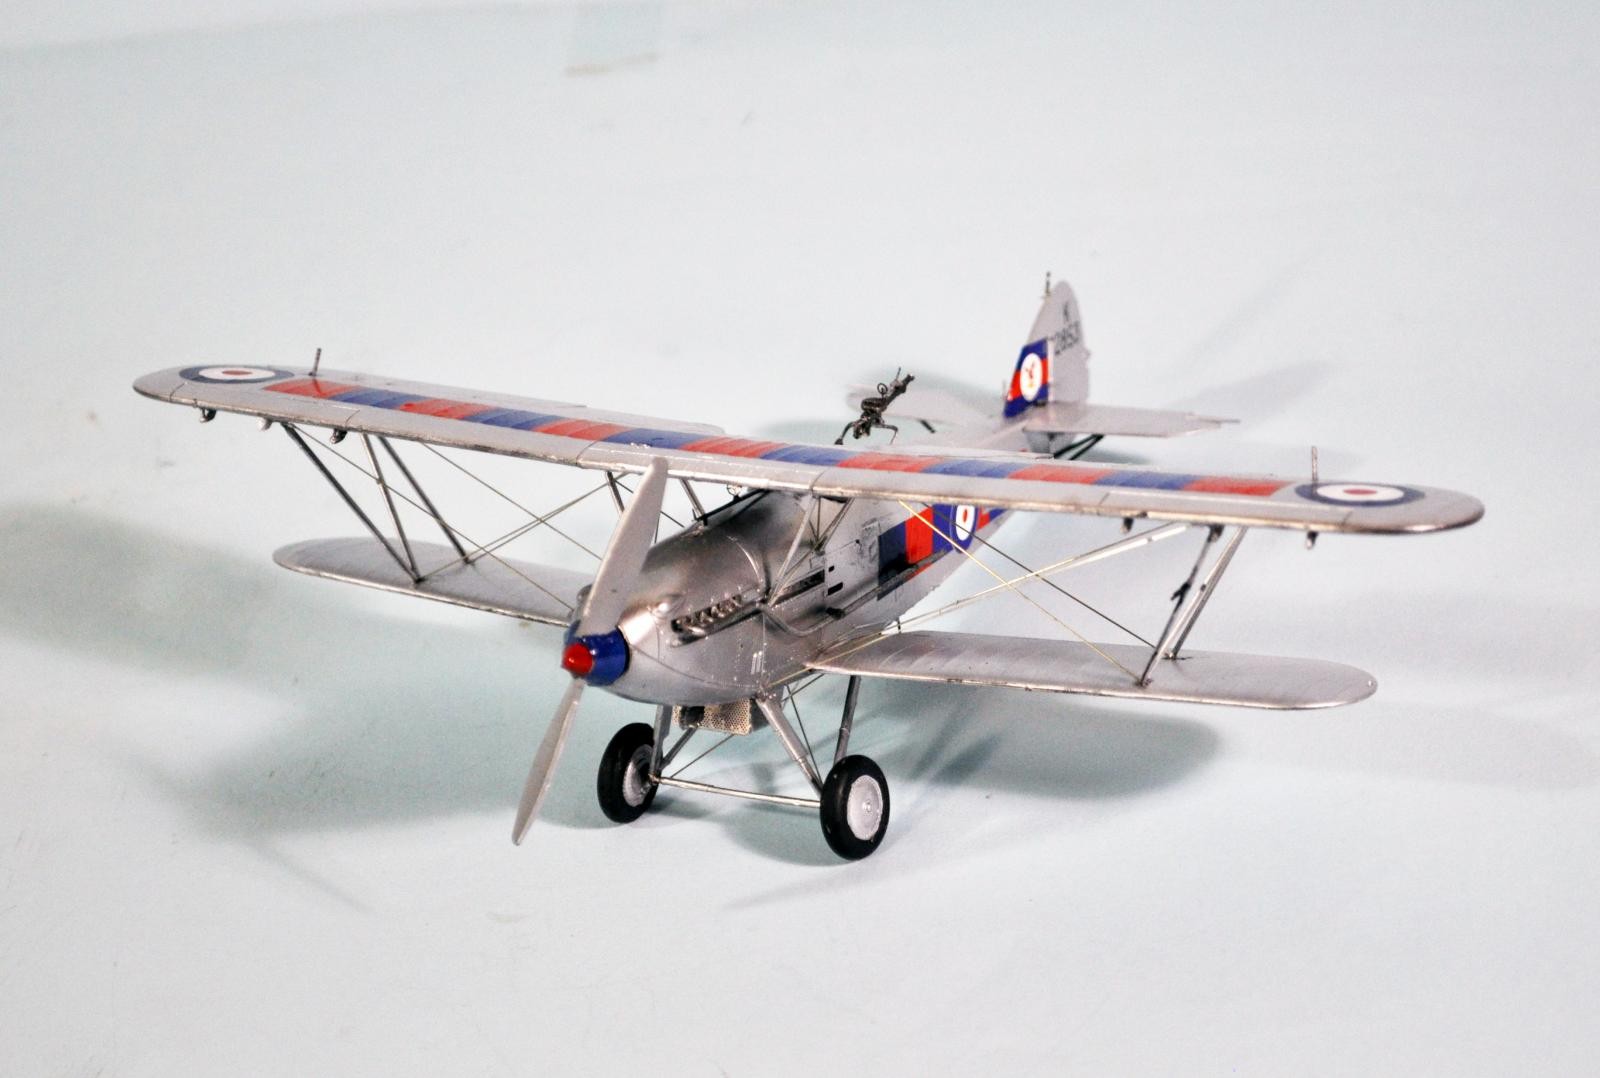
AMG 1/48 Hawker Hart (Demon conversion)
History:
Sidney Camm became Chief Designer at Hawker Aircraft Company in 1925, following his successful design of the Hawker Cygnet. Between then and his retirement from Hawker in 1965, he was responsible for the design of 52 different aircraft, of which 26,000 were produced. He is truly the greatest English aircraft designer. During the 1930s, aircraft of his design constituted 84 percent of the aircraft used by the Royal Air Force. It was said of him by one of the engineers who worked for him, "Camm had a one-tracked mind – his aircraft were right, and everybody had to work on them to get them right. If they did not, then there was hell. He was a very difficult man to work for, but you could not have a better aeronautical engineer to work under. With regard to his own staff, he did not suffer fools gladly, and at times many of us appeared to be fools. One rarely got into trouble for doing something either in the ideas line, or in the manufacturing line, but woe betide those who did nothing, or who put forward an indeterminate solution." Camm's designs included the Fury, Hurricane, Typhoon, Tempest, Sea Hawk, and Hunter, with his final contribution to aviation being the Harrier VTOL jet. His genius was not that of a revolutionary like R.J. Mitchell, but rather an ability to build on what existed and take it to the next logical step. He never designed a failure, though a few did not see production, but not for any fault of the design.
Camm's career as Britain's greatest military aeronautical designer began in 1926, when the Air Ministry circulated a requirement for a two-seat high-performance light day-bomber, to be of all-metal construction with a maximum speed of 160 mph. Hawker, Avro and de Havilland submitted designs in response.
Camm's design was a single-bay biplane powered by a Rolls-Royce F.XI liquid-cooled V12 engine, which would later become known as the Rolls-Royce Kestrel. The fuselage structure was Camm's design of a steel-tube frame covered by aluminium panels and fabric. The wings were constructed of steel spars with duraluminum ribs, covered in fabric. The crew of two sat in individual tandem cockpits, with the pilot sitting under the wing trailing edge. The observer sat behind the pilot, armed with a single Lewis gun on a ring mount. A bombload of 520 pounds could be carried under the wings. The design was known as the Hart.
The Hart prototype, J9052, first flew in June 1928, and was delivered to the Aeroplane and Armament Experimental Establishment at RAF Martlesham Heath on September 8. Testing revealed a performance beyond that specified, with a maximum speed of 176 mph in level flight and 282 miles per hour in a vertical dive. The Hart was pronounced the winner of the competition in April 1929. The Hart was preferred preferred over its competitors since it was cheaper to maintain, a vital aspect during the budget constraints the British armed forces faced during the 1920s.
The production Hart Rolls-Royce Kestrel IB 12-cylinder V-type engine had 485 h.p., for a top speed of 182 mph and a range of 470 miles. It was faster than contemporary RAF fighters, and had excellent maneuverability. During air defense exercises the defending Siskin and Bulldog fighters were often unable to intercept the Harts, which were finally instructed to restrict their height and speed in order to give the fighters a chance. It was particularly embarrassing that it was faster than the Bristol Bulldog, which had just entered service as the RAF's front line fighter. This disparity in performance led the RAF to order the fighter Camm had designed to counter the Hart, that Hawkers had produced as a private venture known as the Hornet, which became known as the Hawker Fury in service.
The Hart was so good that it was adapted for other service in Army Cooperation as the Audax and for the Fleet Air Arm as the Osprey. With over 500 Harts built in addition to the other sub-types, the unit price of the airplane came down considerably, making it even more attractive to the RAF, and to other air forces in the Empire which purchased it. The Fury, on the other hand, was expensive since only some 200 were ordered.
Given that the Hart had such outstanding speed and maneuverability, it soon became apparent that it could be adapted as its own answer, a 2-seat fighter in the tradition of the Bristol F2B Fighter of the First World War. In 1931, six Harts were issued to 23 Squadron of Fighter Command for testing. They quickly became known as the Hart Fighter and demonstrated the value of the airplane as a fighter.
In 1932, a formal contract was let to develop the Hart as a fighter. Rather than one forward-firing .303 machine gun, it would have two, while the gunner kept his single Lewis for rear defense, with the coaming around his cockpit angled to provide a better field of fire. The fighter version of the Hart was named the Demon. The prototype first flew on February 10, 1933. It was powered by the supercharged Kestrel IIS V12, which gave it better performance at high altitudes than the Hart, with a top speed of 184 mph at 13,000 feet.
Over the next four years, 305 Hawker Demons were built, including 232 for the RAF and 73 for other air forces by Hawker and Boulton-Paul at their Wolverhampton factory, where their last example of 106 to be completed was delivered to the RAF in December 1937. Beginning in 1936, the Boulton-Paul Demons were fitted with a hydraulically operated basic Frazer-Nash turret in the aft cockpit because the high speed of the aircraft was such that the rear gunner had difficulty maneuvering the gun against the slipstream, and were known as Turret Demons. This greatly improved the rear gunner's accuracy, but when the turret was pointed to the side, it introduced enough yaw that it badly affected the accuracy of the two forward fixed guns.
Additionally, 54 Demons were built as fighters for the RAAF, fitted with a with a 600 hp Rolls Royce Kestrel V engine, with an additional 36 for army co-operation duties.
The Demon first entered full service in 1933 with No 23 Squadron. Seven regular RAF squadrons and five squadrons of the RauxAF operated it until late 1938. Four RAF Demon squadrons served overseas, with 23 and 41 Squadrons sent to the Middle East in 1935 while 64 and 74 Squadrons were formed at Heliopolis, Greece and Malta, respectively, to support the Abyssinian crisis of 1935-1936.
During World War II, Demons and the Hartebeest - a version of the Hart developed for the South African Air Force - were operated by the SAAF in the East African campaign against the Italians in Ethiopia in 1941 and saw combat against Italian forces.
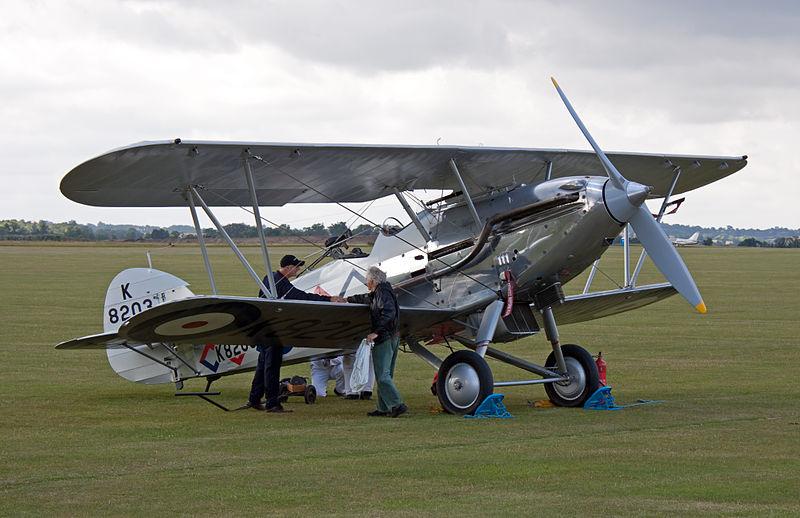
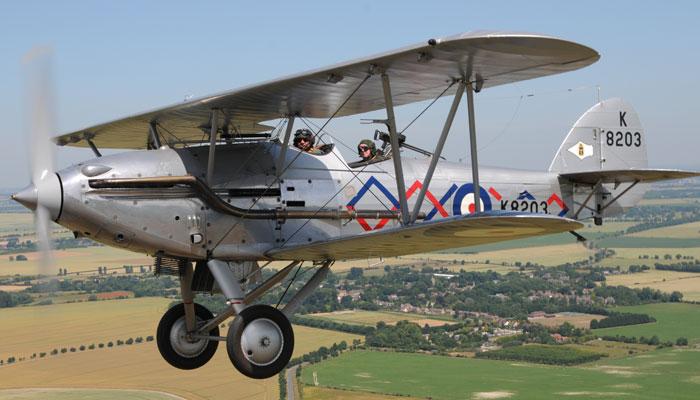
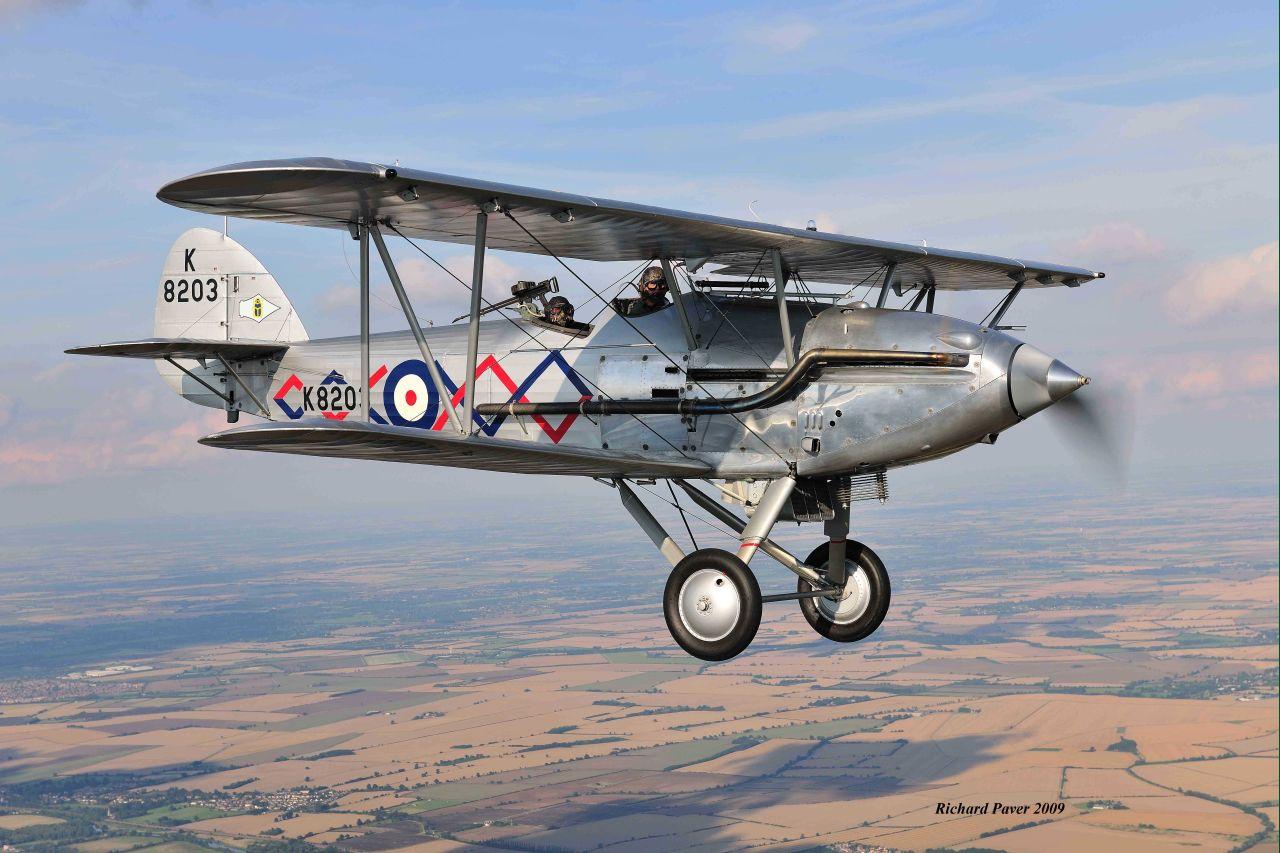
Currently, there is one flying Demon, which is privately operated by Demon Display Ltd. in the UK and is frequently seen on the British air show circuit. Demon K8203 was among the last 37 built by Boulton-Paul Aircraft Ltd. and delivered in late 1937. Initially assigned to No. 64 Squadron at RAF Church Fenton, it was transferred to 25 Squadron at RAF Hawkinge in mid-1938 before being assigned to No. 9 Maintenance Unit at RAF Cosford and No. 9 Air Observers School, before it was struck off inventory on September 28, 1940, and became a ground training aid for No 1 Service Flying Training School at RAF Netheravon. K8023 was finally disposed of in 1943. Fortunately, its rear fuselage survived in storage at the RAF Museum depot at Cardington, and was sold in 1991. SkySport Engineering Ltd. restored it to flying condition over 18 years and more then 35,000 man hours, before it flew again on June 23, 2009.
The Kit:
Airfix first released a Demon in 1/72 scale in the early 1960s. Matchbox did a better version in the early 1970s, and these were the only kits available in that scale until AZ released a Demon some ten years ago. John Adams at Aeroclub did a very accurate 1/48 Demon vacuform released in around 1986 (as I recall ordering one then).
This 1/48 Hart was released by Arsenal Model Group (AMG) from Ukraine in December 2018. A spokesman for the company has stated their intention to do the other Hart developments (Demon, Audax, Osprey, etc.) if sales of this kit warrant. An indication of its quality and accuracy is the fact the instruction sheet thanks John Adams for his support and assistance in design of the kit.
The kit is high quality. I can only describe it as what one might expect of a Hart designed by Wingnut Wings in 1/32, shrunk down to 1/48 without losing any detail. The fabric surface detail is outstanding - among the very best and most accurate I have seen on any model in 1/48 and overall this kit matches or exceeds Eduard's biplane releases. Everything is in scale, which leads to some very delicate parts. The entire cockpit interior is provided. Proof AMG has other variants in plan is borne out by the fact the kit has a cockpit coaming associated with the Demon and other sub-types, as well as an upper wing center section associated with the later types after the Hart. Decals are provided for two Hart bombers and one of the six Hart Fighters assigned to 23 Squadron in 1931; unfortunately, that last option lacks the serial number for the rudder.
The one real head-scratcher is that the kit comes with exhausts for a V-14 engine - seven exhaust ports! Fortunately, if you slice off the last one in line, and then fit the part to the fuselage so it is centered in the opening, it is close enough to “all right” that the problem is solved.
Construction:
The one thing that stands out to me in constructing this kit is that there are a fair number of scale-thickness parts, meaning that there is quite a bit of plastic one can look at and know something's going to be broken getting it off the sprue, no matter the care taken. I came up with a new (at least to me) trick that worked 100 percent in successfully getting delicate parts off the sprue: I cut them off, leaving around 1/16 inch of sprue still attached to the part. Nothing broke! Then I was able to put the part directly against a solid surface and cut off the remainder of the sprue without stressing the part. It's a trick that's going into the Big Bag of Modeling Tricks for future use where needed.
The first thing I did was detail paint all the cockpit parts before removing them from the sprue. Reading information posted by John Adams at Britmodeller, the airplane cockpit was most likely as follows: “cloudy red” where the fabric is - this is because of the red primer in the fabric, which looks “cloudy” with the fabric color where it did not go through the whole way. I did that by airbrushing some “brick red” I mixed up, followed by “blotching” it with Tamiya “Deck Tan,” which is a good fabric color. The aluminum areas were in light grey, which I did using Tamiya “Sea Grey Medium.” According to John, the frame was originally done in gloss black, a process known as “Japanning,” or later painted with aluminum lacquer. I chose the gloss black.
Once the parts were painted, I began assembly of the cockpit. Having test-fitted the cockpit coaming to a fuselage half, I was aware that most of what was in there would not be visible when the model was complete, so I did not go nuts with super-detailing anything, just getting it there so it could be seen in the end. I used Eduard RAF seatbelts; the kit provides photoetch harness, but it has to be painted and I had the prepainted Eduard set and being as lazy as possible... well, you see.
As I began assembling the fuselage, I discovered the “V-14" problem with the exhausts. I had already decided to use one of the sets of exhaust pipes from my Roden Bristol F2B Fighter Mk. IV kit, which would eventually cover all that, so I trimmed off the rear exhaust and glued the part in, centered in the opening. Had I not used the exhaust, this would have been just fine a fix on its own. Particular note can be made about the separate lower surface part for the fuselage, which means there is no seam running through some delicate surface detail where it would be hard to get rid of. As it was, I only used a little Mr. Surfacer to get rid of the seam in the engine cowling upper surface, and scraped off the seam in the rear, which saved the fabric detail.
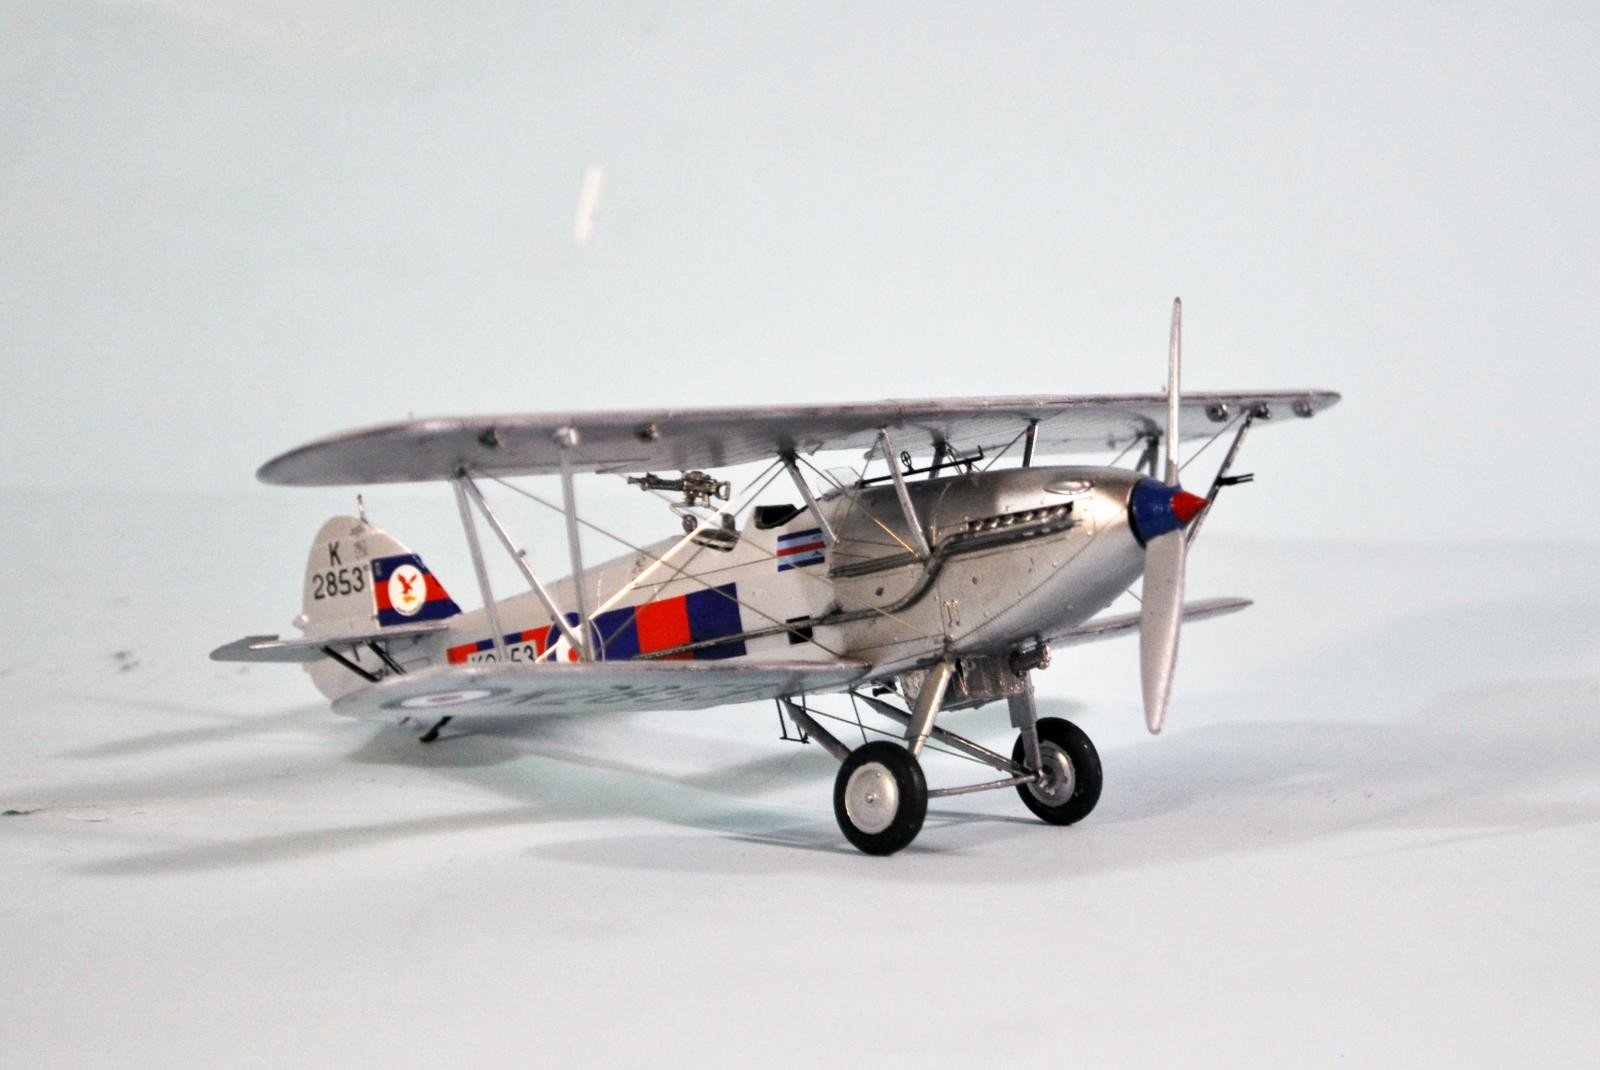
Having decided to turn the model into a Demon, the next thing was to come up with the gun trough on the right fuselage half. I cut out the basic outline of the trough, then used a rat-tail file to work down into the plastic to get the trough. The molded-in trough on the left side is deep, so I filled it with some CA glue, to make it more shallow and - voila! - I had a Demon fuselage. The other thing to do in turning it to a Demon was to use the wing center section not called for in the instructions. With a bit of a “scrape around” on the edges, the cockpit coaming fit the fuselage without problem.
The horizontal stabilizer is a bit of a bugaboo, since it doesn't fit directly onto the “cutout” area of the rear fuselage as one would expect. Fortunately I test-fitted before gluing and realized this before screwing things up with glue. Knowing how it now fit, I attached the elevators to the horizontal stabilizer, drooping them a bit, then attached the vertical fin and rudder. Once this assembly had set up, I fitted it to the fuselage, and everything sat as it should.
I then attached the landing gear. With everything being “scale size” this was a fragile assembly, which I reinforced with some CA glue at the attachment of the axle to the gear leg so it wouldn't bend under the weight of the model, and strengthened the joint of the gear legs similarly. Since this is all hidden by the wheel, nothing is really apparent at the end. I also realized the tail skid was going to be weak, so I covered it in a thin coat of CA glue which atrengthened it considerably - as it turned out I needed to add a bit more CA glue when the model was completed, as that skid is really thin. (As it turned out, after only 4 days sitting on its gear, the kit tailskid collapsed even with reinforcement. I ended up making one of stronger - and a bit thicker - material; there are times when kit reality should supercede recreating actual reality.)
Painting and Markings:
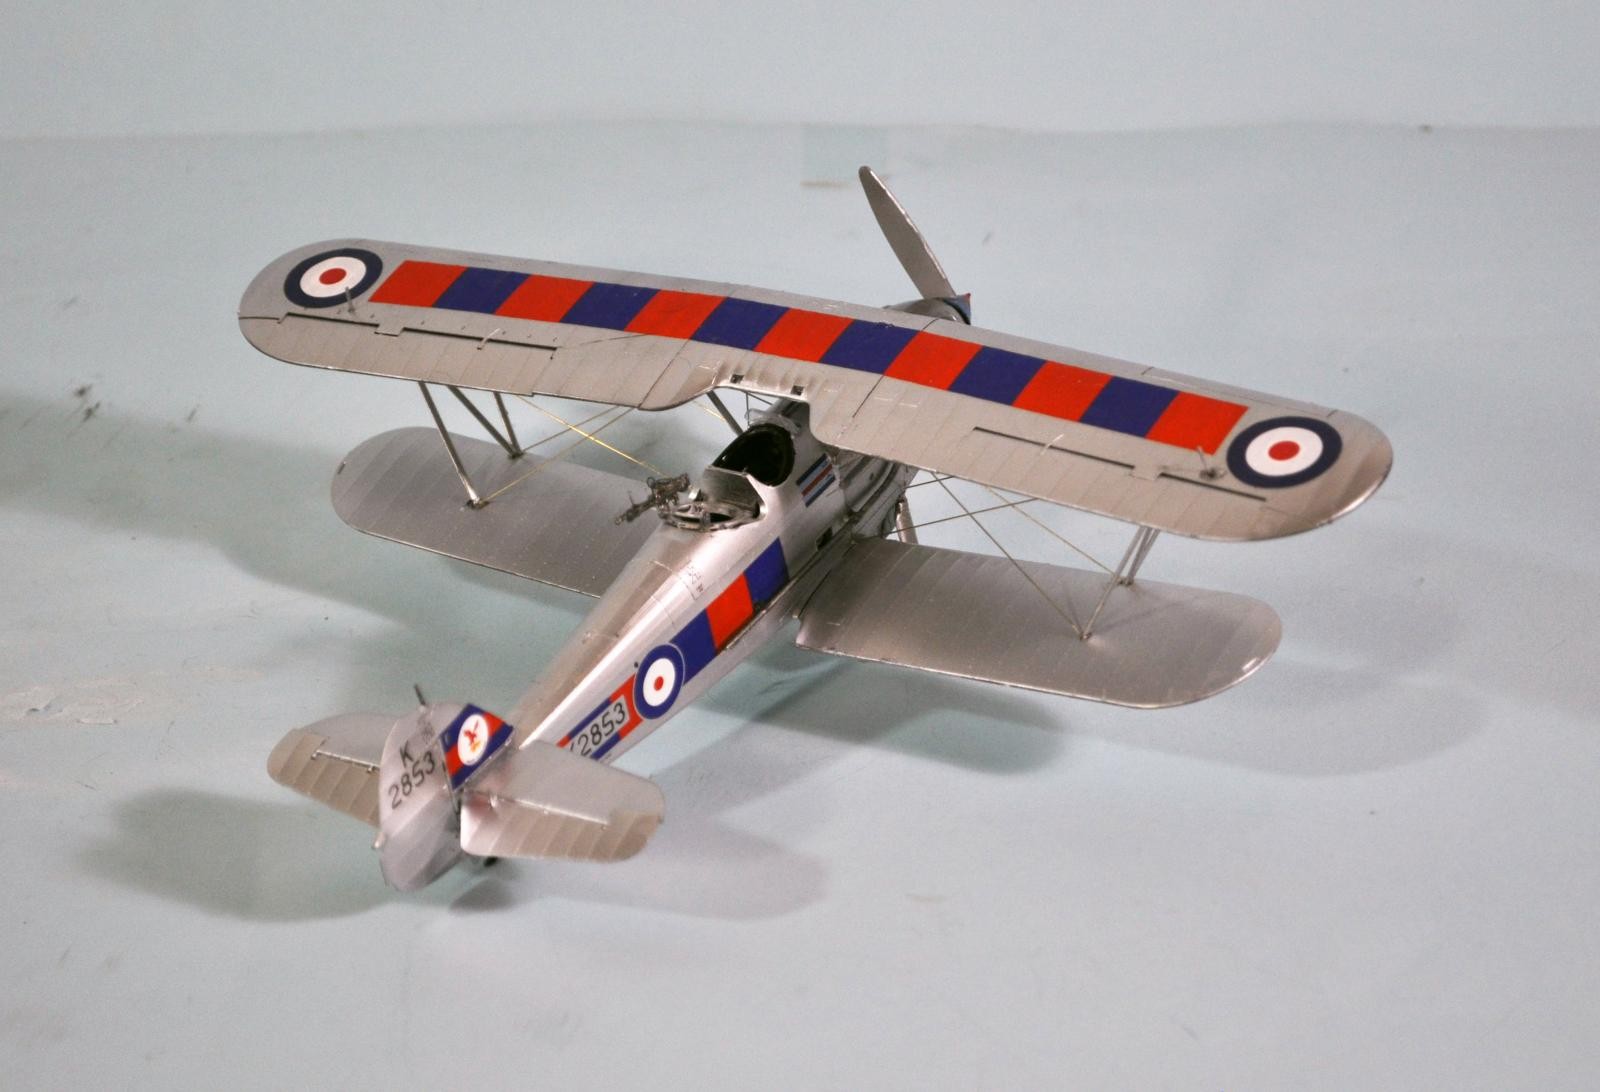
I first applied a thinned coat of Tamiya X-1 Gloss Black. Vallejo metal paints react to the surface of the primer; for most NMF airplanes one doesn't want a fully-glossy finish, so using X-18 Semi-gloss Black is good. But these airplanes were super well-maintained, so I used gloss for the primer.
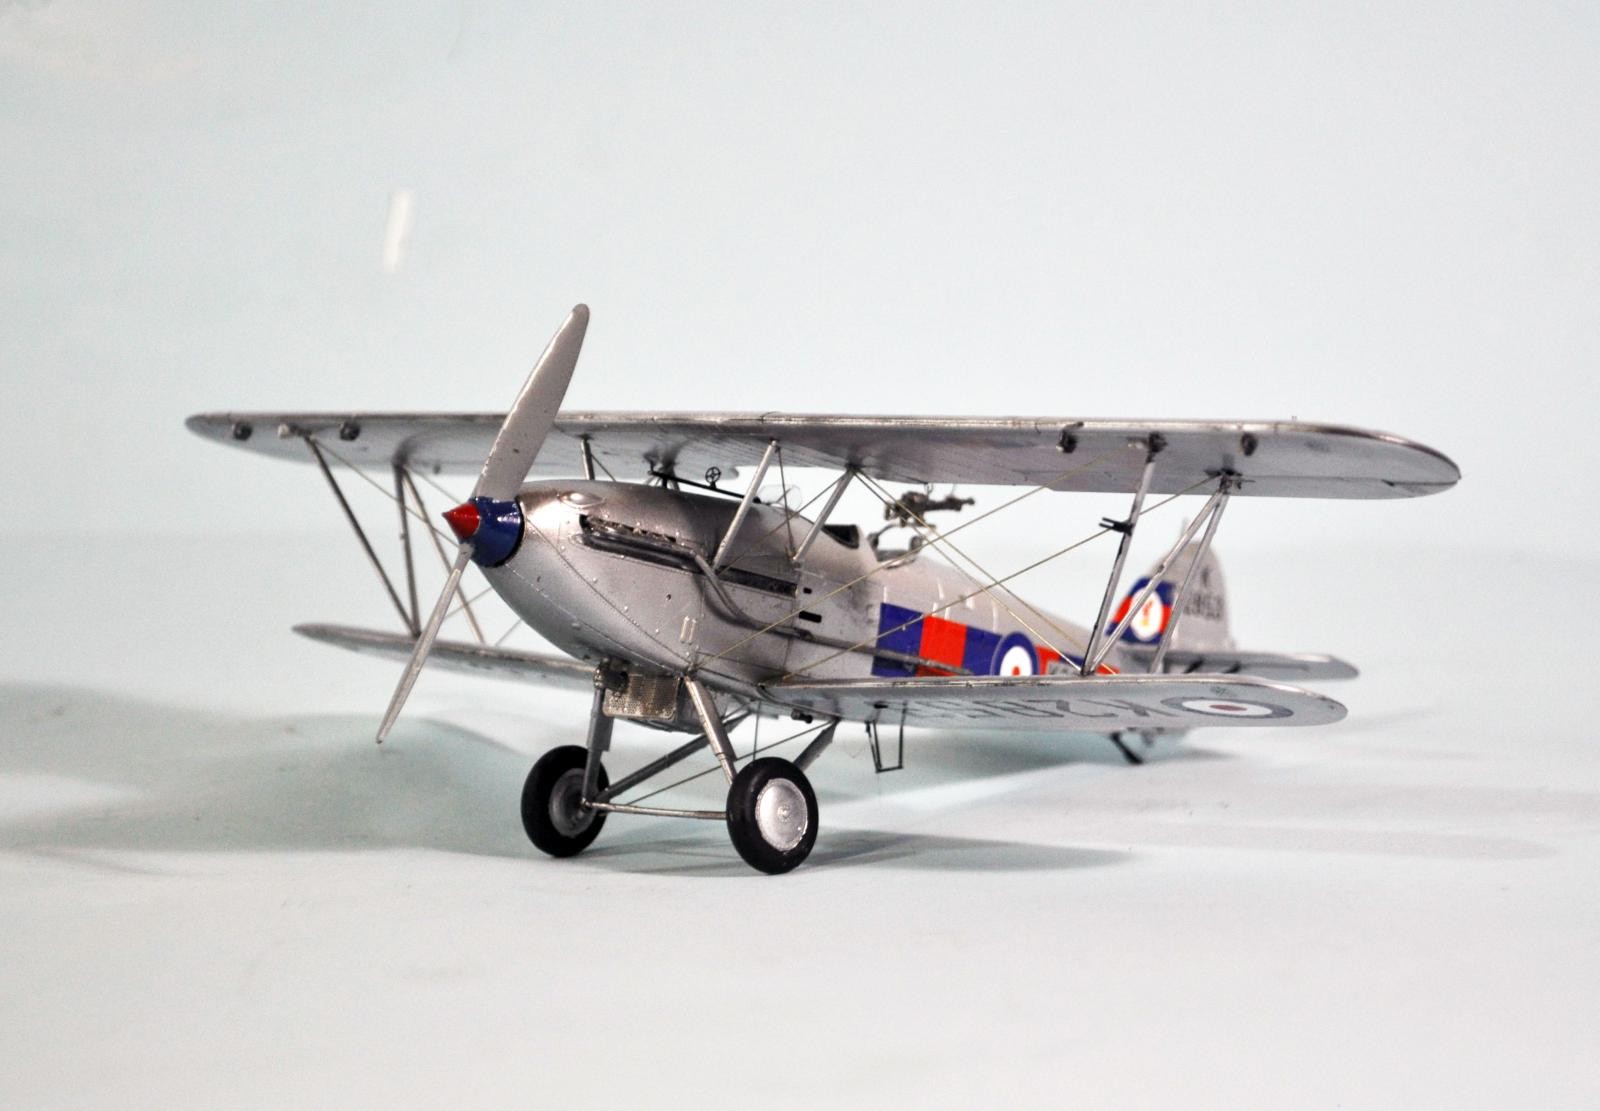
The fabric areas were then painted Vallejo Aluminum. When dry, a thin coat of Satin Clear was applied to protect the finish. The cowling was painted with a 50-50 mixture of Aluminum and Duraluminum, then covered with a coat of Future to make it look like “polished aluminum.”
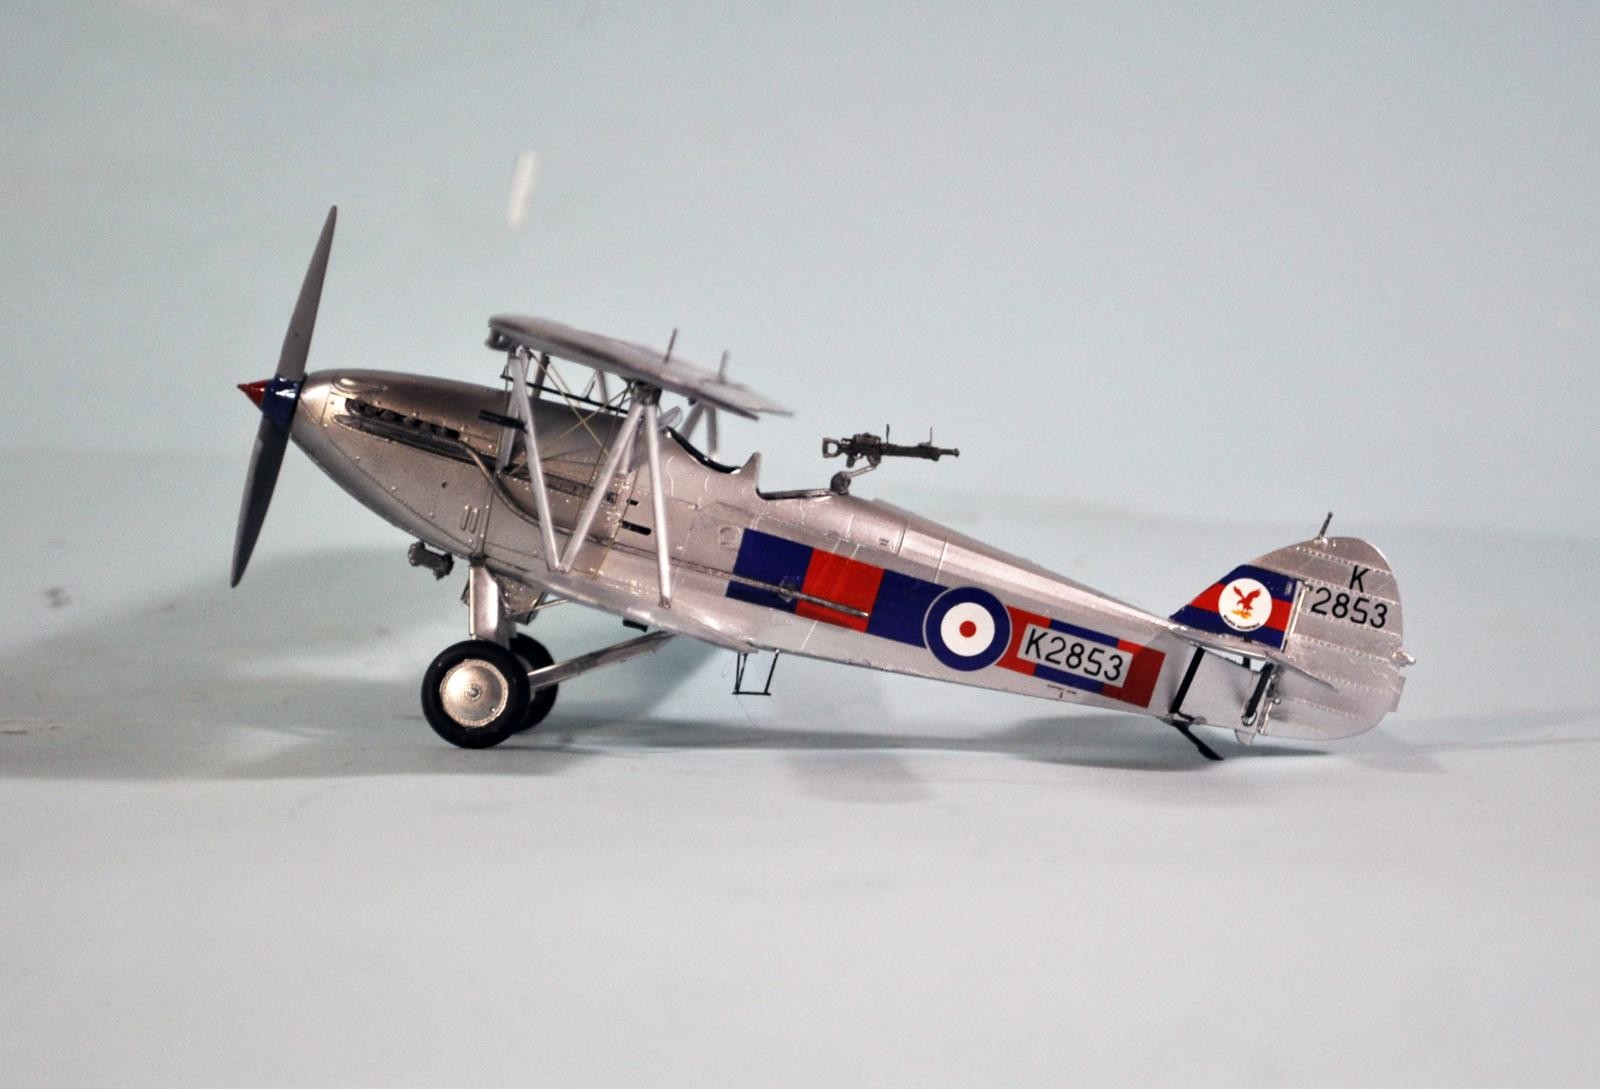
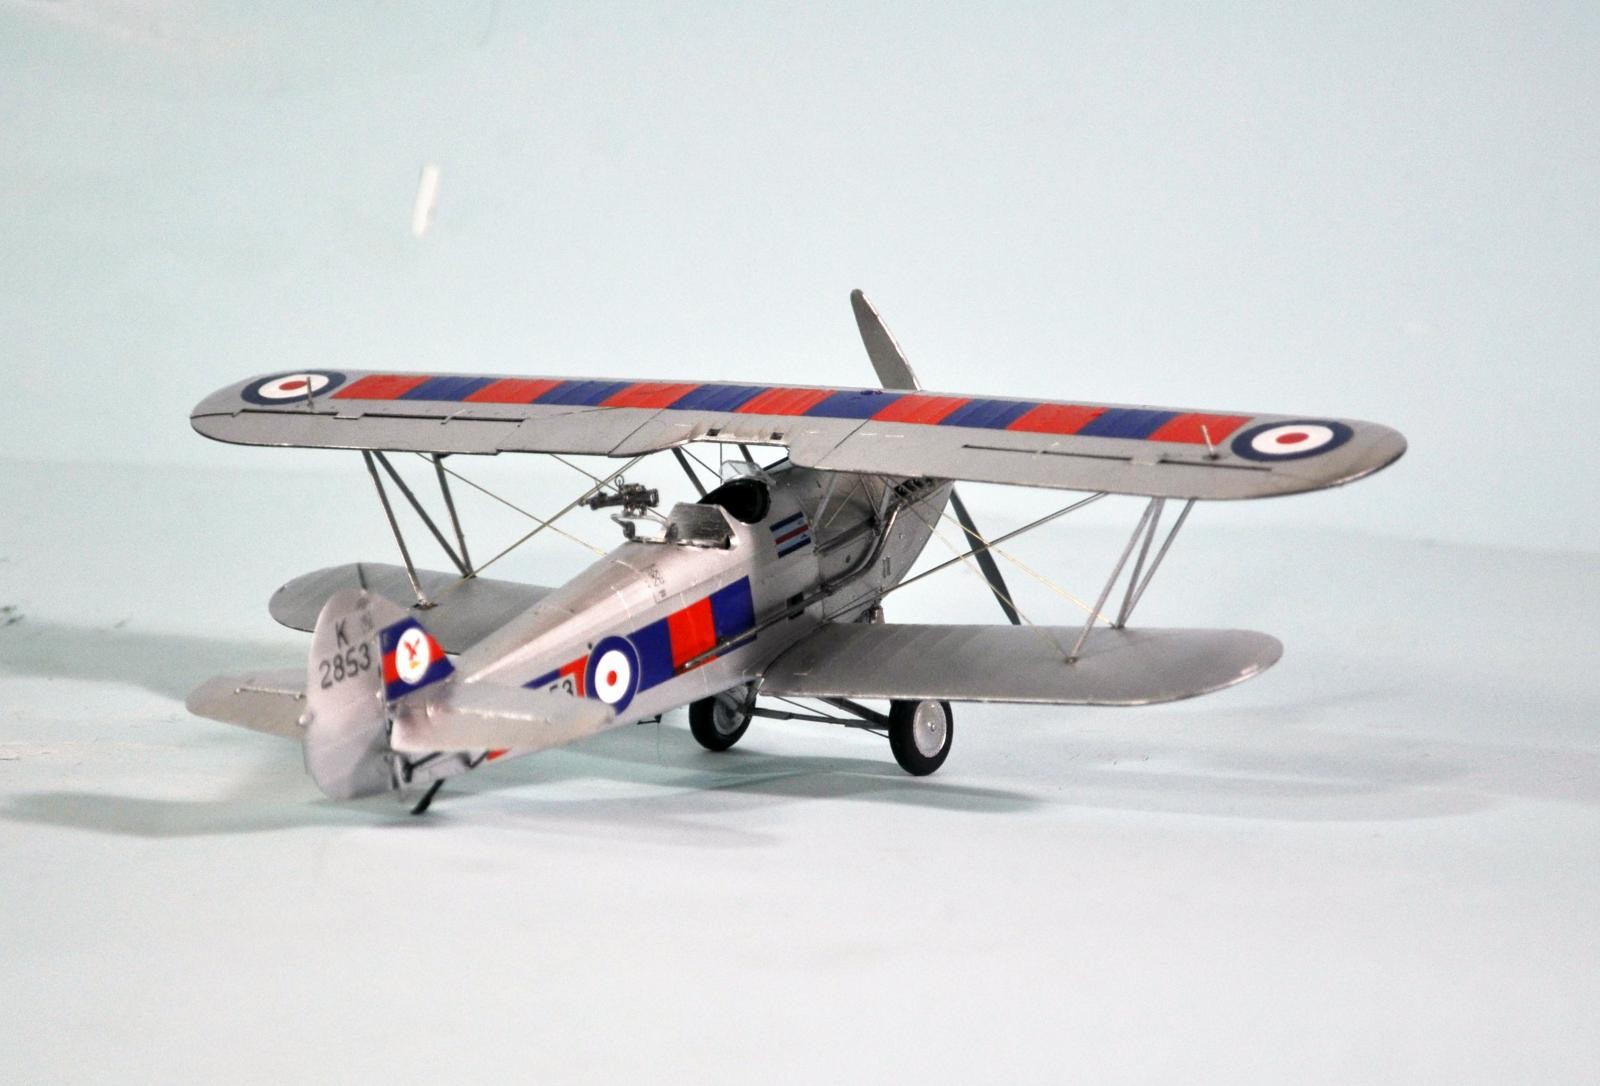
I used the Pheon Decals Demon sheet to make the airplane of the 23 Squadron CO. These went on without problem. The only problem was Pheon does not provide the wing insignia, since the sheet was originally designed to be used with John Adams' vacuform kit which has accurate insignia. I was able to source some prewar British national insignia the right size from the decal dungeon.
I'll note here that the kit-supplied insignia is too large for a Demon fighter and that the blue is far too light to be close to accurate. If you're doing the kit OOB, you really need to source different national insignia regardless.
Final Finish and Assembly:
I first attached the exhaust pipes, which I had bent to the right shape. I then attached the gunsight tube with its photo-etch target ring, and finished by attaching the windscreen. The kit provides a thin clear film sheet to cut out, but I used some thicker clear plastic packaging from a cover for some commercial product; I always keep that kind of packaging because it's so useful for things like this.
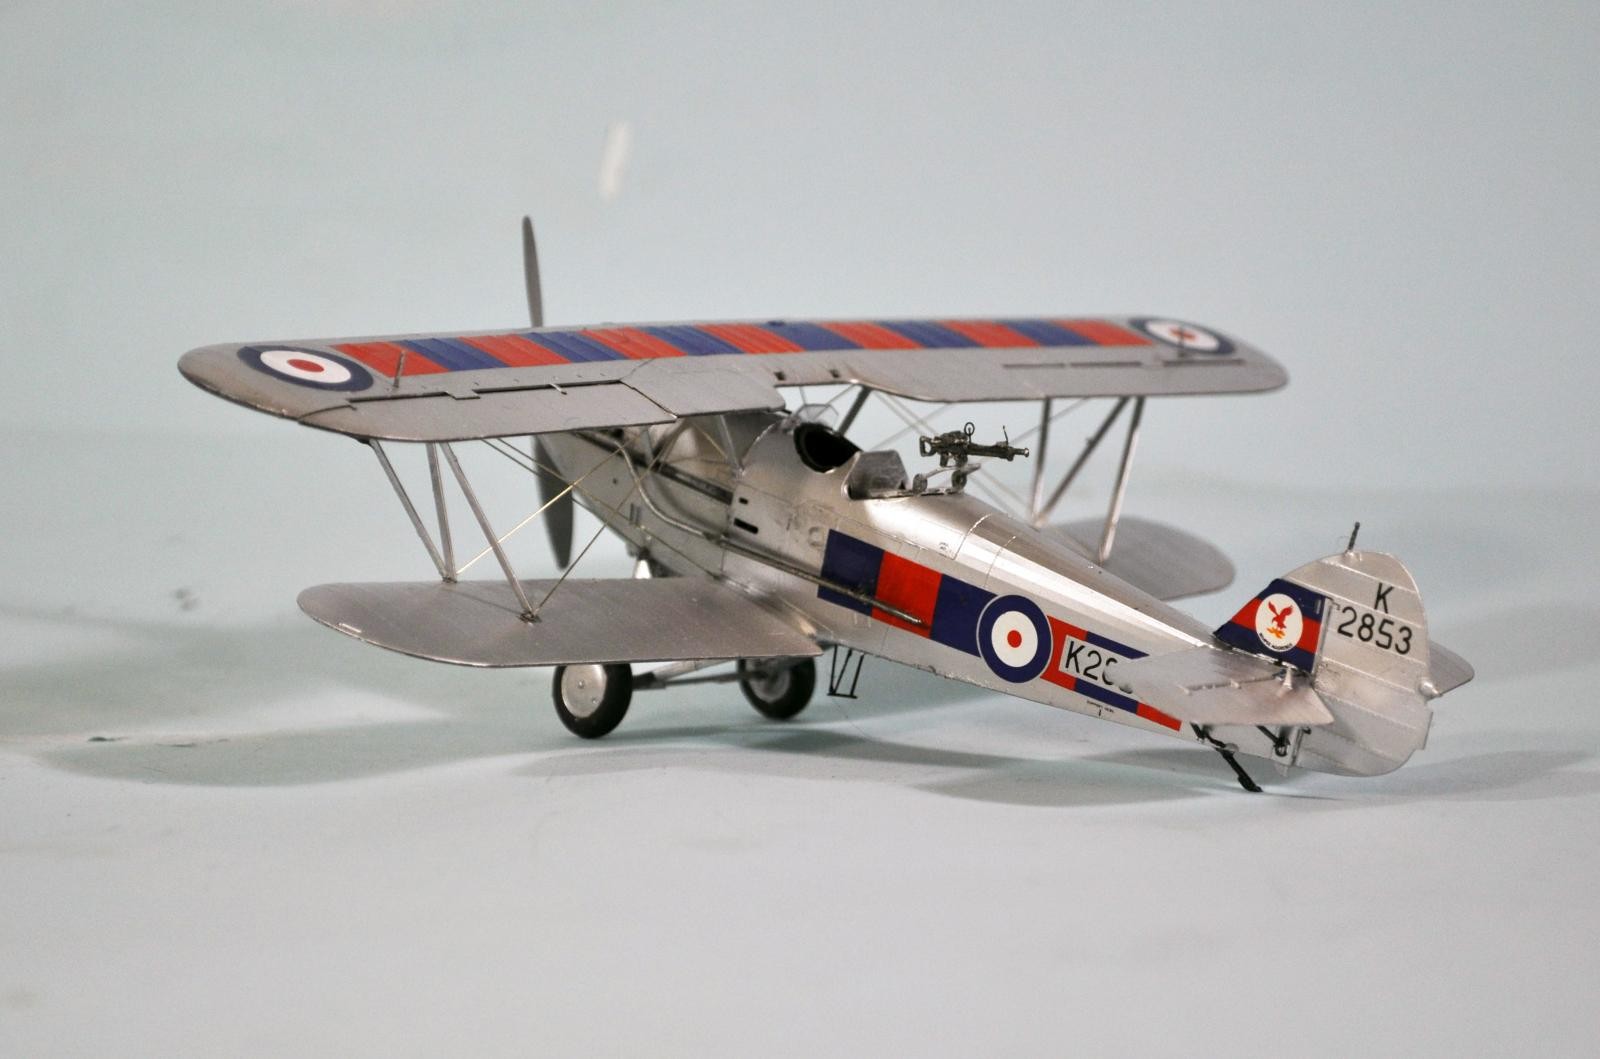
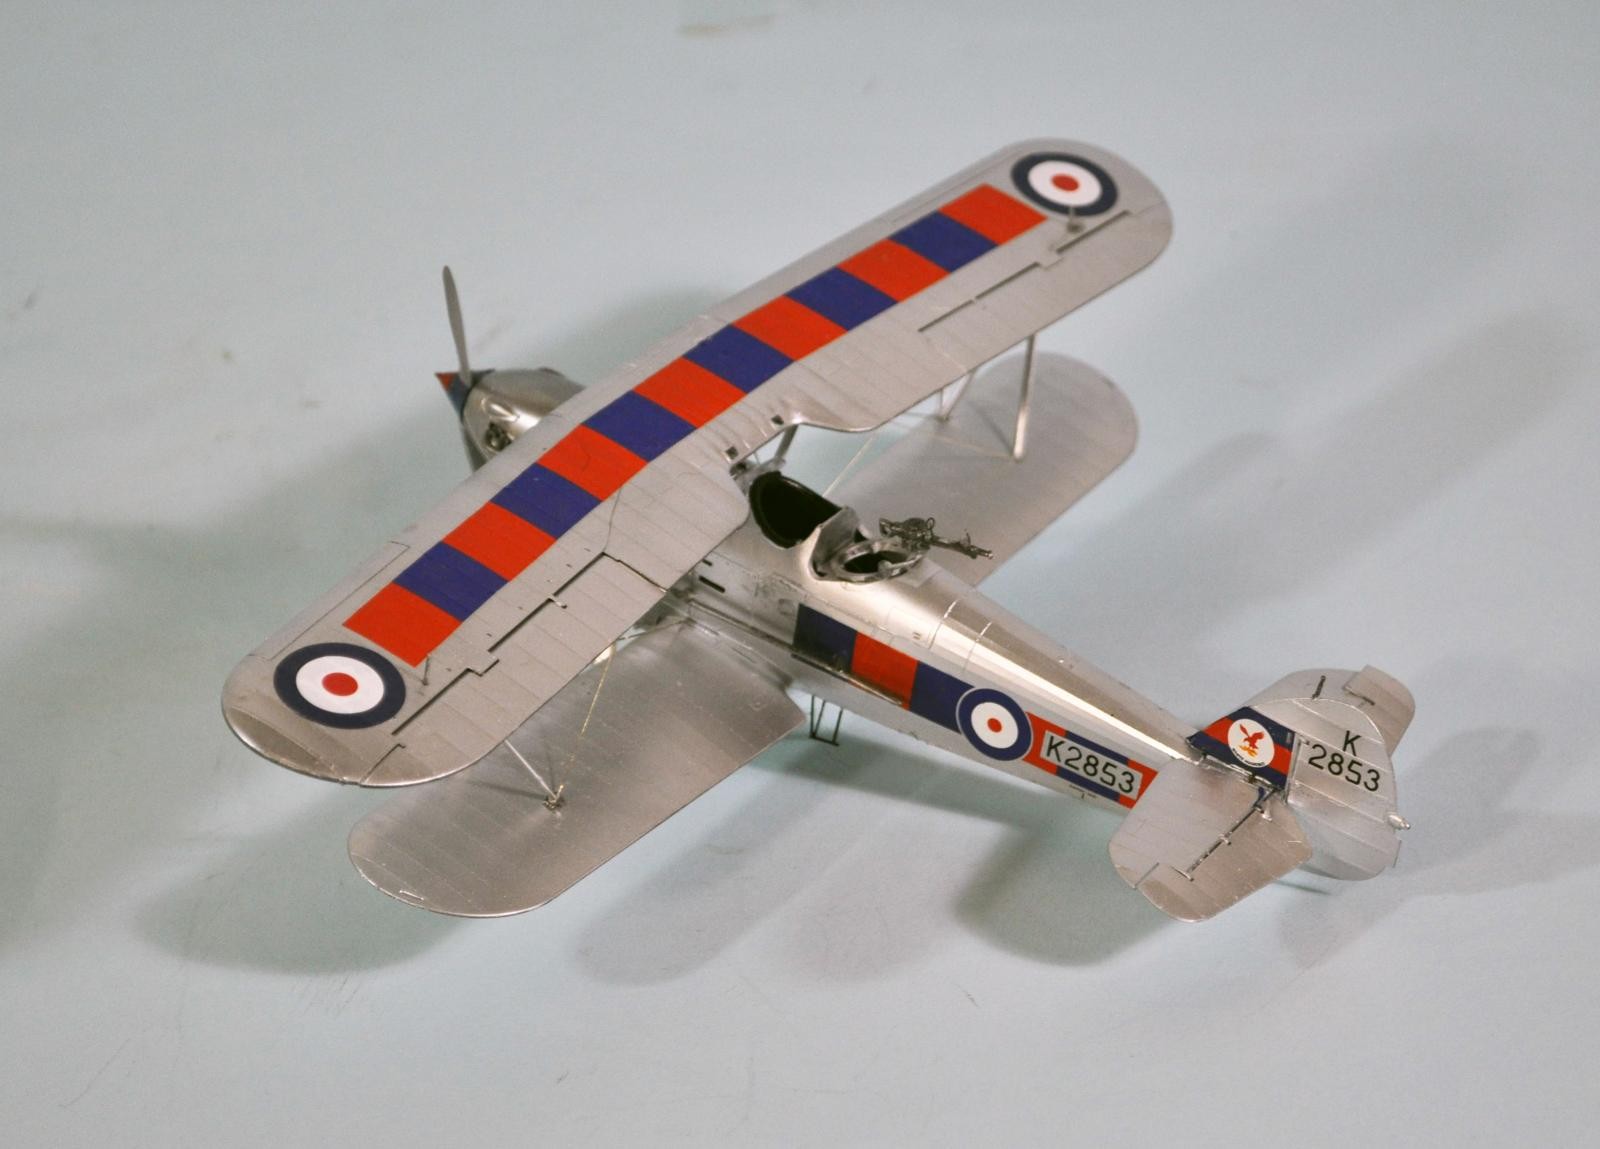
I attached the upper wing to the cabane struts, then attached the interplane “N” struts. If you're an experienced biplane modeler, this isn't hard, but one still has to be careful that the upper wing is properly aligned with the lower wing. If I study the model from directly above long enough, I can detect the wing is almost a millimeter off to the left, but it's not noticeable in any other position. But still, I tell you that because with these scale-thickness struts, it is easy with this model to move things ever so slightly before everything is fully set up, so make a last minute check before you strengthen the strut attachment points with a drop of CA glue, which you really need to do.
I've included some nice photos of the restored Demon you might find useful.
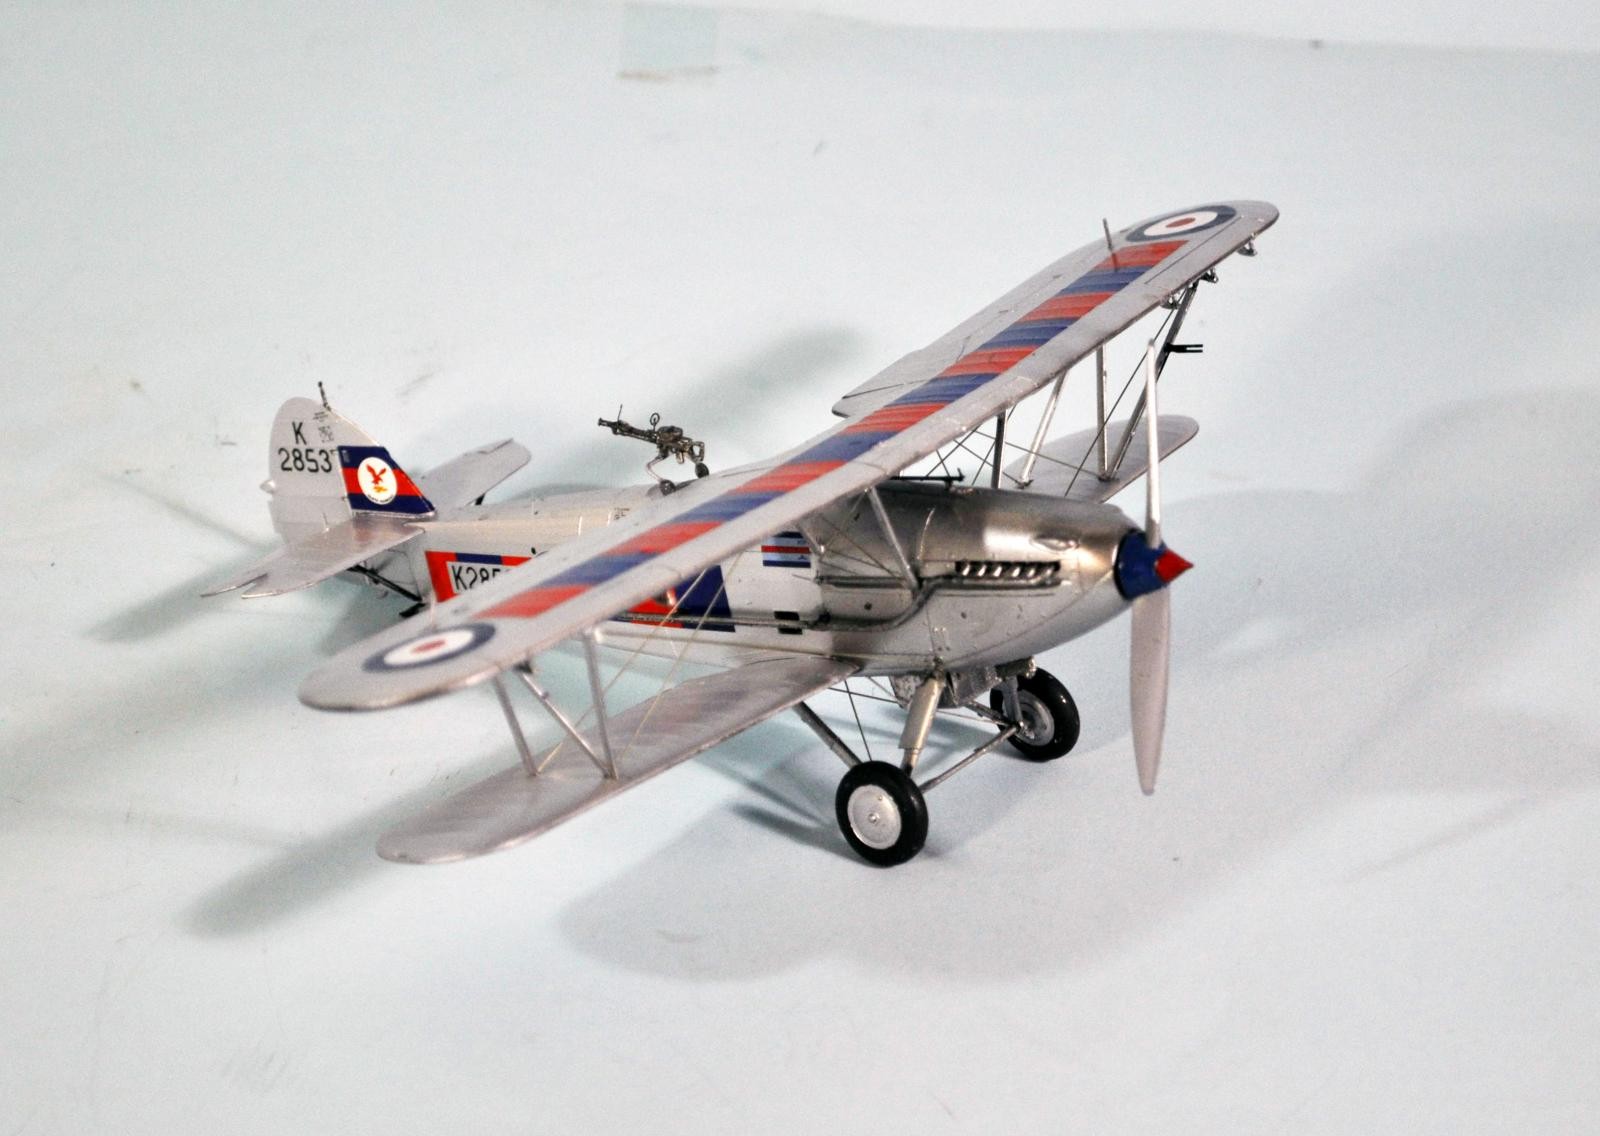
I used Albion Alloys Precision Metals 0.33mm stainless steel wire for the rigging. For this model, the rigging is really useful since it provides the last bit of structural strength needed. I finished off by attaching the prop, which I had painted Sea Grey Medium, then painted the squadron colors on the center section with Tamiya X-4 Gloss blue and X-7 Gloss Red.
I attached the wheels and saw that the attachment to the axle would need some strengthening with CA glue to keep the wheels vertical.
Conclusions:
This is one of the nicest plastic kits I have had the pleasure of building. Period. The production quality is excellent, the parts are accurate. The fabric surface detail is perfect. This kit is fully competitive with any Eduard biplane kit. As I said, the production quality is what one would expect if Wingnut Wings designed the kit in 1/32 and shrunk it to 1/48 without losing detail.
That said, the delicacy of everything means this is not a kit for the ham-handed. You're going to have to pay close attention to getting every part off the sprue successfully, and you're going to have to look at every attachment point as needing some reinforcement; CA glue applied lightly will do the job without being obvious when finished.
Sidney Camm's biplanes of the 1930s are among the most beautiful aircraft ever designed, and the Hart/Demon is one of the best-looking of all. I really like the result I obtained. You should definitely get the Pheon Decals sheet for this. I really hope AMG is able to go on and do the entire Hart family. I'll be getting them!
Highly highly recommended for any fan of Between-the-Wars aircraft. Take care in assembly and you will have a superb result.
Tom Cleaver


Very sharp build Tom. Overall result is one of your best!
Thank you, sir.
Good stuff Tom. Paint looks great. Did you use the Vallejo WWI Metal set? About to hit 3 Starfighters with gloss black, one will stay that way.
Vallejo all the way. I don't use other anymore.
That’s really attractive Tom. I picked one of those up at the O’Hare contest in Chicago last month. So many great new kits, so little time!
This one's really good. But you're sure right about great kits out this year.
Now this one I was eager to read a review, and thankfully it’s one from you Tom! Saw this kit advertised at Hannants and read one quick review about what’s in the box, so not much, and besides the maker is also new to me. The Hart and derivatives are indeed some of the most beautiful biplanes of the interwar period with some pretty colorful schemes.
Do you know if a Fury is on their pipeline also?
They don't announce. The statement about the other Hart derivatives is "based on sales of this kit." So if you want others, buy this one.
Is it possible to build a Fury from this kit you think?
Completely impossible. The best Fury kit to get is the one originally from Impact, later released by Pyro or Lindberg. the Pyro lit is likely to have the best decals.
1 attached image. Click to enlarge.
you never cease to amaze...beautiful
Thank you sir, with a model like this, I even get to surprise myself.
I just love this aeroplane , and your build. I'll be getting one. Lovely job as always. ?
Thanks much, Paul. You'll really like it. It's one of the absolute best kits I have ever built.
I just love this model. You have done a fantastic job Tom. RAAF Hawker Demons were based at RAAF base Richmond during the 1930's, just a few Kilometers from where I live. I really want to build this kit and add it to my RAAF collection. Hope I can do as good a job as you have done.
Great job Tom. I want one.
Hello Tom,
Great job on this very unique British aircraft.
The finis is outstanding.
Thanks for the in depth article, regarding this plane.
Regards, Dirk / The Netherlands.
For a short-run style AMG kit as base the model turned out great! Nice finish