Revell 1/48 F-89J “Scorpion” 451 FIS
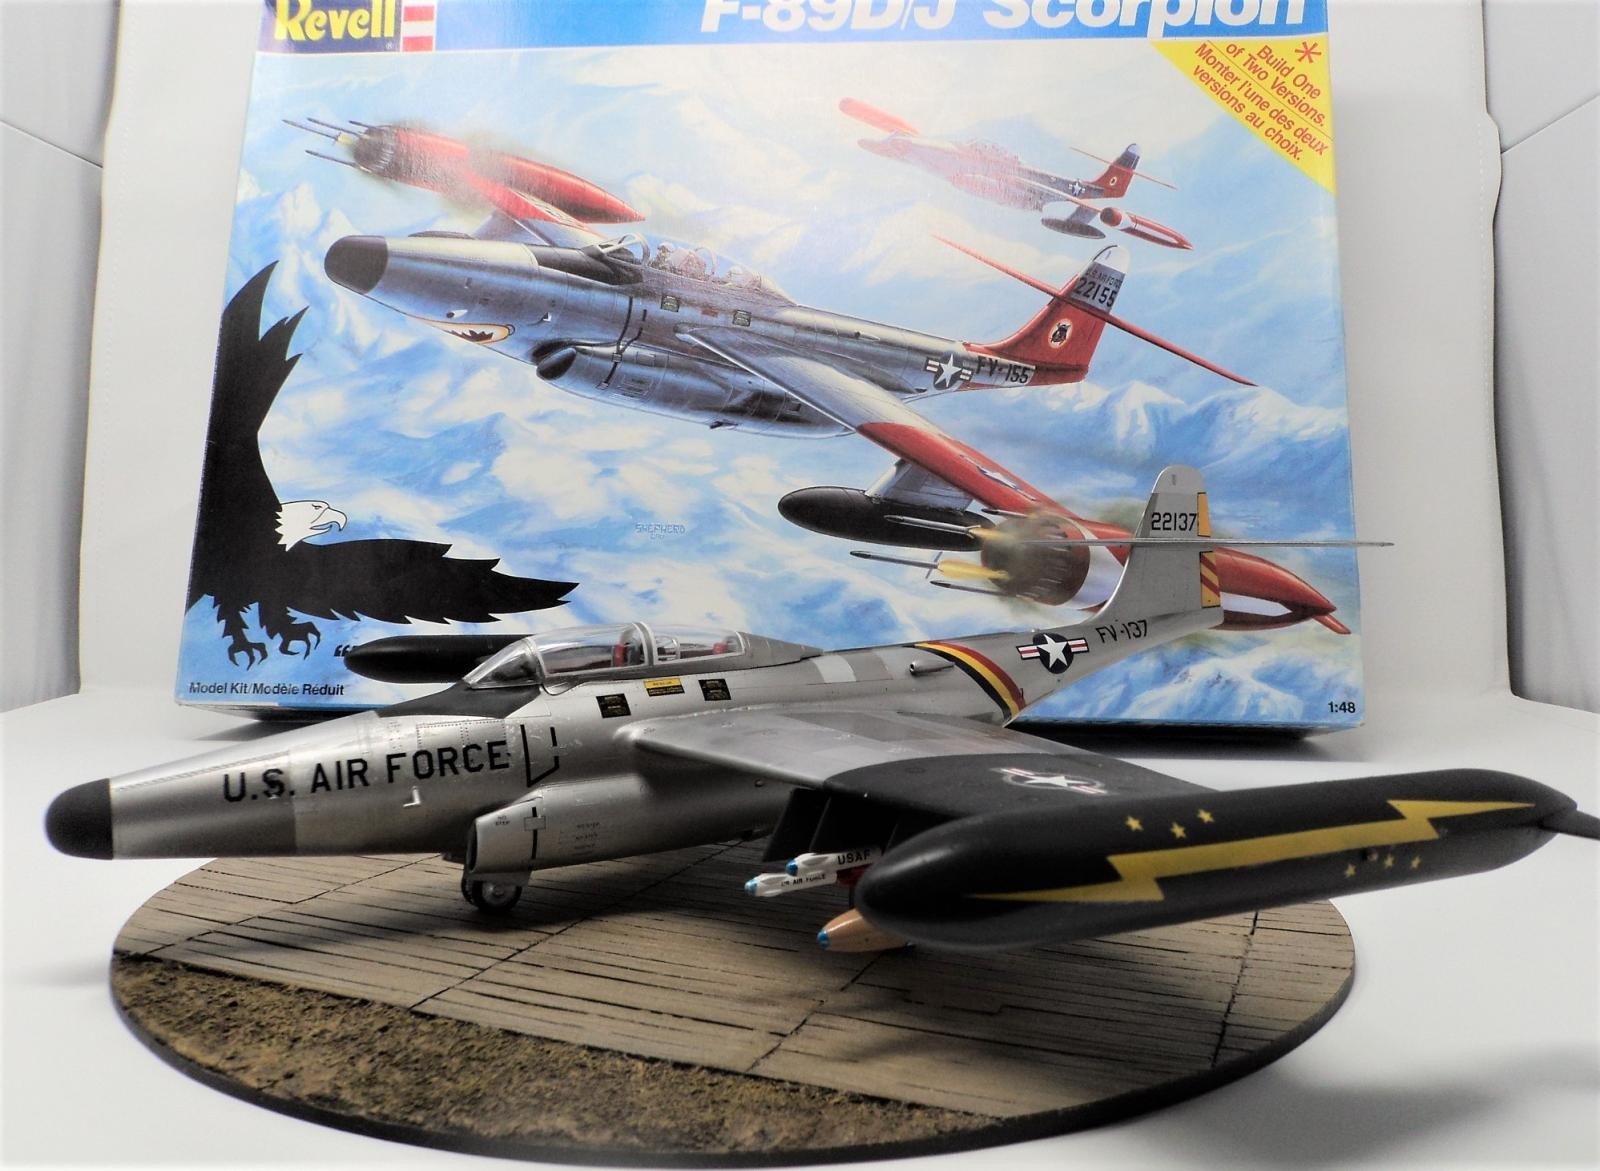
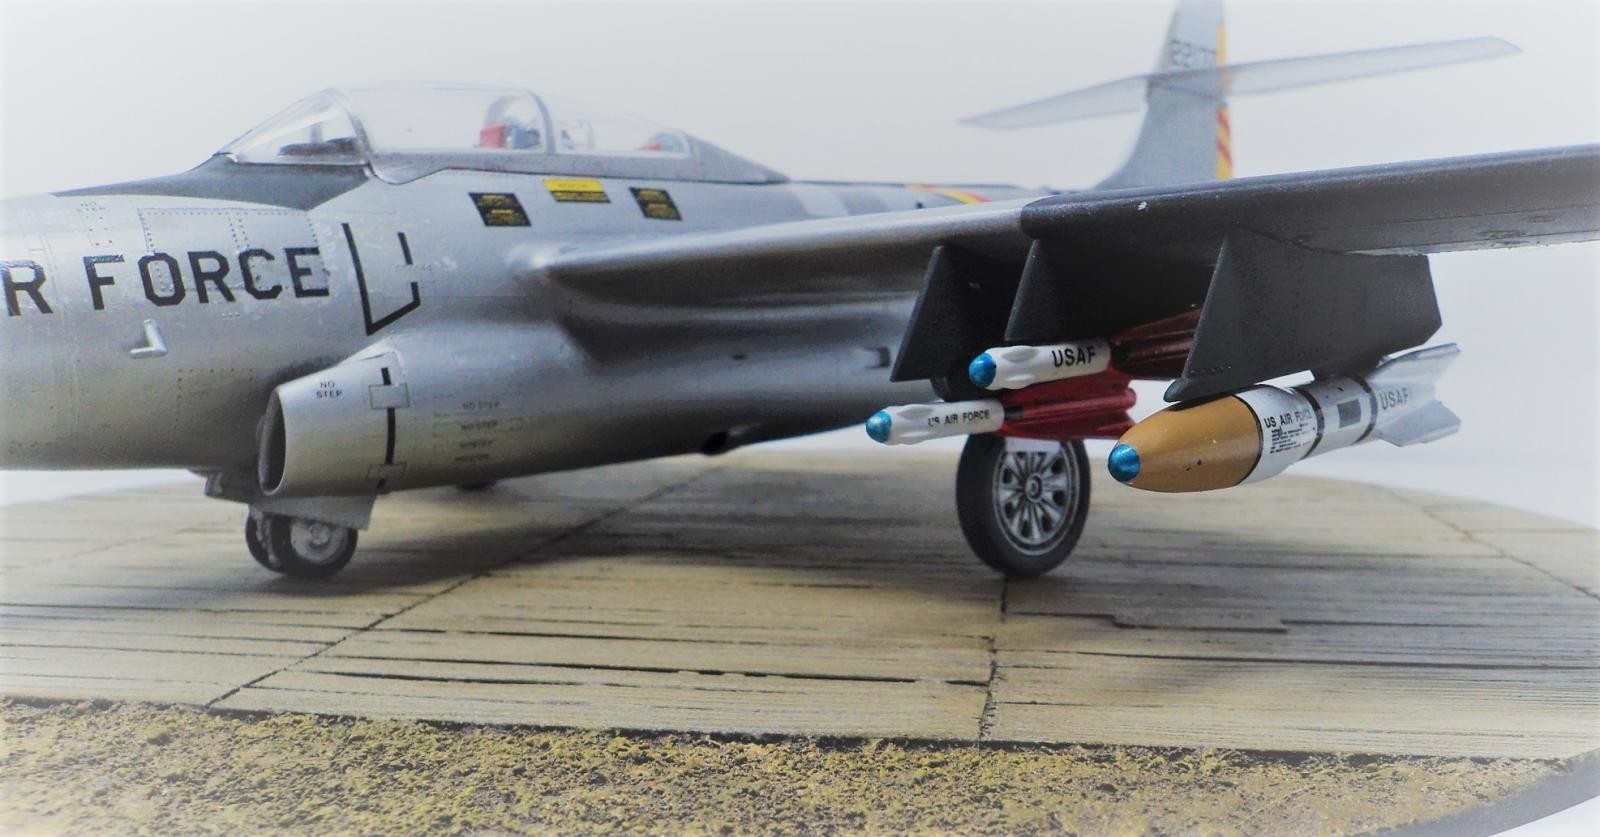
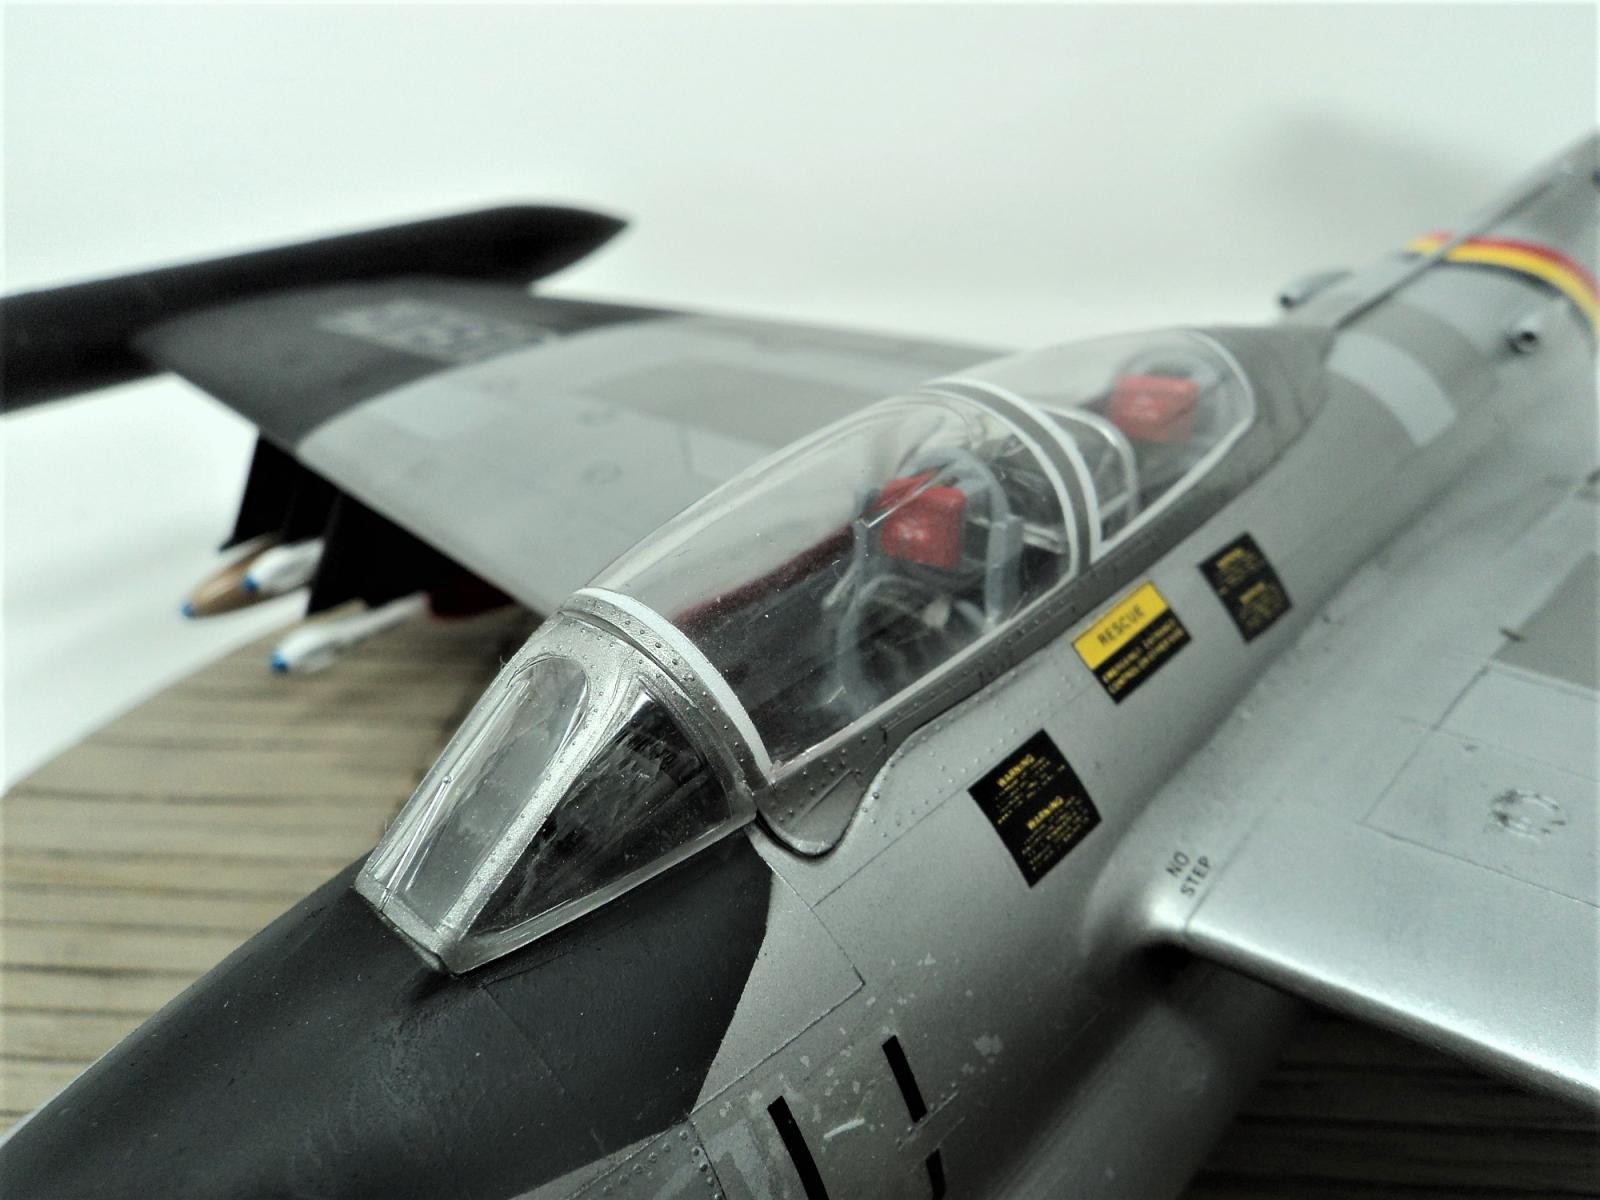
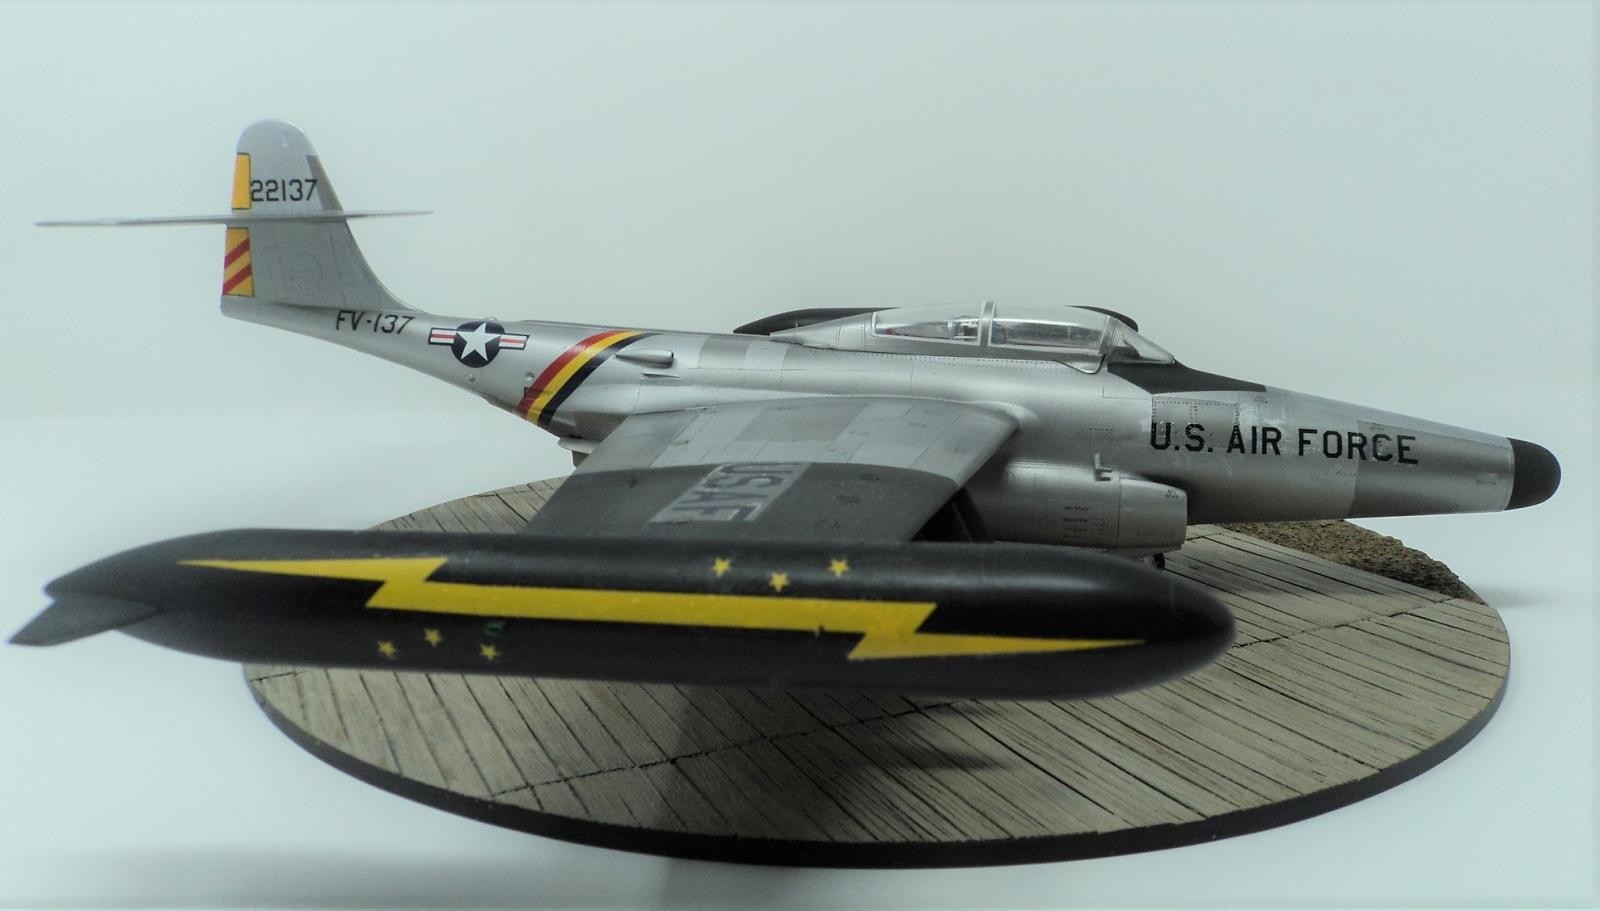
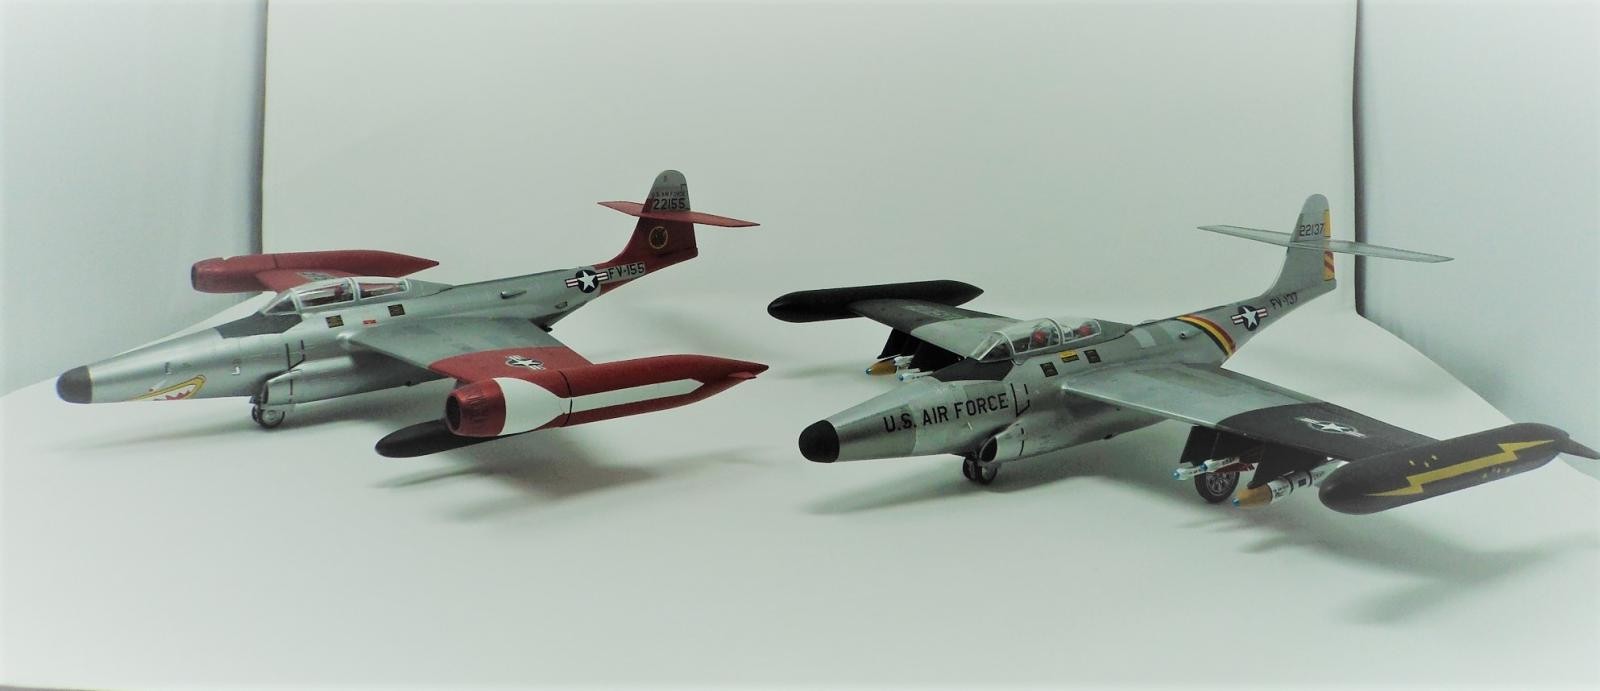
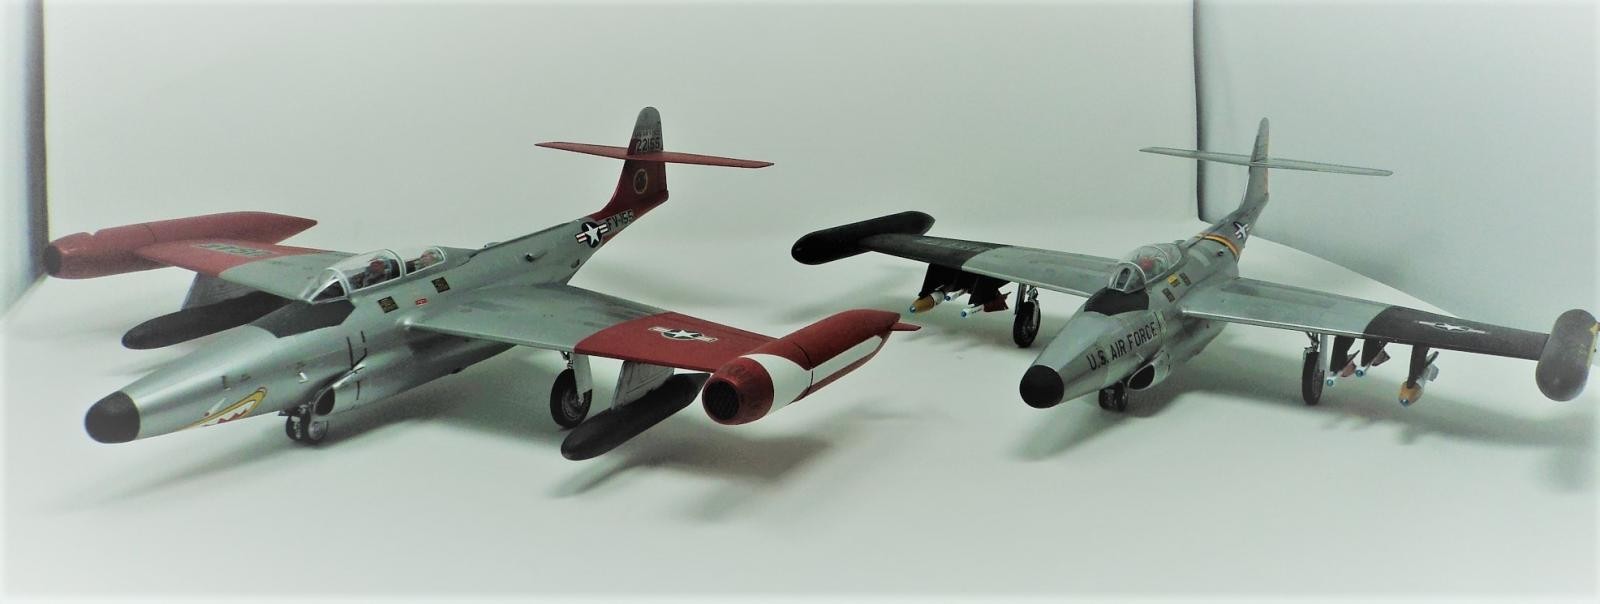
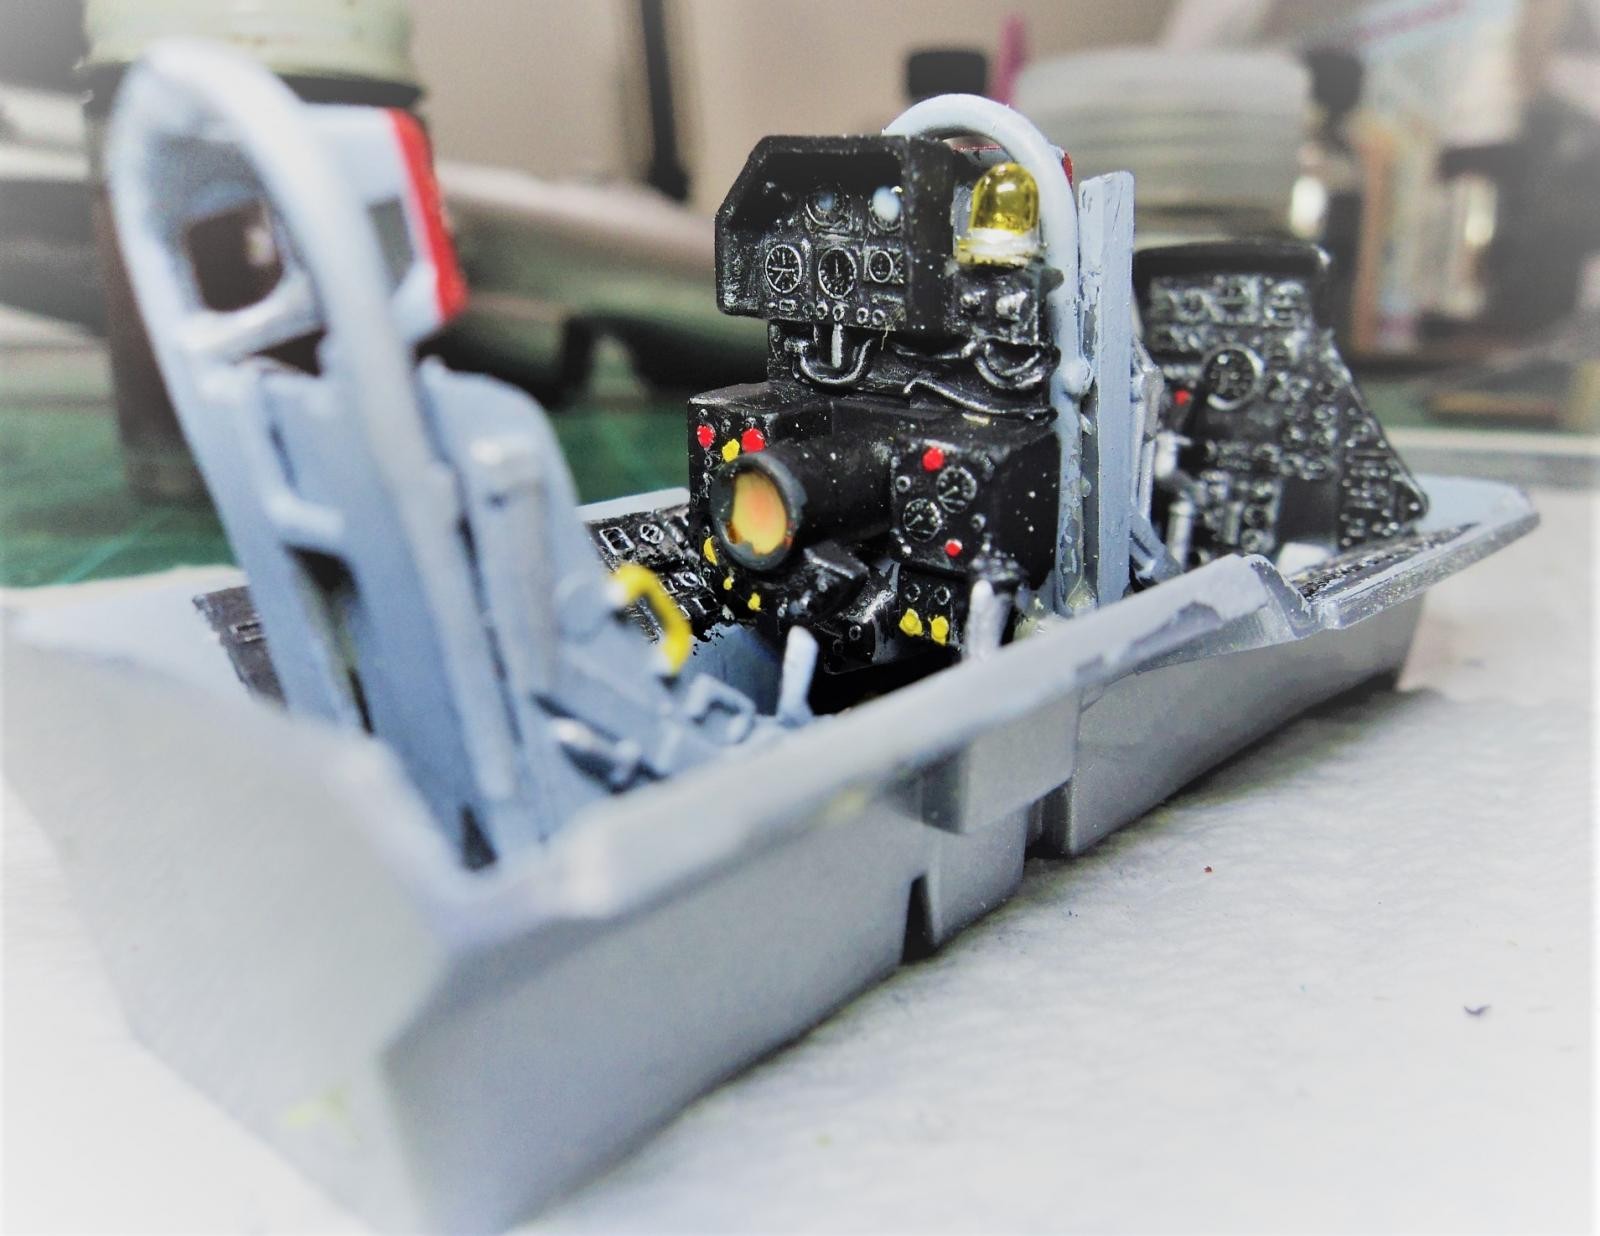
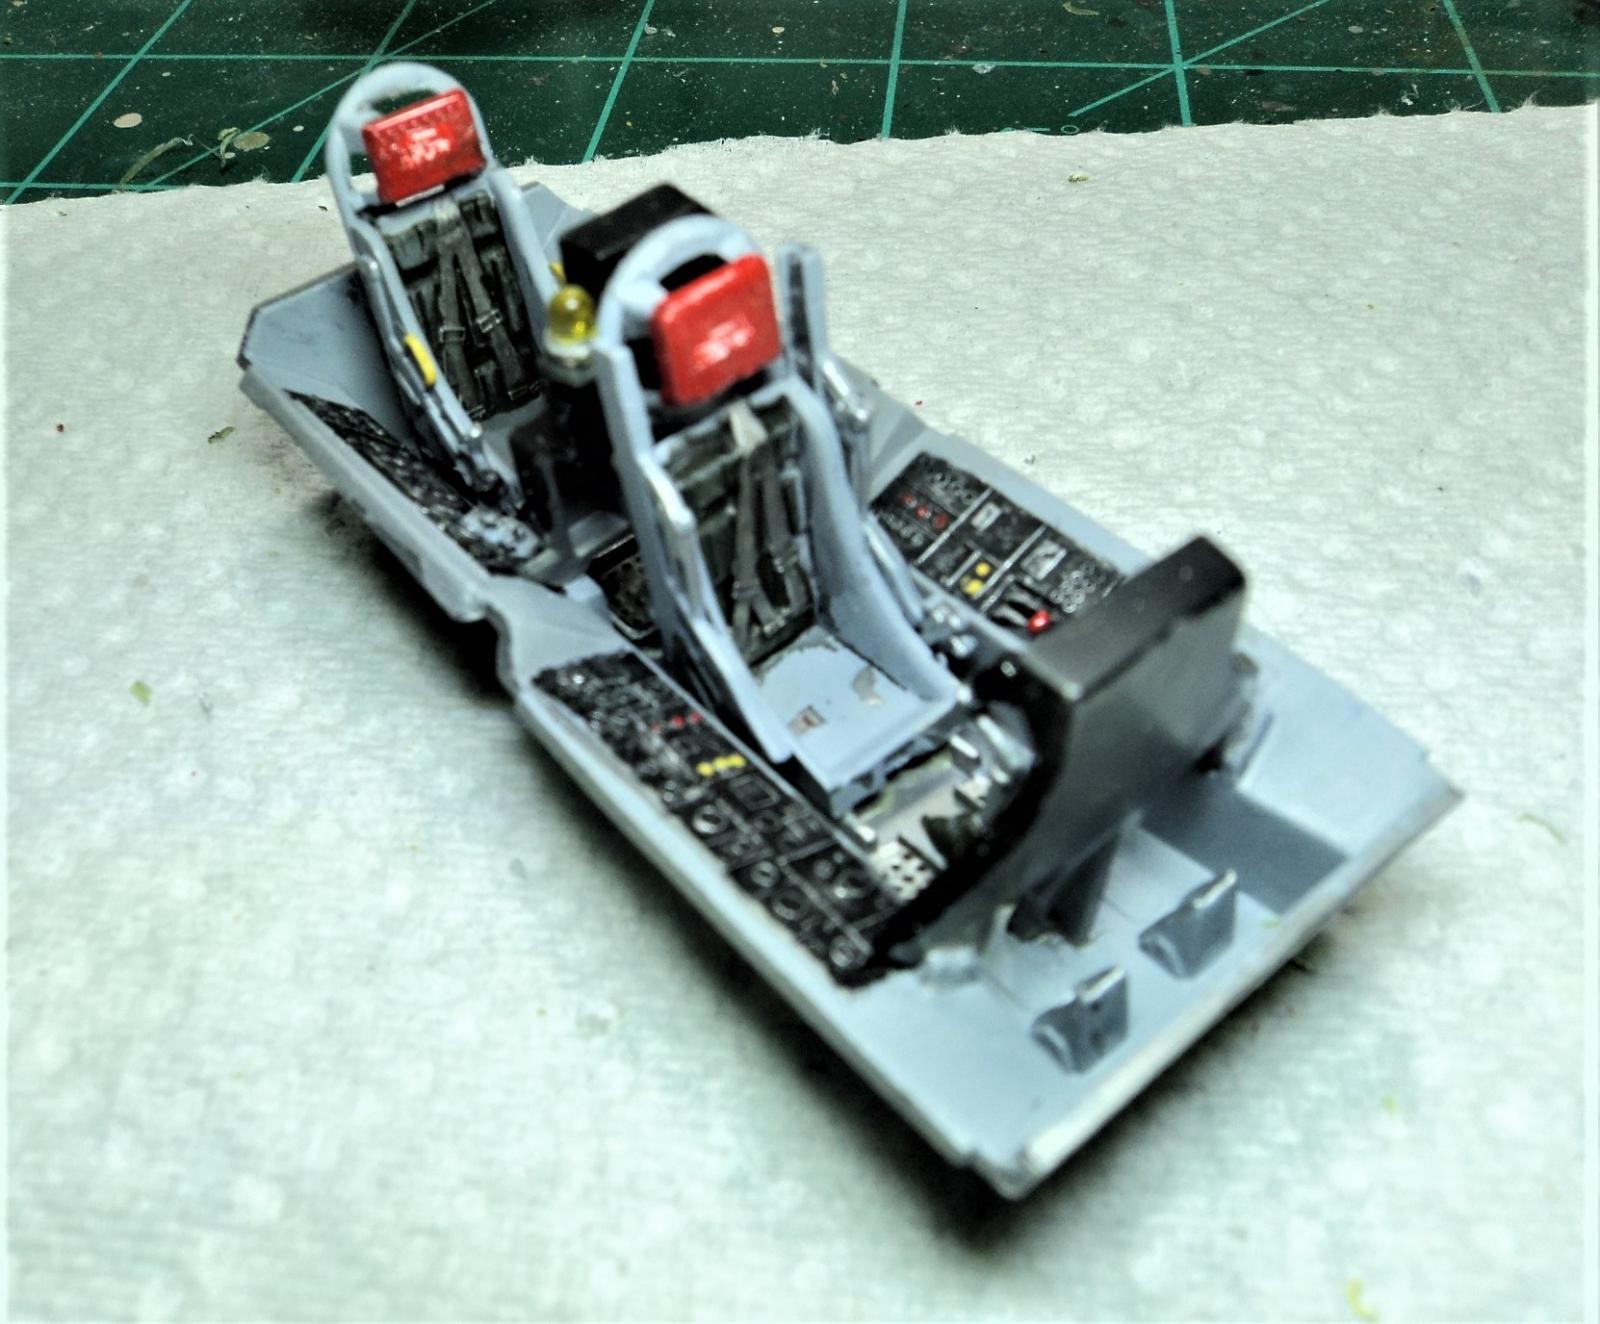
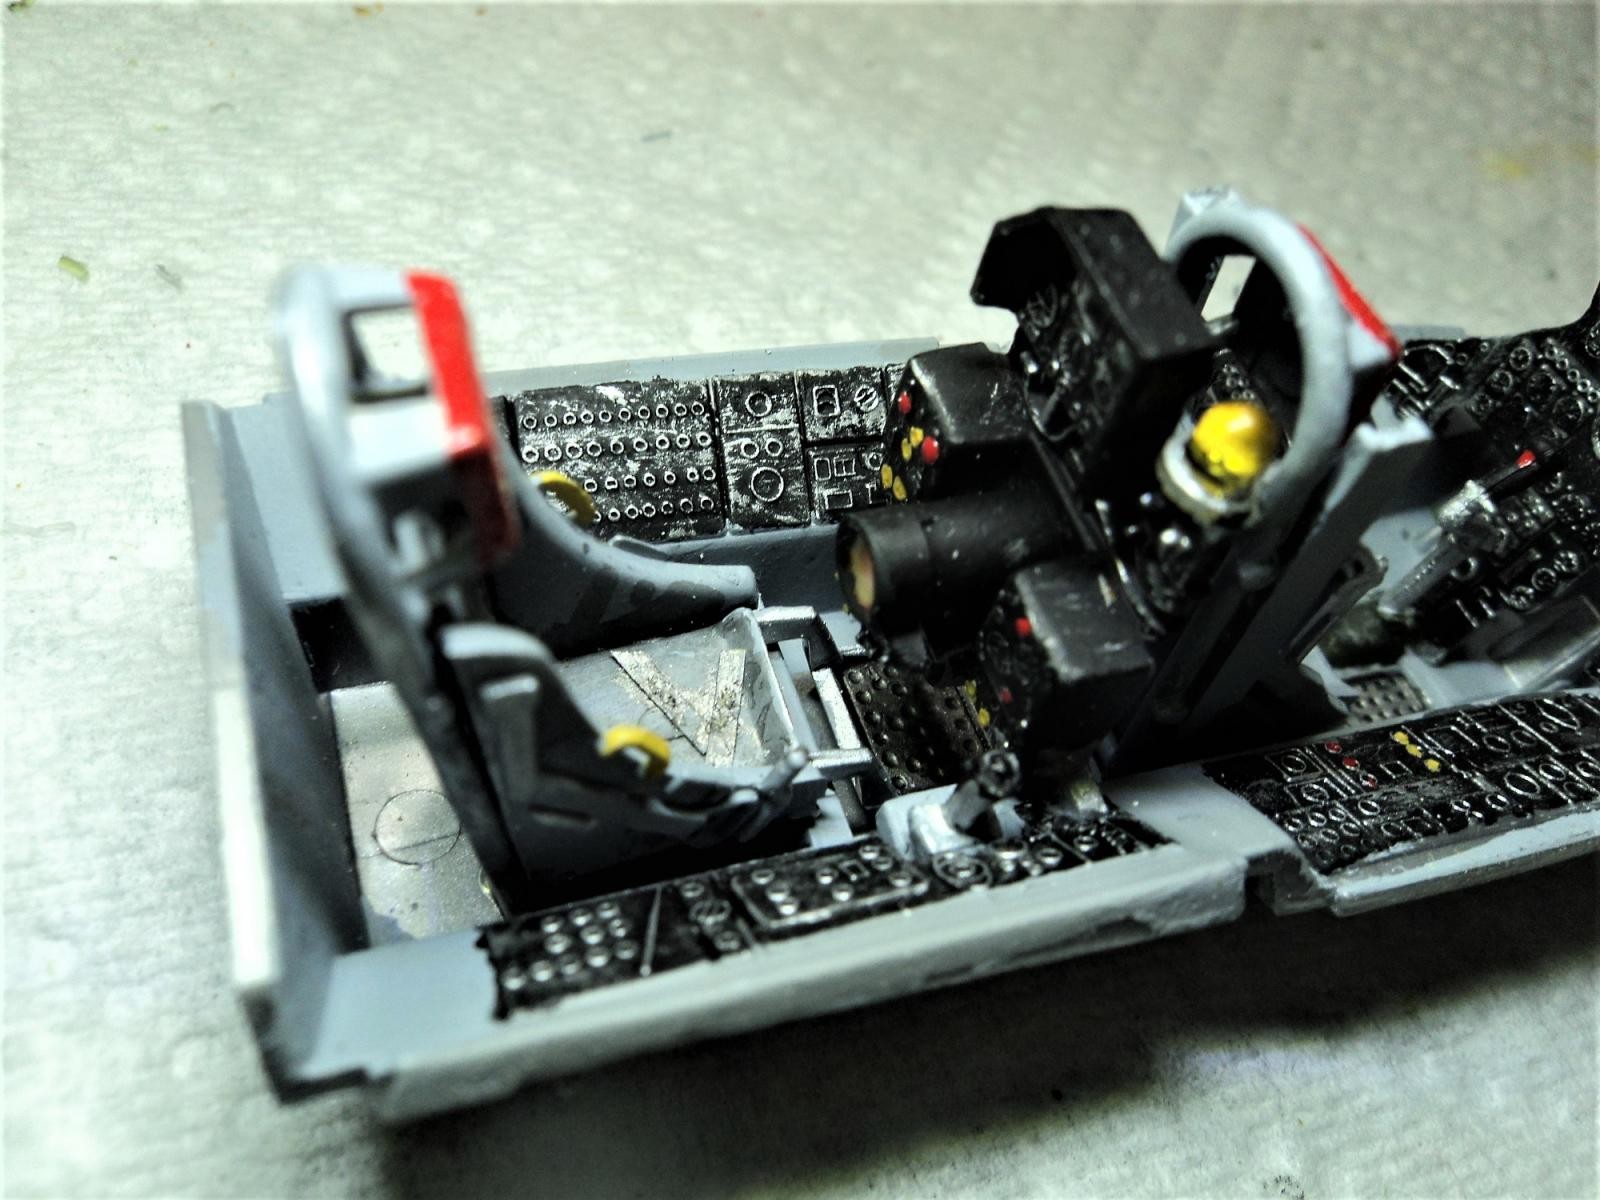
Okay, after my last posting of the Revell F-89D and some of my admitted faux paux;, Tom Bebout graciously sent me a model of the F-89 that he had picked up years ago that the modeler had started the cockpit assemblies and the fuselage halves. I was determined to make this one "right." Using the Super Scale sheet 48-381 I decided on the 451st FIS scheme as it had black wingtips and tanks and a neat fuselage band. The project went swimmingly, seemed like the fit was a bit better than the "D" I had just completed so I was pumped. The cockpit needed a little tweaking and painting but not bad, fuselage was sanded so just a bit more sanding and filling and off to the next steps. I went on line to find references for the Genie and Falcon missiles that were included in the kit and found a page with markings and colors. I had just happened to have had in the drawer an unopened Scalemaster Missile marking sheet. None of which were for the Genie or the Falcon, but enough to liven up the missiles a bit. As I was applying the decals they shattered almost immediately upon sliding off the backing, so I used some Micro Decal Set to firm them up. They still wanted to fall apart but I managed to coax them on and had enough U.S. Air Force, stencils and USAF to make them look respectable. Moving along, things were just humming. Got the wings on. The fit is a bit wonkie but I didn't want to do a lot of filling and sanding as the surface is quite flat and on the previous F-89 created a bit of a groove so I left them as is. I had read on a forum that Tamiya "Nato Black" is a good primer for a natural metal finish (NMF) (or is it "Finnish"?) Either way, I used that. Not a good idea. In the back of my mind I knew that but thought I would try it. I managed to salvage the NMF but it is less than what I was hoping for. Revell doesn't provide a NMF background for the national insignia so I cut a stencil for it. It's okay and from three feet away, eh! It's a difficult stencil to cut. I used a dime and then measured the bars. As the model has raised panel lines, to break up the monochromatic appearance and highlight the panels, I painted different shades using a combination of Alclad, Testors MM Metalizer Aluminum, Testors and Tamya Rattle cans. I am satisfied with the results. I used a fine sanding stick and gently went over the raised areas to sand off the NMF paint and expose the black underneath. It also gave the metal a bit of a weathered appearance that I was quite surprised and happy with. I used the Kit Decals for the USAF on the wings and the U.S. AIR FORCE on the nose. They didn't want to lie down too well even with solvaset. As I was applying them I realized I had used the Micro Decal Saver on them and should have trimmed them more closely. Another lesson learned in the school of Advanced Modeling 101.
Anyway, there it is, overall I am pleased with it and it makes a nice companion to the "D".
And now on to something completely different.


Those are real beauties Mark...nice work.
Thanks Jack and thanks for scoping them out. Duly appreciated.
Awesome! Possibly my favorite 50s USAF fighter!
Hi Rob: Thanks for scoping it out and leaving a nice comment. Obviously one of my favorite 50's Jet Fighters.
The cockpits are great. Nice job Mark @mkrumrey.
Thanks for looking in and your comment. Much appreciated.
My favorite interceptor! The D and the J look great sitting next to each other and the duller appearance of the J (due to being sprayed over rough flat paint) is a great approximation of how the Js looked later in life when sprayed with a clear sealer. (Before they got the ADC grey paint.) I also like the markings with the fuselage band.
Thanks Josh for checking out the page and your comment. They are neat looking aircraft and make a nice "duo".
Revell also makes a C version which also could be made into a B or A with very little work. (Revell even gives you a second canopy without the center framing appropriate to an early Scorpion.) I really want to modify the tip tanks and do an H version. It looks so cool with the three Falcons popped out of each tank! Here's one Phil Brandt did way back when. http://hsfeatures.com/f89hpb_1.htm It's missing the seven tubes for the 2.75 FFRs between each missile bay, but everything else is great!
Hi Josh: Thanks for the link to Phil Brandt's article. Most impressive work. I have the F-89C kit as well but it only has one canopy. When I get to it it will be built OOB. I have the D&S Book on it and there are a few minor corrections to be made to the exterior, but otherwise, OOB.
Thanks again.
To quote an old line from the TV series The A Team, " I just love it when a plan comes together." Nicely done Mark, she really looks good in those markings.
Thanks Tom: The plan came together pretty darned good. I like the outcome of the model. Thanks for looking in, your comments and again thanks for the kit.
Hello Mark,
Very impressive build. Especially your cockpit looks great.
See what you can accomplish with dry-brush. regards, Dirk
Hello Dirk: Yes, one doesn't need a ton of PE to make a cockpit stand out. It's all what came in the kit. Thanks for checking in and leaving your comment. Duly appreciated.
Very nice ! Looks great in this scheme.
Thanks Robert, I appreciate you looking in and your comment.
Mark, @mkrumrey
This is another fantastic looking build ! and I like it... The cockpit really looks good
Thanks for looking in and your comments Louis, duly appreciated.
Beautiful 1950s jets, they look just great together.
Beautiful 1950s jets, they look just great together. Definitely liked.
Thank you George. I appreciate your looking in and your comments. They do make a nice pair don't they.
Came out gorgeous.
Love the lines on that aircraft.
Very nice Scorpion! (both look great!)
Thanks Michael and Greg for looking in and your comments. Duly appreciated.