#IntrepidCorrected – Revell’s Classic 1/720 Essex Class Carrier (Corrected)
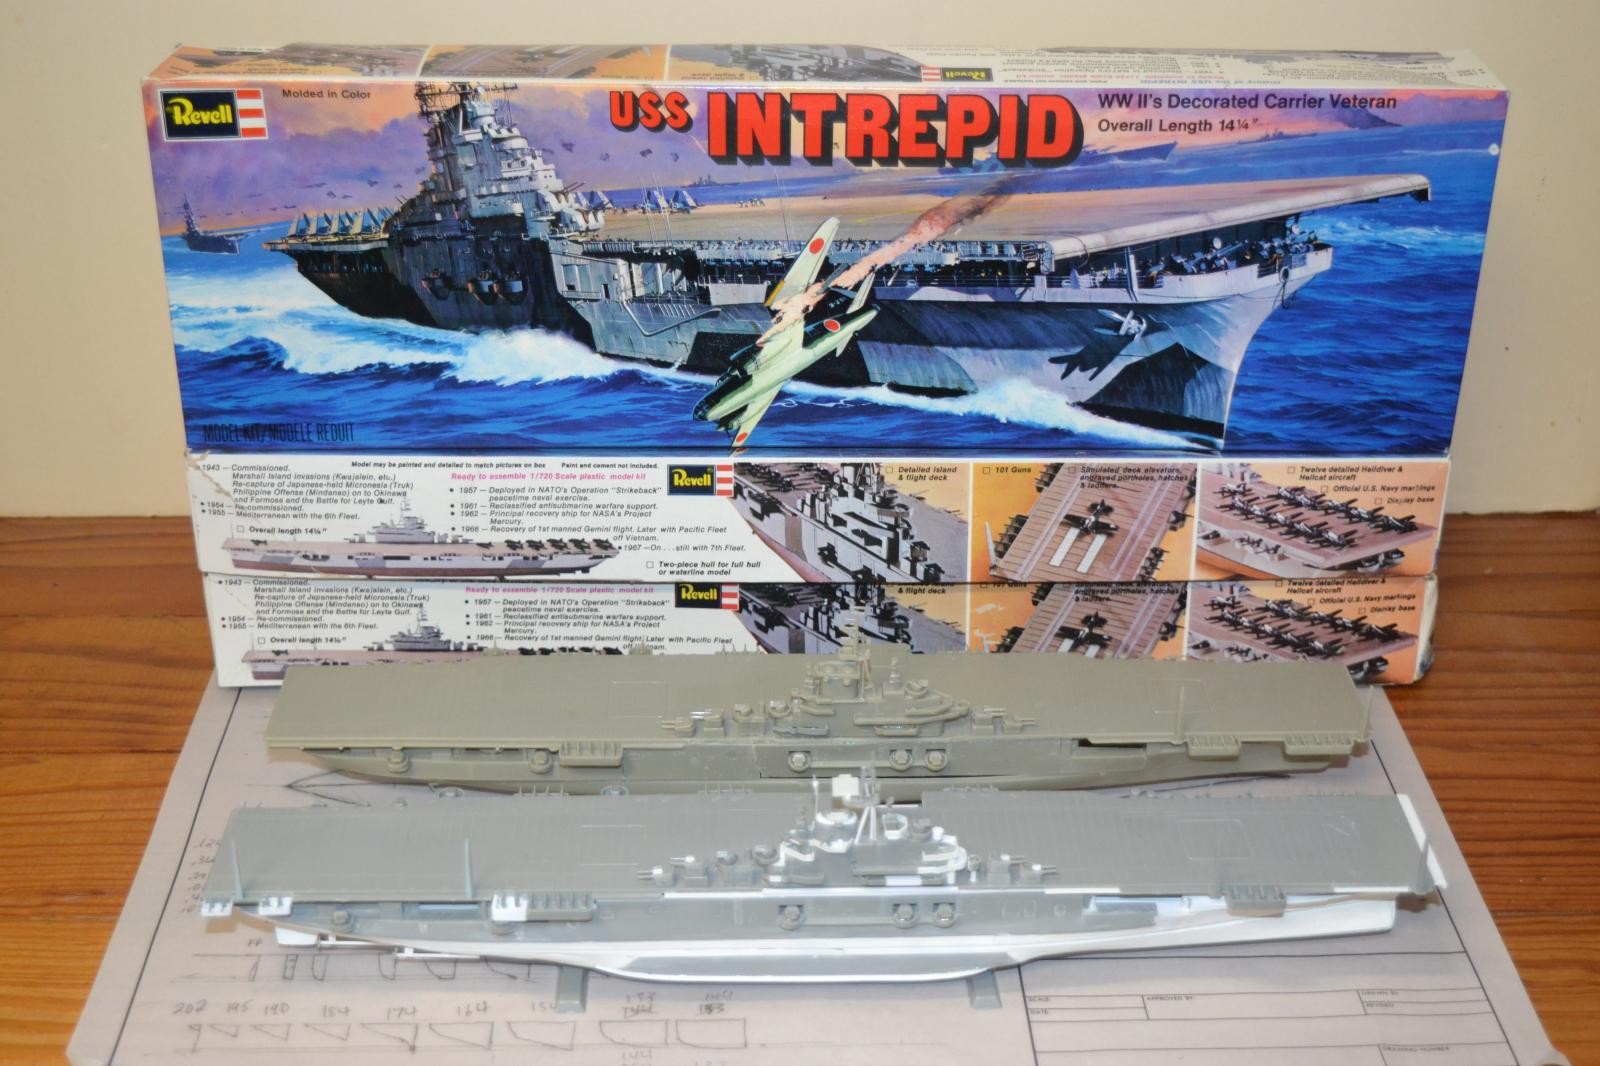
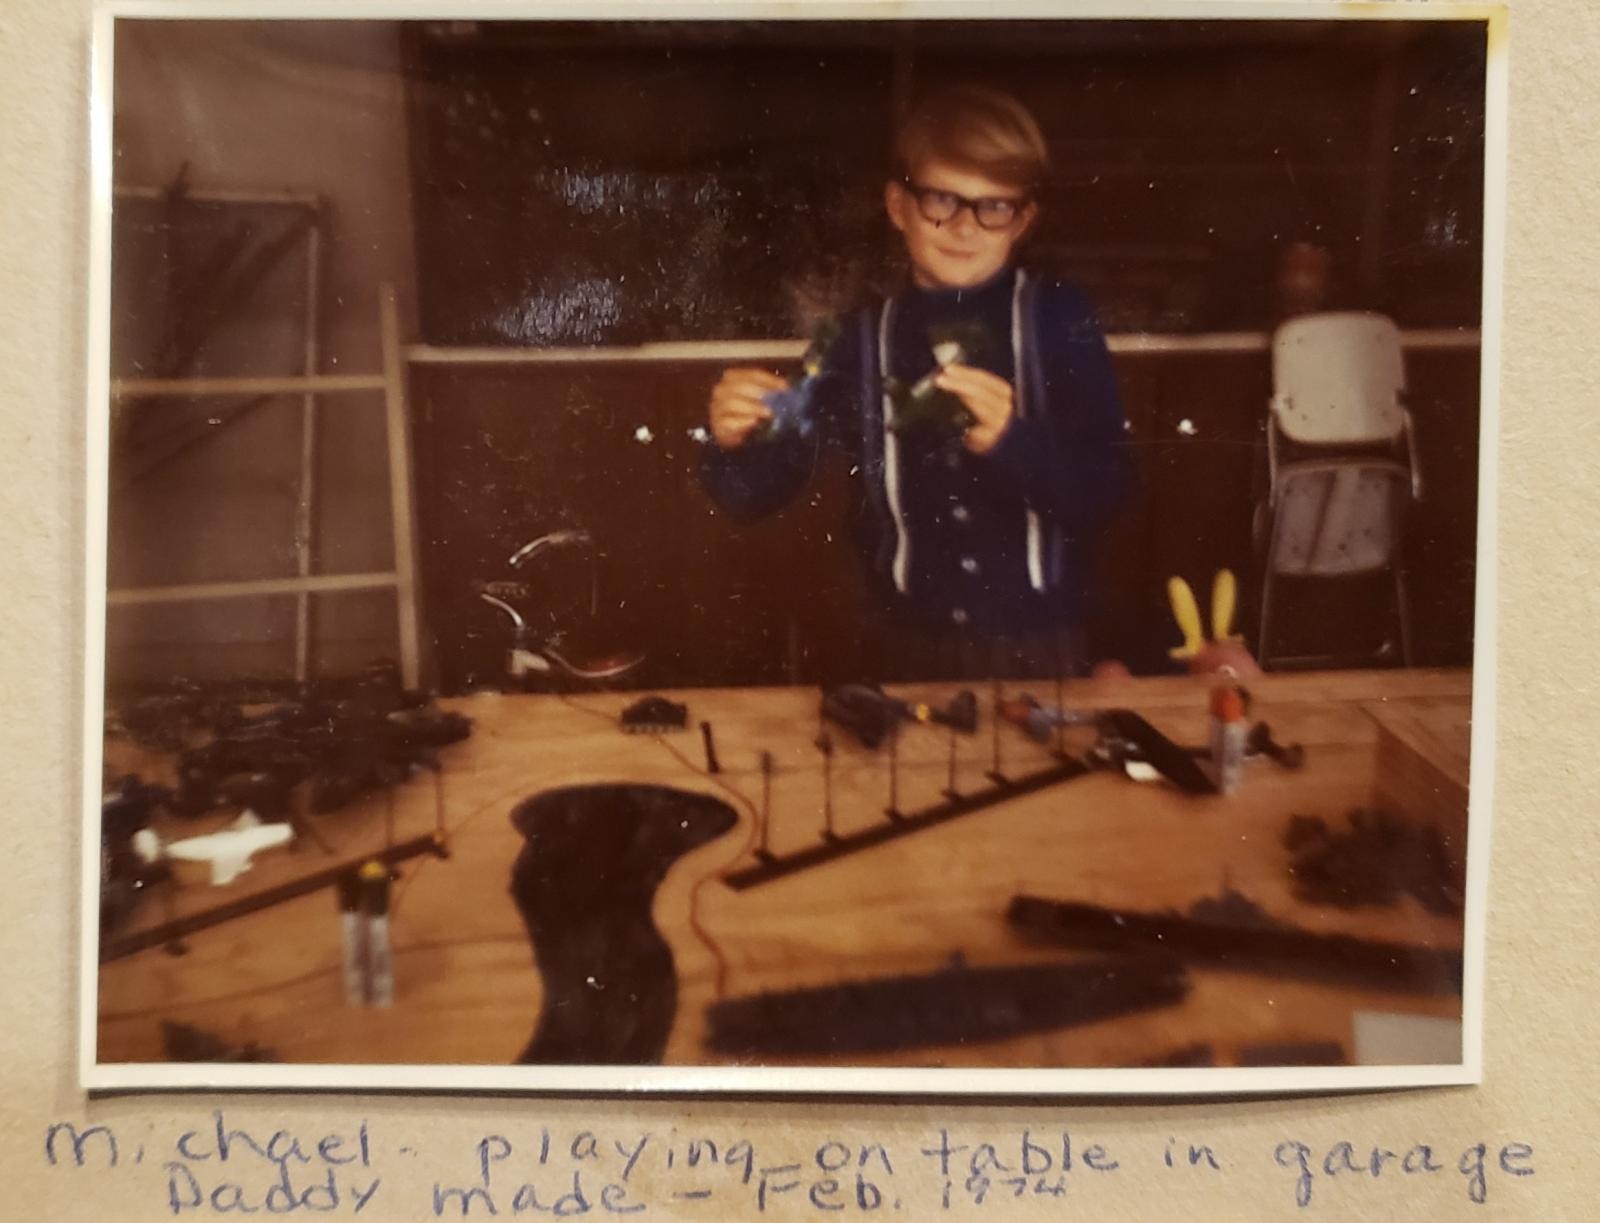
For many modelers of World War II ships, Revell's 1/720 scale model of the USS Intrepid (CV – 11) was an early favorite. It was cheap (two dollars, compared to four dollars for a Tamiya Akagi), easy to build, and gave you a big rectangular flight deck with a dozen aircraft for living room carpet war games. I built my first in 1973-74, and many more since then.
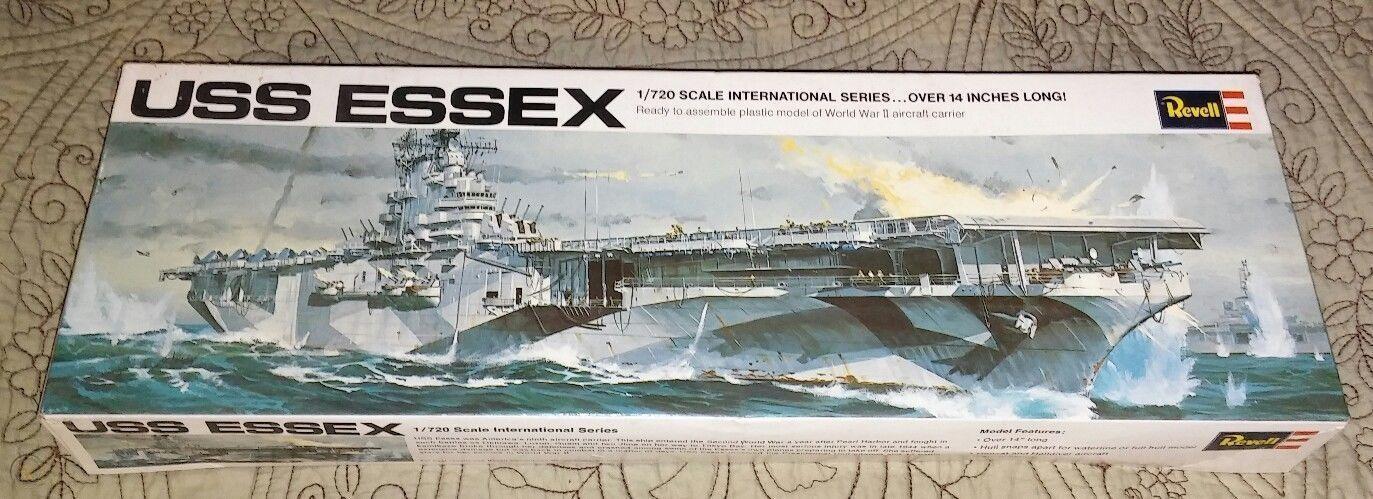
The kit was originally released in 1967 as the USS Franklin (CV–13), and was re-released as the USS Essex (CV-9) the next year. In 1972 it was rereleased as Intrepid. (CV-11). It was the only class of wartime aircraft carrier available in plastic modeling in or near the 1/700 scale until the advent of the water line Japanese manufacturers in the 1970s. While the flight deck is basically accurate, the hull shape is significantly undersized, and the island suffers from numerous inaccuracies. The kit was greatly surpassed in accuracy by the Hasegawa Essex and Hancock kits in1974, and over 20 years later by a far more accurate series of Essex class carriers by Trumpeter and Dragon.
As a result of these later kits, the Revell Intrepid is not a logical candidate for building as anything other than a toy, as one of these later kits could be accurized far more easily. In fact, it would be significantly simpler to build an Essex class carrier in this scale from scratch than it would be to accurize or kitbash this kit into one.
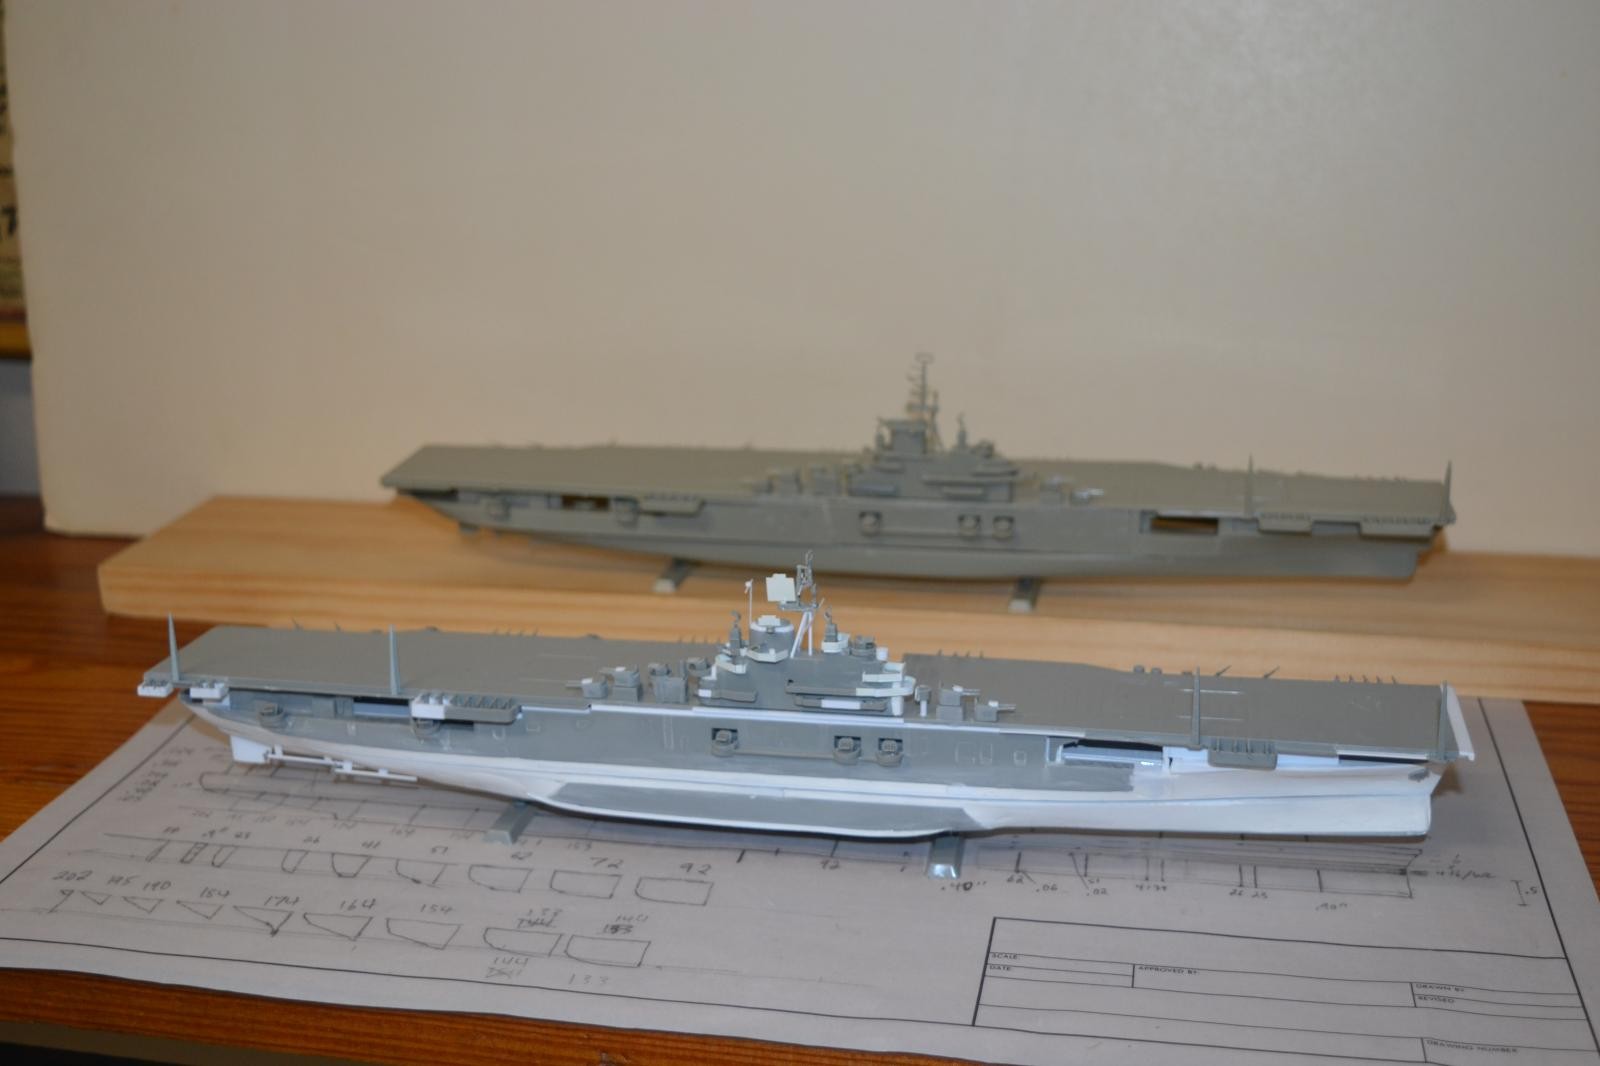
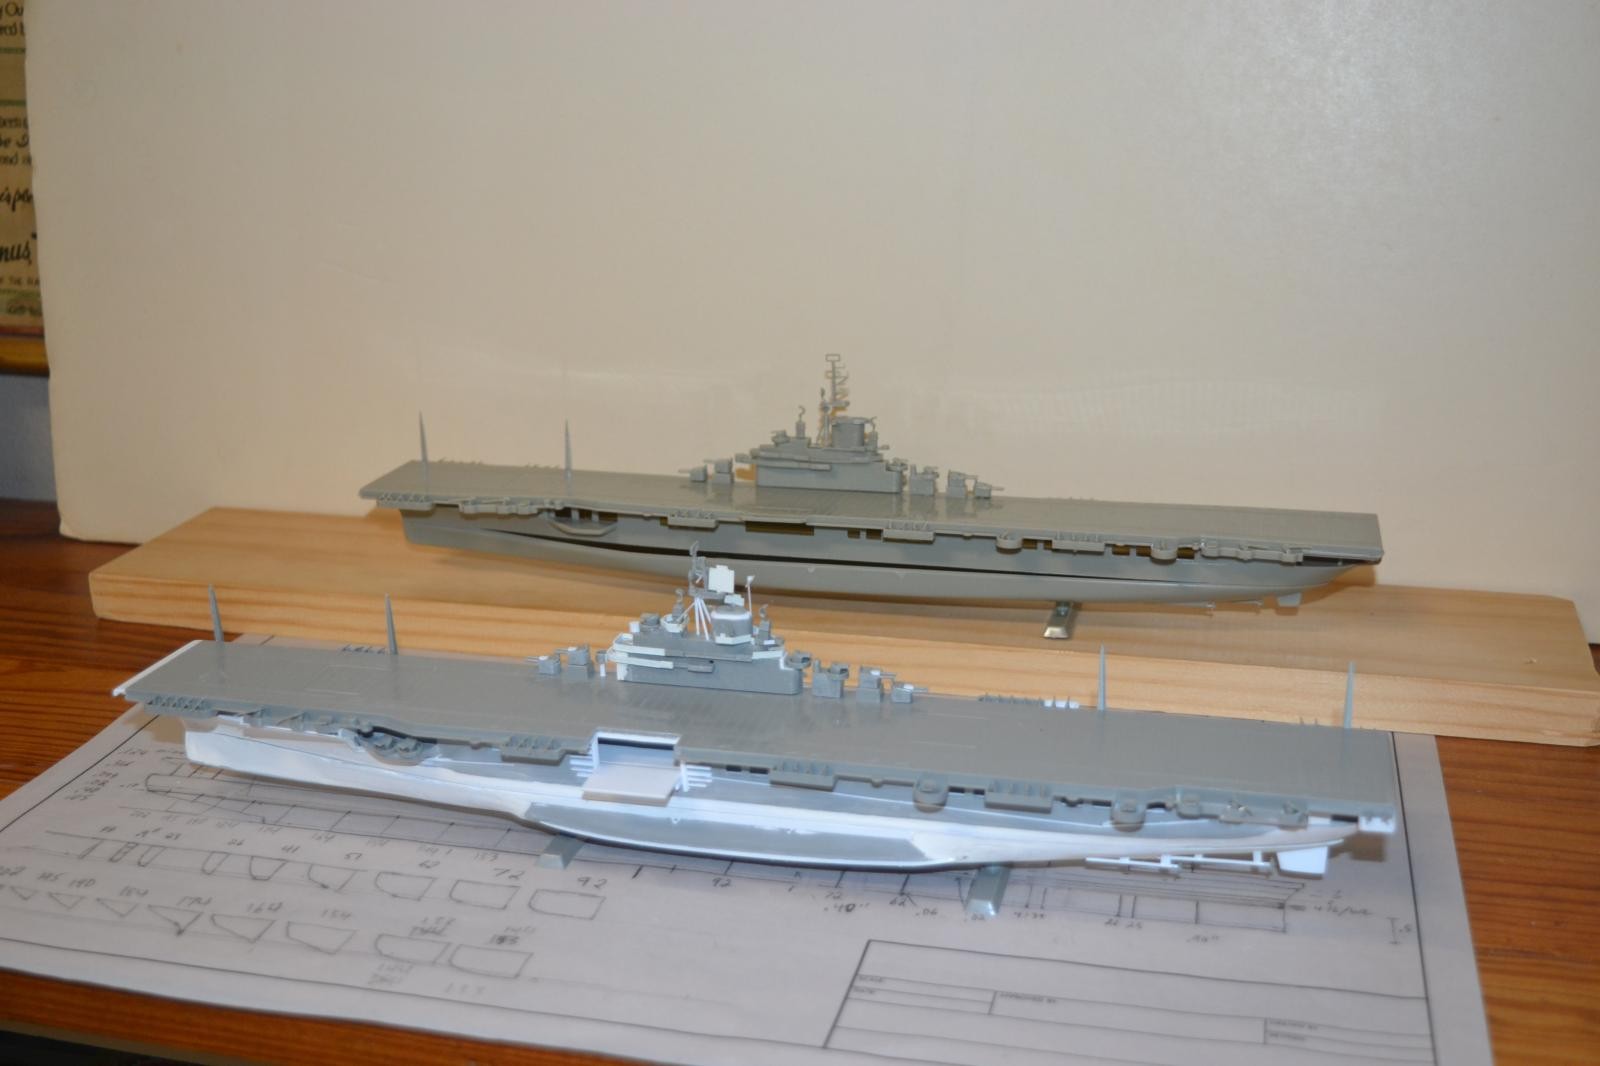
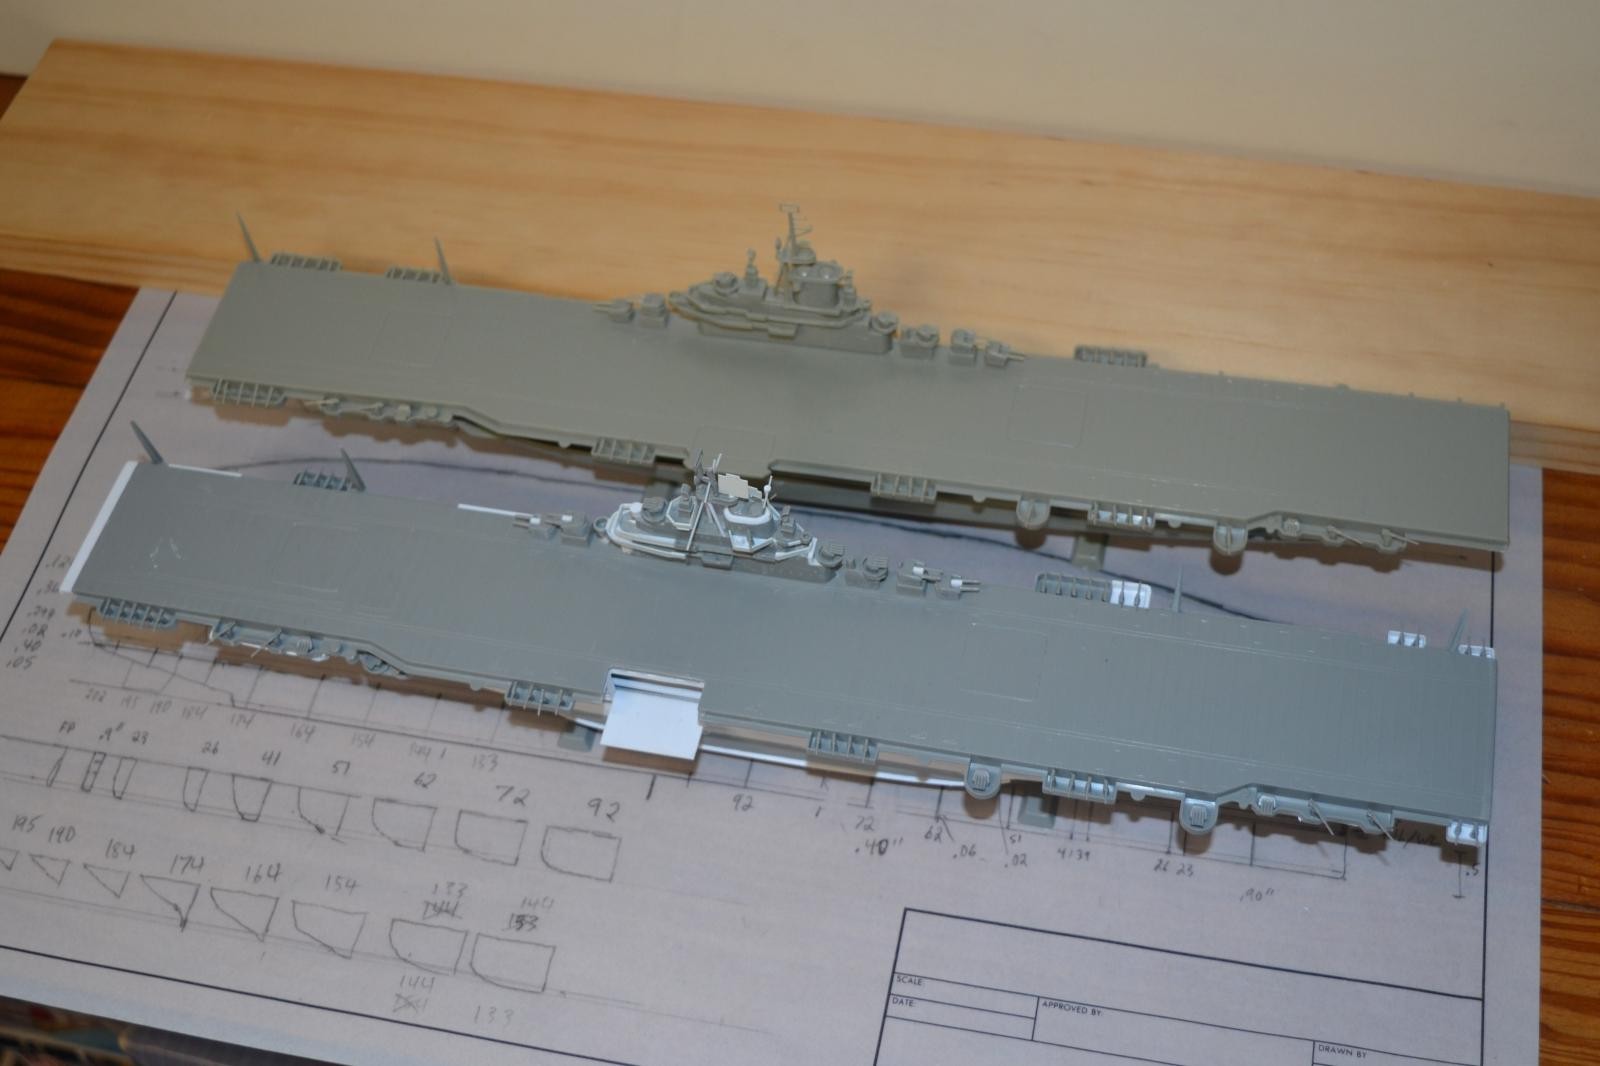
Nonetheless, the kit is a sentimental favorite of mine, and I recently began contemplating building a "corrected"version of the kit which would have the major errors in shape and detail corrected in a way that is visible. I chose to do this by making all the corrections in white plastic and putty, and leaving the model unpainted so that the revisions are clear. Again, the intent was not to detail or accurize the kit – the kit's armament and other details remain the same – but instead only to correct the kit's inaccuracies using the same level and type of construction of the original model. In other words, I focused on making changes that could have been included in the original kit when it was released.
Date of Model
I chose to model the Intrepid as it appeared at the Battle of Leyte Gulf in October, 1944. I did this for two reasons.
First, the kit lacks a 40 mm quad mount on the front of the island, has multiple 40 mm mounts elsewhere, and the box art and kit painting instructions show a dazzle camouflage pattern. This does not match the Intrepid's appearance as built in 1943, but does match its appearance after a March-June 1944 refit following its torpedoing off Truk in February 1944. Intrepid returned to service with the fast carriers of Task Force 38 in August 1944, so Leyte Gulf two months later was a logical time. This also meant that I could use the extensive detailed (and scaled) plans of the Intrepid in its June 1944 configuration in John Roberts' The aircraft carrier Intrepid Anatomy of the Ship book, reduced to 1/720 scale.
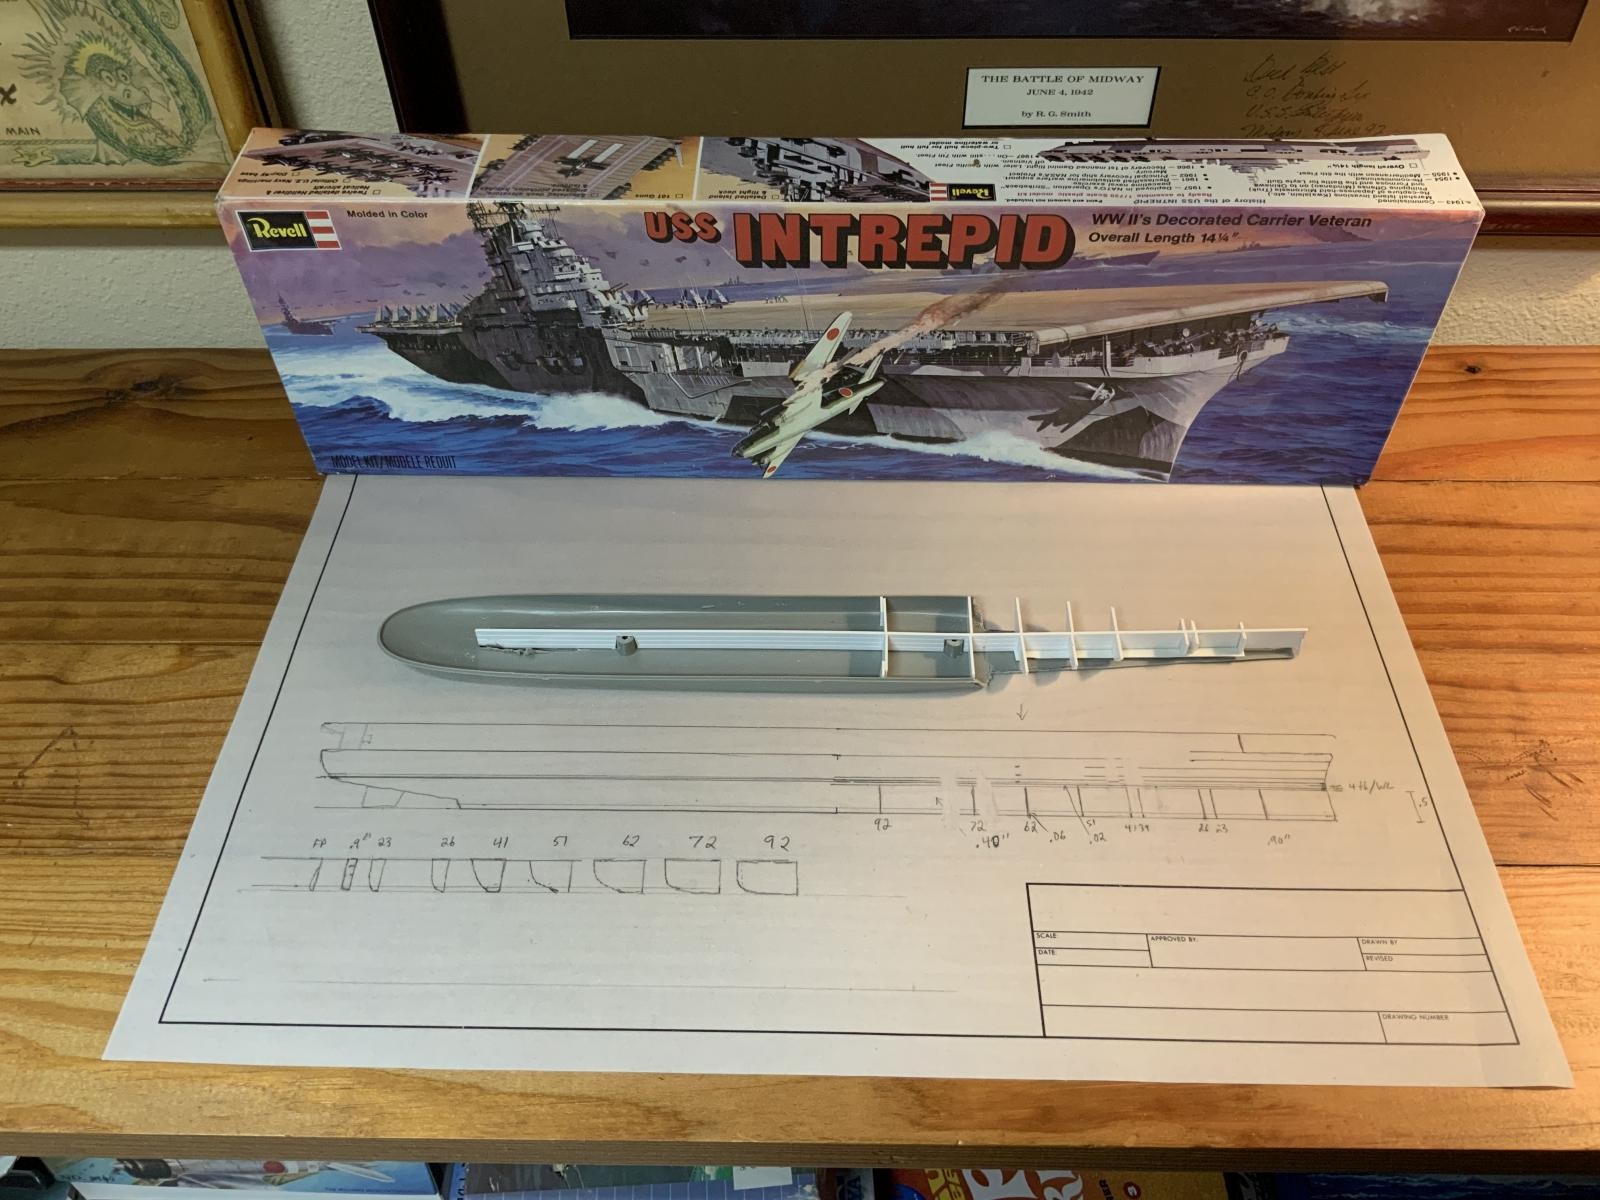
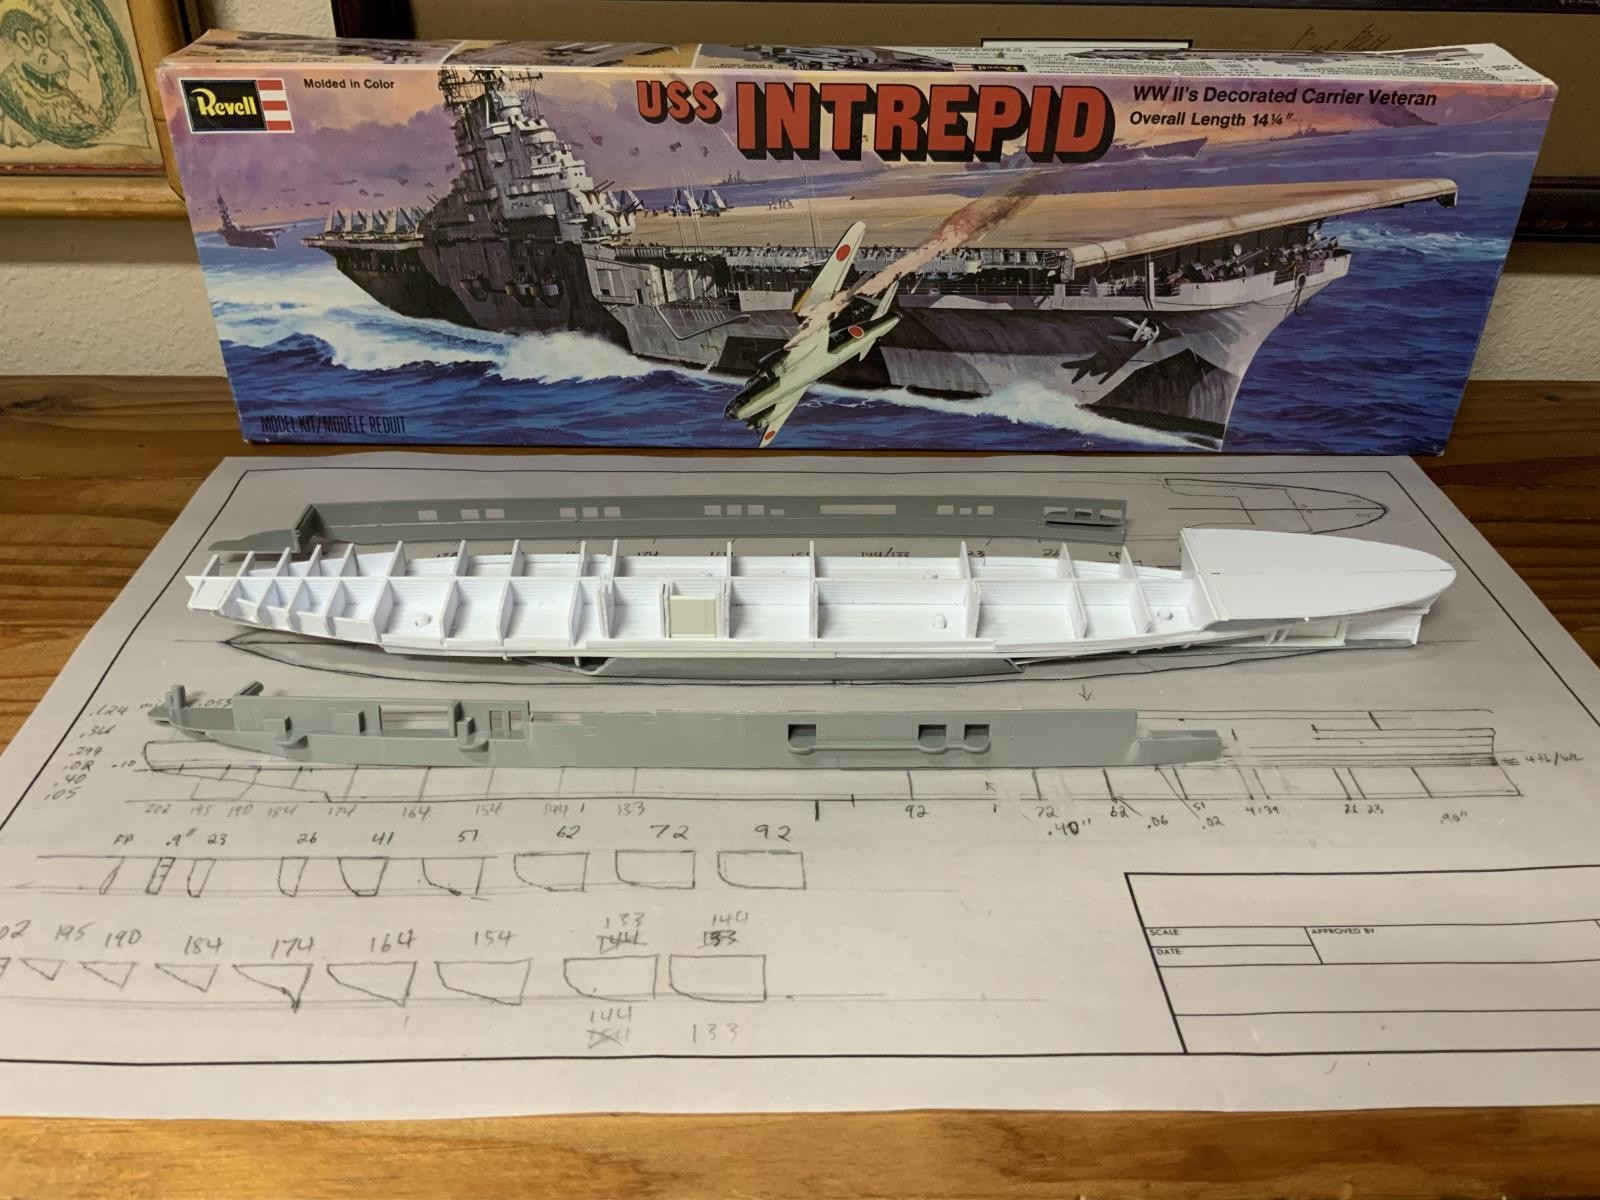
Hull
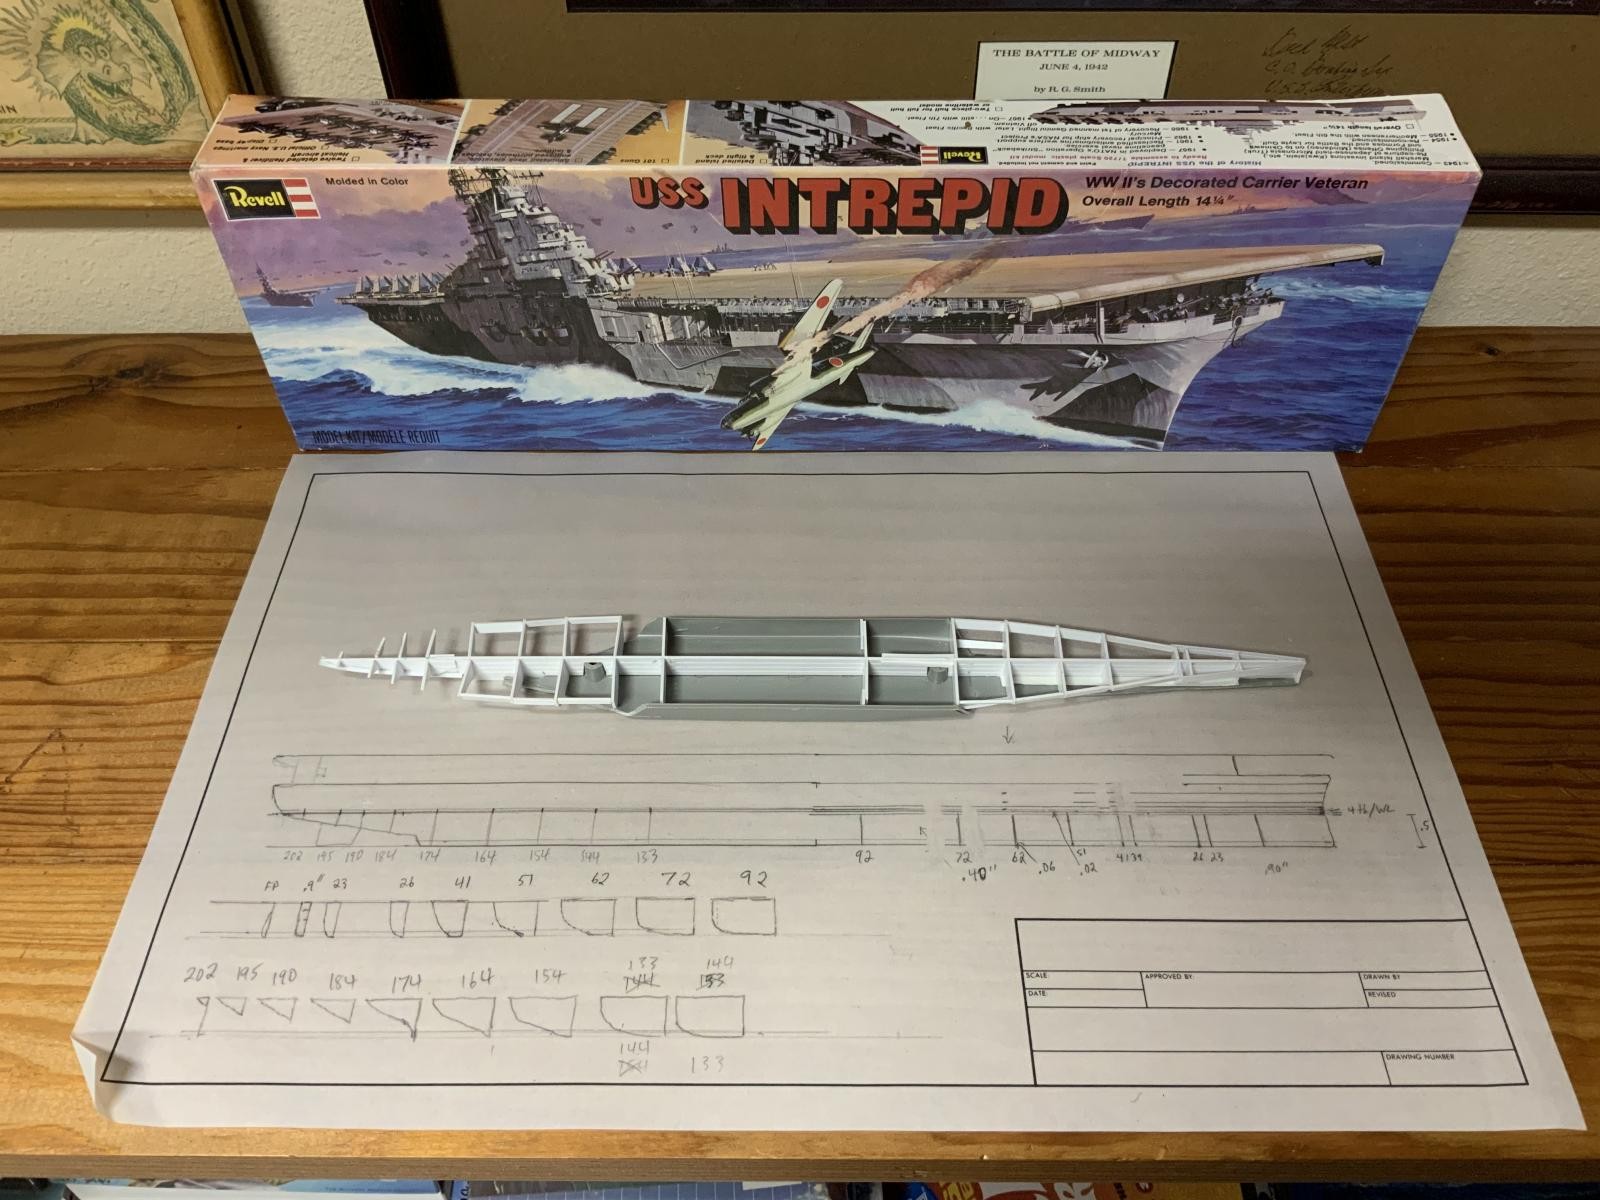
The biggest change to the kit was obviously going to be deepening the hull significantly. I prepared a profile with the accurate dimensions, which gave me precise calculations for how much additional hull material was going to be needed. I used as my starting point the existing kit's main (hangar) deck, and determined that additional height had to be added in the underwater section of the hull, immediately above the water line, and at the top of the hull just below the flight deck.
Underwater Hull
I decided to replicate the kit's two-part hull, so that I could separate the underwater portion from the rest of the ship in case I ever wanted to paint it and add it to my collection of 1/700 waterline Essex- class models. This meant that the first piece of construction was going to be a separate underwater hull.
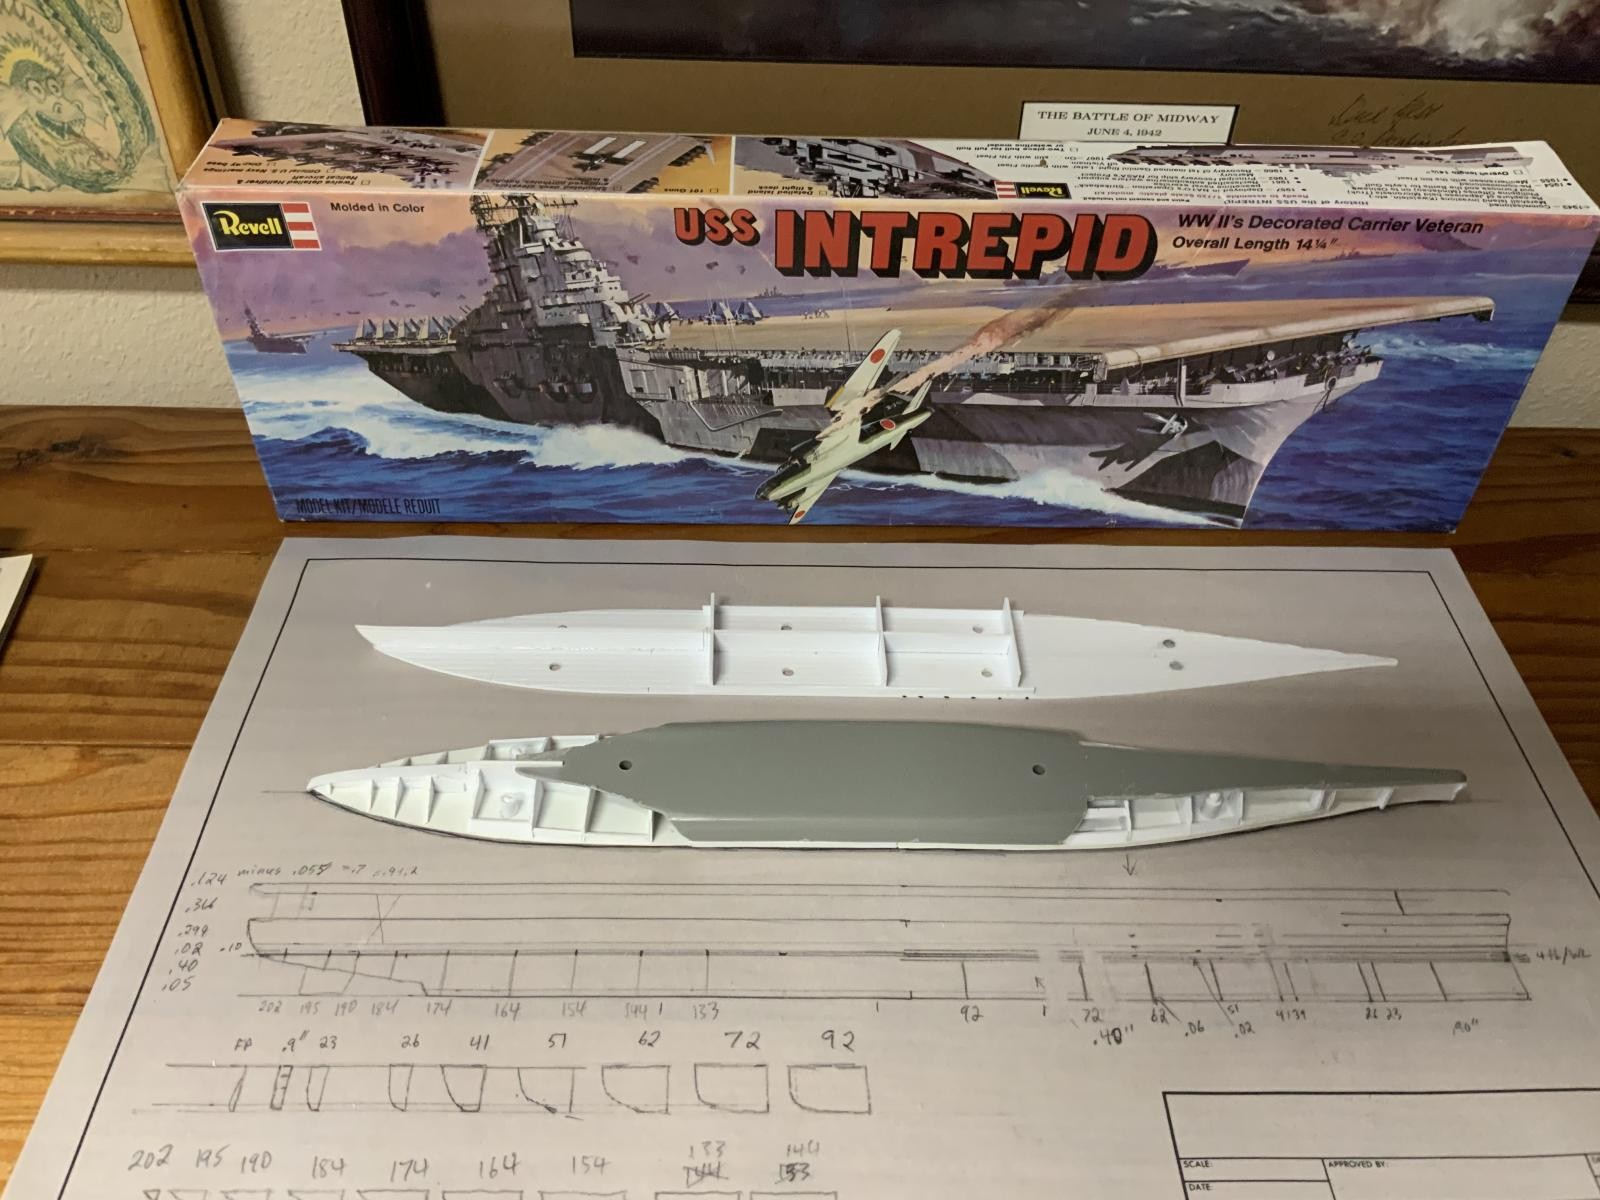
I started by drawing up a set of hull sections to be attached to a central "keel" for the underwater section of the ship. This would then be glued to the existing kit's underwater hull. I quickly realized that this would mean cutting away most of the underwater hull, since the Revell kit is terribly inaccurate in this department. Like its Yorktown class forebears, the Essex class has a streamlined hull fore and aft that is completely unlike the North Carolina class battleships whose underwater hull the Revell kit more closely resembles. In the end, all I ended up keeping of the kit's underwater hull was the bottom, which ended up being the approximate shape and thickness of the ship's double bottom, as well as the sides of the hull amidships. Once the cut-down hull was attached to the keel with hull sections, the rest of the hull was filled in using strip plastic and white Tamiya putty.
I then cut two waterline plates, one to serve as the top of the underwater hull, and the other to serve as the bottom the of the above water hull. After carefully aligning them, I cut holes in both for a series of dowels to align the two parts of the hull when finished. I finished off the underwater hall by scratch building a rudder, propeller shafts (to which the kit propellers were attached) and bilge keels.
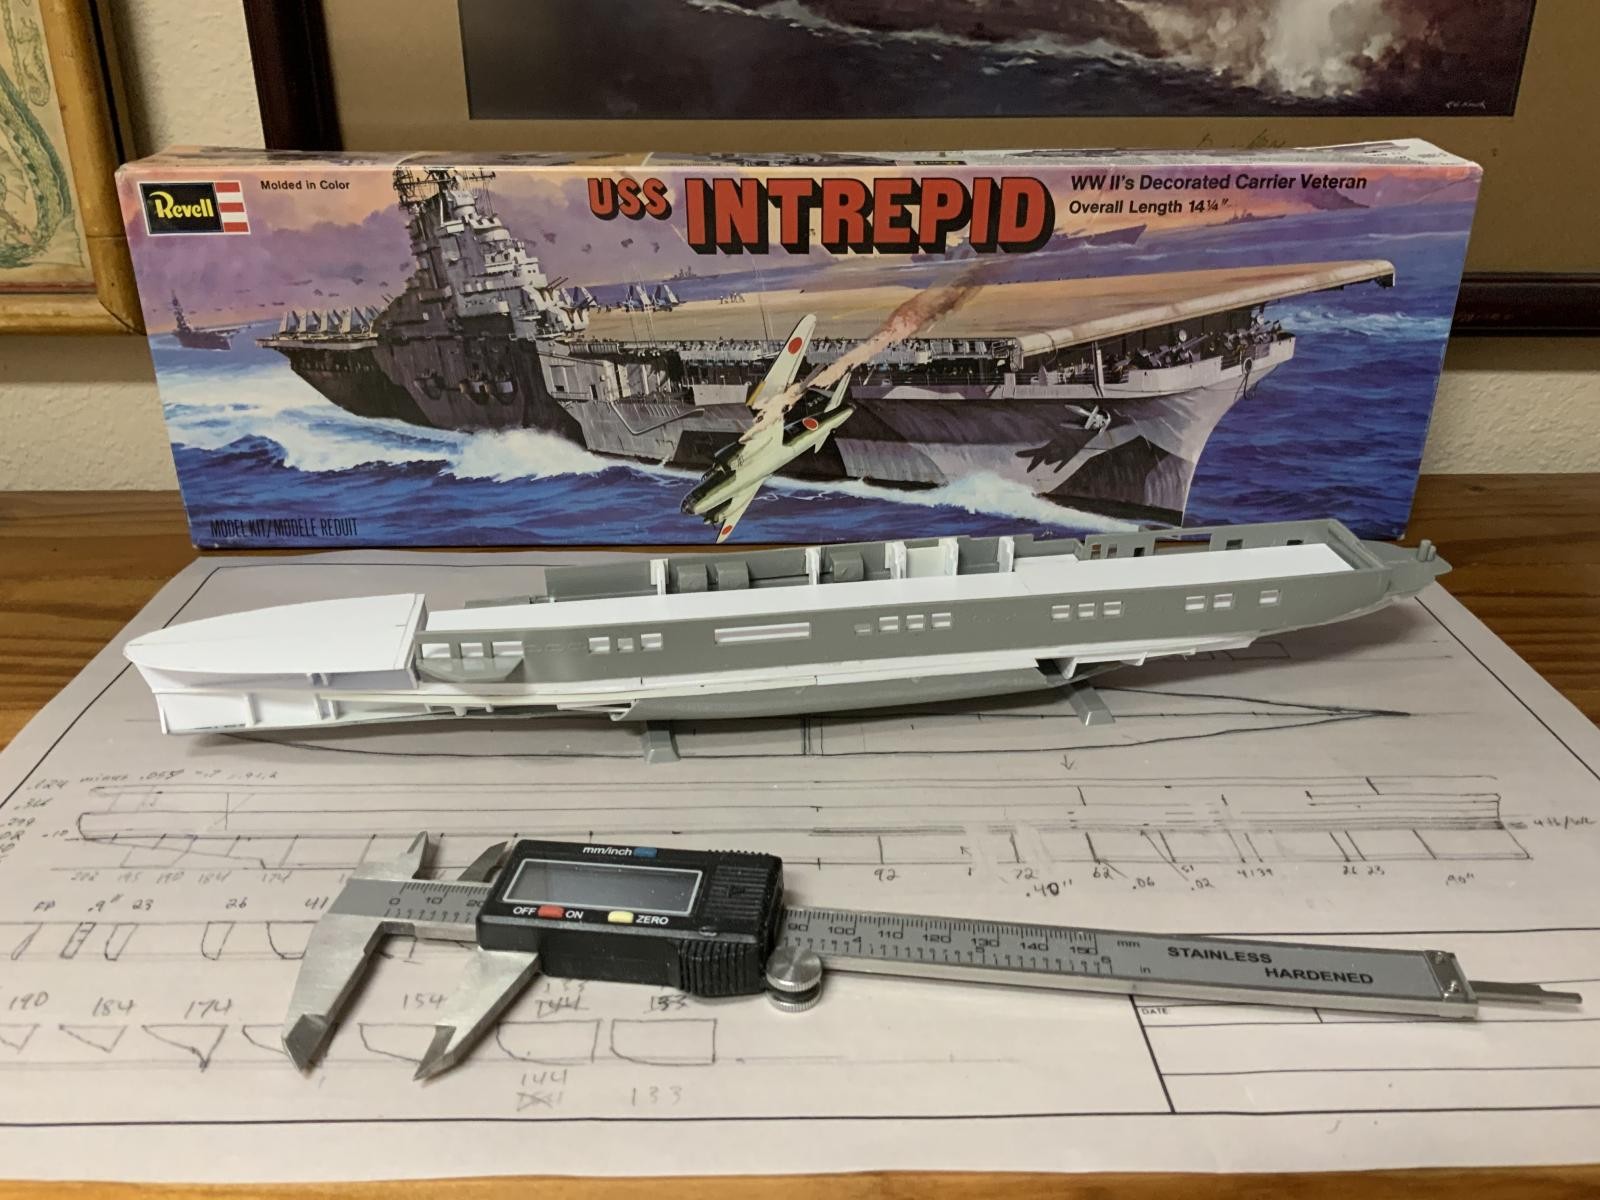
Upper Hull
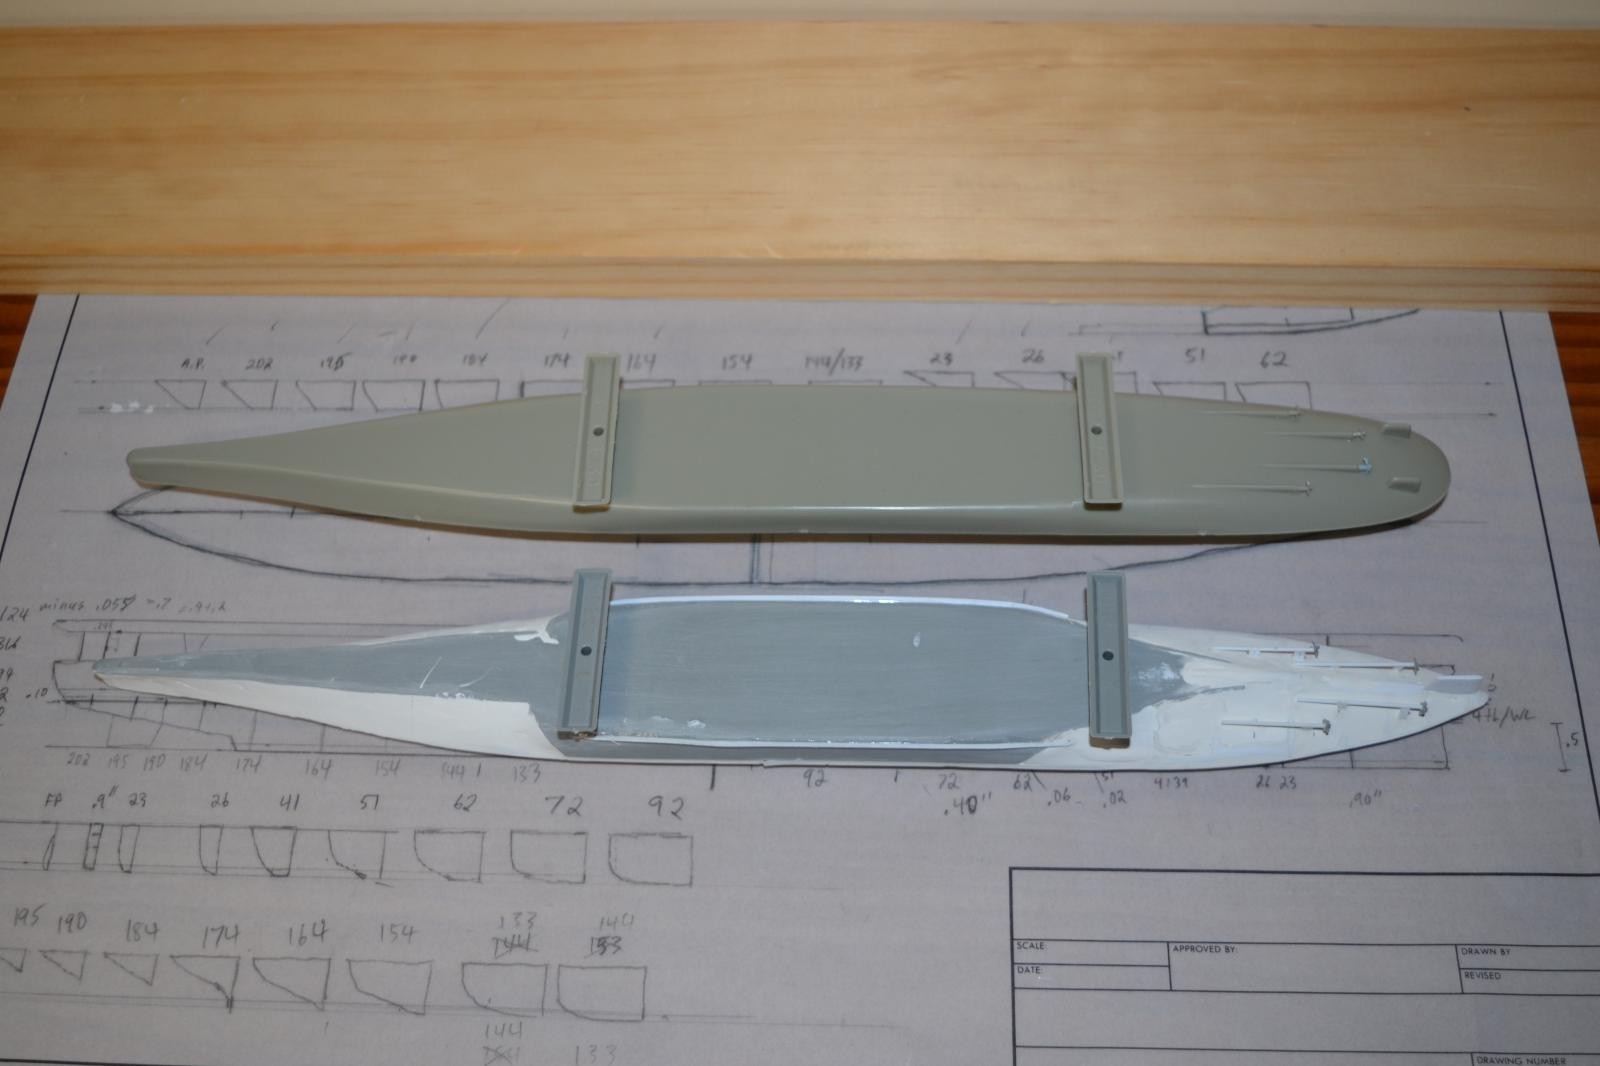
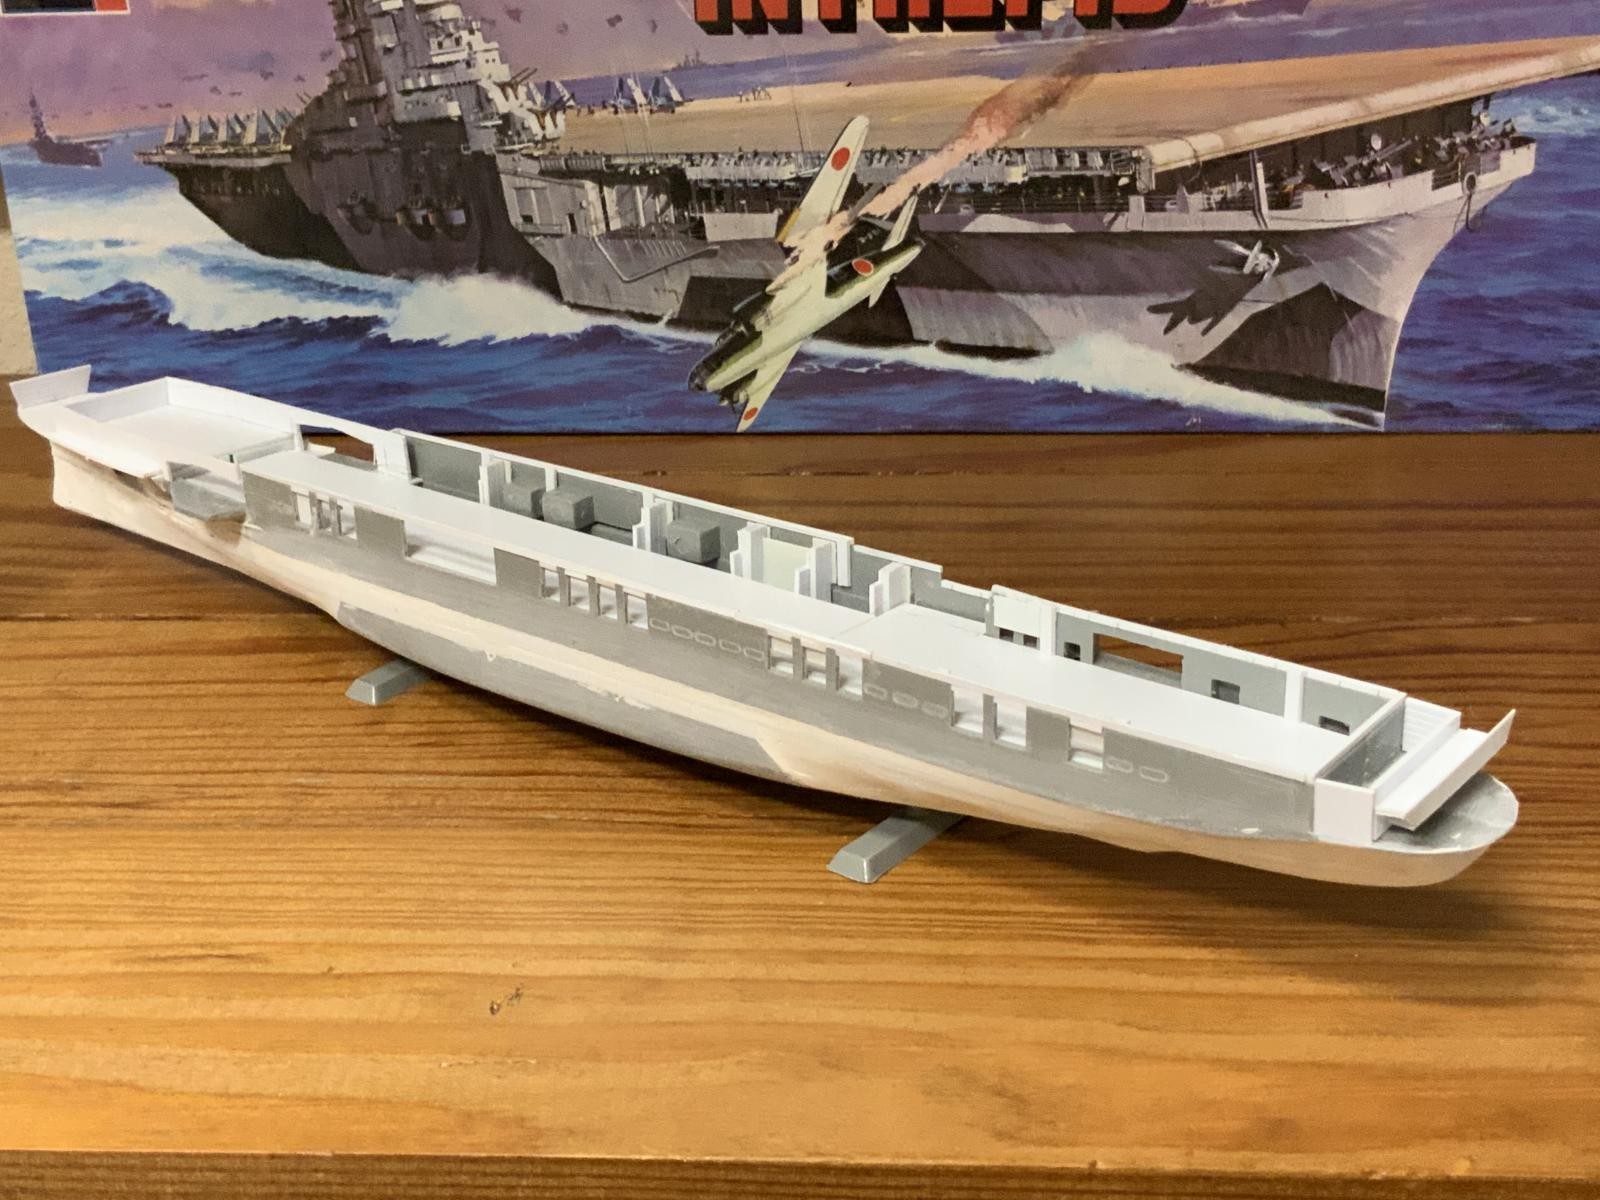
The above-water portion of the hull was built the same way as the underwater hull, with hull sections attached to a longitudinal member glued to the upper water line piece. The approximately quarter-inch section of strip plastic that marked most of the missing depth of the hull above the waterline then served as the guide for how much of the kit's above-water hull would need to be cut away, which was a significant portion below the hangar deck aft, and the entire forecastle forward. Once the kit's hull sides were securely in place, I added a full hangar deck.
If the insufficient depth of the hull is the worst flaw in the kit, the shaping of the forecastle is the second. As a result, the hull was completely reframed forward of the #1 elevator, and topped with a new much broader forecastle deck. Again, the hull was filled out with sheet plastic and putty to the correct shape. The kit's original anchors were cut off the kit's hull pieces and then sanded down as much as possible before being glued on.
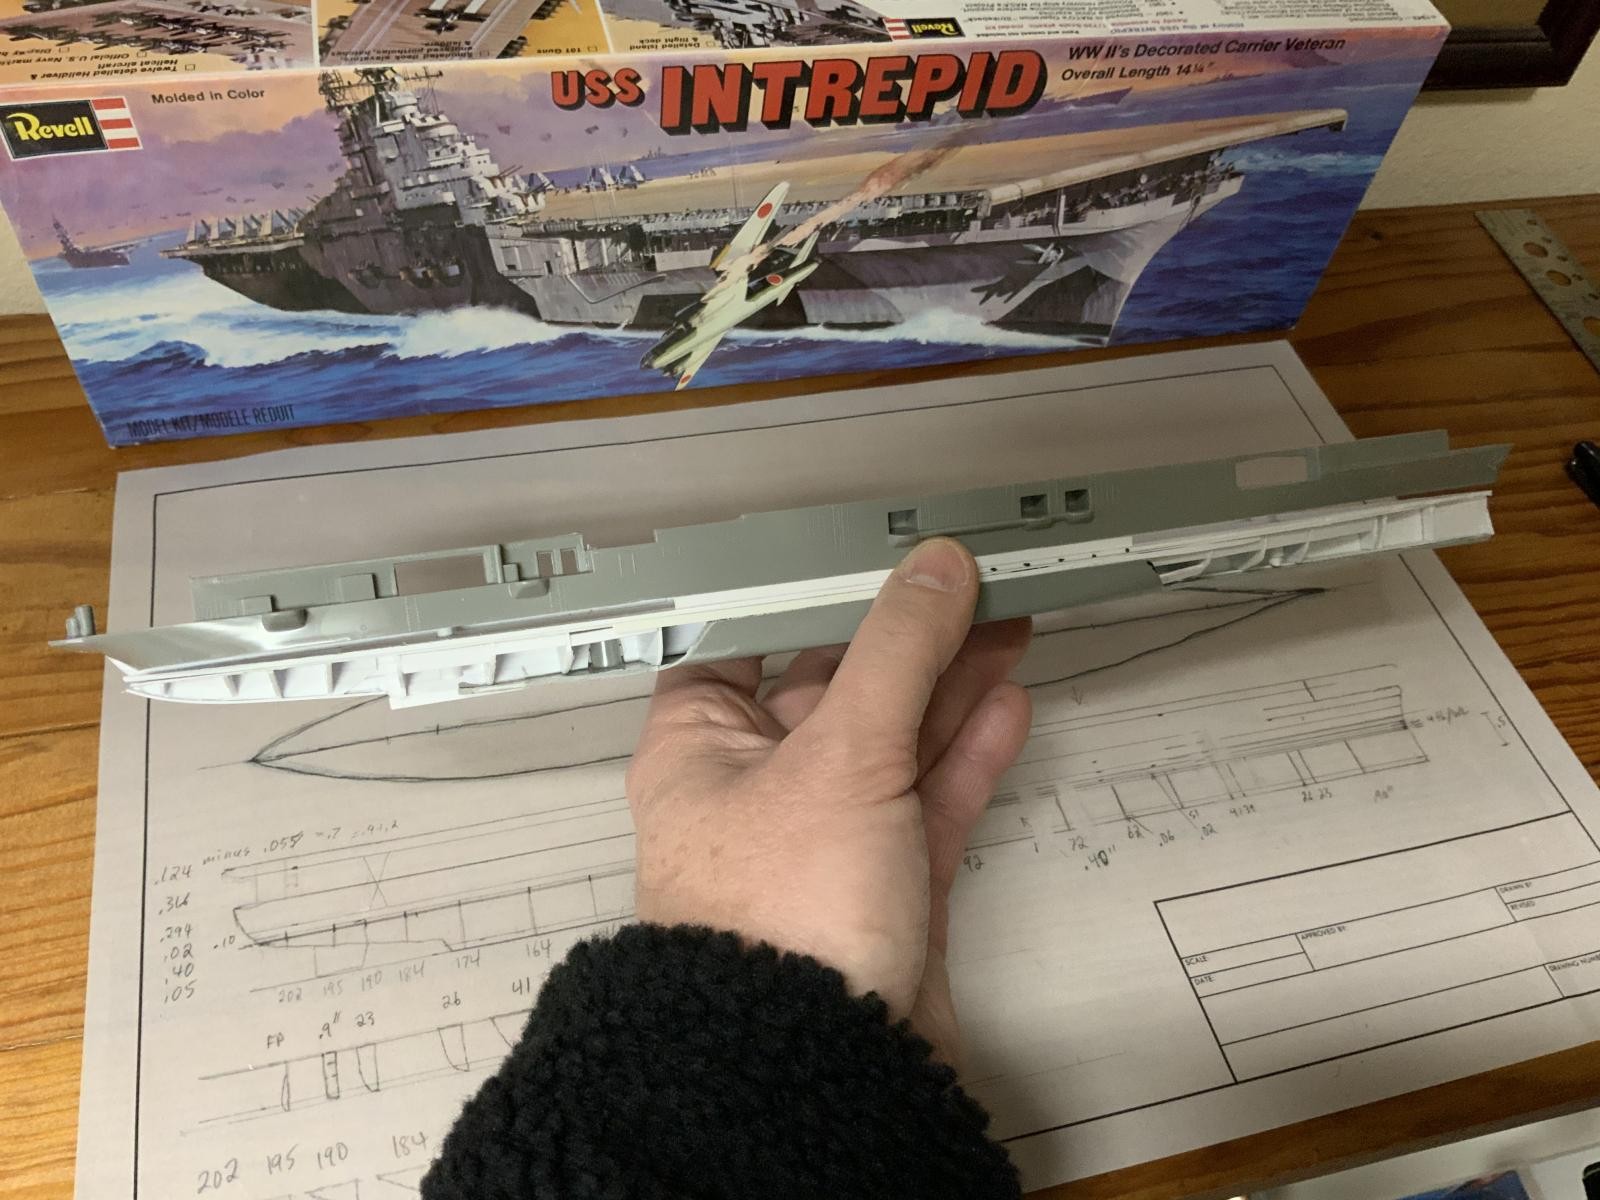
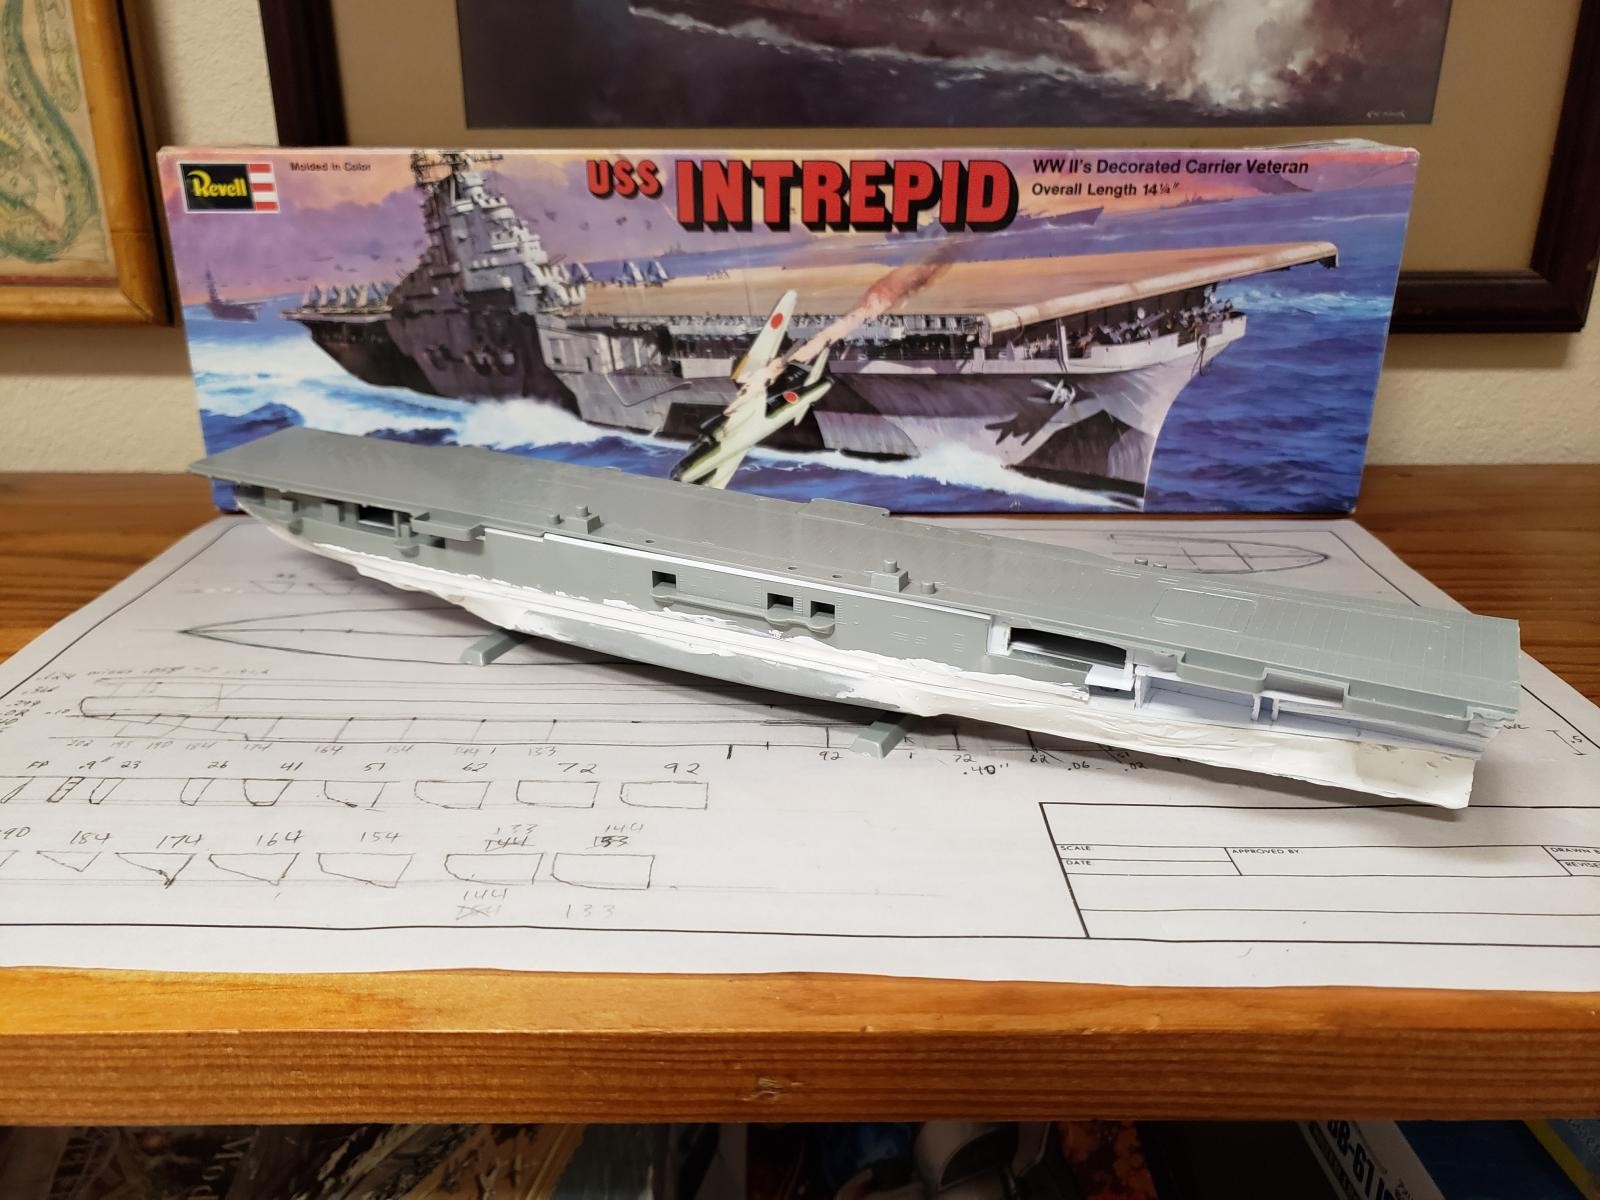
Even with the substantial addition below the kit hull, the hull was still slightly too short from the hangar to the flight deck, so another section of sheet plastic was installed between the hull sides and the flight deck raising it to the required level. Interestingly, the hangar openings in the hull were almost completely accurate – so while I had to raise the height of the openings, I didn't have to move them, as I had to do when kitbashing the Hasegawa Essex and Hancock kits. I couldn't help adding some roller doors in a partially lowered position - which I justified because the way the hull pieces are molded, it would have been easy to include this level of detail.
Hull detailing was deliberately limited, since I did not want to turn this into an accurizing project, but I included the level of detail that was consistent with the molding of the kit's era, including some hull piping which had been lost in all the sanding, as well as supports for the deck-edge elevator. The stern was completely missing the necessary structures, so I included them, built simply enough that they could have been included as part of the kit parts.
Last, the 5 inch gun platforms forward and aft on the port side in the kit completely lacked the necessary sponsons, so I built those up with sheet plastic and putty.
Flight Deck
The kit's flight deck has always been a favorite of mine so I decided early on not to modify it, other than rebuilding the deck edge elevator. The elevator on the kit is not correctly shaped, but more importantly is not the right size, so I cut it out and installed a correctly sized elevator at the hangar deck level. After the bow was lengthened by including a correctly shaped forecastle, and the stern was reduced by eliminating the sponson for two 40 mm quad mounts, which the Intrepid didn't have until later in the war, I had to trim off a portion of the flight deck aft, and add a section forward. The kit's flight deck is slightly wide for scale, but not enough that it demanded change, so I left it alone.
When I checked the gallery deck antiaircraft gun mounts against plans of the ship for the relevant time period, they were surprisingly close to correct. Because the kit's 20 mm mounts are oversized, the gun tubs, while generally the correct size, only hold about two thirds the number of weapons they should, but I thought that was close enough to leave as is. The only place where I modified the shape of an existing gun tub was the aft starboard side, where I substantially increased it in order to get to the same two thirds ratio that the other tub show. I particularly like the Frankenstein's monster appearance it gives the model!
On the starboard side forward, the Intrepid didn't have the forward 20 mm mount gun tub that some other ships of the class had, so I snipped that gun tub out and replaced it with strip plastic, and added another section a little further back on the starboard side gallery deck. Intrepid did have three small gun tubs near the stern that aren't shown on the kit, so I scratchbuilt those and filled them with matching mounts from another kit. The spares box also provided two more lattice masts aft. The last change to the gallery deck mounts was replacing 5 inch 38 caliber guns in two tubs on the port side aft with 40 mm quads - why they didn't have them in the first place is a mystery.
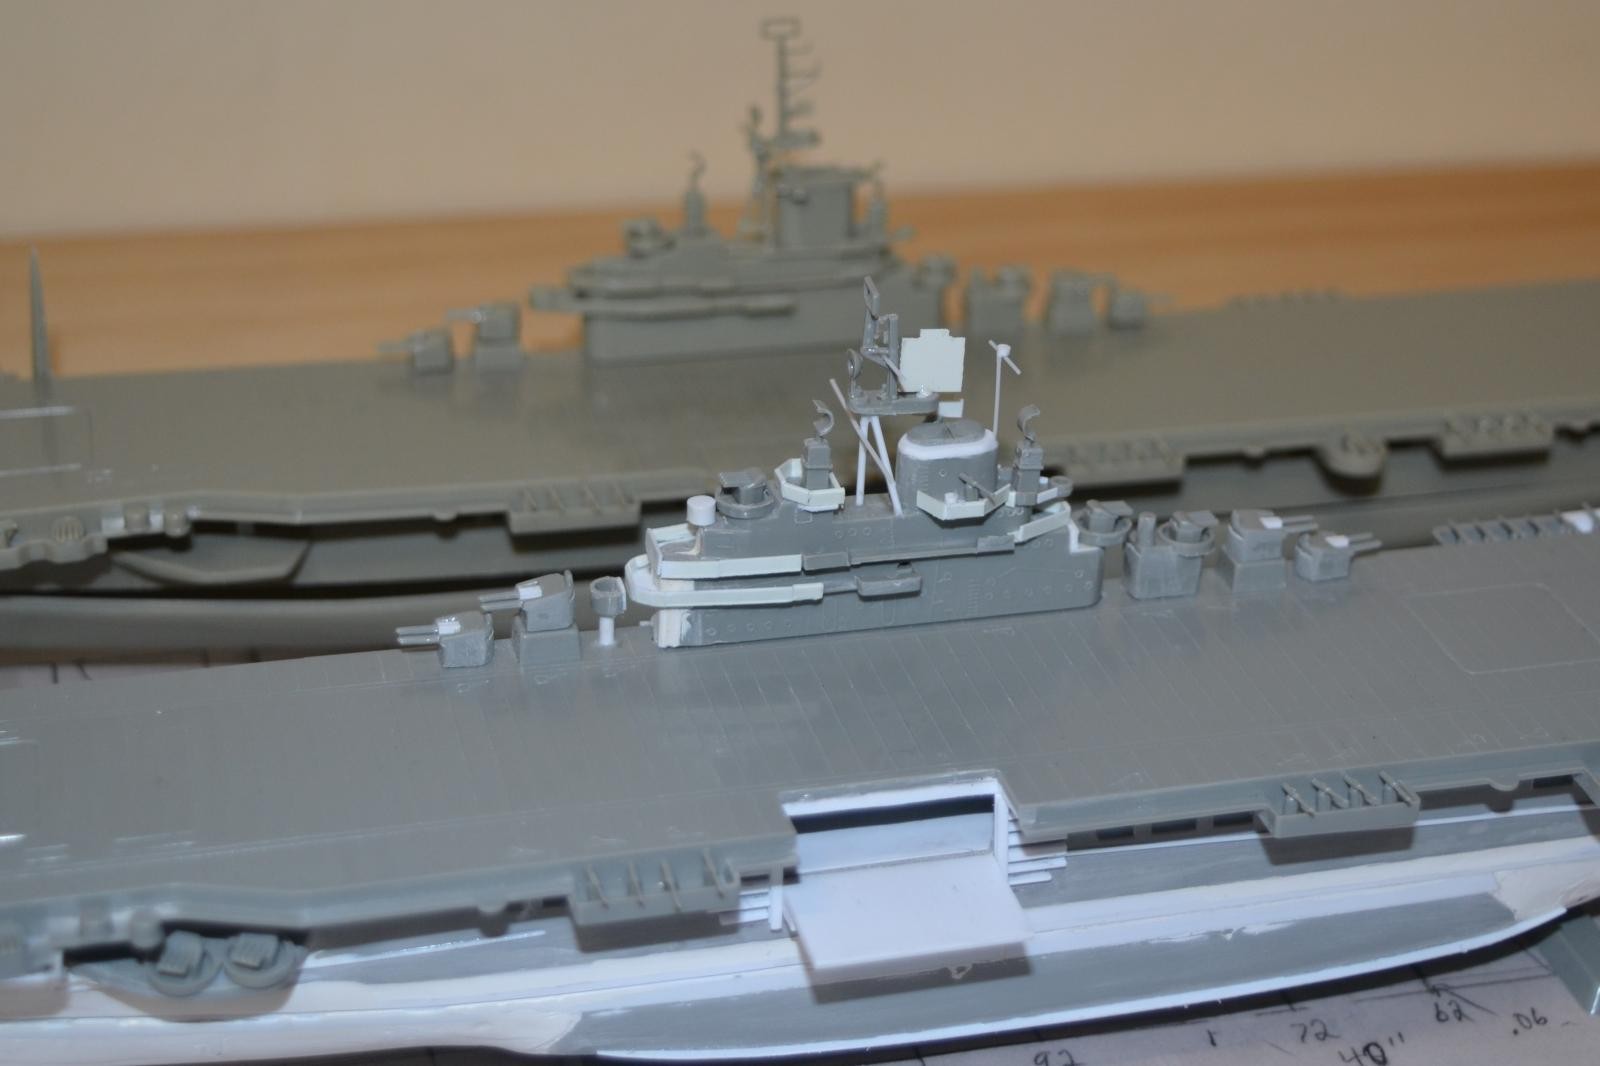
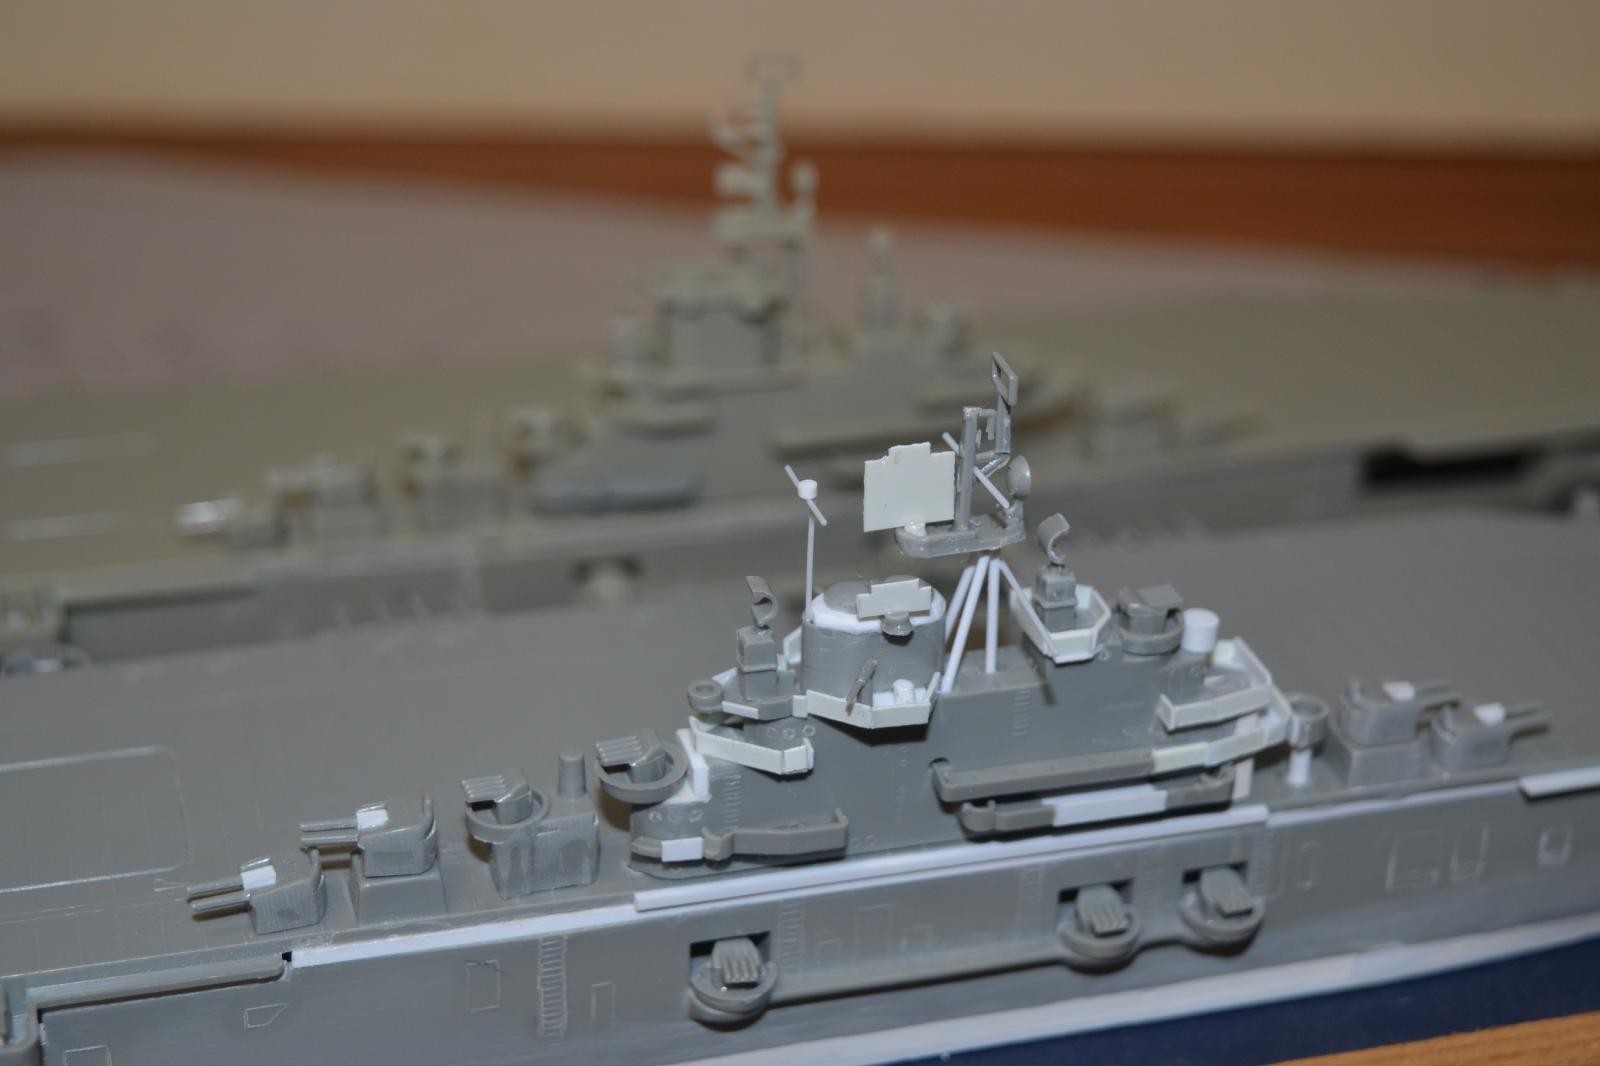
Island
The general shape of the island was, surprisingly, pretty close, but there was some reshaping necessary. Most notably, the kit's island has a rounded shape at the front, which is incorrect, so I squared that off using putty and plastic.
One of the most prominent errors in the kit's island is the inclusion of an open tube at the front of the flag bridge. It isn't intended to be an AA mount, but instead the gun director that sits on a stalk just in front of and below the flag bridge. I cut it off and installed it on the necessary stalk. I then modified the island platforms to match the Roberts plans, which included both trimming existing platforms, which remain in their original gray, and installing new platforms, including a completely new flag and navigation bridge.
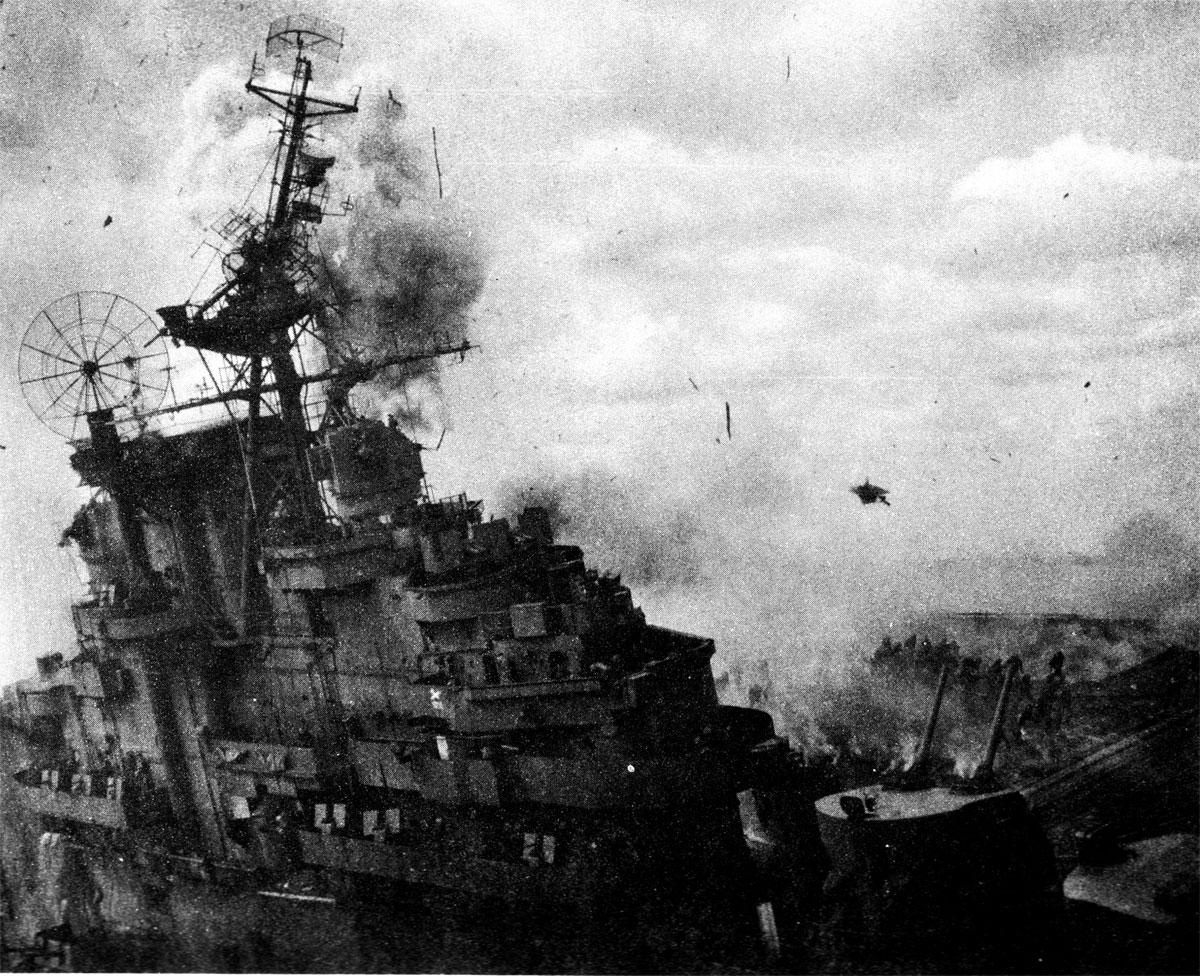
The "hat brim" stack cap on the Revell Intrepid is one of its most characteristic features - and does bear some resemblance to the famous photo of the Franklin afire, but it is still completely wrong. I replaced part of it with sheet plastic cut and carefully sanded to match the actual stack cap, but topped with the original stack covers from the kit trimmed and thinned. The Mark 37 gun directors were a little tall, so I cut the radars off and shortened their attachments, and spent some time sanding off the mold marks. I also added strips of plastic to the 5 inch 38 caliber twin turrets to improve their appearance.
The kit island's worst error is that the tripod mast was molded backwards so that instead of the back legs leaning towards the front, the front leg leans towards the back. I could not fix the kit part, so I scratchbuilt a new tripod mast from rod plastic, and put the kit's mast head platform on top of that. The pole mast on top of the platform is actually the kit mast chopped up. The kit mast is so overscale that I was able to cut it and use the parts for the Intrepid's configuration in the fall of 1944. The yardarms and new mainmast are stretched sprue, but could have been included with the kit in 1967. The SK and SC radars are sheet plastic, and the SC is mounted on a bracket salvaged from the kit's stack cap.
Influence of the USS Franklin (CV-13)
As noted above, this kit was originally released as the Franklin, and numerous details in the kit match the Franklin far better than the Intrepid.
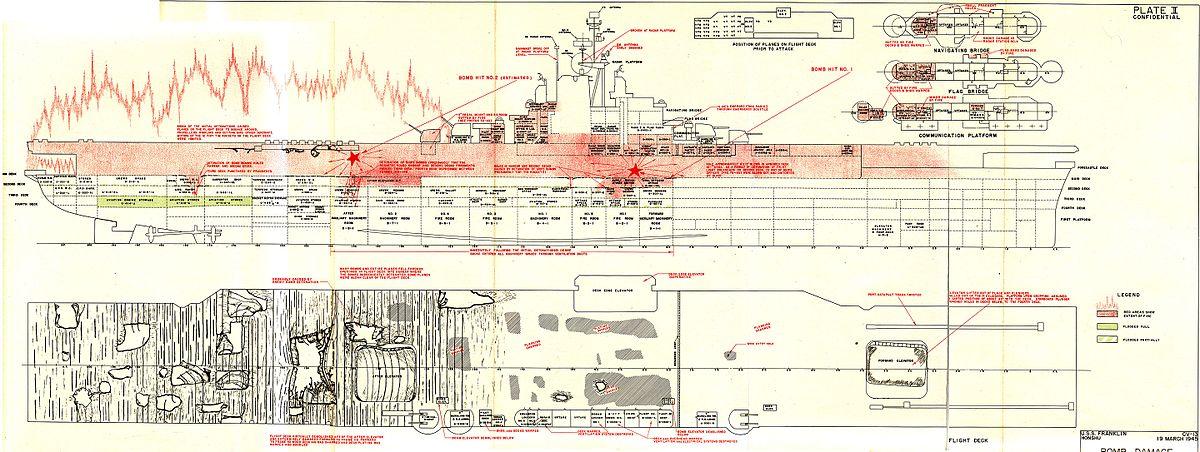
First and foremost, the kit mast is actually fairly accurate for the Franklin. After being damaged in Japanese attacks twice in October 1944, Franklin went through a refit that resulted in several changes that match the Revell kit. First of all, the topmast was still a single pole as shown in the kit, not a stepped one as in the Intrepid. There are also indications that the kit designers had access to the bomb damage drawings of the Franklin, as they show a longitudinally aligned topmast that may have been the source for the kit's - which way the actual ship's was aligned is not completely clear in photos. The unique dog-eared deck edge elevator in the kit is also a close match for the kit. And unlike the Intrepid, Franklin did have twin 40 mm quad mounts at the stern, thanks to a late 1944 refit.
The Franklin may have contributed one other detail to the Revell kit. In that late 1944 refit, the 40 mm quad mounts on her port side gallery deck were all lowered to the same level as the 5 inch .38 caliber mounts, likely for stability reasons. Previously they had been at a slightly higher level, and many other Essex kits show them this way. Only the Revell kit has all of the portside mounts at the same level – even if it inexplicably has two of them with 5 inch guns instead of 40 mm quads.
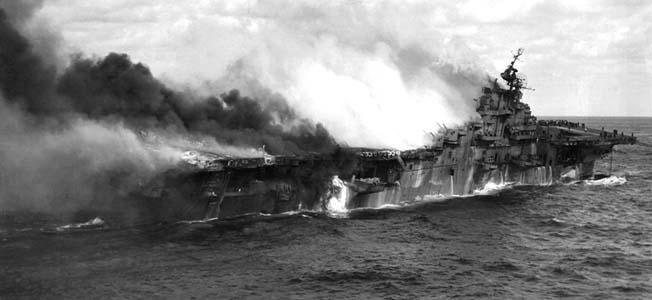
The Franklin may be noteworthy for one other reason – many of the images of the burning Franklin taken after the attack on March 19, 1945 show her listing heavily to starboard, presenting a profile that is very similar to the shallow–draft Revell model.
Conclusion
All in all, this is the model that I always wanted the Revell Intrepid to be. The only question is whether it'll stay gray and white to show the modifications, will get that hand painted tan flight deck and dark gray patches on the hull that I remember so fondly from almost half a century ago, or will get an accurate camouflage scheme. I still haven't made up my mind about that one.
Build log is at https://www.scalemates.com/profiles/mate.php?id=48557&p=albums&album=56282


Well done Michael, really nice scratch building to make her accurate. My vote is to paint her in the camouflage scheme.
I think the camo scheme also - nice work Michael !
Outstanding! If you do Facebook and aren't already in the Revell Vintage kits group, you should join and post this. Well done!
Thanks very much - just did. My other major project now is also an old Revell, so a good place for that as well.
Great, yeah I really enjoy that group as well as the Monogram one. Even with all the great new kits out there, I still feel vintage ones are my favorites!
You did an amazing job of updating! I did the Pennsylvania and a German cruiser in this scale when I was a kid.
That is impressive! I hope you post the final product!
My introductory post here 🙂 I'm an aircraft guy, but have Intrepid burnt into my brains - I bought one (together with the Revell mphhh-scale PT211) at DM 5.00 each on sale at Karstadt Spiel & Sport Mönckebergstraße, likely in early '85, before we moved north some 500km. I have a started Revell "green box" (I think of Franklin, with completely spurious camou scheme) upstairs which is on my list for almost 20 years, and - surprise - the Roberts drawings, reduced to 1/720. In fact I blame the AotS that I bought in the 90s as birthday present for my father (huge outlay) for a meandering collection of maritime books (huge outlay).
If I ever actually get around to building this kit, I may not stick to Intrepid but pick the one which is closest to the kit features, probably also having an eye on that the Measure is an attractive one. As you describe it, Franklin may be a good option.