Major Walter Sigel’s Ju 87R-2 from Stab I./StG 3 – The Cockpit
This article is part of a series:
Unlike many for whom cockpits are a chore, I love building and detailing the pilots workplace.
First I had to decide if I use the Aires cockpit set 4026 intended for the Hasegawa kit or going with the kit parts. As my copy of the Aires set was badly warped and as it is an earlier set, it lacks a bit in detail compared to the newer sets. I therefore decided to use the Airfix parts as a starting pint.
One thing is sure, the designers of this kit surely had a hidden agenda to place as many as possible of the ejector pins in places to be seen and unfortunately the Airfix cockpit is full of ejector pin holes which can do with filling. So the first task after cleaning the parts was to fill this indents from the ejector pins in the visible cockpit area.

And there is no shortage of them!
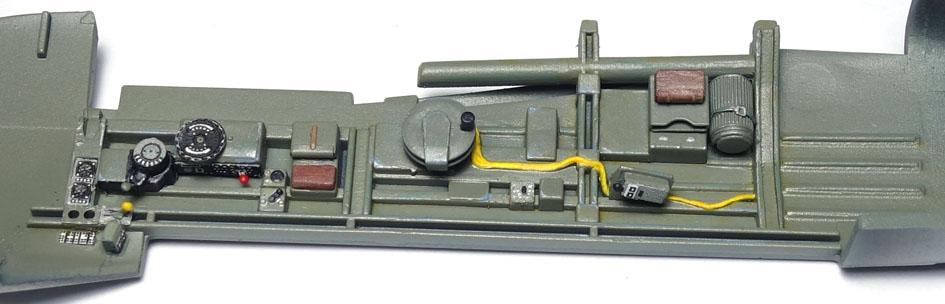
I decided to add the cockpit side panels not to the floor as per the instructions, but glue them to the fuselage sides instead as this will make the detail painting much easier. And I noticed an odd thing. The port fuselage half has no integrated ribs on the fuselage side, making the insert sitting flush. But that is not the case with the starboard fuselage! There are several ribs interfering with the insert resulting that the insert isn't sitting flash. So I removed the interfering ribs from the starboard fuselage half with a gouge.

As a bonus, I could glue some of the removed ribs into the port fuselage which has no ribs at all in parts where they are visible after the insert is in place.
And at the end the inserts fitted nicely and don't look too bad. In addition, I also closed off the rear of the FuG VIII radio equipment.
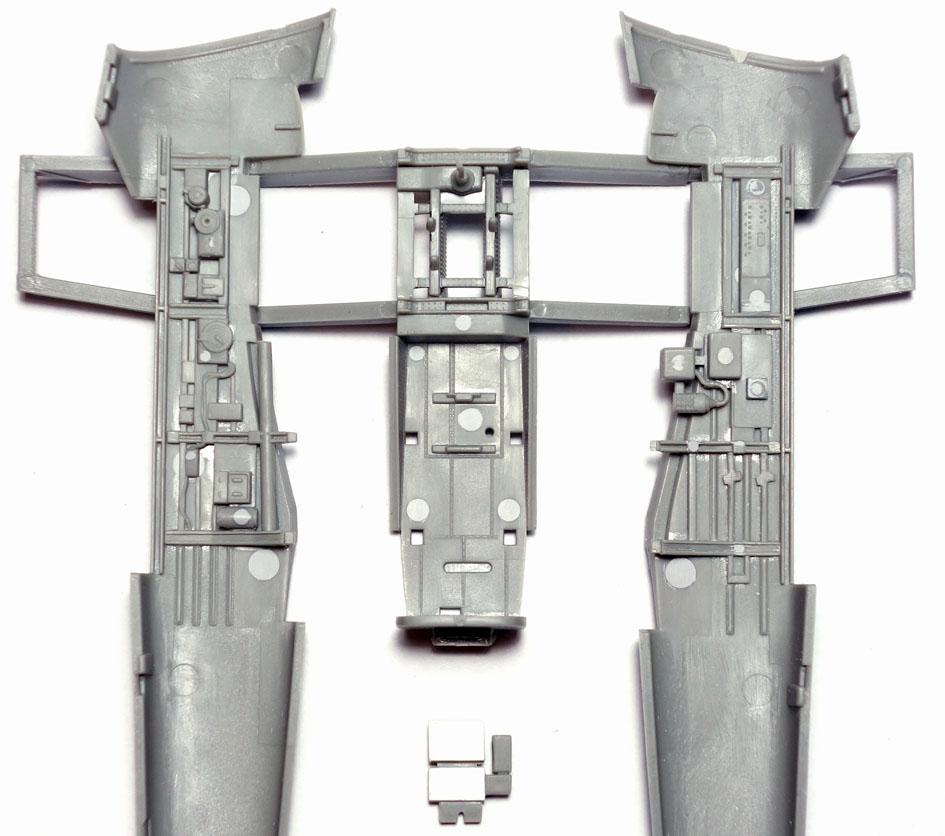
I removed the MG bullet cartridges on the starboard side which had been part of the starboard insert as the representation had just a vague resemblance with the actual part and I will replace them with CMK MG 15 magazines 48138.
It was now time to place the PE parts from the Eduard Interior set 49800 starting with the items which will get painted.

came out all right and I will add some of the pre-painted stuff after the cockpit is painted.
Eduard also provides some rudder pedal replacements on their PE set.
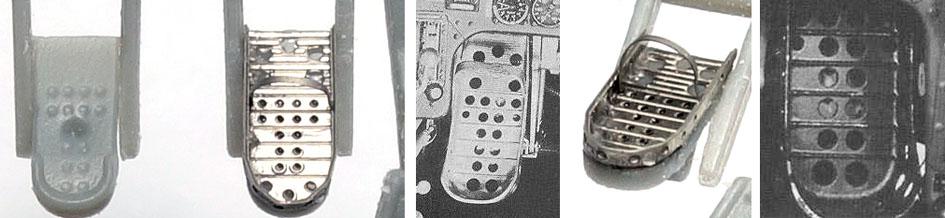
They are certainly better than the kit part, but the real pedals look different, mainly with a much higher heel part and two rows of holes in it. I know this is extreme rivet counting, but the Ju 87 is one of the few planes you actually can see the rudder pedals reasonably well.
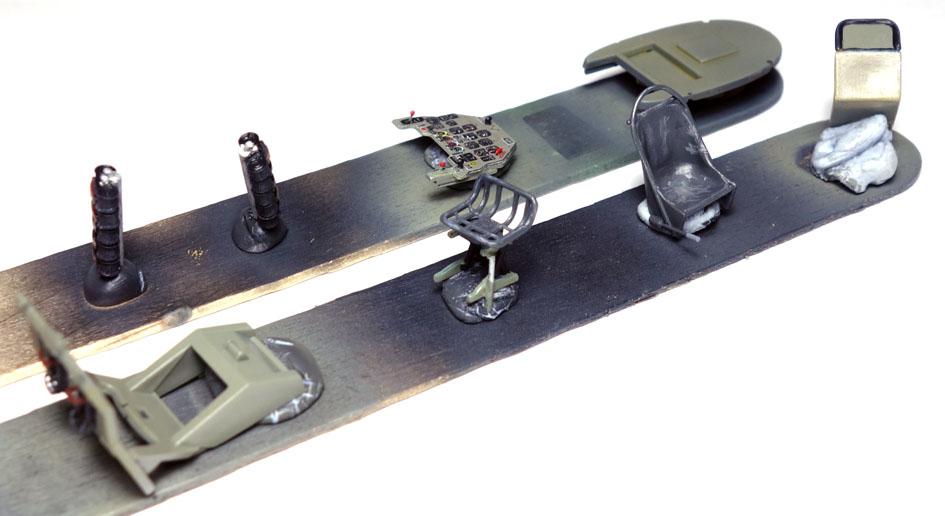
As I purchased a new toy recently in the shape of an Elegoo Mars resin printer, I thought I will have a go making my own rudder pedals, testing how small a part can be printed. I designed the parts I like to print in Solidworks which also include the radio fuse boxes and the oxygen regulator bottles.
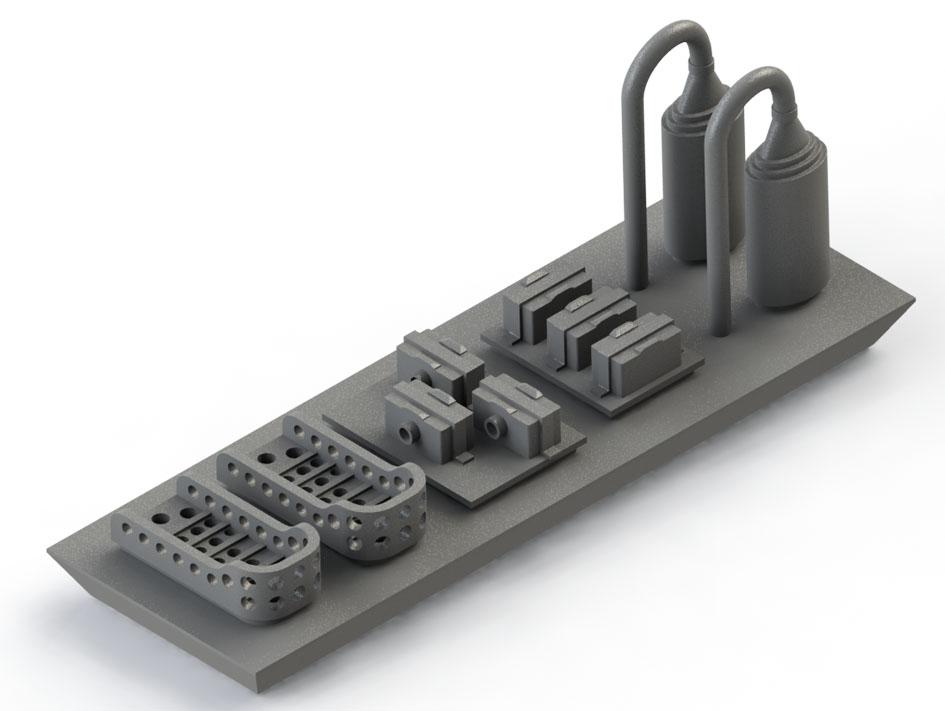
It is one thing to print a large object, but above part is 8 by 20mm and the individual fuse boxes as an example are 1 by 2mm with a height of 1.2mm. But the printer did the job.
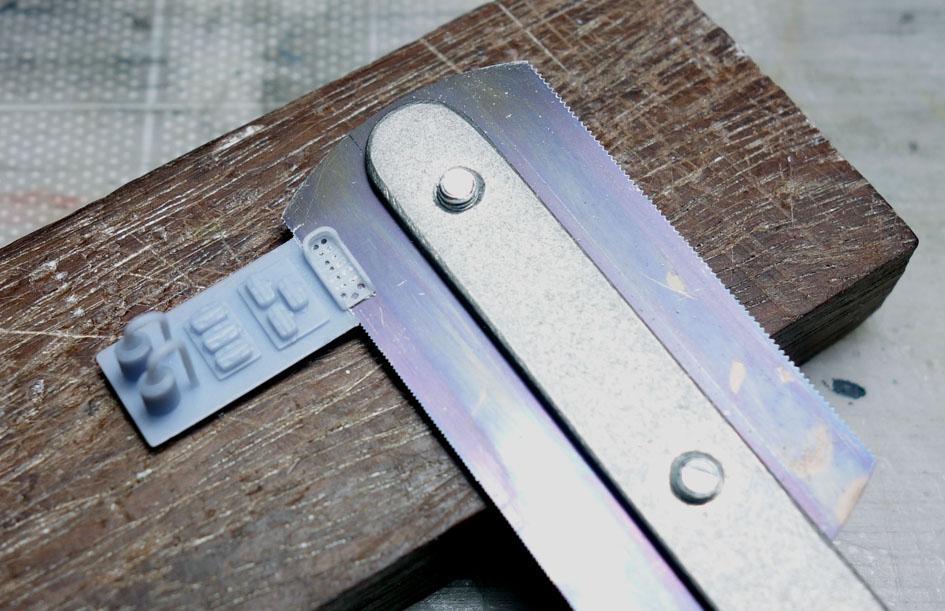
And compared to the Eduard PE part.
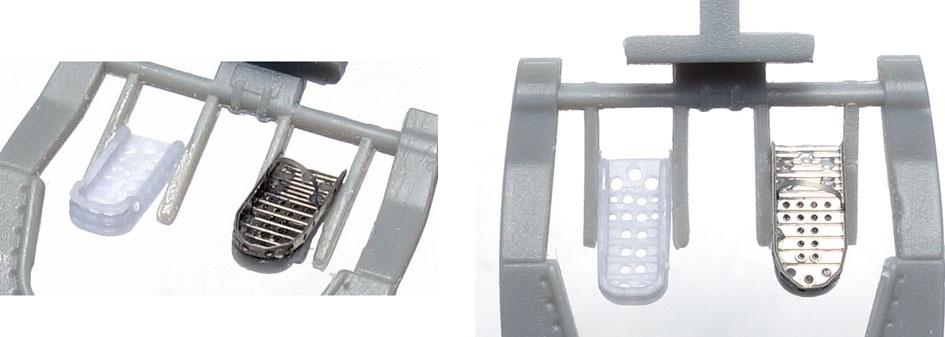
Definitely more accurate, but certainly not a "mast do". But it did demonstrate the capability of the resin printer nicely!
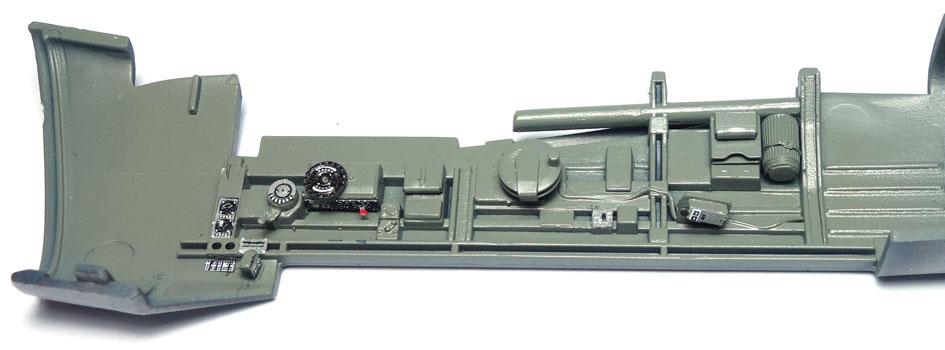
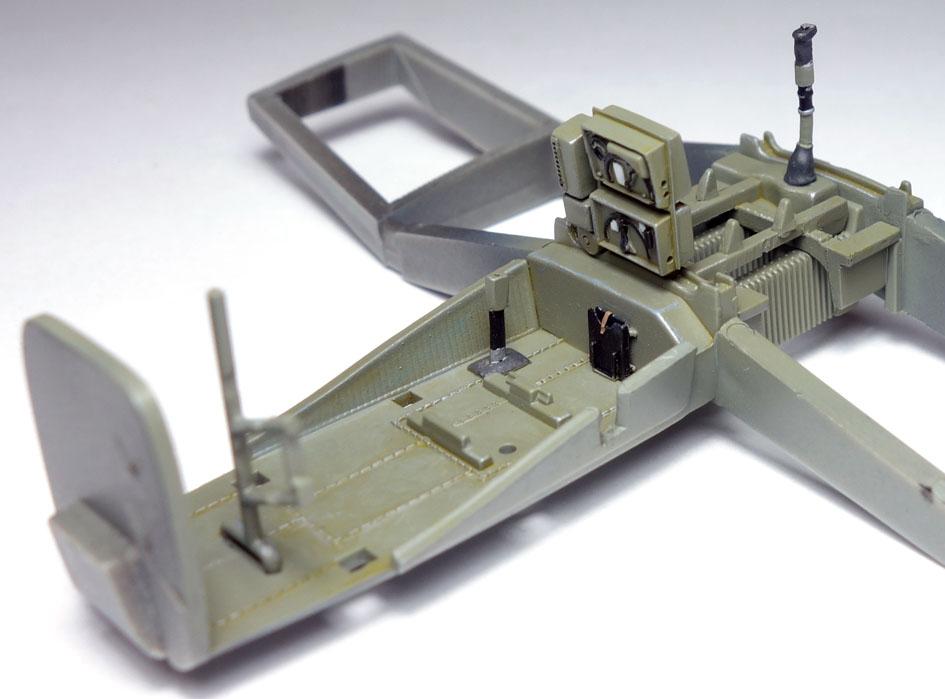
And here are the other printed part fitted into the starboard half of the fuselage.
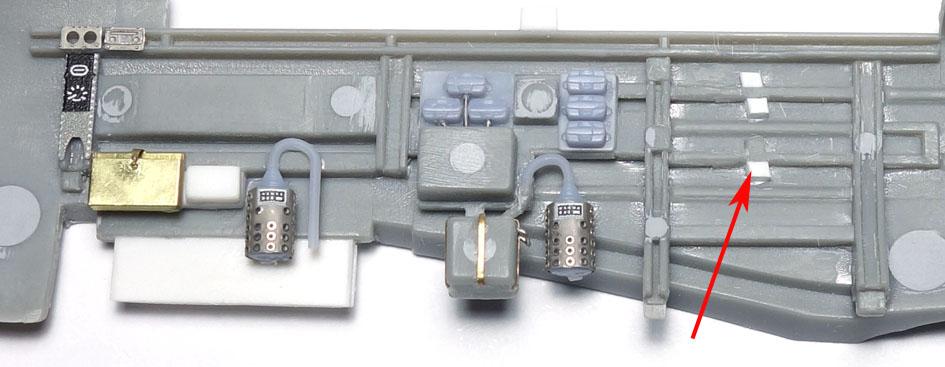
The pilot oxygen regulator is now in place (not provided by Airfix) and I did move the MG bullet cartridges brackets further to the rear as Airfix placed them too much forward.

I did also replace the control stick with the one from the Aires cockpit set as the Airfix one looks just too anorexic. The Aires stick is maybe a bit on the "heavy" side, but the Stuka control stick was of a substantial nature!
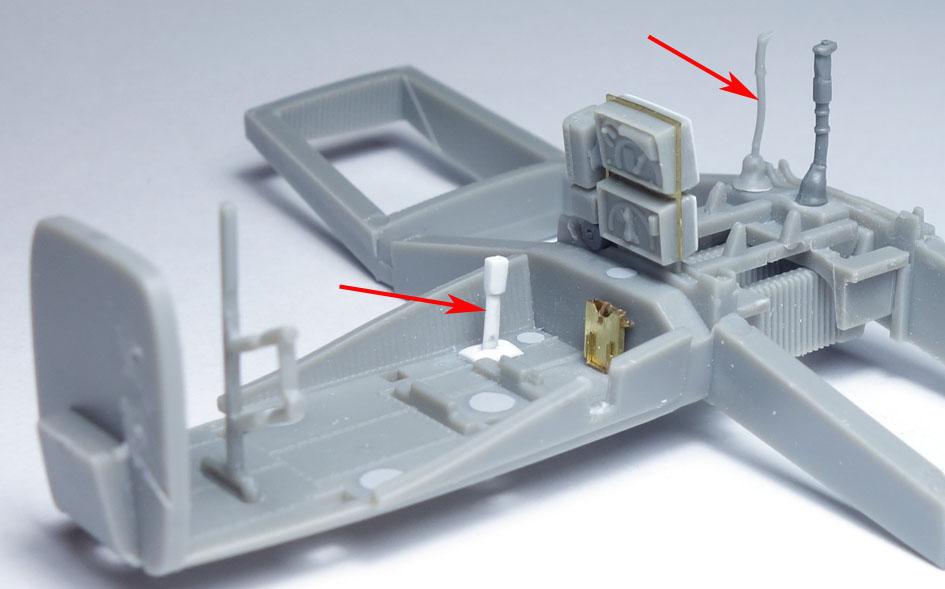
Here is the comparison of the two sticks. It also shows the scratch built chute of the drag areal.
As I already "liberated" the stick from the Aires set, I also used the Aires real of the drag Areal as the Airfix representation looks a bit flat.
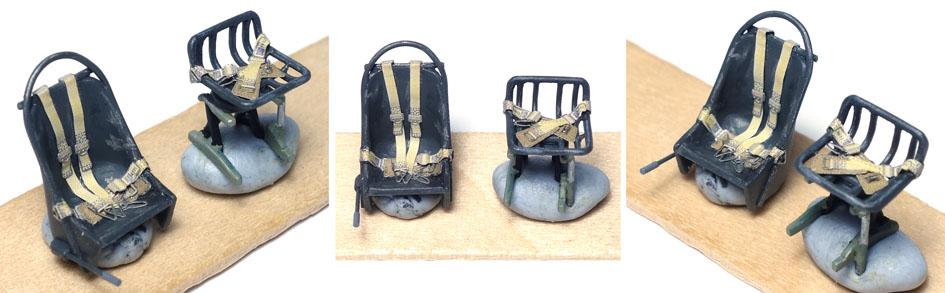
Originally I intended to replace the kit seats with the Quickboost Seats with Seat belts set 48794.

But comparing the Quickboost Seats with the kit seats, I came to the conclusion that the Airfix offering is more accurate for a Berta. One problem is that there are no pictures of the pilot seat I could find at the time and the next best thing was a sketch from the pilot's manual.
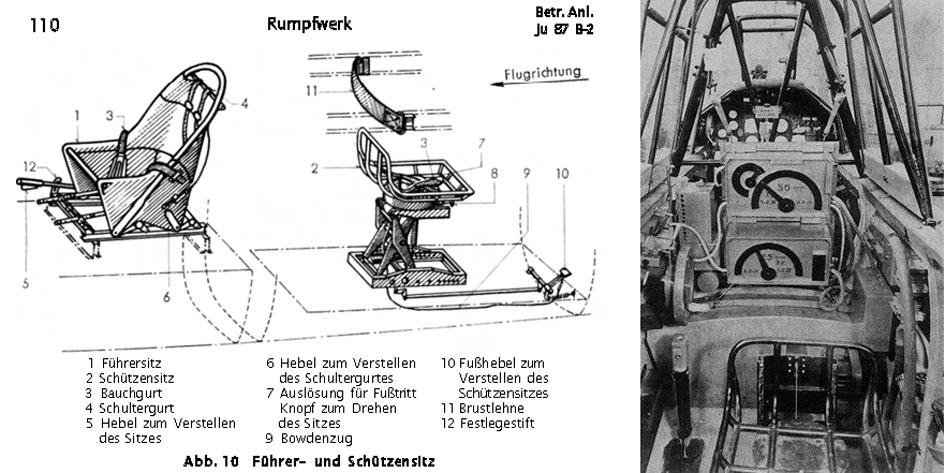
To me, the Airfix seat is closer to the proportion of the actual seat as the Quickboost Seats looks too skinny.
Also the Quickboost gunner's seat isn't correct. It represents the seat used in the Dora with a lower back part. The Berta seat has a noticeable higher back part as can be seen in the sketch and the picture above and the Airfix seat looks much better. But Airfix has it located central in the fuselage whereby it should be closer to starboard as can be seen in the above picture as well. Airfix got it right in their 1/72 Stuka kit so I am puzzled why they placed it central in the 1/48 kit.
I decided to rework the Airfix pilot seat to look more like the one in the pilots manual.
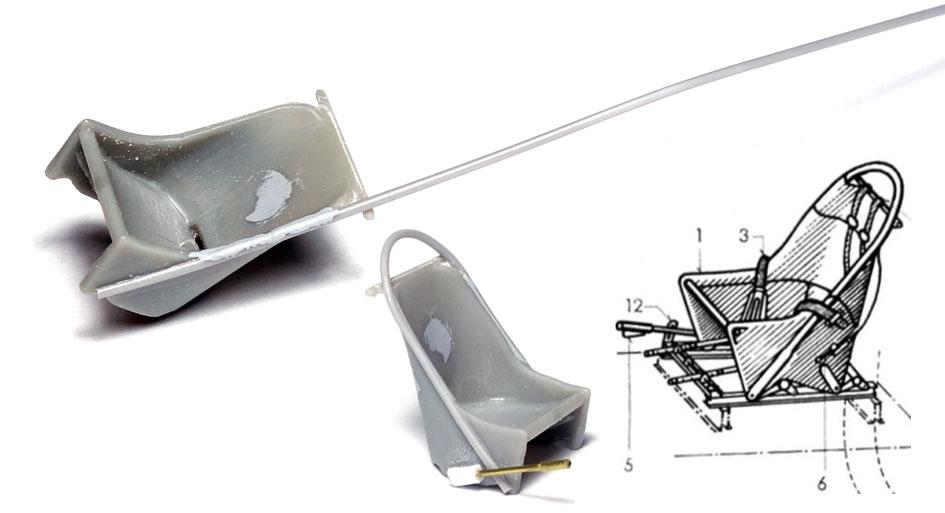
And after finishing the seat, I came across some pictures of an actual seat!
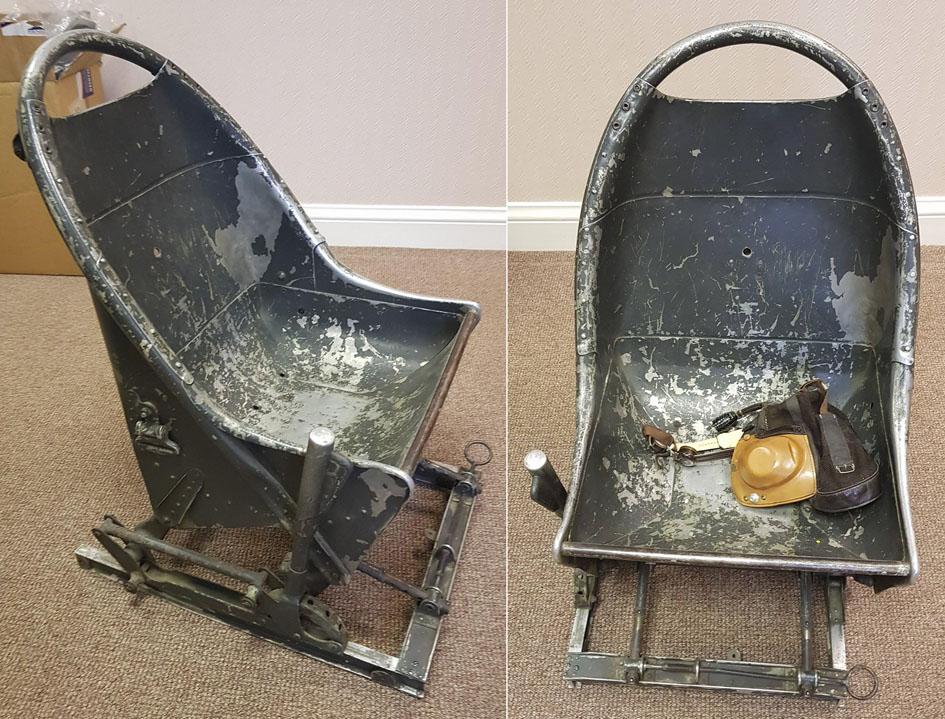
The picture captions stated that this is a seat used in the Ju-87G, but I doubt this as the seat in the G looks very different.
And I also found some pictures of the gunner seat showing some nice details.

The seat on the left if from the Berta and the seat on the right from a Dora.
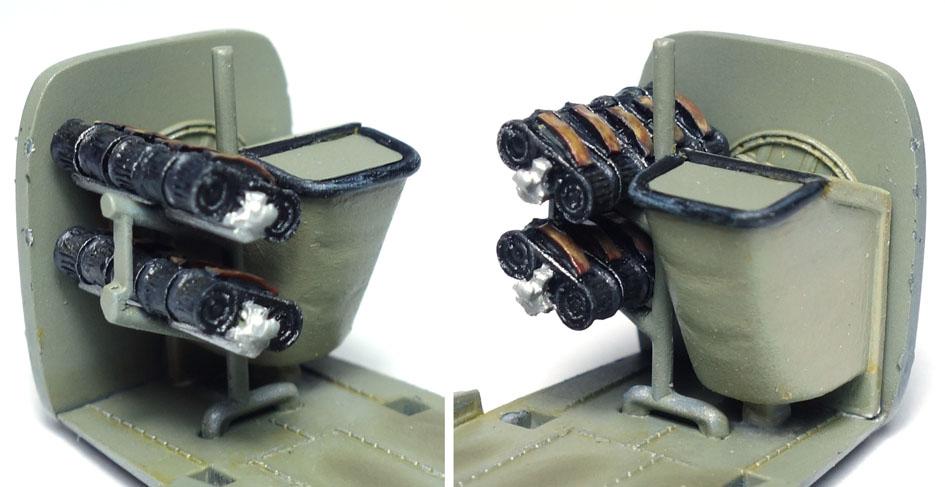
I also replaced the MP ammunition magazine racks with Quikboost set 48373 intended for the Hasegawa kit which does look much better.
And surprise, it does all fit together.
With the instrument panel, Airfix did another boo boo as it represents the feature from the B-2, but has the shape of the B-1 panel.
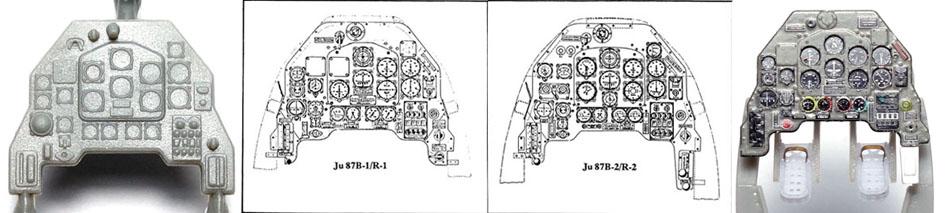
So I decided to modify the Yahu B-1 panel to a B-2 as for whatever reason Yahu doesm't make a B-2 panel.
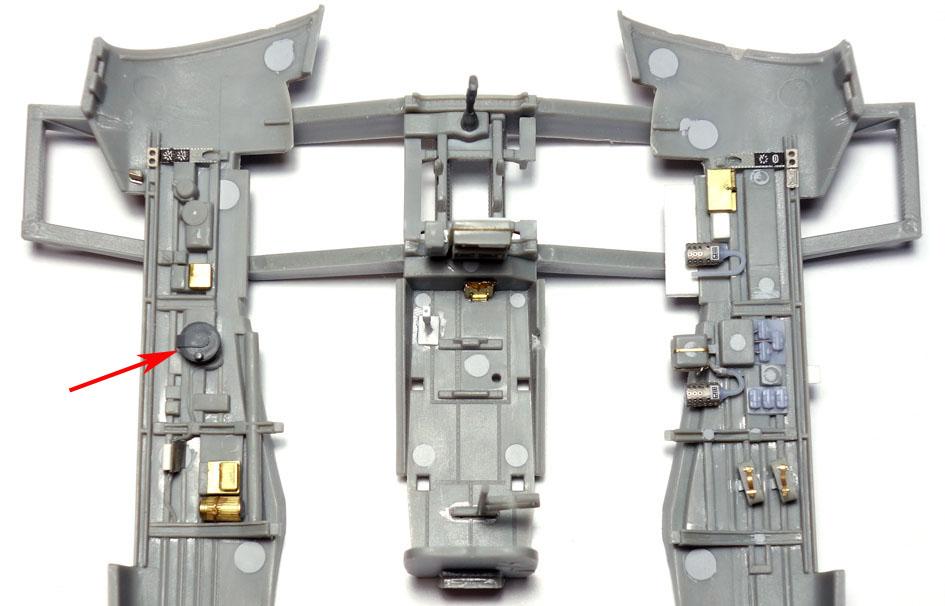
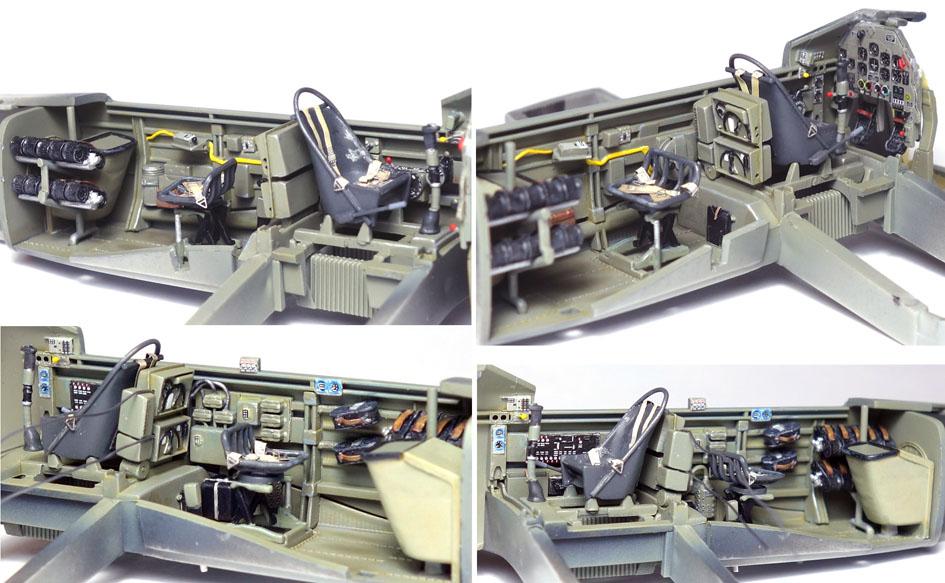
Finally it was time for some paint. First a coat of RLM 02 followed by adding the pre-painted Eduard PE parts.
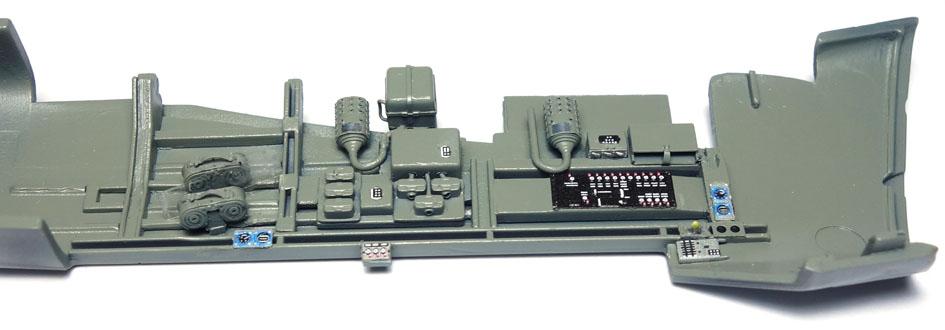
And then detail painting and a wash.

And some of the extra parts.
Fitted to the floor section.
The finished seats with the Eduard harness in place don't look too bad.
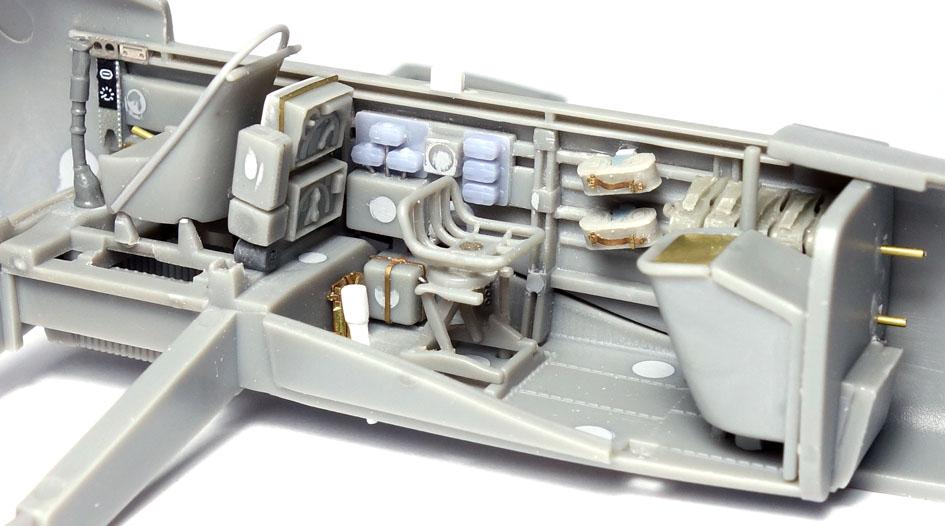
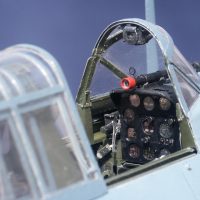
And here we have it - the completed cockpit with a bit of weathering in place.
Unfortunately Airfix forgot some essential cockpit parts in the kit.
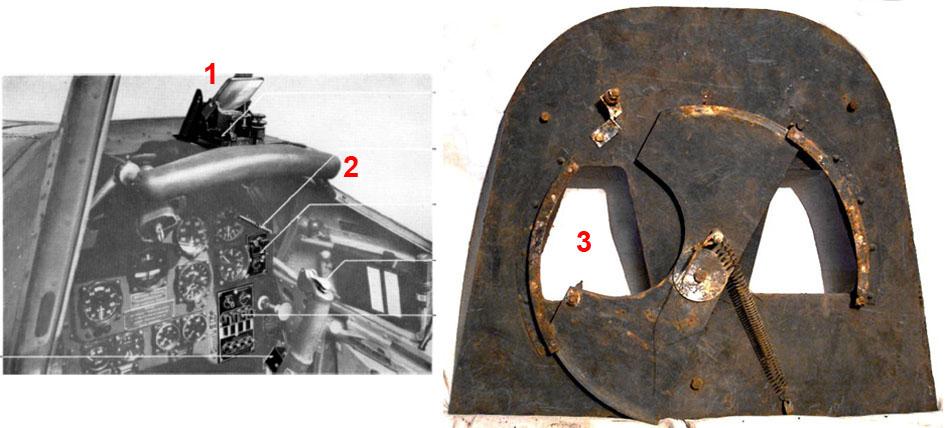
1 = Gun sight
2 = Pilot head protection bar
3 = Pilot head armour
I will cover these parts when I build up the canopy with the MG 15 in place.
Thanks for looking and please share your thought.
Cheers, Peter
Very nice work on that cockpit! I too also love detailing the interior of a cockpit as much as my skills allow me, and this means AM stuff, scratch, painting and weathering. One item I found particularly interesting are decal placards. Airscale produces some great stuff in all scales, meant for different Air forces, including they Luftwaffe, have you tried them?
I admire your dedication to get all the right forms and details on it. Bring on more
Excellent work - lots of detail, and all nicely executed! Looking forward to seeing more as you progress.
Fantastic work, deeply researched.
This is top modeling. Wonderful work!
Nice bit of work. Cockpits are brilliant. Especially on single seaters where you can actually have the canopy open! It's decals that are the spawn of the devil.
This is the best-documented model I have ever seen. Well done.
🙂 … Greetings … 🙂 :
Very nice detail work Peter.
Nice work Peter - great photos - A great build to follow.
Beautiful work. It looks like you had a good time with that project. I love doing cockpits also. Yours looks great, I had much and that the kit supplied you a really good base to work with. One of my favorite interiors is the the one I did for my CyberHobby Bf-110.
1 attached image. Click to enlarge.