P-40E Hasegawa 1/32 – my first post
Hi Guys,
I've been meaning to share for awhile and am finally getting around to it during this coronavirus emergency. This is a great way to relax after a week of stress learning to work from home. I hope these pics are the right size. I shrank them down to standard upload dimensions. Please let me know if i need to adjust anything.
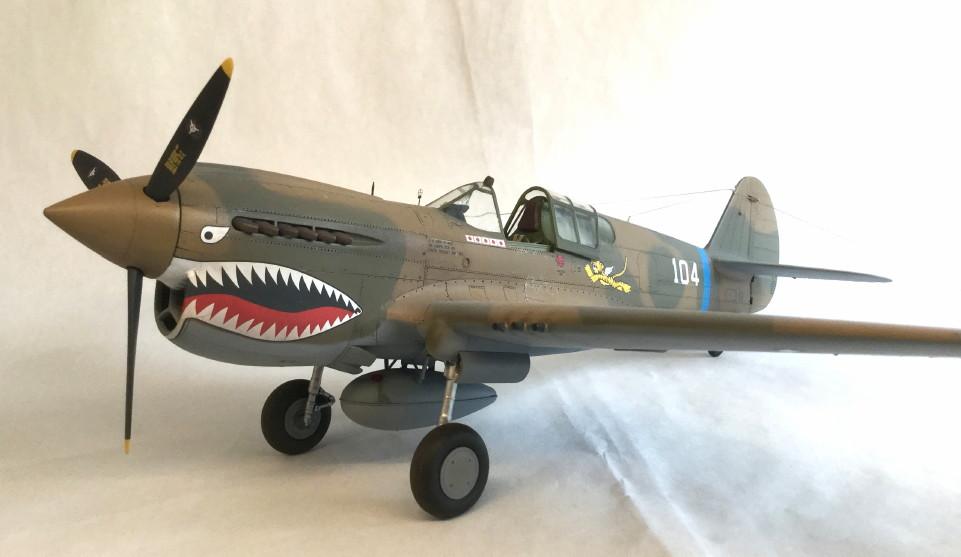
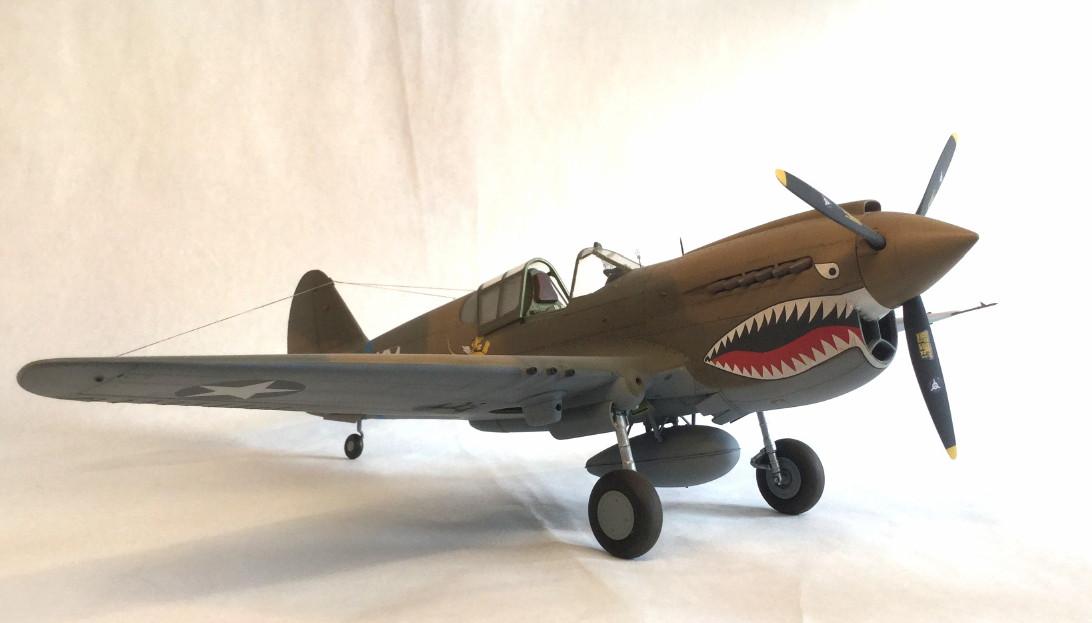
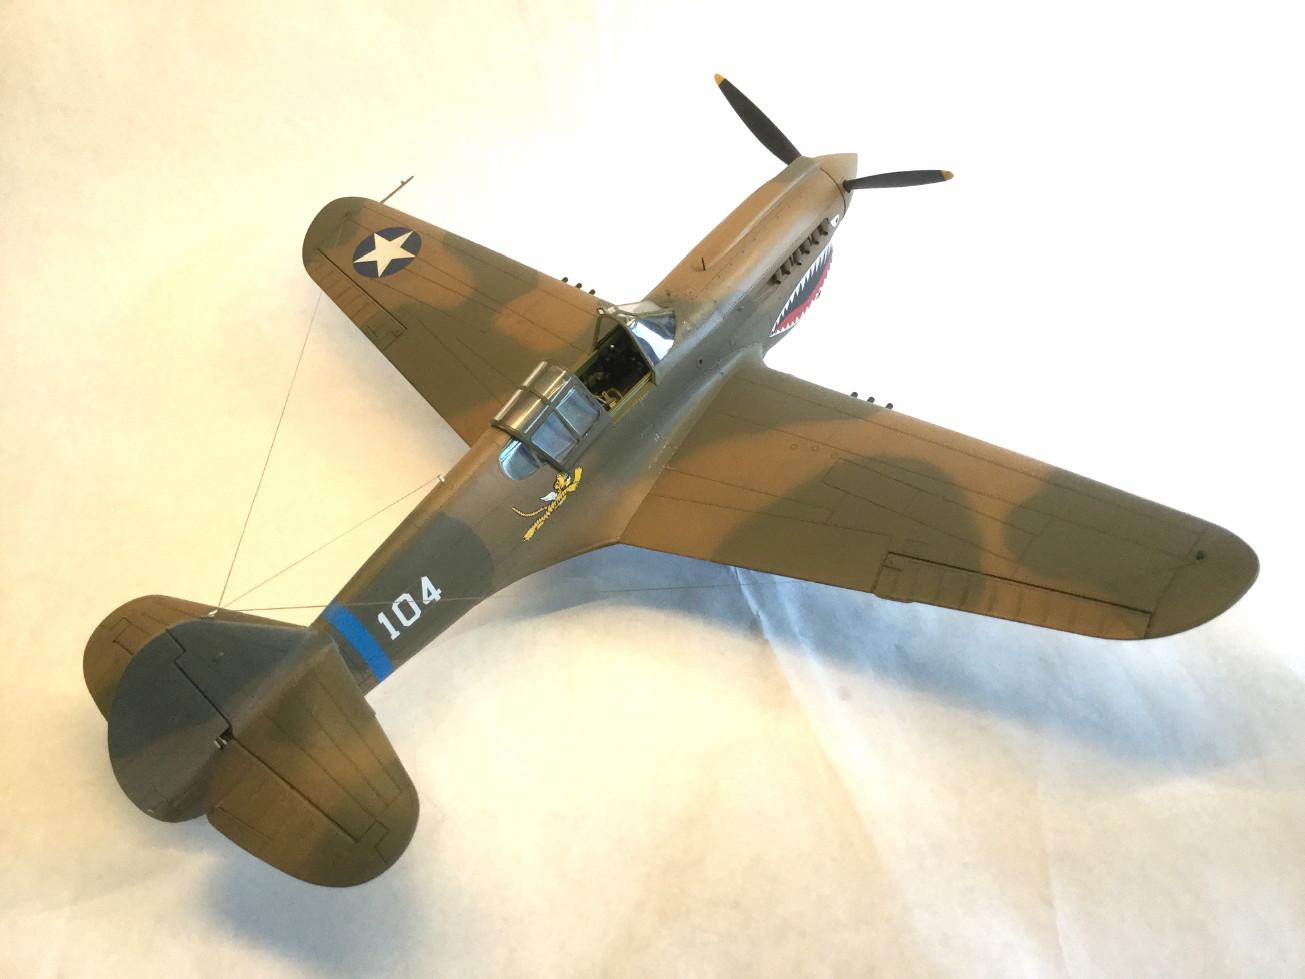
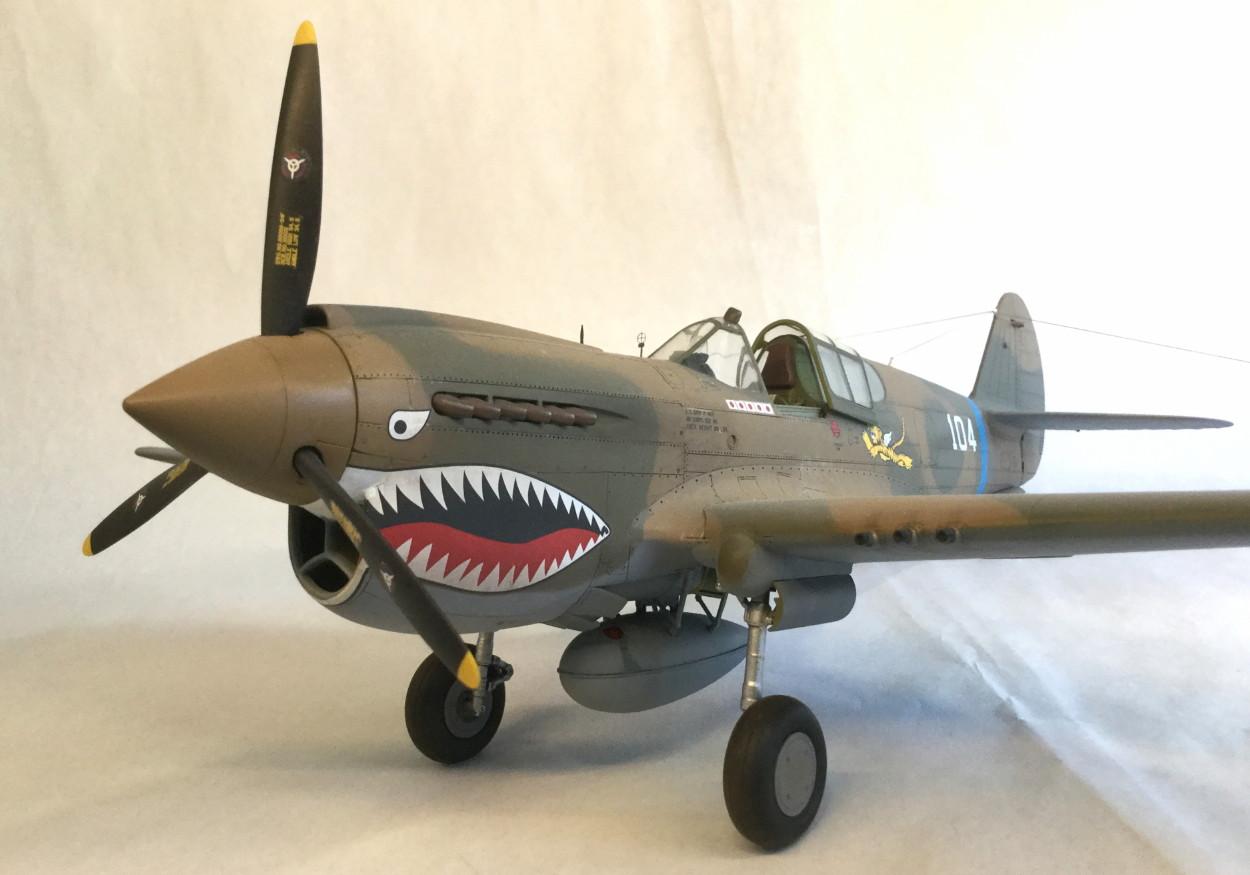
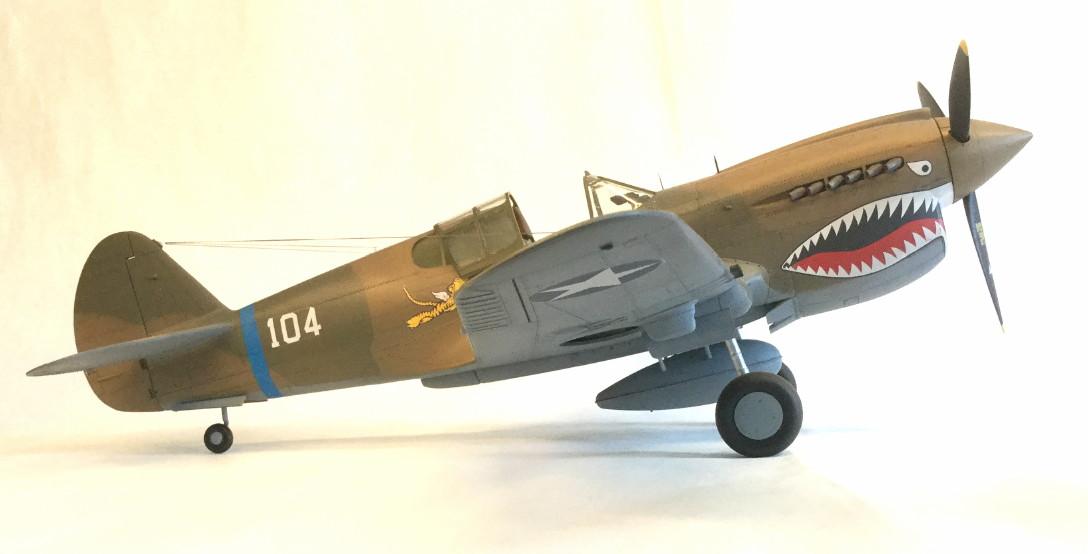
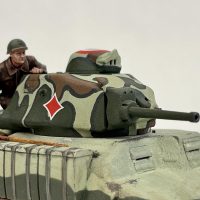
This is my version of the Hasegawa P-40e in 1/32 scale. It represents Ed Rector's a/c as interpreted by a variety of sources and using the kit decals. I guess there may be controversy about whether the wing stars should be USAAF or Chinese AF sun roundels. I always preferred the Chinese version but available decals give the US stars.
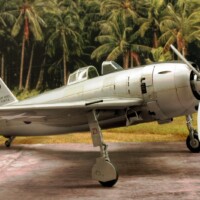
The kit was a lot of work. Most of that was blending in the fuselage inserts, which I think look good in the end. It is nerve-wracking to sand around clear parts and also to glue them in firmly to avoid cracking when they are being blended in. I used Tamiya liquid glue to weld them in place, working very slowly and carefully. For filler, I used stretched sprue, also welded in with extra thin liquid cement. I like that Hasegawa gives large clear parts to allow a good join to the fuselage without marring the transparencies. The E- model kit windscreen has an extra framing bar. I sanded this off and polished the piece back to full transparency with sanding sticks and Novus plastic polish. Great stuff - worked like a charm.
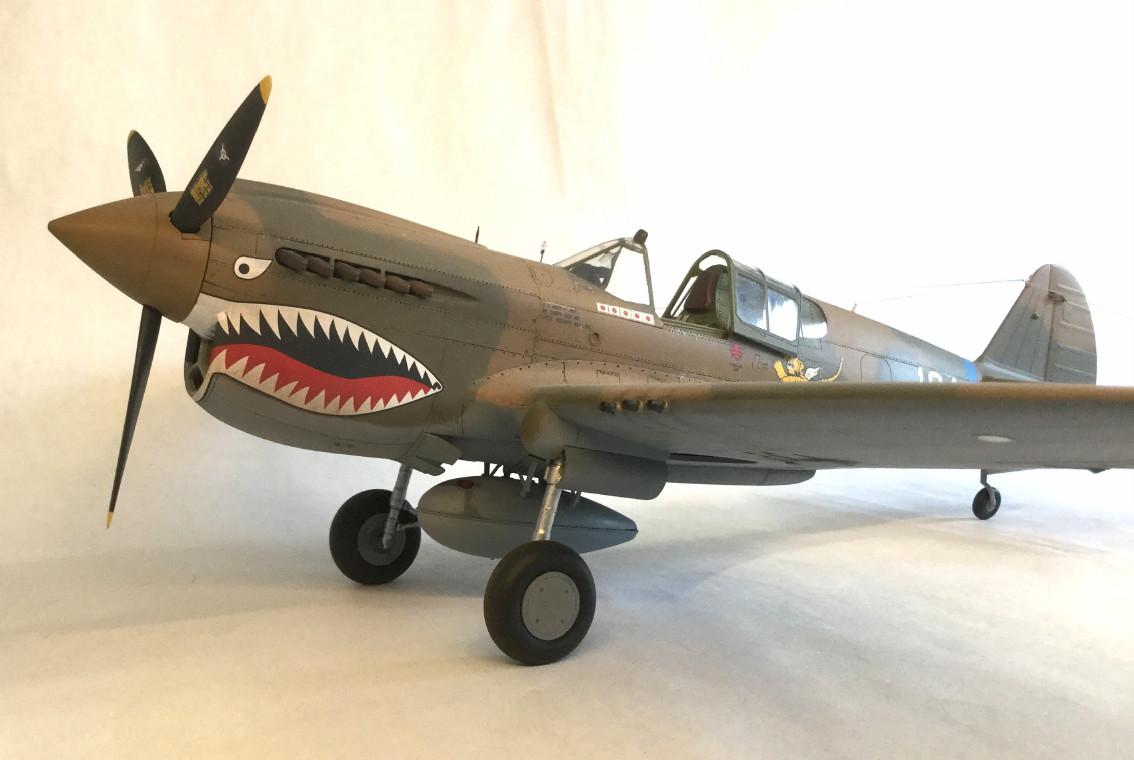
I spent hours trying to do subtle weathering with selective panel tone difference, masking an repainting over and over. The effect doesn't show up too well in photos but a couple of these do show the effect pretty well. I don't like over weathering or the quilt effect of over-dark panel lines. Along with painting, I used oil paint pin washes, pastels and CMK weathering pigment powders.
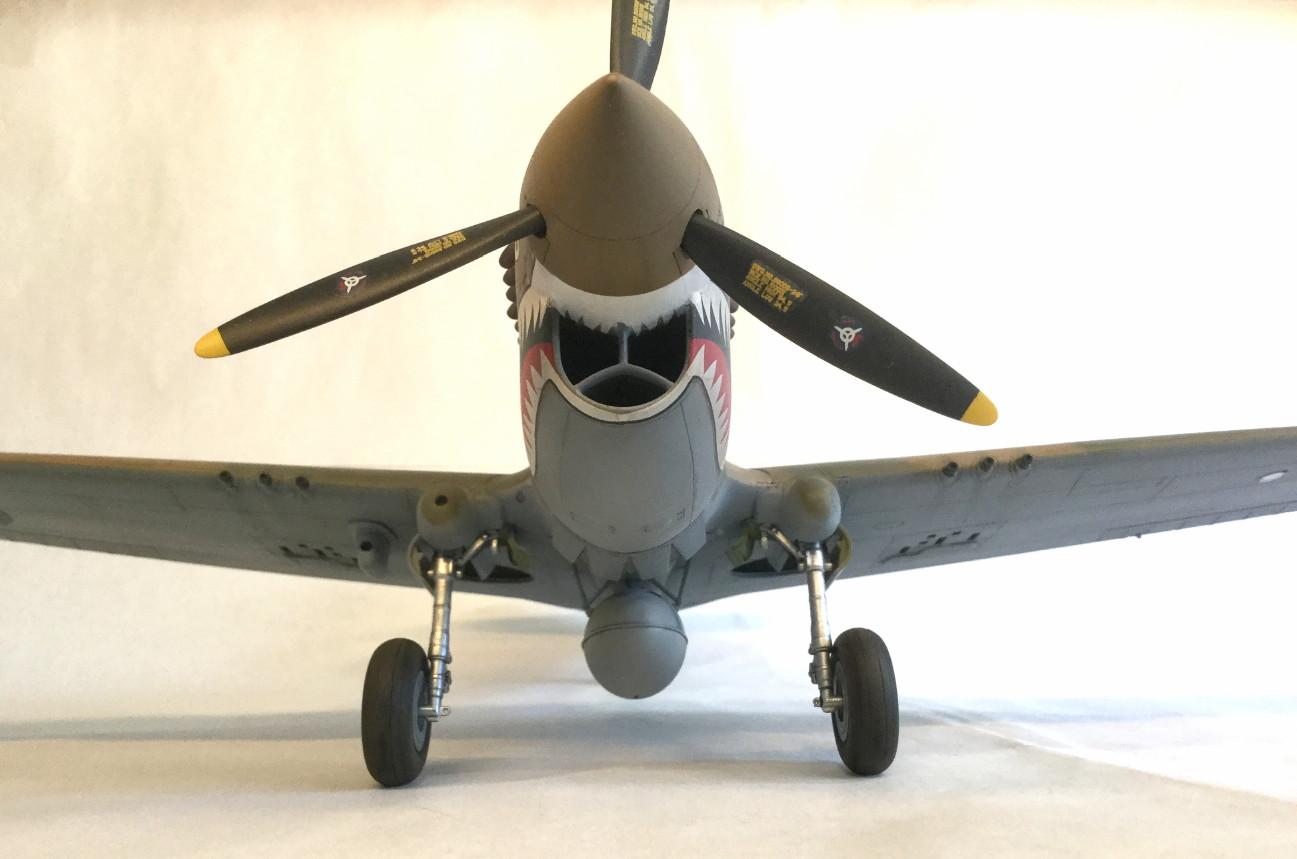
The tiger "shark mouth" is done with the kit decals. These are quite fragile so I had to do repairs with careful airbrushing in white here and there. This model was becoming a shelf queen before I finally got up the gumption to do that decaling. I like the results and it was worth the effort in the end.
This being my first post, I don't want to be too long-winded. I hope to get up some other stuff in 1/32, namely an FW-190A-6 and a P-47D, both Hasegawa. I hope this works.
Feedback is very welcome. This is turning out to be a great on-line modeling community at iModeler and I am keen to contribute.
- Colin

What a great job. I have always liked this airplane, but I never seem to be able to build one right. Your work was worth the effort.
Hi David,
Thanks for your comment. I have loved the look of this airplane ever since I saw the Revell 32nd kit on the shelves as a kid back in the 70s! I could never afford it then and it probably would have defeated me with my meagre modelling skills. In spite of the challenges, I think the Hasegawa kit is great and well-designed in most respects. I hope you decide to take it on some day.
Rector's P-40E was one of the six P-40Es picked up in Accra, Ghana, in April 1942. Thus, it did have Chinese Roundels painted on the wings over the US insignia, (with the fuselage US insignia overpainted (as you have done). Being one of the six Tigers who stuck around to help from the 23rd Fighter Group after the AVG disbanded on July 4, 1942, it then had the Chinese insignia painted out as you have it on the upper right wing and US stars repainted on the wings. So, your answer of which insignia it had would depend on which period of its history you were portraying. As it is here, it has the AVG (ROCAF) markings on the fuselage and the USAAF on the wings, as when it moved on to the 23rd FG in the summer of 1942.
So, you have it right. Moreover, you did it with great attention to detail, since I can't see any "phantom seams" around any of the bits like the upper fuselage aft of the cockpit, the wing guns, etc. Colors are right, airbrushing is super. The only problem is that canopy, and that's inherent to Hasegawa's production design, not anything you did.
I like this a lot, and welcome to the club.
Hi Tom,
Thanks for your detailed comments and constructive feedback. I really appreciate your welcome and warm regards.
When you mentioned the canopy issue, did you mean the rearward sag? I had an approach to straightening it but detailed photos such as the Squadron Walkaround book seemed to show that is does in fact slope down toward the rear when slid back. I left it like that somewhat reluctantly. How should it be oriented, if that is in fact what you meant?
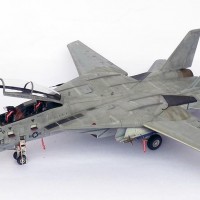
It does fit downward but not that much. the fact the canopy is thick and fits closed makes it difficult to get a correct sit open - it's a factor of their production choices. Here's mine as an example of what I think is the right sit from being around 1:1 P-40s.
1 attached image. Click to enlarge.
Tom, @tcinla
That looks very good with the canopy open... Most people don't notice this little "hidden" canopy slope feature on the newer P-40's, from the "E" model onwards.
This is super build, Colin! Welcome on board! Bring on more please.
All the best!
Thanks, Spiros. More to come for sure.
Welcome to iModeler Colin, you sure made a strong debut here! That’s one great looking AVG Tiger. Looks like a very solid build overall. Hoping to see more of your work over here.
Hello Collin, @ColinG
and welcome to Imodeler. I think that you will enjoy it here... and like the others, I also look forward to seeing more of your work.
I think your P-40 looks outstanding... slanted canopy and all. You are correct, they do appear to slant just a little when slid back. I have been around several different versions of the full sized 1 to 1 scale type, and have noticed this "oddity" first hand. This is me standing next to the worlds only surviving P-40 from the Pearl Harbor attack...
and another photo that shows the slant on this two seat version...
This P-40 started life out as a P-40F and was converted to a two seat configuration many years later.
This picture shows the "slanted canopy anomaly" very well. I posted it to show the others what you are talking about.
Please continue to post away ! The other Hasegawa planes you have mentioned are among my favorites...
Two thumbs up my friend, and I pressed the "liked" button too.
Thanks, Louis. I appreciate the photos and insight into my question. Adjusting the slant of the canopy would not be difficult at this point as I think it is still exaggerated compared to the photos. I experimented with it awhile back and then settled on that angle to glue it in place before a model show. I used white glue so the placement would be reversible.
Great that you get to see so much of the real warbirds. We have a good museum in Hamilton near where I live in Canada but the really great collections are in the U.S. and Europe. When all this virus business is done I will be checking out the museums in California.
Welcome to the site Colin! Fabulous job on your P-40.
Thanks, Josh. I am glad you like it. I hope to post more soon.
I have used ordinary Future Floor Wax. (FFW) right out of the bottle for 3 decades to glue on clear parts, including other items. The FFW lets you aline your parts before it dries. Once dried, it is extremely difficult to take off one of these parts. It beats out tube and other types of glue, including superglues.
Great job on your "Tiger" mouth, as I painted on mine. RJW...
Thanks, Rodney. I appreciate the tip and comments. I have also used Future from time to time for canopies, as well as Testors clear parts cement. both were crucial when i did my TBF Avenger in 1/48th, which I will be posting later. The AM Avenger has quite a canopy greenhouse and turret assembly with clear parts that have to be glued to each other (always tricky).
BTW, I have admired your great modelling work on various sites for many years . It's been an inspiration in getting my skills together.
Very nice build of Col. Rector’s Tiger 104. I built the same bird so I’m always a fan when I see one. Welcome to the asylum.
Thanks, Matt. Having the company of fellow hobbyists does help to keep us sane in these crazy times.
Nice work, Colin! Welcome. What paints did you use for the camo?
Thanks, John. I used Gunze H72 Dark Earth and H73 RAF Dark Green topside (with a pre-shade of Tamiya flat black for weathering) and Tamiya Neutral Gray for the undersides. It is interesting that Rector's had neutral gray for under surfaces when some other aircraft had a lighter gray, apparently. I use tamiya Clear for a gloss coat before doing an oil wash and finish with a light coat of MM Acryl Clear Flat. The cockpit is Gunze US Interior Green. I forgot to mention that I used the Eduard photo-etch detail for the instruments.
Thanks!
Great looking P-40, and welcome aboard!
Thanks, Robert. Glad I finally took the plunge. It s super easy to post compared to other sites.
That's for sure!
Welcome to the site. That is a very nice P-40.
Thanks, Haslam. I am happy you like it.
Nice work Colin, I have this airplane on the bench right now (in 1/48) so your model is a great reference for me.
Thanks, Dusan. I really like your SU-30 on this site. I do MiGs and Sukhois too, from time to time.
Well done Colin, and welcome to iModeler, you'll find a lot of friendly modelers here. Being a great fan of P-40's, built 19 to date, yours looks really well done. Do us a favor and update your profile page and tell us a little about yourself.
Thanks, Tom. I will update the profile soon. I am a bit involved working on-line this week but will get to it soon. Great to have this community when trapped at home.
Very nice Colin - a great straightforward, clean build!
Thanks, Greg!
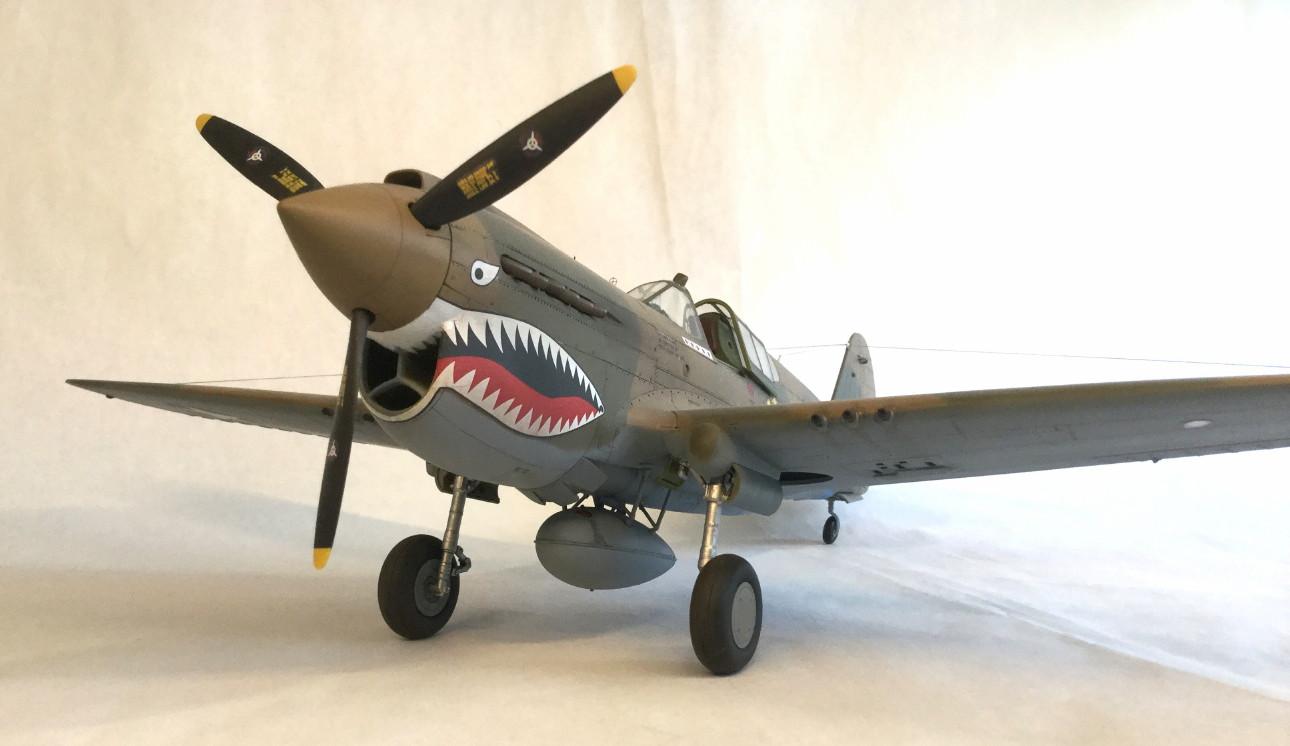
Welcome to another P-40 Fanatic. Great job all around. Funny how the "subtle" techniques get lost in pics but so true. Nothing takes a low front photo like a Warhawk.